
Documentation Index

Fetch the complete documentation index at: https://docs.mention-me.com/llms.txt

Use this file to discover all available pages before exploring further.

Using the new platform at app.mention-me.com? See Upload a CSV instead. The page below describes the legacy Upload Tags tool. Concepts are unchanged, only the UI is different.
The Upload Tags tool lets you upload data directly to the Mention Me platform. If SFTP isn’t an option for transferring data such as an eligibility feed, this feature processes eligibility data with a simple file upload and field mapping.

Steps to Upload Tags

1

Open Upload Tags

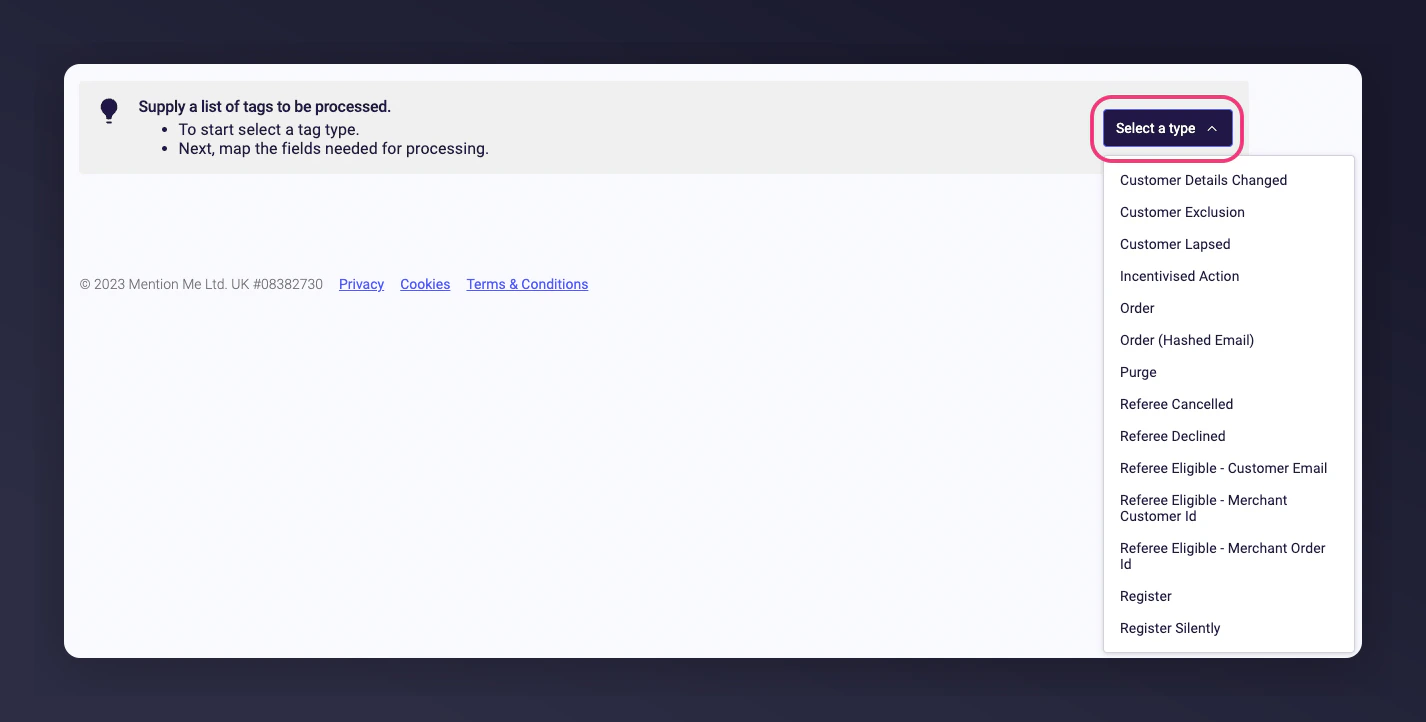
Log into your dashboard, go to Settings & Tools then Upload tags, or search for “Upload tags” and select the first option.
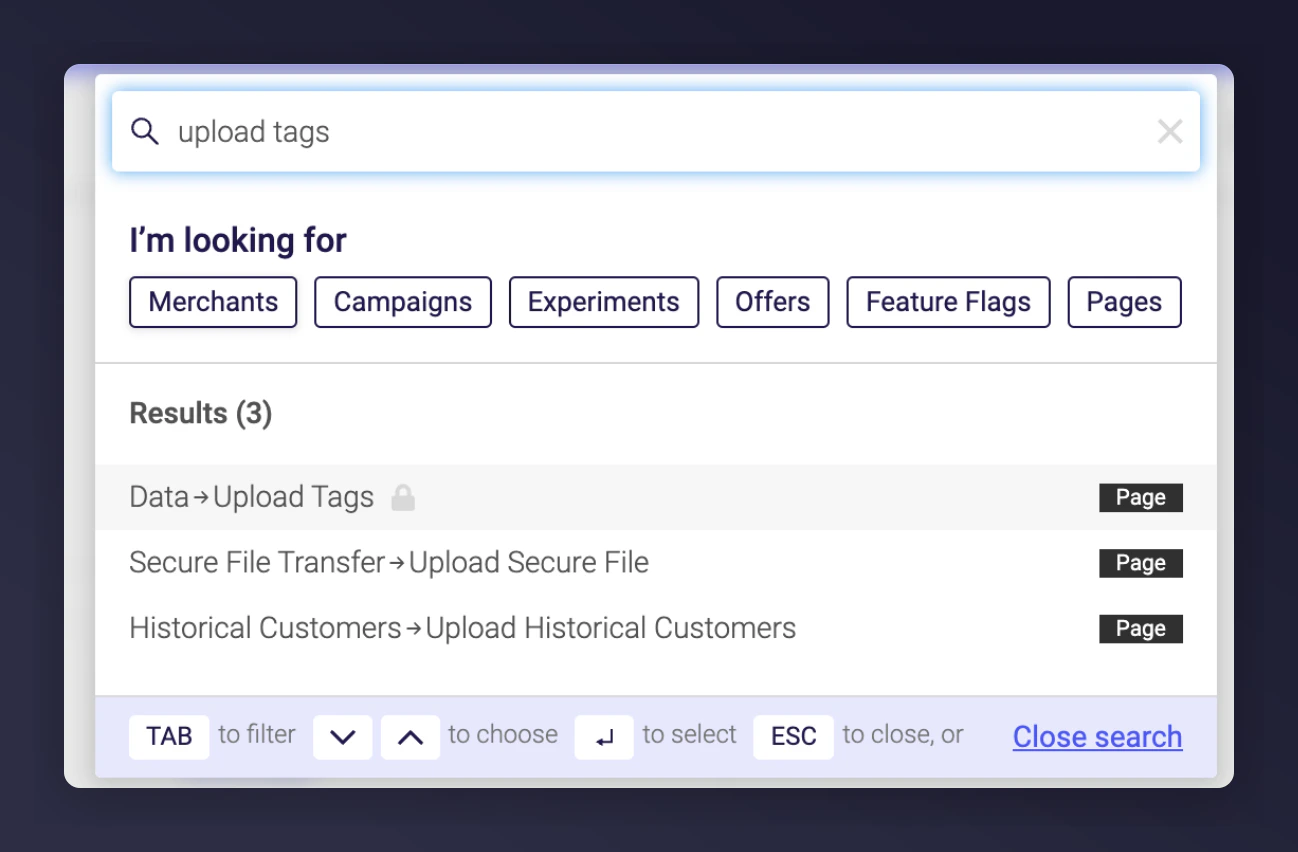
Upload tags option in Settings and Tools
2

Select a tag type

You’ll see a list of possible tags to upload.List of available tag types to upload
3

Prepare your CSV

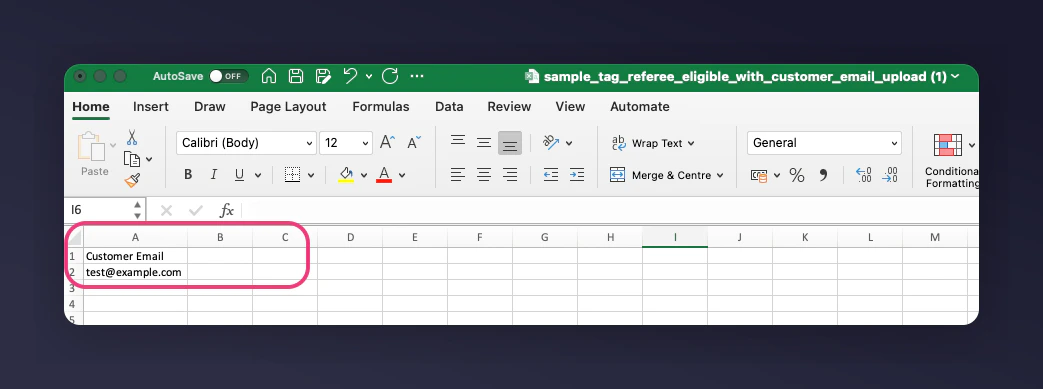
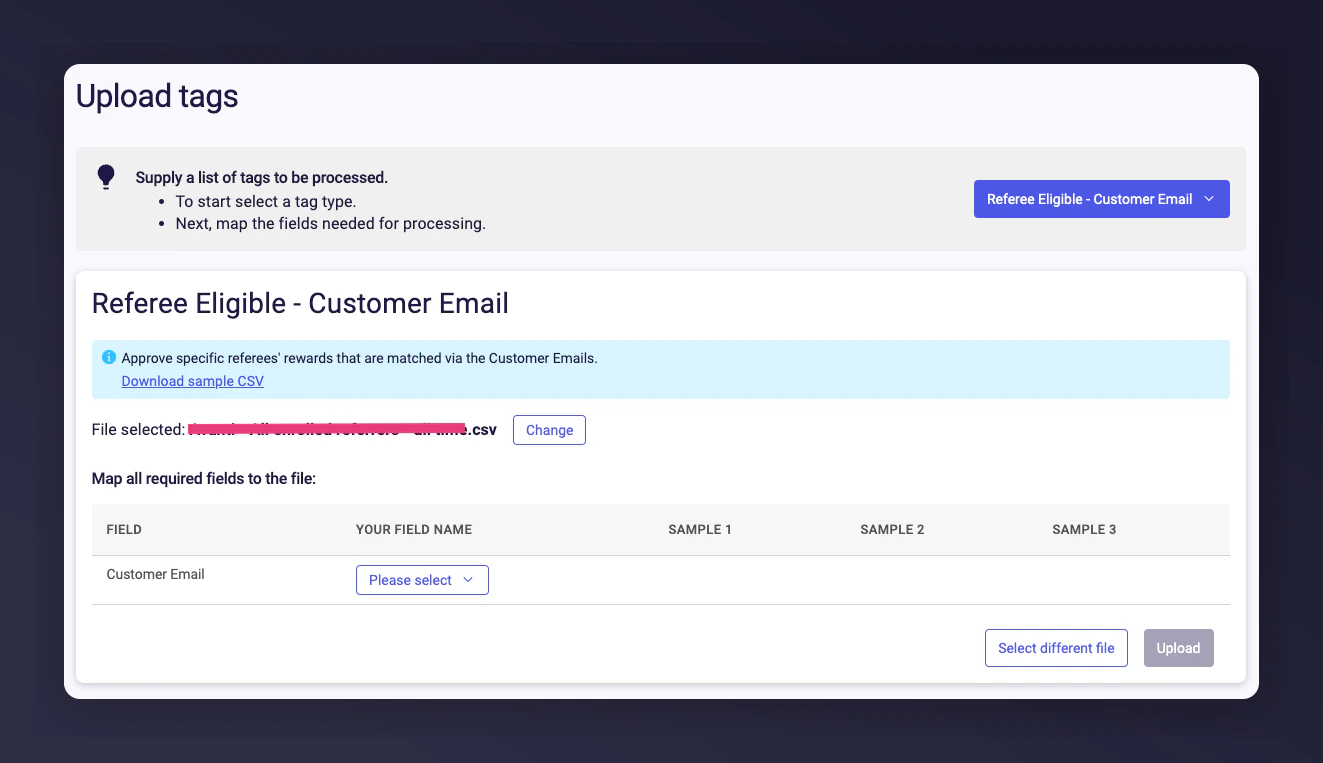
The document to upload must be a CSV file. The first row should always include the required headers. For a list of emails (e.g., new customers who qualified for a reward), select the option from the dropdown and download the sample document.
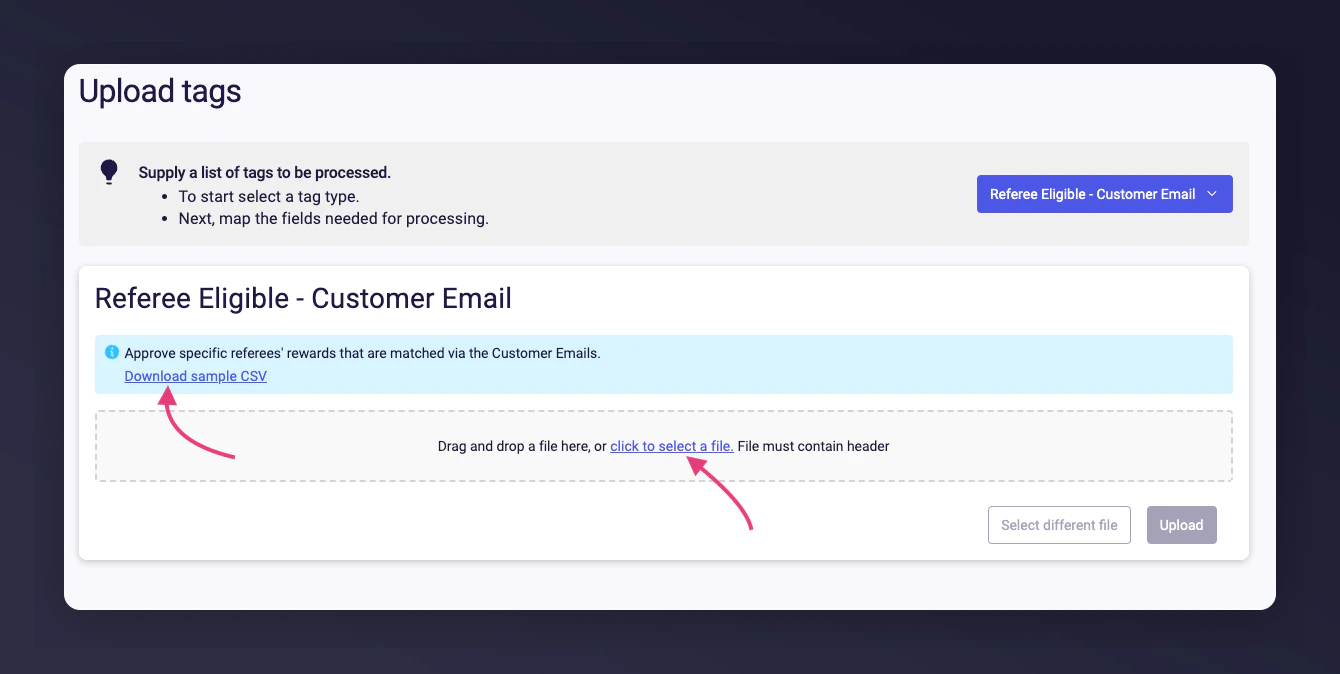
Dropdown to select tag type and download sample CSVThe sample file contains all required headers and one example under each for your reference.Sample CSV file with required headers and example data
4

Map your fields

You can map your own headers to mandatory and optional fields before each upload. This step appears right after dropping your file onto the page.Field mapping interface after file uploadMandatory fields are always visible during mapping. Optional fields might be available depending on your upload choice, but these are hidden by default. Click the Optional fields bar to see and map these.Optional fields section expanded during mapping
5

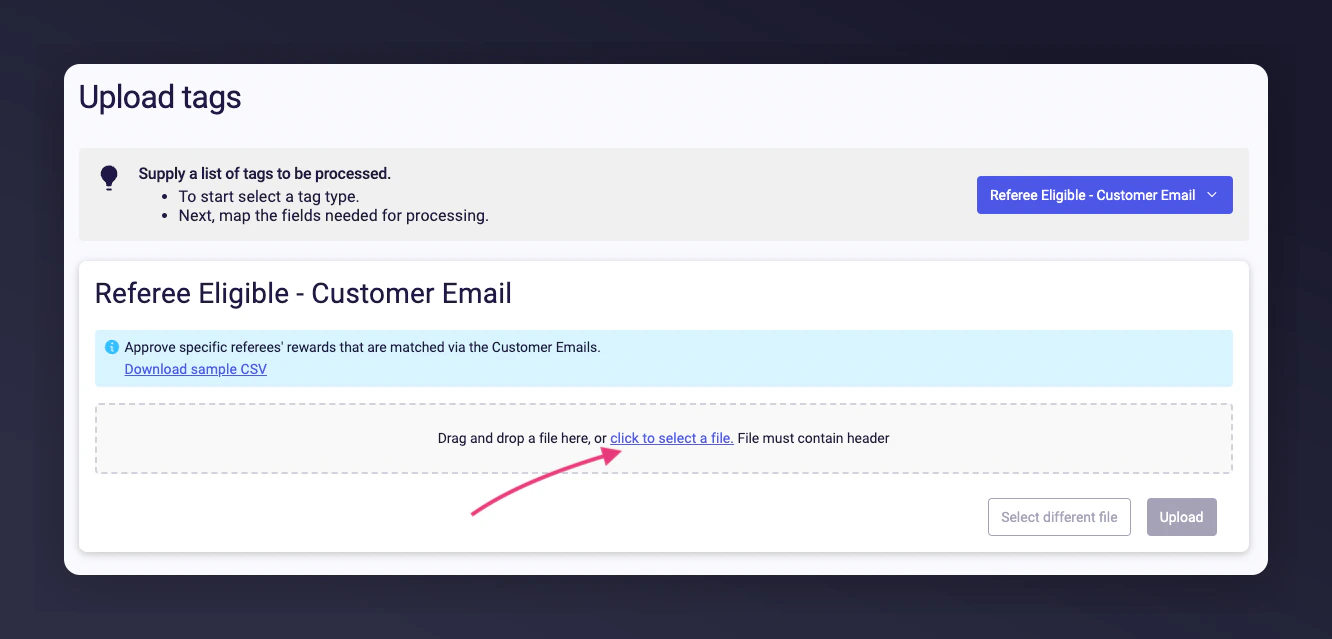
Fix any validation errors

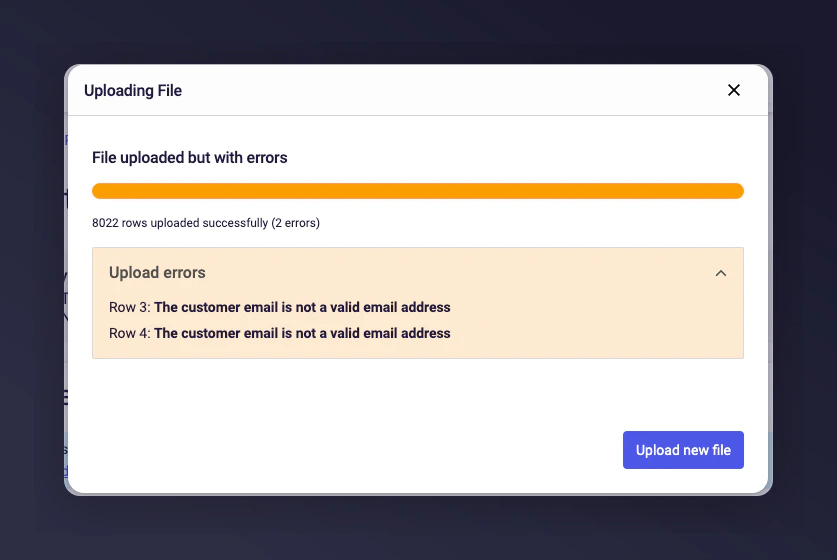
Mapping fields triggers the first stage of validation. If your data format is incorrect, you’ll see a red error message straight away.
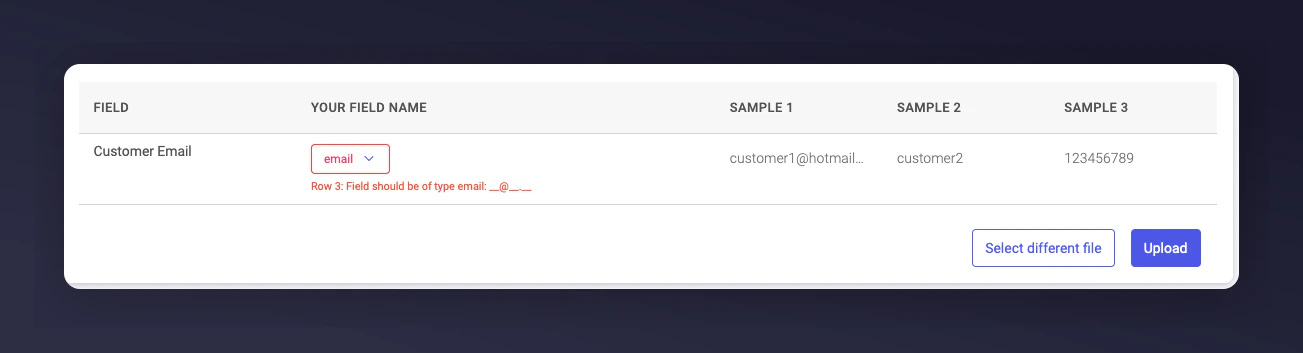
Validation error shown during field mappingThe tool checks the first ~100 rows in your file and shows you any errors, like an invalid email address. If you continue, the rest of the rows are validated on our servers. Any row with an issue will be skipped during processing.
6

Upload

When all fields are mapped and there are no validation errors, click Upload to start processing your file.

What Happens Next?

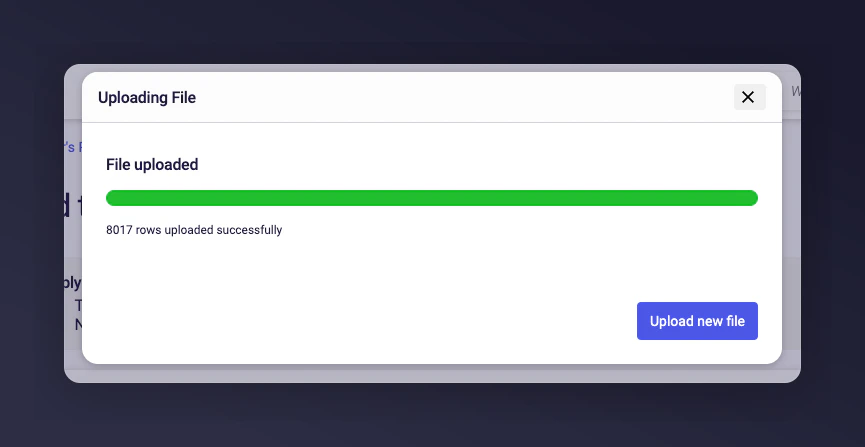
Once the process finishes, you’ll see a confirmation popup showing how many rows failed and how many were processed successfully. Valid rows are sent to the Tag queue, ready for use in your campaign. Upload confirmation popup showing processed and failed rows Upload processing results summary Animated walkthrough of the tag upload process
Last modified on May 7, 2026