Before you start
You’ll need:- A CSV file with headers in the first row.
- A clear idea of which columns map to which Mention Me fields. Don’t worry if your column names don’t match ours, you’ll map them in the wizard.
- File size under 1GB.
- For Enrol in offer uploads, the offer must already exist in your account, and you need GDPR consent on file if you plan to email these customers.
Choose what to upload
Two upload types are available today.| Type | Use when |
|---|---|
| Existing customers | You want to suppress your existing buyers from referral or registration emails. |
| Enrol in offer | You want to enrol existing customers into an offer so they can refer friends. |
More upload types (tags / segments, voucher codes, influencers) are coming soon. They’ll appear in the type picker once available.
Existing customers
Uploads a suppression list. Mention Me uses it to avoid sending referral or registration emails to people who are already your customers. If your team already hashes customer emails before sharing them (for privacy or compliance reasons), turn on My emails are already hashed. Hashes must be SHA-256, lowercase hex. See hashed data for the full spec.Enrol in offer
Enrols the customers in your CSV into a specific offer, so they’re eligible to refer friends. You’ll be asked to:- Pick the offer to enrol customers in. Only existing offers in your account appear here.
- Optionally tick Send referrer registration and forward emails to these customers. Only do this if you have written or verbal GDPR consent from those customers.
Upload your file
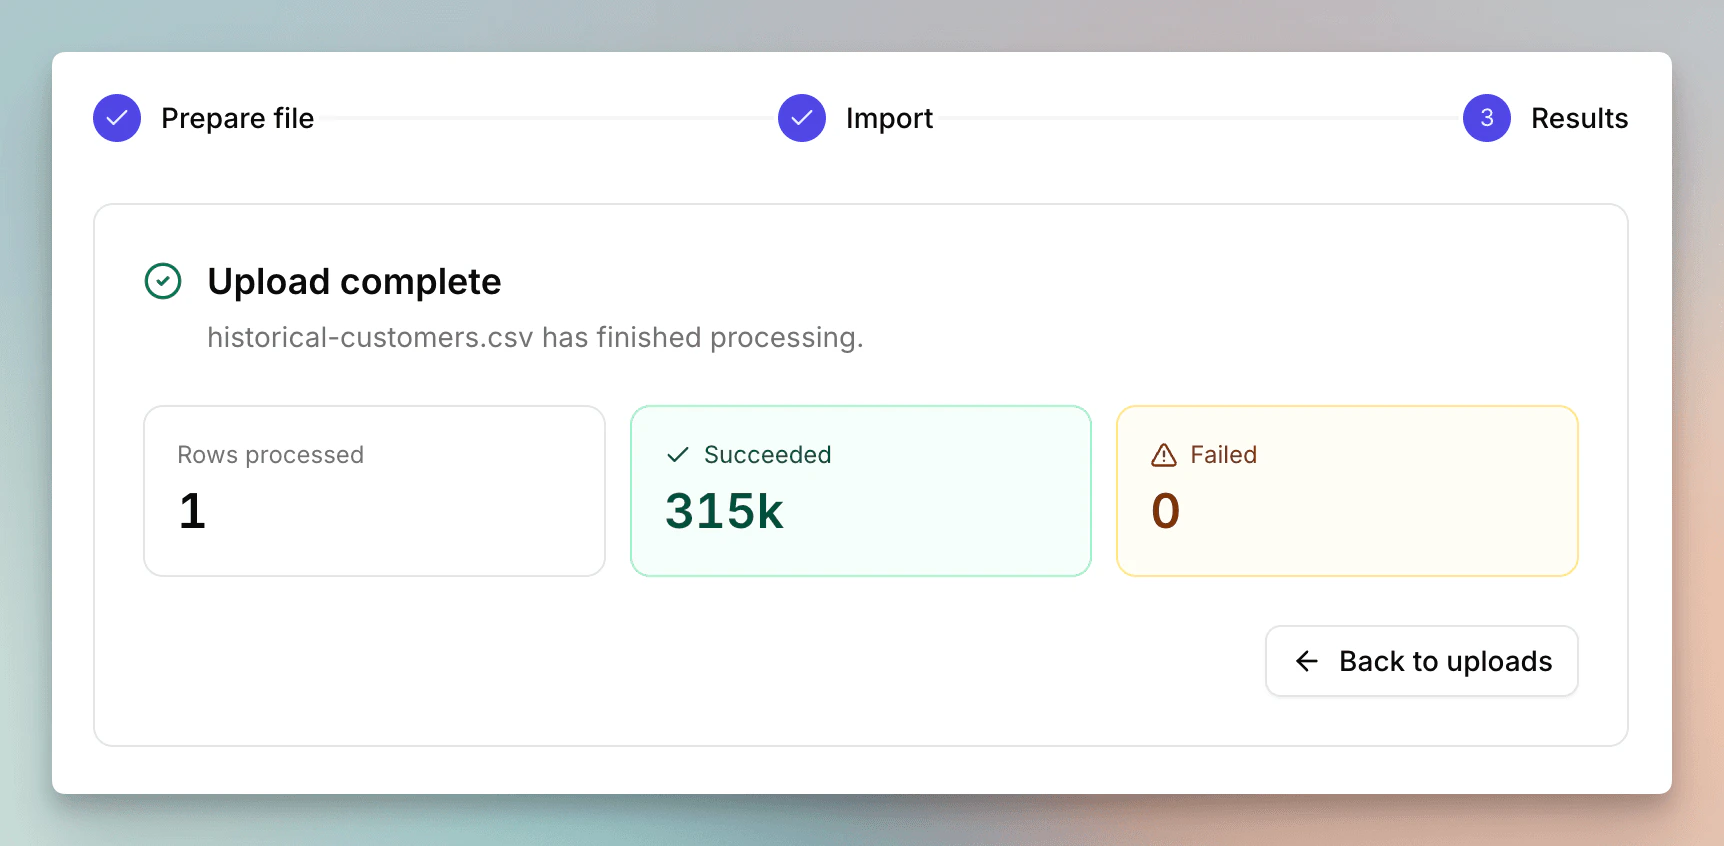
Click New upload to open the wizard. It has three steps: Prepare file → Import → Results.Pick a type and download the sample CSV
Select the upload type at the top of the page. Click the download icon next to the type to grab a sample CSV. The sample contains the exact column headers we expect, with one example row.Match your data to the sample’s structure where you can. You don’t have to use the exact same column names, mapping happens in the next step.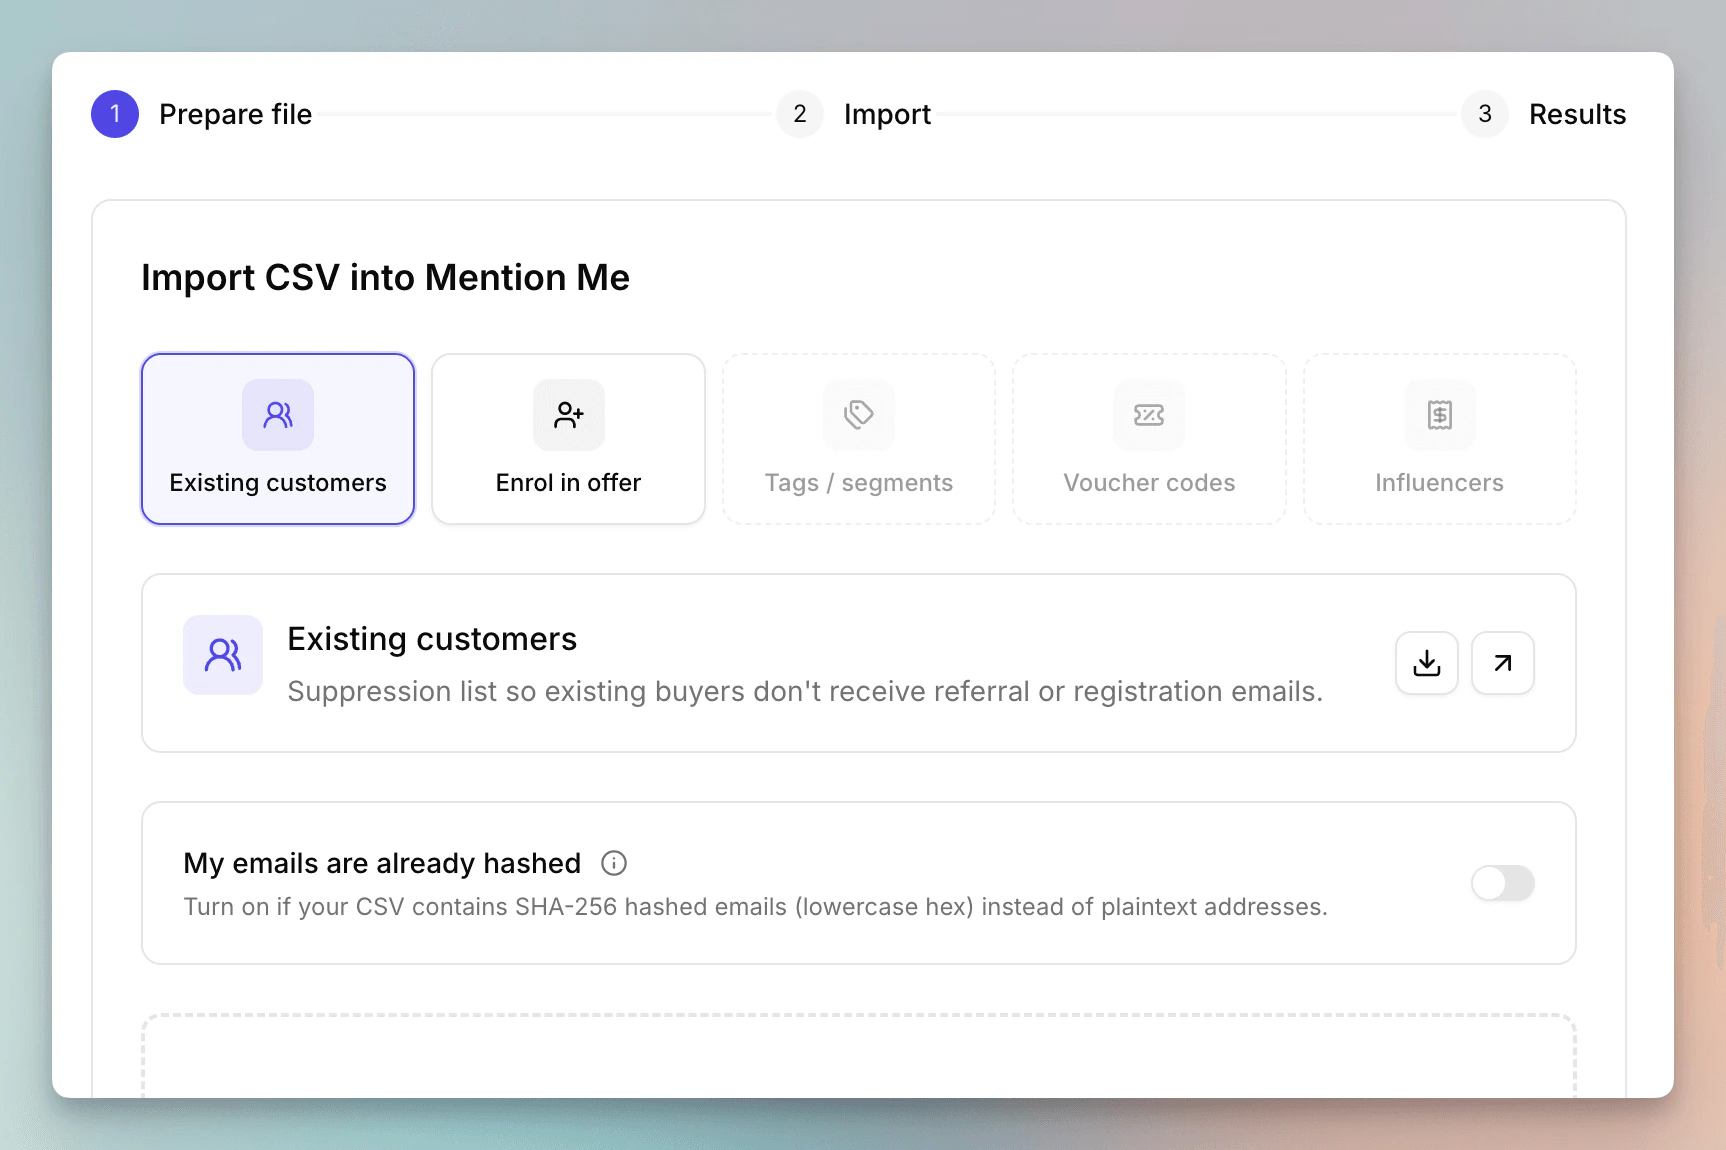
Drop your file in
Drag your CSV onto the dropzone, or click to browse. We accept CSV only, up to 1GB.Once the file is parsed, you’ll see the filename, file size, and how many rows were detected.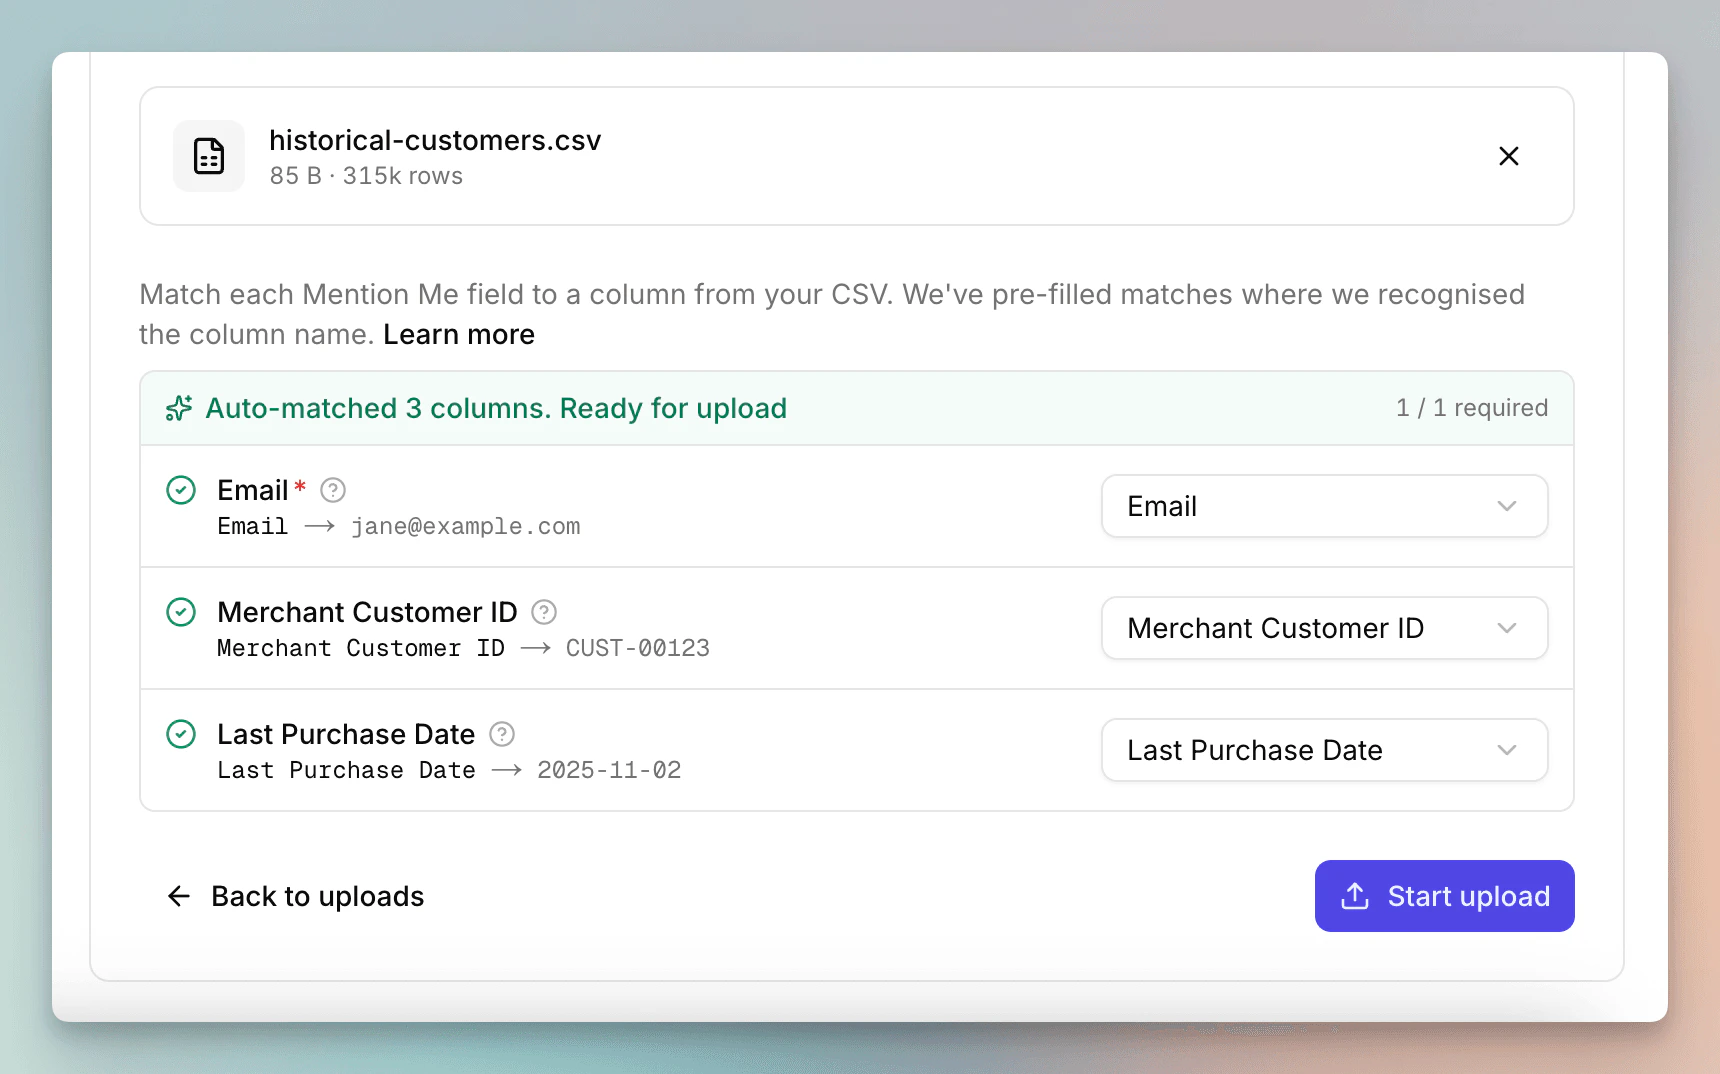
Map your columns
Mention Me reads the headers from your CSV and tries to match them to our fields automatically. Anything we couldn’t auto-match shows up for you to map manually.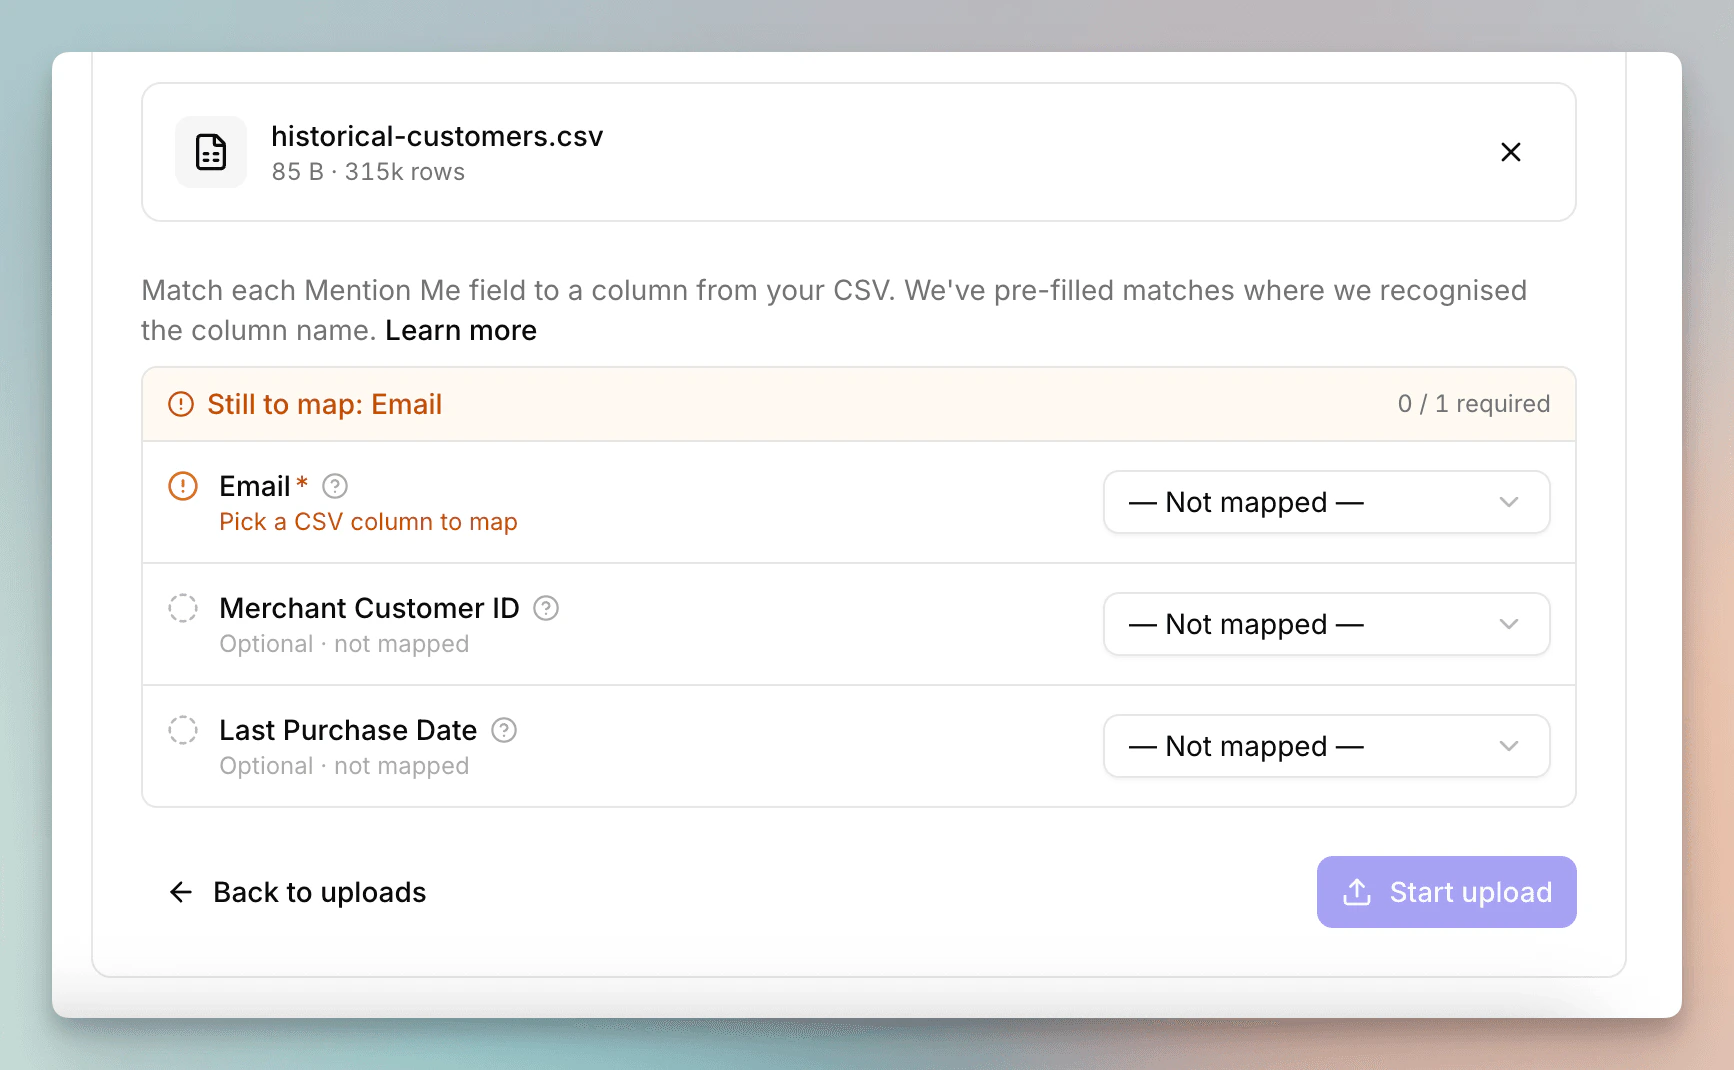
- Required fields are always shown. You can’t start the upload until each one is mapped, the Start upload button stays disabled until you do.
- Optional fields vary by upload type. Map them if you have the data, leave them blank if you don’t.
Fix validation errors
We validate the first ~100 rows of your file as soon as you finish mapping. If a value looks wrong (for example, a malformed email address), you’ll see an inline error pointing at the row and column.Fix the source data in your CSV, re-upload, and continue. Rows that fail validation later in the file are skipped during processing, not rejected outright.
Start the upload
Click Start upload. The wizard moves to the Import step and shows live progress as rows are processed.Don’t close the tab until the import finishes. If something goes wrong (network drop, server error), you’ll see a clear error and a Try again button.
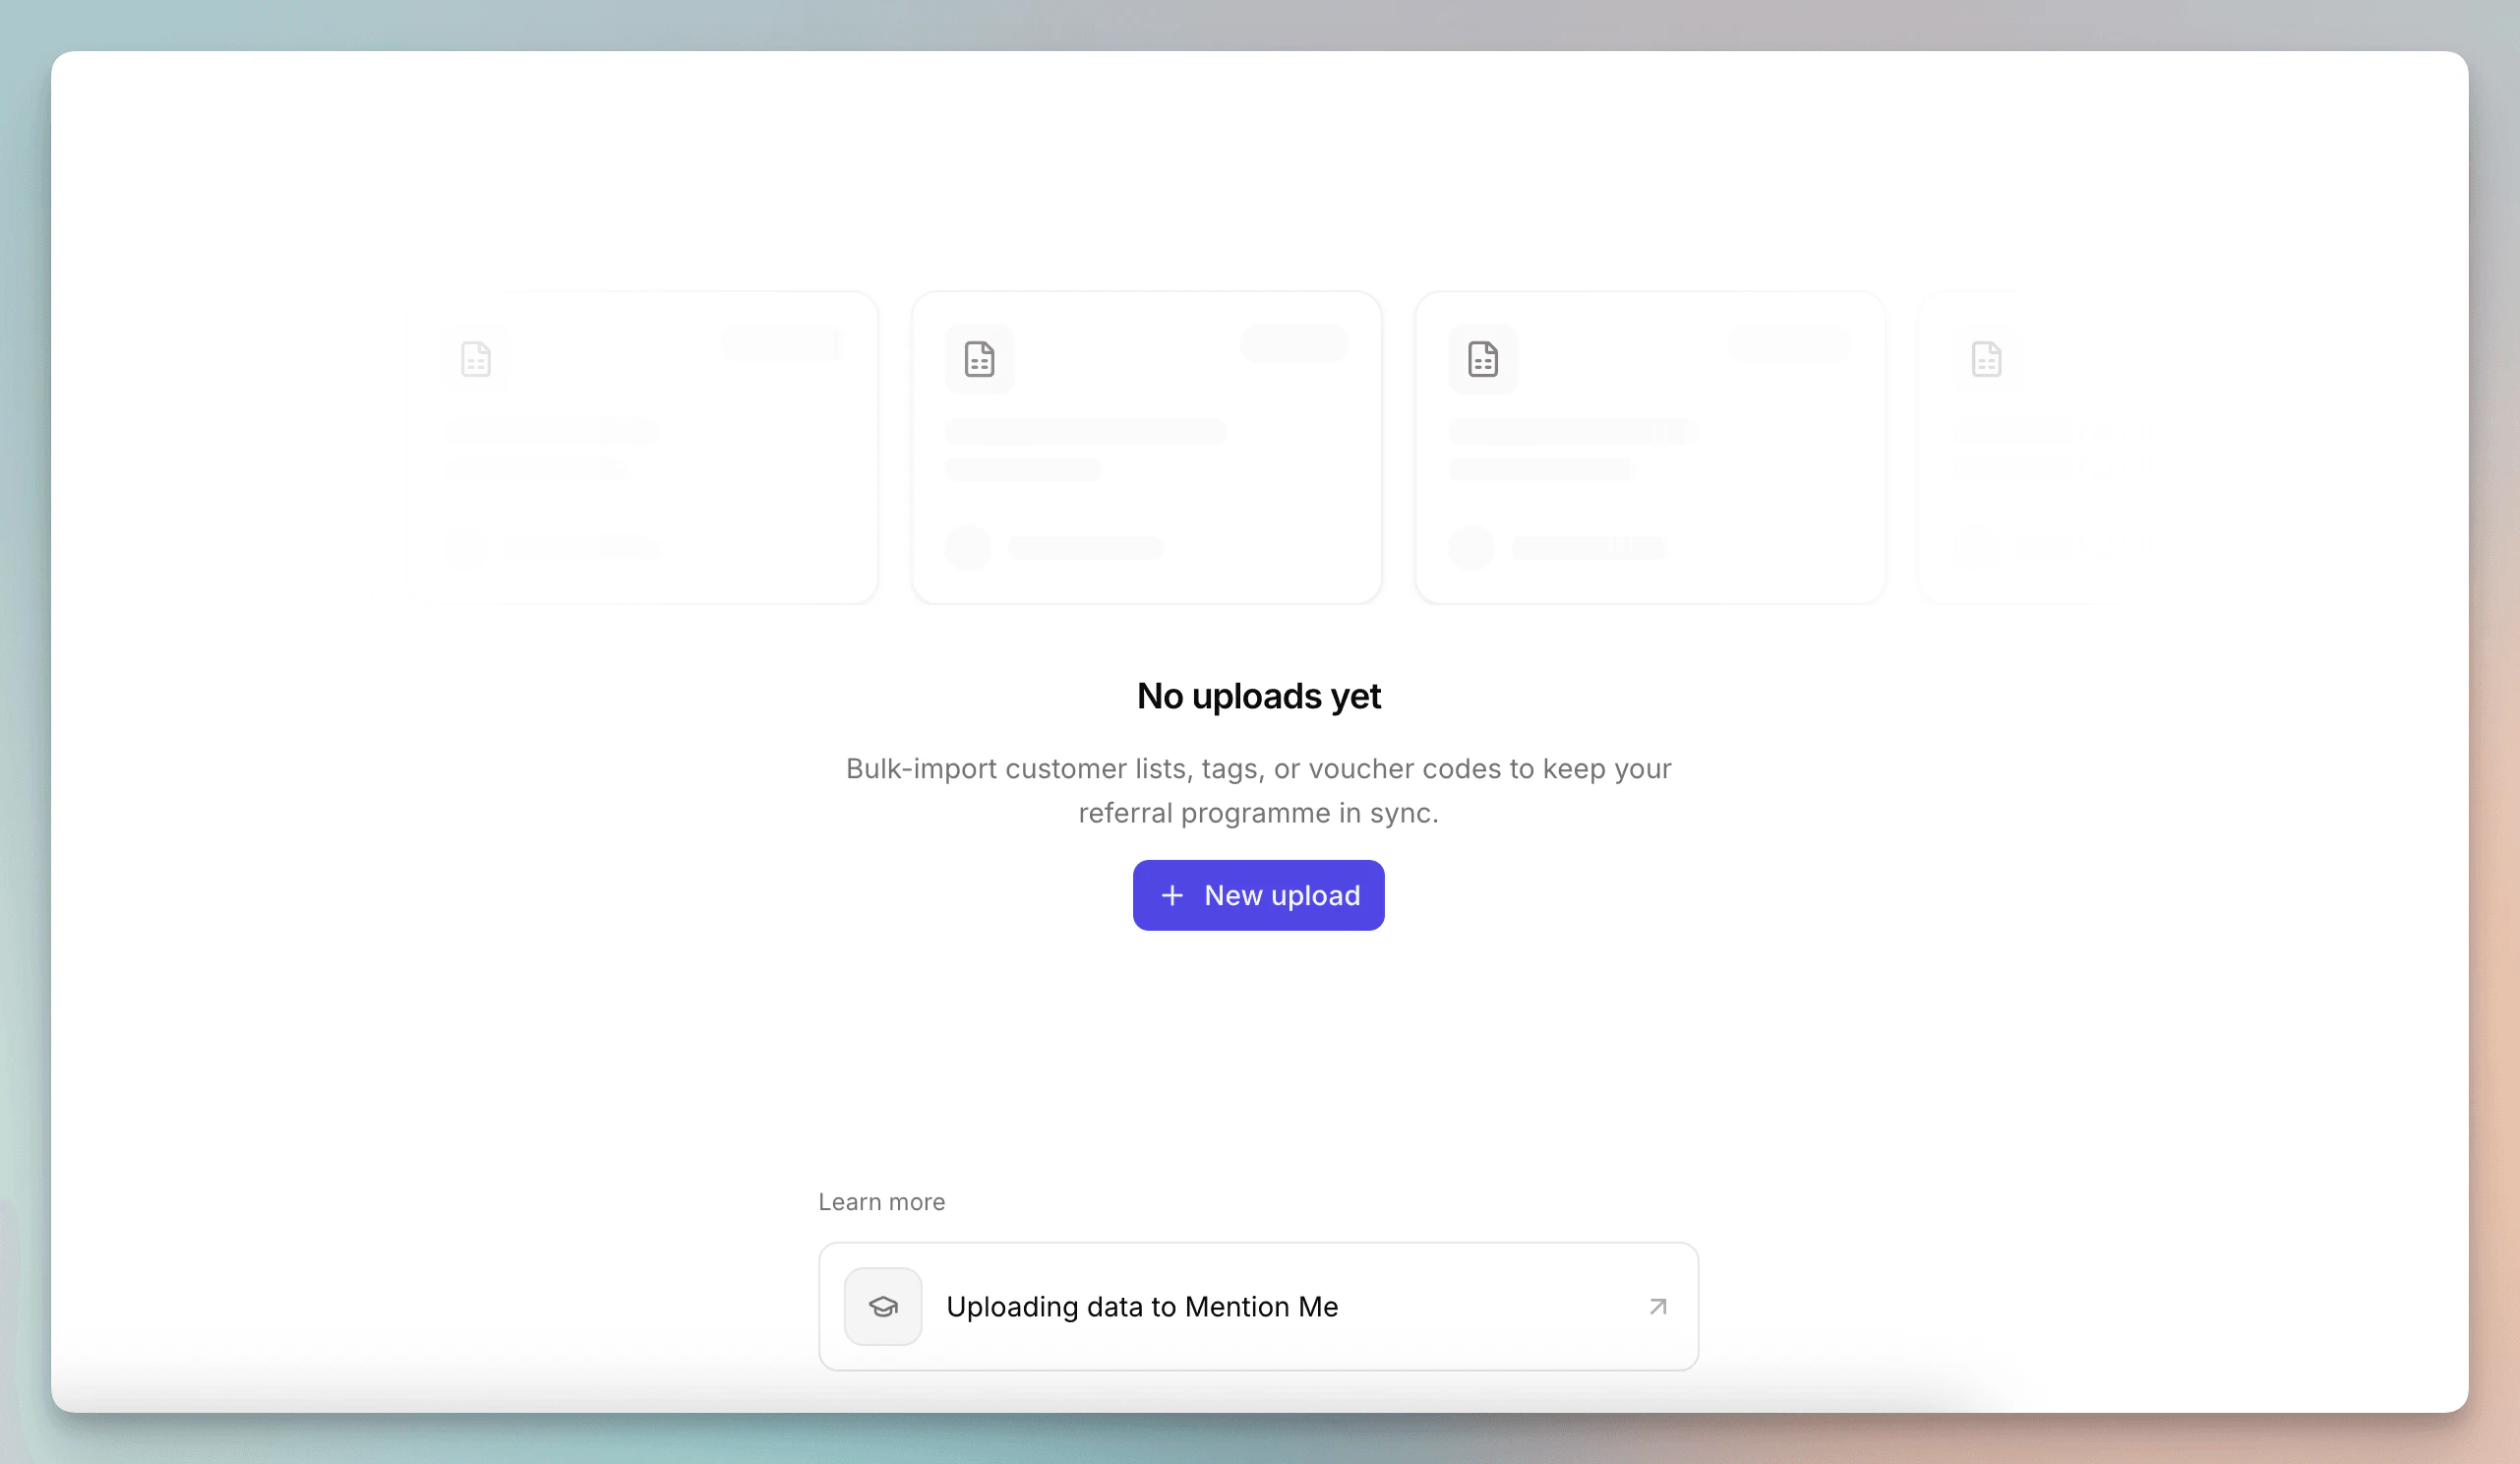
Review past uploads
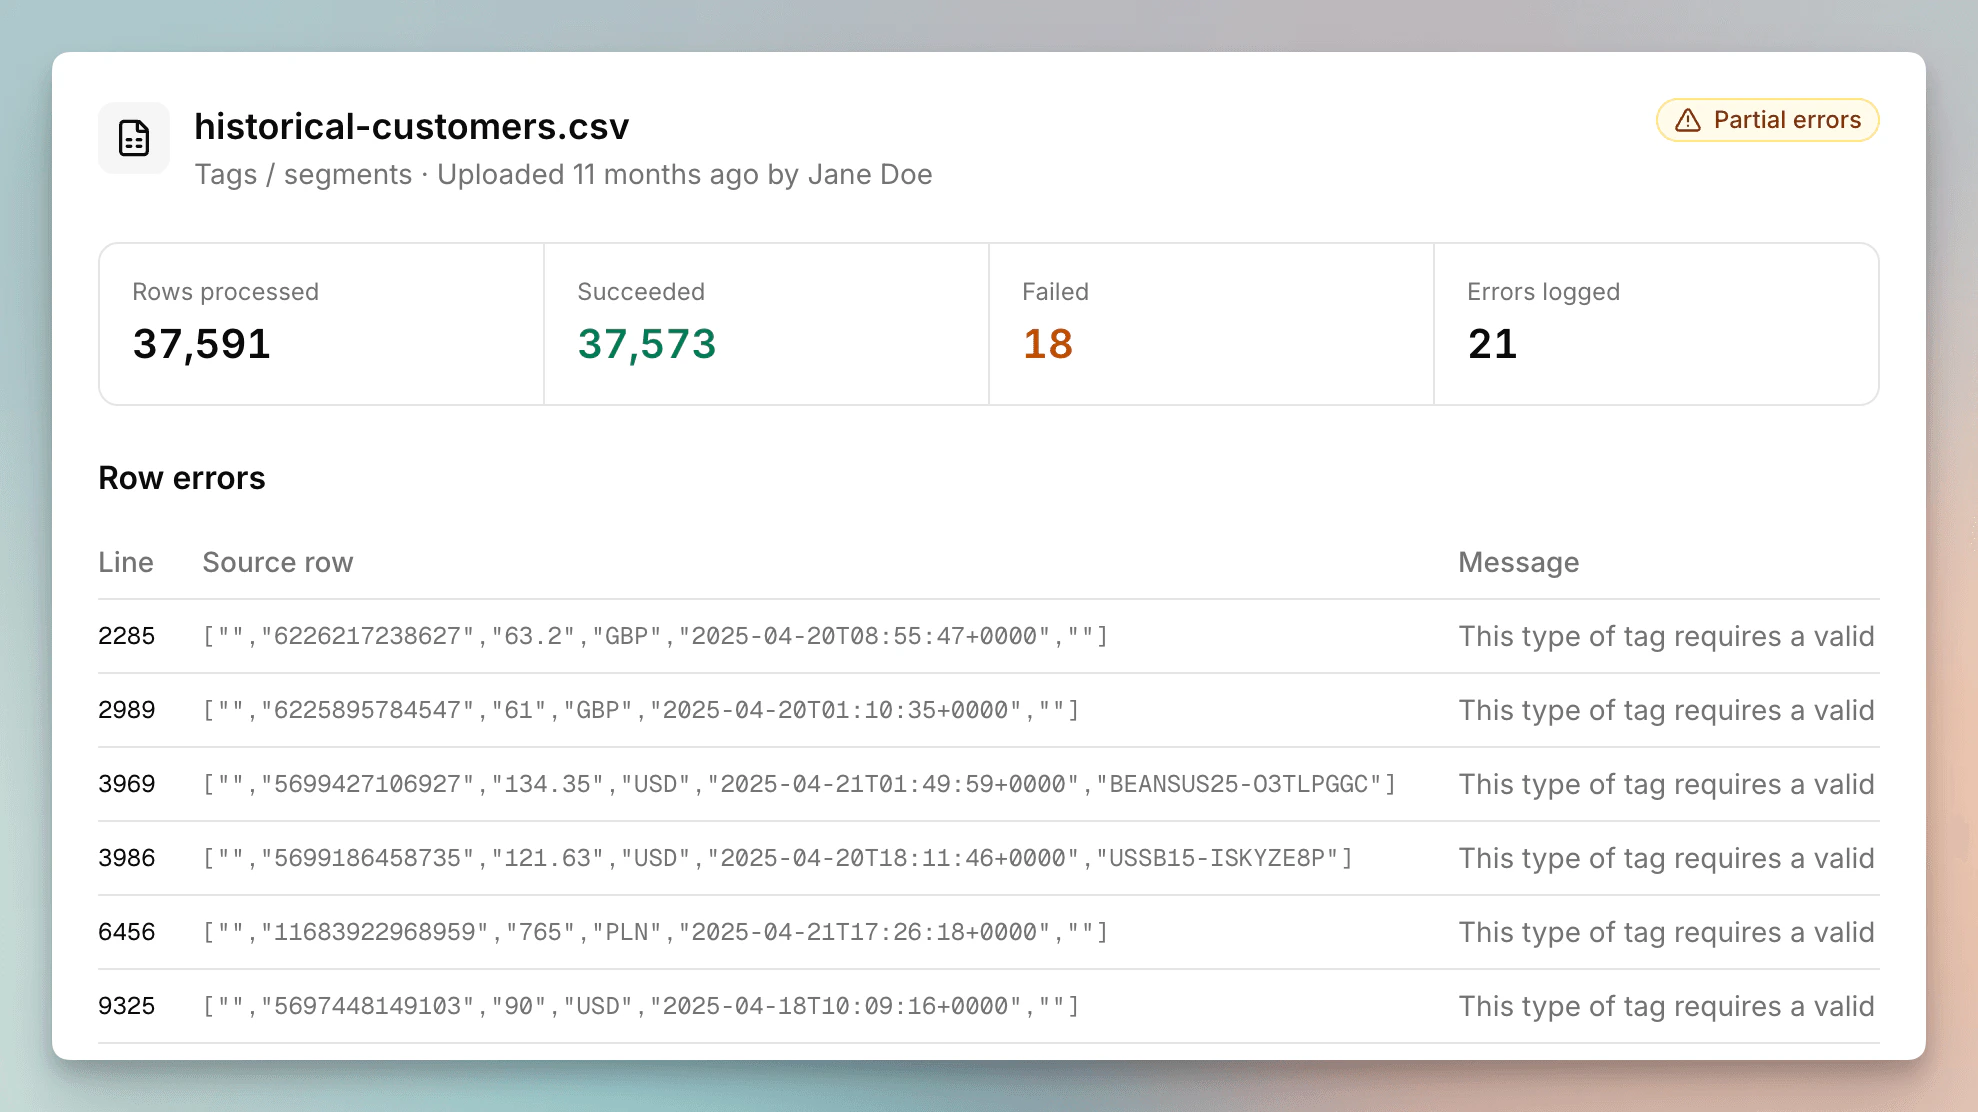
Every upload you and your team run is listed on the main Uploads page, newest first. Each row shows the filename, type, who uploaded it, when, the status, and the success/failure counts. Click any row to open a detail panel with:- The full status (e.g. processing, complete, failed).
- Total rows processed, succeeded, and failed.
- A row-level list of any errors, with the line number, the original CSV row, and the error message. Use this to fix bad data before re-uploading.
Common issues
My CSV won't upload
My CSV won't upload
Check the file is genuinely a
.csv (not .xlsx renamed) and is under 1GB. The dropzone rejects anything else.Validation flags my email column as invalid
Validation flags my email column as invalid
If you ticked My emails are already hashed, every value in the email column must be a SHA-256 hex digest, lowercase, with no spaces. Plaintext emails will fail. If your emails aren’t hashed, leave that toggle off.
A required field has no matching column
A required field has no matching column
Mention Me can’t infer a column it didn’t find. Either rename your CSV header to match the sample, or pick the right column manually in the mapping step.
Some rows succeeded, some failed
Some rows succeeded, some failed
That’s expected. We process every row independently, so a few bad rows don’t block the rest. Open the upload’s detail panel to see exactly which rows failed and why, fix those rows in your source CSV, and re-upload just the failed ones.
I can't tick the 'send emails' box on Enrol in offer
I can't tick the 'send emails' box on Enrol in offer
You need to pick an offer first. The checkbox enables once an offer is selected. Only tick it if you have GDPR consent.
See also
- Hashed data - when and how to hash customer emails before upload.
- SFTP setup - the recurring-feed alternative to manual CSV uploads.
- Historical order upload - context on what happens to data after it’s imported.