Your mobile phone (for identity verification by SMS)
The magic link to your influencer dashboard, sent in your registration email
1
Access your influencer dashboard
Locate your registration email from the brand you are an influencer for. Inside, you’ll find an option to request a magic link. Click this link to receive an email that lets you log into your influencer dashboard.
2
Go to your profile
Once logged in, go to your dashboard homepage and select Profile.
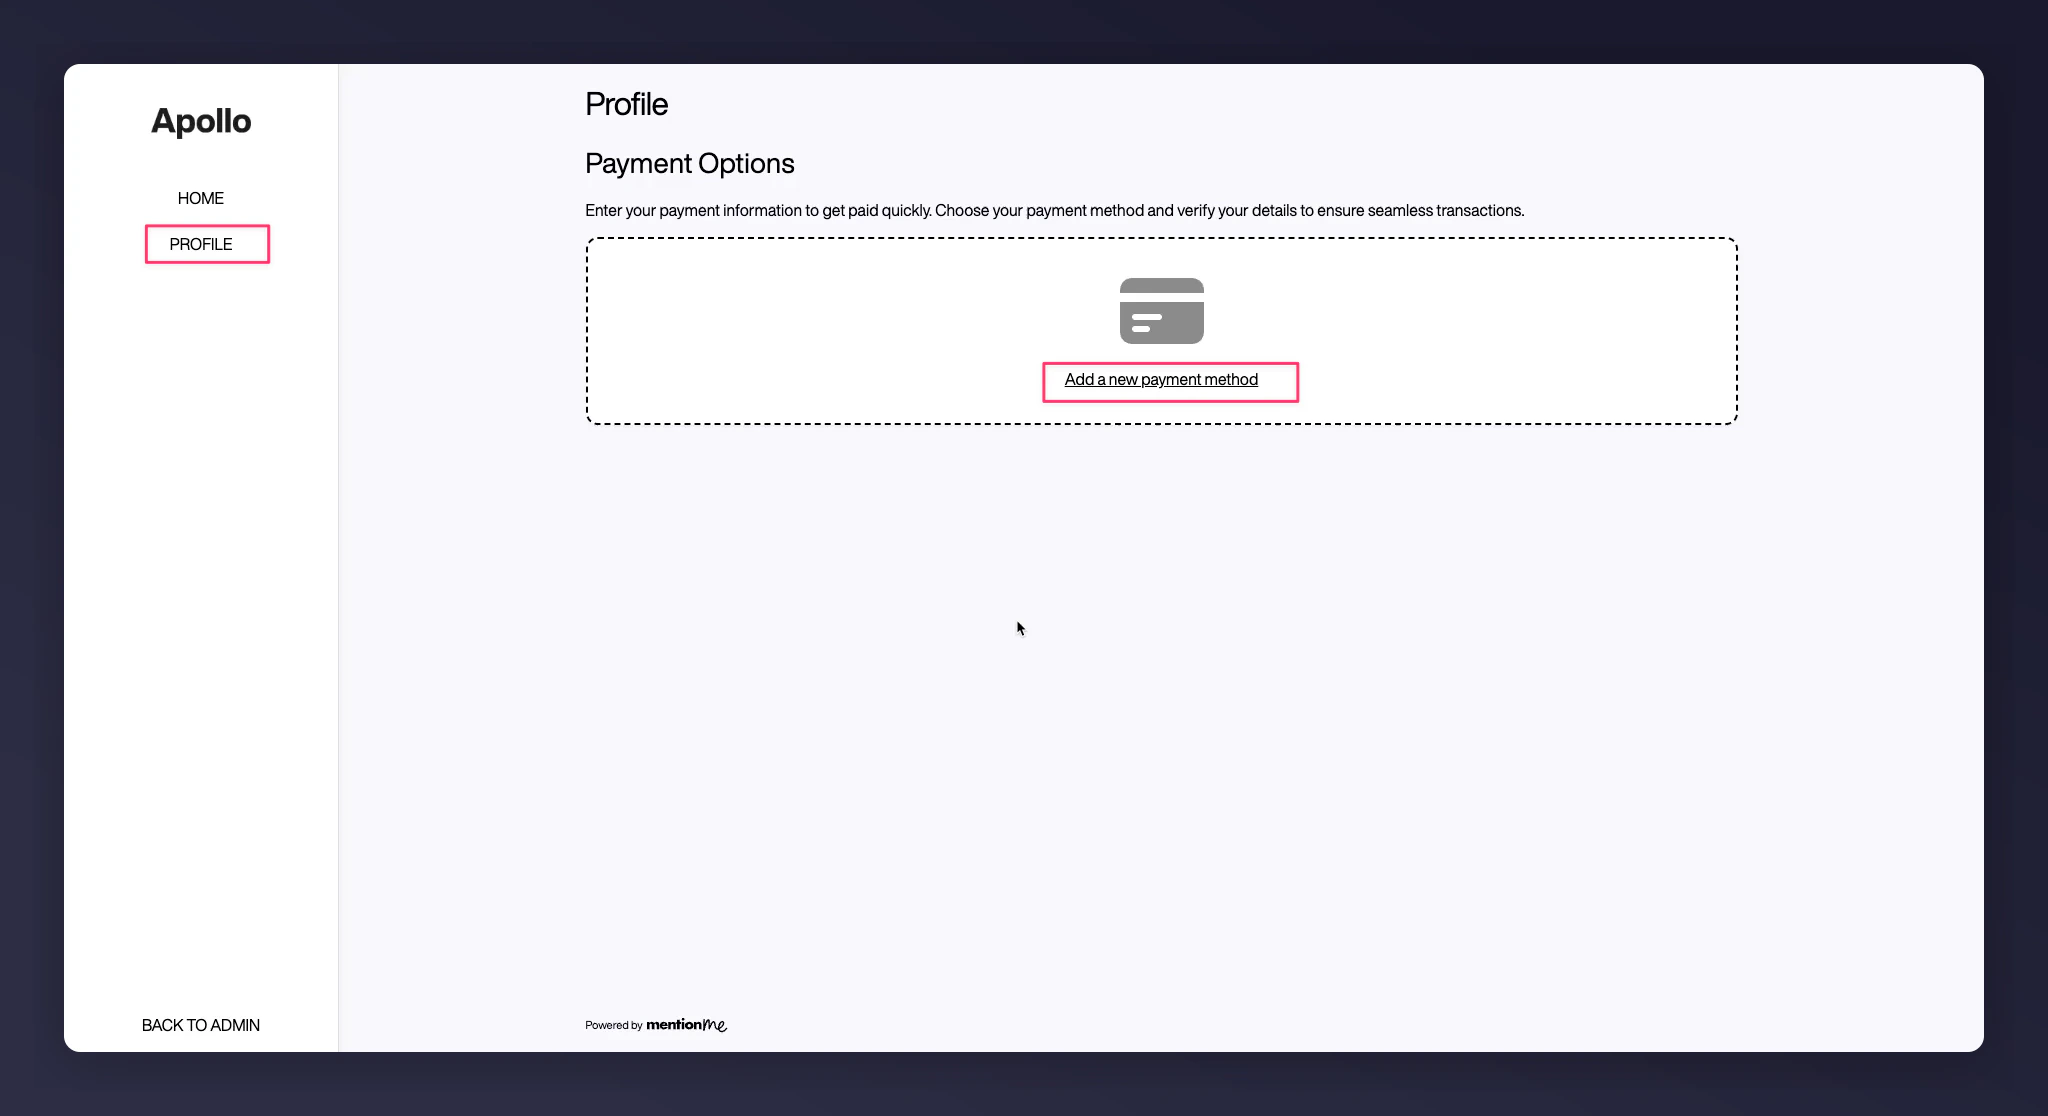
To create a payment method: click Add new payment method.
To edit an existing payment method: click Edit details.
The influencer dashboard profile page with payment method options.
Once a payment method is added, it appears in the payment details navigation bar:
The payment details navigation bar on the influencer dashboard.
3
Verify your mobile number
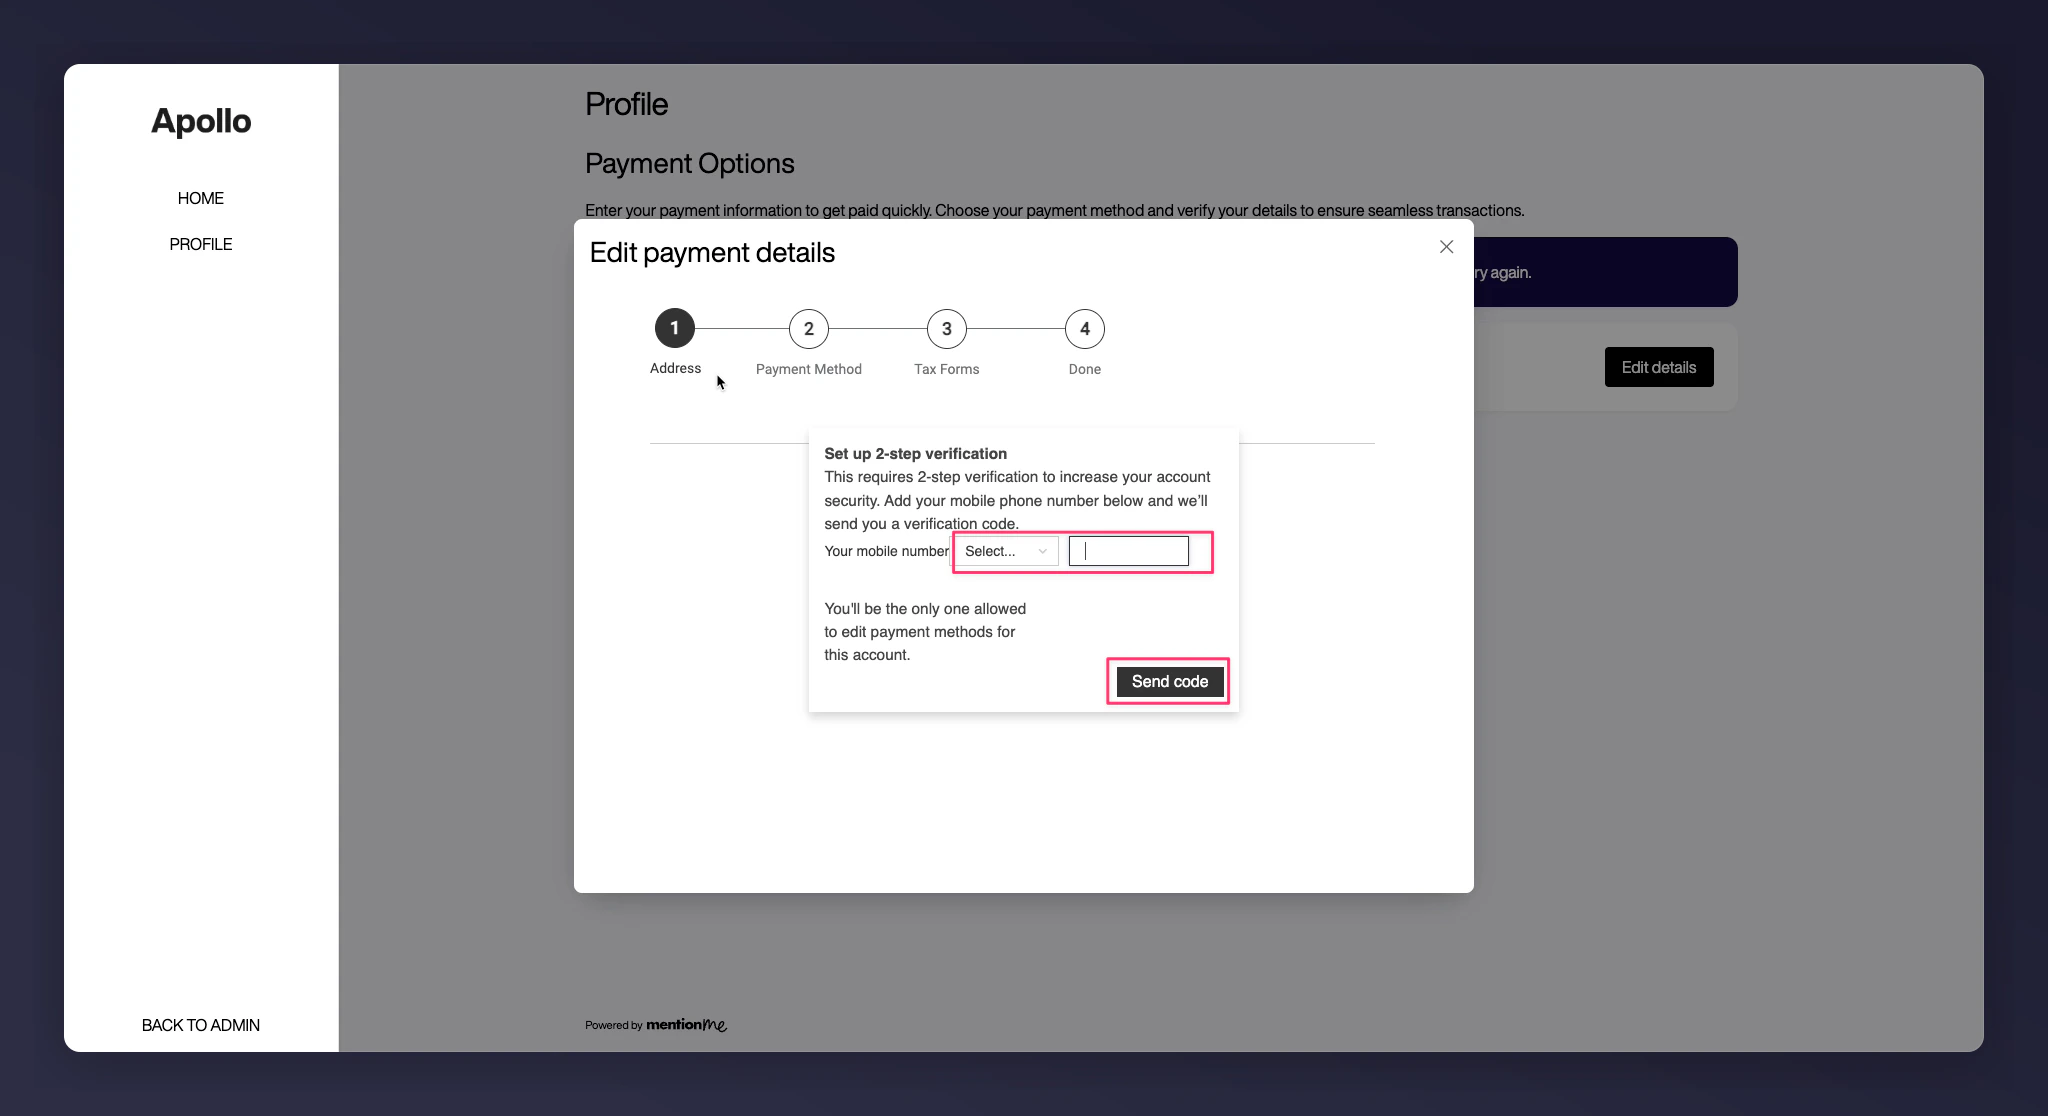
For security, add your mobile number (include the country code). You’ll receive a one-time PIN by SMS. Enter this PIN on the next screen to confirm your identity.
The mobile number verification screen with country code and PIN entry.
4
Enter your address details
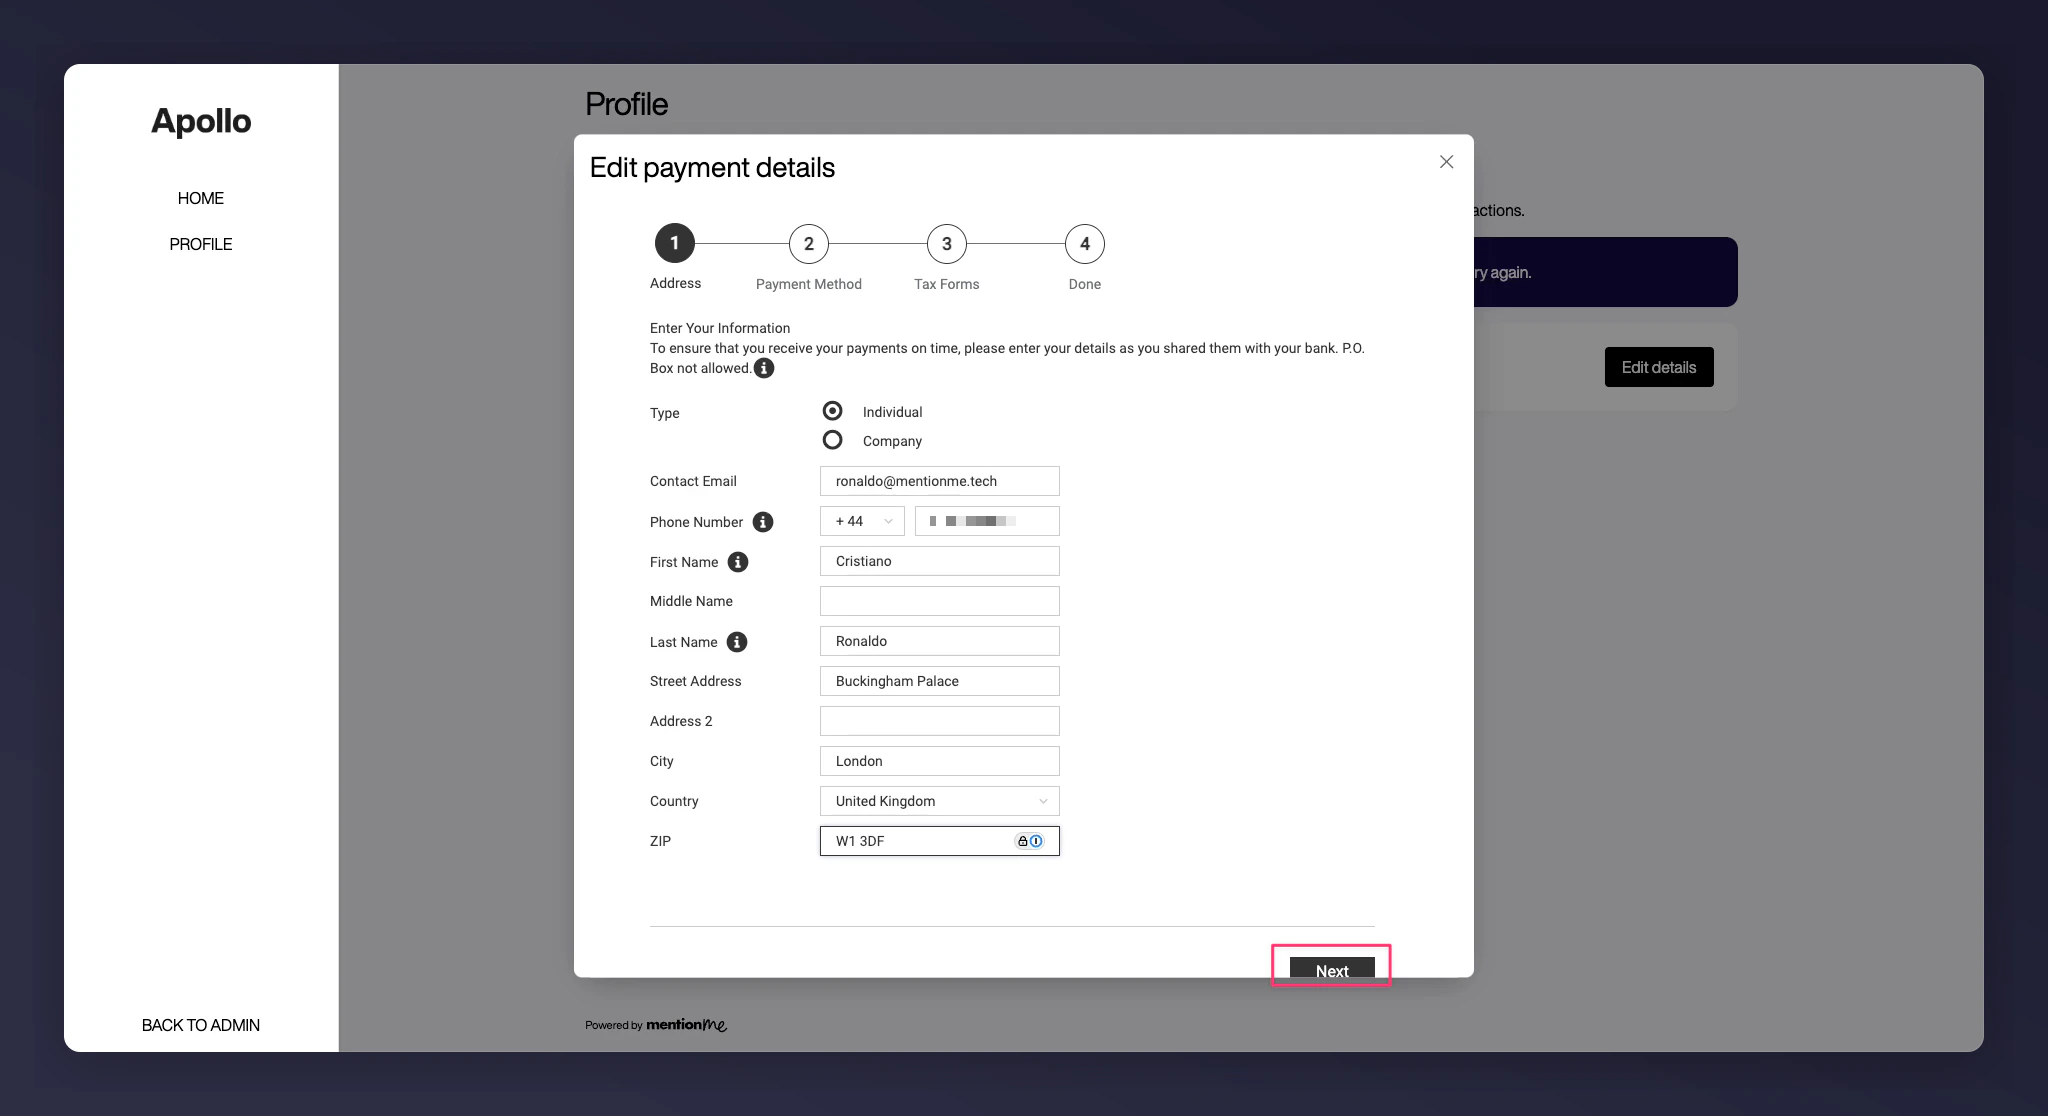
Provide your full address. This must match the address registered with your bank (required for KYC checks).
Your email address and first name will be pre-filled.
Add your mobile number, complete address (including postcode and country).
The country you choose determines your available currencies and payment methods.
The address details form with pre-filled email and name fields.
5
Address confirmation
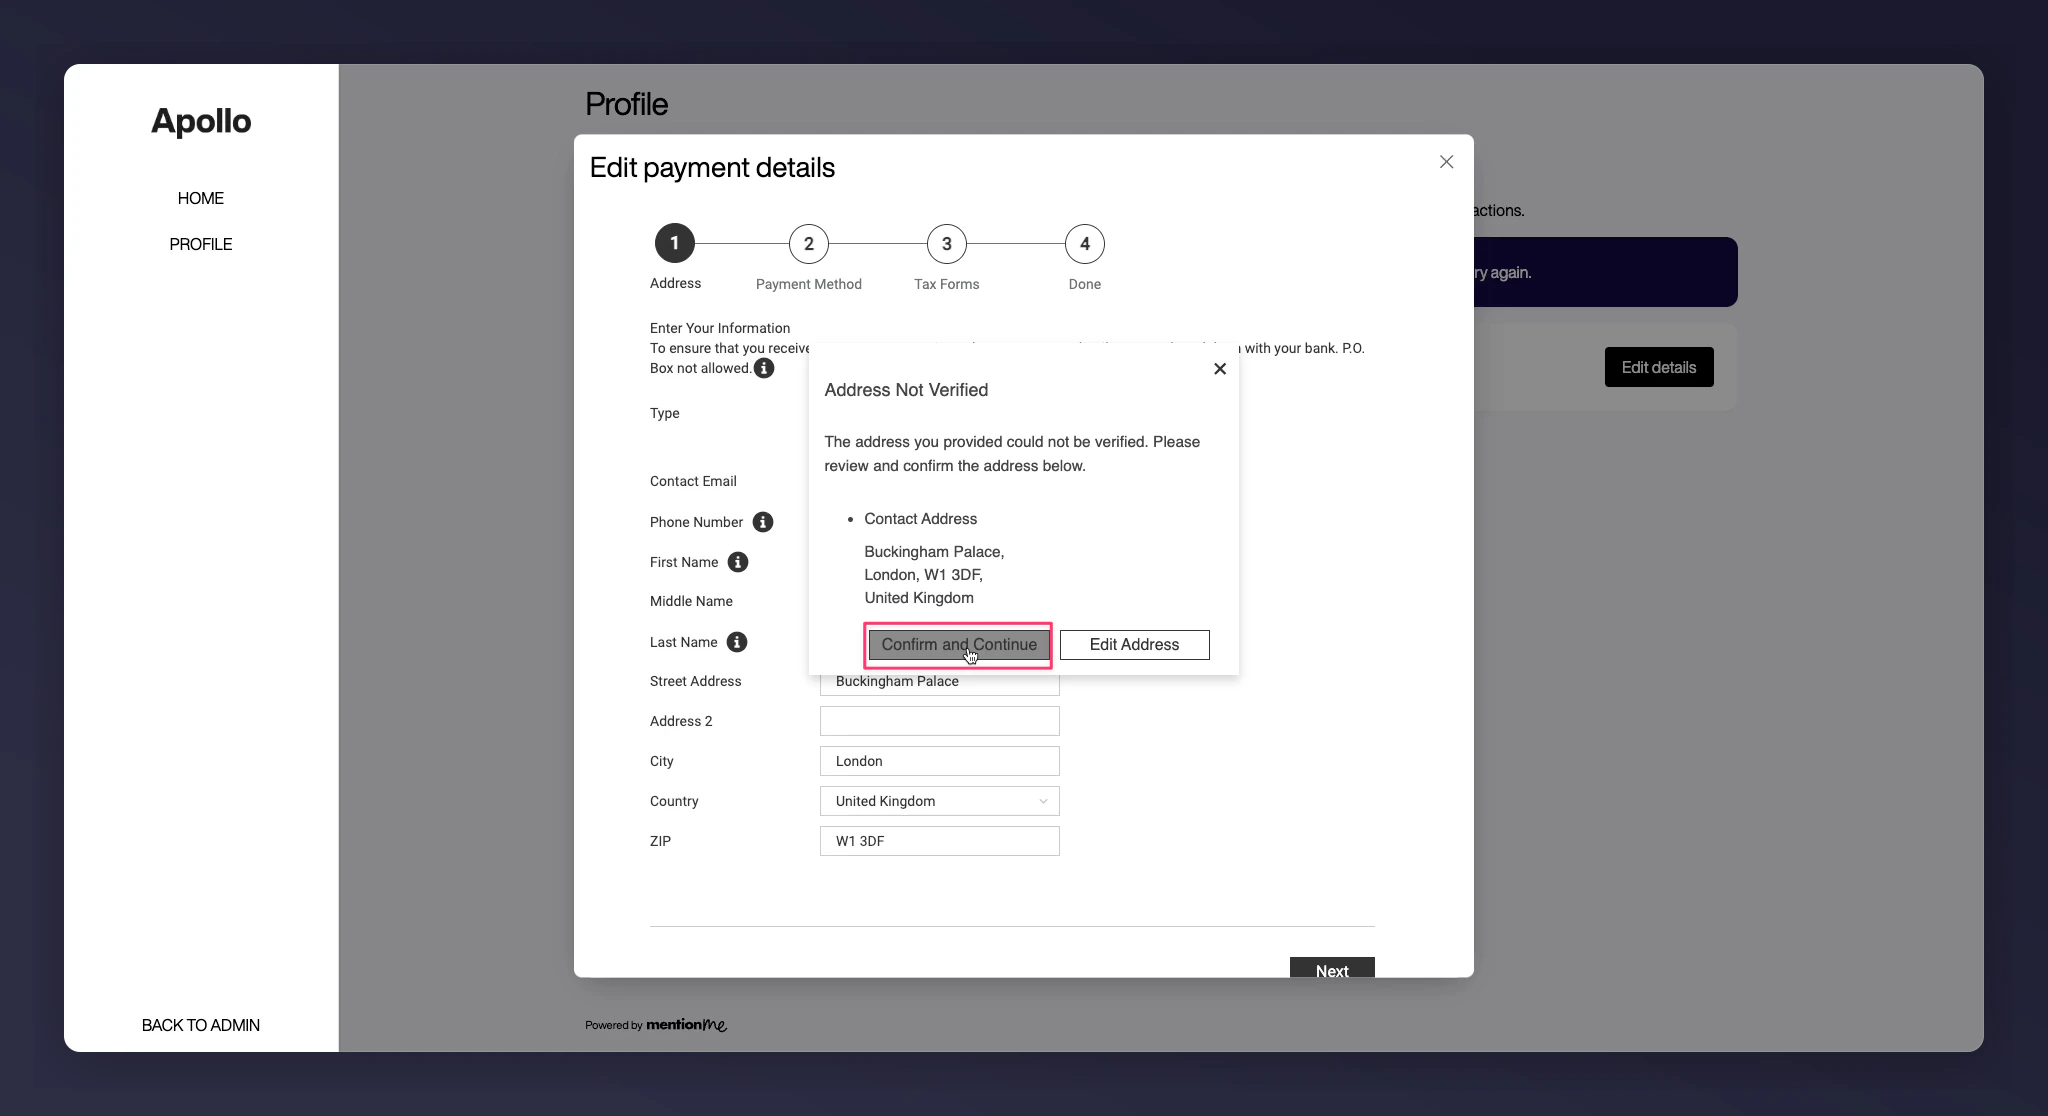
Your address will be verified automatically. If it can’t be verified, you’ll be asked to confirm or edit it.
The address confirmation screen with the option to edit or confirm.
6
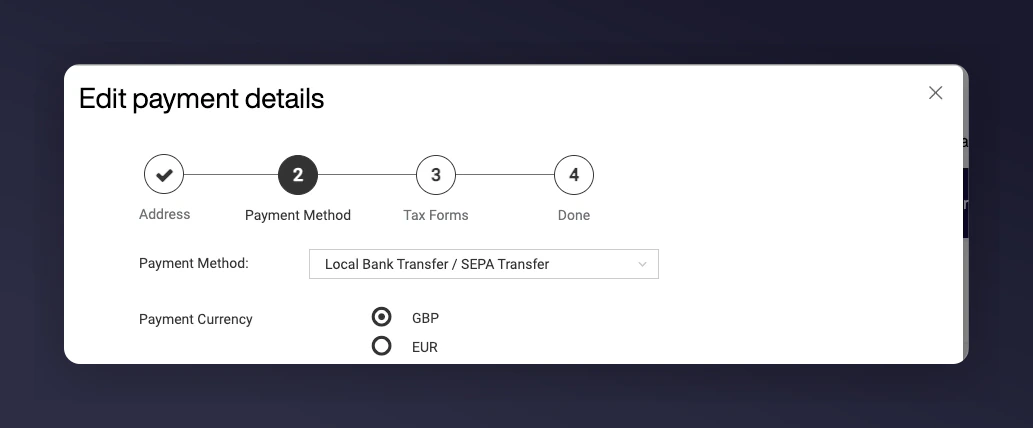
Choose your currency and payout method
Select the currency for payment based on your country.
GBP or EUR: The only available method is local bank transfer.
USD: You can choose between local bank transfer or PayPal (where supported in your region).
The currency and payout method selection screen.
7
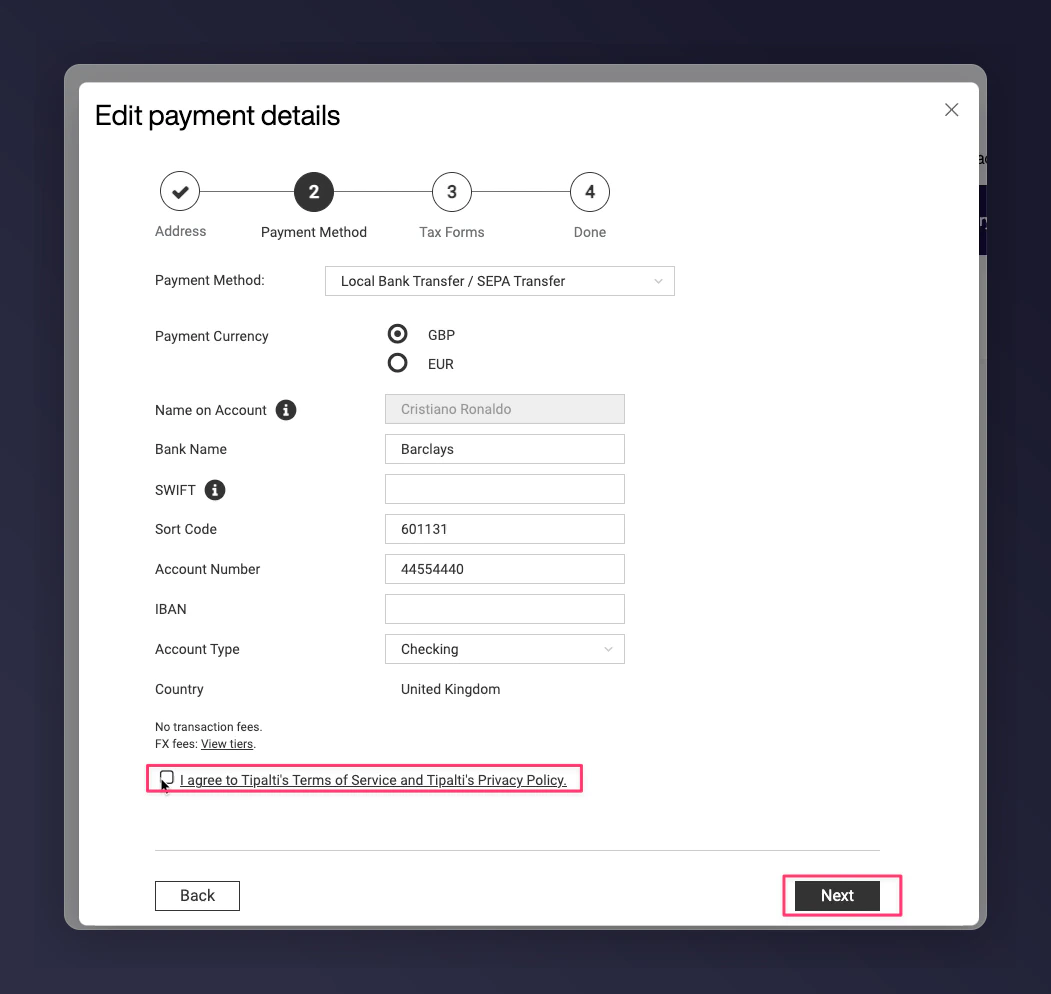
Add your bank details
Enter your bank details exactly as shown by your bank:
UK accounts: Sort code and account number.
EU accounts: IBAN and SWIFT/BIC.
The required fields vary depending on your location and currency choice.
Select the correct account type (checking or savings).
The bank details entry form with sort code and account number fields.
Incorrect information can delay or prevent your payments from reaching you.
8
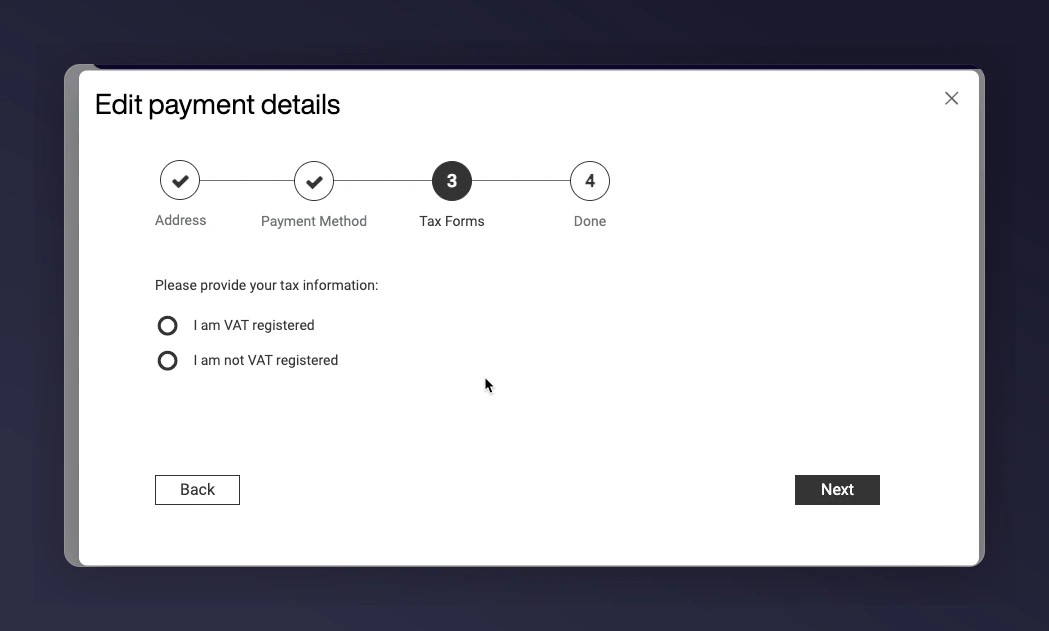
VAT registration (if applicable)
If you’re VAT registered, tick the relevant box and add your VAT number. If not, select Not registered.
The VAT registration checkbox and VAT number input field.
9
Confirm and finish
Read and agree to the terms and conditions. Once confirmed, your payment details are set up.
After adding your payment details, you can withdraw funds when they become available. There must be a minimum of 5 GBP/EUR/USD in your account before you can make any withdrawals.
Once you request to withdraw your funds, it can take up to 7 working days for the funds to reach you via your chosen payment method (subject to no payment verification delays).
Last modified on July 10, 2026
Was this page helpful?
Assistant
Responses are generated using AI and may contain mistakes.