` is present and the correct tag is implemented. Look for JavaScript errors in the browser console. Ensure you are using the DEMO tag.
> * **No request to tag-demo.mention-me.com** -- check you are using the DEMO tag; reload after clearing cache/cookies.
> * **Email/locale missing in request** -- check your Mention Me tag initialisation includes customer email and locale.
>
> ## Need Help?
>
> Start a conversation with the in-platform Support widget in the bottom-right corner of your dashboard - it can usually answer this straight away. If it can't, raise a request via the [request form](https://help.mention-me.com/hc/en-gb/requests/new?ticket_form_id=1900000712373).
>
> 
>
> The in-platform Support widget starting an AI-assisted conversation.
> [tab] Live
>
> 
>
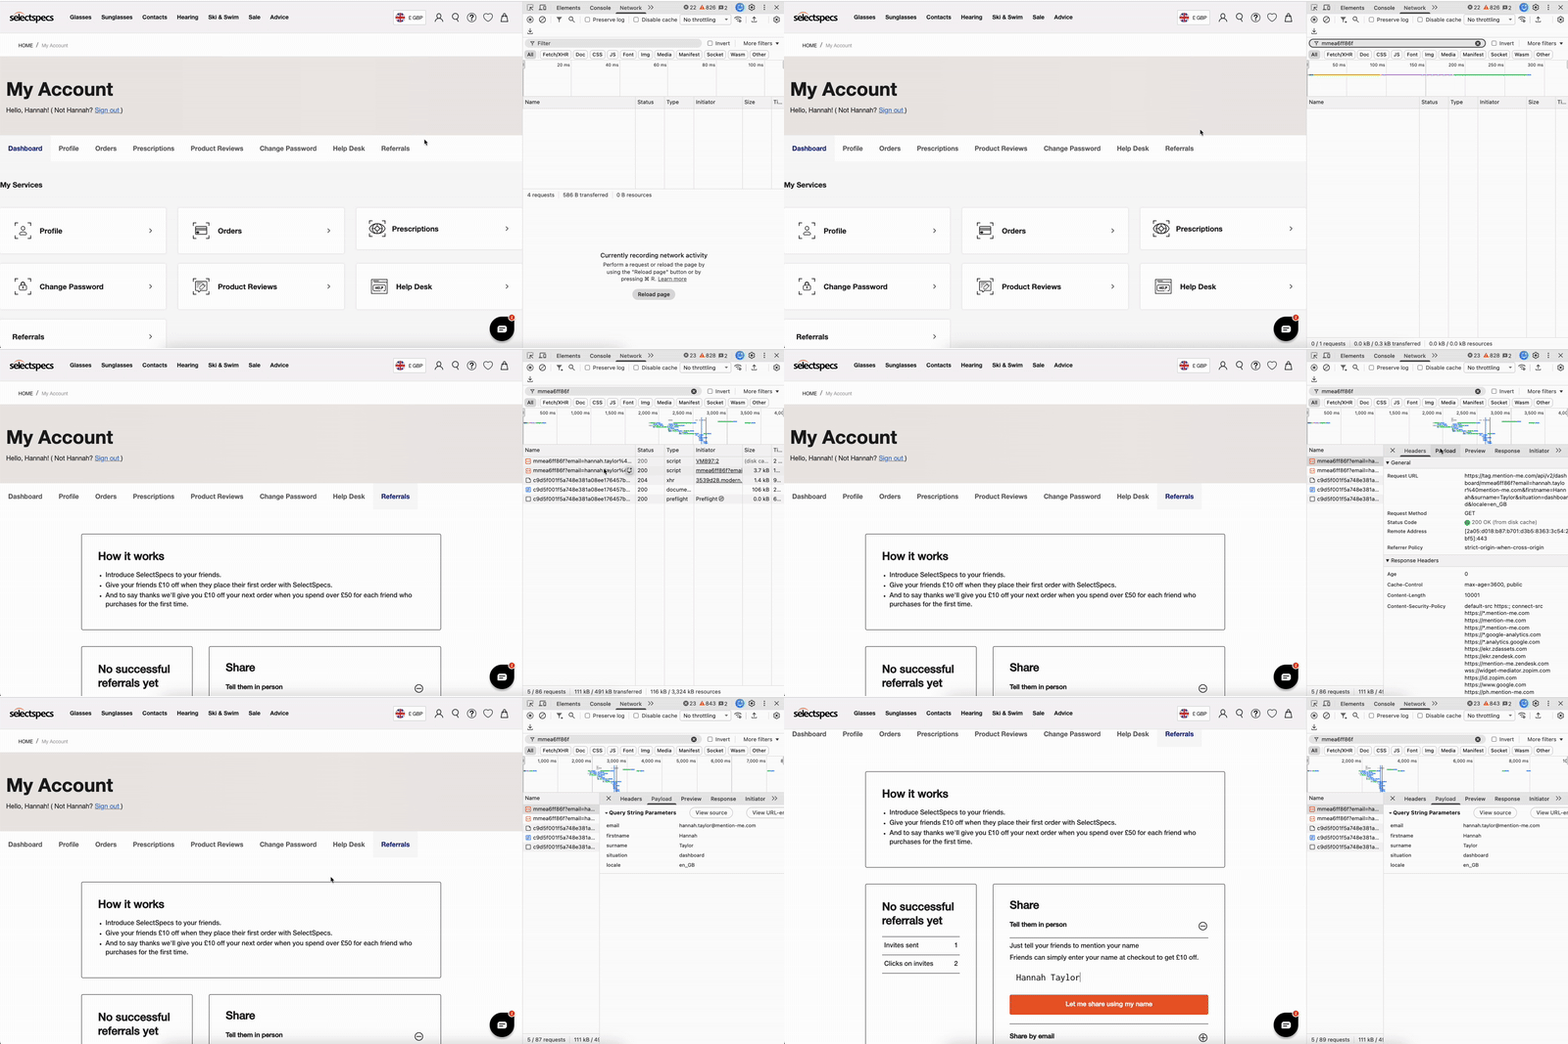
> Testing the dashboard tag in the LIVE environment.
>
> ## Website Test
>
> **1. Open DevTools**
>
> Open your browser's **Network** tab (right-click, **Inspect**, then **Network**). Filter for your **partnerCode** before loading the page.
>
> **2. Navigate to your dashboard page**
>
> Log in with your test customer account and go to the page where your dashboard has been implemented.
>
> **3. Check the embedded dashboard**
>
> Check the embedded referral dashboard is displayed within `
` or the correct container.
>
> **4. Verify network requests**
>
> Confirm a request in the Network tab to **tag.mention-me.com** with:
>
> * **Headers:** environment is **production**
> * **Payload:** **situation** is **dashboard**, **email** matches the logged-in customer, and **localeCode** matches the account page language
>
> ## Troubleshooting
>
> * **Dashboard not visible** -- check `
` is present and the correct tag is implemented. Look for JavaScript errors in the browser console. Ensure you are using the PRODUCTION tag (**tag.mention-me.com**).
> * **No request to tag.mention-me.com** -- check you're using the PRODUCTION tag; reload after clearing cache/cookies.
> * **Email/locale missing in request** -- check your Mention Me tag initialisation includes customer email and locale.
> * **Error responses from Network request:**
> * **400 -- Bad Request:** check the payload for missing or malformed parameters
> * **403 -- Forbidden:** check that you have enabled debug mode
> * **404 -- Not Found:** your partnerCode or URL may be incorrect
>
> ## Need Help?
>
> Start a conversation with the in-platform Support widget in the bottom-right corner of your dashboard - it can usually answer this straight away. If it can't, raise a request via the [request form](https://help.mention-me.com/hc/en-gb/requests/new?ticket_form_id=1900000712373).
>
> 
>
> The in-platform Support widget starting an AI-assisted conversation.
# How to Switch from Demo to Live Tags
Source: https://docs.mention-me.com/knowledge/onboarding/testing/demo-to-live
How to switch from testing with Mention Me Demo tags to production Live tags, for JavaScript, Shopify, and Google Tag Manager.
The way you switch from the demo (`tag-demo.mention-me.com`) to the live (`tag.mention-me.com`) environment depends on how Mention Me is installed. Pick your integration below.
> [tab] JavaScript tags
>
> 
>
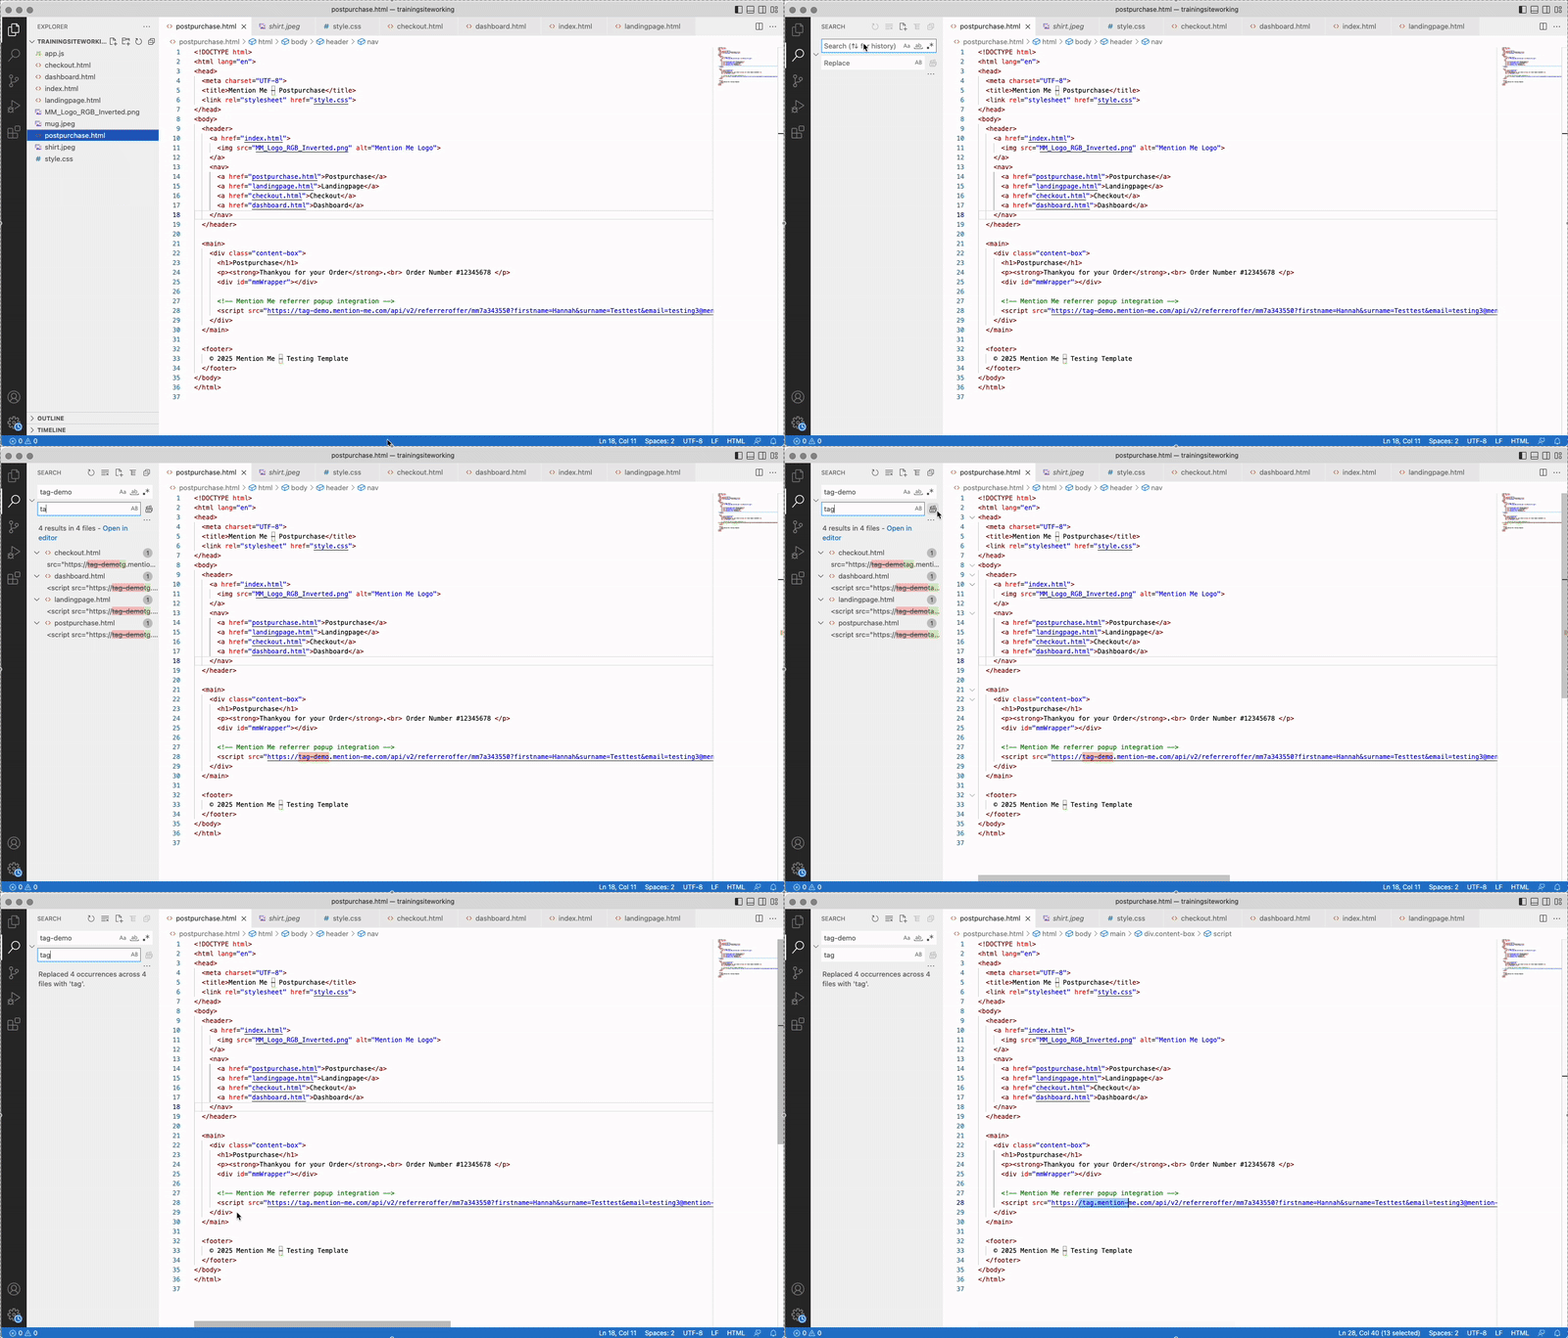
> Switching from DEMO to LIVE Mention Me tags.
>
> **1. Update your tag URLs**
>
> Remove `-demo-` from your Mention Me JavaScript tag URLs wherever they appear in your code. For example, change `tag-demo.mention-me.com` to `tag.mention-me.com` in all relevant script links.
>
> **2. Publish your changes**
>
> Save and publish your changes to your live website.
> [tab] Shopify
>
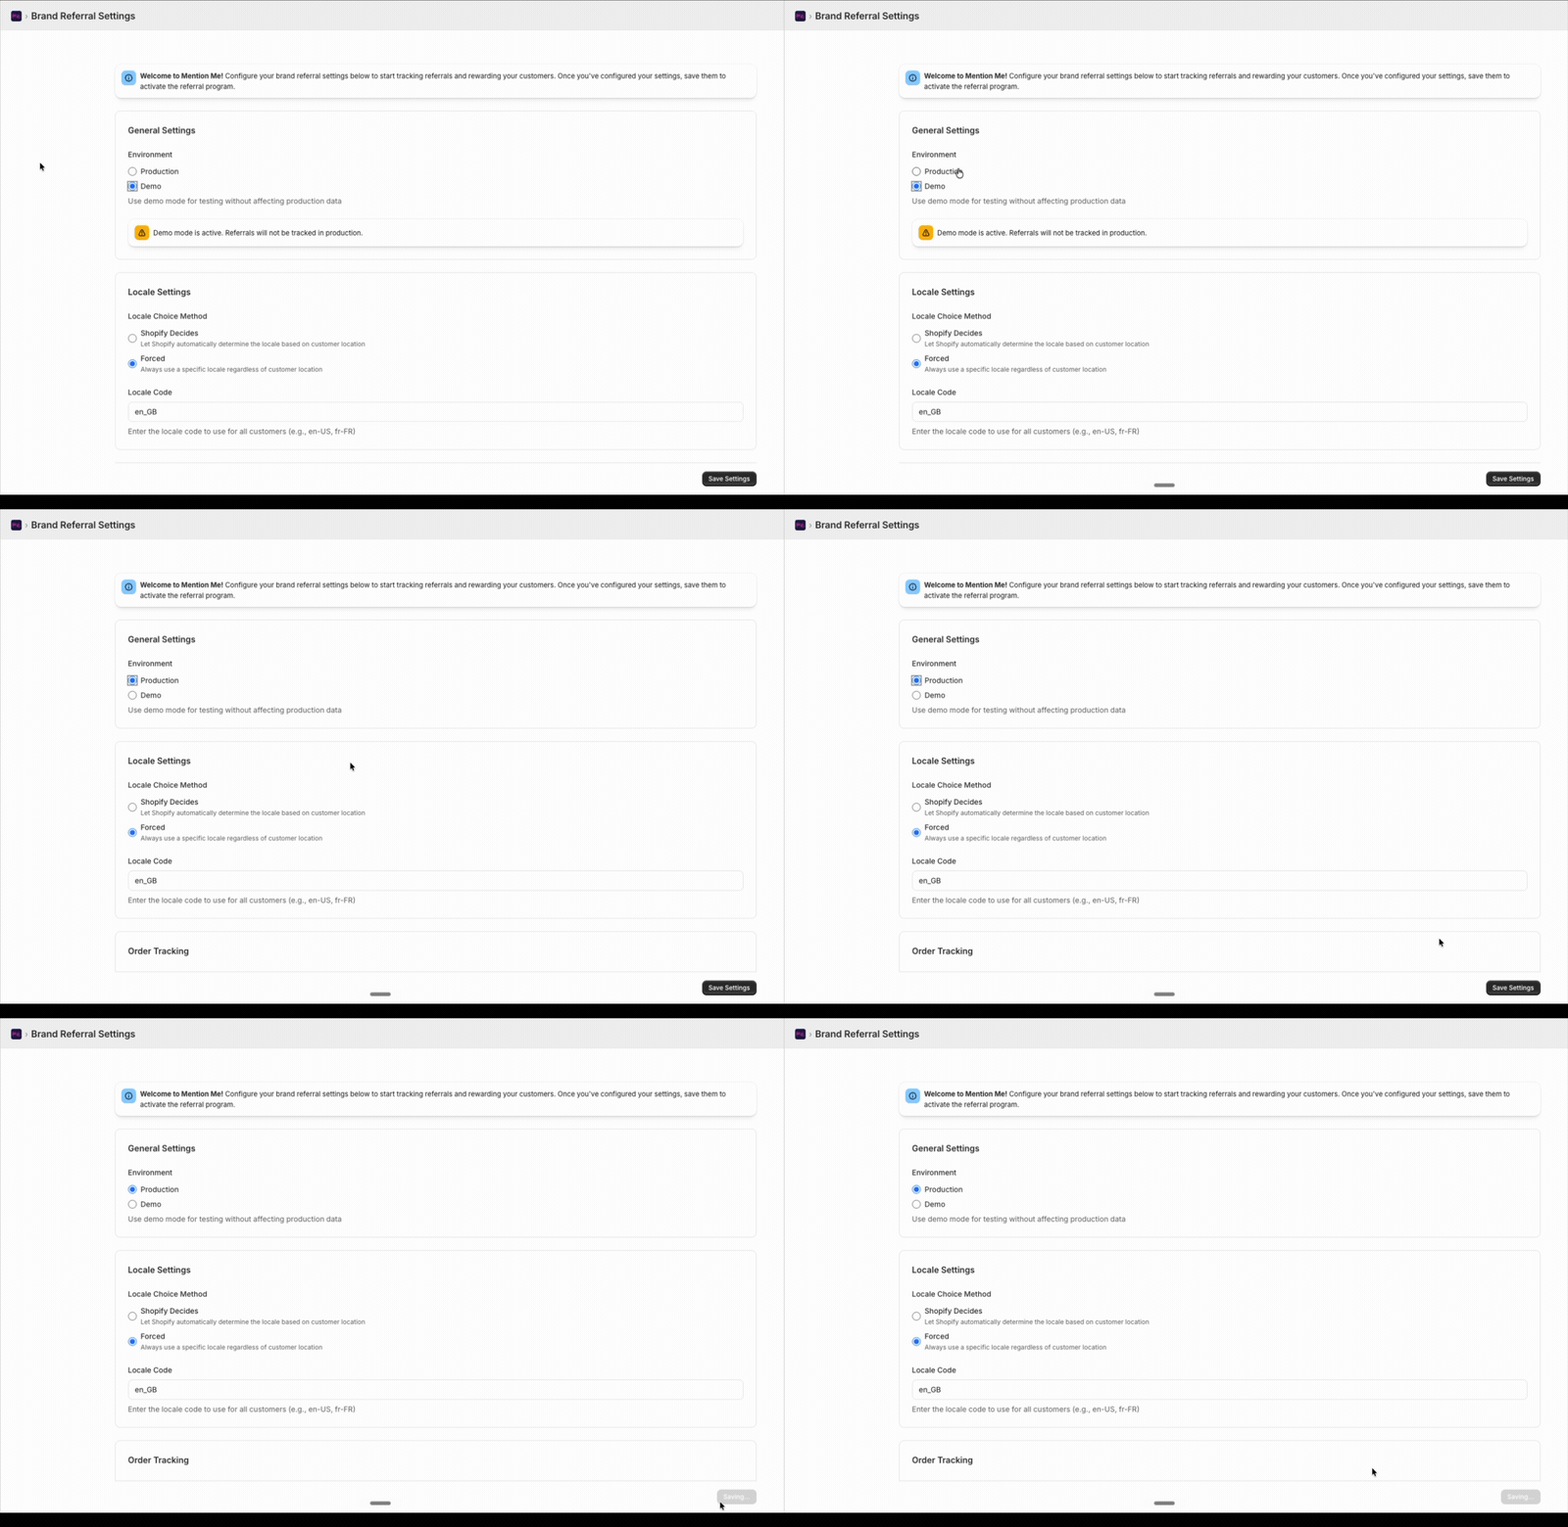
> In the Mention Me Shopify app there is no code to change. Switch the app's environment from **Demo** to **Production**.
>
> 
>
> Switching the Mention Me Shopify app from Demo to Production.
>
> **1. Open the app settings**
>
> In Shopify Admin, open the **Mention Me** app.
>
> **2. Switch the environment to Production**
>
> Change the environment setting from **Demo** to **Production**.
>
> **3. Save**
>
> Save your changes. The app now loads the live (`tag.mention-me.com`) environment.
> [tab] Google Tag Manager
>
> > [tab] Legacy (manual JavaScript)
> >
> > If you deployed the Mention Me tags through a **Custom HTML** tag in GTM, switch the environment in the tag URL.
> >
> > **1. Update your Custom HTML tags**
> >
> > In each Mention Me Custom HTML tag, switch the tag URL from `tag-demo.mention-me.com` to `tag.mention-me.com`, once you've verified the integration end-to-end.
> >
> > **2. Preview and publish**
> >
> > Use GTM's Preview mode to confirm the tags still fire, then publish the container.
>
> > [tab] Community template
> >
> > The Mention Me Referral Tag GTM template has no URLs to edit. You switch environments with the tag's **Environment** field.
> >
> > **1. Open each Mention Me tag**
> >
> > In Google Tag Manager, go to **Tags** and open each Mention Me Referral Tag.
> >
> > **2. Set Environment to Live**
> >
> > Change the **Environment** field from **Test** to **Live**. `Live` sends events to `tag.mention-me.com`; `Test` sends them to `tag-demo.mention-me.com`.
> >
> > **3. Publish your container**
> >
> > **Save** each tag, then **Submit** and publish your GTM container.
## Next Step
Start testing your LIVE tags with the [Landing Page Tag -- LIVE Testing Guide](/knowledge/onboarding/testing/landing-page).
# How to Test Your Referral Landing Page
Source: https://docs.mention-me.com/knowledge/onboarding/testing/landing-page
How to test your referral landing page in both Demo and Live environments.
This guide walks you through testing your referral landing page to confirm that referral content appears, loads from the correct environment, and that test referrer profiles are created as expected.
> [tab] Demo
>
> ## Website Test
>
> 
>
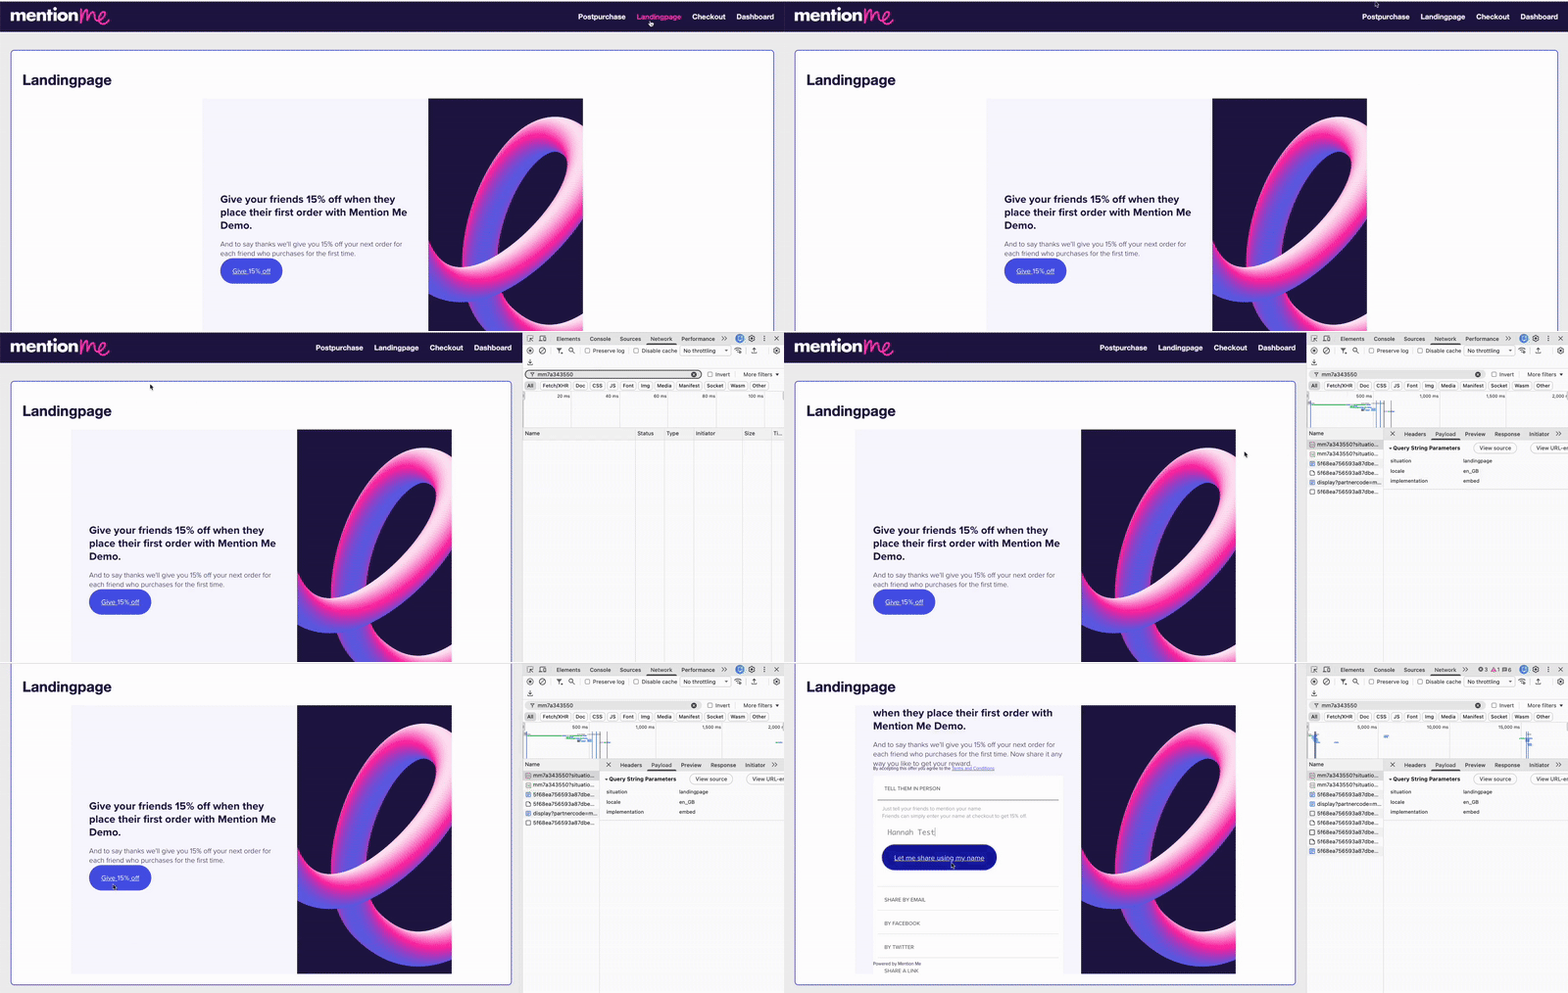
> Testing the referral landing page in the DEMO environment.
>
> **1. Open a private browser window**
>
> Open a private or incognito browser window.
>
> **2. Navigate to your landing page**
>
> Go to your referral landing page (e.g. `https://yourdomain.com/refer-a-friend`).
>
> **3. Check the referral offer**
>
> Check the Mention Me embedded offer is visible and enrol as a referrer with test details.
>
> **4. Inspect network requests**
>
> Right-click anywhere and select **Inspect**, then open the **Network** tab. Filter by your partnerCode, reload the page, and look for requests to **tag-demo.mention-me.com**.
>
> **5. Verify request details**
>
> Click the request and check:
>
> * **Headers** tab -- environment is **demo**
> * **Payload** tab -- partnerCode and localeCode are correct, **situation** is set to **landingpage**
>
> 
>
> The Network tab showing DEMO environment request details.
>
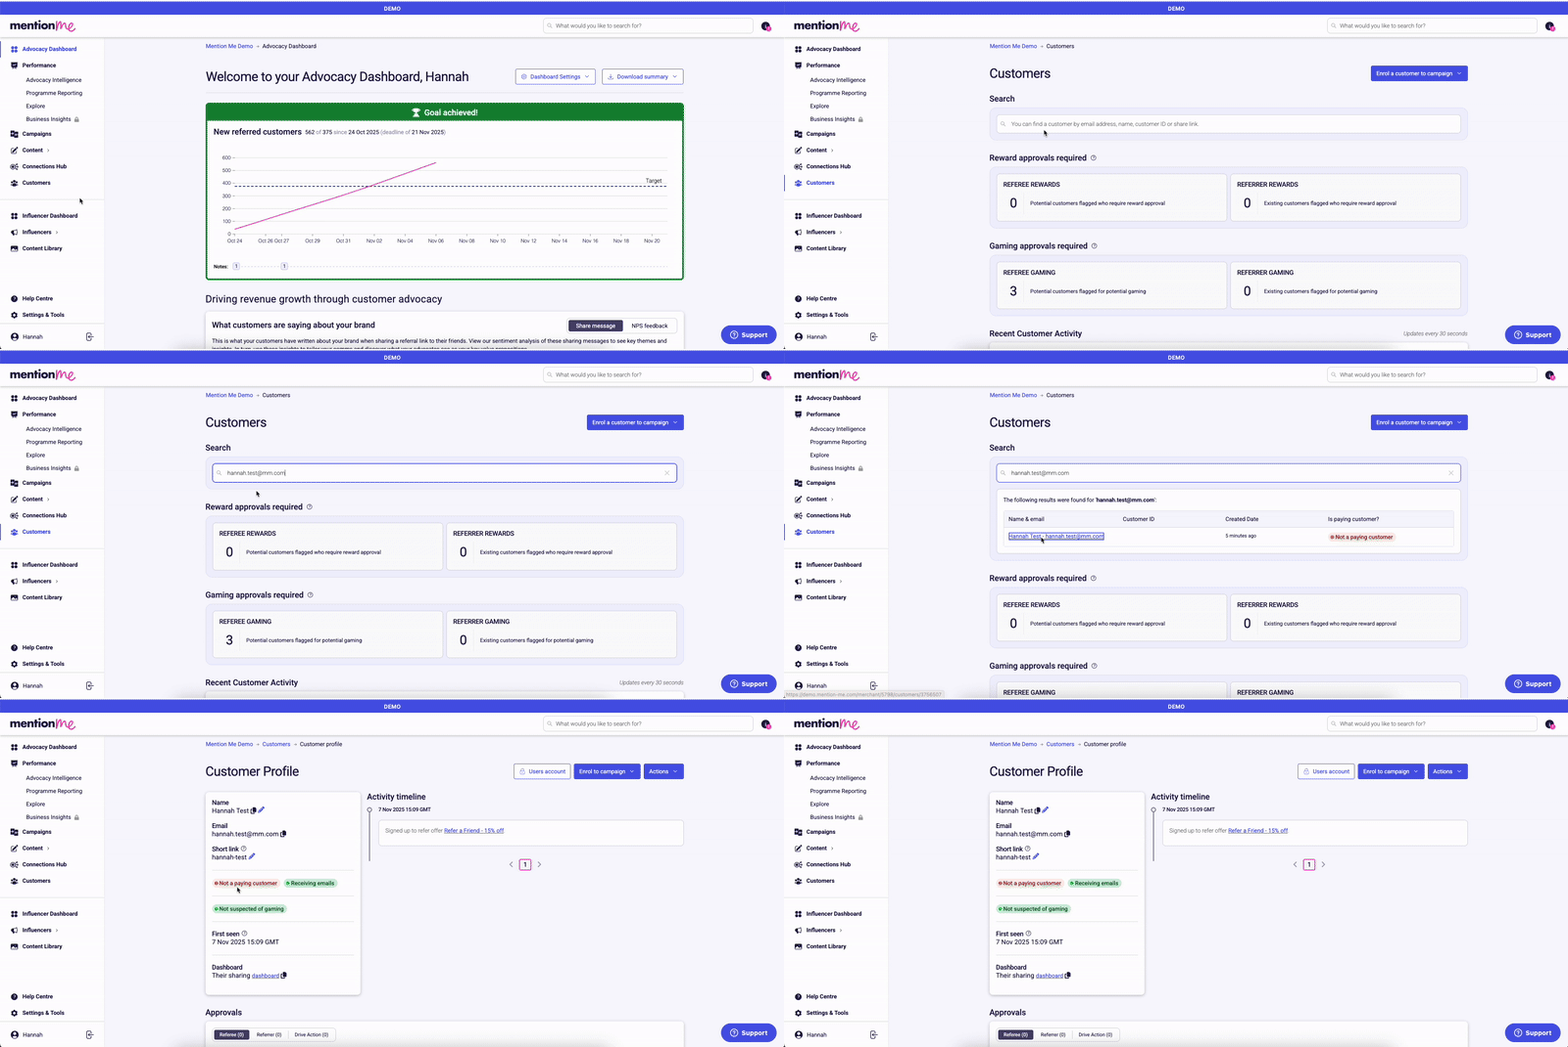
> ## Platform Verification
>
> **1. Search for your test referrer**
>
> In the Mention Me platform, go to [**Customers**](https://demo.mention-me.com/merchant/~/customers) and search for your test referrer's email address.
>
> **2. Confirm the profile**
>
> Click the profile and confirm:
>
> * Customer is signed up for the expected campaign
> * All customer details (campaign, locale, referral status) match your test
>
> 
>
> Verifying the test referrer profile in the platform.
>
> ## Troubleshooting
>
> * **Content doesn't appear** -- check that the Mention Me JavaScript is included on the page and ensure the wrapper element (`
`) is present in your HTML.
> * **Requests go to tag.mention-me.com instead of tag-demo.mention-me.com** -- you're pointing to the live environment. Switch to the DEMO JavaScript tag until testing is complete.
>
> ## Need Help?
>
> Start a conversation with the in-platform Support widget in the bottom-right corner of your dashboard - it can usually answer this straight away. If it can't, raise a request via the [request form](https://help.mention-me.com/hc/en-gb/requests/new?ticket_form_id=1900000712373).
>
> 
>
> The in-platform Support widget starting an AI-assisted conversation.
> [tab] Live
>
> ## Before You Begin
>
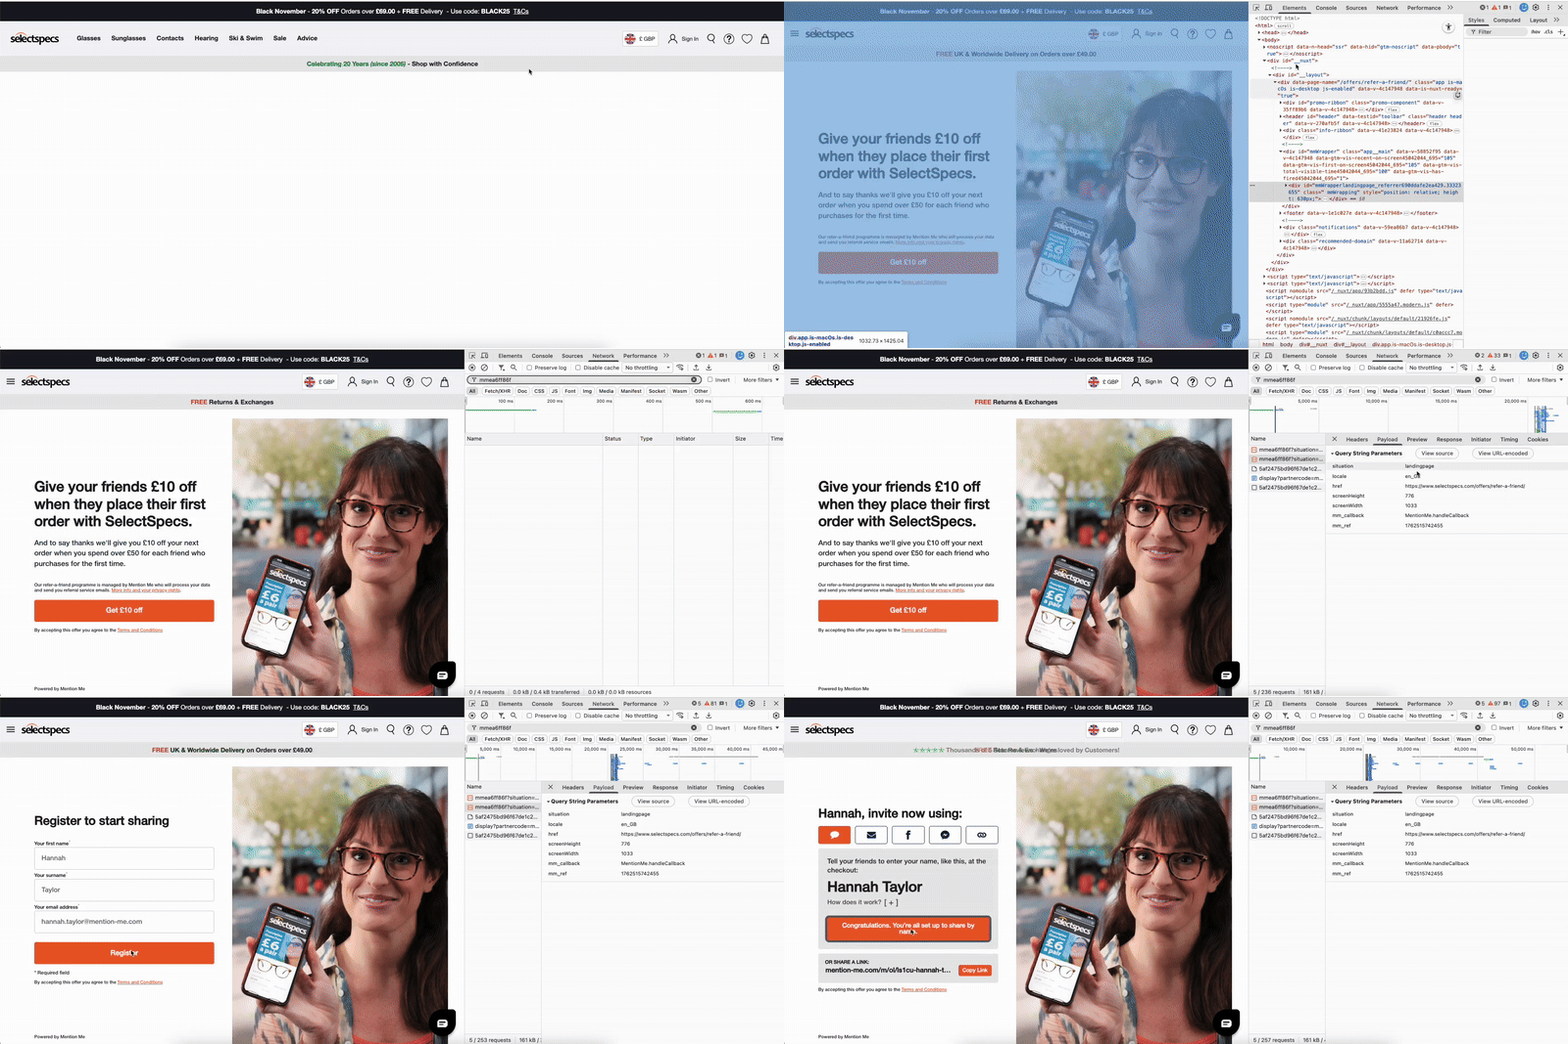
> * **Activate Debug Dashboard** -- log in to your Mention Me Production dashboard, go to your [**Debug Dashboard**](https://mention-me.com/merchant/~/tools/debug-dashboard), and click "Enable debug mode" to activate real-time monitoring.
> * **Confirm campaign setup** -- set your campaign to **Running**. Customers won't see anything yet.
>
> 
>
> Enabling debug mode and setting the campaign to Running.
>
> ## Website Test
>
> **1. Navigate to your referral page**
>
> Navigate directly to your referral page URL (e.g. `https://yourdomain.com/refer-a-friend`).
>
> **2. Check the page**
>
> Embedded referral content appears clearly and layout/messaging look as expected.
>
> **3. Open DevTools**
>
> Right-click anywhere on the page, select **Inspect**, then open the **Network** tab and reload.
>
> **4. Verify network requests**
>
> Filter by your partnerCode and check the request to **tag.mention-me.com**:
>
> * **Headers** tab -- script begins with `https://tag.mention-me.com`
> * **Payload** tab -- partnerCode is correct, localeCode matches your campaign, situation = **landingpage**
>
> 
>
> The Network tab showing a LIVE environment request to tag.mention-me.com.
>
> ## Platform Verification
>
> **1. Submit test details**
>
> Enter a test first name, surname, and email address into the referral form, then submit and interact with the share options.
>
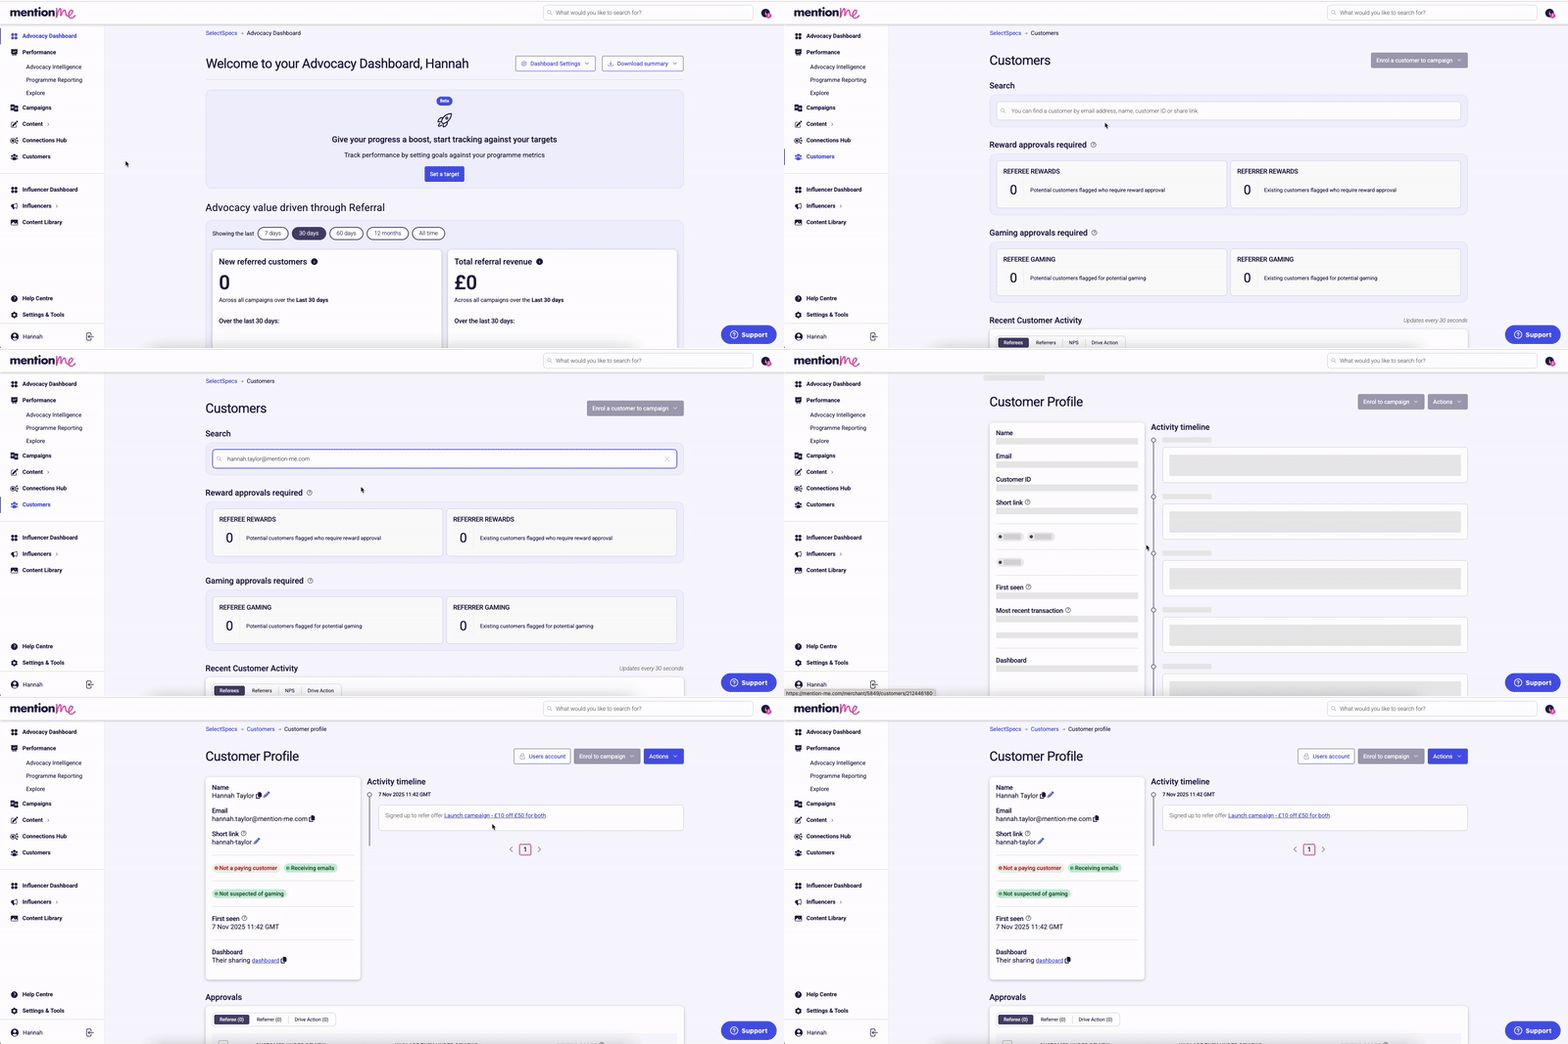
> **2. Search for the test profile**
>
> In your Production dashboard, go to [**Customers**](https://mention-me.com/merchant/~/customers) and search with the test email.
>
> **3. Verify the profile**
>
> Check the profile: referrer has been created, status shows signed up to the expected campaign and offer, and customer details are correct.
>
> 
>
> Verifying the test referrer profile in the Production dashboard.
>
> ## Troubleshooting
>
> * **Content not appearing** -- confirm `` is present, ensure the live Mention Me script is in use (**tag.mention-me.com**), and reload in incognito with no extension blockers.
> * **"Unable to find suitable offer" warning in debug** -- the offer is not set to **Running**. Go to the campaign and ensure the offer status is set to "Running".
> * **Error responses from Network request:**
> * **400 -- Bad Request:** check the payload for missing or malformed parameters
> * **403 -- Forbidden:** check that you have enabled debug mode
> * **404 -- Not Found:** your partnerCode or URL may be incorrect
>
> ## Need Help?
>
> Start a conversation with the in-platform Support widget in the bottom-right corner of your dashboard - it can usually answer this straight away. If it can't, raise a request via the [request form](https://help.mention-me.com/hc/en-gb/requests/new?ticket_form_id=1900000712373).
>
> 
>
> The in-platform Support widget starting an AI-assisted conversation.
# How to Test the Postpurchase Tag
Source: https://docs.mention-me.com/knowledge/onboarding/testing/postpurchase-tag
How to test the Mention Me postpurchase tag on your order confirmation page in both Demo and Live environments.
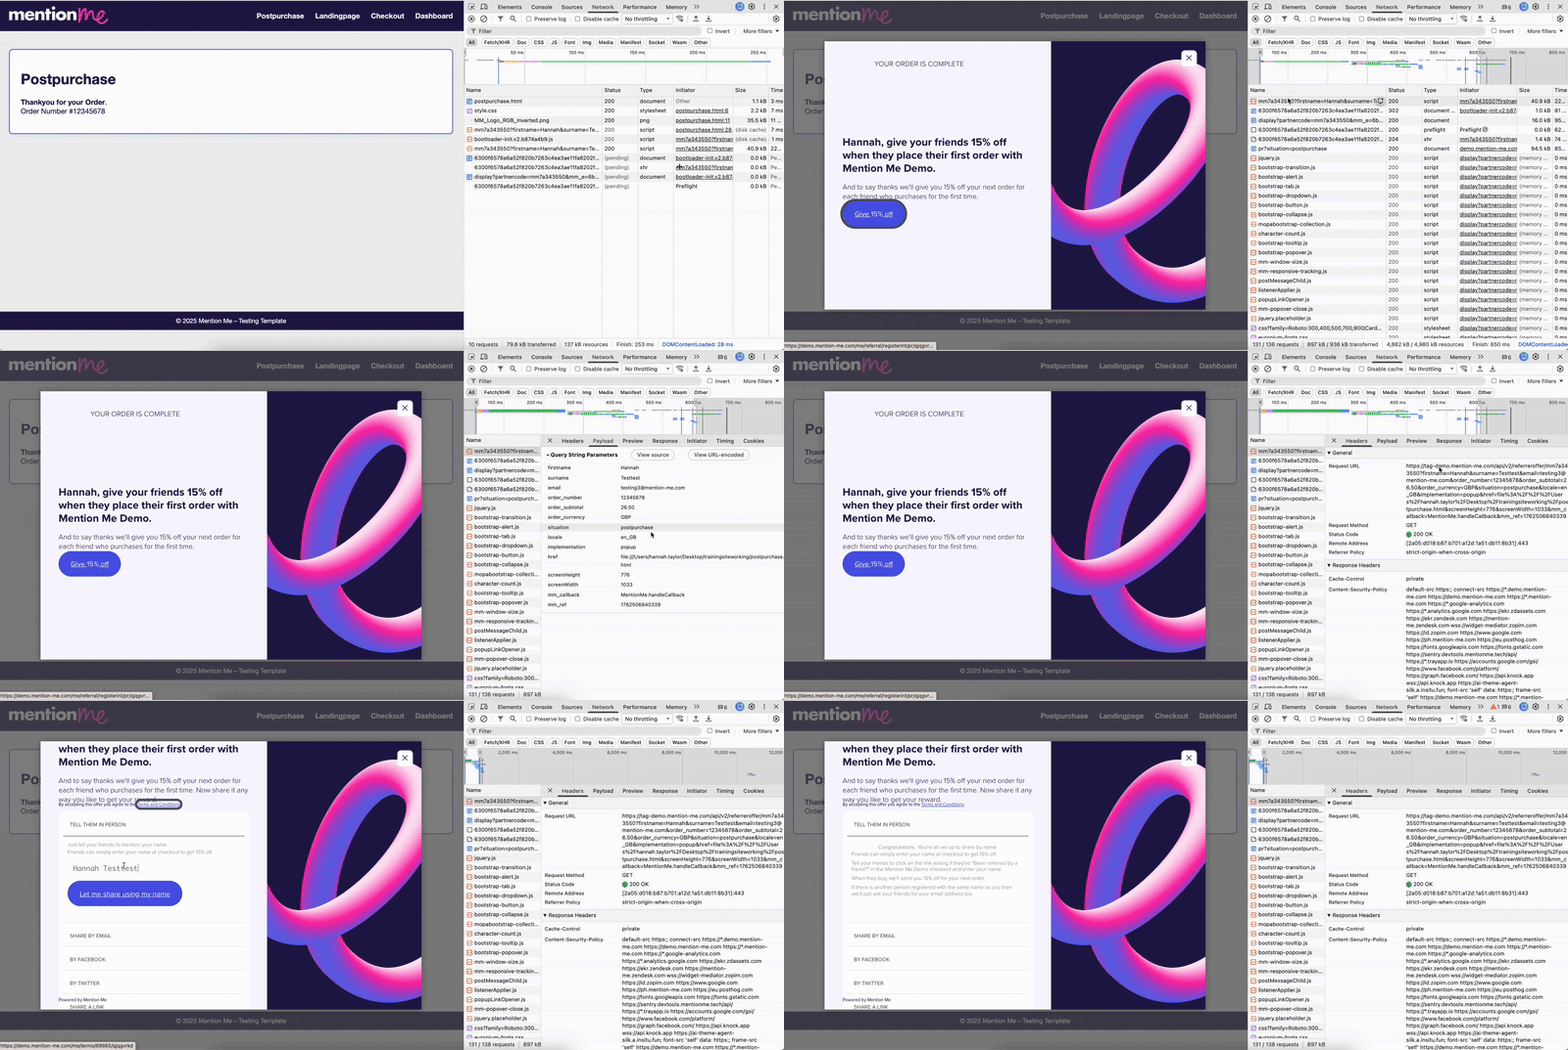
The postpurchase tag fires on your order confirmation page, triggers the referral popup, and closes the referral loop by crediting the referrer. This guide covers testing in both Demo and Live environments.
> [tab] Demo
>
> 
>
> Testing the postpurchase tag in the DEMO environment.
>
> ## Website Test
>
> **1. Proceed through checkout**
>
> Add an item to your basket and proceed through checkout, using your test referee email at purchase.
>
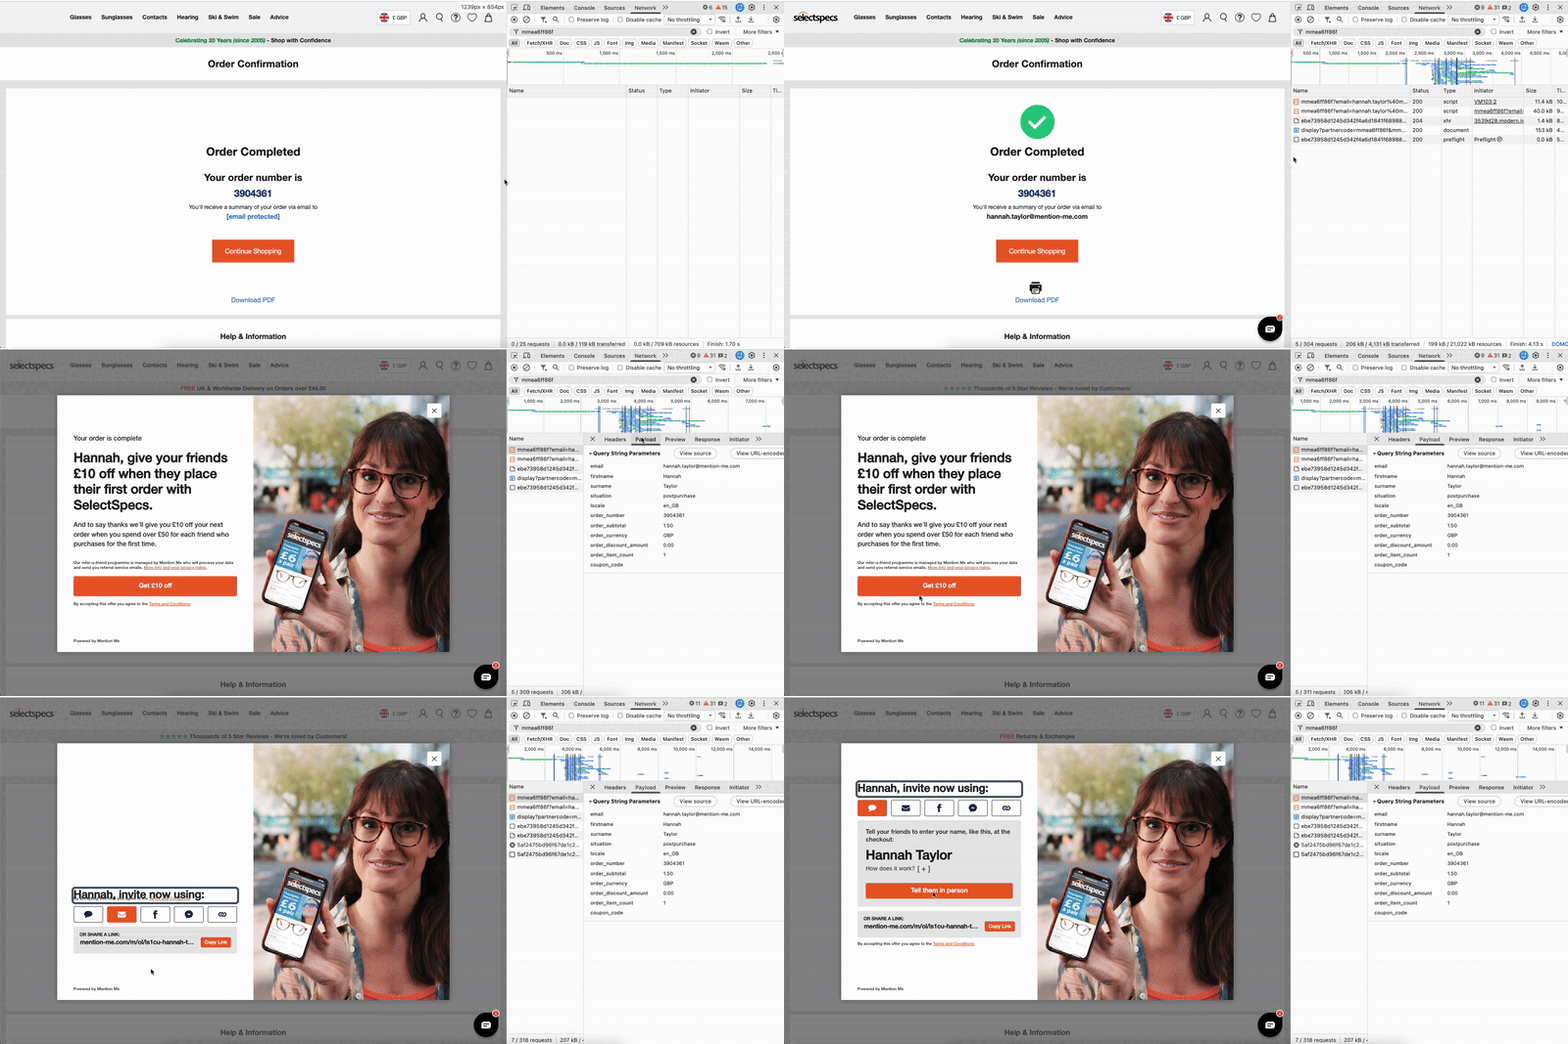
> **2. Check the referral popup**
>
> Place the test order. On the order confirmation/thank you page, a Mention Me popup should appear:
>
> * A message thanks the customer and confirms their purchase.
> * The popup invites the customer to refer friends with an offer.
>
> **3. Verify network requests**
>
> Open DevTools, go to the Network tab, reload the page, and filter for your **partnerCode**. Find the request to **tag-demo.mention-me.com** with:
>
> * **environment:** demo
> * **situation:** postpurchase
> * All required customer and order details (e.g. **firstname**, **surname**, **email**, **order_number**, **order_subtotal**, **order_currency**, **coupon_code**, **locale**)
>
> ## Platform Verification
>
> **1. Check the Debug Dashboard**
>
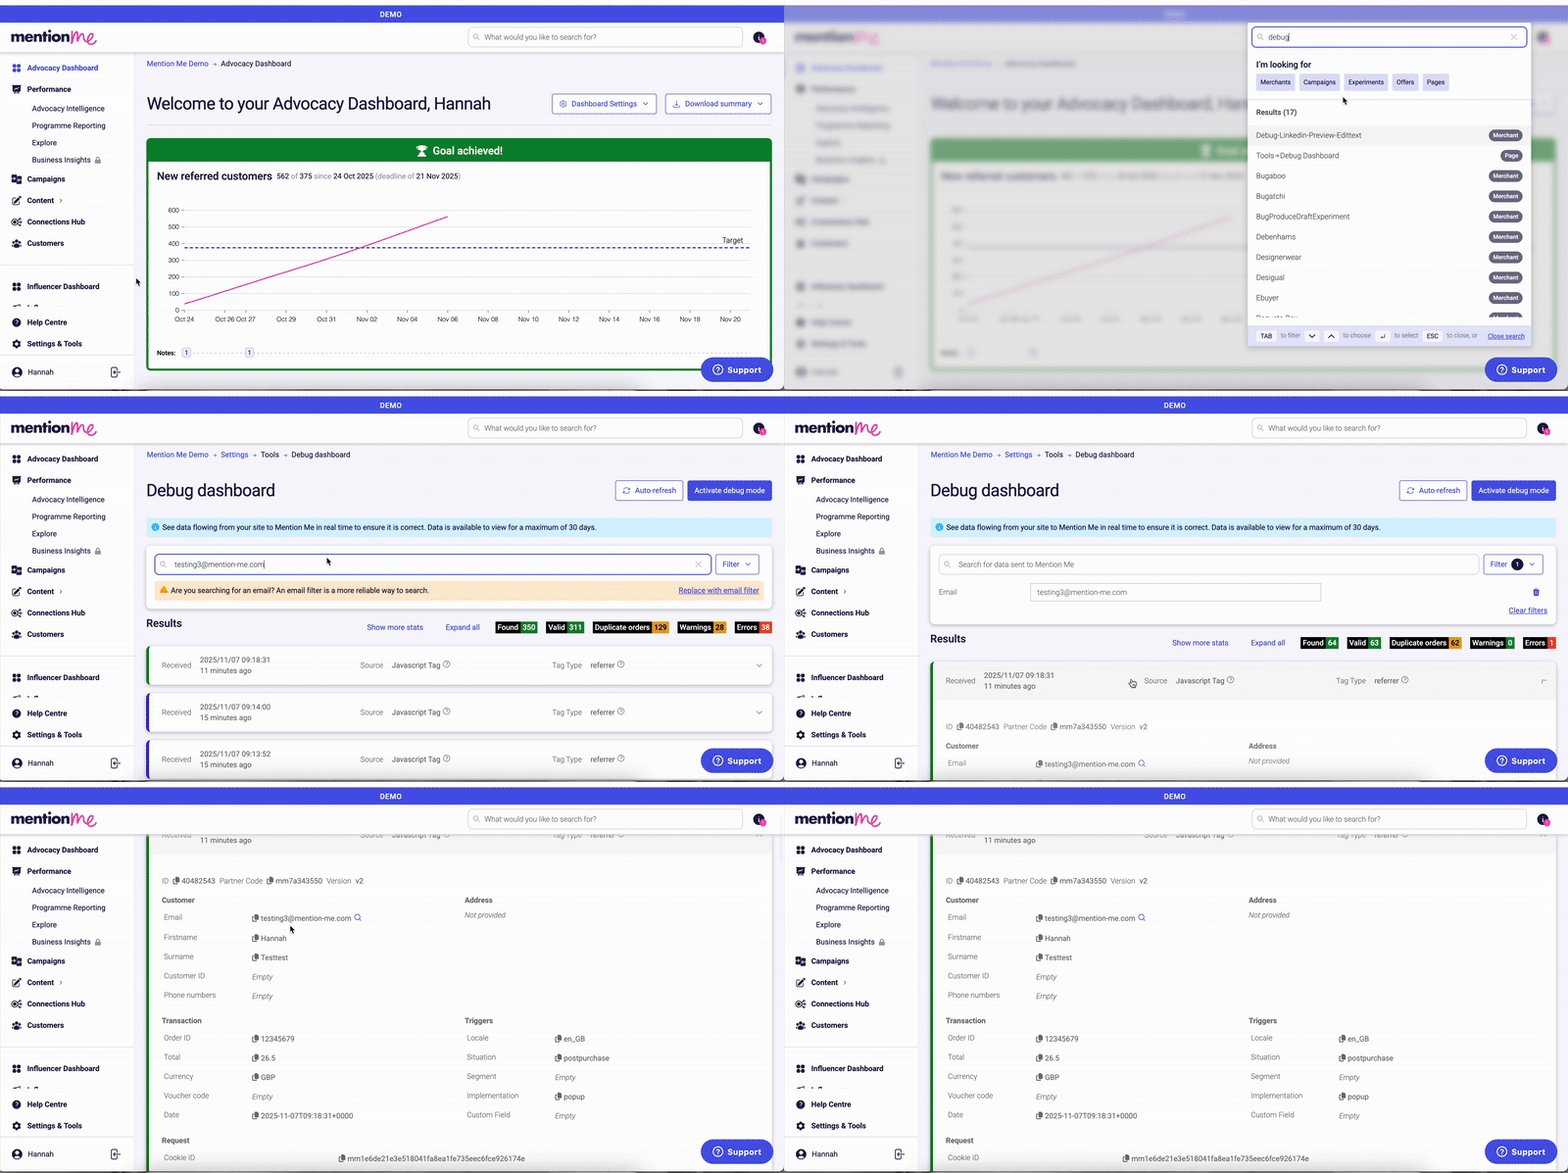
> Check your [**Debug Dashboard**](https://demo.mention-me.com/merchant/~/tools/debug-dashboard) for the latest postpurchase tag fired with your test referee email and confirm all order details have been captured.
>
> 
>
> The Debug Dashboard showing postpurchase tag data.
>
> **2. Verify the referee profile**
>
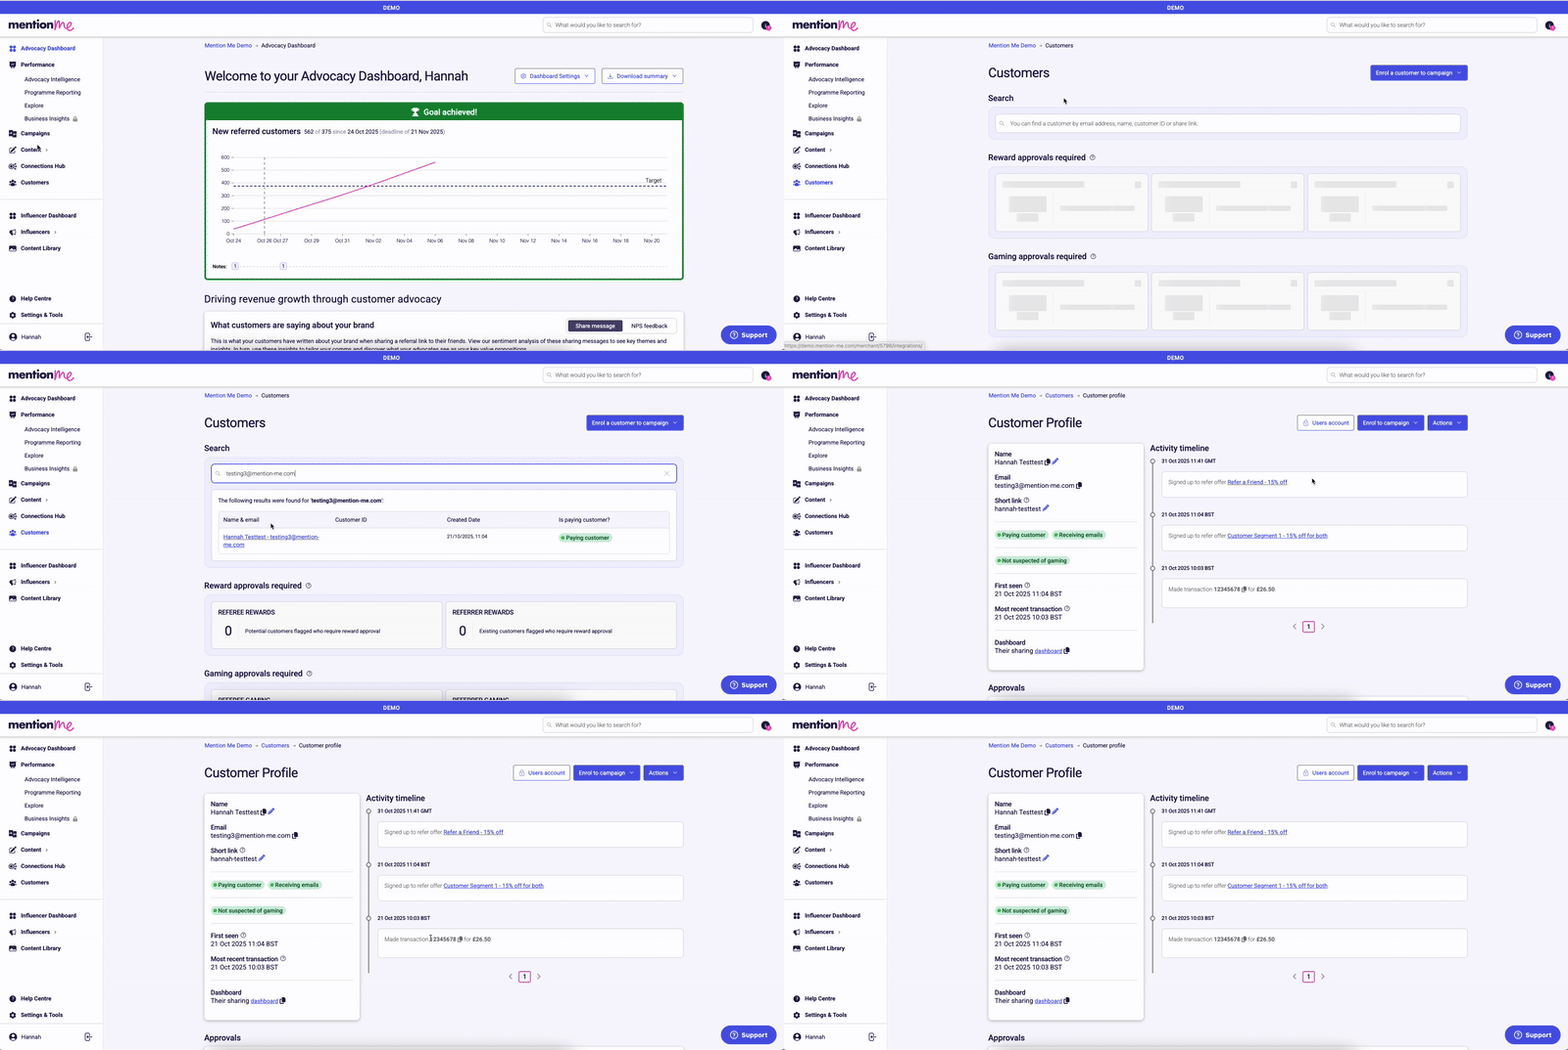
> Go to [**Customers**](https://demo.mention-me.com/merchant/~/customers/) and search for your referee test email:
>
> * Status should show **Paying customer**
> * Profile should include matching campaign, order ID, and referral details
>
> **3. Verify the referrer is credited**
>
> Search for your referrer's email:
>
> * The referrer should be credited/rewarded (confirmation of closed referral loop)
>
> 
>
> Verifying referee and referrer profiles after a postpurchase test.
>
> ## Troubleshooting
>
> * **No popup on thank you page** -- confirm the postpurchase tag is on your order confirmation page and using the DEMO tag. Check for browser errors or blocked scripts.
> * **No network request to tag-demo.mention-me.com** -- ensure the correct JavaScript tag is implemented.
> * **Required customer data missing in request** -- all required fields must be passed on order confirmation (see field list above).
> * **Referral not tracked/credited** -- confirm the same referee email was used for both checkout and purchase steps.
>
> ## Need Help?
>
> Start a conversation with the in-platform Support widget in the bottom-right corner of your dashboard - it can usually answer this straight away. If it can't, raise a request via the [request form](https://help.mention-me.com/hc/en-gb/requests/new?ticket_form_id=1900000712373).
>
> 
>
> The in-platform Support widget starting an AI-assisted conversation.
> [tab] Live
>
> 
>
> Testing the postpurchase tag in the LIVE environment.
>
> ## Website Test
>
> **1. Start checkout**
>
> Add an item to your basket and start checkout.
>
> **2. Open DevTools**
>
> Open DevTools, go to the Network tab, and filter for your **partnerCode**.
>
> **3. Place the order and check the popup**
>
> Place the live order. On the order confirmation/thank you page, a Mention Me popup should appear:
>
> * A message thanks the customer and confirms their purchase.
> * The popup invites the customer to refer friends with an offer.
>
> **4. Verify network requests**
>
> Check the Network tab for the request to **tag.mention-me.com** with:
>
> * **environment:** production
> * **situation:** postpurchase
> * All required customer and order details (e.g. **firstname**, **surname**, **email**, **order_number**, **order_subtotal**, **order_currency**, **coupon_code**, **localeCode**)
>
> ## Platform Verification
>
> **1. Log in to the live portal**
>
> Log in to your [**Mention Me live portal**](https://app.mention-me.com/merchant/~/).
>
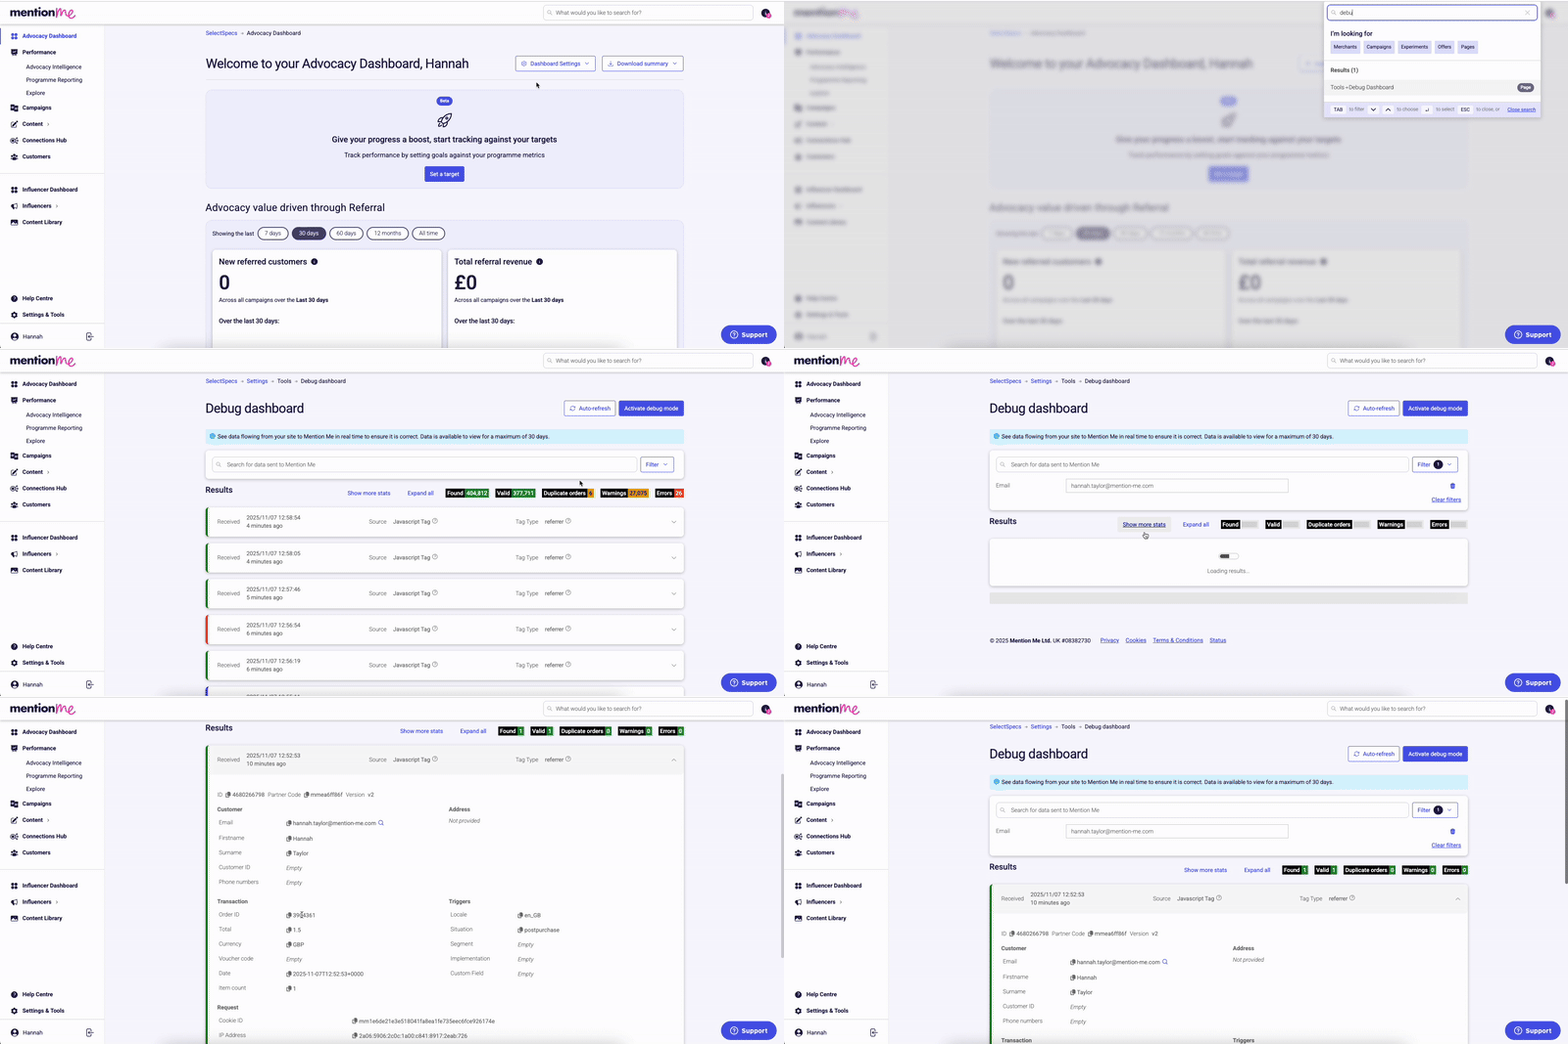
> **2. Check the Debug Dashboard**
>
> Check your [**Debug Dashboard**](https://app.mention-me.com/merchant/~/tools/debug-dashboard) to ensure the latest postpurchase tag fired with your test email and all order details are captured.
>
> 
>
> The Debug Dashboard showing LIVE postpurchase tag data.
>
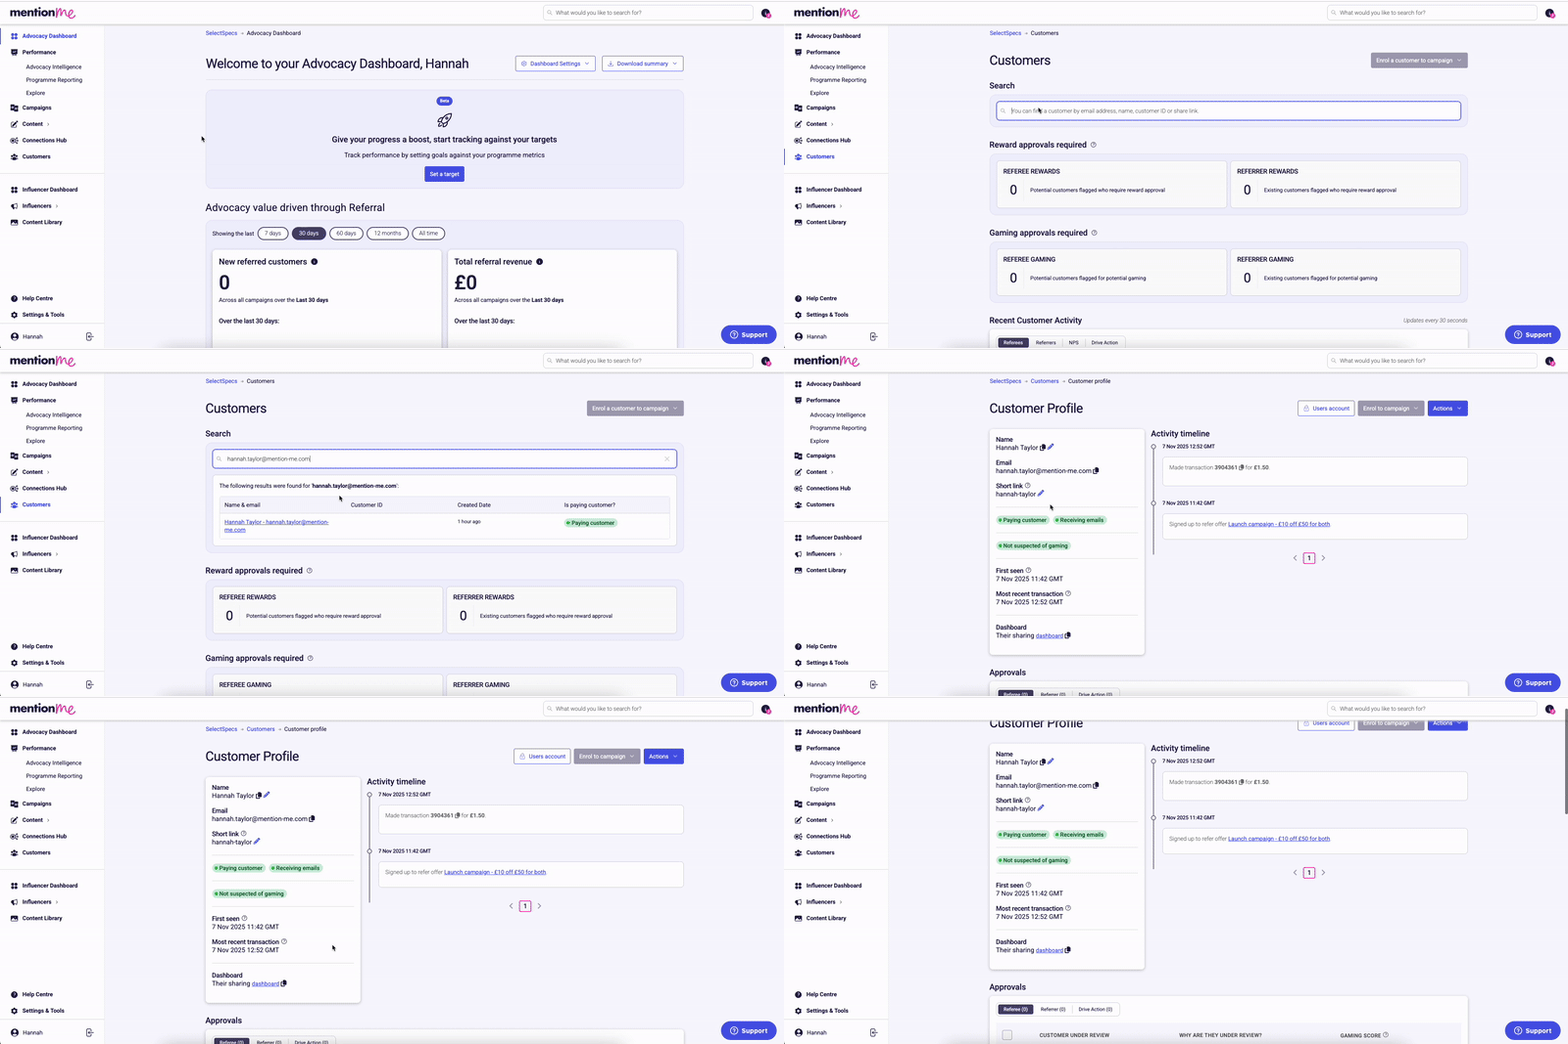
> **3. Verify the customer profile**
>
> Go to [**Customers**](https://app.mention-me.com/merchant/~/customers/) and search for your test email:
>
> * Status should show **Paying customer**
> * Profile should include matching campaign, order ID, and referral details
>
> 
>
> Verifying the customer profile in Production after a postpurchase test.
>
> ## Troubleshooting
>
> * **No popup on thank you page** -- confirm the postpurchase tag is correctly installed and using the live tag. Check for browser errors or blocked scripts.
> * **No network request to tag.mention-me.com** -- ensure the production JavaScript tag is implemented.
> * **Required customer data missing in request** -- all required fields must be passed on order confirmation.
> * **Error responses from Network request:**
> * **400 -- Bad Request:** check the payload for missing or malformed parameters
> * **403 -- Forbidden:** check that you have enabled debug mode
> * **404 -- Not Found:** your partnerCode or URL may be incorrect
>
> ## Need Help?
>
> Start a conversation with the in-platform Support widget in the bottom-right corner of your dashboard - it can usually answer this straight away. If it can't, raise a request via the [request form](https://help.mention-me.com/hc/en-gb/requests/new?ticket_form_id=1900000712373).
>
> 
>
> The in-platform Support widget starting an AI-assisted conversation.
# How to Test the Referee Tag
Source: https://docs.mention-me.com/knowledge/onboarding/testing/referee-tag
How to test the Mention Me referee tag on your checkout page in both Demo and Live environments.
The referee tag lets new customers confirm who referred them at checkout and unlock their reward. This guide covers testing the tag in both Demo and Live environments.
## Understanding Referee Eligibility
The referee eligibility tag communicates reward approval status to Mention Me. When you pass a referee-eligible tag, you're telling the system one of the following:
1. **Referee reward is pending approval** -- you're confirming the referee has met your criteria and their reward can be fulfilled. Most common in the "after purchase" case (e.g. waiting to confirm the referee has completed an action before issuing a reward).
2. **Referee is approved but referrer reward is pending** -- you're saying the referee introduced by the referrer has met eligibility criteria, and the referrer can now be rewarded. Most common in the "before purchase" case where the referee has already received their reward.
3. **Both referee and referrer require approval** -- only the referee approval is processed automatically. The referrer approval is handled separately (e.g. the referee gets a subscription credit automatically while the referrer gets a manually-approved reward).
> [tab] Demo
>
> 
>
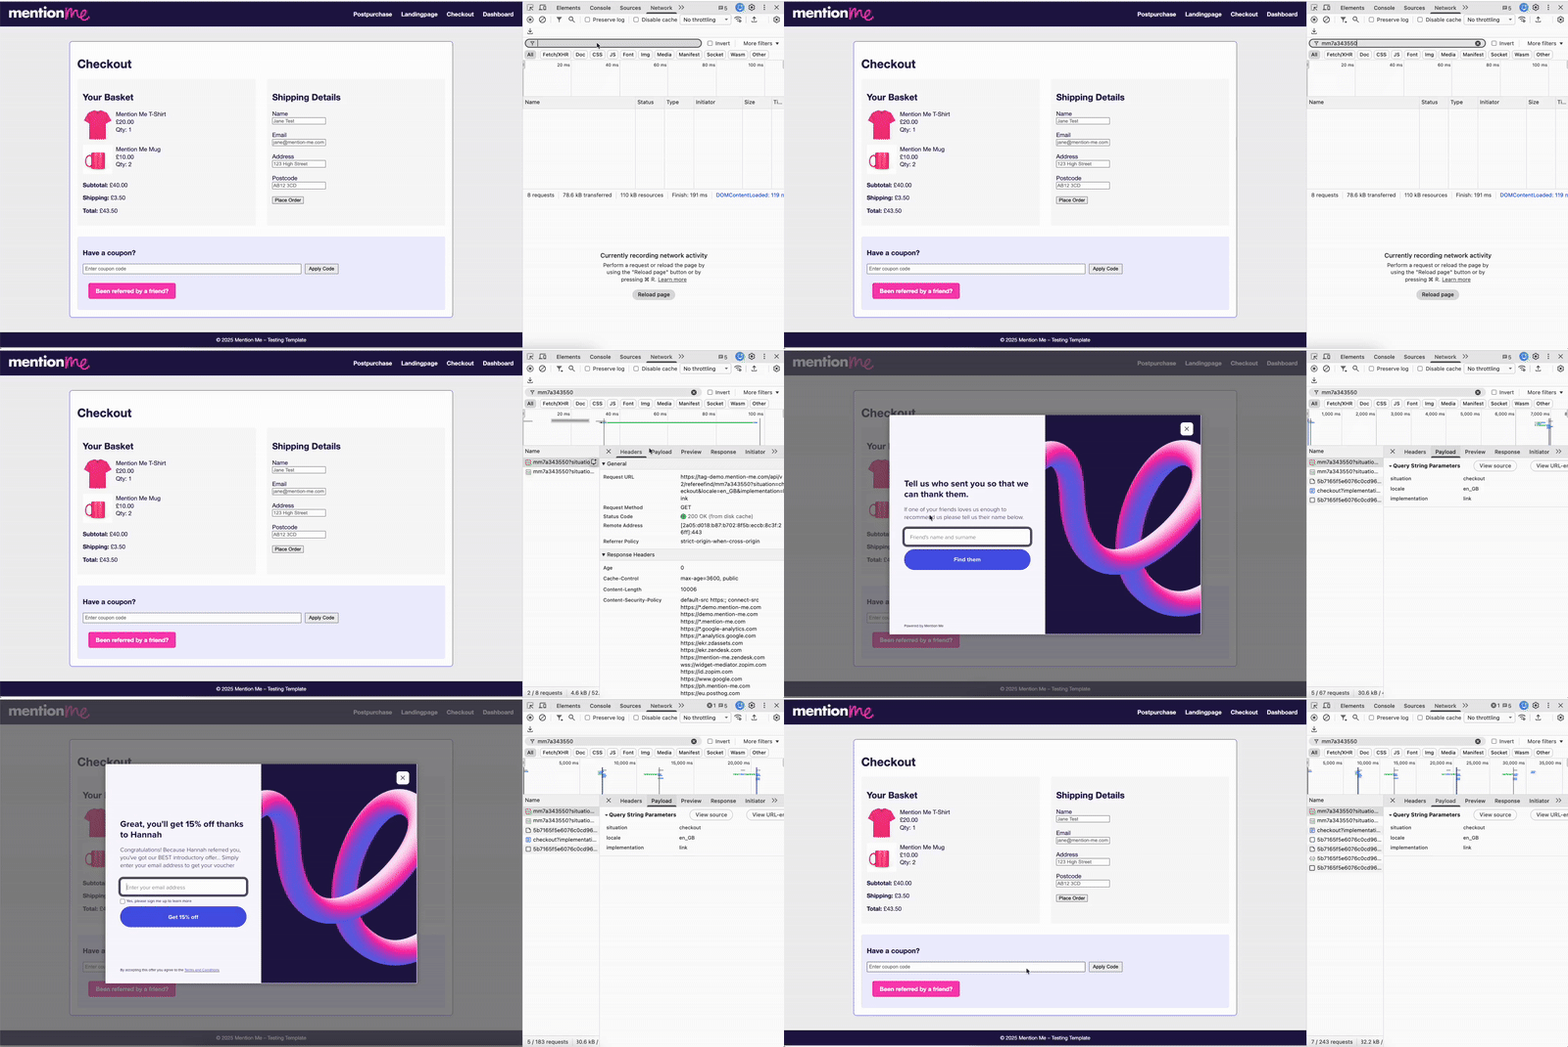
> Testing the referee tag in the DEMO environment.
>
> ## Website Test
>
> **1. Navigate to checkout**
>
> Go to your site, add an item to your basket, and proceed to checkout (don't submit payment).
>
> **2. Check for the referee link**
>
> Check for the visible referee link: **"Been referred by a friend?"** near the email, promo, or form field.
>
> **3. Complete the referral overlay**
>
> Click the link, complete the overlay (enter the referrer you created and your test referee email), and submit. Note the code or reward that displays.
>
> **4. Verify network requests**
>
> Open DevTools, go to the Network tab, reload the page, and filter for your **partnerCode**. Confirm a request to **tag-demo.mention-me.com** with:
>
> * **environment:** demo
> * **partnerCode** and **localeCode** are correct
> * **situation:** checkout
>
> 
>
> The Network tab showing DEMO referee tag request details.
>
> ## Platform Verification
>
> **1. Open the Customers page**
>
> Go to the [**Customers**](https://demo.mention-me.com/merchant/~/customers/) page in the Mention Me platform.
>
> **2. Search for your referee**
>
> Search for your referee.
>
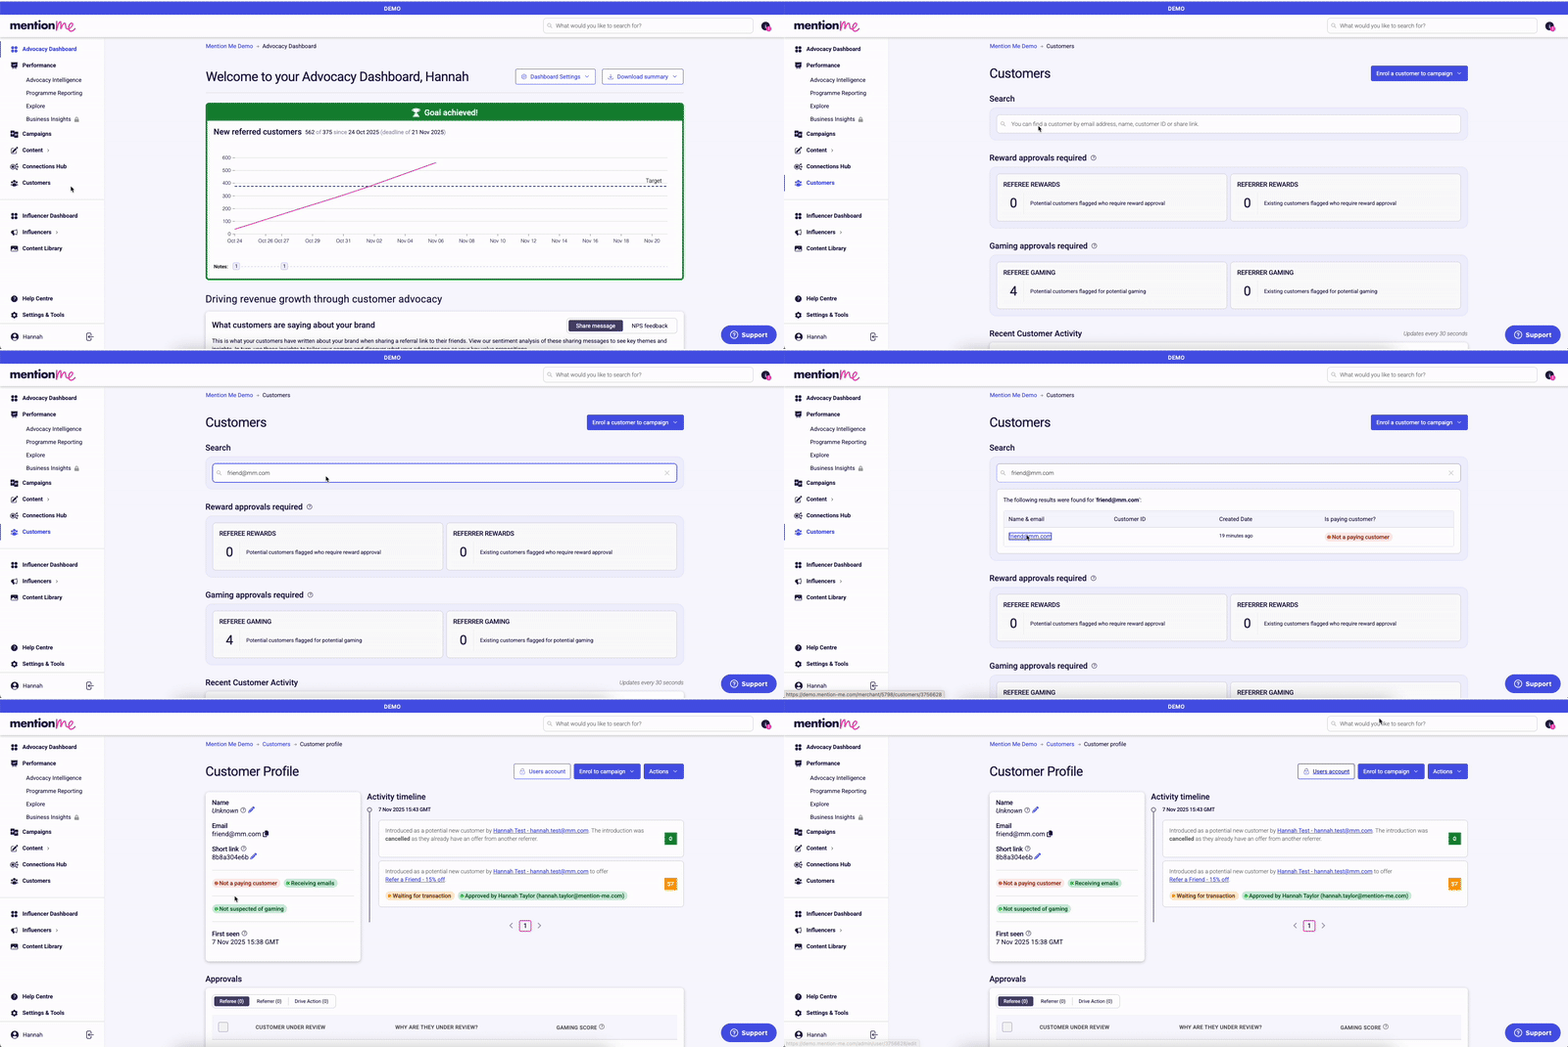
> **3. Confirm the profile**
>
> Open the profile and confirm:
>
> * The referee is created and status shows "awaiting purchase"
> * Details match your campaign and locale
>
> 
>
> Verifying the referee profile status in the platform.
>
> ## Troubleshooting
>
> * **Link not displaying** -- confirm JavaScript and wrapper are present, and the referee tag is enabled for this page.
> * **Overlay doesn't appear** -- check for the correct page element (`
`) and install errors in the console.
> * **No profile created** -- use a completely new test email and check that you're searching the demo environment.
> * **Requests go to tag.mention-me.com (not DEMO)** -- update your script for DEMO testing.
>
> ## Need Help?
>
> Start a conversation with the in-platform Support widget in the bottom-right corner of your dashboard - it can usually answer this straight away. If it can't, raise a request via the [request form](https://help.mention-me.com/hc/en-gb/requests/new?ticket_form_id=1900000712373).
>
> 
>
> The in-platform Support widget starting an AI-assisted conversation.
> [tab] Live
>
> 
>
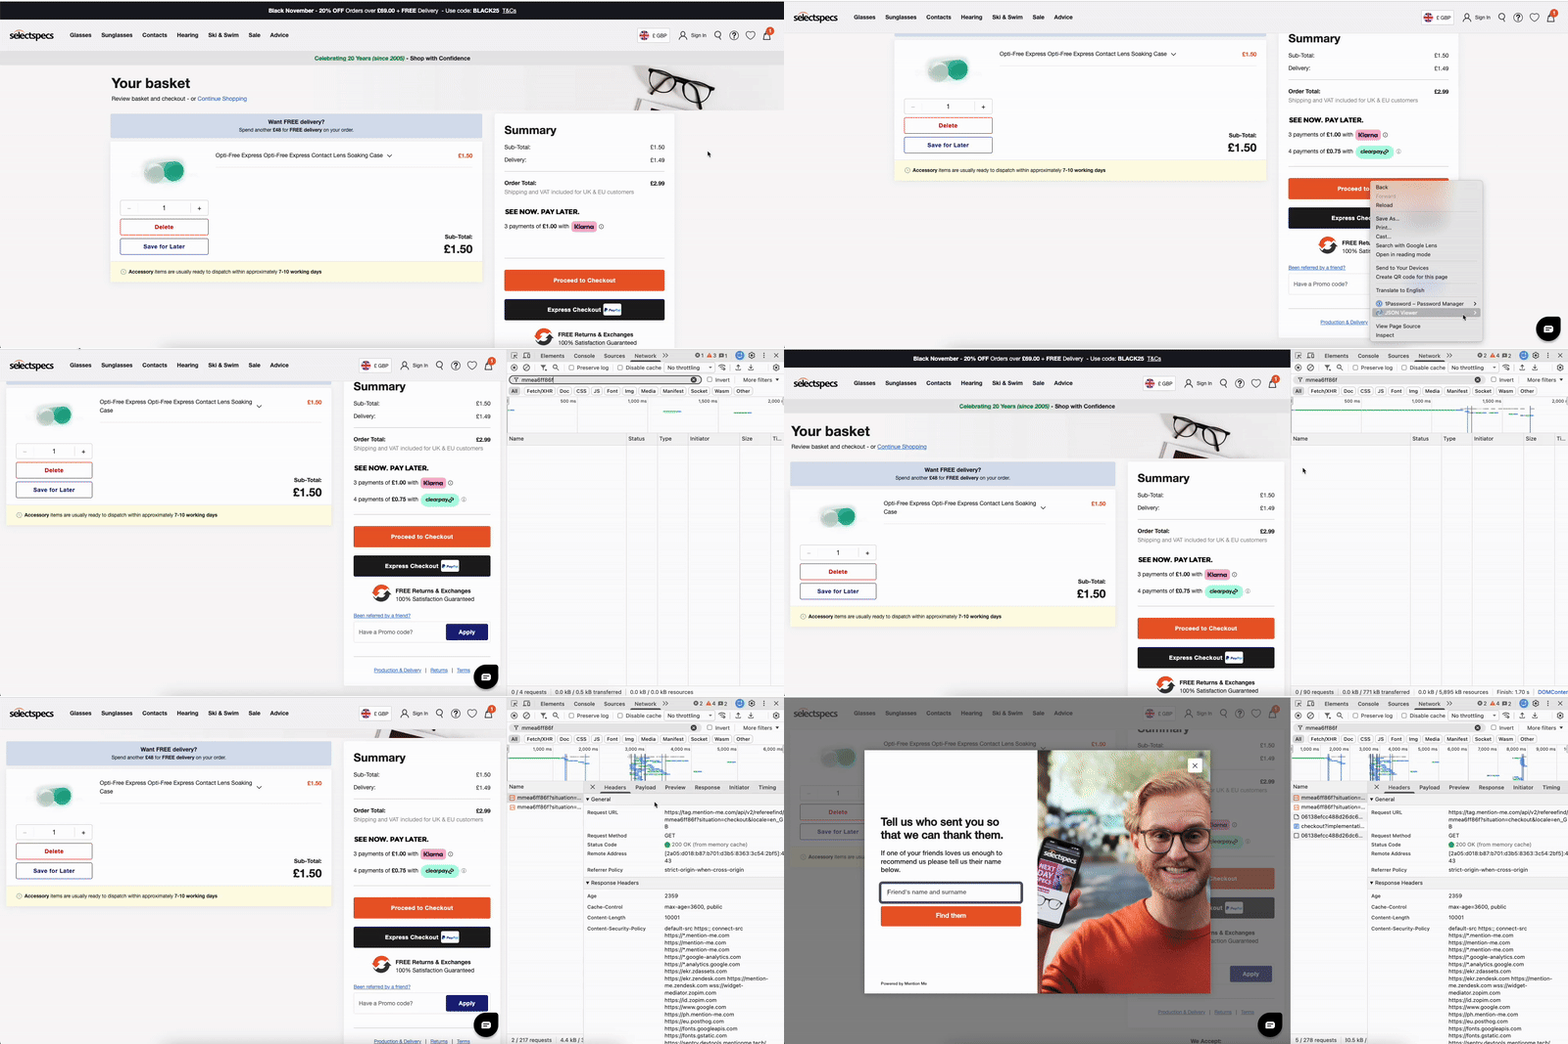
> Testing the referee tag in the LIVE environment.
>
> ## Website Test
>
> **1. Navigate to checkout**
>
> Go to your live website, add an item to your basket, and proceed to checkout (do not make a real payment unless you intend to place an order).
>
> **2. Check for the referee link**
>
> Check for the visible referee link: **"Been referred by a friend?"** near the email, promo, or form field.
>
> **3. Complete the referral overlay**
>
> Click the link, complete the overlay (enter your real referrer's details and a new referee email), and submit. Note the code or reward that displays.
>
> **4. Verify network requests**
>
> Open DevTools, go to the Network tab, reload the page, and filter for your **partnerCode**. Confirm a request to **tag.mention-me.com** with:
>
> * **environment:** production
> * **partnerCode** and **localeCode** are correct
> * **situation:** checkout
>
> 
>
> The Network tab showing LIVE referee tag request details.
>
> ## Troubleshooting
>
> * **Link not displaying** -- confirm the JavaScript and wrapper are present, and the referee tag is enabled for this page.
> * **Overlay doesn't appear** -- check for the correct page element (`
`) and check for JavaScript errors in the console.
> * **No profile created** -- use a completely new email and check that you're searching the production environment.
> * **Requests go to tag-demo.mention-me.com** -- update to the live/prod tag (**tag.mention-me.com**).
>
> ## Need Help?
>
> Start a conversation with the in-platform Support widget in the bottom-right corner of your dashboard - it can usually answer this straight away. If it can't, raise a request via the [request form](https://help.mention-me.com/hc/en-gb/requests/new?ticket_form_id=1900000712373).
>
> 
>
> The in-platform Support widget starting an AI-assisted conversation.
# How to Test Your Shopify App Integration
Source: https://docs.mention-me.com/knowledge/onboarding/testing/shopify-app
How to verify your Mention Me Shopify integration before going live.
## Pre-Launch Shopify Integration Check
**1. Check your campaigns**
In your Mention Me dashboard, make sure your referral campaigns are set to **Running** with the offers you want to use.
**2. Open Shopify checkout settings**
In Shopify, go to **Settings > Checkout** and select **Checkout extensibility**.
**3. Verify Mention Me blocks**
Confirm that your Mention Me blocks are placed and active for the **Checkout**, **Thank You**, and **Order Status** pages, with correct positioning and content set to appear for each stage.
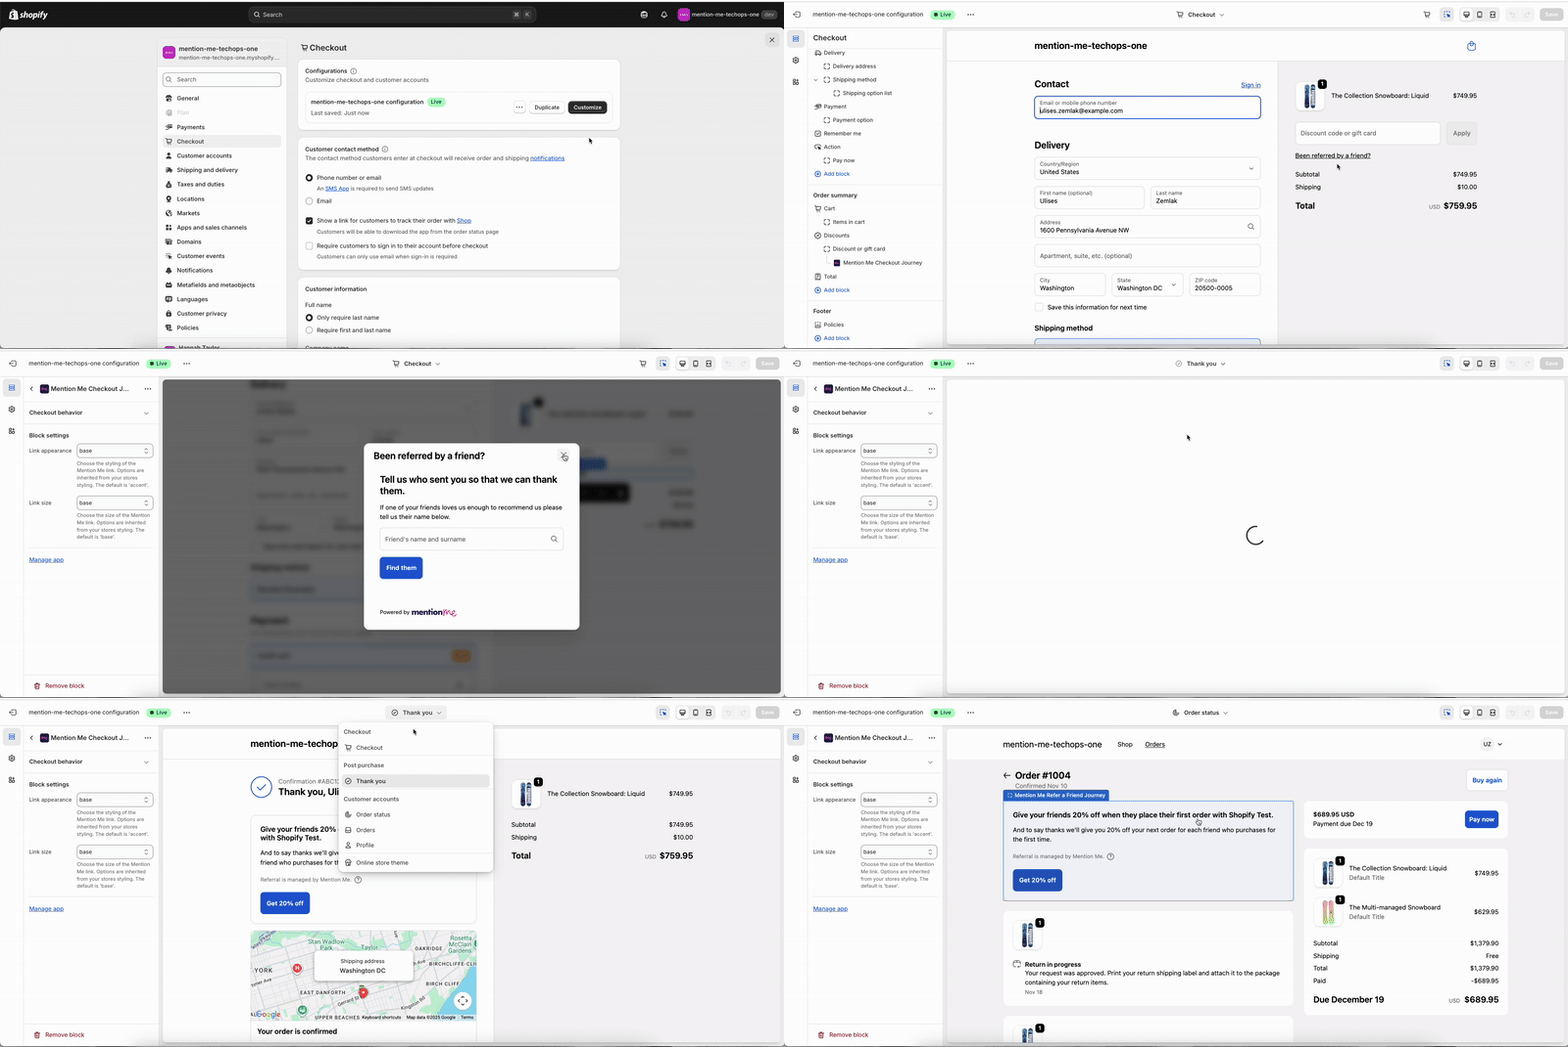
Shopify checkout extensibility settings showing the Mention Me blocks.
## Platform Verification
Once the blocks are in place, live data should start to flow into Mention Me, though customers won't see the Mention Me experience.
1. Go to your Mention Me [**Debug Dashboard**](https://app.mention-me.com/merchant/~/tools/debug-dashboard). Filter by **situation** `shopify-thank-you` and `shopify-order-status` to confirm data is flowing in from your test transactions.
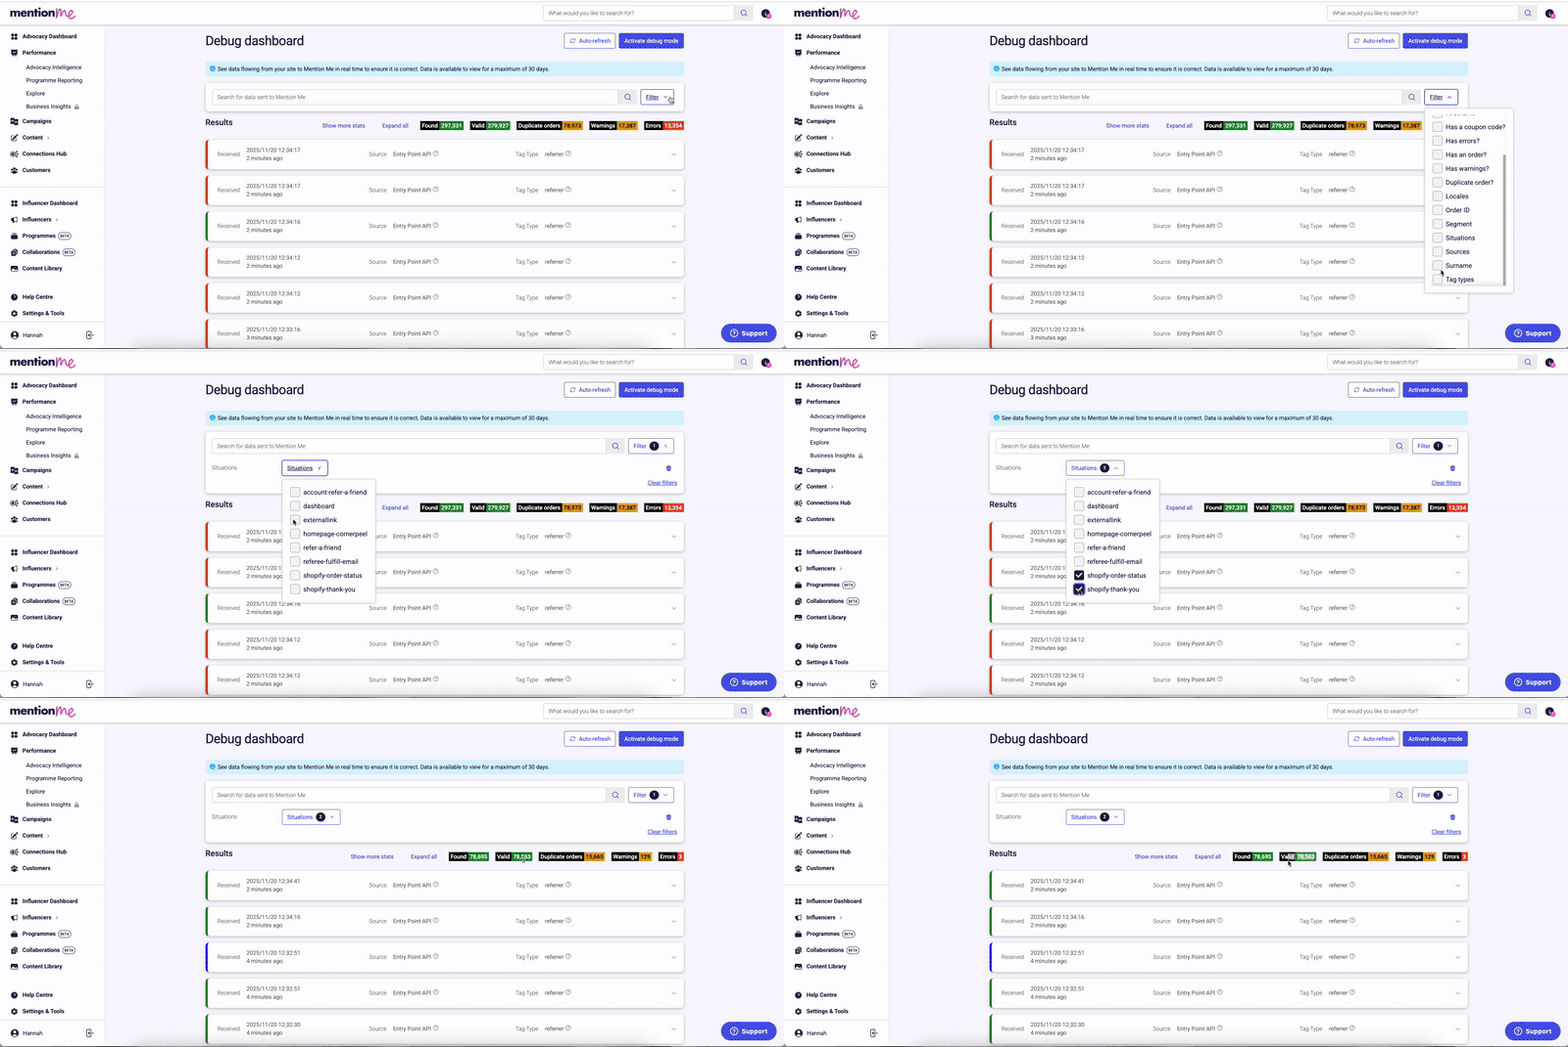
The Debug Dashboard filtered by Shopify checkout situations.
## Need Help?
Start a conversation with the in-platform Support widget in the bottom-right corner of your dashboard - it can usually answer this straight away. If it can't, raise a request via the [request form](https://help.mention-me.com/hc/en-gb/requests/new?ticket_form_id=1900000712373).

The in-platform Support widget starting an AI-assisted conversation.
## Next Steps
> [card] [Test the referral landing page](/knowledge/onboarding/testing/landing-page)
>
> Verify the landing page tag renders correctly in your test environment.
> [card] [Test the dashboard tag](/knowledge/onboarding/testing/dashboard-tag)
>
> Confirm the referrer dashboard appears in your customer account area.
# How to Use the Campaign Preview Tool
Source: https://docs.mention-me.com/knowledge/referral/campaigns/campaigns-page
How to use the campaign preview tool to visualise, review, and share your referral customer journey.
The Campaign Preview tool gives you a comprehensive way to visualise and share your customer journey across all user scenarios. It helps you streamline reviews, spot issues early, and launch high-performing campaigns.
## Getting Started
To access the preview:
**1. Log in to Your Dashboard**
Log in to your Mention Me dashboard.
**2. Select a Campaign**
Go to the **Campaigns** section and select a live or draft campaign.
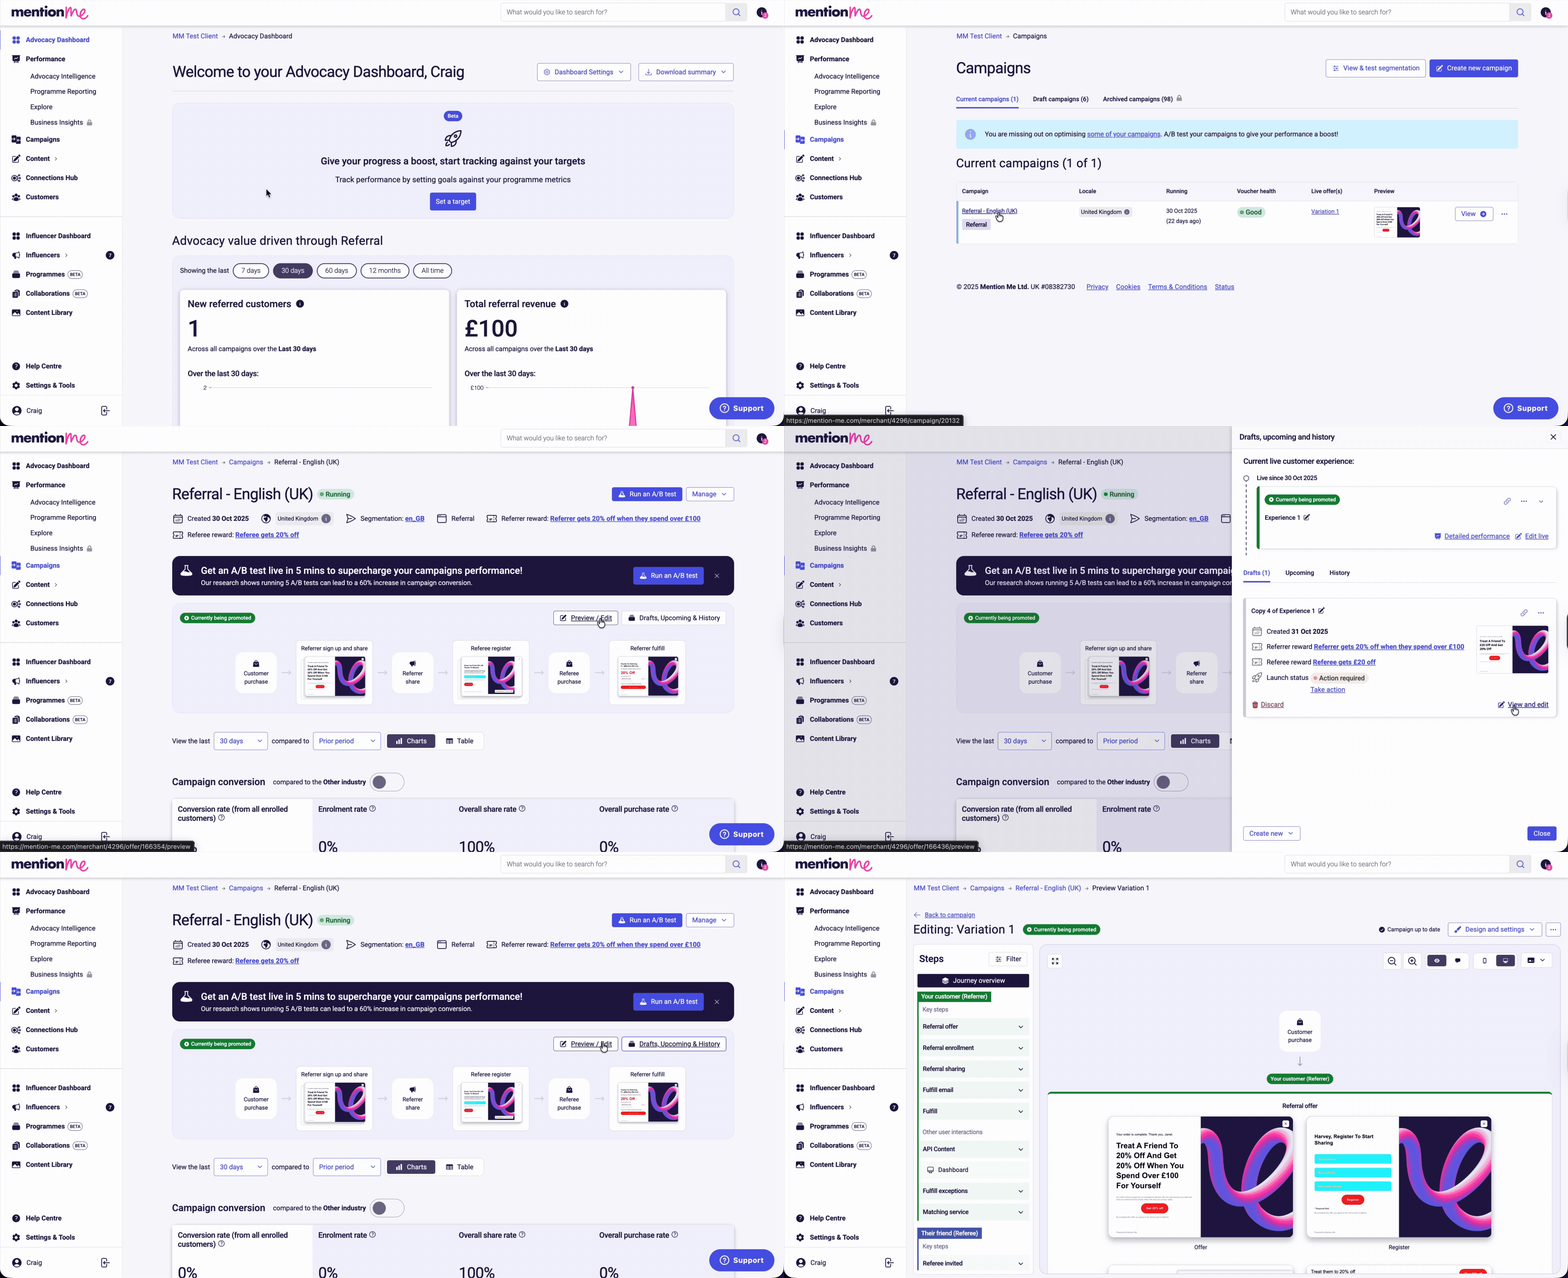
The campaign preview being accessed from the Campaigns section.
**3. Open the Preview**
Click **Preview / Edit** to preview the journey for your live experiment, or click **Drafts, Upcoming & History** followed by **View and Edit** to preview a non-live experiment.
## Using the Preview
The redesigned preview interface offers:
* **Full campaign journey overview** - visualise the complete journey for both referrers and referees
* **Simplified navigation** - journey steps are clearly outlined and organised
* **Clean, intuitive layout** - navigate with more clarity and less friction
## Journey Breakdown
The left-hand panel categorises the journey into two user perspectives:
* **Your Customer** (Referrer)
* **Their Friend** (Referee)
Each perspective is segmented into:
* Key Steps
* Other Interactions
These segments are organised by scenario, showing individual pages and actions aligned with specific user behaviours.
### Filters
Use filters to tailor your preview:
* **User:** Referrer or Referee
* **Scenario:** Show specific user conditions or paths
* **Touchpoint:** Filter by Website, Email, or Social
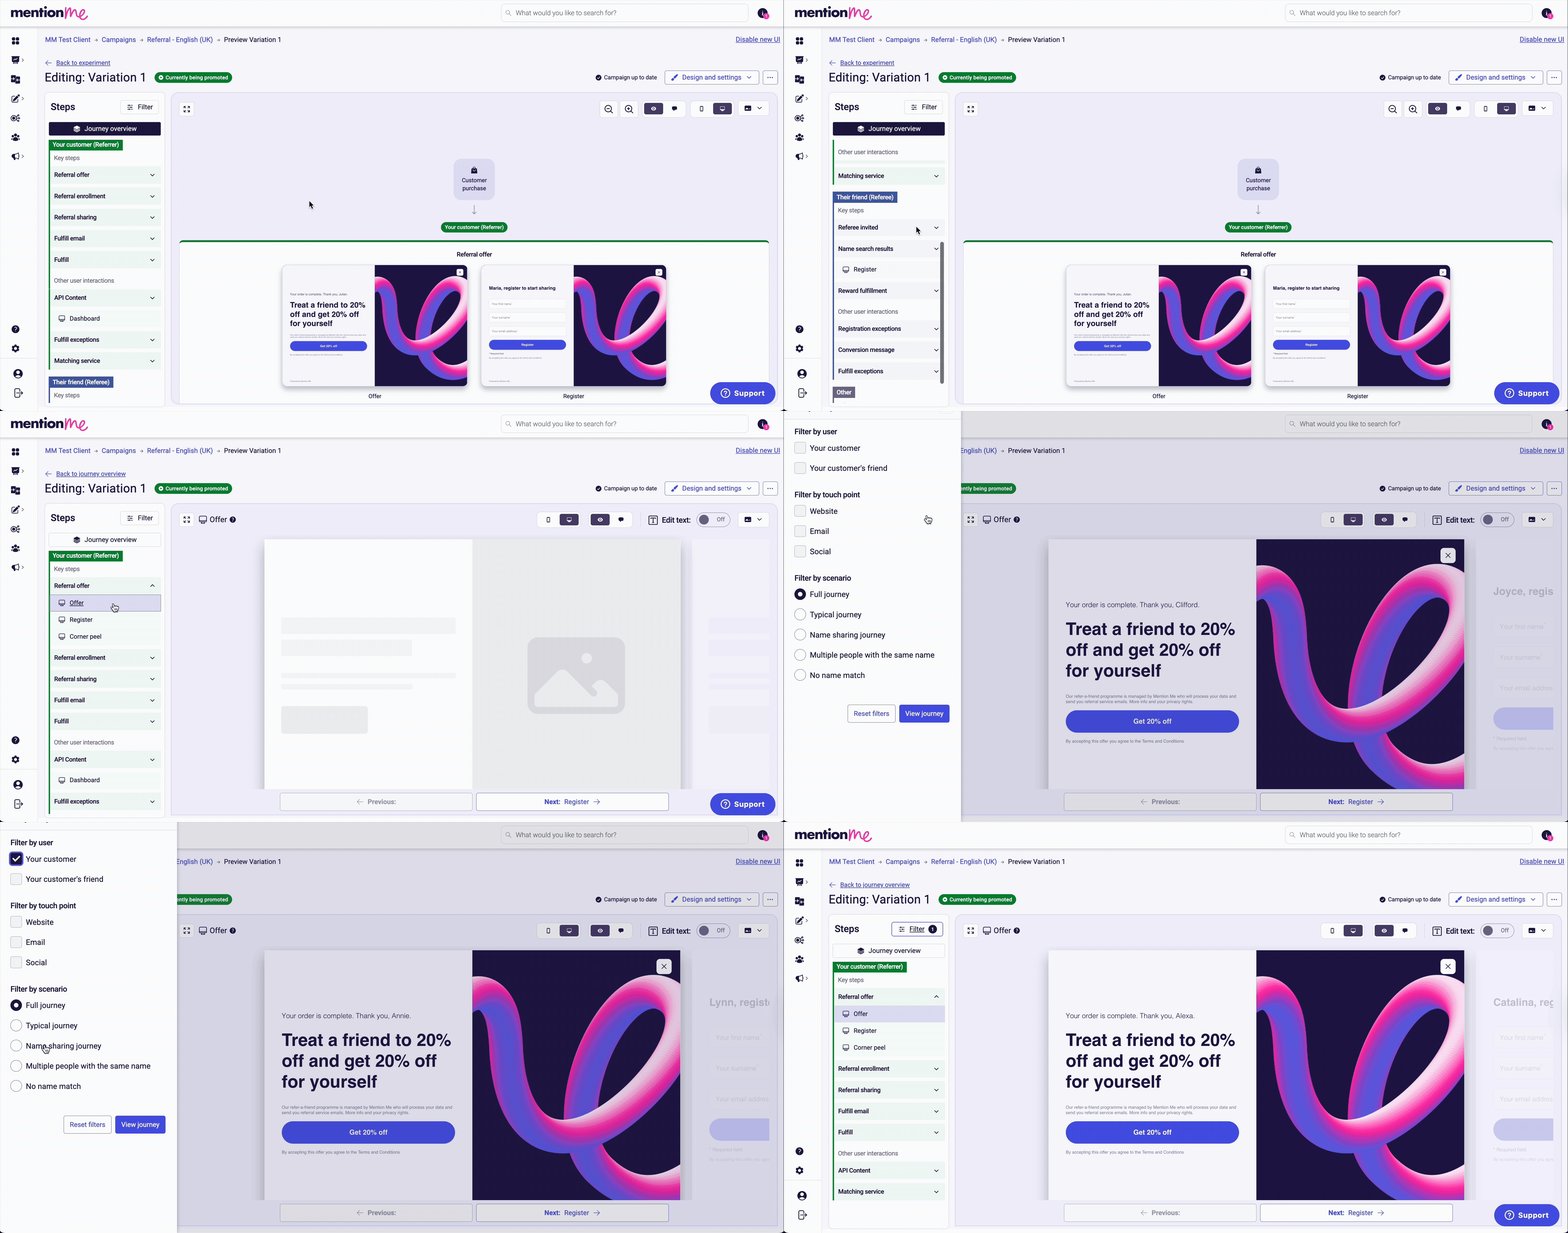
The campaign preview filters for user, scenario, and touchpoint.
## Preview Features
* **Journey timing** - view when pages display and when automated emails trigger
* **Adjustable view** - zoom in or go full screen
* **Page navigation** - click through each screen, or use Next/Previous buttons. Use keyboard arrow keys to toggle through screens.
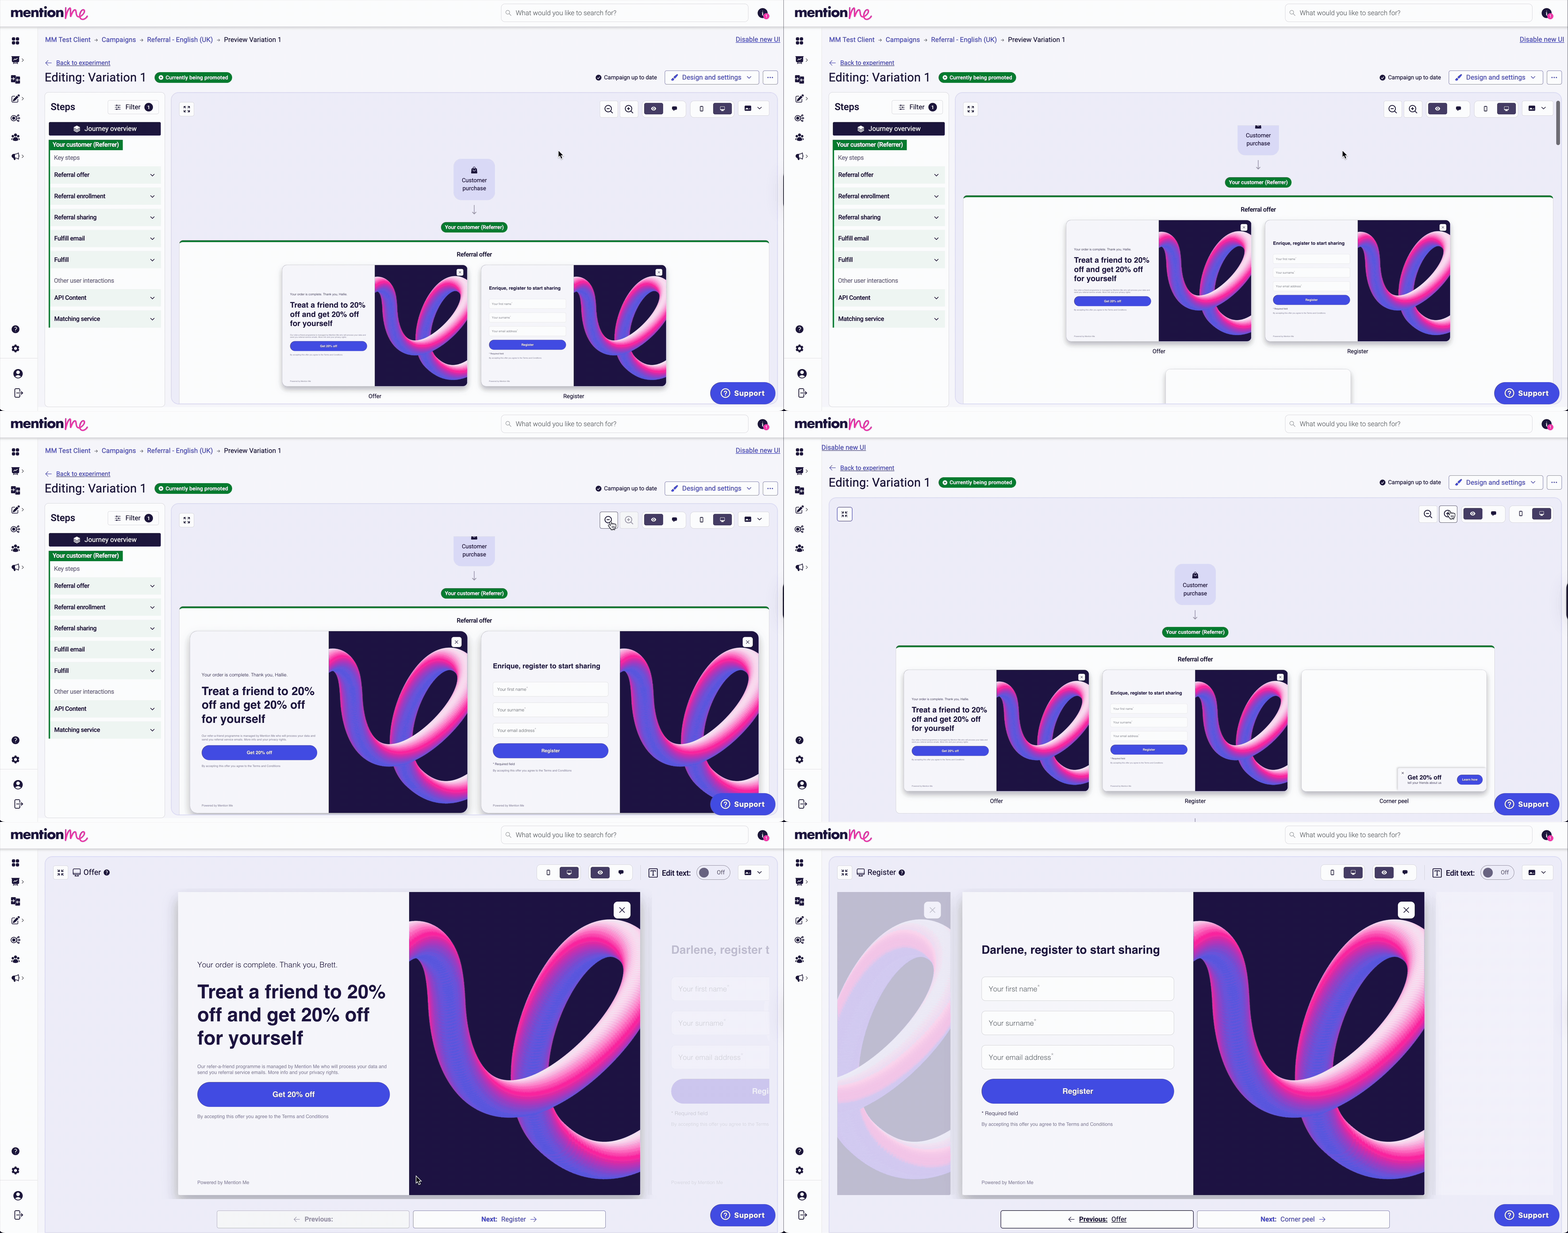
Journey timing and page navigation shown in the campaign preview.
## Additional Tools
All previous tools are still available:
* Switch between mobile and desktop views
* Add and view comments directly on the preview
* Edit offer messaging and details
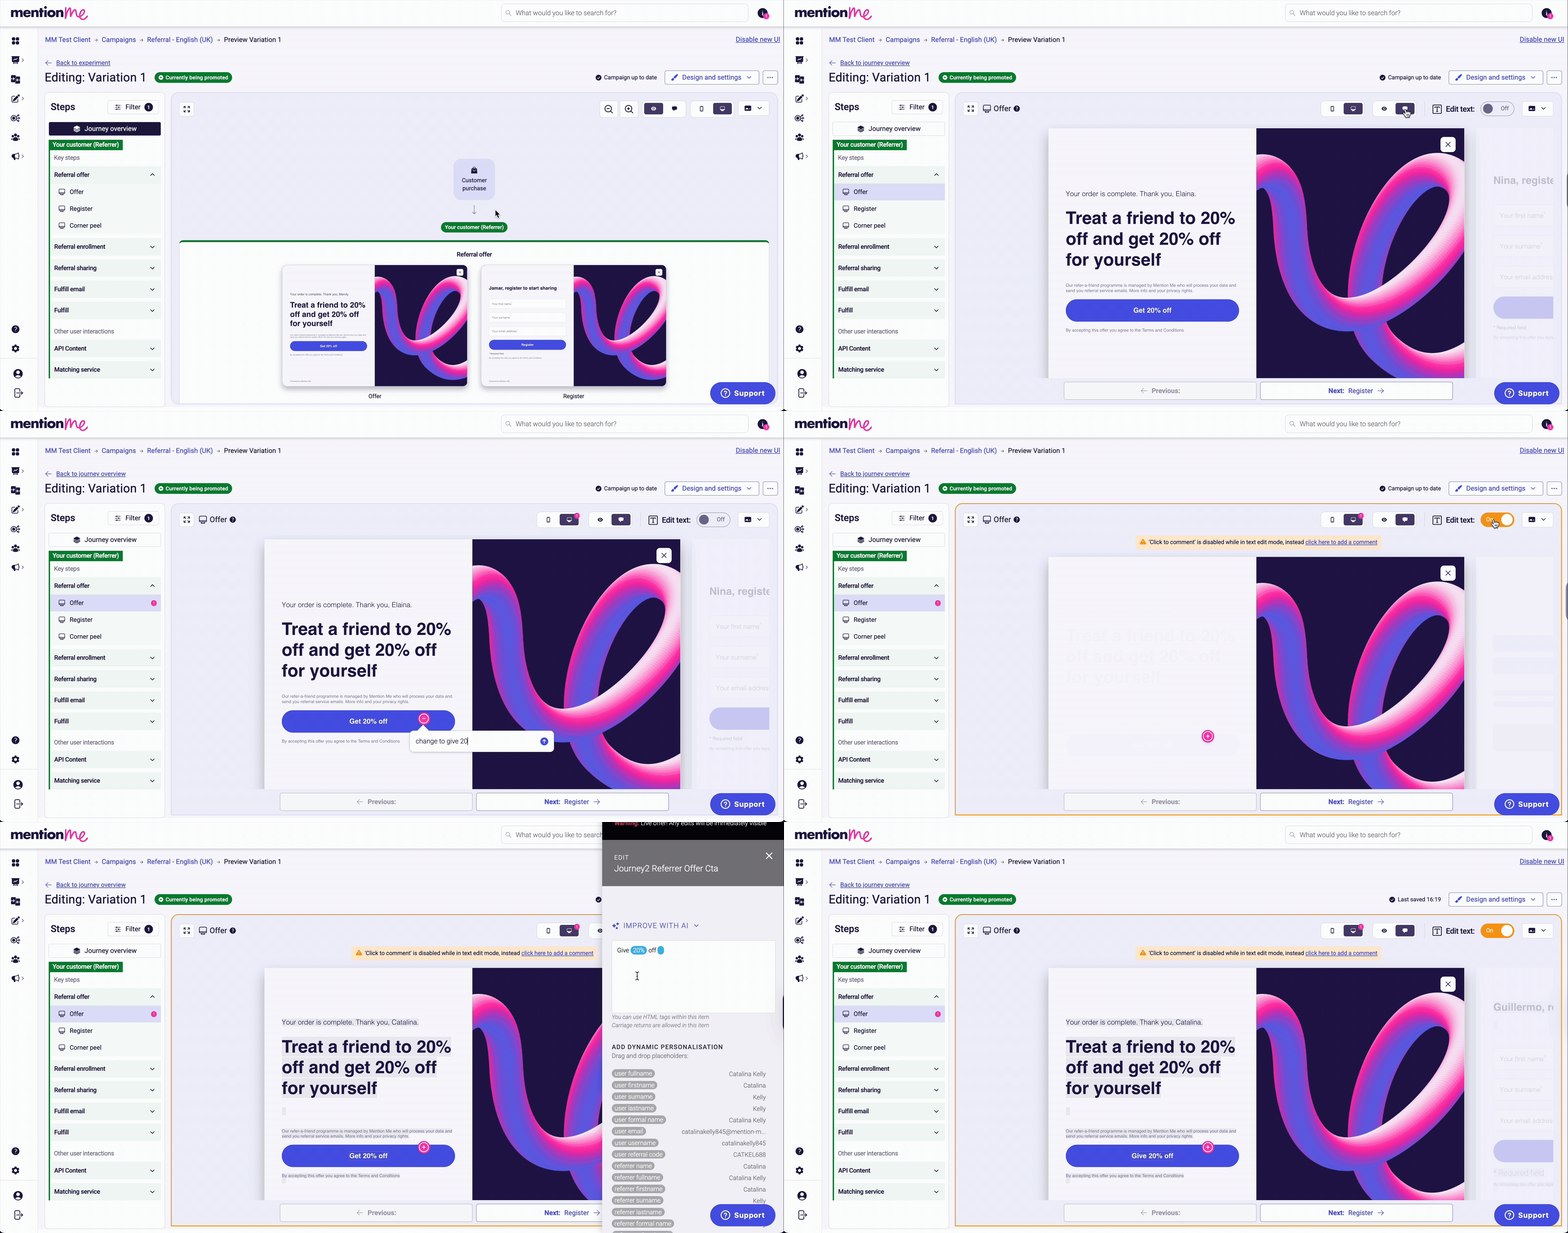
The mobile and desktop view toggle, comments, and editing tools.
# How to Organise & Run Campaigns
Source: https://docs.mention-me.com/knowledge/referral/campaigns/organise-and-run
A comprehensive guide to setting up campaigns in Mention Me, including locales, triggering rules, customer segmentation, and referee qualification.
> [!NOTE]
>
> Using **Mention Me**? Campaign setup now lives in the campaign editor. See
> [Campaigns](/knowledge-app/referral/campaigns/overview). The page below
> describes campaigns on Classic.
Campaigns are a main building block of your referral programme. With campaigns, you can define rules to target specific customer segments. For example, you may want to target only customers who:
* Use a particular language
* Belong to your loyalty scheme
* Have purchased in the last three months
* Have just spent more than £50 on their order
Only customers who meet the criteria will see the referral offer. You can run multiple campaigns simultaneously.
Watch how to organise your campaigns in Classic.
> [accordion] See each step in detail
>
> ## 1. Setting Up Locales
>
> In your campaign settings, the **Campaign summary** tab shows the **Locale to present in** for the campaign, and the expected currency.
>
> Locales are configured according to your contract. To add a new locale or market, contact your Account Manager or the Support team.
>
> ## 2. Using Triggering Rules to Promote to Referrers
>
> If you're using campaigns across different locales, use [triggering rules](/knowledge/referral/campaigns/triggering-rules) to ensure the right offer is shown to the right customer.
>
> Open the **Referrer segmentation** tab to set your triggering rules. These decide which customers see the campaign's offer. Click **Add group** to start a new group of rules:
>
> 
>
> Campaign triggering rules with Add Group button
>
> For example, to serve an offer to high spenders, define a rule setting the Order Total greater than a specific amount. This uses the order subtotal from your tag and ignores currency.
>
> 
>
> Order Total triggering rule for high spenders
>
> Click **Add another** to add a rule to the same group. Customers must match every rule within a group, so the offer is only shown if both rule 1 AND rule 2 are satisfied:
>
> 
>
> Combined triggering rules using AND logic
>
> For example, requiring the customer to be using locale en_GB and to have spent more than 100.
>
> You can also use multiple groups (Group 1 OR Group 2) for broader targeting logic. Customers only need to match one group.
>
> ## 3. Customer Segmentation
>
> Triggering rules can leverage customer data to serve offers to specific segments. For instance, target single-order vs. subscription customers with different campaigns.
>
> Use the **segment** parameter in your referrer or order tag:
>
> 
>
> Segment parameter in triggering rules for customer segmentation
>
> You can also import a batch of customers under a segment to enrol them into a campaign, assuming you have customer consent. [Learn how to upload tags](/knowledge/admin/upload-tags).
>
> 
>
> Batch customer import option for segment enrolment
>
> Another approach: use the **custom_field** parameter in your post-purchase or order tag to serve offers based on product category (e.g. "dresses").
>
> 
>
> Custom field parameter for product category targeting
>
> Ensure your tags include the **segment** or **custom_field** values if using these rules. The `custom_field` is only available on post-purchase and order tags. Regex is used to match values within the string.
>
> 
>
> Regex matching for custom field values in campaign rules
>
> ## 4. Referee Qualification
>
> On the **Referee rules and options** tab, under **Which referee purchases qualify as a referral under this campaign?**, you can define who qualifies as a "referee". This affects whether a referrer is rewarded. By default, every purchase qualifies.
>
> For example, require that a referee's order value is higher than £50 to trigger a successful referral:
>
> 
>
> Referee rules and options with order value qualification
>
> Most referral programmes do not use referee rules by default. Adding them may reduce the number of successful referrals. Understand the implications before applying restrictions.
>
> ## 5. Advanced Gaming Rules
>
> You can configure gaming rules on the **Gaming settings** tab of the campaign. The **Gaming score weights** control how each referral's gaming score is worked out.
>
> These settings help detect abuse and should not be changed for new programme launches. Only modify with the help of the Mention Me team.
>
> When you've finished making changes on any tab, click **Save changes**.
>
> Read more about [managing gaming](/knowledge/referral/gaming/managing-gaming).
>
> 
>
> Fraud rules section for gaming score configuration
# Understanding Parallel Campaigns
Source: https://docs.mention-me.com/knowledge/referral/campaigns/parallel-campaigns
Understand how parallel campaigns let you run multiple simultaneous referral campaigns targeting different products or customer segments.
Parallel campaigns allow you to run multiple referral campaigns simultaneously, targeting different products or customer segments while letting referrers participate in all of them.
## When to Use Parallel Campaigns
Parallel campaigns are useful when:
* Your brand offers different products or services (e.g. Electricity vs. Gas)
* Different rewards or rules apply per product
* You can't determine in advance which product a referred friend might be interested in
For most clients, a single campaign works well when the product offering is consistent. Parallel campaigns are for brands with multiple product categories that behave differently in terms of economics, markets, or rules.
## Example: Lovely Energy
Lovely Energy offers two services:
* **Electricity** (referral reward: £50)
* **Gas** (referral reward: £20)
Separate campaigns are needed for each, but customers might buy both services or refer friends to either. With parallel campaigns:
* Customers are enrolled in both the Electricity and Gas campaigns by default
* They can use separate share links for each service
* The appropriate reward is applied based on the referred product
## Key Features
* **Multiple segment enrolment** — Customers automatically join all related campaigns when they qualify for one
* **Separate share links** — Each campaign generates its own unique referral link
* **Custom rewards** — Each campaign can have its own reward and qualifying rules
* **Automatic switching** — If a referred friend switches services while buying, the system tracks and rewards based on the actual purchase
## Dashboard Experience
Referrers in parallel campaigns see tabs for each campaign in their dashboard, helping them track both segments separately.
### Locale-Aware Previews
When campaigns within a parallel set target different locales, the dashboard preview filters the campaign list to show only campaigns matching the selected campaign's locale. This mirrors how customers experience enrolment - they are only enrolled in campaigns matching their locale, so the preview reflects exactly what a real customer would see.
If a campaign has no locale set, it appears in the preview alongside all other campaigns regardless of locale, matching the enrolment fallback behaviour.
## Controlling Customer Behaviour
### Rules Management
Define what purchasing activity qualifies under each campaign.
### Switching Behaviour
By default, new customers must complete the purchase under the campaign linked in the share link they clicked. You can allow switching scenarios — for example, if the customer clicks an Electricity link but purchases Gas, rewards will still be appropriately issued based on the first purchase.
# Triggering Rules
Source: https://docs.mention-me.com/knowledge/referral/campaigns/triggering-rules
A reference guide to all available triggering rules in Mention Me campaigns, covering tag data, platform facts, historical data, and advanced segmentation.
Triggering rules determine when and to whom referral offers are shown within a campaign. This guide is a reference for understanding what each rule does.
When requesting a new campaign setup, include the relevant triggering rules and triggers in your request.
## Tag Rules (Data Passed via Website Tags)
| Rule | Description |
| - | - |
| Order Total | Individual order value for a specific order |
| Currency | Currency the customer places their order in |
| Merchant Custom Field | Custom data passed by the client, not captured by a standard tag field |
| Segment | Specific customer group to show content to (defined by the client) |
| Locale | Language and country that a campaign will show in |
| Implementation | How the referral programme is displayed: Link to overlay, Popup/overlay, Embedded, Link to new window, or Cornerpeel |
| Situation | Where the campaign is shown: LandingPage, PostPurchase, or Cornerpeel. See [promotion points](/knowledge/referral/promoting/promotion-points) for more detail |
| Order ID | Unique ID for an individual order |
| Customer ID | Target customers with a specific Customer ID |
| Coupon Code | Target customers based on whether they have or haven't been given a specific coupon code |
| Customer Email | Target specific customers by email |
| Customer Address City | Target customers in a specific city |
| Customer Address Country | Target customers in a specific country |
## Fact Rules (Data Stored Within the Platform)
| Rule | Description |
| - | - |
| Last Order Date | Date a customer last purchased. Use to drive order frequency or show post-purchase messaging |
| Share Count | Number of times a customer has shared a referral. Use to differentiate messaging for active sharers vs. new referrers |
## Historical Fact Rules
| Rule | Description |
| - | - |
| Previously Identified Segment (last 6 months) | Show different content based on segments identified in the last 6 months |
| Previously Identified Segment (last 12 months) | Show different content based on segments identified in the last 12 months |
| Previously Identified Segment (All Time) | Show different content based on all historically identified segments |
## Tag & Fact Combination Rules
| Rule | Description |
| - | - |
| Total Spend (Previous and Current) in Pounds/Euros/Dollars | Combined total spend — target customers by cumulative spend when segment data isn't available |
| Customer Order Number (including current) | Total number of orders placed including the current one |
| Segment specified via customer upload (Advanced) | Client provides a CSV of email addresses to segment customers according to campaign priority |
| Has Been Successfully Referred | Whether a customer has been successfully referred previously |
## NPS Rules
| Rule | Description |
| - | - |
| Most recent NPS — Detractor | Show content based on NPS score range (detractor) |
| Most recent NPS — Passive | Show content based on NPS score range (passive) |
| Most recent NPS — Promoter | Show content based on NPS score range (promoter) |
| Most recent NPS score value | Show content based on specific NPS score |
## Gender Rules
| Rule | Description |
| - | - |
| Customer is likely Male | Assumption based on customer name |
| Customer is likely Female | Assumption based on customer name |
| Customer gender unknown | Customer name is considered unisex |
## Extended Customer Revenue (ECR) Rules
ECR values are assigned to any customer who has successfully referred. Customers are split into High, Medium, and Low categories with thresholds unique to each client.
| Rule | Description |
| - | - |
| ECR is High/Medium/Low & Active | Show content based on ECR category combined with the client's definition of Active |
| ECR is High/Medium/Low & Dormant | Show content based on ECR category combined with the client's definition of Dormant |
| ECR is High/Medium/Low & Lapsed | Show content based on ECR category combined with the client's definition of Lapsed |
To view ECR thresholds for your account, go to the customer revenue page and hover on the tooltip.
## Related Guides
> [card] [How to Organise & Run Campaigns](/knowledge/referral/campaigns/organise-and-run)
>
> Set up and manage the campaigns that these triggering rules apply to.
# How to Change a Customer's Name
Source: https://docs.mention-me.com/knowledge/referral/customers/change-name
Update a customer's first or last name in the Mention Me dashboard, and understand short link and email handling.
A guided walkthrough of changing a customer's name in the Mention Me platform.
## Steps to Update a Customer's Name
> [accordion] See each step in detail
>
> **1. Find the customer**
>
> In the left-hand menu, click **Customers**. Search for the customer by their name or email address, then click their name in the results to open their profile.
>
> 
>
> Customer search results filtered by name or email.
>
> **2. Edit their name**
>
> Click the pencil icon next to their name. Update the **Firstname** and **Surname** fields as needed.
>
> 
>
> The pencil icon used to edit a customer's first name and surname.
>
> **3. Save changes**
>
> Click **Save** to apply the changes. A success message confirms the change, and the new name shows on their profile.
>
> 
>
> The Edit Customer detail form, with the name fields, the Short Link warning and the Save button.
## Short Link Updates
The **Short Link** is on the same Edit Customer detail form, but changing it breaks any share links the customer has already sent. Only edit it if you need to. If you're not sure, [contact the Support team](https://help.mention-me.com/hc/en-gb/requests/new?ticket_form_id=1900000712373) for assistance.
## Email Address Handling
Email addresses cannot be changed within the platform. If a customer has signed up using the wrong email address, advise them to sign up again with the correct email. Alternatively, you can [manually enrol](/knowledge/referral/customers/search-add-link) them using the correct details.
# How to Change a Customer's Status
Source: https://docs.mention-me.com/knowledge/referral/customers/change-status
Change a customer's status from non-paying to paying in the Mention Me platform.
You will need to do this when your customers must be labelled as an existing customer to share a referral with their friends. In some cases, it is also required to reward a referral that has already taken place.
> [!NOTE]
>
> For background on why a referrer doesn't need to be a paying customer, and what happens once they register, see [Understanding Non-Paying Referrers](/knowledge/referral/customers/understanding-non-paying-referrers).
A guided walkthrough of changing a customer's status in the Mention Me platform.
## Steps to Change Status
> [accordion] See each step in detail
>
> **1. Find the customer**
>
> In the left-hand menu, click **Customers**. Search for the customer by their name or email address, then click their name to open their profile.
>
> 
>
> The Customers section in the platform navigation.
>
> **2. Identify their campaign**
>
> Check the **Activity timeline** to see which campaign they're enrolled in, for example Referral - English (UK). Their profile also shows that they aren't a paying customer yet.
>
> 
>
> A customer profile showing campaign enrolment and the activity timeline.
>
> **3. Re-enrol as paying customer**
>
> Go back to **Customers**, open the **Enrol a customer to campaign** menu in the top right, and pick the same campaign.
>
> > [!WARNING]
> >
> > Use this menu rather than **Enrol to campaign** on the customer's profile, which enrols them straight away without the options below.
>
> The **Add referrer** form opens. Scroll down and re-enter your customer's details (first name, surname and email address). Make sure **This customer is a paying customer of...** is ticked, and untick **Send referrer registration and forward emails** so they don't get another email. Then click **Save**.
>
> 
>
> The Add referrer form with the paying customer box ticked and the email box unticked.
>
> Their profile now shows them as a paying customer.
>
> 
>
> A successful change: the profile tag goes from Not a paying customer to Paying customer.
# How to Check Referral Status
Source: https://docs.mention-me.com/knowledge/referral/customers/check-referral-status
Review a customer's referral activity timeline, confirm purchases, and handle reward or gaming approvals.
A guided walkthrough of checking a customer's referral status in the Mention Me platform.
## Steps to Check Referral Status
> [accordion] See each step in detail
>
> **1. Access the Customers section**
>
> In the left-hand menu, click **Customers**.
>
> 
>
> The Customers tab in the platform navigation.
>
> **2. Find the new customer (referee)**
>
> Use their name, email, customer ID, or share link to search. Then click their name in the results to open their profile.
>
> 
>
> Customer search results and profile selection.
>
> **3. Review key areas in their profile**
>
> See the sections below for details on what to check.
### Key Areas to Review
#### Activity Timeline
The **Activity timeline** lists everything the customer has done, in chronological order. This includes shared offers, referral enrolments, and whether rewards have been issued.
For a referee, the timeline shows:
* **Who introduced them**, and the offer they were referred to
* **A status pill** showing that Mention Me has approved and rewarded the referral. It doesn't track whether the voucher was redeemed
* **A gaming score** showing their gaming risk
* **Each purchase confirmed** for the customer, listed above the referral

A customer's activity timeline showing referral events in chronological order.
#### Confirm a Purchase
If a purchase hasn't been picked up, for example because the customer used a different email at checkout, open the **Actions** menu and click **Confirm purchase**. If there's nothing to confirm, the option is greyed out.
If you're confident the email is correct, it could be a data mismatch. [Contact the Tech Ops team](https://help.mention-me.com/hc/en-gb/requests/new?ticket_form_id=8840645829405) to investigate further.

The Confirm purchase button in the Actions menu.
For the full step-by-step process, see [How to Confirm a Referral Purchase](/knowledge/referral/customers/confirm-purchase).
#### Approvals
Scroll down the profile to **Approvals**. There are two common approval prompts:
* **Reward Approval:** Normally handled automatically. You can manually approve within the Rewards tab if necessary
* **Gaming Suspicions:** Always requires manual approval. This happens if the system detects unusual or suspicious activity. Review the denial reason carefully to decide whether to approve. See [How to Approve or Decline Referral Suspects](/knowledge/referral/gaming/approve-decline-suspects) for guidance

Manually approving a reward within the Rewards tab.
A gaming suspicion prompt looks similar, but shows the reason the referral was flagged for review:

A gaming suspicion flagged for manual approval, showing the denial reason.
### Can't Find the Customer?
If the customer doesn't appear in your search:
* [Manually add](/knowledge/referral/customers/search-add-link) the customer to the platform
* Then [link their friend](/knowledge/referral/customers/search-add-link) (referrer) to their account
# How to Confirm a Referral Purchase
Source: https://docs.mention-me.com/knowledge/referral/customers/confirm-purchase
Manually confirm a referee's purchase in the merchant dashboard so referral rewards are issued when eligibility isn't detected automatically.
> [!WARNING]
>
> Confirming a purchase sends a reward to the referrer. If the offer includes an "after purchase" reward, the referee also receives one.
Mention Me usually confirms a qualifying purchase automatically. You may need to confirm one manually if:
* The referee used a different email for their purchase than the one they used to sign up
* Your integration isn't sending orders with the correct email
A guided walkthrough of confirming a referral purchase in the Mention Me platform.
## Steps to Confirm a Purchase
> [accordion] See each step in detail
>
> **1. Open the Customer Search**
>
> Go to [mention-me.com/merchant](https://mention-me.com/merchant/) and click **Customers** in the left-hand menu.
>
> 
>
> The Customers tab in the Mention Me dashboard navigation.
>
> **2. Search for the Referee**
>
> > [!WARNING]
> >
> > You must search for the **referee** (the new customer), not the referrer, to confirm a purchase.
>
> Search using the referee's email, name, customer ID, or share link.
>
> 
>
> Searching for the referee in the customer lookup bar.
>
> **3. Open Their Record**
>
> Click the customer's name in the results to open their profile. Their **Activity timeline** shows that they were introduced by a referrer and are waiting for a transaction.
>
> 
>
> Opening the customer's account record.
>
> **4. Open the Actions Menu**
>
> Click **Actions**.
>
> 
>
> The Actions menu on the customer profile.
>
> **5. Click Confirm Purchase**
>
> Click **Confirm Purchase**. A panel opens explaining why a purchase might have been missed, with who introduced the customer and the nominal transaction amount that will be recorded.
>
> 
>
> The Confirm purchase option in the Actions menu.
>
> **6. Confirm Despite Minimum Spend (if Applicable)**
>
> > [!NOTE]
> >
> > There are two ways this step can proceed, depending on the order.
>
> If the purchase was below the minimum spend, you can still confirm it to issue rewards.
>
> 
>
> Confirming a purchase that didn't meet the minimum spend.
>
> **7. Confirm the Promotion (if Applicable)**
>
> If the purchase is part of a promotion, you'll see whether confirming it applies to that promotion.
>
> 
>
> Choosing whether the confirmation applies to an active promotion.
>
> **8. Click Confirm New Purchase**
>
> Click **Confirm New Purchase** to proceed.
>
> 
>
> The final confirmation button for the new purchase.
>
> **9. Refresh and Verify**
>
> Refresh the page to check it worked. The customer is now a paying customer, and the referral has been approved and rewarded.
>
> 
>
> The customer account after refreshing the page.
>
> **10. Check the Activity Timeline**
>
> The customer's **Activity Timeline** shows the transaction as confirmed manually, with the referral linked.
>
> 
>
> The confirmed referral shown in the customer's activity timeline.
>
> **11. Reveal the Reward Code**
>
> Scroll down to the **Rewards** section to see the code that was issued. If you have the right permissions, click **Reveal** to display it.
>
> 
>
> Revealing the issued reward code.
# Emails Mention Me Sends to Your Customers
Source: https://docs.mention-me.com/knowledge/referral/customers/customer-emails
Every email your referrers and referees can receive from Mention Me: who gets it, what triggers it, why it's sent, and whether it can be turned off.
Mention Me sends a small set of emails to your referrers and referees as they move through your refer-a-friend programme. Use this page to answer customer questions like "why did I get this?" and to see which emails you can switch off.
The emails below are the standard set. Which ones your customers receive depends on how your programme is set up.
## At a Glance
| Email | Sent to | Triggered when | Unsubscribe link | Can be turned off |
| - | - | - | - | - |
| [Referrer Register](#referrer-register) | Referrer | They first join the programme | Yes | Yes |
| [Referrer Forward](#referrer-forward) | Referrer | They first engage with a new offer | No | Yes |
| [Referee Promise](#referee-promise) | Referee | They register for a reward that comes after their first purchase | Yes | Yes |
| [Fulfil Delay](#fulfil-delay) | Referrer or referee | Their reward is held up | Yes | No |
| [Referrer Claim](#referrer-claim) | Referrer | Their friend completes the referral, if breakage is on | Yes | Yes |
| [Referrer Reward Fulfil](#referrer-reward-fulfil) | Referrer | Their friend completes the referral | Yes | No |
| [Referee Reward Fulfil](#referee-reward-fulfil) | Referee | They qualify for their reward | Yes | No |
| [Referrer Fulfil Cancelled](#referrer-fulfil-cancelled) | Referrer | You tell Mention Me their friend cancelled | Yes | No |
| [Fulfil Declined](#fulfil-declined) | Referrer or referee | You decline a referral flagged by fraud checks | Yes | No |
| [Duplicate Match](#duplicate-match) | Possible referrer | A friend's name search needs confirming | No | No |
"Can be turned off" means switching the email off for your whole programme. See [Turning Emails Off](#turning-emails-off). Any customer can still unsubscribe themselves from emails that carry an unsubscribe link, and you can [unsubscribe an individual customer](/knowledge/referral/customers/unsubscribe) from the platform.
## Referrer Emails
### Referrer Register
* **Sent to:** anyone who joins your programme by clicking the refer-a-friend call to action in a Mention Me placement.
* **When:** once only, the first time they engage with the programme.
* **Why:** to welcome the referrer and give them all their sharing options in one place.
* **Unsubscribe link:** yes.
* **Can be turned off:** yes.
### Referrer Forward
* **Sent to:** the same referrers as the Register email.
* **When:** each time the referrer engages with a different refer-a-friend offer for the first time. You can delay it by up to 15 minutes.
* **Why:** to give the referrer an email they can forward straight to friends and family, with their share link inside.
* **Unsubscribe link:** no. The email is designed to be forwarded, so if someone clicked unsubscribe there'd be no way to tell whether it was the referrer or one of their friends.
* **Can be turned off:** yes.
### Referrer Claim
* **Sent to:** a referrer who has made a successful referral, on offers with breakage turned on.
* **When:** once their friend has done everything needed to complete the referral. It's sent instead of the reward going out straight away.
* **Why:** to tell the referrer their referral worked and invite them to claim their reward. Once they claim it, the Referrer Reward Fulfil email delivers the reward. Rewards that are never claimed aren't issued, which is what breakage means.
* **Unsubscribe link:** yes.
* **Can be turned off:** yes. It's only sent when breakage is on, and breakage is off by default.
### Referrer Reward Fulfil
* **Sent to:** a referrer who has made a successful referral.
* **When:** once their friend has done everything needed to complete the referral.
* **Why:** to tell the referrer their referral worked and deliver their reward.
* **Unsubscribe link:** yes.
* **Can be turned off:** no, because it delivers the reward. The only exception is a customer who has unsubscribed individually.
### Referrer Fulfil Cancelled
* **Sent to:** a referrer who has made a successful referral.
* **When:** the referee cancels their purchase, which makes the referral invalid.
* **Why:** to let the referrer know they're no longer eligible for the reward.
* **Unsubscribe link:** yes.
* **Can be turned off:** no, but it only goes out if you send Mention Me a cancellation feed by SFTP, webhook or API. Without that feed, this email is never sent.
## Referee Emails
### Referee Promise
* **Sent to:** a referee who registers for an offer where the reward arrives after their first purchase, rather than straight away.
* **When:** as soon as they register.
* **Why:** to introduce the reward they've been promised and explain what they need to do to earn it, including any qualifying terms.
* **Unsubscribe link:** yes.
* **Can be turned off:** yes.
### Referee Reward Fulfil
* **Sent to:** a referee who has done what's needed to qualify for their reward.
* **When:** as soon as they become eligible.
* **Why:** to confirm the referral was successful and deliver the referee's reward.
* **Unsubscribe link:** yes.
* **Can be turned off:** no, because it delivers the reward. The only exception is a customer who has unsubscribed individually.
## Emails to Either Side
### Fulfil Delay
There are two versions, one for each side of the referral.
* **Sent to:** a referrer, a referee, or both.
* **When:** fulfilment of their reward is delayed. That's usually because the purchase has to pass a review or qualifying period first, for example a minimum holding period before the reward is released. It can also be sent for technical reasons.
* **Why:** to keep the customer informed, so they know a reward is on its way and aren't left wondering where it is. The referrer version tells them there's a wait before they can claim, and the referee version explains what happens next with their reward.
* **Unsubscribe link:** yes.
* **Can be turned off:** no. The only exception is a customer who has unsubscribed individually.
### Fulfil Declined
There are two versions, one for each side of the referral.
* **Sent to:** a referrer, a referee, or both.
* **When:** you decline a referral that Mention Me's gaming and fraud rules have flagged. See [Approve or Decline Suspects](/knowledge/referral/gaming/approve-decline-suspects).
* **Why:** to confirm the referral was unsuccessful, so the customer isn't left waiting for a reward. The referrer version explains that their friend didn't meet the programme's terms and conditions. The referee version tells them their referral was checked against the terms and conditions and was unsuccessful.
* **Unsubscribe link:** yes.
* **Can be turned off:** no, but it's only sent when you decline a referral.
### Duplicate Match
* **Sent to:** the email address a referee gives for the friend who referred them.
* **When:** a referee uses [share by name](/knowledge/referral/offers/sharing-methods), the name they enter matches more than one referrer, and the email address they then provide isn't one Mention Me recognises.
* **Why:** to confirm the identity of a referrer whose name is on your eligible referrer list but whose email address is new to Mention Me.
* **Unsubscribe link:** no. It's a one-off, plain-text customer service email.
* **Can be turned off:** no. It comes with share by name: if share by name is on for your programme, this email is on too.
## Turning Emails Off
You can switch the Referrer Register, Referrer Forward, Referrer Claim and Referee Promise emails on or off for each offer. Changes can only be made on a [draft experiment](/knowledge/referral/offers/setup-reward).
**1. Open your draft experiment**
Go to **Campaigns**, select your campaign and open the draft experiment.
**2. Open the email settings**
Go to **Design & Settings** → **Other Settings** → **Email**.

The Email tab of an offer's settings in Classic.
**3. Choose your emails**
Untick any email you don't want to send. You can also set **Delay the Referrer Forward Email** to a whole number of minutes between 0 and 15.
The **Referee Emails** section, with the Referee Promise checkbox, only appears on offers where the referee's reward comes after their first purchase.
**4. Push the draft live**
Your changes apply once you [push the draft live](/knowledge/referral/offers/push-draft-live).
The same tab also holds two reward settings for referrers:
* **Enable breakage for the referrer:** sends the [Referrer Claim](#referrer-claim) email, so referrers claim their reward instead of receiving it automatically.
* **Allow the referrer to receive their reward directly in the referrer fulfil email:** puts the reward in the email itself rather than behind a link. If breakage is on, turn this on too, so referrers who try to claim when a reward has run out still receive it once it's available.
## Related Articles
> [card] [How to Resend a Reward Email](/knowledge/referral/customers/resend-reward-email)
>
> Resend an email from a customer's profile if they can't find it.
> [card] [How to Unsubscribe a Customer from Emails](/knowledge/referral/customers/unsubscribe)
>
> Stop all Mention Me emails for a single customer.
> [card] [Reward Fulfilment](/knowledge/referral/offers/fulfilment)
>
> How rewards reach your customers and how to manage fulfilment yourself.
> [card] [Sharing Methods](/knowledge/referral/offers/sharing-methods)
>
> The ways referrers share, including share by name.
# How to Move Customers Between Campaigns
Source: https://docs.mention-me.com/knowledge/referral/customers/move-between-campaigns
Manually move a customer between campaigns or roll forward a referrer to the latest offer.
A guided walkthrough of moving a customer between campaigns in the Mention Me platform.
## Moving a Customer to a Different Campaign
> [accordion] See each step in detail
>
> **1. Find the customer**
>
> In the left-hand menu, click **Customers**. Search for the customer by email, name, customer ID, or share link, then click their name to open their profile.
>
> **2. Check their campaign**
>
> Scroll down to **Sharing**. This shows the campaign they're currently sharing, along with their shares and successful referrals.
>
> **3. Stop current sharing**
>
> Open the **Actions** menu on that campaign and click **Stop sharing**. A message confirms they're no longer sharing the offer, and the campaign disappears from the list.
>
> **4. Enrol in new campaign**
>
> Scroll back to the top, open the **Enrol to campaign** menu and pick the campaign you want to move them to.
>
> 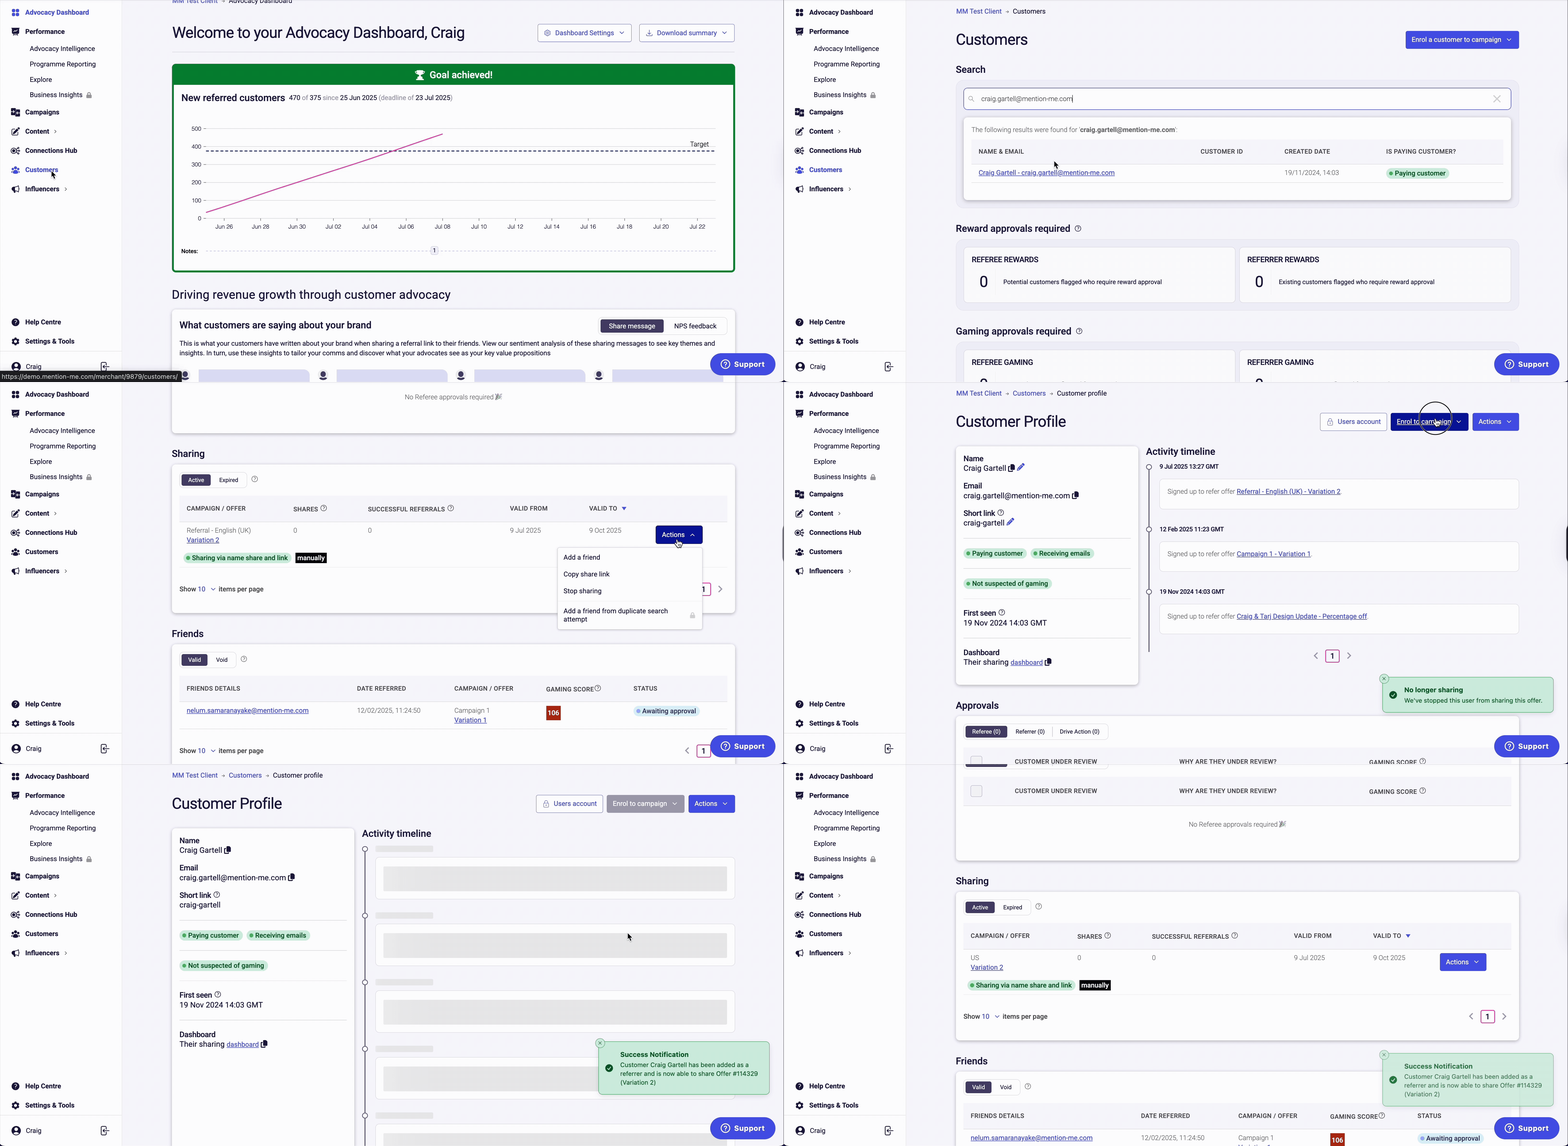
>
> Moving a customer to a different campaign using Stop Sharing and Enrol.
>
> **5. Check the move**
>
> The **Activity timeline** shows they've signed up to the new offer, and **Sharing** now lists the new campaign.
## Rolling Forward a Referrer to the Latest Offer
Use this to update the referral offer for one individual customer.
### Option 1: Manual Re-enrolment
> [accordion] See each step in detail
>
> **1. Find the customer**
>
> In the left-hand menu, click **Customers**. Search for the customer by email, name, customer ID, or share link, then click their name to open their profile. **Sharing** shows the older offer they're on.
>
> **2. Enrol to latest campaign**
>
> Scroll to the top, open the **Enrol to campaign** menu and pick the same campaign. You'll see a notification confirming successful enrolment.
>
> 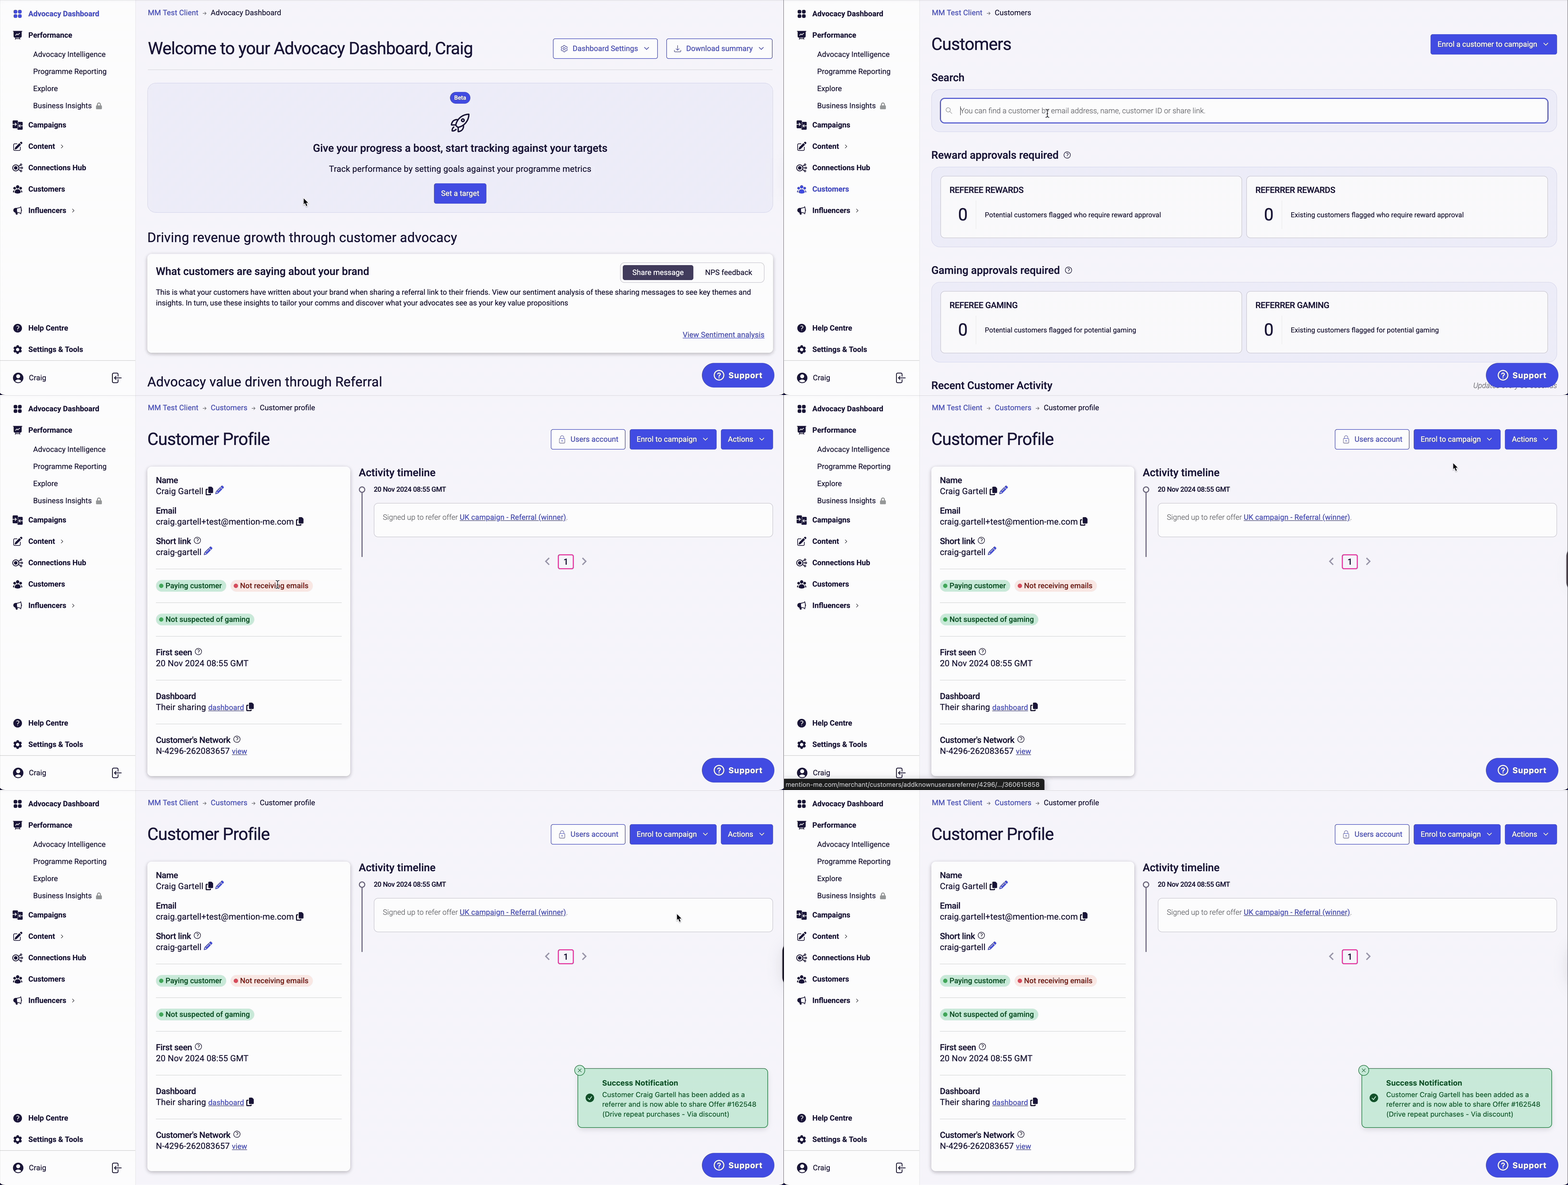
>
> Re-enrolling a customer to the latest campaign.
>
> **3. Check the new offer**
>
> Back in **Sharing**, the latest offer now appears at the top of the list.
### Option 2: Actions under Sharing
> [accordion] See each step in detail
>
> **1. Open their current offer**
>
> On the customer's profile, scroll to **Sharing** and open the **Actions** menu on their current offer.
>
> **2. Move to the latest offer**
>
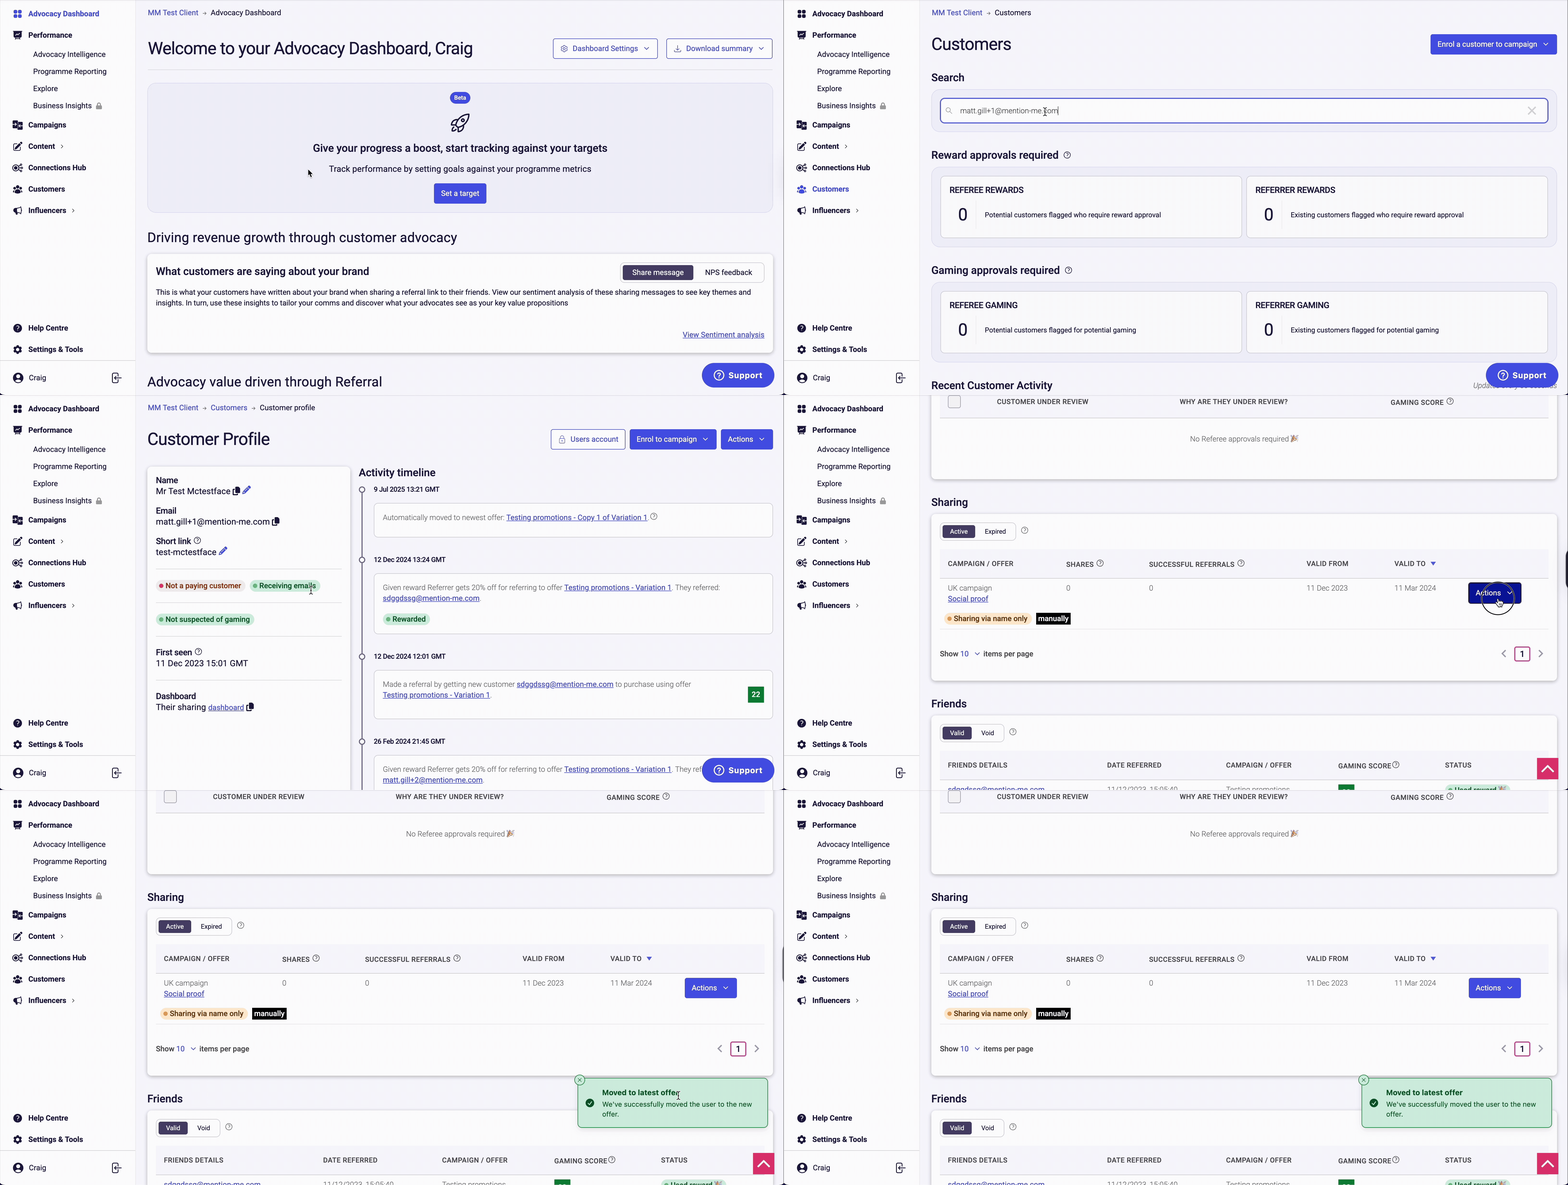
> Click **Move to latest offer**. They'll be enrolled in the latest offer available to them, which could be better or worse than their current one.
>
> 
>
> The Move to Latest Offer option under Sharing Actions.
>
> **3. Check the move**
>
> The **Activity timeline** shows they were moved to the newest offer, and **Sharing** lists the latest campaign.
# How to Purge Customer Data
Source: https://docs.mention-me.com/knowledge/referral/customers/purge-data
Permanently delete customer data from the Mention Me platform individually, in bulk via CSV, or automatically via SFTP.
There are three ways to purge customer data:
1. **Manual, individual deletion** - Delete a single customer directly from the platform
2. **Manual, bulk deletion via CSV upload** - Upload a list of customer emails to purge multiple accounts at once
3. **Automated deletion via SFTP** - Automate regular customer data purges by securely sending CSV files via SFTP
A guided walkthrough of purging customer data in the Mention Me platform.
## Manual Deletion: Individual Accounts
> [accordion] See each step in detail
>
> **1. Find the customer**
>
> In the left-hand menu, click **Customers**. Search for the customer by email, name, customer ID, or share link, then click their name to open their profile.
>
> 
>
> Customer search results and profile selection.
>
> **2. Purge the account**
>
> Open the **Actions** menu and click **Purge**. A tooltip explains that this permanently deletes the customer's data, and that you'll be asked to confirm.
>
> 
>
> The Actions menu showing the Purge option.
>
> **3. Confirm deletion**
>
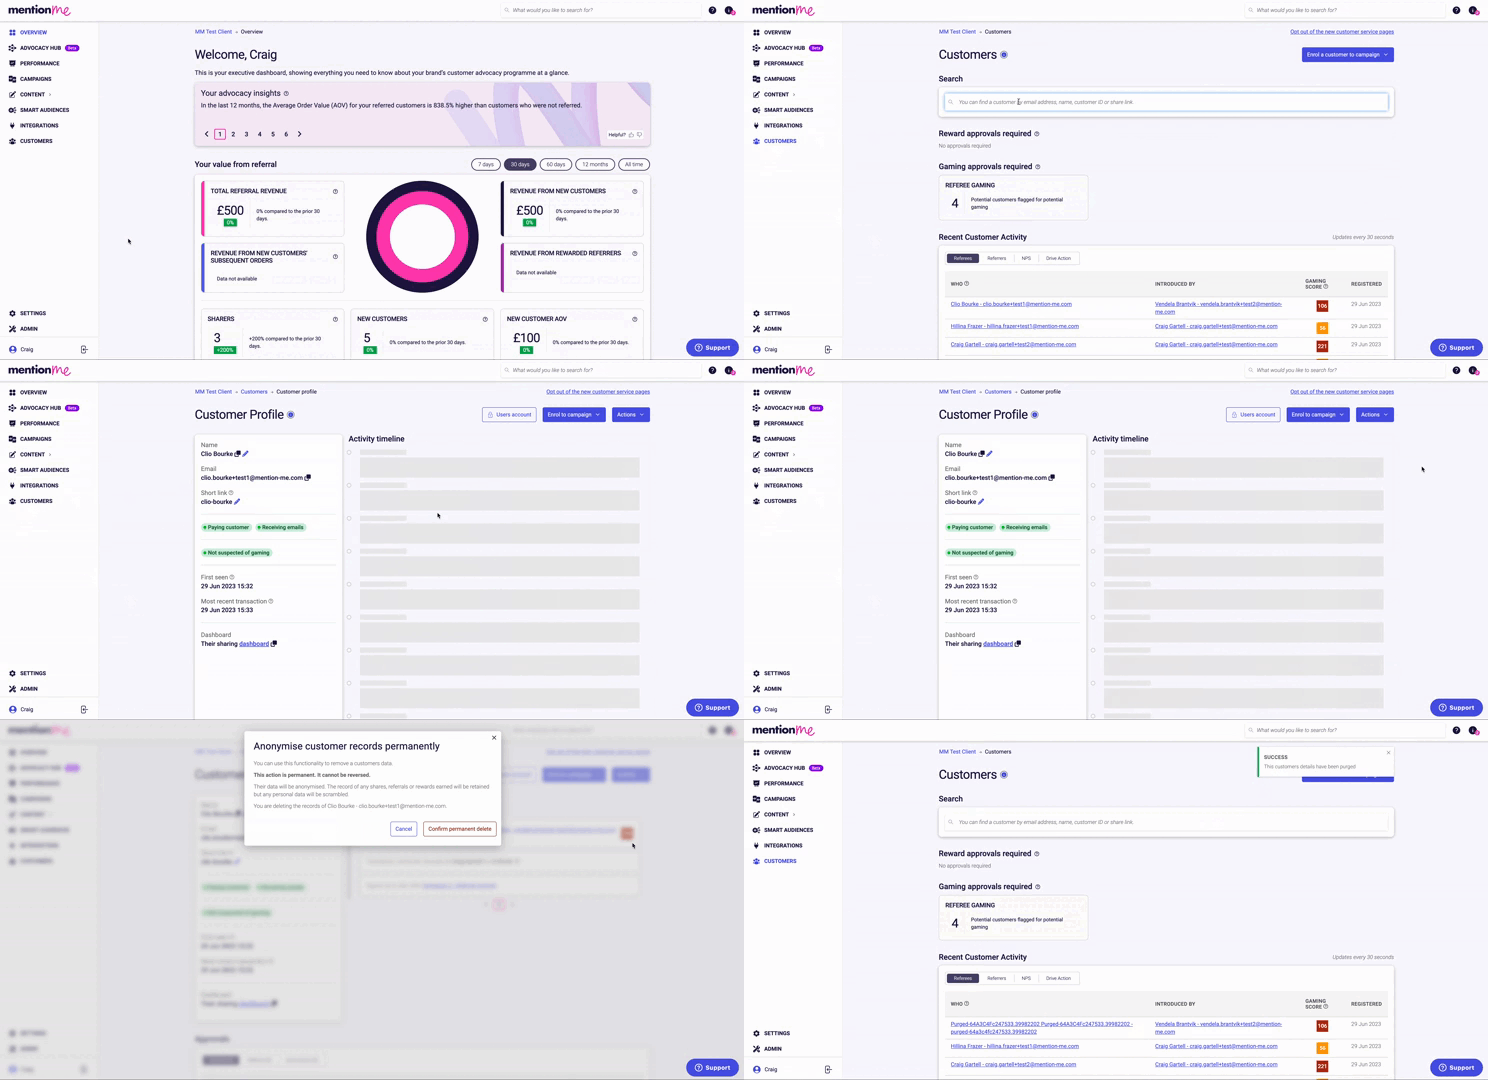
> A pop-up explains that the customer's personal data is removed for good, while any shares, referrals and rewards are kept anonymously. Click **Confirm permanent delete** to finish, or **Cancel** to back out.
>
> 
>
> Confirming permanent deletion of a customer account.
## Manual Deletion: Bulk Upload via CSV
> [accordion] See each step in detail
>
> **1. Access the Upload Tags tool**
>
> In the left-hand menu, click **Settings**, then **Upload tags** under **Data & Reporting**. You can also search for "Upload tags" and select the first result.
>
> 
>
> The Upload Tags tool within Settings and Tools.
>
> **2. Select Purge action**
>
> Open the **Select a type** menu and choose **Purge**. Download the sample CSV if you'd like a template.
>
> 
>
> Selecting the Purge action from the dropdown.
>
> **3. Upload your CSV file**
>
> Drop your `.csv` file onto the page, or click to select it.
>
> 
>
> Uploading a CSV file for bulk purge.
>
> **Required CSV field:** Only "Customer Email" is mandatory. Ensure your file is saved in `.csv` format.
>
> | Field | Field type | Example |
> | - | - | - |
> | Customer Email | email | [test@example.com](mailto:test@example.com) |
>
> **4. Map fields and validate**
>
> Map the **Customer Email** field to your column. You'll see sample rows so you can check the data, and the first \~100 rows are validated, with any problem rows (e.g. an invalid email) shown in red. Fix any errors, then click **Upload**. Invalid rows will be skipped during processing.
>
> **5. Review confirmation**
>
> After processing, you'll see a summary of total rows processed, number of successful deletions, and any failed rows. Valid entries will be added to the purge queue and processed.
## Automated Deletion via SFTP
You can automate customer deletion by uploading a CSV file to our SFTP server. Once received, we permanently delete listed users. No additional input is required from your team.
### If You Already Have SFTP Set Up
> [accordion] See each step in detail
>
> **1. Open the integration instructions**
>
> In the left-hand menu, click **Settings**, then **Integration instructions**.
>
> **2. Find the purge format**
>
> Under **SFTP**, open **SFTP Data Formats** and expand **Purge**. You can also go straight to the [purge file format](/developer-docs/integration/sftp-data-formats#purge).
>
> **3. Format your file**
>
> Each row needs the type of purge (`purge`) and the customer's email address.
>
> **4. Upload the file**
>
> Upload the file to your SFTP folder to send the request. We will begin deleting the users as soon as the data is received.
### If You Don't Have SFTP Set Up Yet
* SFTP needs to be enabled for your account first. See [SFTP Setup](/knowledge/integrations/data-feeds/sftp-setup) to request access
* For connection details, see [SFTP connection](/developer-docs/integration/sftp-connection)
* Once connected, you can start submitting CSV files for automated deletion
Please let us know if you require any [additional help](https://help.mention-me.com/hc/en-gb/requests/new?ticket_form_id=8840645829405).
# How to Redeem a Customer's Reward
Source: https://docs.mention-me.com/knowledge/referral/customers/redeem-reward
Redeem a customer's reward from their Claim Reward email in the Mention Me platform.
This guide shows you how to redeem a customer's reward from their 'Claim Reward' email.
> [!WARNING]
>
> Only users with Customer Support Supervisor access or higher have permission to perform this action. [Learn more about user access and permissions](https://help.mention-me.com/hc/en-gb/articles/360008895418-How-to-Add-Unlock-Users-within-your-Account#h_01JP7F8MPPS982M3C64SXJPKWJ).
A guided walkthrough of redeeming a customer's reward in the Mention Me platform.
> [accordion] See each step in detail
>
> **1. Open the Customers Section**
>
> In the left-hand menu, click **Customers**.
>
> 
>
> Accessing the Customers section from the platform navigation.
>
> **2. Search for the Customer**
>
> Search for the customer using their name, email, customer ID, or share link, then click the matching result to open their profile.
>
> 
>
> Searching for a customer's details.
>
> **3. Check the Referral**
>
> The **Activity timeline** shows their successful referral, with a reward they're yet to claim.
>
> **4. Open the Claim Reward Email**
>
> Scroll down to the **Emails** section and click the **Referrer Claim Reward** email. The claim step is only available for referrers.
>
> 
>
> Locating and opening the Claim Reward email.
>
> **5. Click the Call to Action in the Email**
>
> The email opens. Click its call to action (for example, 'Get your £20 off here').
>
> 
>
> Clicking the main call to action in the customer email.
>
> The call to action sometimes appears in a different position within the email:
>
> 
>
> An alternate example of where the call to action appears in the email.
>
> **6. Confirm the Claim**
>
> You'll land on the Claim page. Click the call to action to confirm the claim (for example, 'Claim your thank you reward' or 'Claim code').
>
> 
>
> The Claim page where reward confirmation happens.
>
> **7. View the Reward Code**
>
> The Fulfil page now shows the reward code.
>
> 
>
> An example of a successful reward issuance.
>
> **8. Share the Reward Code**
>
> The customer will also receive a fulfilment email containing the code. Use **Copy code** if you'd like to send it to them yourself.
>
> **9. Check the Profile**
>
> Back on their profile, the reward appears under **Rewards**, and the **Referrer Fulfil** email is listed under **Emails**.
# How to Resend a Reward Email
Source: https://docs.mention-me.com/knowledge/referral/customers/resend-reward-email
Resend a previously sent email to a customer from their profile if they can't find it, such as a reward, registration, or reminder email.
If a customer can't find an email you sent them, resend it directly from their profile. Useful for reward fulfilment, registration, or reminder emails.
> [!NOTE]
>
> Only delivered emails show a **Resend now** button. Bounced, suppressed, or unsent emails won't have one.
> [!TIP]
>
> Before resending, remind the customer to check their spam or junk folder first. It's often already there.
A guided walkthrough of resending a reward email in the Mention Me platform.
> [accordion] See each step in detail
>
> **1. Open the Customers Section**
>
> In the left-hand menu, click **Customers**.
>
> 
>
> Accessing the Customers section from the platform navigation.
>
> **2. Search for the Customer**
>
> Search for the customer using their name, email, customer ID, or share link, then click their name to open their profile.
>
> 
>
> Searching for a customer's details.
>
> **3. Scroll to the Emails Section**
>
> Scroll down to the **Emails** section and find the email you want to resend, for example the **Referrer Fulfil** email with their reward.
>
> **4. Click Resend now**
>
> Click **Resend now** next to the email.
>
> 
>
> The Resend now button next to a sent email.
>
> A message confirms the email has been resent.
## See Also
> [card] [How to Redeem a Customer's Reward](/knowledge/referral/customers/redeem-reward)
>
> Redeem a customer's reward from their Claim Reward email instead of resending it.
> [card] [How to Find a Customer's Reward Code](/knowledge/referral/customers/reveal-reward-code)
>
> Reveal a customer's reward code directly from their profile if they can't find it in their fulfilment email.
# Understanding Retention and Reactivation Periods
Source: https://docs.mention-me.com/knowledge/referral/customers/retention-and-reactivation
Understand how Mention Me retains and purges customer data, and how reactivation lets long-inactive customers be referred again.
Mention Me holds customer data for a defined period and then purges it automatically. Alongside this, a separate setting called reactivation controls whether a customer who hasn't purchased in a long time can be referred again. This article explains both concepts, the default periods we apply, and how you can request changes.
## Retention Periods
Retention periods determine how long we keep a customer's personally identifiable information (PII) before it is purged. Purging doesn't delete the underlying event record. It overwrites the PII with random data, prefixed with "Purged", so the event trace remains for auditing while the personal data is removed.
We apply four default retention periods, each covering a different type of customer:
| Customer Type | Default Retention Period | Description |
| - | - | - |
| Referees who haven't purchased | 2 years | Customers who were referred but haven't gone on to make a purchase |
| Uninterested referrers | Forever | Referrers who saw an offer but never engaged with it any further |
| Referrers who don't share | 4 years | Referrers who engaged with an offer but have never shared it with a friend |
| Other non-referral customers | 2 years | Other customers Mention Me may know about, for instance those who've engaged in an NPS survey but not in referral |

The Retention Periods settings page showing the default period for each customer type.
Customers who successfully complete a referral, either as a referrer who shares or a referee who is referred, are **not** purged automatically. We keep these records for the lifetime of the contract to track incremental referrals, support customer service, prevent gaming, and deliver personalisation. All customer records are purged once a client churns, typically within a month of the contract ending.
### Why These Periods Were Chosen
The 2-year and 4-year defaults are based on aggregated sharing and purchasing behaviour across our client base:
* Referral is a comparatively slow channel: only 59% of shares happen within the first 3 months of enrolment, rising to 89% by 24 months and 96% by 36 months. It takes 48 months to reach 98%. This is why the default retention period for referrers who don't share is 4 years.
* Similarly, it takes around 2 years for 98% of referees who've been given an incentive to make their first purchase, which is why the default retention period for referees is 2 years.
This data is aggregated across all clients and isn't specific to any one industry, so individual results may vary.
> [!WARNING]
>
> Shortening these retention periods can reduce referral volume. One client that set their referrer retention period to just 2 months found that referrers were being purged before they had a chance to share, which measurably hurt their programme's performance.
### Requesting a Change
You can override the default retention periods if needed. If you're an existing client, speak to your Client Success Manager. If you're a prospective client, speak to a member of our pre-sales team, and we'll configure this during onboarding.
> [!NOTE]
>
> This retention data can also be a useful reference if you're compiling your own Data Protection Impact Assessment (DPIA).
## Reactivation
Without reactivation, a customer who hasn't purchased in a long time can never be referred again by friends or family, even though they're technically still an existing customer. This means any potential for that customer to re-engage through a referral is lost.
Reactivation solves this by treating a long-inactive customer as if they were new. Once a customer hasn't purchased within the reactivation period, their friends can refer them again, giving the brand a way to re-engage dormant customers and potentially win back a lapsed relationship.
For example, a customer who made several purchases around five years ago but hasn't transacted since would, without reactivation, be permanently excluded from being referred again. With reactivation enabled, that customer becomes eligible to be referred once more after the reactivation period has passed.
### Default Reactivation Period
By default, reactivation is set to 12 months: a customer becomes eligible to be referred again once 12 months have passed since their last purchase.
You can adjust this period to suit your business, in whole months from 1 to 240 (for example 12, 18, or 36 months). Setting the value to 0 disables reactivation entirely.

The Referee Reactivation settings page with the reactivation period field set to 20 months.
### Requesting a Change
To change your reactivation period, [contact our support team](https://help.mention-me.com/hc/en-gb/requests/new?ticket_form_id=1900000712373) with your preferred number of months, or let us know if you'd like reactivation disabled.
# How to Find a Customer's Reward Code
Source: https://docs.mention-me.com/knowledge/referral/customers/reveal-reward-code
Reveal a customer's reward code directly from their profile if they can't find it in their fulfilment email.
If a customer can't find their reward code in their email, you can look it up directly from their profile.
> [!WARNING]
>
> Only users with Customer Support Supervisor access or higher have permission to perform this action. [Learn more about user access and permissions](https://help.mention-me.com/hc/en-gb/articles/360008895418-How-to-Add-Unlock-Users-within-your-Account#h_01JP7F8MPPS982M3C64SXJPKWJ).
>
> If you don't have the necessary access, you can [resend the customer's fulfilment email](/knowledge/referral/customers/resend-reward-email) instead.
A guided walkthrough of finding and revealing a customer's reward code from their profile.
> [accordion] See each step in detail
>
> **1. Open the Customers Section**
>
> In the left-hand menu, click **Customers**.
>
> 
>
> Accessing the Customers section from the platform navigation.
>
> **2. Search for the Customer**
>
> Search for the customer using their name, email, customer ID, or share link, then click their name to open their profile.
>
> 
>
> Searching for a customer's details.
>
> **3. Reveal the Reward Code**
>
> Scroll down to the **Rewards** section, find the reward that was issued, and click **Reveal** in the **Code** column. The reward code now shows, with a copy icon next to it, so you can share it with the customer.
>
> 
>
> The reward code, revealed on the customer's profile.
## See Also
> [card] [How to Redeem a Customer's Reward](/knowledge/referral/customers/redeem-reward)
>
> Redeem a customer's reward from their Claim Reward email instead of revealing it directly.
> [card] [How to Confirm a Referral Purchase](/knowledge/referral/customers/confirm-purchase)
>
> Manually confirm a referee's purchase so a reward is issued in the first place.
# Search, Add & Link Customers
Source: https://docs.mention-me.com/knowledge/referral/customers/search-add-link
Search for customers, manually add them to campaigns, and link referrers to referees in the Mention Me platform.
A guided walkthrough of searching for, adding and linking customers in the Mention Me platform.
## How to Search for a Customer
> [accordion] See each step in detail
>
> **1. Open the Customers section**
>
> In the left-hand menu, click **Customers**.
>
> 
>
> The Customers section in the platform navigation.
>
> **2. Search and select**
>
> Search for the customer by email, name, customer ID, or share link, then click their name to open their profile.
>
> If the customer is not found, they have not interacted with the referral programme previously and will need to be enrolled manually (see below).
>
> 
>
> Customer search results filtered by name, email, or share link.
## How to Add a Customer
> [accordion] See each step in detail
>
> **1. Select a campaign**
>
> In the left-hand menu, click **Customers**, then click **Enrol a customer to campaign** to see your campaign options.
>
> 
>
> The Enrol a customer to campaign button and campaign options.
>
> Ensure the correct campaign is selected based on the customer's locale, segment, or status.
>
> 
>
> The campaign selection dropdown for customer enrolment.
>
> **2. Enter customer details**
>
> Scroll down and enter the customer's first name, surname, and email address.
>
> 
>
> The customer enrolment form with name and email fields.
>
> **3. Configure options and register**
>
> If the customer is a paying customer (i.e. they've purchased your product), ensure that "This customer is a paying customer" is ticked. Ask the customer if they consent to receiving emails. If they do, tick "Send referrer registration and forward emails". Otherwise, leave the box unticked. Click **Save**, and their new profile opens.
>
> 
>
> The paying customer and email consent options.
> [!NOTE]
>
> If your customer has opted out of Registration & Forward emails, they will still receive reward fulfilment emails for any successful referrals they make.
## How to Link Customers
> [accordion] See each step in detail
>
> **1. Find the referrer**
>
> In the left-hand menu, click **Customers**. Search for the existing customer (referrer) by name, email, customer ID, or share link, then click their name to open their profile. If the customer is not found, enrol them manually first (see above).
>
> 
>
> Searching for an existing referrer customer.
>
> **2. Add a friend**
>
> Scroll down to **Sharing**, open the **Actions** menu and click **Add a friend**.
>
> 
>
> The Actions menu showing the Add a friend option under Sharing.
>
> **3. Enter referee details**
>
> Enter the friend's email, first name and surname on the **Add a friend** page, then click **Save**.
>
> 
>
> The Add a friend form with the friend's details.
>
> **4. Check the link**
>
> The friend's profile opens, linked to the referrer. Their **Activity timeline** shows who introduced them, and that the referral is waiting for a transaction. If they've already bought, [confirm the purchase](/knowledge/referral/customers/confirm-purchase) from their **Actions** menu so the referrer is rewarded.
>
> 
>
> The friend's profile, introduced by the referrer and waiting for a transaction.
# Understanding Non-Paying Referrers
Source: https://docs.mention-me.com/knowledge/referral/customers/understanding-non-paying-referrers
Understand why a referrer doesn't need to be an existing customer, and what happens to their status once they register.
Referrers do not need to have previously bought from your business. A visitor browsing your website can register on your referral landing page and refer a friend without ever having placed an order.
## Why Non-Paying Referrers Are Allowed
Allowing visitors to register as referrers is useful when someone isn't ready to buy themselves but knows a friend who would be interested in your products or services. The reward on offer for their friend's first order gives them a reason to share, and that reward can also encourage the referrer to become a customer themselves in future.
## What Happens When Someone Registers as a Referrer
Once a visitor completes registration, the Mention Me platform classes them as a Referrer and treats them as an existing customer, even though they haven't made a purchase yet.
This classification has two consequences:
* They can no longer be referred by another friend
* They can't claim the introductory offer that's normally available to new referees
> [!NOTE]
>
> If you only want paying customers to be eligible to register as referrers, see [How to Restrict Referrer Eligibility to Paying Customers](/knowledge/referral/gaming/restrict-referrer-eligibility).
For guidance on manually changing a customer's status between non-paying and paying, see [How to Change a Customer's Status](/knowledge/referral/customers/change-status).
# How to Unsubscribe a Customer from Emails
Source: https://docs.mention-me.com/knowledge/referral/customers/unsubscribe
Stop all Mention Me referral-related emails for a customer, or re-enable them later.
If a customer no longer wishes to receive emails related to your refer-a-friend programme, you can unsubscribe them directly from the platform. This stops all Mention Me powered emails, including referral reminders and reward fulfilment, while still allowing the customer to receive other marketing communications from your brand.
> [!WARNING]
>
> Turning off emails will stop all communications from Mention Me to the selected customer, including reward fulfilment emails. This will not affect any marketing emails you send directly from your own systems.
A guided walkthrough of turning off a customer's emails in the Mention Me platform.
## How to Disable Emails for a Customer
> [accordion] See each step in detail
>
> **1. Find the customer**
>
> In the left-hand menu, click **Customers**. Search for the customer by name, email, customer ID, or share link, then click their name to open their profile. Their profile shows that they're **Receiving emails**.
>
> 
>
> Customer search results by name, email, or share link.
>
> **2. Turn emails off**
>
> Open the **Actions** menu and click **Turn emails off**. Their profile now shows **Not receiving emails**.
>
> 
>
> The Actions menu showing the Turn emails off option.
>
> **3. Turn emails back on (if needed)**
>
> To switch them back on, open the **Actions** menu again and click **Turn emails on**. They'll start receiving emails from Mention Me again.
# Custom CSS
Source: https://docs.mention-me.com/knowledge/referral/design/custom-css
Customise the appearance of your referral program with CSS styles for text, images, buttons, and other elements.
## How to Add Your Custom CSS
**1. Open the CSS editor**
Go to your Mention Me Dashboard and navigate to **Theme > Edit CSS**.
Navigating to the CSS editor in the theme settings.
**2. Add your CSS**
Choose the appropriate CSS section based on what you're styling, and add your labelled, commented CSS.
## Brand CSS
Brand CSS styles the frontend of Mention Me journeys, ensuring the design aligns with your brand's visual identity. It applies across multiple touchpoints, including the Referrer Journey, Referee Journey, Dashboards, and more.
With Brand CSS, you can:
* Customise styles across all brand themes
* Use media queries for responsive design
* Implement specific requirements, such as right-to-left text alignment for certain locales
Brand CSS is considered advanced because it can affect every journey and theme. It is a powerful tool, but should be used with caution. Where possible, avoid creating fully custom designs, as these may impact maintainability or future updates.
## Onsite Content CSS
On-site content refers to content directly integrated into a website or platform, often used for customisation and enhancing user experience. This can include elements like text, images, CSS styles, and scripts embedded within the site.
## Where to Add CSS
Different parts of the platform require CSS to be added in specific locations:
| Component | CSS Location | Requires Europium? |
| - | - | - |
| Referrer Journey | Theme > Edit CSS > Referrer CSS | Yes (except fulfil page) |
| Referrer Fulfil Page | Theme > Edit CSS > Referrer CSS | No |
| Referee Journey | Theme > Edit CSS > Referee CSS | No |
| Dashboard | Theme > Edit CSS > Dashboard CSS | No |
| Corner Peel | Theme > Edit CSS > Corner Peel CSS | No |
| Brand CSS | Content > Brand CSS | No |
| Onsite Content | Settings & Tools > Onsite Content | No |
## Targeting Elements in CSS
All elements are wrapped in a class called `.mm-body`. When targeting elements, remove `.mm-body` from your selectors and start with the next class in the hierarchy.
* **Correct:** `.mm-section .mm-button { ... }`
* **Incorrect:** `.mm-body .mm-section .mm-button { ... }`
## Labelling Custom CSS
Always add comments to label any additional CSS you've added:
```css theme={null}
/* Custom button styling for referrer form */
.mm-button--primary {
background-color: #ff6b35;
border-radius: 8px;
}
/* Hide specific section on mobile */
@media (max-width: 768px) {
.mm-promotional-banner {
display: none;
}
}
```
## Referrer Journey Styling with Europium
### What is Europium?
Europium is a behind-the-scenes tool built by Mention Me that helps you customise how your referrer journey looks while keeping the structure and layout consistent. It allows you to make visual changes without affecting the rest of your referral program or causing layout issues.
Europium is only required for the referrer journey, and does not apply to the referrer fulfil page.
### How Europium Works
Styling changes using Europium must be wrapped in a block:
```less theme={null}
/* Custom referrer journey styling */
&-europium {
/* Your styles go here */
/* Remember: don't include mm-body in your selectors */
.mm-section {
padding: 20px;
}
.mm-button--primary {
background-color: #your-brand-colour;
}
}
```
## Best Practices
* Always label your CSS with comments explaining what each section does
* Remove `.mm-body` from your CSS selectors when targeting elements
* Use browser developer tools to inspect elements and test styles before adding to the platform
## What Not to Do
* Don't use Europium outside of the referrer journey (it won't work)
* Don't include Europium for the referrer fulfil page
* Don't add new HTML or JavaScript - this is for CSS styling only
* Don't include `.mm-body` in your CSS selectors when targeting elements
* Don't add CSS without proper comments and labels
* Don't put CSS in the wrong section — each component has its designated place
# How to Add Custom Fonts
Source: https://docs.mention-me.com/knowledge/referral/design/custom-fonts
Use custom fonts across your referral journey via font URLs or ZIP file uploads.
You can use custom fonts across your referral journey on the website screens, but not on emails. This can be done via font URLs or by uploading a ZIP file.
## Uploading Custom Fonts Using a URL
If you're using fonts from Adobe Typekit or Google Fonts, you can paste the stylesheet into the URL box.
### Adobe Typekit URL
For Adobe Typekit, ensure your fonts are in a "Web Project" and use the URL ending in `.css`:

Adobe Typekit web project showing font URL.
**1. Navigate to Font Settings**
Go to **Content > Themes** in the left-hand side navigation and select the **Manage fonts** button.
**2. Enter Your Font URL**
Click the **Change** button, enter your font URL, and click **Save**.
Entering the font URL in the Mention Me platform.
### Google Fonts URL
For Google fonts, take the API URL (found when selecting @import) and paste it into the URL box:

Google Fonts import URL for embedding custom fonts.
Follow the same steps as above: navigate to **Content > Themes** → **Manage fonts** → **Change** → paste URL → **Save**.
## Uploading Custom Fonts in a ZIP
Name the font file(s) accordingly. This is how they will appear in the theme editor. Ensure the custom font is in a supported format (`.ttf` file) and zip the file before uploading.
```text theme={null}
fontname-fontweight.ttf
```
**1. Navigate to Font Settings**
Go to **Content > Themes** in the left-hand side navigation and select the **Manage fonts** button.
**2. Upload the ZIP File**
Select the **Upload new font zip** button and select your zip file (may take a few minutes).
**3. Set as Current**
Click the arrow button and confirm by clicking the **Set as current** button.
Uploading a custom font ZIP file in the platform.
## Email Fonts
We don't use custom fonts in Mention Me emails.
### Plain Text Emails
The Share by email and the Forwarded email don't have any styling including fonts because they are plain text. When the customer shares these emails, the customer's email client controls the styling.
### Other Emails
In styled emails (the other referrer and referee emails), we don't add custom fonts as we can't guarantee they will be received as designed.
Adding a font to an email is fundamentally different to adding a font to the normal referral flow. With emails, the email will search the environment it lands in for that font (the individual customer's inbox). If the customer doesn't have that font installed on their system, the email will display a default font and may cause other design breakages.
We use web safe fonts to guarantee emails will be received as intended.
### Default Web Safe Fonts
* Arial, sans-serif
* Verdana, sans-serif
* Tahoma, sans-serif
* Trebuchet MS, sans-serif
* Times New Roman, serif
* Georgia, serif
* Garamond, serif
* Courier New, monospace
* Brush Script MT, cursive
# How to Manage Design Themes
Source: https://docs.mention-me.com/knowledge/referral/design/design-themes
Customise, manage, and assign design themes to your referral touchpoints using the theme editor.
## Managing Your Themes
### Editing
To change the way your offers look, click **Edit** on the theme you want to change. This opens the theme editor where you can customise and preview changes in real time.
### Renaming
**1. Open the Rename Option**
Click **Actions** on the theme you want to rename.
**2. Confirm the New Name**
Select **Rename**, enter the new name, and confirm by clicking **Rename**.
Renaming a theme via the Actions menu.
### Duplicating
Click **Actions** and select **Duplicate**. This creates a new theme that looks exactly like the original. It will not be assigned to any offers by default.
Duplicating a theme via the Actions menu.
You can also make changes to a theme in edit mode and view them without making them live. Your progress will be saved.
### Assigning Themes to Offers
You can assign your theme to multiple offers at once:
**1. Open the Assign Option**
Click **Actions** on the theme you want to assign.
**2. Filter and Select Offers**
Using the filter toolbar, select **Campaign**, **Campaign status**, or **Experiment status** to filter by. Click the checkbox on the offer or offers you want the theme applied to.
**3. Confirm the Assignment**
Click **Assign** in the bottom right to confirm.
Assigning a theme to multiple offers at once.
You can also view the offers using a theme via **Show offers using theme** under **Actions**.
## Theme Editor
### Edit Controls
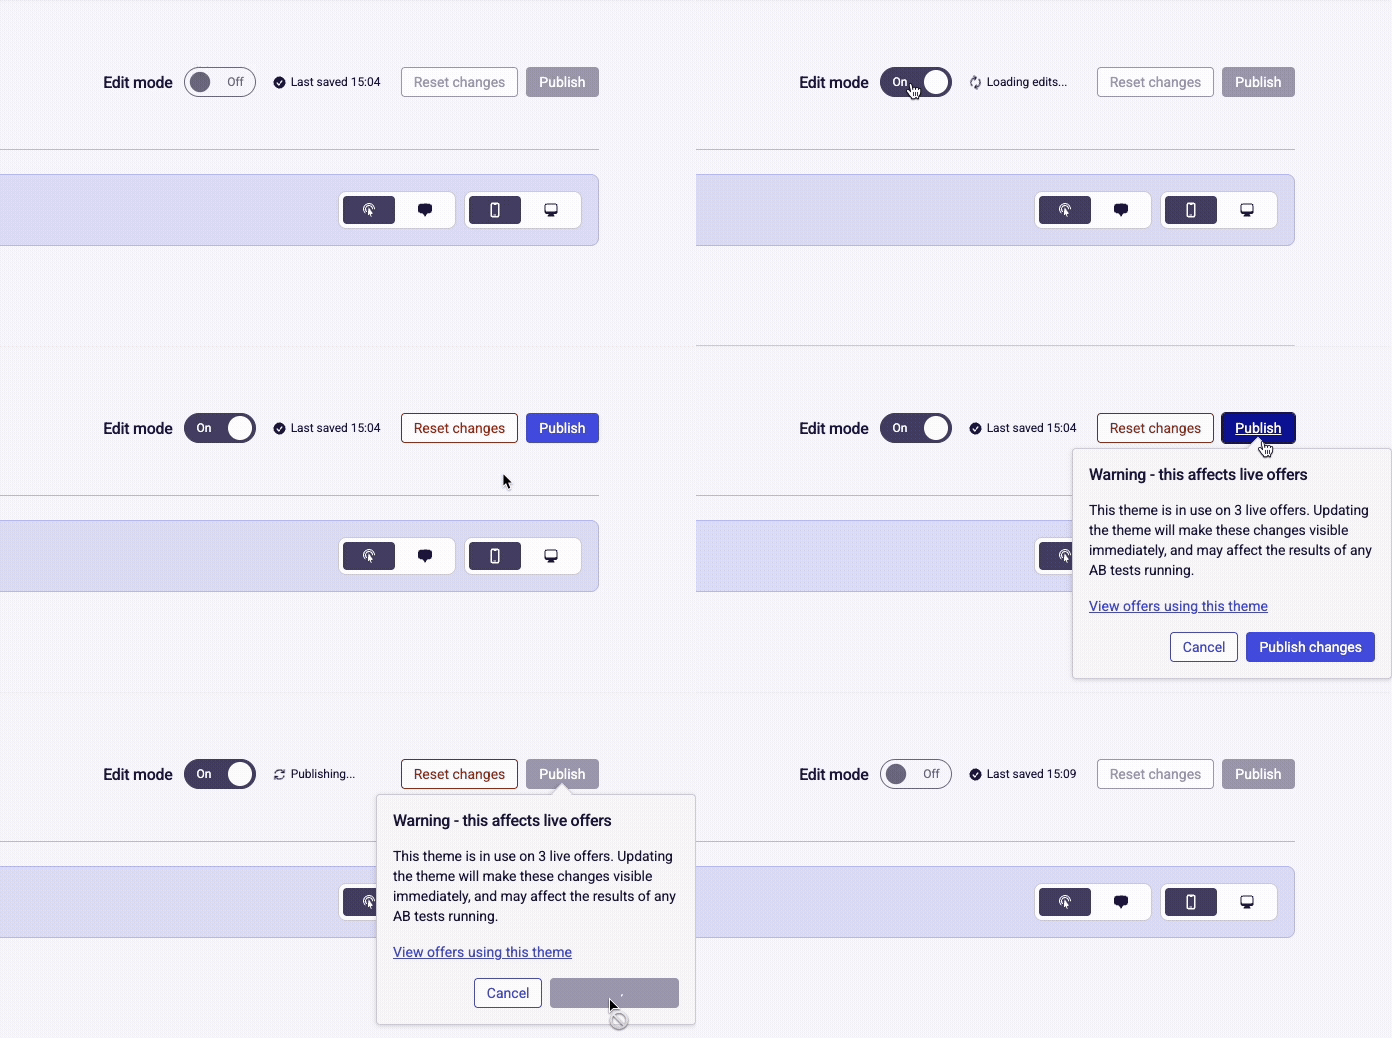
The edit mode toggle and publish button in the theme editor.
**Edit mode**: must be switched on to make any edits. All edits are autosaved but not put live. If you close the page and return, toggle edit mode back on to see your edits.
**Publish**: clicking **Publish** pushes your changes live across all offers linked to the theme.
### Touchpoint Navigation
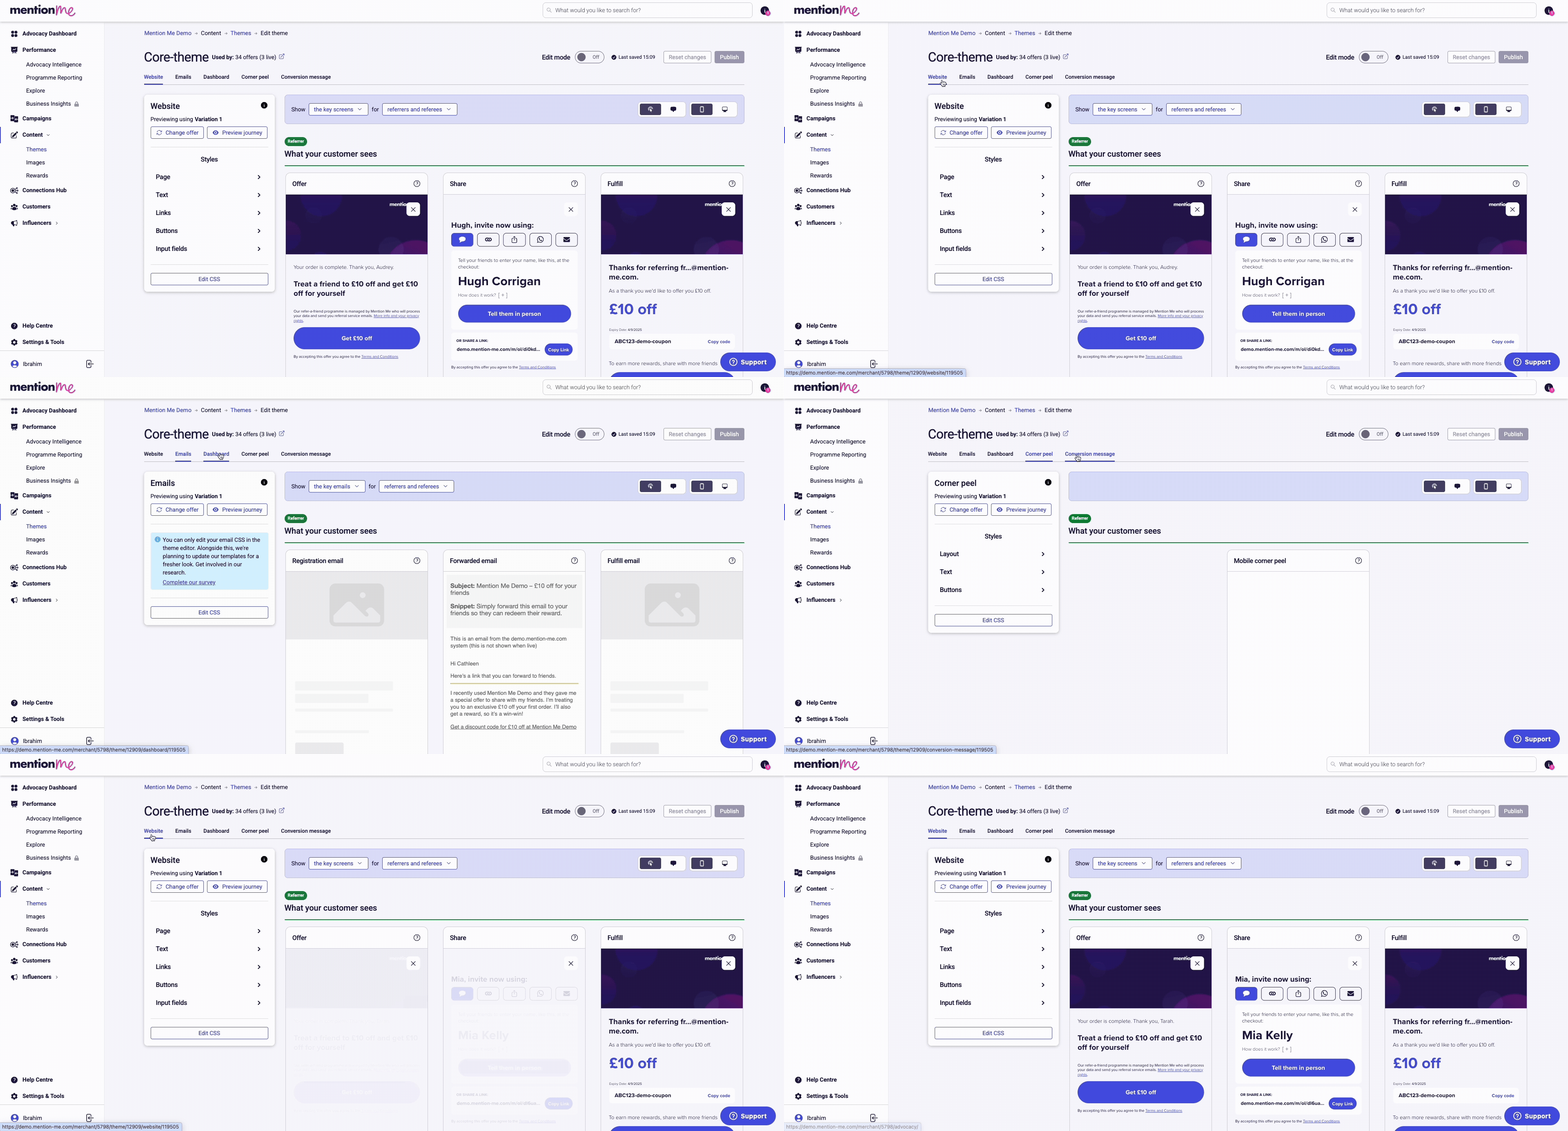
Touchpoint navigation adjusting based on the offer type being previewed.
Depending on which offer you're previewing, the navigation adjusts to show the touchpoints in use. Click the touchpoint you want to edit and the styling controls will update accordingly.
### Preview Controls
#### Preview Offers
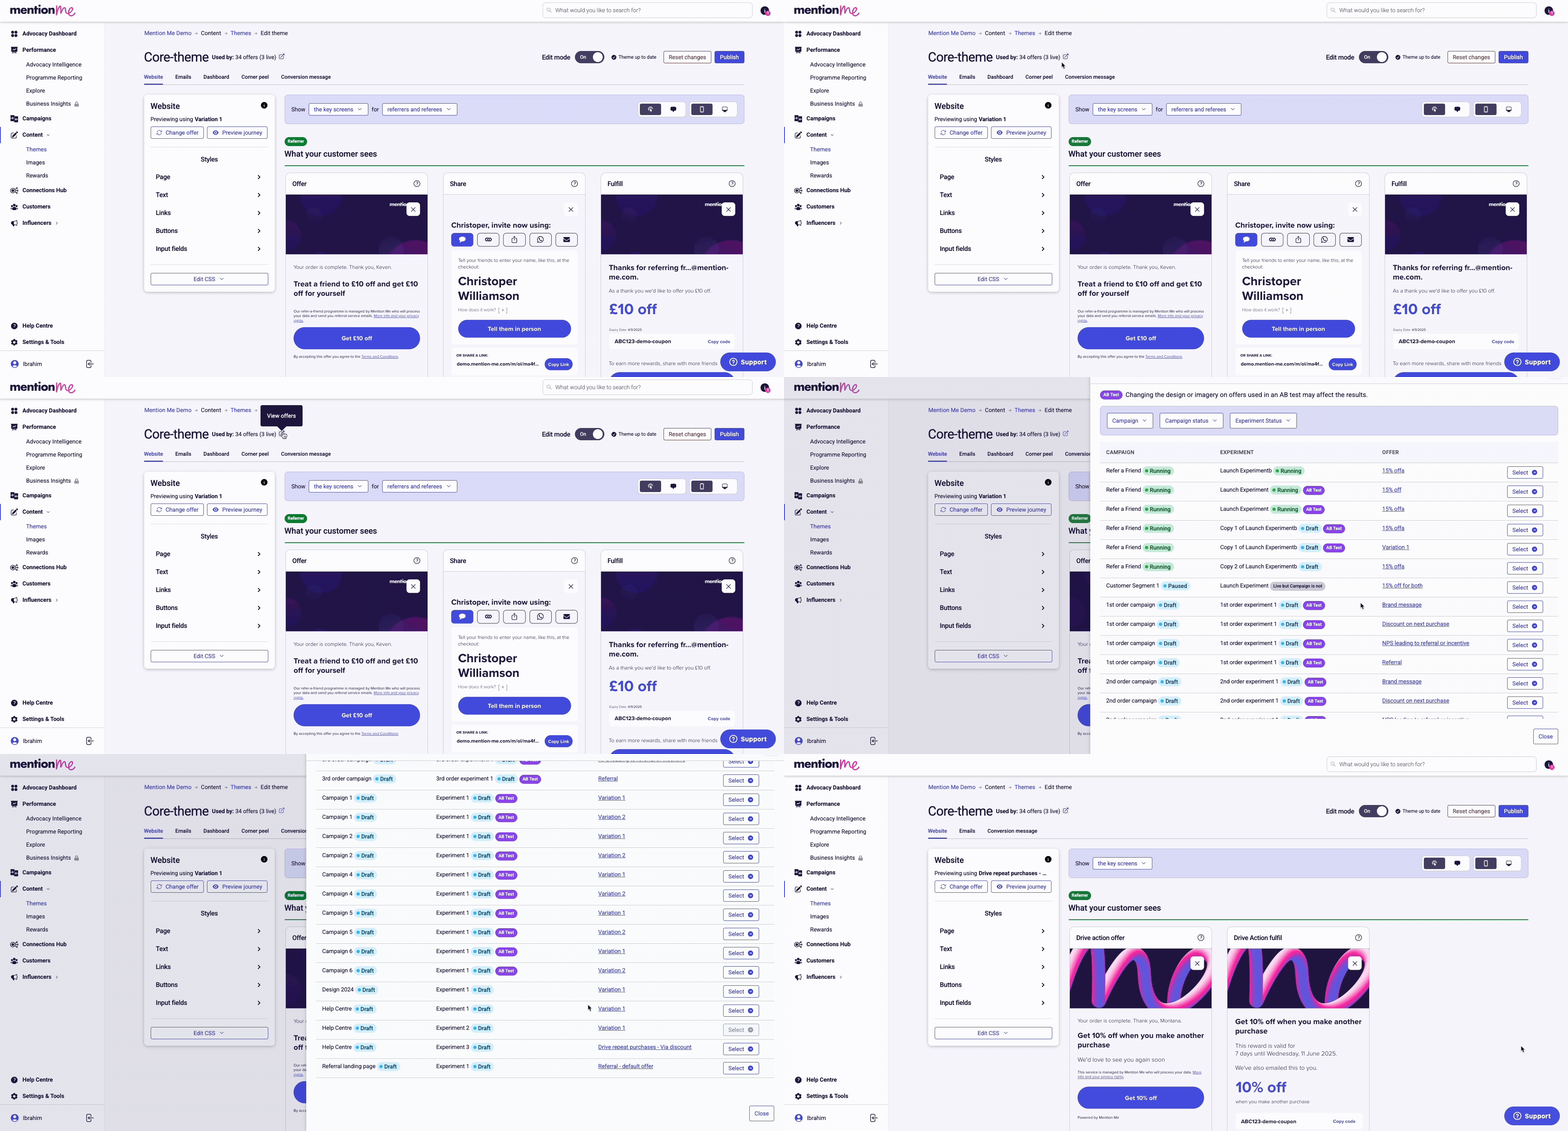
Selecting different offers to preview in the theme editor.
Choose which offer to show in the theme editor. The theme must be assigned to the offer for it to appear here.
#### Screen Filters
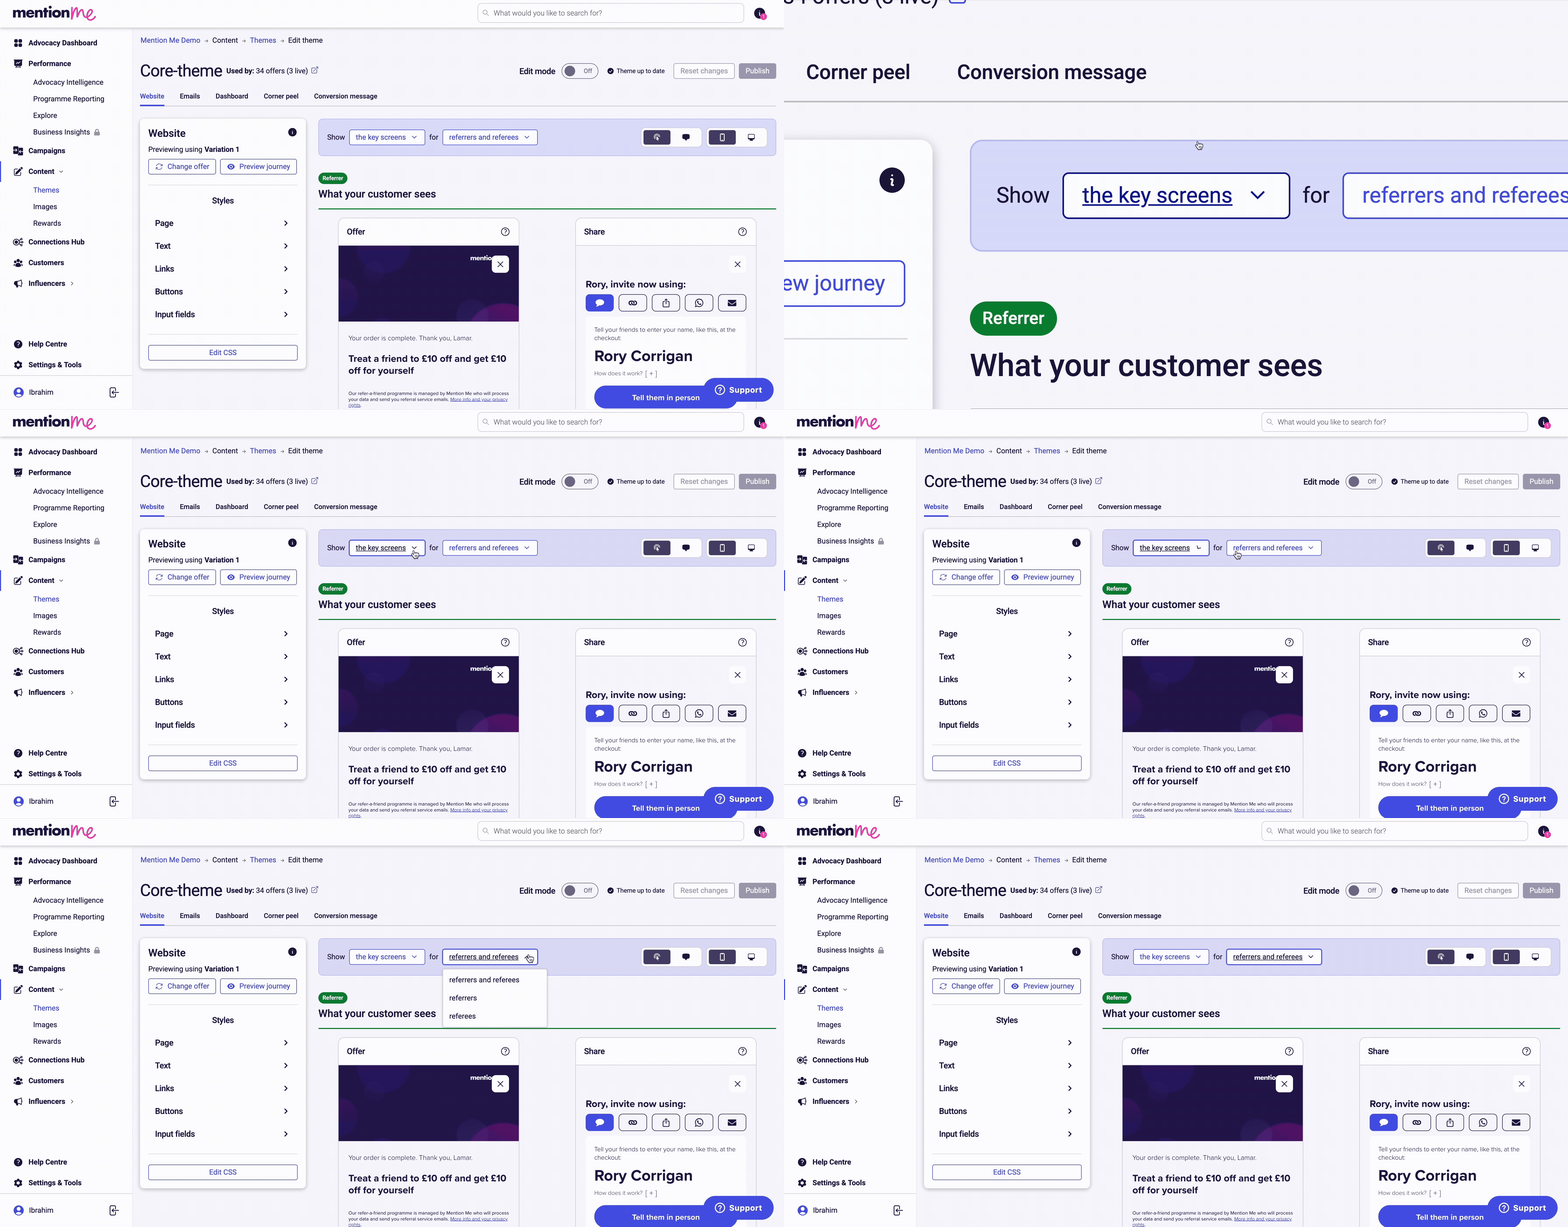
Screen filters for key screens, all screens, referrer, and referee views.
Choose between **Key screens** or **All screens** to display your designs on. You can further refine by choosing between **Referrer** or **Referee screens**.
#### Comment and View Mode
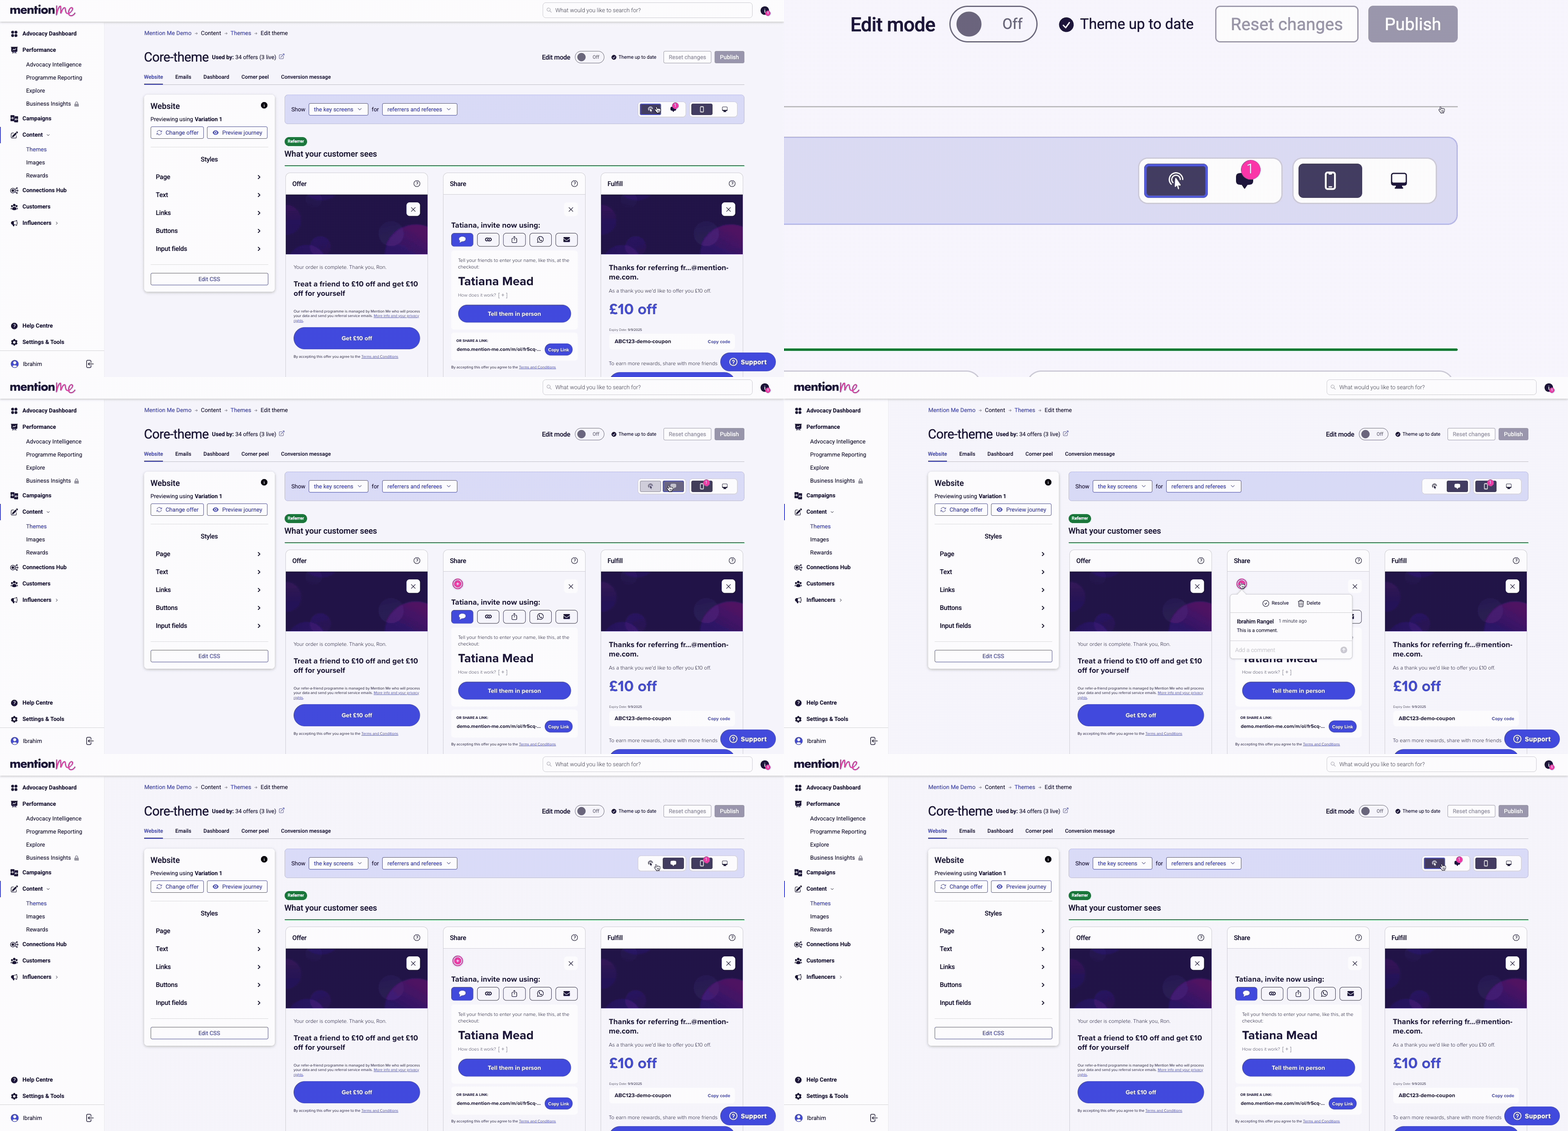
Comment mode and view mode toggle for leaving feedback on preview screens.
Switching to **Comment mode** allows you to click anywhere on the screens and leave a comment to request an amend from your design team or leave a note for a colleague. Switching back to **View mode** hides the comments.
#### Device Views
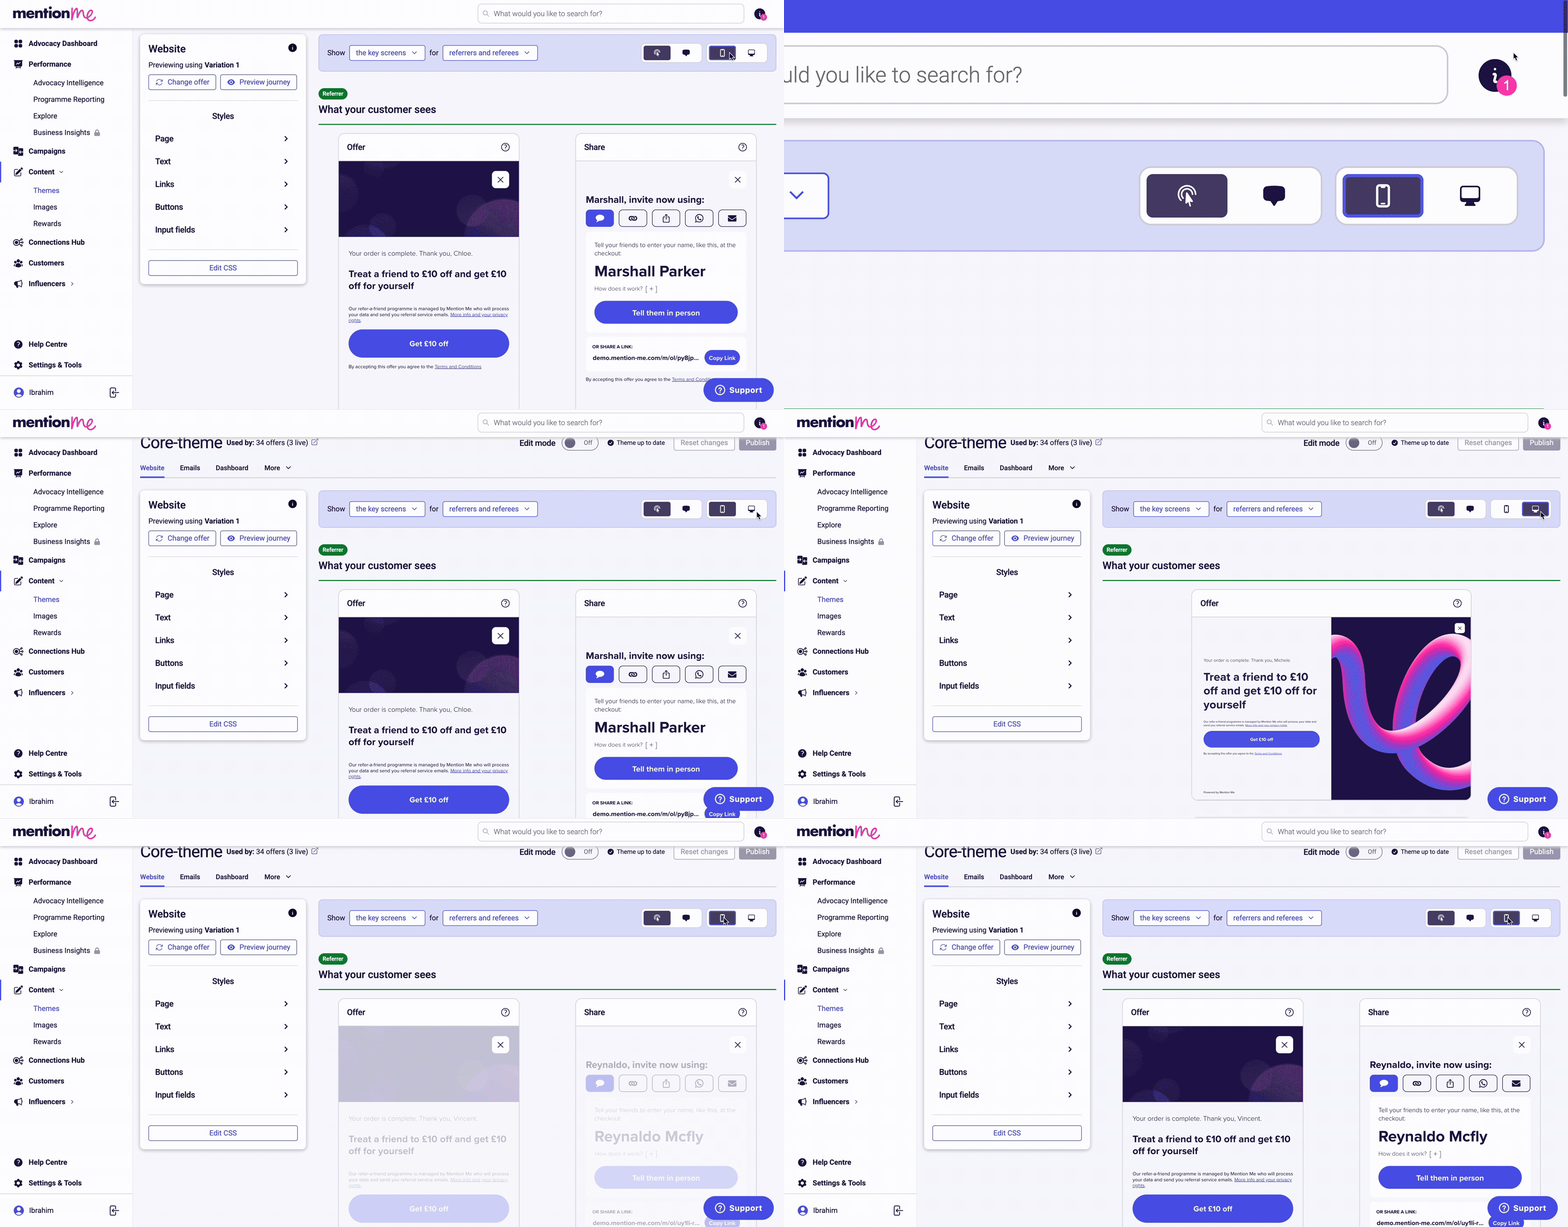
Mobile and desktop device view toggle in the theme editor.
Preview the touchpoint in mobile or desktop view. You can leave comments separately on mobile or desktop for more specific feedback.
## Styling Controls
Not all settings are the same for each touchpoint. Some are unique to specific touchpoints, and some touchpoints have reduced styling options as they inherit the screen styling for consistency.
> [!NOTE]
>
> The email touchpoint has no styling controls. Email styling must be done via custom CSS. We recommend requesting the Mention Me design team to style this for you.
### Page and Layout Styling
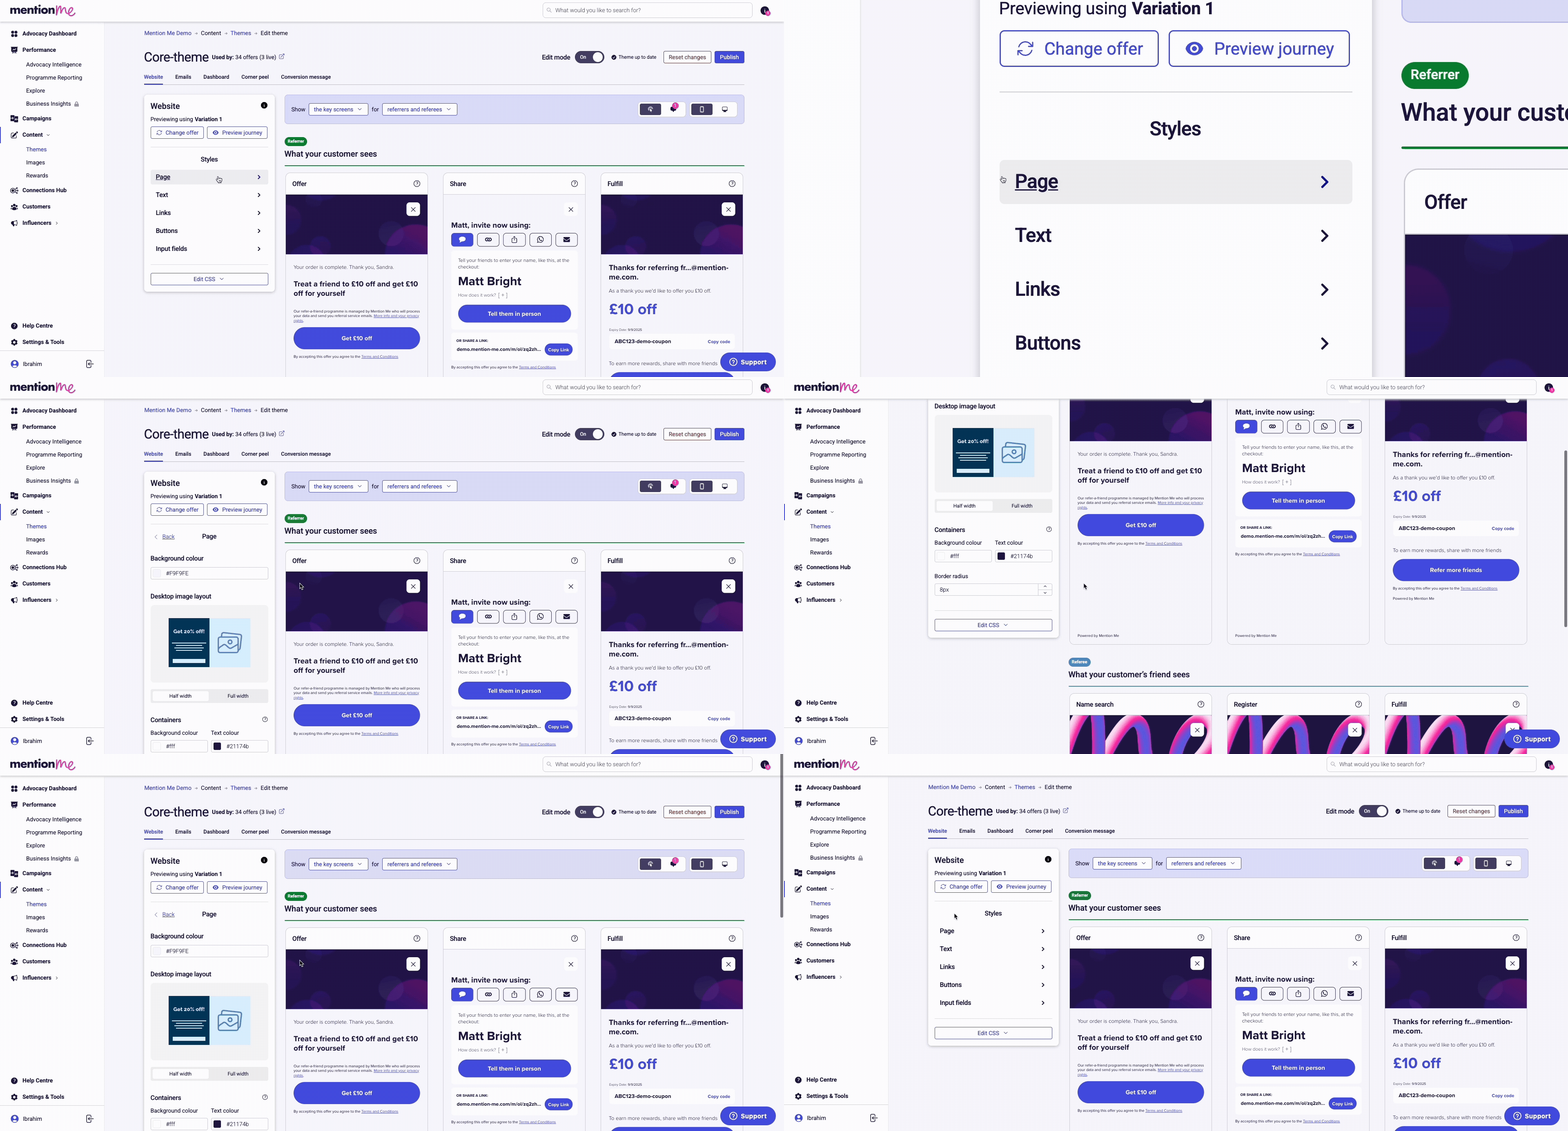
Page and layout styling controls for the background and container of a touchpoint.
Controls the main container or iframe of the selected touchpoint. This most commonly includes background colour styling and master controls which cascade across the touchpoint.
### Text Styling
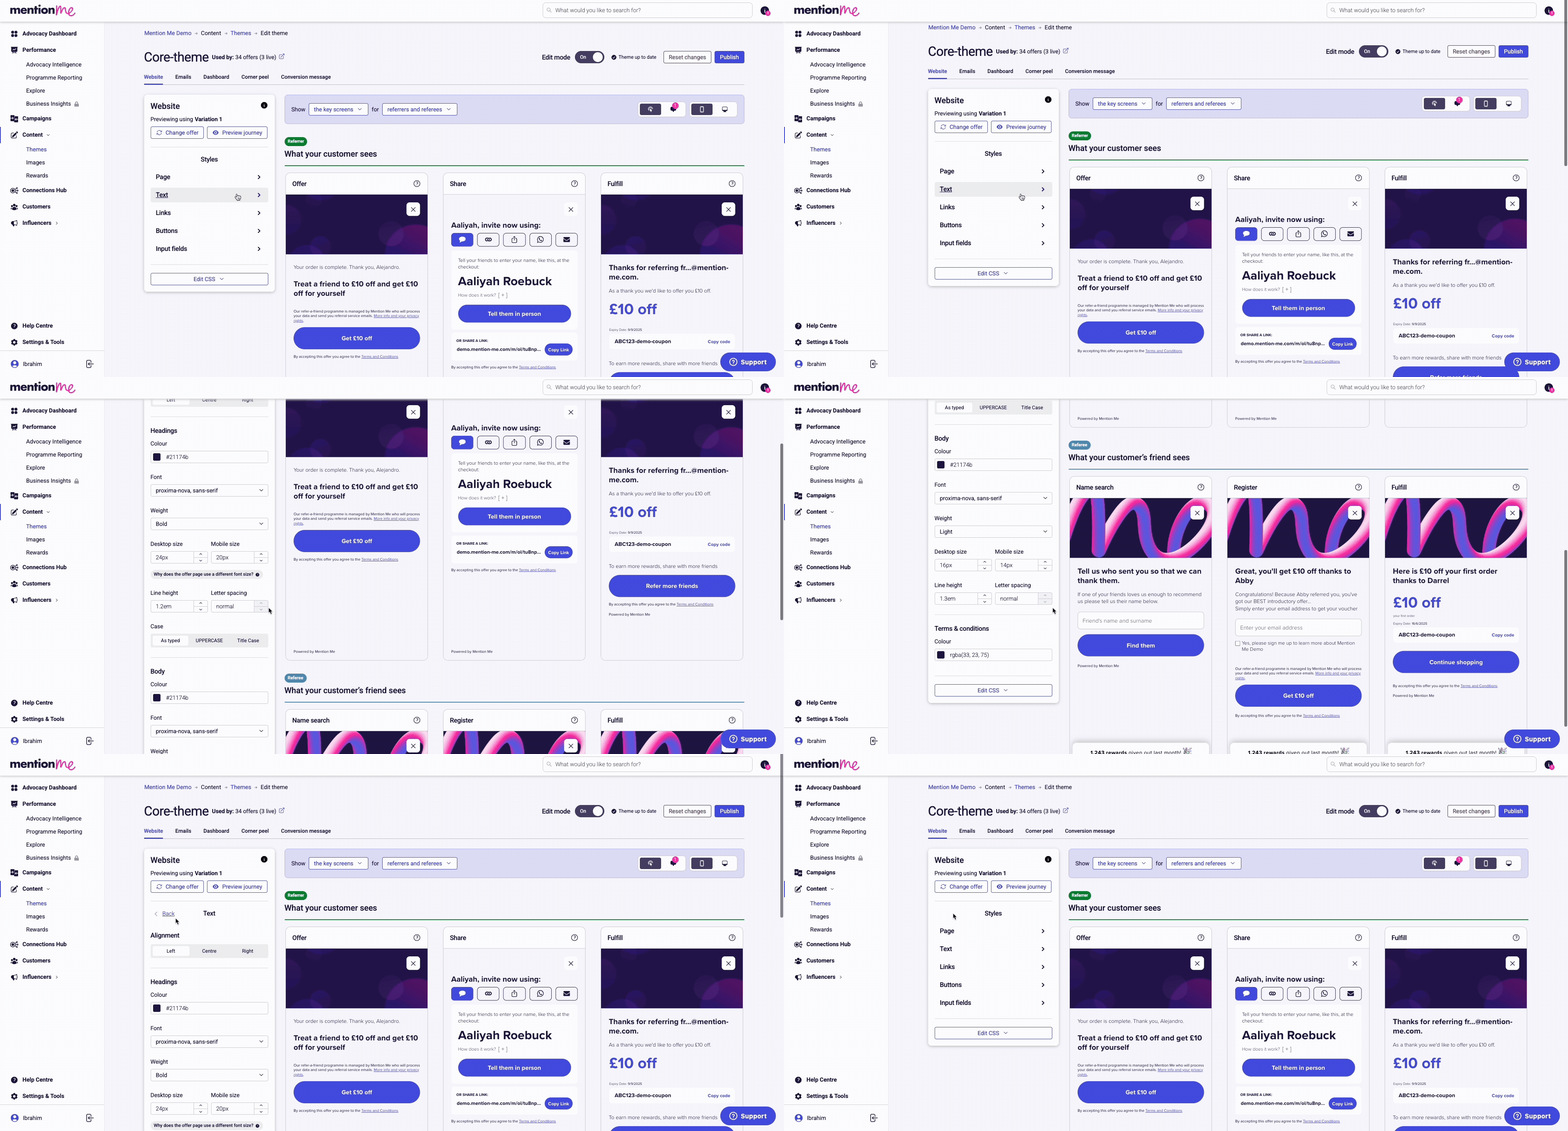
Text styling controls for headings, body copy, and terms and conditions.
Style headings, body copy, and terms and conditions. Where appropriate, you can differentiate between mobile and desktop settings. Terms and conditions inherits most styling and therefore has limited settings.
### Link Styling
Link styling controls for colour and underline settings.
By default, all links are underlined and in a contrasting colour to adhere to accessibility criteria. This can be adjusted to suit your design system.
### Button Styling
Button styling controls for states, types, and width.
All buttons for the touchpoint can be styled here. Switch between button types with the tab menu at the top. Different button states can be styled, and you can adjust how the button width sits in the touchpoint.
### Input Field Styling
Input field styling controls for matching the default state of any brand.
Basic input field styling to match the default state of any brand.
### Custom CSS
The custom CSS editor for adding touchpoint-specific stylesheets.
For further customisation, you can add or edit CSS for all touchpoints on separate stylesheets. We recommend only editing this if you are competent in CSS and LESS CSS, as custom CSS can potentially break parts of your journey.
# Understanding Journey Design
Source: https://docs.mention-me.com/knowledge/referral/design/journey-design
Understand the referral journey design and how it is shaped to optimise conversion and effectiveness.
## Styling
We recommend making the iframe feel like part of your website rather than giving it a separate design treatment. This can include buttons, colours, card styling, border radius, and more.
You can [customise your design theme](/knowledge/referral/design/design-themes) yourself with the theme editor and see changes in real time, or provide us with the information below and we can edit it for you. If you use Optimise, your journey includes a dynamic Trustpilot integration which we can also style for you.
If you've already had a demo created for your brand, we've already considered your site's styling. Otherwise, to get all your touchpoints looking on brand with a consistent look and feel, we need the following information:
| Type | Description | CSS |
| - | - | - |
| Logo | See [image dimensions and file types](/knowledge/referral/design/managing-images) | |
| Header | Font name, font weight, font colour | `font-family: font-weight: color:` |
| Paragraph | Font name, font weight, font colour | `font-family: font-weight: color:` |
| Button | Default colour, default text colour, hover colour, hover text colour | `color:` (x4) |
| Background | Colour | `color:` |
> [!NOTE]
>
> The Mention Me logo cannot be removed from customer journeys. Its inclusion is required for GDPR compliance, as we engage with customers via email and handle their data as part of your referral programme. Conversion rates also tend to improve when customers feel assured the referral programme is an integral part of your brand.
## Golden Rules of Referral
These are the best practices we recommend to maximise your offer's effectiveness when first presented to a customer.
### Call to Action

Call to action design examples showing bold, prominent buttons.
This is the button that progresses your customers to the next step and confirms they want the reward. To make this a successful call to action:
* Big and bold
* The most prominent UI element
* Make sure the main CTA is obvious at every stage
* Perfectly matched to your branding
* Use a colour that contrasts with most UI elements
### Message Hierarchy

Message hierarchy examples showing the offer as the most prominent element.
The offer needs to be the first thing the customer sees and therefore the most prominent message:
* Clear to grasp in 1–2 seconds
* Visually bigger than all other text
* Draws attention to the reward
* Never too long
### Fonts

Font usage examples showing brand-matched typography in the referral journey.
Fonts are a key element of each brand's identity. Your referral design should be completely indistinguishable from your own website.
We recommend using the same headings and body fonts as your site, but we will adjust sizing to improve the message hierarchy in most cases. [Find out more about custom fonts](/knowledge/referral/design/custom-fonts).
### Make Sharing Simple

Simple sharing screen design with clearly differentiated sharing options.
The sharing screen is where customers choose their preferred method of sharing. To make this as simple as possible:
* Simplify and declutter as much as possible
* Ensure customers understand they have different options
* Use a distinct design for active and inactive tabs
## Key Functionality
These features have been proven to improve performance. We are always looking at how to improve conversion in the customer journey.
### Personalised Share Image

A personalised share image with dynamic copy overlaid for the referee's sharing channel.
Personalising the sharing image lets you put dynamic copy on the image that referrers share. This is the image and copy the referee will receive on their sharing channel (for example, Facebook or WhatsApp).
We have seen as high as a 17% increase in purchase rate and a 14% increase in overall referral conversion. See [how to customise the share image and copy](/knowledge/referral/design/share-messages).
### Native Share

Native share functionality shown on a mobile device.
Native share makes sharing easier by allowing referrers to share using any app on their mobile, including Instagram.
We have seen it deliver anywhere from a 5%–15% increase in share rate and overall conversion. See [how to set up Native Share](/knowledge/referral/offers/sharing-methods).
### Social Proof

Social proof displaying the number of rewards given out on referee pages.
Social proof displays the number of rewards given out in the previous calendar month. It appears on several referee pages.
When tested, social proof for the referee has driven a 10%–20% increase in purchase rate. See [how to set up Social Proof](/knowledge/referral/design/social-proof).
### A/B Testing New Functionality
When adopting new functionality, we recommend A/B testing against your current offer to measure effectiveness via conversion data. To request a test, .
## Imagery
One of the most impactful elements on your main referral screens is the imagery, due to its size on desktop and hierarchical order on mobile.
See [image dimensions and how to manage your imagery](/knowledge/referral/design/managing-images).
### Landscape vs. Portrait

Landscape vs portrait image comparison across different touchpoints.
**There is a range of touchpoints with different sizes and one image may not fit all.**
Depending on your brand's offer, you may want to focus on a product or particular section of an image. A portrait image may cut off the focus area on mobile because there's not enough space to scale it down.
Where possible, provide or use an image that covers both landscape and portrait orientations, or a range of images that can be used where appropriate.
### Imagery Themes
#### Simple

Simple imagery theme using a solid colour background for easy text overlay.
The referral journey has limited space with lots of content at every stage. Complex images can cause design problems, so sometimes simple is best.
* Solid colour backgrounds work best as they make it easy to overlay text with contrast
* Identify plenty of clear space in a good position for each screen
* Close up and zoom in
#### Product Focussed

Product-focused imagery theme highlighting desirable items a customer could purchase with their reward.
Showing the customer what they can potentially spend their reward on will help progress their decision making.
* Put the product in focus
* Make it look desirable
* Consider a close-up or detail view
* Don't cover or overlap with other UI elements
#### Social

Social imagery theme using images that evoke friendship and togetherness.
Referral is a social activity, so help people think about their friends. Look for images that hint at doing things together and friendship:
* A photo of two models together
* Two cups of coffee
* Two pairs of shoes side by side
#### Emotional

Emotional imagery theme using positive facial expressions to inspire feeling.
Make people feel something positive when they look at the visual. Inspire positive emotions like amazement, awe, intrigue, amusement, and determination. People's facial expressions help bring emotions to design:
* Smile kindly
* Laugh
* Looking down the lens
#### Illustrated

Illustrated imagery theme integrating brand illustrations in place of photography.
You don't need photos for a well-designed referral journey. If illustrations are part of your brand language, you can integrate them in your designs. When using minimal imagery, typography plays a very important role — ensure the fonts have a strong presence.
### Graphics and Additional Information

Examples of graphics and additional information overlaid on referral screens.
Graphics can add an extra layer of incentive via reassurance or social proof:
* Show a positive review
* Add the potential gift cards they can receive
* Insert branded elements for coherence
* Illustrated examples of the offer
Mention Me is unable to create, add, or resize graphics on artwork, or create animations or GIFs.
## Touchpoints
There are several touchpoints where your customers will come across your offer, each with their own levels of customisation.
### Referrer and Referee Screens

Half panel and full width design options for referrer and referee screens on desktop.
These are the main screens where offers, sign-ups, and rewarding take place. On desktop, choose between a half panel or full width design.
**Half Panel** — The image takes up 50% of the referral screens. A portrait image works best for this.
**Full Width** — The text sits on top of the image and to one side. A landscape image works best, but the focus of the image must be to one side.
#### Information Notice (Privacy Notice)

Information notice placement on referral screens, shown before the action button.
The purpose of an information notice is to make consumers aware of how their data is being used. This is a key privacy law requirement across the UK and European territories, and is increasingly becoming a requirement in other territories such as the US.
This information notice provides a link to our privacy policy and tells consumers how we use their data acting as your data processor.
The order of information is deliberate: the customer is aware of what they are agreeing to before clicking the button. This is our interpretation of the requirements under GDPR; you should speak with your own legal team if you have any questions about this privacy notice.
#### Newsletter Opt-in Checkbox
A newsletter opt-in checkbox cannot be added to the referrer registration page. This isn't a legal restriction: it comes down to the page's template and layout, which don't have room for an extra element without harming the design and the customer's experience.
The referrer registration page is also shown to existing customers who have already made a purchase. These customers may already have been given the chance to opt into your newsletter during an earlier interaction with your brand. Leaving the checkbox off this page keeps the experience focused, so customers aren't shown newsletter sign-up messaging more than once.
### Iframe

Iframe dimensions for referrer and referee screens on desktop.
The container all Mention Me content sits in is called the *iframe*. This is a fixed size based on desktop browsing and differs slightly between the Referrer and Referee screens. The mobile iframe is responsive across all compatible devices.
### Mobile

Mobile design showing a short image height to keep content above the fold.
The mobile image is kept short in height to increase the likelihood of content appearing above the fold on all mobile devices. This is important for user experience, as no dwell time is lost scrolling.
### Corner Peel
The corner peel sits in the corner of your website and is used to trigger the referral pop-up.
#### Flexibility

Corner peel with a block colour background for high contrast and clear message hierarchy.
The default structure of the corner peel contains the optimal message hierarchy to increase conversion. For high contrast, a block colour background is recommended.
#### Position

Corner peel shown in different positions on the screen.
The corner peel can be positioned anywhere on the screen. This helps avoid overlap with other tools or marketing prompts.
#### Size

Corner peel size options for adjusting prominence and canvas size.
You can change the size of your corner peel to better suit your needs — to improve prominence on the page or to allow for a more branded look and feel via a bigger canvas.
### Dashboard

The referral dashboard in carded format for tracking shares and rewards.
The dashboard allows you to share your referral, track successful referrals, and track the rewards you've earned. It's styled in a carded format, so you can easily match your site's styling using the [theme editor](/knowledge/referral/design/design-themes).
### Email

Email design format used across referrer and referee journey emails.
We send emails at key stages of the customer journey to maximise the potential of both the referrer and referee journeys. The emails follow a simple, effective format. The structure is fixed: imagery, sections, and buttons cannot be moved from their default positions.
Depending on your journey, you can have different images per email or choose to have none at all. We use a design that is compatible with most email clients. See [our email client support](/knowledge/admin/browser-support).
#### Share by Email and Forwarded Email

Share by Email and Forwarded Email in plain text format, mimicking a message sent from a mobile device.
The Share by Email and Forwarded emails are designed to mimic a message sent from a customer's native device. **These emails are in plain text format and cannot be styled.**
> [!NOTE]
>
> Mention Me does not support adding or editing custom CSS for email client-specific rendering issues (such as Outlook). Email display differences across clients cannot be resolved through custom CSS updates.
# How to Manage Your Referral Campaign Copy
Source: https://docs.mention-me.com/knowledge/referral/design/managing-copy
Edit your referral campaign copy, leave comments for the Mention Me team, find and fix hardcoded placeholders, and request copy changes.
A guided walkthrough of updating your referral campaign copy in the Mention Me platform.
## How Your Copy Is Structured
Your campaign copy is built from four layers. Knowing how they fit together lets you edit once and keep the whole journey consistent.
### Content Holders
All copy lives in content holders. One content holder can be used at several stages of the referral journey, so the same wording shows wherever it's needed and you only edit it once.
### Personalised and Generic Copy
Some content holders let you personalise the text with the customer's name. You'll see this most at the post-purchase stage, where the customer has just checked out with their details. On a landing page, where someone might be registering for the first time, their name isn't known, so the generic version shows instead.
### Placeholders
Placeholders hold key information like reward values, dates and your brand name. They're dynamic, so the same value stays consistent across the whole referral flow. Use them wherever you can.
* Placeholders with a pencil icon next to them can be edited. Change one and every other instance updates automatically.
* Reward value and date placeholders come from your reward setup and can't be edited by hand. To change them, set up a new reward.
### Hardcoding
Hardcoding means removing the placeholders and typing the values in freehand. Avoid it: hardcoded copy won't update when your offer changes, which can affect upcoming offers built from the current one.
## Editing Your Offer Copy
> [accordion] See each step in detail
>
> **1. Select Your Campaign**
>
> In the left-hand menu, click **Campaigns**, then select the campaign you want to update. You can create a draft to edit copy without affecting your live experience, or make changes directly to the live experience.
>
> **2. Open the Editor**
>
> To change the live version straight away, click **Preview / Edit**. To work on a draft first, open **Drafts, Upcoming & History**, open the actions menu (three dots) on the live experience and choose **Duplicate to draft**, then click **View and edit** on your draft.
>
> 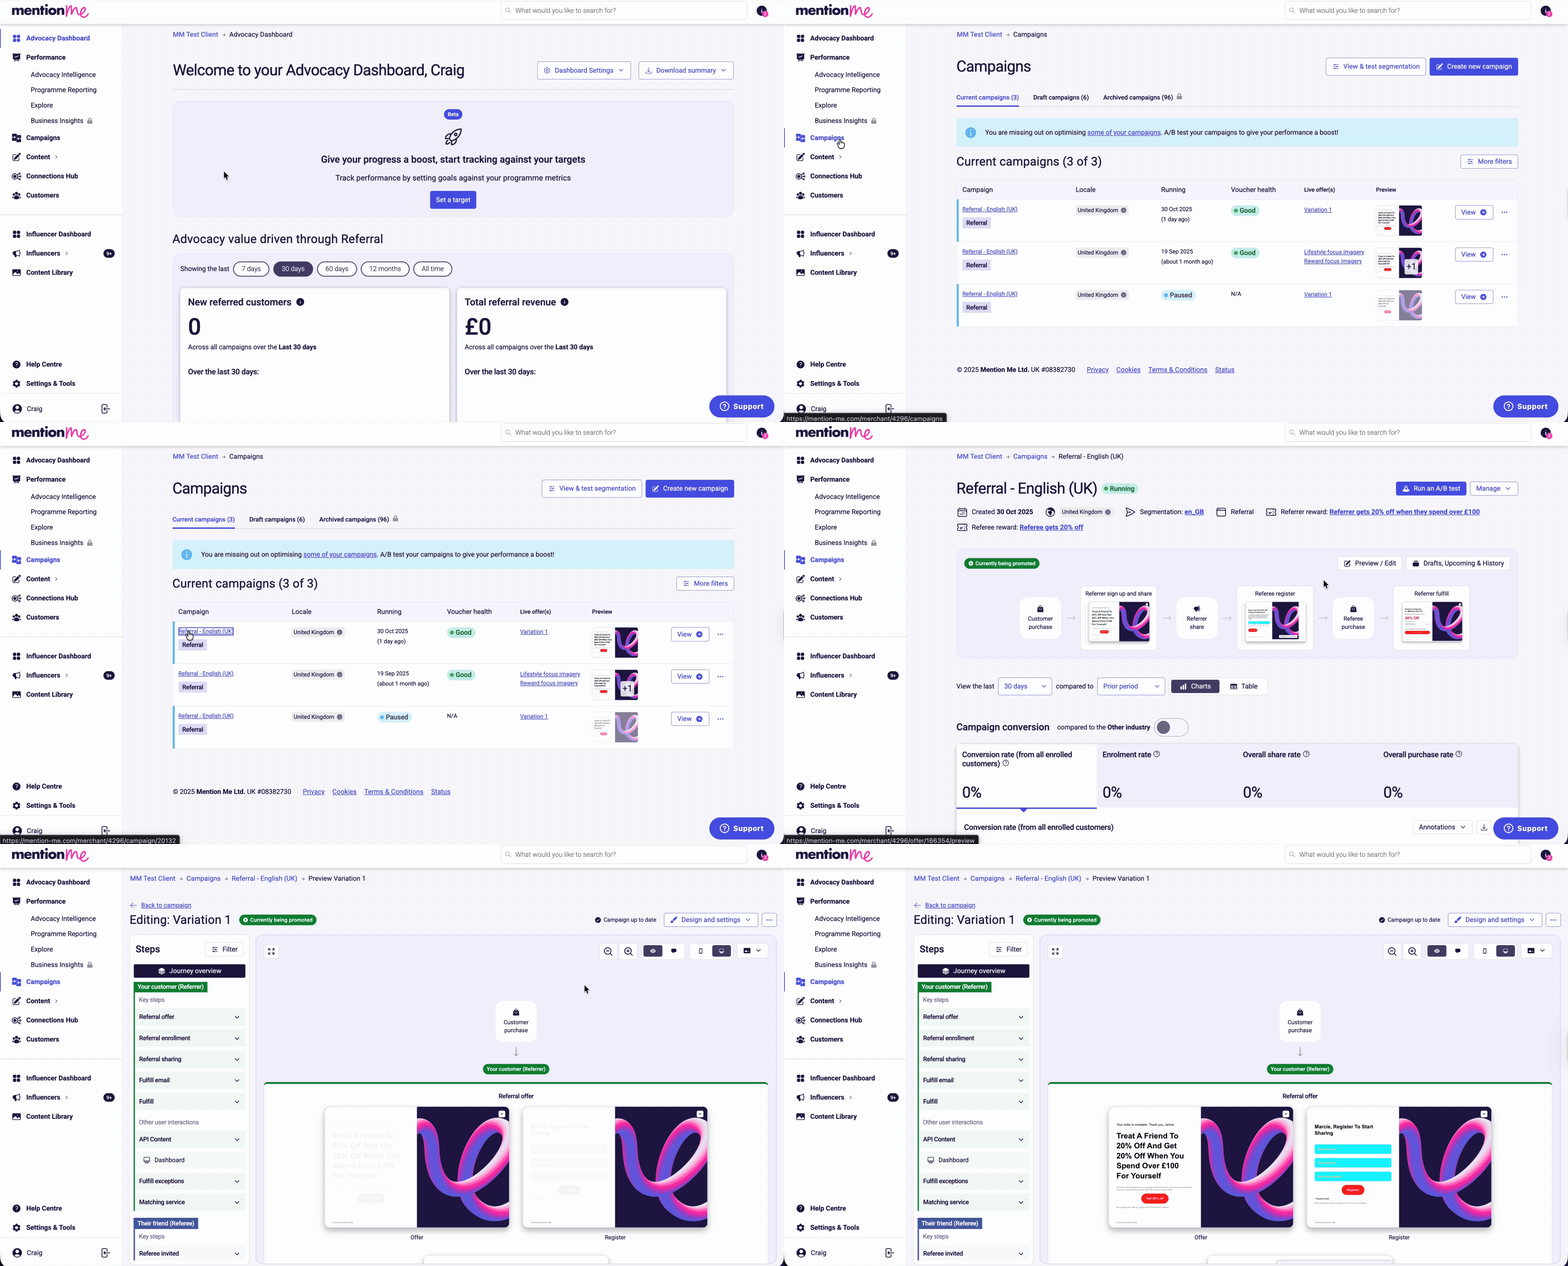
>
> Clicking Preview / Edit on the live experience.
>
> 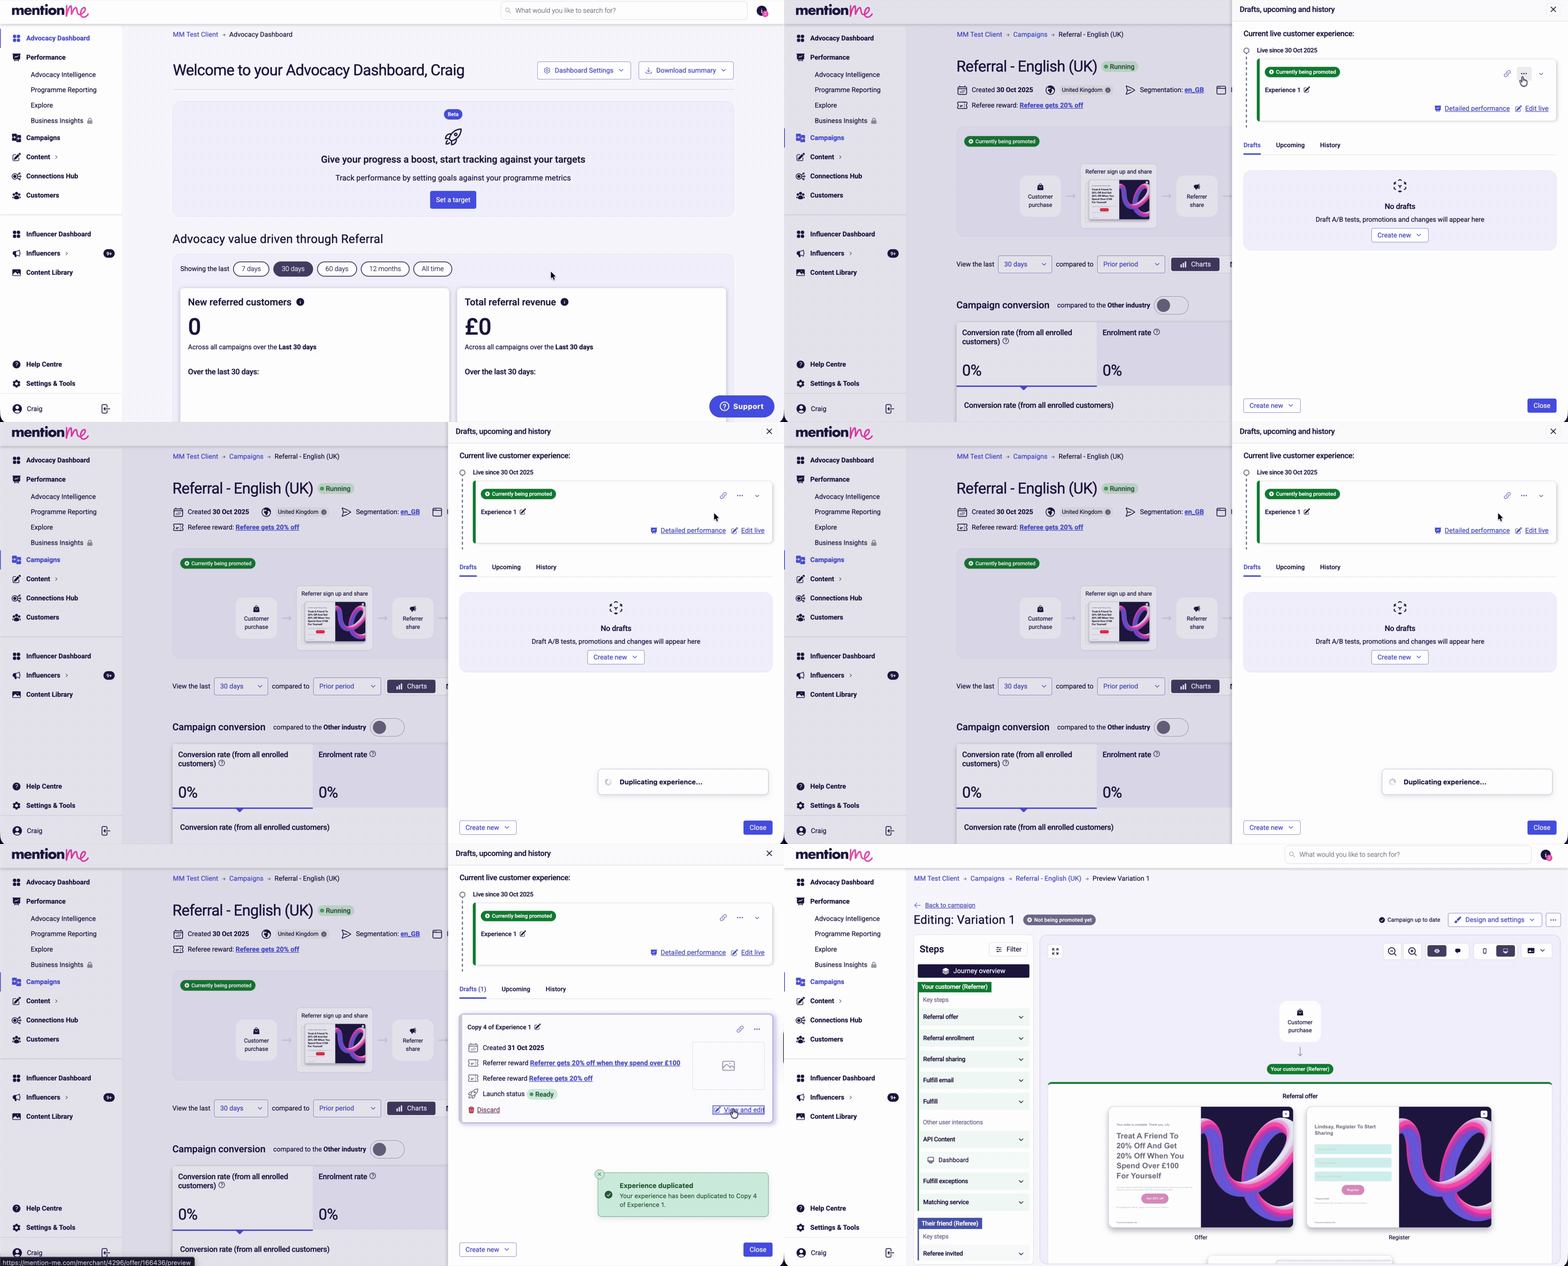
>
> Duplicating to draft and clicking View and edit.
>
> **3. Choose Your Editing Mode**
>
> Use the device icons to switch between desktop and mobile. The **Steps** panel on the left lists every page in the journey: for example, open **Referral offer**, then click **Offer**.
>
> **4. Edit the Copy**
>
> Turn on **Edit text**, then click the text you want to change. An edit panel opens.
>
> Blue tokens are placeholders, like the reward offer in the headline. You can replace them with your own text, but placeholders are recommended: when your offer changes, values like reward amounts and expiry dates update across the journey automatically. Change the words around them, and drag in more placeholders from the list if you need them.
>
> Where the panel says you can use HTML tags, you can add simple HTML, like bold text or links. Anywhere HTML isn't accepted, it's removed automatically. Update the **Generic** tab too, which shows when the customer's name isn't known.
>
> **5. Save Your Changes**
>
> Click **Save and preview** to see the change.
>
> If you're editing the live version, the edit panel warns you that changes show to customers straight away. The first time you edit live, a pop-up appears too: click **Edit and don't show again** to carry on.
>
> 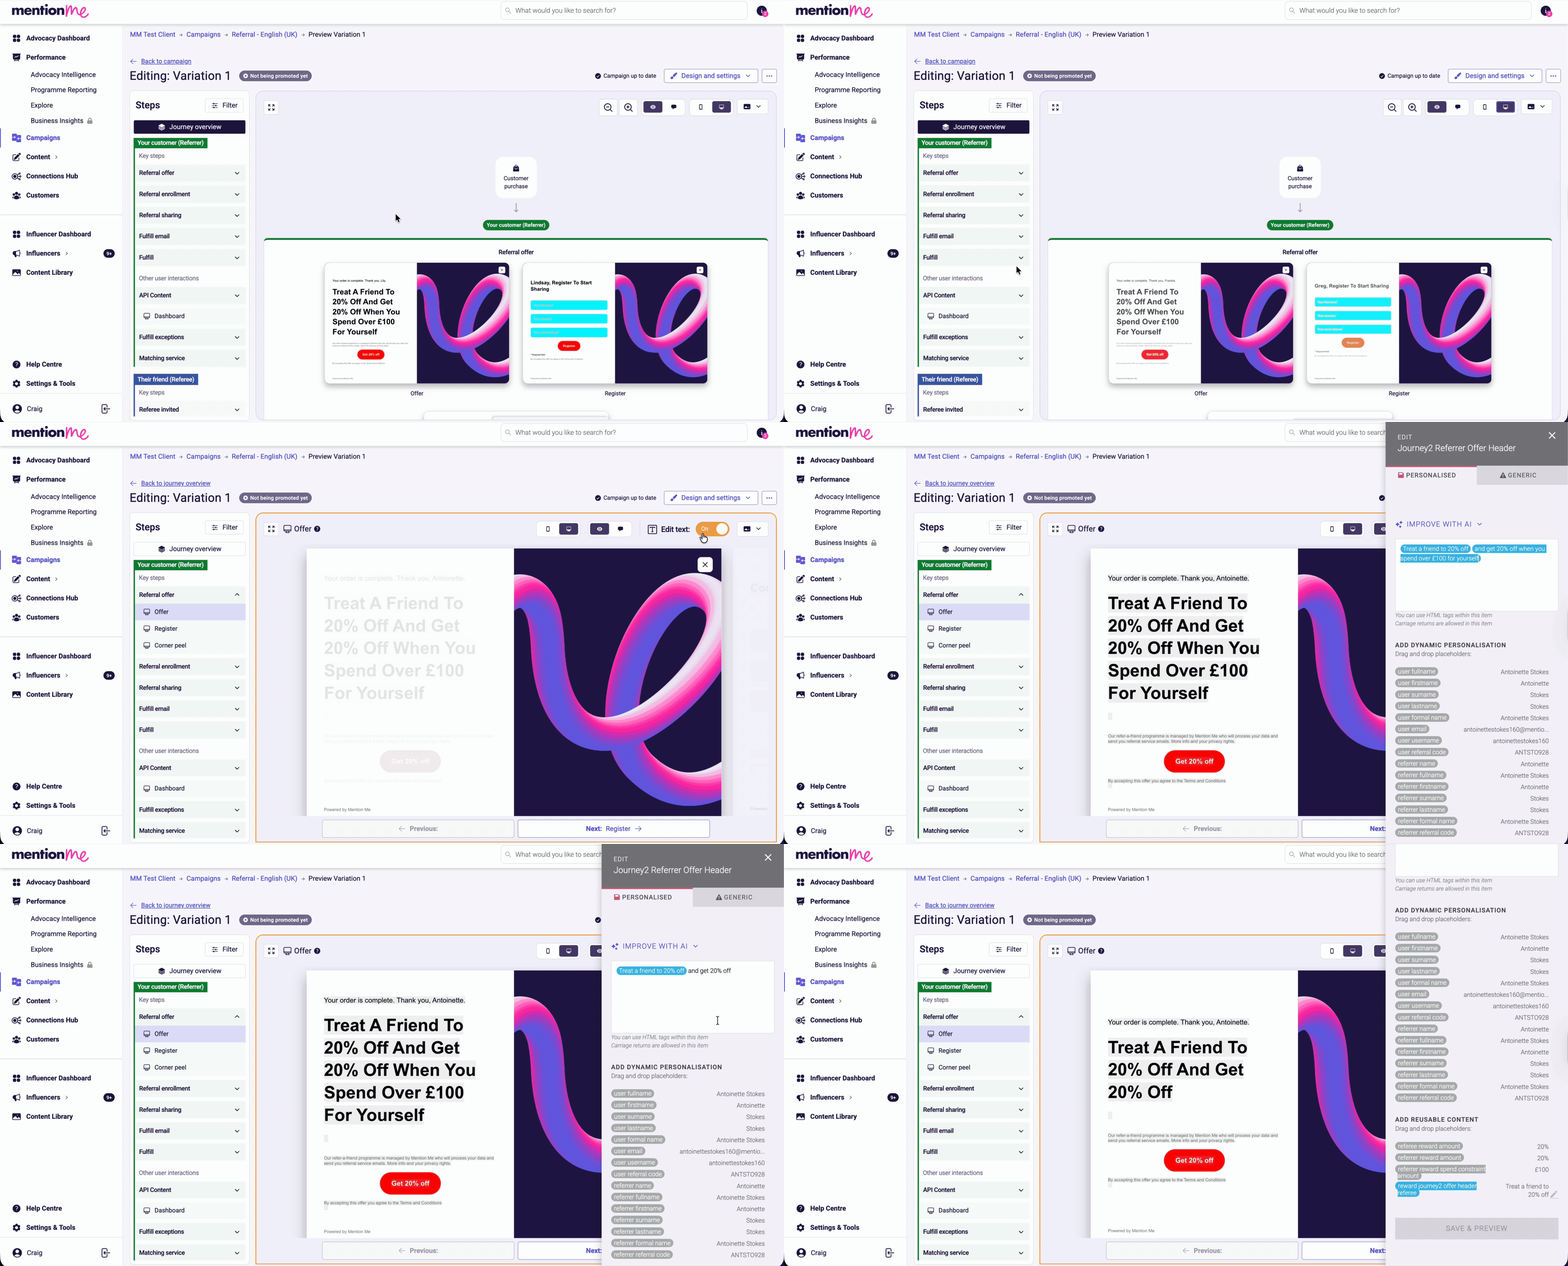
>
> Editing text with the Edit text mode toggle and dynamic placeholders.
> [!WARNING]
>
> Avoid editing placeholder labels (blue tokens) as this modifies all shared instances.

Dynamic personalisation and reusable content placeholders.
If **Edit text** mode is not available (for example, if the offer is not shareable or the campaign is paused), add `/edit` to the end of the preview URL manually. For example: `https://mention-me.com/merchant/4544/offer/113436/preview/edit?device=mobile`
## Leaving Comments for Content You Can't Edit
Some content is not editable in the front end. In those cases, leave a comment directly on the preview page.
> [!NOTE]
>
> The "Been referred by a friend?" referee link is one example of this - its copy can't be edited directly in the offer preview. To change the wording, contact the Mention Me support team.
> [accordion] See each step in detail
>
> **1. Enter Comment Mode**
>
> Turn **Edit text** off and switch to **Comment mode** at the top of the Preview page.
>
> **2. Place Your Comment**
>
> Click where the change is needed to place a comment pin, type your note, and click **Save**. You can move or delete comment pins at any time.
>
> 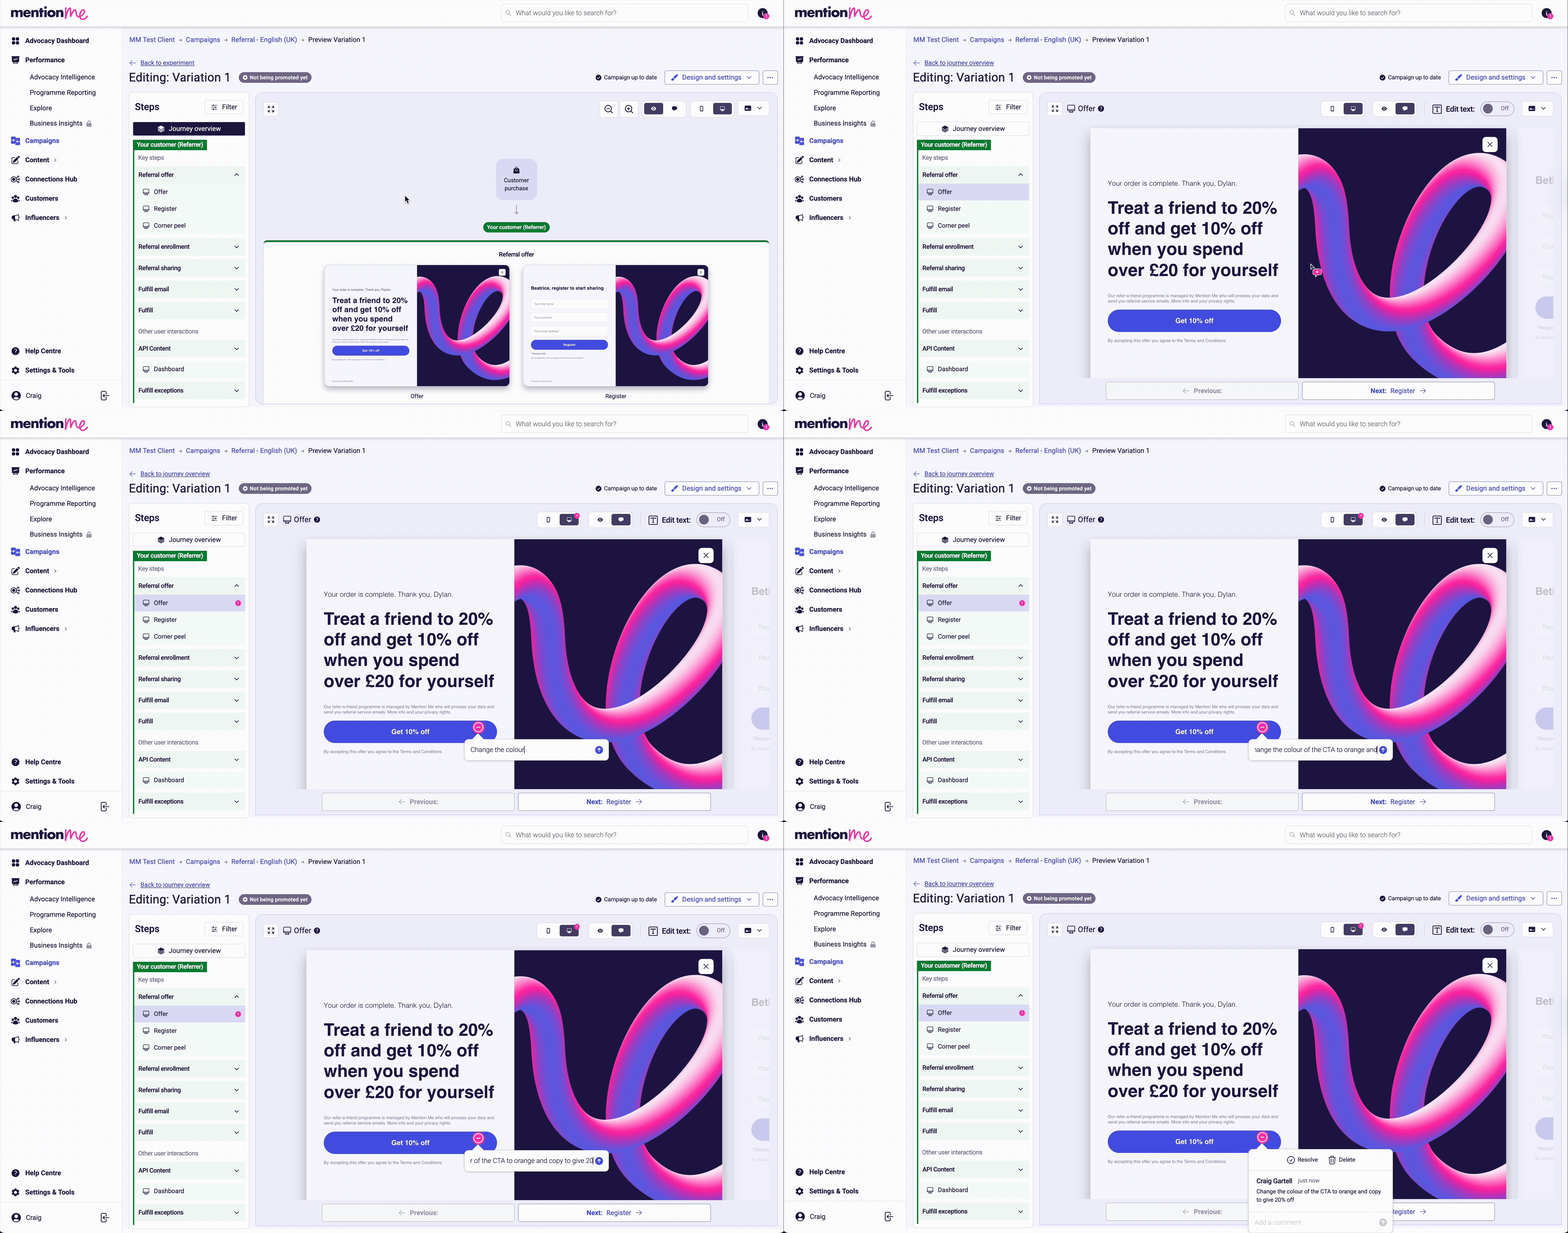
>
> Leaving a comment in comment mode on the preview page.
>
> Your comment will automatically be sent to Mention Me Support for review. You'll receive an email notification when it is resolved or replied to.
## Pages with the Highest Impact on Conversion
The following pages are editable and have the greatest effect on referral conversion:
* **Referrer - Offer page:** The first view after purchase, which encourages sharing.
* **Referrer - Sharing screen:** Controls the share message text seen by others.
* **Referee - Registration page:** The first brand interaction for new customers.

Referrer offer page and sharing screen with editable copy.
Referrer emails - **Share by email** and **Forwarded email** - share the same copy.

Forwarded email copy showing subject line and snippet.
The **Share by email** message follows the same pattern:

Share by email referral message copy.

Referee registration page with editable copy.
> [!TIP]
>
> Write copy that sounds like it's from one friend to another: authentic and simple.
## Using HTML in Copy
You can use HTML where enabled, such as on Terms & Conditions pages. Look for areas labelled "You can use HTML tags within this item".

HTML editing in terms and conditions with highlighted editable areas.
A full list of available HTML tags is available at [w3schools.com](https://www.w3schools.com/html/default.asp).
## Finding and Fixing Hardcoded Placeholders
Sometimes reward values such as "\$50" get [hardcoded](#hardcoding) instead of using dynamic placeholders. To find and fix these:
* Duplicate an existing offer and use text editing mode to locate and replace outdated references.
* Use Command+F (or Ctrl+F) to search for legacy reward amounts in preview screens.
* Replace static text with the appropriate dynamic content items to future-proof your campaigns.
If you have questions, contact the Support or On-Demand team via the [request form](https://mention-me.zendesk.com/hc/en-gb/requests/new?ticket_form_id=5268418076701).
## Requesting a Copy Change
We always recommend customising generic copy in-house to align with your brand's tone of voice using the steps above. If you need help, you can request a copy change in two ways:
1. **Use the comments tool** - leave a comment directly on the offer preview as described above.
2. **Fill in our dedicated form** - select the **Help** button in the bottom right corner of your dashboard, or visit the [request form](https://mention-me.zendesk.com/hc/en-gb/requests/new?ticket_form_id=5268418076701).
> [!NOTE]
>
> The form accepts up to five attachments. For additional files, include a Google Drive link in your submission.
## Need Help?
Start a conversation with the in-platform Support widget in the bottom-right corner of your dashboard - it can usually answer this straight away. If it can't, raise a request via the [request form](https://mention-me.zendesk.com/hc/en-gb/requests/new?ticket_form_id=5268418076701).

The in-platform Support widget starting an AI-assisted conversation.
# Managing Images
Source: https://docs.mention-me.com/knowledge/referral/design/managing-images
Image dimensions, uploading imagery across single or multiple offers, and managing your image library.
## Image Dimensions
There are two designs available - Half panel and Full width - which require different sized imagery. Consider the contrast of text when using a Full width design as this can impact conversion and accessibility.
When uploading/changing an image, you can find the recommended dimensions beneath each button.
### Half Panel Design
| Journey | Touchpoint | Width | Height | Filetypes | File Size |
| - | - | - | - | - | - |
| All | Mobile | 1080px | 455px | .jpeg, .png, .gif | \< 5mb |
| All | Email | 1200px | 800px | .jpeg, .png, .gif | \< 5mb |
| Referrer | Website | 960px | 1260px | .jpeg, .png, .gif | \< 5mb |
| Referee | Website | 846px | 1194px | .jpeg, .png, .gif | \< 5mb |
| Referee | Invited by link | 1200px | 630px | .jpeg, .png, .gif | 250kb max |
### Full Width Design
| Journey | Touchpoint | Width | Height | Filetypes | File Size |
| - | - | - | - | - | - |
| All | Mobile | 1080px | 455px | .jpeg, .png, .gif | \< 5mb |
| All | Email | 1200px | 800px | .jpeg, .png, .gif | \< 5mb |
| Referrer | Website | 1920px | 1260px | .jpeg, .png, .gif | \< 5mb |
| Referee | Website | 1692px | 1194px | .jpeg, .png, .gif | \< 5mb |
| Referee | Invited by link | 1200px | 630px | .jpeg, .png, .gif | 250kb max |
### Miscellaneous
| Journey | Touchpoint | Width | Height | Filetypes | File Size |
| - | - | - | - | - | - |
| All | Logo | 556px | 223px | .jpeg, .png | \< 5mb |
| All | Social media | 1600px | 800px | .jpeg, .png | \< 5mb |
> [!NOTE]
>
> Each social network crops social media images differently. Keep anything important out of the left-most and right-most 160px of the image so it can be cropped without losing anything.
> [!TIP]
>
> Use exact dimensions for any images with graphics to ensure the journey looks as expected.
### Image Editing
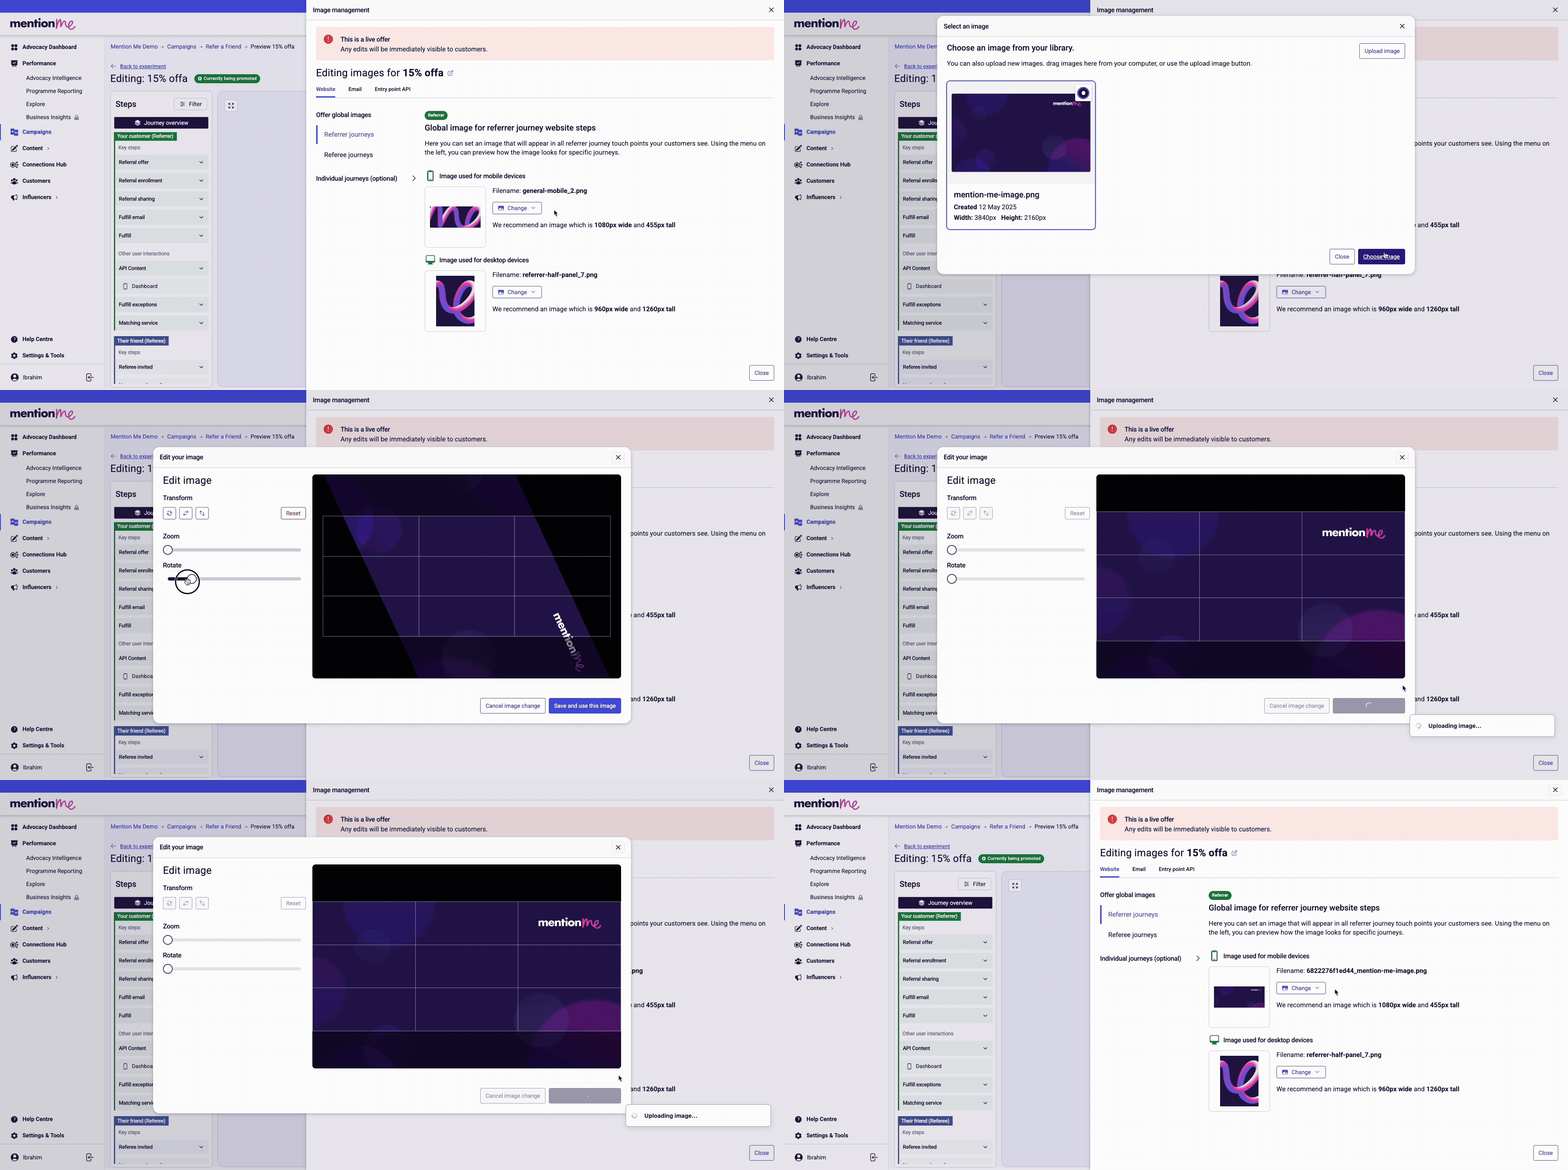
Image editing tools showing zoom, rotate, and drag to crop.
If you don't have the exact size, the platform allows you to **zoom, rotate**, and **drag** to crop the particular section of the image you want.
## Uploading Images
You can upload imagery from two different places, both with the same functionality. You can upload new imagery or select from your image library which contains images you have used in the past.
The platform accepts `.jpeg`, `.png`, and `.gif` files. We recommend file sizes less than 5mb.
### From the Offer Preview
**1. Open the offer preview**
Open the preview page for the offer you want to change/upload to.
**2. Open image management**
Click the **Manage images** button in the top right and select **For this offer**.
**3. Upload your image**
Click the **Change** button on your selected touchpoint, then select **Upload new image** and choose an image from your device.
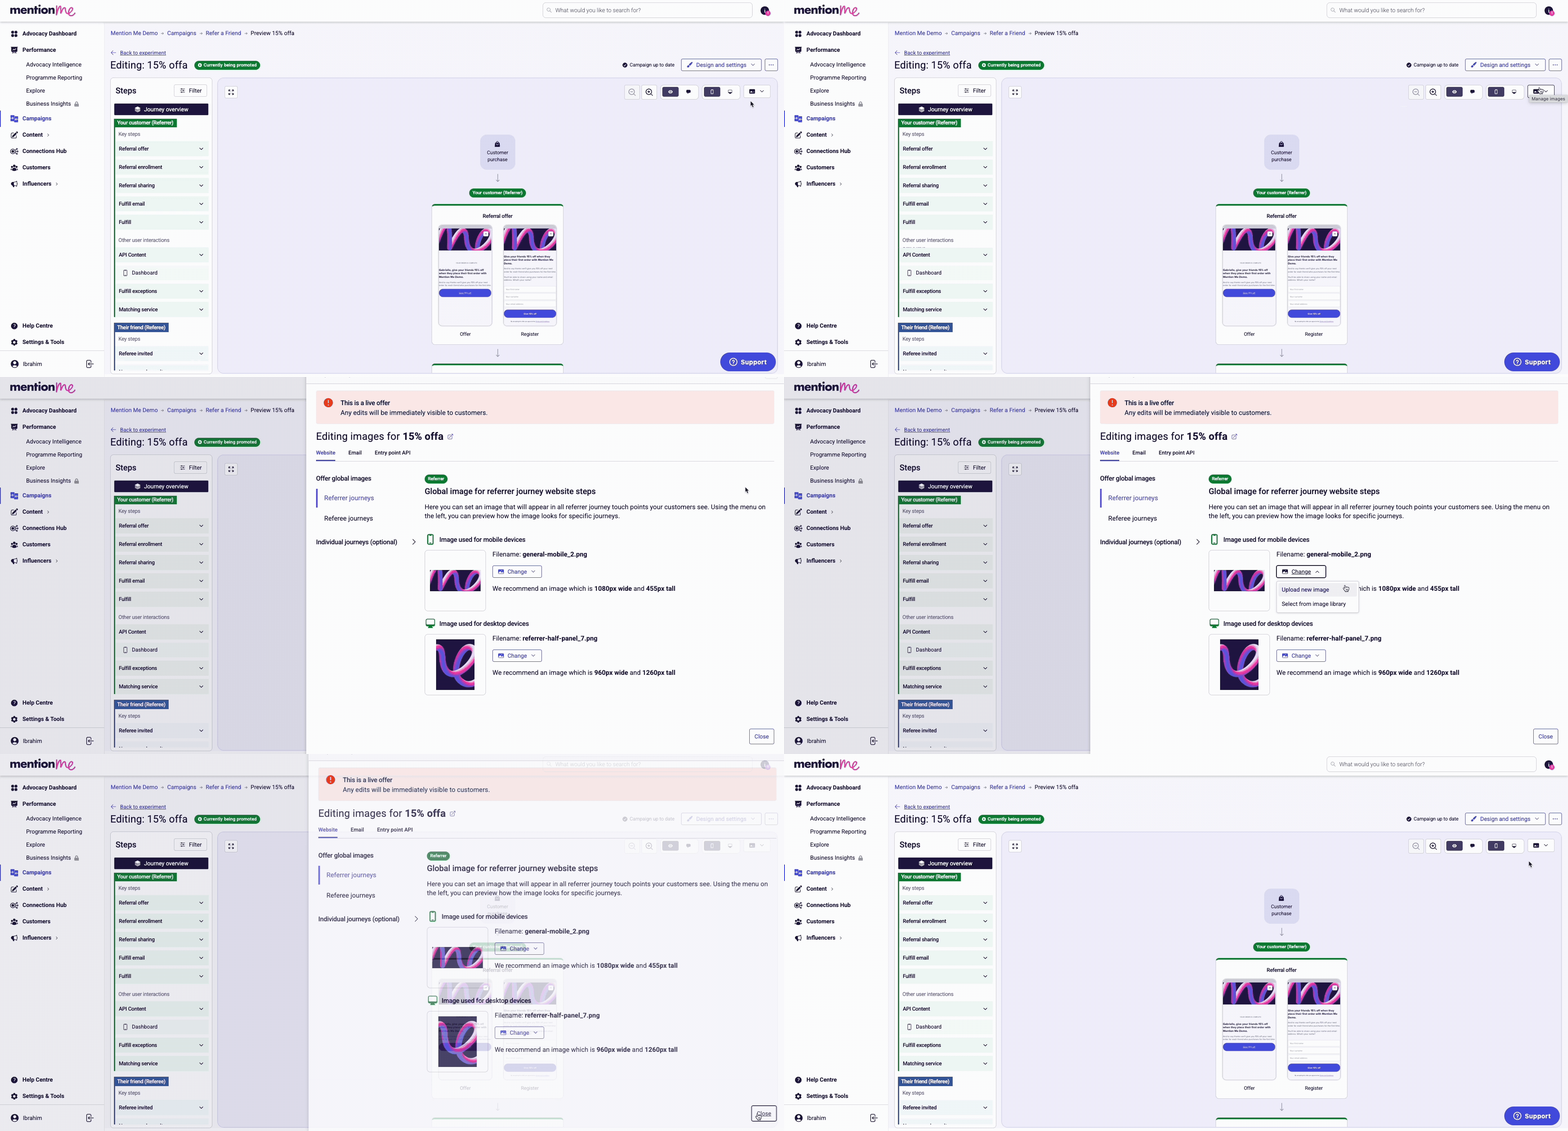
Uploading images from the offer preview page.
### From the Image Library
**1. Navigate to image library**
In the left hand side menu, navigate to **Content > Images**.
**2. Upload your image**
Click the **Upload Images** button in the top right and select an image from your device.
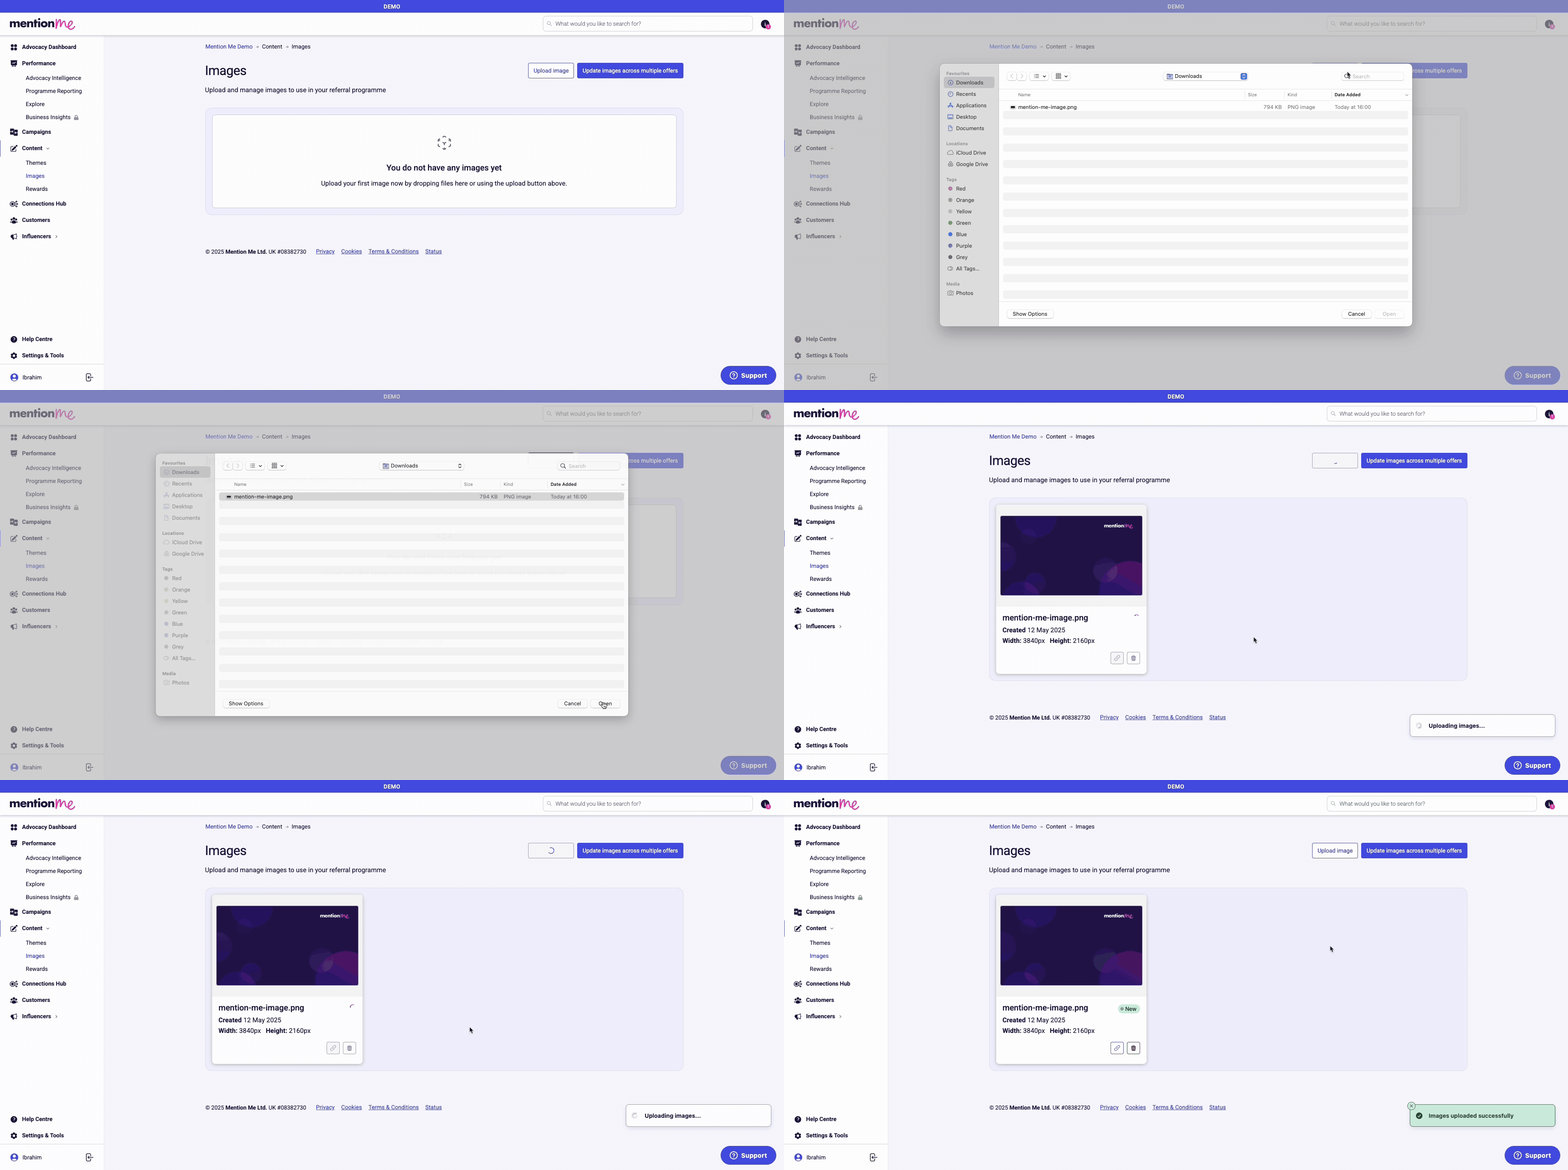
Uploading images from the image library via the Content menu.
### Across Multiple Offers
Changing/uploading imagery across multiple offers follows the same process as a single offer. The only difference is that you click the multiple offers option and select the offers you want to change.
**1. Navigate to images**
In the left hand side menu, navigate to **Content > Images**.
**2. Select multiple offers**
Click the **Update images across multiple offers** button in the top right. Select the offer type from the right hand side dropdown, then select the campaigns from the left hand side dropdown.
**3. Apply changes**
Tick the offers from the list shown and click the **Manage images** button in the bottom right.
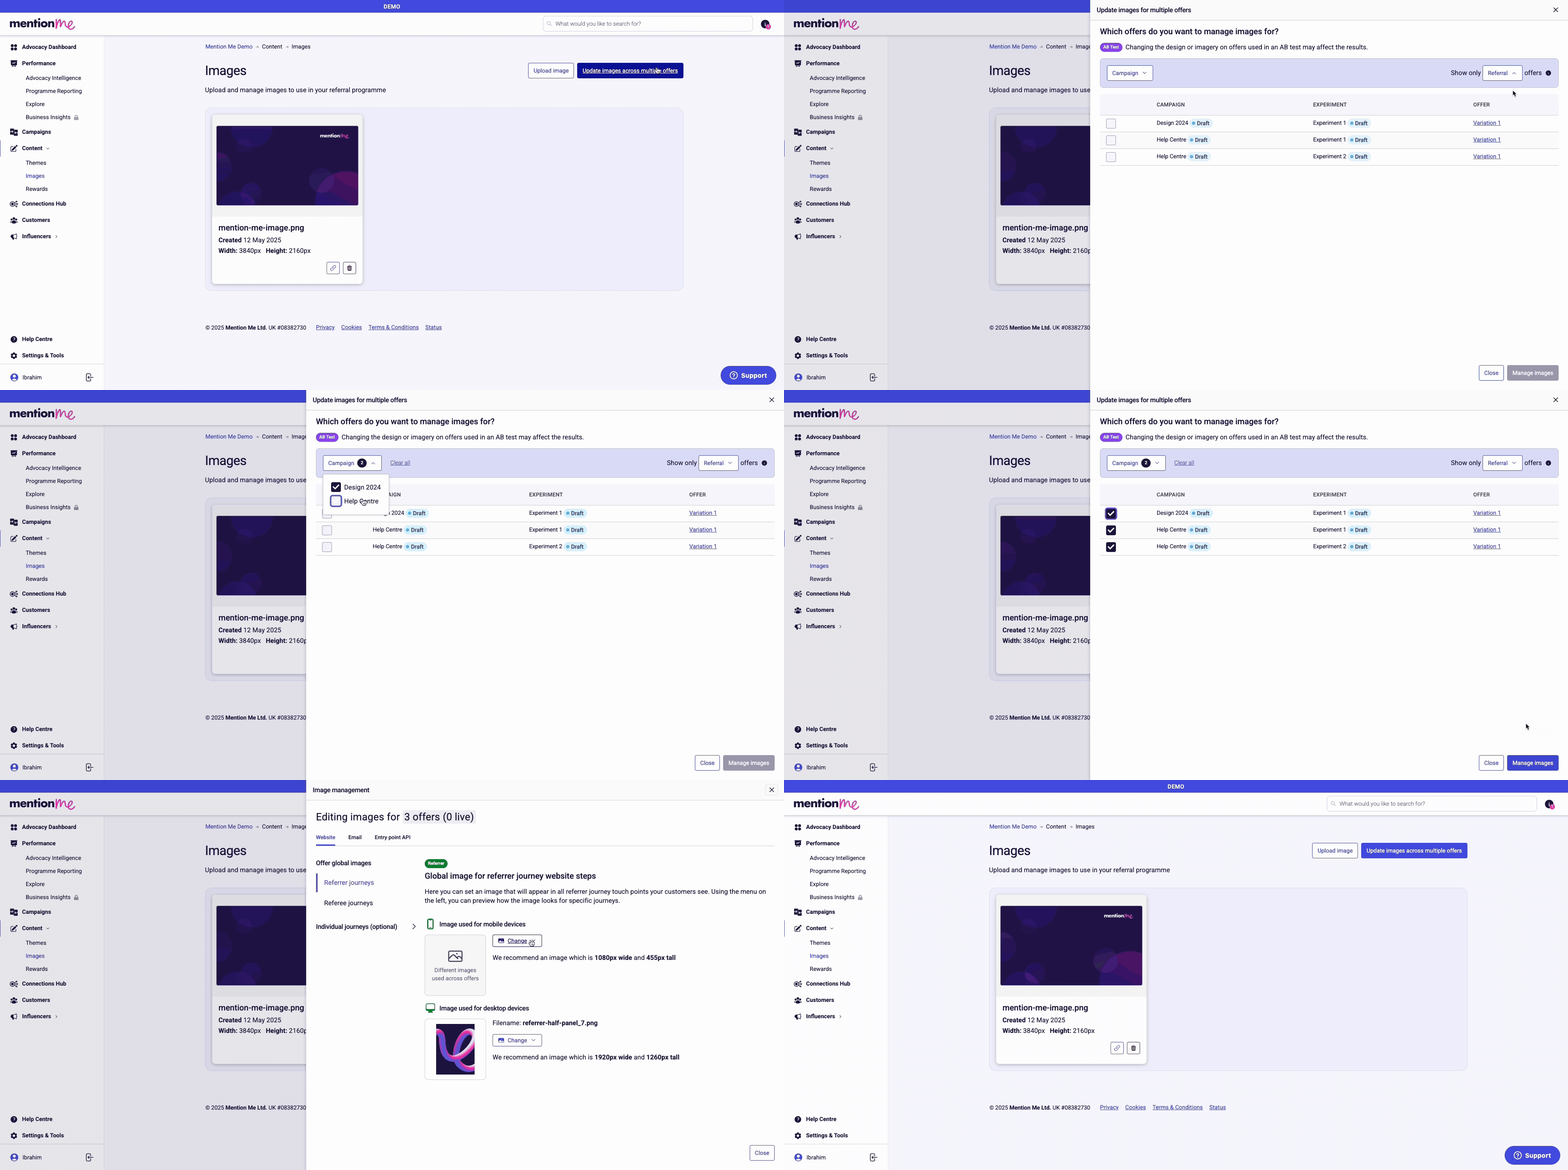
Updating images across multiple offers at once.
> [!NOTE]
>
> You can only bulk update imagery for offers of the same type (e.g. Referral, Drive Action, or NPS survey). To update all imagery, do one type at a time.
### Exceptions
The **Referee Invited by link** needs to be updated from the offer preview for each offer. The image uploader tool cannot be used for this specific part of the platform at this time.
Follow [How to Edit Share Messages](/knowledge/referral/design/share-messages) to edit the Referee Invited by link (Personalised Share Image & Copy).
### Global and Individual Journey Images

Global and individual journey image settings.
Website imagery is split between **global images** and **individual journeys** (optional). Global imagery shares the image across all screens for the referrer and all screens for the referee.
Individual journeys break up the screens into more granular journeys so the customer can see alternative imagery depending on what stage they are on:
| Referrer Sign Up | Referrer Fulfil | Referrer Duplicate Match | Referee Search | Referee Fulfill |
| - | - | - | - | - |
| Offer, Register, Share | Fulfill | Match enter email, Match retry email, Match success, Match support, Match support submitted | Name search, Name search duplicate, Name search no match, Register, Existing customers, Referring self | Fulfill, Fulfill fail |
> [!TIP]
>
> We recommend changing the image on the Referrer Fulfill and Referee Fulfill screens as an A/B test to drive conversion. You can [submit an A/B test request](https://help.mention-me.com/hc/en-gb/requests/new?ticket_form_id=5268134356509).
## Managing Your Image Library
### Where
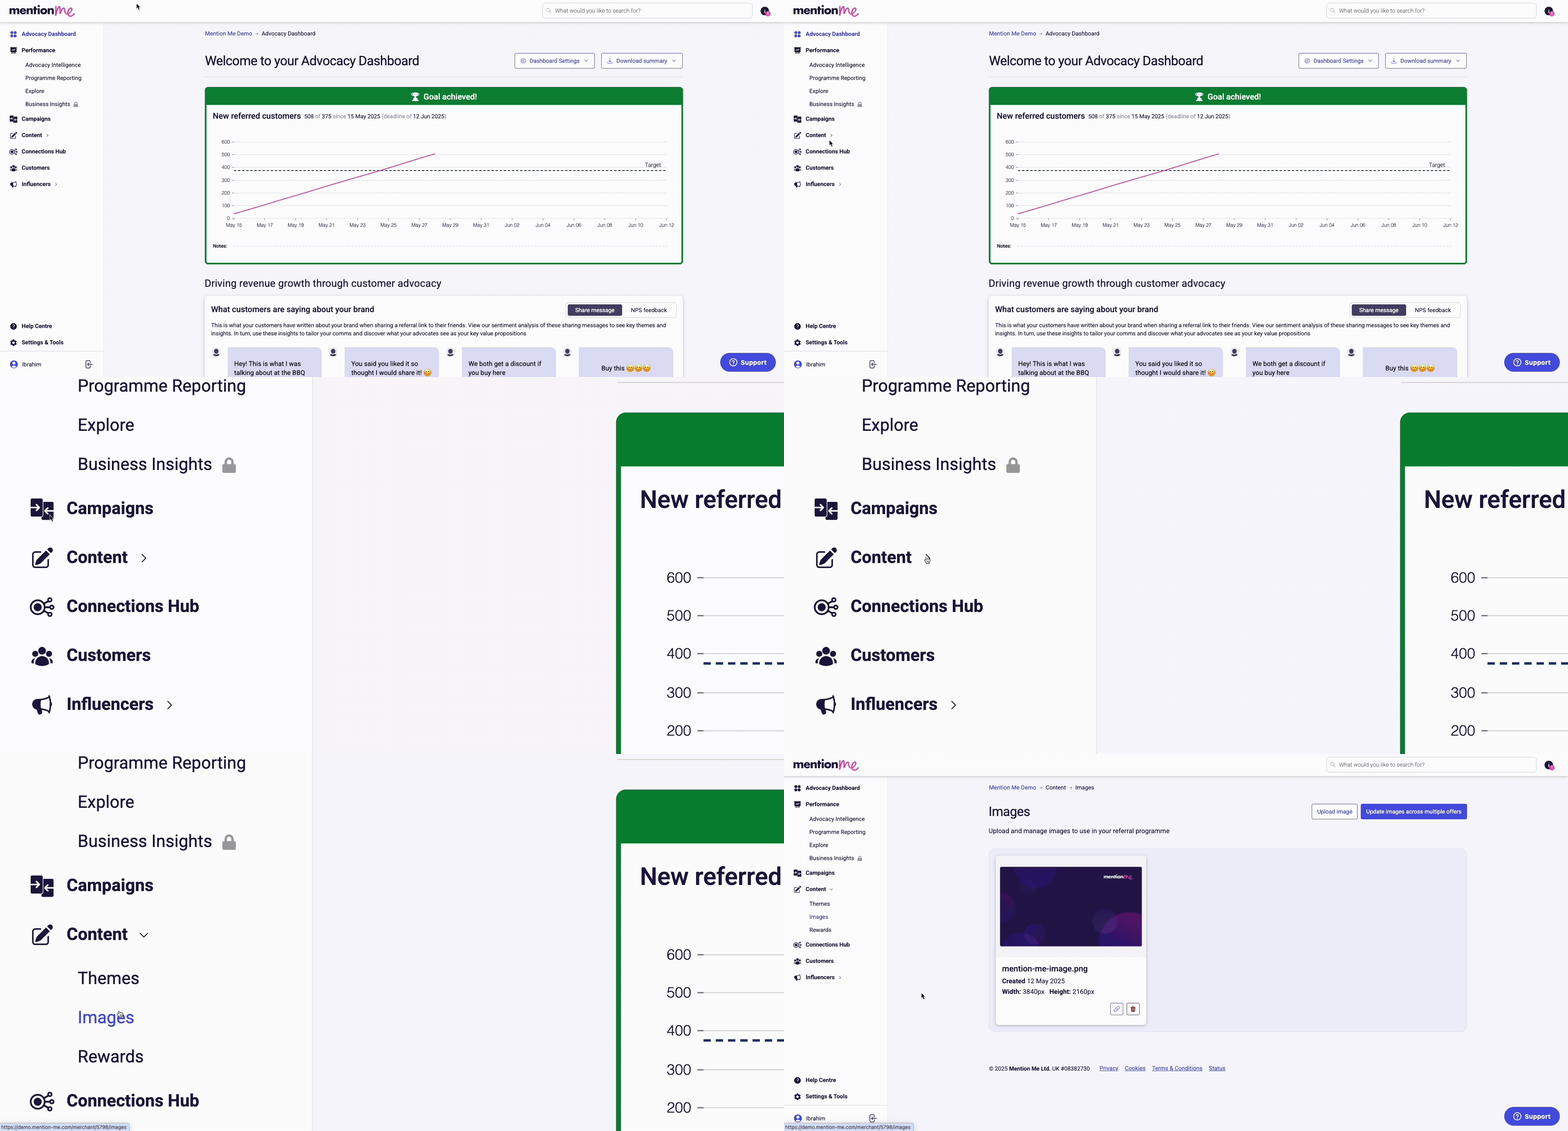
The image library in the Content menu showing uploaded images.
In the left navigation go to **Content > Images**. This is your image library containing any imagery you've uploaded to the platform since the feature launched. New imagery uploaded from anywhere will also be stored here.
### Archiving
Remove images from your library by archiving them. The archive button is at the bottom of each image card.
> [!NOTE]
>
> If an image is being used on an offer and it is archived, it will still be present on the offer until a new image is uploaded.
### Image Links
When images are uploaded to the platform they are hosted online. Each uploaded image generates a link which you can use. The copy URL button is at the bottom of each image card.
# How to Edit Share Messages
Source: https://docs.mention-me.com/knowledge/referral/design/share-messages
Edit the share message, customise the share image and overlay copy that referees see on social channels.
## What is the Share Message?
The share message is the message that the referee or friend will receive on their sharing channel (for example WhatsApp). It includes both a personalised share image and accompanying text.
We have seen as high as 17% increase in purchase rate and 14% increase in overall referral conversion when using personalised share images.
## Share Image Dimensions
| Journey | Touchpoint | Width | Height | Filetypes | File Size |
| - | - | - | - | - | - |
| Referee | Invited by link | 1200px | 630px | .jpeg, .png, .gif | 250kb max |
Dimensions for all journey images can be found [here](/knowledge/referral/design/managing-images).
A guided walkthrough of editing your share messages in the Mention Me platform.
## Upload or Change the Share Image
> [accordion] See each step in detail
>
> **1. Navigate to the Referee invited step**
>
> Make your changes on a draft, so your live experience isn't affected. Open your draft in the campaign editor. In the **Steps** panel, open **Referee invited**, then click **Referee invited by link**. This is what a friend sees when your customer shares their link.
>
> **2. Upload your image**
>
> Click the share image to open **Manage your social sharing**. Click **Change image** and select your image from your device. For the best result, use an image 1200px wide and 630px tall, no bigger than 250KB. Then click **Save and close**.
>
> 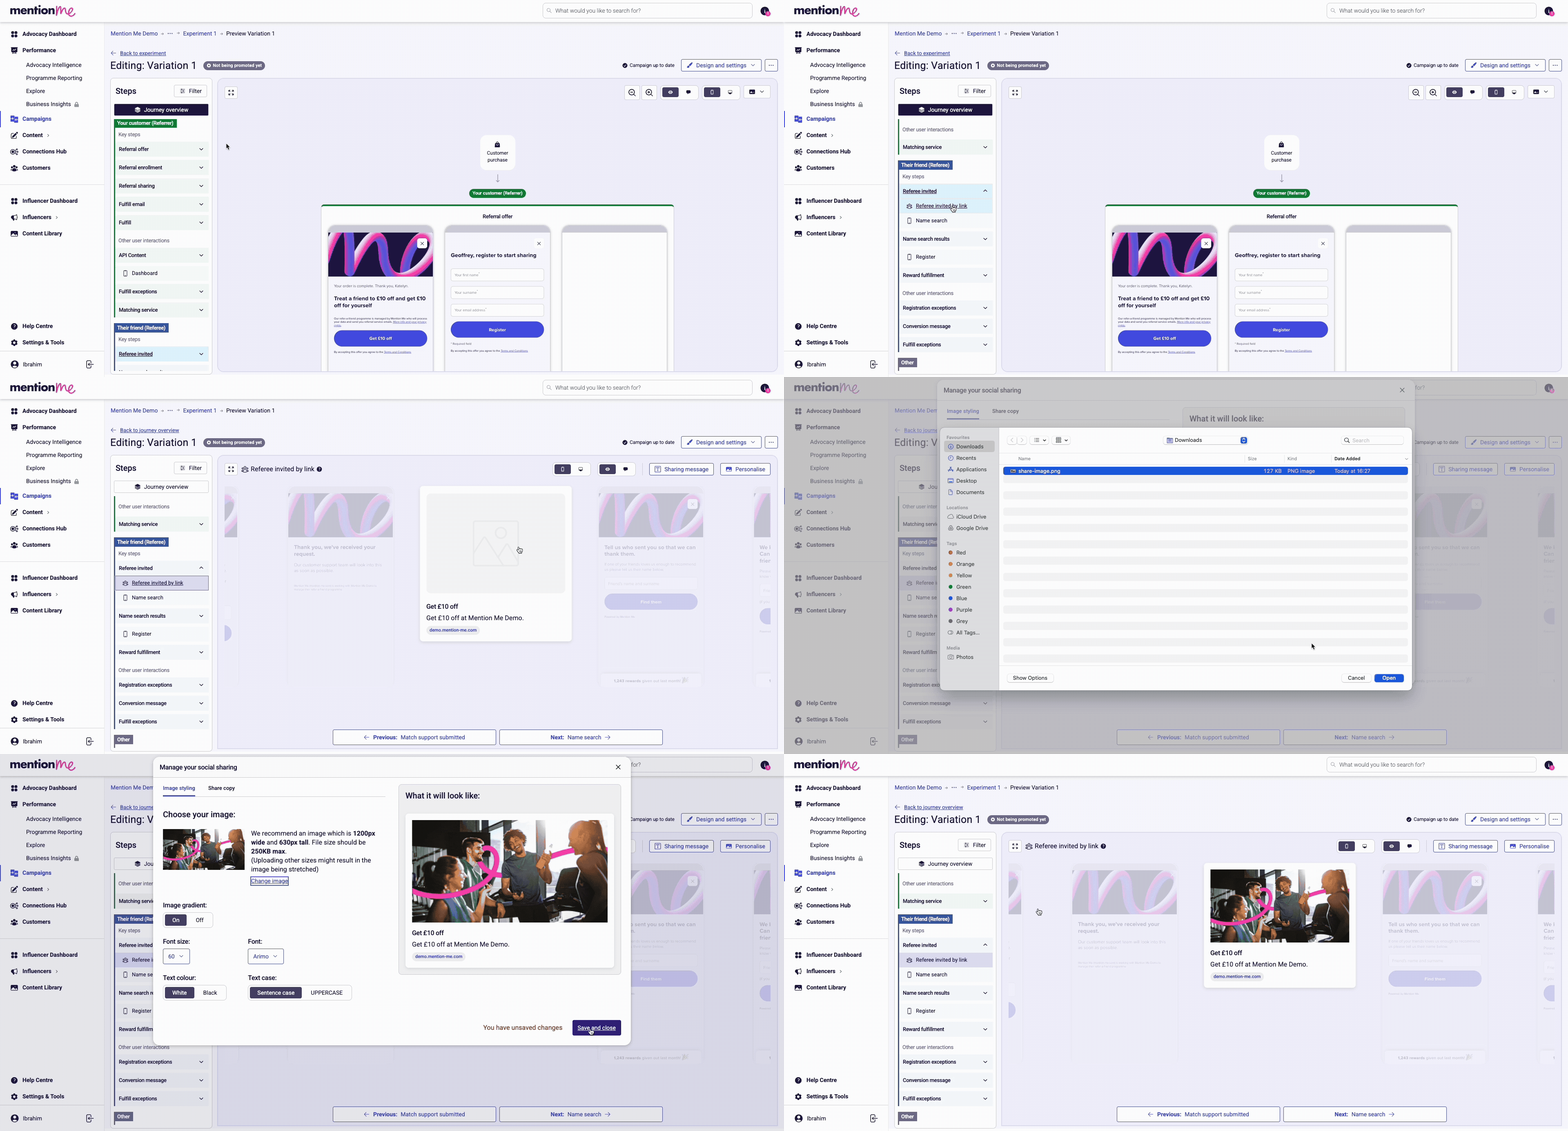
>
> Uploading or changing the share image in the offer preview.
## Edit the Overlay Copy
The overlay copy is the text that sits on top of the image, which gets rendered as part of the image when sent to the referee. You can style this copy to be on brand.
### Dynamic Content
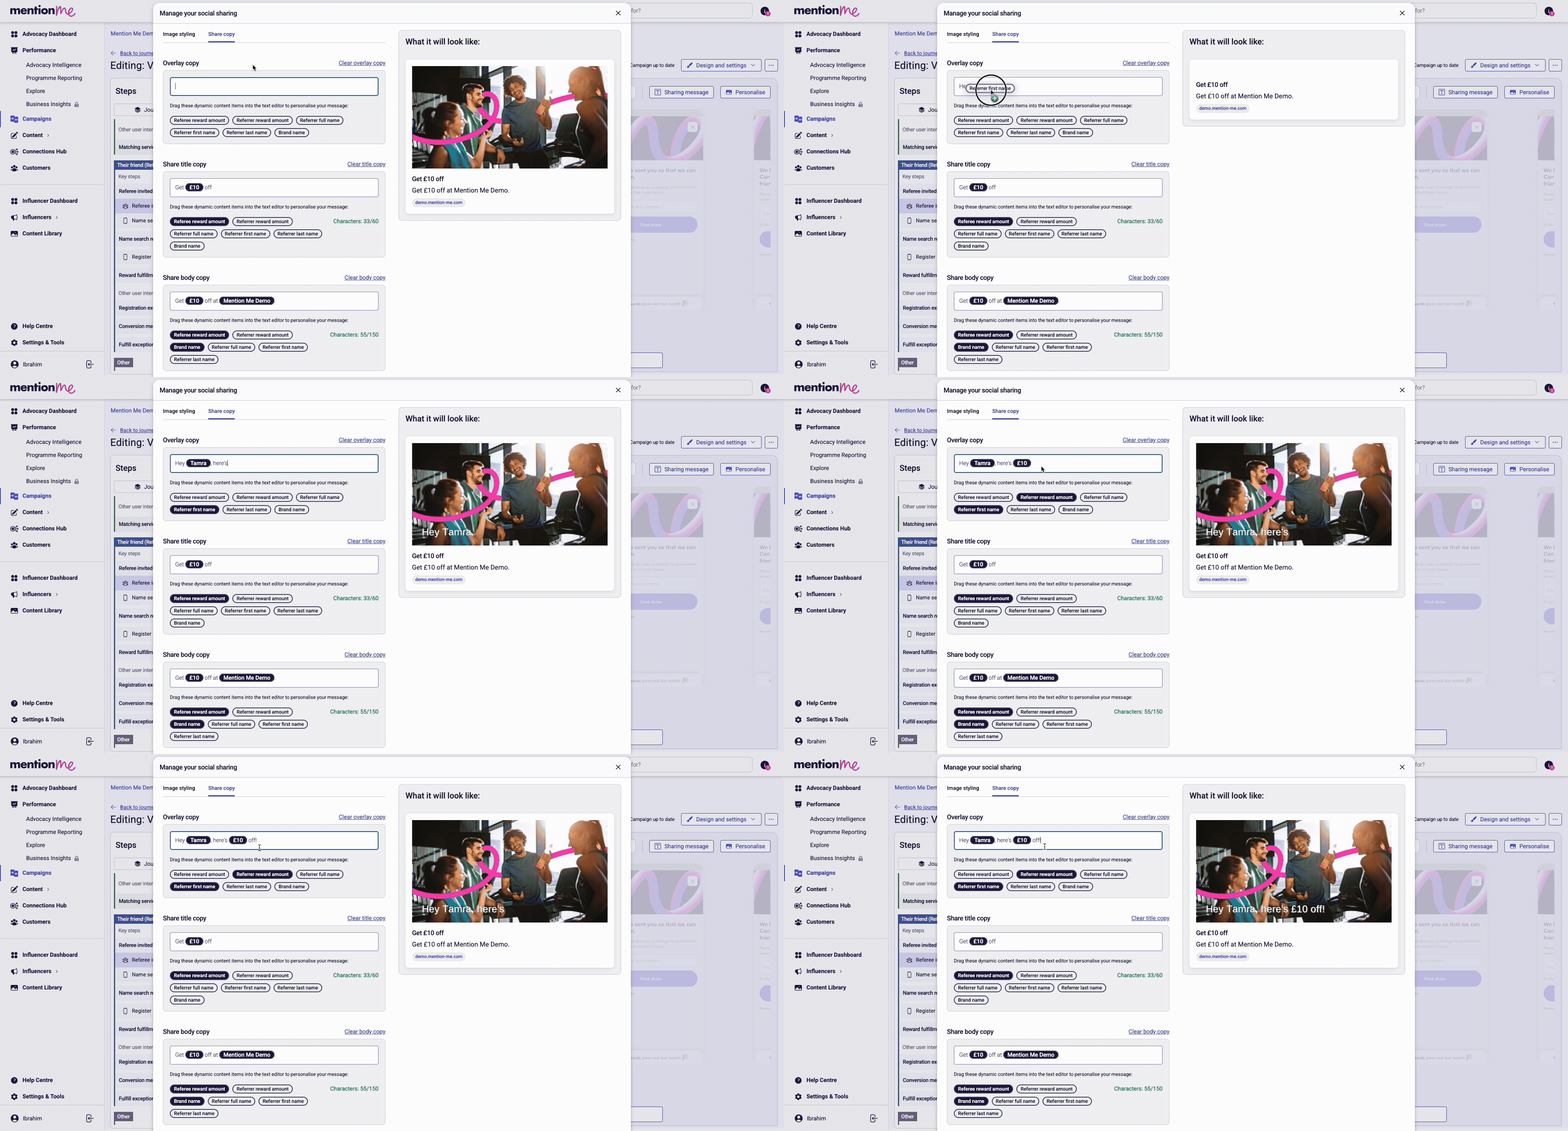
Editing overlay copy with dynamic content placeholders.
In the same pop-up, click the **Share Copy** tab and use the **Overlay copy** section. You can select from different dynamic content to pull in real user or brand data when the image is generated.
### Styling Options
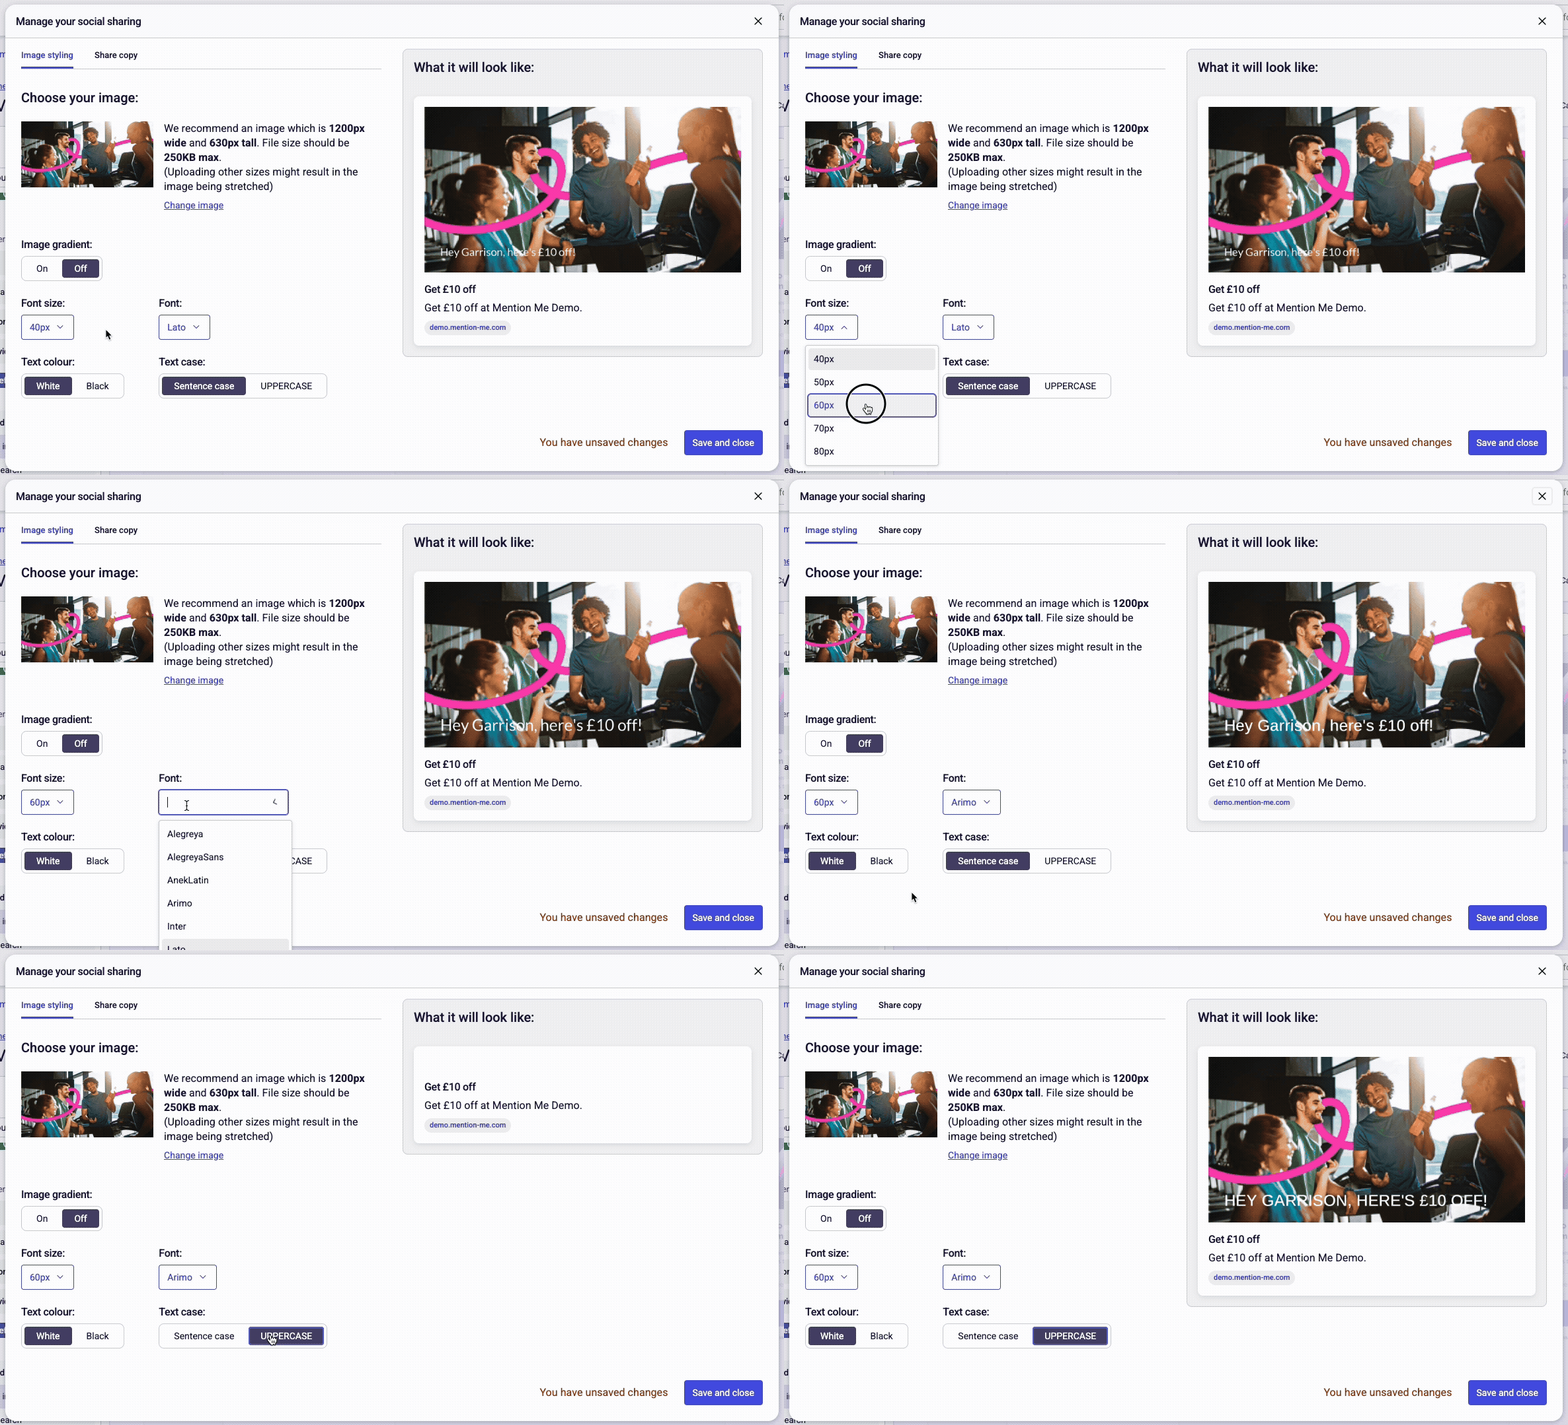
Image styling options including fonts, size, colour, and gradient.
Click the **Image styling** tab to view the styling settings:
* **Fonts** - select from a list of web safe fonts
* **Font size** - adjust from 40px to 80px depending on message length
* **Text colour** - choose between black and white text (ensure sufficient contrast with your background)
* **Text case** - choose between uppercase and sentence case
* **Image gradient** - adds a drop shadow to improve readability on brighter images
## Edit the Share Copy
The share copy is the message that gets sent with the image as plain text.
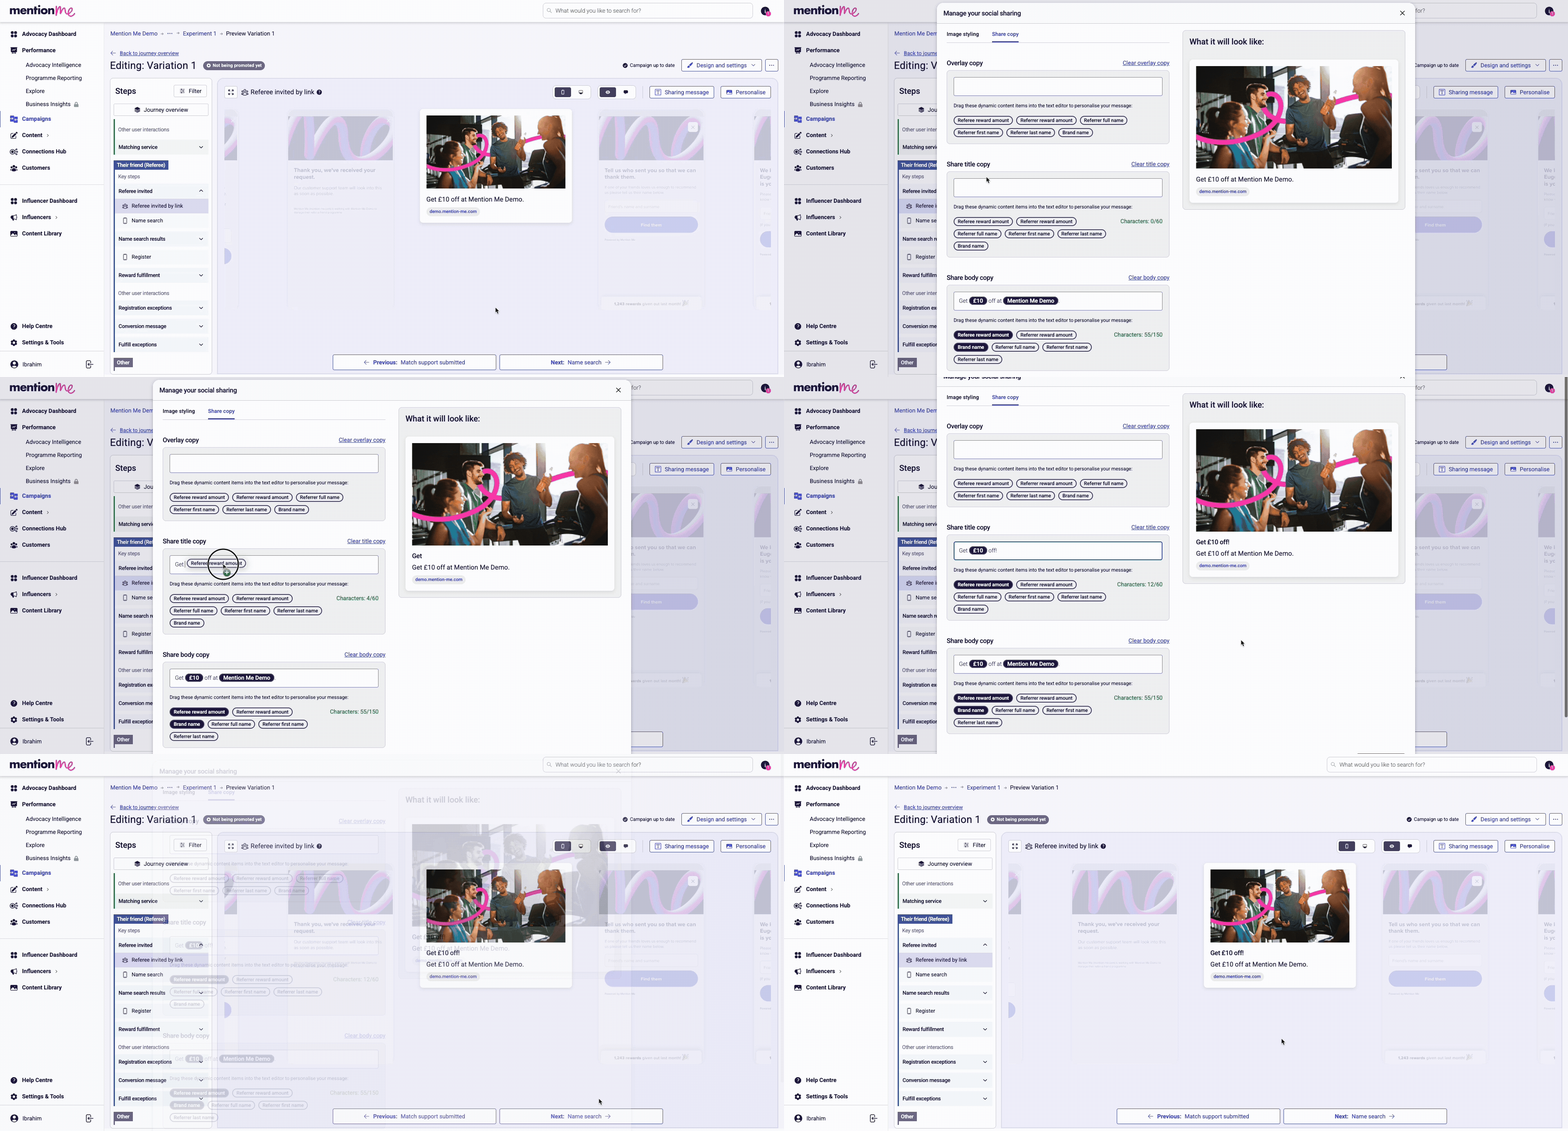
Editing share title and body copy with dynamic content.
In the same pop-up, click the **Share Copy** tab and use the **Share title copy** and **Share body copy** sections. You can select from different dynamic content to pull in real user or brand data.
> [!TIP]
>
> Use placeholders for reward values and dates rather than typing them in. Hardcoded values won't update when your offer changes. See [How Your Copy Is Structured](/knowledge/referral/design/managing-copy#how-your-copy-is-structured).
## Preview Your Changes
On the right hand side of the pop-up you will see the **What it will look like** preview which changes in real time.
## Edit the Share Message per Channel
> [accordion] See each step in detail
>
> **1. Open a draft experiment**
>
> In the left-hand menu, click **Campaigns** and select one of your live campaigns. Create a draft experiment (the easiest way is duplicating an existing experiment), then open it in the campaign editor.
>
> **2. Navigate to sharing message settings**
>
> In the **Steps** panel, open **Referee invited by link**, then click **Sharing message** at the top of the preview. The **Edit the default share message** pop-up opens.
>
> **3. Edit per channel**
>
> Click the tab for each sharing channel, for example **Native share** or **WhatsApp**. Type a default message and drag in placeholders, like your brand name. Leave a box blank for no default message. Click **Save and close** when done.
## FAQ
### Where do I edit the sharing copy for the email the referrer sends to the friend?
This is handled in the **Share by email** part of the preview page.
### Why are there only 5 sharing channels I can edit the share message for?
Native Share, WhatsApp, X (formerly Twitter), Line, and SMS are the only channels where we have a share message. Email is handled in the **Share by email** part of the preview page.
# Social Proof
Source: https://docs.mention-me.com/knowledge/referral/design/social-proof
Increase trust and drive higher conversion rates by displaying how many referral rewards were given out last month.
Social proof is a powerful way to increase trust and drive higher conversion rates in your referral programme, particularly for referees. By displaying how many referral rewards were given out last month, you build instant credibility and encourage referees to complete their purchase.
## What Is Social Proof for Referees?
Social proof displays the number of rewards issued in the previous calendar month (e.g. "2,417 rewards given out last month").
It appears on these referee-facing pages:
* Referee registration (mobile & desktop)
* Referral fulfilment pages
* Fulfilment exceptions (e.g. reward already fulfilled)
* Name search variations: no match, duplicate, final no match

Social proof on referee registration showing the rewards count on mobile.
The same message appears on the desktop version of the registration page:

Social proof on referee registration showing the rewards count on desktop.
## Performance
A/B tests show that social proof can increase referee conversion rates by 10-20%. It doesn't impact the referrer experience.
## How to Set Up Social Proof
**1. Request Setup via Form**
Submit your request via [this form](https://help.mention-me.com/hc/en-gb/requests/new?ticket_form_id=5268134356509). Select **Social Proof** under the A/B test type dropdown. To set a custom threshold (default = 100 rewards/month), specify it in the request description.

The A/B test type dropdown with the Social Proof option highlighted.
**2. Preview and Manage in the Dashboard**
Open an affected referee page from your campaign's journey to preview social proof. Social proof displays only after your campaign meets the reward threshold.

A campaign preview showing social proof on the referee registration page.
The same preview is also available directly from the dashboard:

Social proof displayed on the referee page in the dashboard preview.
## Best Practice
Run social proof as an A/B test before rolling out to measure uplift and effectiveness at scale.
## Customisation Options
### Copy
* The default copy (e.g. "2,417 rewards given out last month") performs well
* To customise, use the form above and A/B test your copy changes
### Styling
* Defaults to white background and primary brand font/colour
* To change background or text colour, contact the Operations team
### Positioning
* Default positions are optimised for best performance
* Custom positioning is possible. Please A/B test before finalising
## Supported Languages
Social proof messages support: French, Polish, German, Dutch, Italian, Swedish, Norwegian, Japanese, Korean, Chinese, Arabic, Portuguese, and Spanish.
For design or styling requests, [contact the Operations team](https://help.mention-me.com/hc/en-gb/requests/new?ticket_form_id=5266040952605).
## FAQs
### Why Don't I See Social Proof in My Journey?
This typically means your monthly reward threshold hasn't been reached. Contact Mention Me to confirm or adjust it.
### What's the Count Based On?
It's based on incented friends (rewarded referrals) from the last calendar month, segmented by region/locale.
### Why Is the Number Split by Locale?
It ensures the customer sees a region-specific reward total for accuracy and relevance.
Need more help? Contact your Client Success Manager or the Mention Me Operations Team.
# Approve or Decline Suspects
Source: https://docs.mention-me.com/knowledge/referral/gaming/approve-decline-suspects
Mark customers as suspected of gaming, and approve or decline referrals individually or in bulk from the gaming approvals queue.
A guided walkthrough of approving or declining gaming suspects in the Mention Me platform.
## How to Mark a Customer as Suspected of Gaming
This only works if [Gaming Controls](/knowledge/referral/gaming/managing-gaming) are enabled. It won't stop the user from seeing referral offers, but their links will not yield rewards without manual approval.
> [accordion] See each step in detail
>
> **1. Find the customer**
>
> In the left-hand menu, click **Customers**. Search by name, email, customer ID, or share link, then click the customer to open their profile.
>
> **2. Mark as suspected**
>
> Open the **Actions** menu and click **Mark as suspected of gaming**. A pop-up explains that they can still share and see your offers, but any rewards they earn will need manual approval. If you'd rather stop them getting rewards at all, [block them](/knowledge/referral/gaming/block-customer) instead.
>
> 
>
> The Actions menu showing the Mark as suspected of gaming option.
>
> **3. Confirm and check their status**
>
> Click **Mark as gaming** to confirm. Their profile now shows **Suspected of gaming**.
>
> Once marked:
>
> * All future referrals by that customer will require manual approval
> * Their IP address and cookie will be flagged, affecting related profiles
>
> 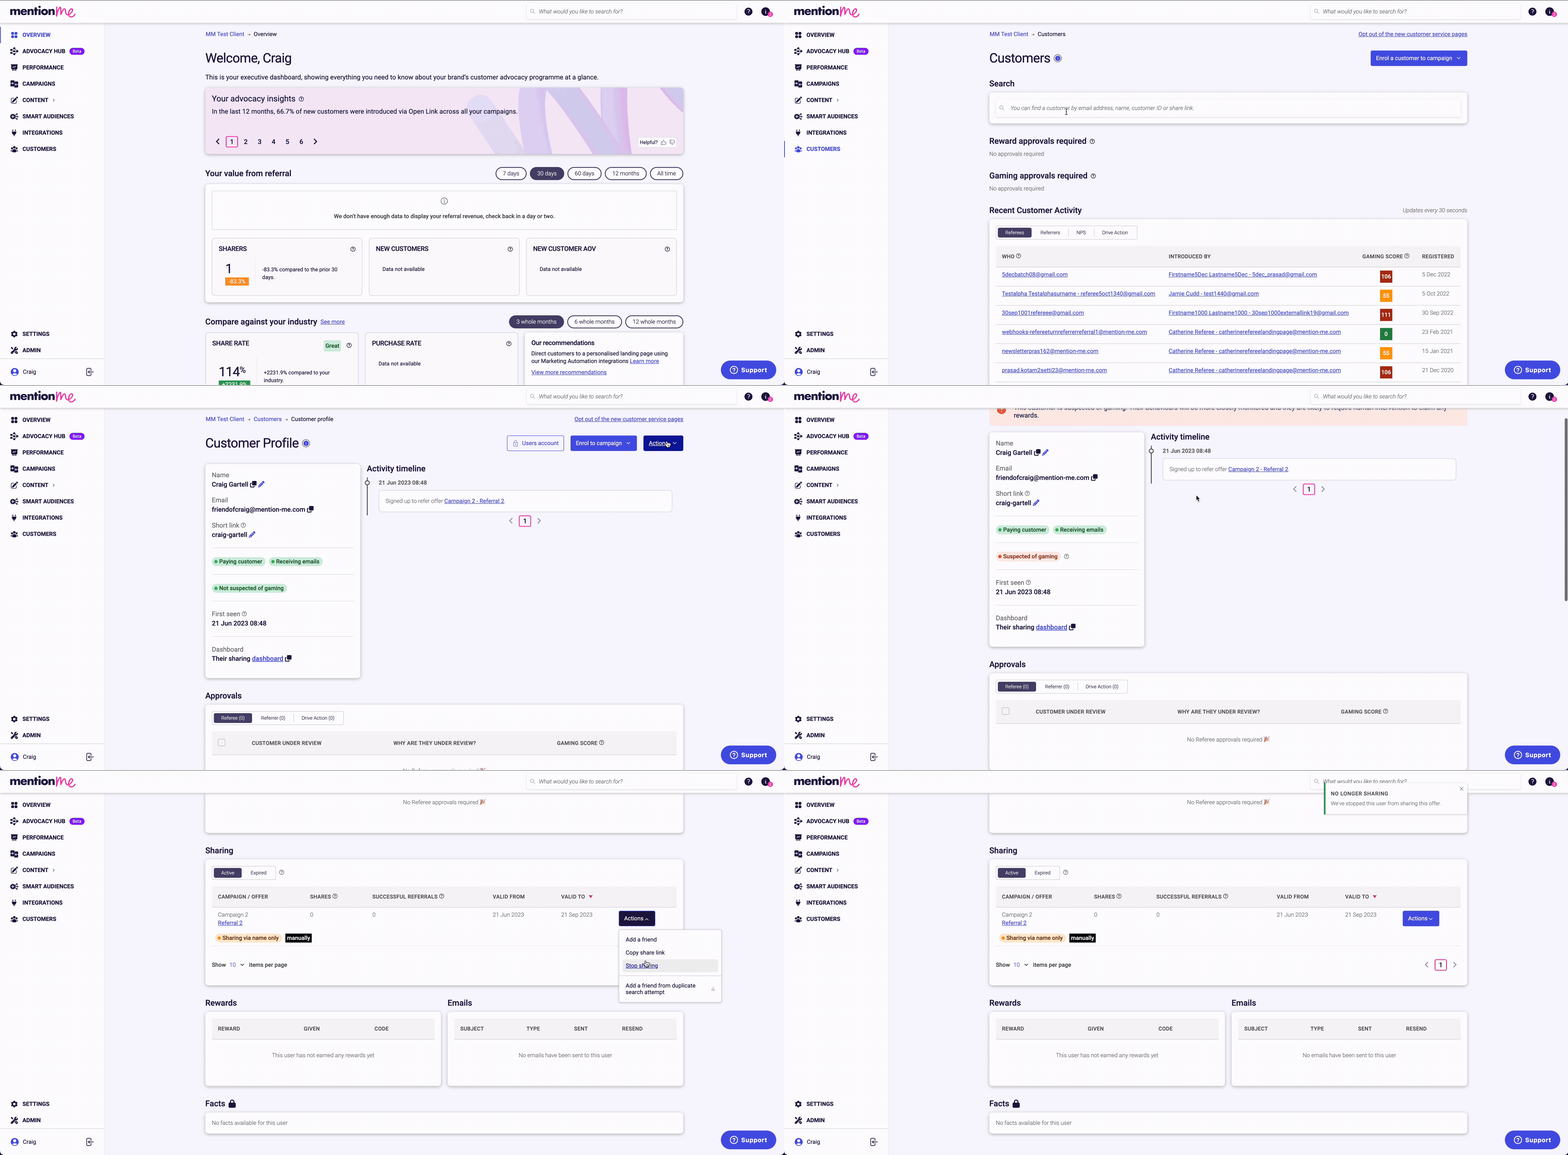
>
> A customer marked as suspected of gaming, showing the flagged status.
>
> To undo it, open **Actions** and click **Mark as not suspected of gaming**.
## How to Access the Gaming Approvals Queue
> [!NOTE]
>
> * Access requires specific user permissions. [See permission guide](/knowledge/security/account/user-management)
> * Gaming and Velocity approvals are separate - you must manually approve both if flagged
> * Bulk actions only affect visible referrals from the past 3 months
> * Each referral attempt by the same customer must be approved individually
> [accordion] See each step in detail
>
> **1. Open the Customers section**
>
> In the left-hand menu, click **Customers**. Flagged referrals land in **Gaming approvals required** on the Customers page.
>
> 
>
> The Customers section in the platform dashboard.
>
> **2. Select the gaming queue**
>
> Click **Referee gaming** for new customers, or **Referrer gaming** for existing customers.
>
> 
>
> The Gaming approvals area showing the Referee and Referrer Gaming tabs.
>
> **3. Choose an approval method**
>
> Choose one of three approval methods described below.
### Option 1: Approve or Decline an Individual Referral
Each referral attempt must be actioned individually. Tick a referral, then approve it, archive it or decline it. **Decline** lets you choose whether to notify the referrer and referee:
* **Decline with no notification**
* **Decline and notify both referrer and referee**

An individual referral approval showing the decline options.
Selecting **Decline** opens a dropdown with the notification choices:

The decline dropdown showing notification options.
### Option 2: Approve or Decline All Visible Customers
Bulk action applies to all listed customers, regardless of score.
### Option 3: Approve/Decline Based on Gaming Score
Open the **Approve / Decline based on gaming score** menu and choose **Bulk approve** or **Bulk decline**, then set a threshold, e.g.:
* Approve all scores ≤ 50
* Decline all scores ≥ 70
Bulk approve also lets you choose what happens to customers who trip velocity controls: **Do not approve them** leaves them in the gaming queue for you to review manually, or **Approve and give reward**.

Bulk approve or decline options based on a gaming score threshold.
The threshold filter lets you set the exact score cut-off for bulk actions:

The gaming score threshold filter used for bulk actions.
## Need Help?
Start a conversation with the in-platform Support widget in the bottom-right corner of your dashboard - it can usually answer this straight away. If it can't, raise a request via the [request form](https://help.mention-me.com/hc/en-gb/requests/new?ticket_form_id=5268418076701).

The in-platform Support widget starting an AI-assisted conversation.
# How to Block a Customer
Source: https://docs.mention-me.com/knowledge/referral/gaming/block-customer
Prevent a customer from referring, receiving rewards, or receiving any communication from Mention Me.
To prevent a customer from referring, receiving any rewards, or receiving any communication from Mention Me:
A guided walkthrough of blocking a customer in the Mention Me platform.
> [accordion] See each step in detail
>
> **1. Find the customer**
>
> In the left-hand menu, click **Customers**. Search by name, email, customer ID, or share link, then click the customer to open their profile.
>
> **2. Block the customer**
>
> Open the **Actions** menu and click **Block this customer**. A pop-up explains what happens: they can't share with friends or receive rewards, and they won't be told they're blocked. If blocking feels too heavy-handed, choose **Mark as suspicious instead** (see [Approve or Decline Suspects](/knowledge/referral/gaming/approve-decline-suspects)). Otherwise, click **Block this customer**.
>
> **3. Verify**
>
> A message at the top of their profile confirms they're blocked, and that neither they nor their friends can receive rewards. Their status shows **Blocked**, and their emails are switched off too.
>
> **4. Unblock if you need to**
>
> To unblock the customer, open **Actions** again and click **Unblock this customer**. They may still be marked as suspected of gaming, which you can change from the **Actions** menu.
# Managing Gaming
Source: https://docs.mention-me.com/knowledge/referral/gaming/managing-gaming
Understand what gaming is and how to use gaming controls, velocity controls, and eligibility checks to protect your referral programme.
## What Is Gaming?
Gaming refers to attempts by customers to get referral rewards without referring genuine new customers. Common forms include:
* **Self-referrals and fake accounts** - Creating multiple accounts using different emails to refer themselves
* **Collusion** - Groups of individuals referring each other to inflate numbers
* **Incentive misuse** - Signing up multiple times to access welcome offers
* **Broadcasting referral links** - Posting links on public forums or coupon sites
About 15% of referrals may be suspicious, often higher in luxury segments. Most brands accept a small level of gaming that still leads to purchases.
## Core Tools to Manage Gaming
Mention Me provides three core tools, plus a handful of more targeted controls for specific situations (see [Further Prevention Options](#further-prevention-options) below):
1. **Gaming Controls** - Algorithmic scoring that evaluates referrals via IP address, cookies, email similarity, and more
2. **Velocity Controls** - Limits on how many rewards a referrer can earn or distribute in a set time
3. **Eligibility Controls** - Business-specific criteria that must be met before rewards are issued
## Gaming Controls
Our gaming algorithm evaluates referrals via factors such as IP address, cookies, and email similarity to prevent self-referral. You can:
* Apply controls to referrer and referee flows independently
* Manually review or automatically decline high-scoring referrals
* Use recommended defaults or customise for each offer
* Enhance scoring using additional data (e.g. postcode)
* Blacklist suspicious emails or IPs
### Components of the Gaming Score
Each triggered fraud rule adds to the score. Higher scores mean increased likelihood of dishonest behaviour.

The gaming score components, showing fraud rules and their point values.
Not all rules apply immediately. For example, name-matching can't occur if the referee doesn't enter their name.
### Configuring the Gaming Score
Controls can be applied to either the referrer or referee side, or both:
* **Referee side:** Stops reward until a reviewer approves
* **Referrer side:** Allows introductory reward; referrer is reviewed only if fraud is detected later

The gaming controls configuration for the referrer and referee sides.
### Acting on the Gaming Score
Referrals that exceed thresholds go into an approval queue. These should be reviewed regularly for approval or rejection.

The gaming approval queue, showing flagged referrals.
The score threshold for each rule can be configured to suit how strict or lenient you want the queue to be:

The gaming score threshold configuration.
### How to Switch on or Amend Gaming Controls
Gaming Controls are enabled by default. To update them:
> [!NOTE]
>
> These controls apply at the Offer level. If you update one offer, replicate changes across other active offers.
Watch how to switch on gaming and velocity approval rules for an offer in Classic.
> [accordion] See each step in detail
>
> **1. Create a draft experiment**
>
> In the left-hand menu, click **Campaigns**, select the relevant campaign, then click **Drafts, upcoming & history**. Open the actions menu (three dots) on your live experience and click **Duplicate to draft**.
>
> 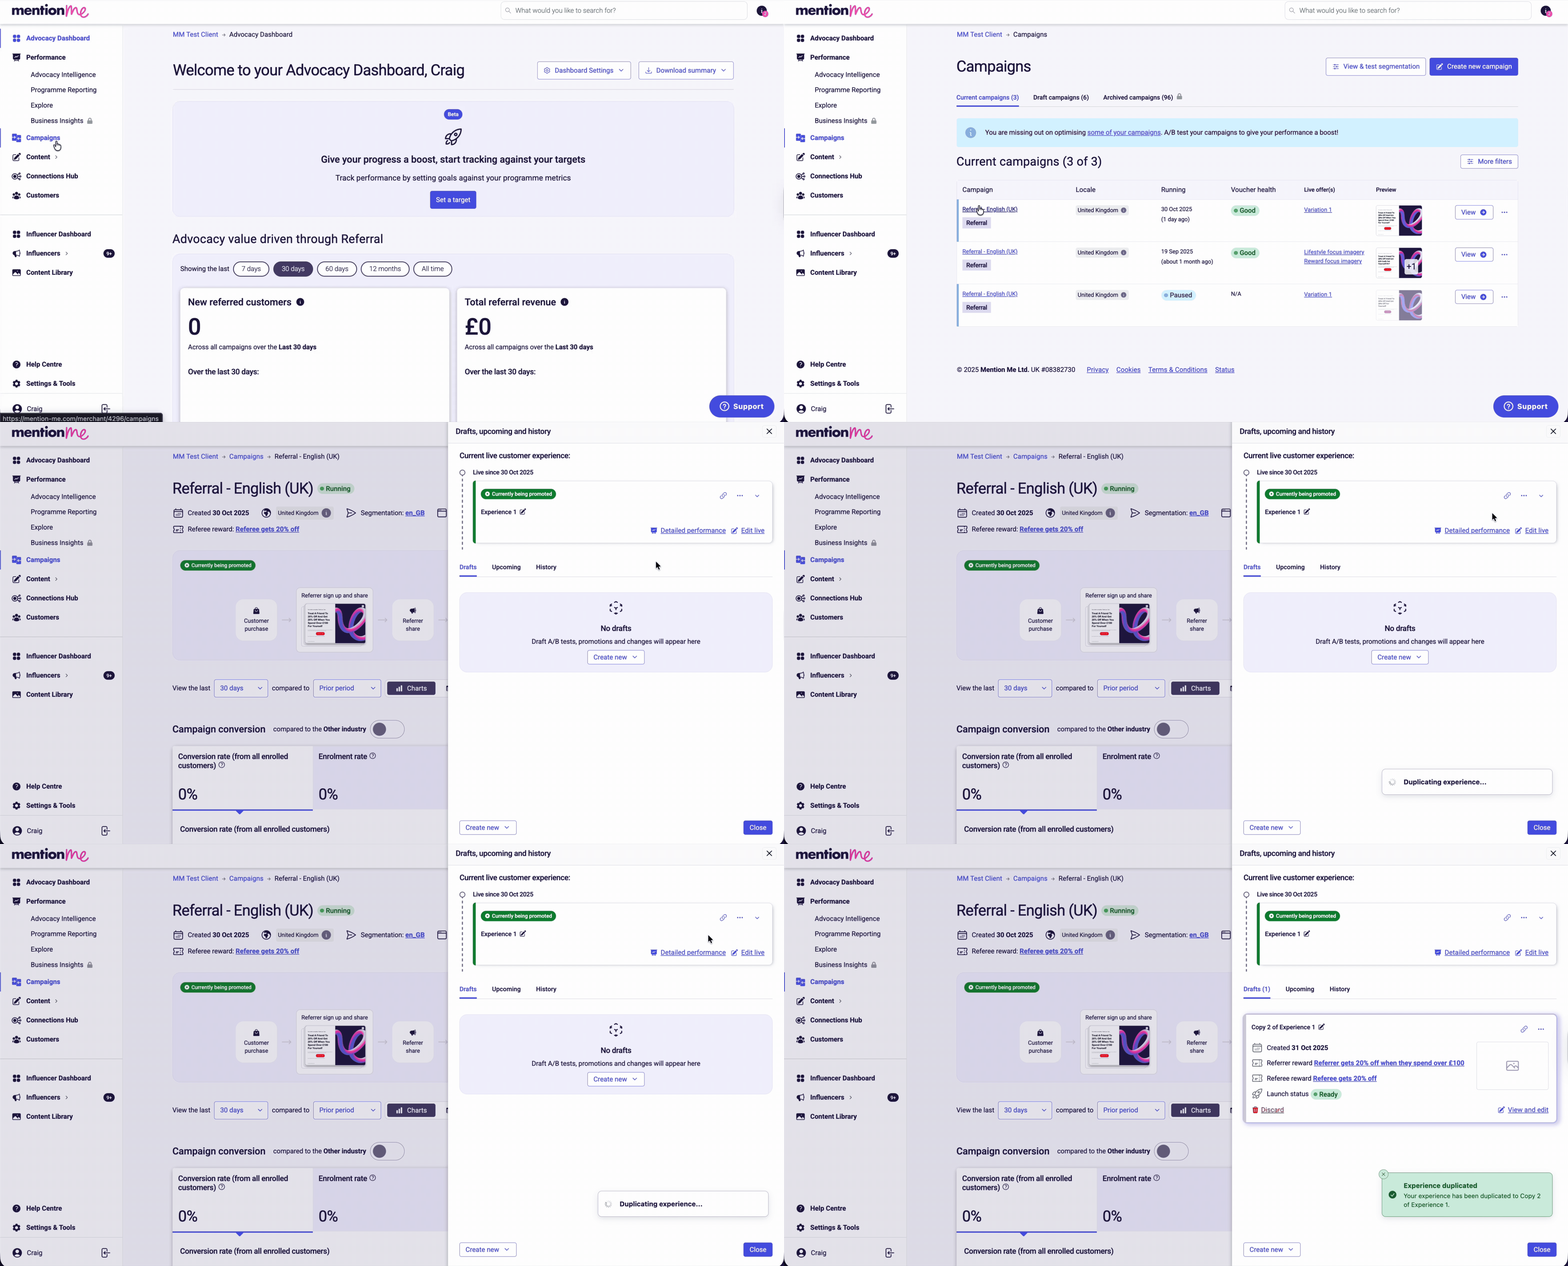
>
> Navigating to offer settings via the experiment actions menu.
>
> **2. Open approval rules**
>
> On your draft, open the actions menu (three dots) again and click **View offer settings**. Then open the **Approval rules** tab. These rules decide when a referral needs approval before anyone is rewarded.
>
> **3. Add gaming rules**
>
> Click **Add rule**, and repeat to add both:
>
> * **Gaming score (at Referrer fulfillment)**
> * **Gaming score (at Referee fulfillment)**
>
> The standard gaming threshold is a score of **55 for existing customers** and **49 for new customers**. Raise the scores to make your programme more lenient, or lower them to make it stricter.
>
> 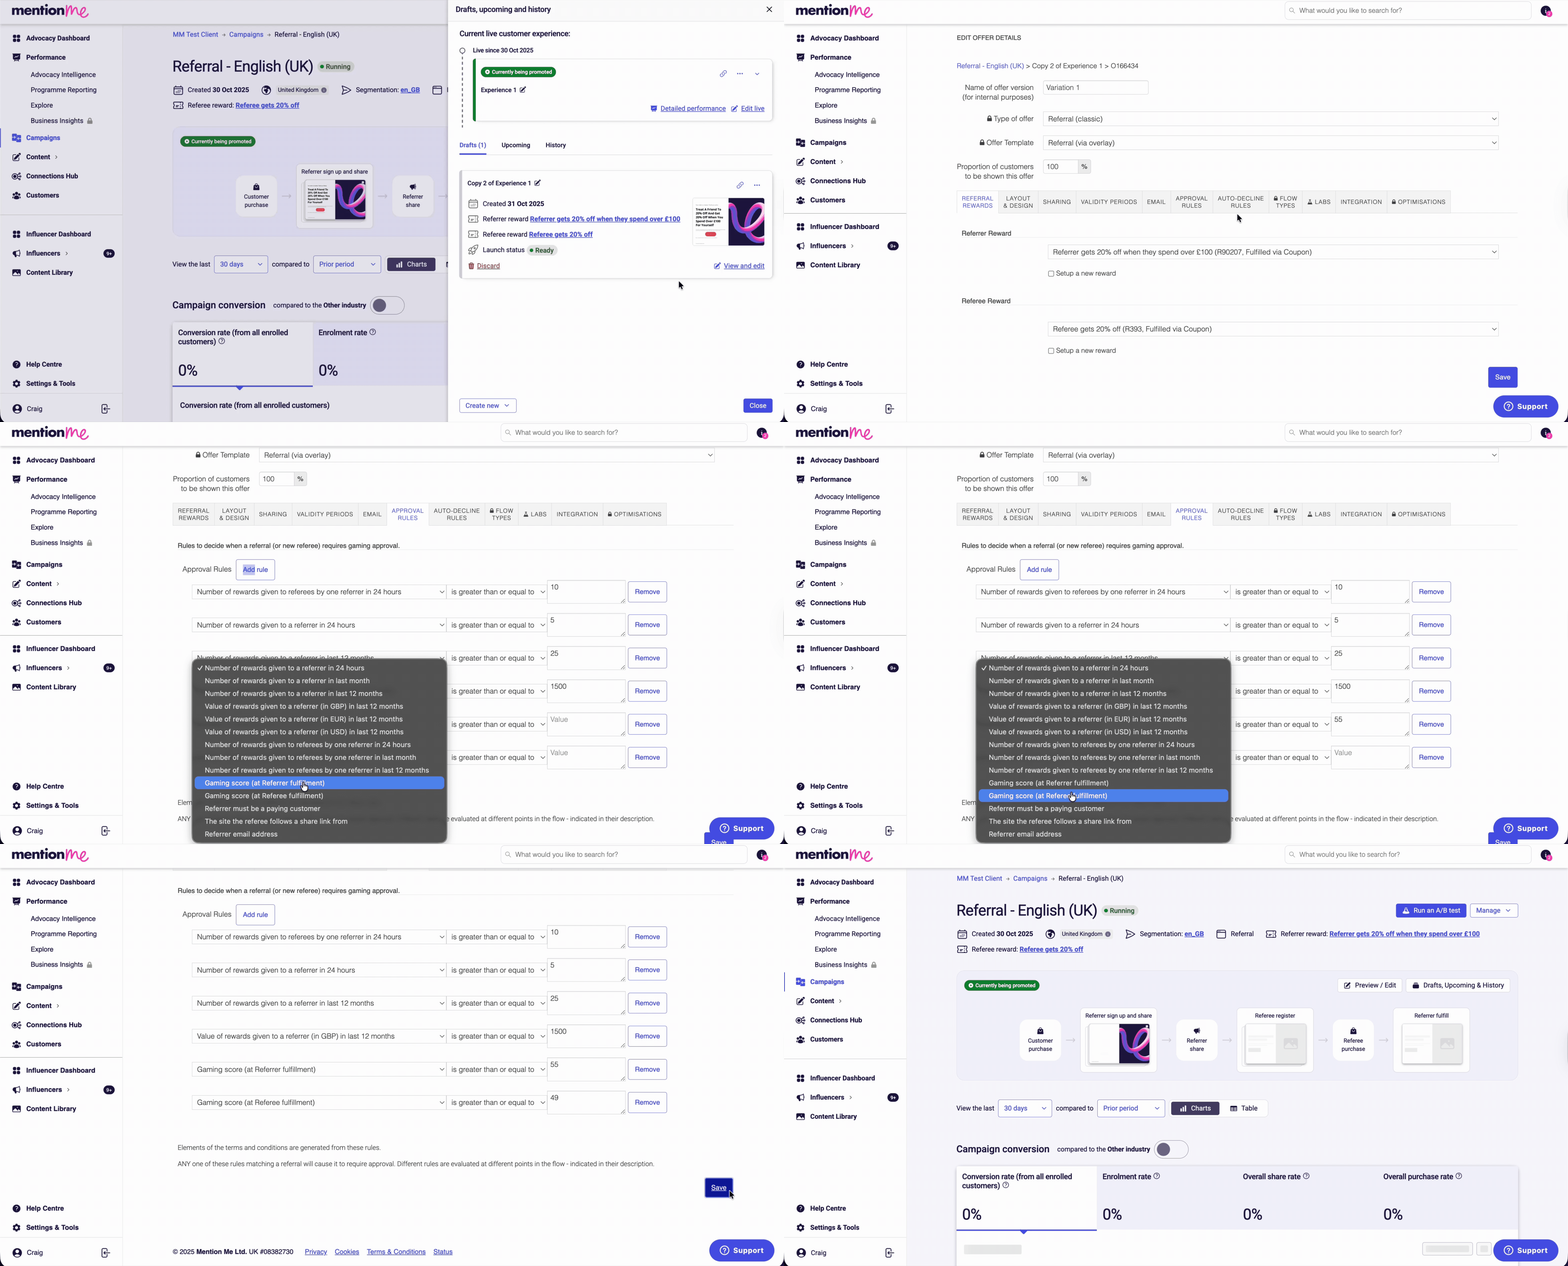
>
> Adding gaming score approval rules to offer settings.
>
> **4. Check velocity controls**
>
> Velocity controls work the same way. These rules limit how many rewards a referrer can get in a set time, like 24 hours or 12 months. See [Velocity Controls](#velocity-controls) below for the standard thresholds.
>
> **5. Save and repeat**
>
> When you're happy, click **Save**. Then repeat the same rules on your other active offers.
## Velocity Controls
Velocity controls prevent disproportionate reward distribution, especially during viral events. They pause referral rewards once limits are reached, requiring manual approval.
They can apply to:
* **Referrers:** Cap how many vouchers they send per timeframe
* **Referees:** Cap how many referrals can come from a referrer
Standard velocity control examples:
* 5 referrer rewards in 24 hours
* 25 referrer rewards in a year or 12 month period
* 10 introductory offers claimed from the same referrer in 24 hours

The velocity controls configuration, showing reward limits.
To set up velocity controls, follow the same steps as [Gaming Controls setup above](#how-to-switch-on-or-amend-gaming-controls) and add velocity rules in the ApprovalRules section.
### Acting on Velocity Thresholds
When scores exceed limits, referrals go to a queue. Review them manually for approval or decline.

The velocity threshold approval queue.
## Eligibility Controls
Ensures referrals meet business-specific criteria before rewards are issued. Examples:
* **Utilities:** Reward delayed until supply begins
* **Travel:** Reward given after trip completion
Connected data feeds or timed delays can be used to revoke rewards if eligibility isn't confirmed.
## Further Prevention Options
Beyond the three core tools above, a few more targeted controls are available for specific situations.
### Voucher Controls
The codes referrers and referees receive can be configured to make them harder to exploit:
* **Single-use** - a code can only ever be redeemed once, so it can't be copied and reused
* **Non-stackable** - codes can't be combined with other codes on the same order
* **Minimum spend** - a code only unlocks a reward once an order reaches a value you set, protecting your margin on low-value test purchases
* **Market or product restrictions** - codes can be limited to specific markets or product ranges
These are set when your voucher codes are configured, and can be adjusted at any time.
**Email verification for suspicious referees**
Where a referee is flagged as high risk, their voucher code can be sent to their email address instead of shown immediately. It's much harder to create working email accounts at scale than to fill in a form, so this adds a real barrier for anyone farming codes with disposable addresses, while genuine referees never notice the difference.

Enabling email verification for suspicious referees in the Campaign Gaming Settings tab.
Genuine referees never notice the difference, but a flagged referee sees a message like this instead of getting their code straight away:

What a referee sees when their voucher code is sent to their email instead of shown immediately.
This can be switched on in the Campaign Gaming Settings tab for any offer.
### Account and Link Blacklisting
Sometimes it's obvious a specific person or link is being used to abuse your programme: an affiliate promoting your referral offer instead of their own, say, or a reseller running the same trick repeatedly.
* **Blacklist an account** - flag a specific customer as a suspected gamer. Every referral connected to them, and their associated IP address and cookie, is then scored more harshly.

Marking a customer account as suspected of gaming.
* **Blacklist a referring URL** - withhold rewards for anyone arriving via a specific website, such as a coupon site your sharing links have ended up on without your permission.

Blocking a specific referring URL from earning rewards.
You can flag a suspected account or block a specific URL directly from your offer settings.
### Referrer Eligibility
By default, anyone who registers as a referrer can earn a reward, whether or not they're a paying customer. If you'd rather only reward existing customers, subscription and membership businesses often do, you can require referrers to have a matching order on file before they can earn anything.

The auto-decline rule requiring referrers to be existing customers.
This is set up as an auto-decline rule on the offer, in the same ApprovalRules section as your Gaming and Velocity controls above. It relies on Mention Me receiving an up-to-date feed of your customer and order data to work accurately. See [Restrict Referrer Eligibility](/knowledge/referral/gaming/restrict-referrer-eligibility) for full setup steps.
### Enrolment Controls
Referral landing pages are usually open to anyone who lands on them, good for reach, but it means people can register as a referrer without ever having interacted with your brand. If you'd rather restrict registration to customers who arrive through a genuine journey, like a post-purchase email or on-site prompt, you can block manual registrations on the open landing page.

Blocking manual registrations on an open landing page.
Like referrer eligibility, this is set up as an auto-decline rule alongside your other approval rules. It's a lighter-touch control, since it only affects people registering directly on the public page rather than through a link you've sent them, so it's usually paired with the other controls here rather than used alone. See [Restrict Referrer Eligibility](/knowledge/referral/gaming/restrict-referrer-eligibility) for full setup steps.
## How Mention Me Detects Gaming
Mention Me uses several methods to identify and address gaming:
* **Intelligent detection** - Machine learning and behavioural analytics identify unusual activity patterns such as repeated referrals from the same device, email domain, or IP address
* **Gaming score system** - Evaluates referral behaviour based on risk indicators including referral frequency, IP duplication, and account creation patterns
* **IP and device tracking** - Monitors IP addresses and device fingerprints to detect unusual patterns
* **Dynamic rewarding rules** - Set specific eligibility criteria such as purchase validation periods or referral thresholds
* **Controlled reward distribution** - Implement a waiting period before rewards are issued
Together, these controls let you tune your programme's protection to match your appetite for risk, without limiting the genuine referrals doing the real work for your brand.
# How to Restrict Referrer Eligibility to Paying Customers
Source: https://docs.mention-me.com/knowledge/referral/gaming/restrict-referrer-eligibility
Stop non-customers from becoming referrers by setting eligibility rules at the offer or campaign level.
You can stop non-customers from becoming referrers at either the offer or campaign level within the Mention Me platform.
> [!NOTE]
>
> For background on why non-customers can become referrers by default, see [Understanding Non-Paying Referrers](/knowledge/referral/customers/understanding-non-paying-referrers).
A guided walkthrough of restricting referrals to paying customers in the Mention Me platform.
## At an Offer Level
Follow these steps to ensure only paying customers can refer friends.
> [accordion] See each step in detail
>
> **1. Duplicate the Offer**
>
> In the left-hand menu, click **Campaigns**, then click the name of the campaign you wish to amend. Click **Drafts, Upcoming & History** so you can make the change on a draft. If you don't have one yet, click the experiment actions menu (three dots) and select **Duplicate to draft** or **Create new A/B test**.
>
> **2. Open Offer Settings**
>
> On your draft, click the offer actions menu (three dots), then click **View offer settings**.
>
> **3. Add the Auto-Decline Rule**
>
> Click the **Auto-Decline Rules** tab, then click **Add Rule**. Select the **Referrer Must Be a Paying Customer** option.
>
> 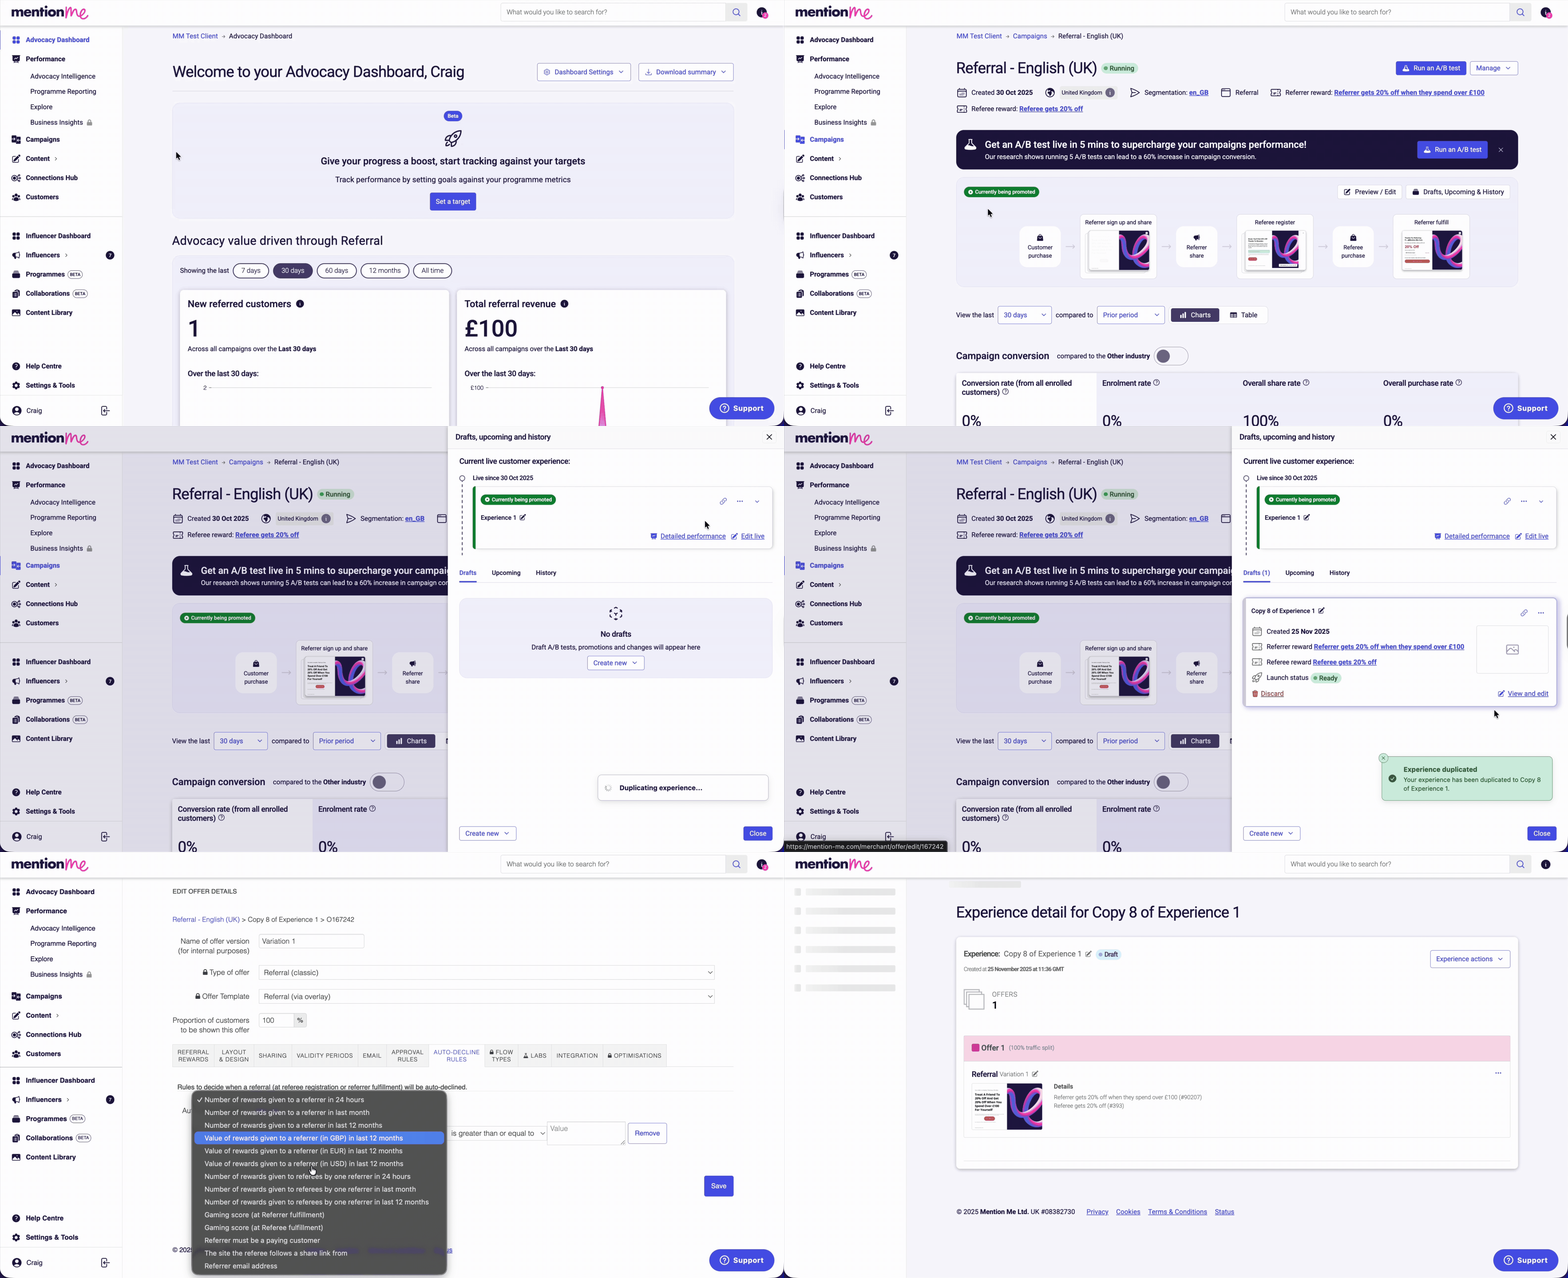
>
> The 'Referrer must be a paying customer' rule selected in Offer Settings.
>
> **4. Save Your Changes**
>
> Click **Save**. Referrals from anyone who hasn't bought from you will now be declined automatically.
## At a Campaign Level
You can block manual registrations for new referrers via the embedded registration page in the campaign settings.
> [accordion] See each step in detail
>
> **1. Open Campaign Settings**
>
> In the left-hand menu, click **Campaigns**, then click the name of the campaign you wish to amend. Click **Manage**, then click **Settings**.
>
> **2. Block Manual Registrations**
>
> Click the **Advanced Options** tab, then click the checkbox for **Block manual registrations from new referrers (eg via submitting the form on an embedded registration page)**. This stops people signing up as a referrer through an embedded registration form.
>
> 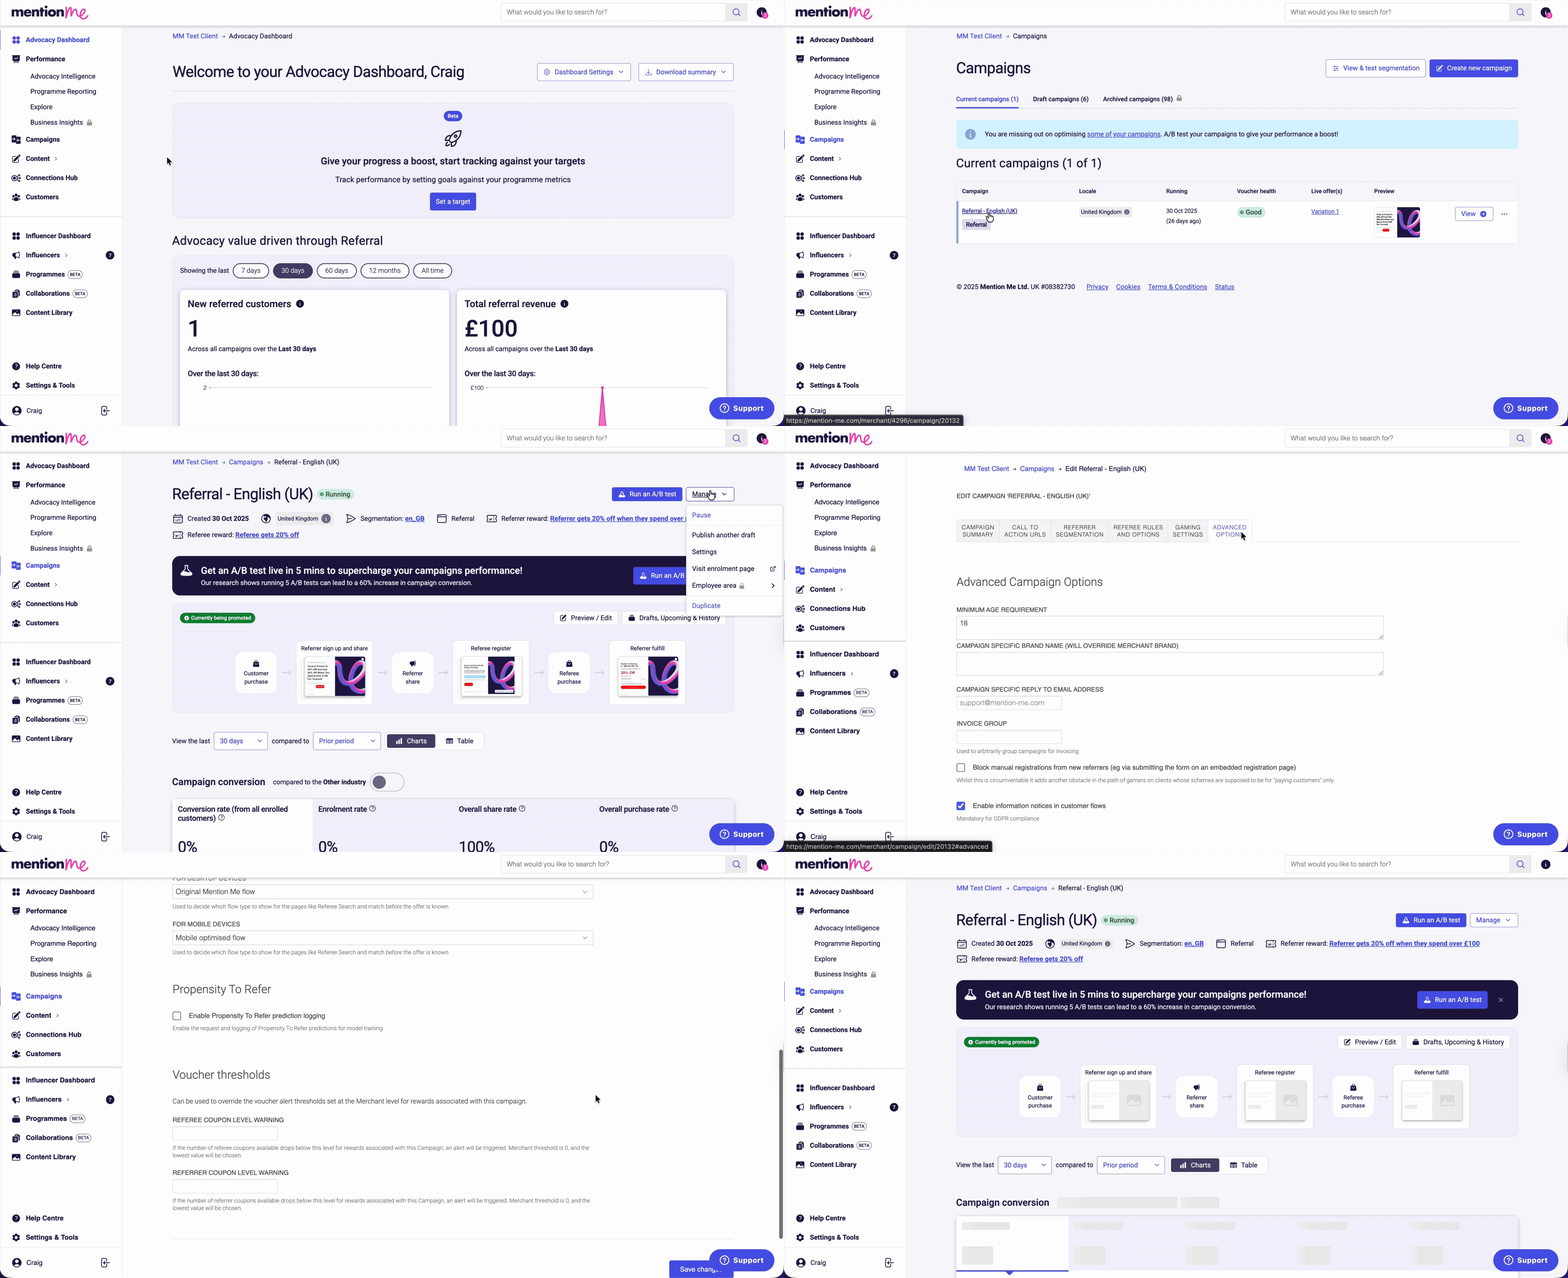
>
> The 'Block manual registrations from new referrers' checkbox selected in Campaign Settings Advanced Options.
>
> **3. Save Your Changes**
>
> Click **Save changes** at the bottom of the page.
# How to Redirect Referral Share Links to Your Website
Source: https://docs.mention-me.com/knowledge/referral/offers/custom-share-link-redirect
Set up a self-hosted landing page so referral share links direct referees to your own site instead of a Mention Me-hosted page.
By default, referral share links direct referees to a Mention Me-hosted page. You can instead deliver the referee experience on your own site, giving referees a seamless, branded journey when they click a shared link.
This guide covers the two steps needed to set up and optimise this functionality:
* Embed the Mention Me referee tag on your landing page to personalise and track journeys
* Work with your Client Success Manager to enable share link integration and assign your custom URL
**1. Set up a referee tag on your landing page**
Create a dedicated landing page for referee traffic. This page displays the referee journey driven by Mention Me.
> [!WARNING]
>
> The landing page should not contain details about the offer. Mention Me automatically adds personalised messaging and content.
On the landing page, embed the [referee tag](/developer-docs/integration/entry-points/referee) using the embedded implementation:
```
implementation=embed
```
**2. Enable referee share link implementation**
Once your landing page is live, tell your Client Success Manager or the [Support Team](https://help.mention-me.com/hc/en-gb/requests/new?ticket_form_id=1900000712373). They'll update your account settings so that share links point to your chosen landing page URL.
This automatically redirects referees to your branded experience instead of the default Mention Me-hosted page.
## Need Help?
Start a conversation with the in-platform Support widget in the bottom-right corner of your dashboard - it can usually answer this straight away. If it can't, raise a request via the [request form](https://mention-me.zendesk.com/hc/en-gb/requests/new?ticket_form_id=5268418076701).

The in-platform Support widget starting an AI-assisted conversation.
## Related Guides
> [card] [Referee Tag Integration](/developer-docs/integration/entry-points/referee)
>
> How to embed and configure the referee tag on your landing page.
> [card] [Sharing Methods](/knowledge/referral/offers/sharing-methods)
>
> The channels referrers can use to share their link.
# Reward Fulfilment
Source: https://docs.mention-me.com/knowledge/referral/offers/fulfilment
How to manage reward fulfilment in Mention Me, including self-fulfilment, changing fulfilment methods, confirming referee eligibility, and managing email notifications.
This guide explains how to manage reward fulfilment and related communications, whether you're using automated fulfilment or handling it manually.
## When to manage fulfilment yourself
You may choose manual fulfilment if:
* You want to include an additional item in a referee's first order
* You need to apply credit to a referrer's account internally
* You already use an in-house reward fulfilment process
* You're running a one-off campaign or competition where you manually select winners
Fulfilment method changes can only be made on offers in **Draft** status. [Learn how to create a draft experiment](/knowledge/referral/offers/setup-reward).
## How to change the fulfilment method
Watch how to change how a reward is fulfilled in Classic.
> [accordion] See each step in detail
>
> **1. Open your draft offer**
>
> In the left-hand menu, click **Campaigns** and select the relevant campaign. Click **Drafts, upcoming & history**, then open your draft offer. Click **Design and settings** and choose **Rewards**.
>
> The **Manage rewards** panel shows the reward for your customer and the one for their friend.
>
> **2. Choose or create a reward**
>
> Open the dropdown to pick an existing reward that already uses the fulfilment method you want, or choose **Create new reward**.
>
> **3. Define reward details**
>
> When creating a new reward, set:
>
> * Type (percentage discount, fixed amount, or free item)
> * Value
> * Minimum spend, if applicable
> * Validity period (recommended: use default)
>
> **4. Set the fulfilment method**
>
> Open the **Which will be fulfilled using** section and choose how the reward is fulfilled:
>
> * Default: **Coupon code**
> * Other options: **Coupon link**, **Webhook**, or **Shopify**
> * If using **Webhook**, ensure the connection is set up beforehand
> * If using **Shopify**, you can choose to have the discount created in Mention Me automatically, or link to a discount you pre-created in Shopify. See the [Shopify fulfilment guide](/knowledge/referral/offers/shopify-fulfilment) for details.
> * For custom fulfilment (e.g. external gift cards), click **Can't set your reward provider?** or contact your Client Success Manager or Operations Team
>
> Click **Update and close** to save the reward.
>
> 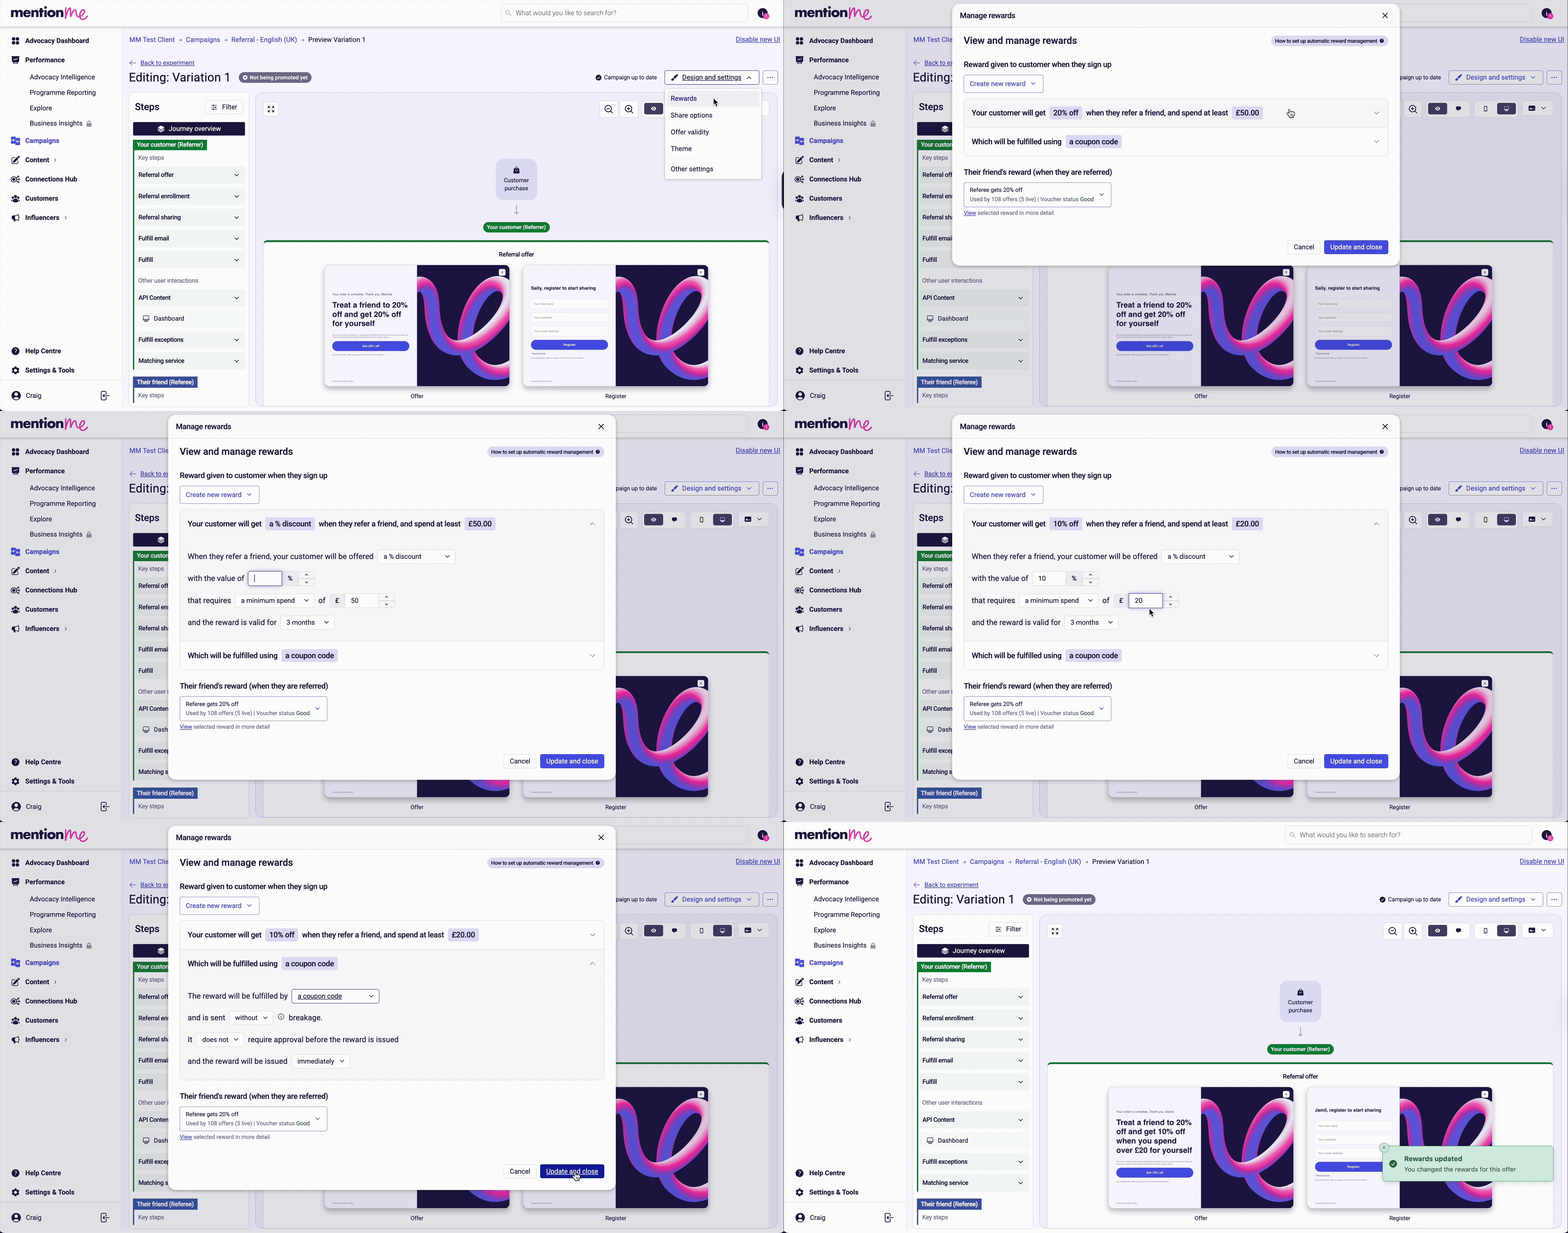
>
> The reward fulfilment method selection showing coupon code, link, and webhook options.
>
> **5. Upload vouchers**
>
> Once the reward is created, upload your voucher file to complete configuration. [Follow the voucher upload guide](/knowledge/referral/vouchers/upload-vouchers).
## Referee Eligibility and Reward Approval
Eligibility settings control **when** and **how** rewards are approved. They only affect reward approval and do not override gaming protection - a customer flagged for gaming stays ineligible for a reward regardless of any eligibility tag.
### Approve a Referee Reward (After Purchase)
If a referee's reward is awaiting approval, an eligibility tag confirms that the referee has met your criteria and their reward can be approved. This is the most common scenario, used when a reward is only issued once a referee's purchase or sign-up is verified.
### Approve a Referrer Reward (Before Purchase)
If the referee's reward is already approved (or doesn't require approval) but the referrer's reward does, the tag confirms that the referee is valid and the referrer can be rewarded. This setup is typical when the referee receives their reward upfront and the referrer becomes eligible separately, for example once a voucher is fulfilled.
### Both Referee and Referrer Need Approval
If both rewards require approval, Mention Me only acts on the referee's approval first. You then approve the referrer separately.
This is typically used where the referee's reward (such as a subscription credit) is auto-approved, and the referrer's reward (such as a voucher) is held for manual approval.
If you want both rewards approved together automatically, turn off approval for the referrer's reward. This makes the setup follow the first scenario above.
You can confirm referee eligibility manually, via [SFTP](https://demo.mention-me.com/api-demo/v2/496-test-client/sftp/receiving_data#eligibility_feed), or using the [Batch Tag Upload tool](/knowledge/admin/upload-tags).
| Scenario | What Happens | Common Use Case |
| - | - | - |
| Referee reward pending approval | The referee is eligible, so their reward can be approved | After purchase |
| Referrer reward pending, referee approved | The referee is valid, so the referrer can be rewarded | Before purchase |
| Both rewards require approval | Approve the referee and referrer separately | Split or dual reward journeys |
For guidance on setting up eligibility tags for your referral journey, contact your Client Success Manager or Operations Team.
## Managing emails from Mention Me
By default, Mention Me sends automated emails to referrers and referees about reward status, next steps, and fulfilment details.
If you prefer to manage these communications yourself, you can disable Mention Me emails.
### How to manage email communications
* Open your draft offer
* Click **Design and settings** → **Other settings**, then open the **Email** tab
* Untick the emails you don't need
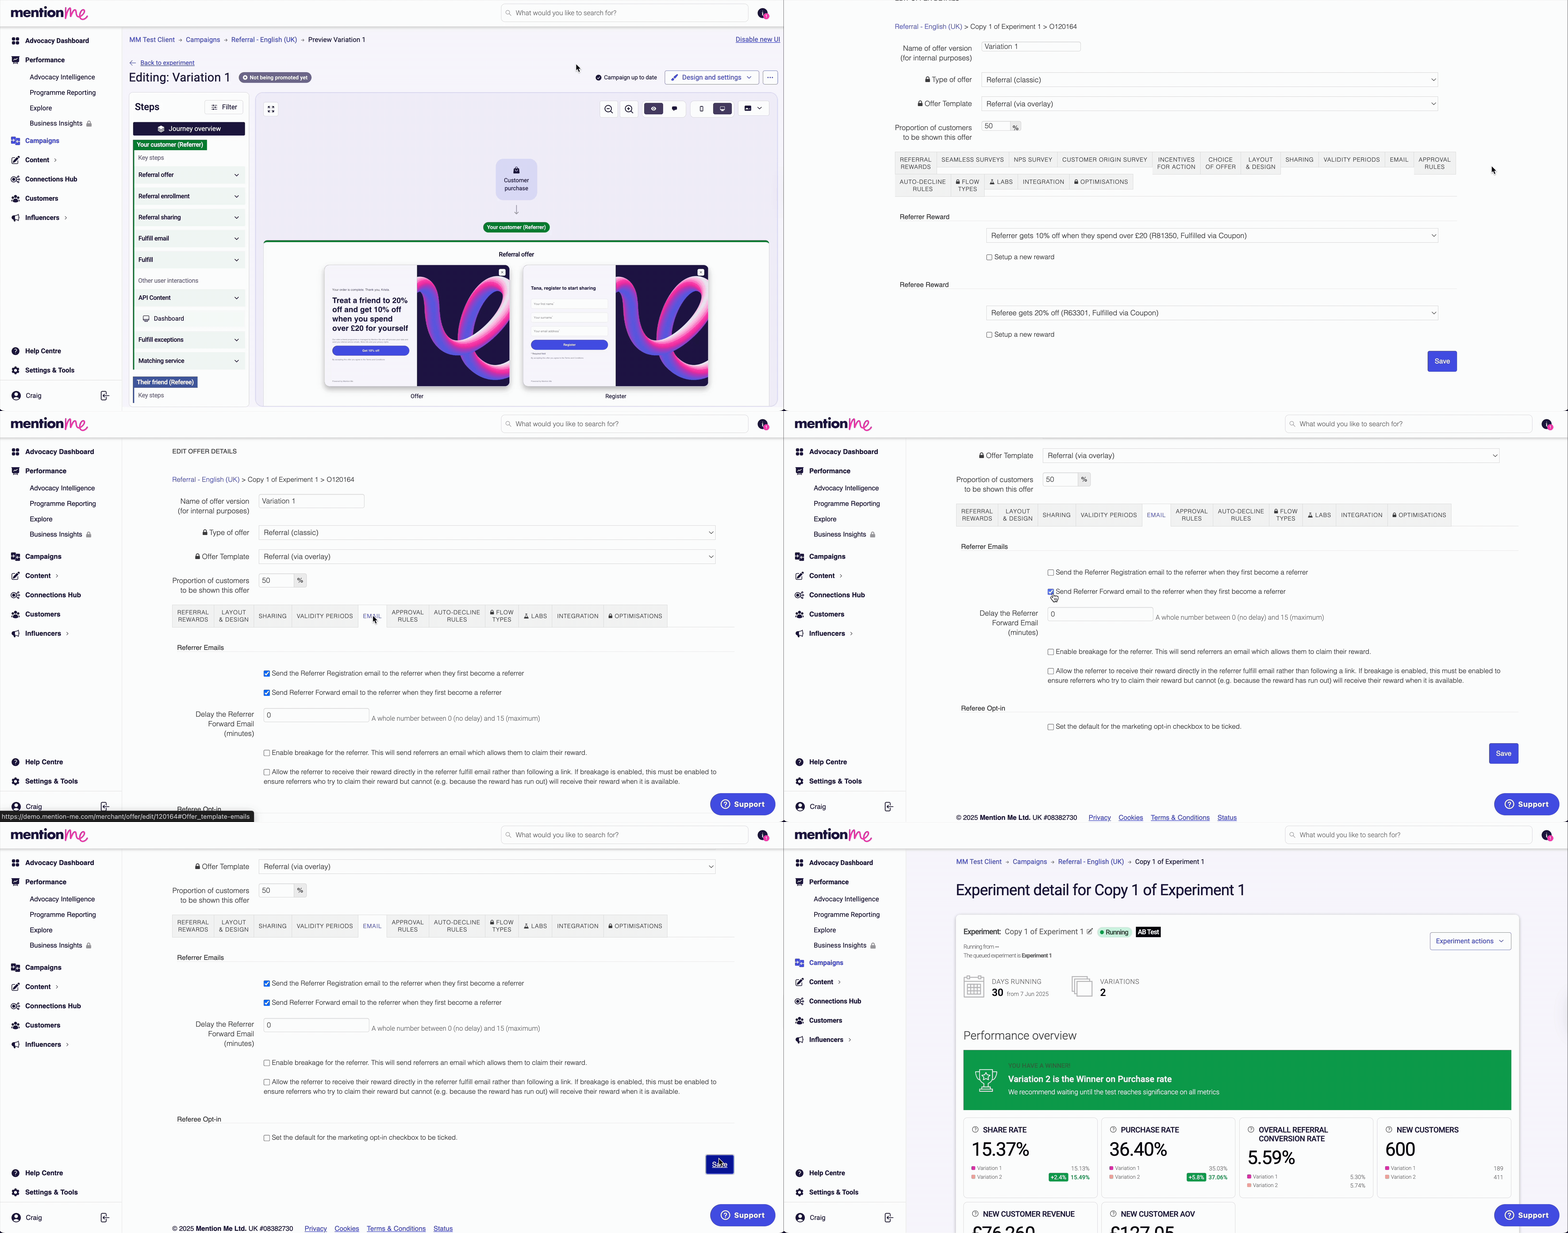
The email communication settings for managing reward notifications.
# How to Set Up Native Share
Source: https://docs.mention-me.com/knowledge/referral/offers/native-share
Set up Native Share so referrers can share your referral offer through any app on their mobile device, including Instagram.
Native Share lets referrers share your referral offer through any app installed on their mobile device, including previously unsupported platforms such as Instagram. This guide covers what Native Share is, why it's worth testing, and how to set it up in a campaign.
## What Native Share Does
Native Share lets mobile users share your referral offer through any app installed on their device, including Instagram. It works on both iOS and Android.

The share page transitioning into the native share sheet on a mobile device.
> [!NOTE]
>
> Native Share is available on mobile devices only. It cannot be used on desktop.
Native Share can:
* Boost sharing and conversions, with a typical lift of 5-15%
* Give referrers a personal message option to make shares more compelling
* Use built-in AI to analyse shared messages for customer insights and brand sentiment, see [Understanding How We Use AI](/knowledge/security/data-privacy/ai-and-data)
## Why Test Native Share
* It improves shareability on mobile, delivering 5-15% increases in share and conversion rates
* It supports all apps, expanding share channels to include Instagram and others
* It enables sentiment analysis through captured share messages, see [Understanding Sentiment Analysis](/knowledge/reporting/advocacy/sentiment-analysis)
## How to Set Up Native Share in a Campaign
A guided walkthrough of setting up Native Share in the Mention Me platform.
> [accordion] See each step in detail
>
> **1. Open the campaign**
>
> In the left-hand menu, click **Campaigns**, then click the name of the campaign you want to edit.
>
> **2. Open draft history**
>
> Click **Drafts, Upcoming & History**.
>
> **3. Open experiment actions**
>
> Click **experiment actions** (the three dots menu) on your draft.
>
> **4. Duplicate or create a test**
>
> If you don't have a draft yet, choose **Duplicate to draft** or **Create new A/B test** first.
>
> **5. Open offer actions**
>
> Click **offer actions** (the three dots menu).
>
> **6. View offer settings**
>
> Select **View offer settings** and choose the variation you want to edit.
>
> **7. Open sharing settings**
>
> Click the **Sharing** tab. The lists on the left are the share options customers see, on desktop and on mobile. Everything on the right is switched off.
>
> **8. Add Native Share with Message Capture**
>
> Drag **Native Share With Message Capture** from the right into the **Responsive & Mobile** list.
>
> **9. Move Link share**
>
> Drag **Link** share across to the unused list on the right, since Native Share covers it.
>
> **10. Save your changes**
>
> Scroll down and click **Save** to confirm your changes.
>
> 
>
> Enabling Native Share in the campaign's sharing settings.
## Preview and Verify Your Changes
### Preview the Changes
> [accordion] See each step in detail
>
> **1. Open the preview on mobile**
>
> Open your draft in the preview and switch to mobile.
>
> **2. Go to the share page**
>
> In the **Steps** panel, open **Referral sharing**, then click **Share**.
>
> **3. Check Native Share**
>
> Native Share uses your current design, with a message box and a **Share now** button.
>
> 
>
> The Native Share preview screen within the campaign preview.
### Verify Styling
* Check the mobile appearance in the preview
* Contact [Support](https://help.mention-me.com/hc/en-gb/requests/new) if anything looks incorrect
## Launch the Experiment
> [accordion] See each step in detail
>
> **1. Return to your drafts**
>
> When you're happy, go back to **Drafts, Upcoming & History**.
>
> **2. Set live or schedule**
>
> Open your draft's actions menu and choose **Set live or schedule**. You can launch straight away, or pick a date and time.
## Recommended Test Plan
| Test | Aim | Test Setup |
| - | - | - |
| Test 1 | Validate Native Share | Control: current setup. Variant: Native Share with Message Capture replacing Link. Name Share in position 1, Native Share in position 2. If results aren't positive, try a variant using Native Share without message capture, replacing Link. |
| Test 2 | Optimise share option order | Control: Name Share (1), Native Share with Message Capture (2). Variant: Native Share with Message Capture (1), Name Share (2). |
| Test 3 | Test only Name Share and Native Share | Control: previous winner setup. Variant: all other options removed except Name Share and Native Share. |
| Test 4 | Customise the default share message | Control: no default message. Variant 1: standard default message. Variant 2: "Tell me the best thing about *brand*". |
## FAQs
### What's the Difference Between Native Share and Native Share with Message Capture?
* **Native Share:** lets users share through any app on their phone
* **Message Capture:** adds a prompt for the referrer to write a message, which can improve engagement and conversion

Comparison of the Native Share and Native Share with Message Capture options.
### What About Link Share?
We recommend removing Link Share and using Native Share as outlined in the test plan above.
### Which Version Should I Use if There's No Difference in Conversion?
Use **Native Share with Message Capture**. It offers more flexibility for future enhancements.
### I've Tested Native Share but Didn't See Good Results. What Can I Test?
* Set Name Share to position 1 and Native Share to position 2
* Switch from the Message Capture version to standard Native Share, or vice versa
* Test a more engaging default message, for example "Tell me the best thing about *brand*"
### I Saw a Higher Share Rate but a Lower Purchase Rate. What Now?
This can happen. If total conversions are up, it may still be worth it. Otherwise:
* Prioritise Name Share in position 1
* Switch Native Share versions
* Test different default share messages
### What's the Default Share Message with Native Share?
It's blank by default, which typically performs best. You can try alternatives on the Referee "Invited by Link" configuration page.

The Referee Invite configuration page where you can set a default share message.
### Are There Restrictions on Native Share?
Native Share is mobile only. It cannot be used on desktop.
### Does Native Share Work on Both iOS and Android?
Yes, it's fully supported on both platforms.

Native Share on iOS.

Native Share on Android.
# Understanding New Customer Attribution
Source: https://docs.mention-me.com/knowledge/referral/offers/new-customer-attribution
How Mention Me defines new referred customers and how referral attribution works, including email-based tracking and first-click attribution.
This guide explains how Mention Me defines and attributes new referred customers.
## Definition of a New (Referred) Customer
A referee who purchases on your website for the first time is considered a new referred customer.
Mention Me uses the email address as the unique identifier. By default, voucher code usage is also tracked, but only if the code is for your website and is single-use. Codes for third parties (e.g. Amazon Gift Cards) or multi-use codes are not used for attribution.
This behaviour can be disabled on a merchant-by-merchant basis if you prefer email-only attribution.
## New Customer Acquisition
Clients often track referral performance using code redemptions, but this overlooks customers who haven't used a code. Mention Me uses email addresses to identify whether new customers have been referred and by whom.
For example, if a referee's code only applies to certain items but they purchase something else, Mention Me still counts them as an introduced customer.
## Attribution Model
Mention Me uses **first-click attribution**.
If Sally clicks a referral link shared by a friend and registers for an offer, but later places her first order using a different promotion (e.g. a new customer discount), Mention Me still attributes her to referral - because that's how she originally discovered the brand.
## Why Mention Me Data Differs from Google Analytics
Discrepancies between Mention Me and other attribution tools (e.g. Google Analytics) are common. Key reasons:
1. **Different attribution models:** Mention Me uses first-click attribution. Google Analytics typically uses last-click. Mention Me credits the referral interaction; Google Analytics may credit a later source (paid ad, direct visit).
2. **Different identification methods:** Mention Me identifies referred customers through email matching. Your tools may track based on voucher code redemption or other methods.
3. **Untrackable referral sources:** Some methods, like [Name Share](/knowledge/referral/offers/sharing-methods), aren't fully trackable in Google Analytics. A friend referred via Name Share in conversation will likely visit your site organically or via search. Google Analytics attributes this as Direct or Paid Search; Mention Me recognises it as a referral through email matching.
Every customer attributed to Mention Me has had a genuine interaction with a referrer - whether through a direct link or a casual conversation. These interactions play a meaningful role in driving conversions, even when untracked by other platforms.
# How to Push a Draft Offer Live
Source: https://docs.mention-me.com/knowledge/referral/offers/push-draft-live
Step-by-step guide to pushing a draft campaign live in Mention Me, including A/B test configuration and scheduling.
This guide walks you through pushing a draft campaign live, whether from your own drafts or via a review link from the Operations Team.
## What You Need
* Access to the Mention Me platform
* The draft campaign you want to launch, or a review link from the Operations Team
## How to Push a Draft Campaign Live
A guided walkthrough of pushing a draft offer live in the Mention Me platform.
> [accordion] See each step in detail
>
> **1. Navigate to the draft experiment**
>
> In the left-hand menu, click **Campaigns**. Select the campaign you want to go live, then click **Drafts, Upcoming & History**.
>
> **2. Select Set live / schedule**
>
> Open the actions menu (three dots) on your draft and choose **Set live / schedule**. For an A/B test, this opens **Manage A/B test**. For a draft that isn't an A/B test, see [Launching a single draft](#launching-a-single-draft) below.
>
> 
>
> Navigating to experiment actions and selecting Set live or schedule.
>
> **3. Check your variants**
>
> Check your control and your variant. Each one needs its rewards set, or **Run test** stays greyed out.
>
> **4. Check the test parameters**
>
> Under **Running the A/B test**, tell us roughly how many unique orders you see in a week. If your order volumes are too low to test with, we'll suggest a single variant experience instead. Otherwise, sensible defaults are applied:
>
> * **Confidence Level:** the confidence we need before declaring a winner (e.g. 90%)
> * **Success Metric:** the metric we measure, which defaults to variation conversion rate
>
> 
>
> The Running the A/B Test panel, with weekly order volume, confidence level and success metric.
>
> **5. Check test outcomes**
>
> **Manage test outcomes** sets what happens when the test ends. The test ends automatically and your campaign updates:
>
> * **If a winner is found:** the winning variation is chosen
> * **If a better variation is found (but no winner):** choose which variation takes over
> * **If no substantial difference is found:** choose which variation takes over
>
> Afterwards, you can still switch variants yourself.
>
> 
>
> Test outcome settings showing auto-conclude behaviour.
>
> **6. Run or schedule the test**
>
> When you're ready, click **Run test**. Set it live now, or choose **Schedule for later**. If scheduling, preview the full flow before continuing.
>
> Press **Next**, choose your start date, start time, and time zone, then press **Confirm schedule**.
>
> 
>
> Scheduling a draft offer with date, time, and timezone selection.
## Launching a Single Draft
For a draft that isn't an A/B test, **Set live / schedule** opens **Launch campaign** instead.
> [accordion] See each step in detail
>
> **1. Work through the checklist**
>
> Work through the **Prepare for go-live** checklist first. For example, if voucher levels need topping up, **Next** isn't available until you do.
>
> **2. Preview and launch**
>
> Click **Next**, preview your experience, then set it live or schedule it.
# Reward Types & Fulfilment
Source: https://docs.mention-me.com/knowledge/referral/offers/reward-types
An overview of the reward types available in Mention Me, including spend constraints and fulfilment methods.
Choosing the right reward type is key to driving participation and converting both referrers and referees.
Rewards serve two purposes:
* **Direct incentive** - Rewards compensate referrers for advocating on your behalf.
* **Referral usefulness** - Rewards add value for the referee, so referrers feel they're genuinely helping a friend.
Do not run a referral programme without either a referrer or referee reward - they are critical to its success.
Before setting up rewards, read the guide on [what makes a good reward](/knowledge/referral/offers/what-makes-a-good-reward).
## Common Reward Types
### Discount Off Next Purchase
Offers referrers and/or referees a discount on a future or initial purchase (percentage-based or fixed amount).
Example: £5 off for the referrer and 20% off for the referee.
### Free Item Options
Assigns specific items as rewards (e.g. 10 free pencils for the referrer, 10 free lipsticks for the referee).
### Free Gift
Provides a single item as a reward (e.g. a free camera) for both parties after a qualifying purchase.
### Third-Party Voucher
Suitable for businesses without repeat purchases. Contact [support@mention-me.com](mailto:support@mention-me.com) for setup details.
### Gift Card for Next Purchase
Provides a gift card for your brand as a customer reward.
### Amount on Account
Adds points or monetary value to a customer's account for future use or combination with existing points.
## Spend Constraints
Spend constraints are rules that dictate how rewards can be used.
### Minimum Spend
Customers must meet a minimum purchase amount to use a discount (e.g. spend £50 to use a £10 off coupon).
### Specific Products or Categories
Discounts apply only to certain items or categories (e.g. 20% off clothing but not electronics).
## Reward Fulfilment
Most rewards are fulfilled via voucher codes, especially discounts. Shopify merchants can also have discount codes created in Mention Me directly in their store. For details on all fulfilment methods, see the [fulfilment guide](/knowledge/referral/offers/fulfilment) and the [Shopify fulfilment guide](/knowledge/referral/offers/shopify-fulfilment).
# How to Set Up a Reward
Source: https://docs.mention-me.com/knowledge/referral/offers/setup-reward
Step-by-step guide to editing or creating rewards for your campaign experiments in Mention Me.
This guide walks you through editing or creating rewards for your campaign experiments.
A guided walkthrough of setting up a reward in the Mention Me platform.
## Editing rewards in a campaign
> [accordion] See each step in detail
>
> **1. Navigate to campaign drafts**
>
> In the left-hand menu, click **Campaigns**, select the campaign you wish to edit (current or draft), then click **Drafts, Upcoming & History**.
>
> **2. Duplicate or create a test**
>
> Click **Experiment actions** (three dots). If you need a draft, choose **Duplicate to draft** to copy the current experiment, or **Create new A/B test** using one of the existing variations. Then click **View and edit** on your draft.
>
> 
>
> Navigating to manage test in a draft experiment.
>
> **3. Open reward settings**
>
> In the editor, open **Design and settings**, then **Rewards**. The **Manage rewards** window shows the reward your customer gets when they sign up, and the reward their friend gets when they're referred. Each one shows how many offers use it, and its voucher status.
>
> Open the dropdown to pick an existing reward, or choose **Create new reward**. A new reward is written as a sentence you can edit:
>
> * Reward type (money off, percentage discount, or free item)
> * Discount value
> * Minimum spend amount (if required) and the value
> * Reward validity period (defaults to your main account settings)
>
> **4. Configure fulfilment and save**
>
> Choose how the reward will be fulfilled: a coupon code, a coupon link, Shopify, or your own webhook. You can also set whether it needs approval before it's issued, and when it's issued. Repeat for both the customer's and their friend's rewards as needed, then click **Update and close**.
>
> 
>
> The reward setup UI showing type, value, minimum spend, and fulfilment options.
## Using the A/B testing wizard
You can also use the A/B testing wizard to set up tests comparing reward types (e.g. money off vs. percentage discount) or to reduce reward value.
After selecting a test, click **Select rewards** on your variant to set up a different reward to test, like money off against a percentage discount, and follow the reward setup UI.
Using the A/B testing wizard to select rewards
## Creating a reward in a single experience
> [accordion] See each step in detail
>
> **1. Duplicate the experiment**
>
> Via **Experiment actions** → **Convert to single variant** → choose variation A (control) or B.
>
> **2. Configure the reward**
>
> Click **View and edit** → **Design and settings** → **Rewards** and follow the reward setup UI.
>
> 
>
> Creating a reward in a single experience via experiment actions.
## Creating a brand new single experience
> [accordion] See each step in detail
>
> **1. Create the experience**
>
> In **Drafts, Upcoming & History**, click **Create new** at the bottom, then select **Single experience**.
>
> **2. Configure the reward**
>
> Click **View and edit** → **Design and settings** → **Rewards** and follow the reward setup UI.
>
> 
>
> Creating a brand new single experience with reward setup.
## Related guides
> [card] [How to Fulfil Rewards](/knowledge/referral/offers/fulfilment)
>
> Search for a reward code, resend a reward email, or help a customer claim their reward.
> [card] [How to Introduce an Eligibility Check before Issuing Rewards](/knowledge/referral/offers/fulfilment#referee-eligibility-and-reward-approval)
>
> Add an approval step before a reward is issued.
> [card] [How to Upload New Vouchers](/knowledge/referral/vouchers/upload-vouchers)
>
> Add a batch of voucher codes for use as rewards.
# Sharing Methods
Source: https://docs.mention-me.com/knowledge/referral/offers/sharing-methods
A guide to the referral sharing methods available in Mention Me, with industry-specific recommendations for driving the best results.
Not all sharing methods perform equally. Choosing the right ones can significantly boost referral success. Focusing on a few high-performing options for your sector often leads to greater engagement than offering every option at once.
## Why It Matters
Offering every available sharing method can overwhelm customers and impact performance. Refining your choices typically results in higher conversion rates.
Performance varies by industry and device (desktop vs. mobile). The insights below are based on sector-specific data.
## Available Sharing Methods
### Email
Referral invitation sent directly from the share screen via email.
### Link
"Copy Link" option - lets users share using any app they prefer (e.g. SMS, WhatsApp, Messenger).

The share overlay showing the link copy and sharing options.
By default, this link directs referees to a Mention Me-hosted page. See [how to redirect share links to your own website](/knowledge/referral/offers/custom-share-link-redirect) for a branded, self-hosted alternative.
### Forwarded Email
Referral email sent to the referrer so they can forward it manually to friends.

The forwarded email referral configuration in the platform.
### Name Share
A distinctive Mention Me feature that allows customers to refer friends by name, without digital messages. Ideal for in-person scenarios or on-site prompts, it captures offline word-of-mouth referrals and mirrors how people naturally recommend brands in conversation. On average, 34% of new customers are delivered this way, and some brands see up to 77% of their referrals through it.
Name sharing requires you to pass us first and last names through tags, or for referrers to manually register their name. It can only be used via the referee tag (the "Been referred by a friend?" link at checkout, on the homepage, etc.).
#### How It Works for the Referee
1. The referee clicks the "Been referred by a friend?" link on the checkout page. This launches an overlay prompting them to enter the name of the person who referred them.
2. The referee enters the referrer's name. We link the new customer to the matched referrer and give the referrer their reward on the referee's first purchase. See [How searching for a name works](#how-searching-for-a-name-works) below for what happens in each match scenario.
If a referee makes a purchase without entering their referral details, you'll need to [link their accounts retrospectively](/knowledge/referral/customers/search-add-link).
#### How Searching for a Name Works
There are three possible outcomes when a referee searches for a name:
* **Exact match:** the referrer is found and the referee receives the coupon code.
* **Duplicate match:** if multiple people have the same name, we ask the referee to confirm the referrer's email address. By default, we issue the code even if the email addresses don't match (we also email the referrer to check whether they registered with a different address). You can disable this option if preferred.
* **No match:** if nobody in the system matches the search, we ask for the referrer's email address and only issue the coupon code on an exact match.
A referrer's name may not match for several reasons:
* Names change (for example, from maiden to married name)
* Not all names are two words (some names have only one word)
* People often go by nicknames
If a referee enters a referrer's name that isn't in our records, we do our best to match them by looking for a similar name in the database and checking it's them.
#### Things to Note
* We treat international names like Western names, and can handle non-Latin characters
* We can only work off names registered with us. You can update customers' names if required
* Matching is case-insensitive
* We remove titles (Mr, Mrs) if the referee adds them, but specific titles (like Captain) will affect the search
### Admin (Special Case)
Appears in reporting when the referral relationship is manually created - either by your internal team or Mention Me Support.
## Industry-Specific Insights
Based on collective data across sectors, the four most effective sharing methods vary by platform (desktop and mobile). Use these insights to:
* Prioritise top-performing methods in your UI
* Optimise messaging around your most valuable channels
* Run A/B tests comparing sector averages vs. customer-specific preferences

Sharing method rankings by industry for Sports, Online Services, Health, and Home.
The rankings continue across further sectors.

Sharing method rankings by industry for Entertainment, FMCG, Food, and Gifts.
Additional sectors are covered in the final set of rankings.

Sharing method rankings for additional sectors.
## Need Help?
Start a conversation with the in-platform Support widget in the bottom-right corner of your dashboard - it can usually answer this straight away. If it can't, raise a request via the [request form](https://help.mention-me.com/hc/en-gb/requests/new?ticket_form_id=1900000712373).

The in-platform Support widget starting an AI-assisted conversation.
# Shopify Reward Fulfilment
Source: https://docs.mention-me.com/knowledge/referral/offers/shopify-fulfilment
How to configure Shopify as a fulfilment method for referral rewards, including discounts created in Mention Me.
When you use Shopify as your fulfilment method, referral rewards are issued as Shopify discount codes. You can choose how those discounts are managed:
* **Created in Mention Me** - Mention Me automatically creates and configures the discount in your Shopify store when a reward is issued. You control the scope, eligibility and combination rules from the reward form.
* **Managed in Shopify** - You pre-create the discount in your Shopify admin and link it to the reward in Mention Me. This is the original Shopify fulfilment flow.
> [!NOTE]
>
> The "Created in Mention Me" option requires a connected Shopify App (installed via the [Shopify App Store](https://apps.shopify.com/mention-me)) with discount creation permissions. If your store only has a legacy API-key configuration, you'll see the "Managed in Shopify" flow only.
## Before you begin
You'll need:
* A Shopify store with the [Mention Me app installed](/knowledge/shopify/app-installation)
* A Mention Me account with the Referral product enabled
* Permission to manage rewards in the merchant dashboard
## Choosing a management option
When you select **Shopify** as the fulfilment method on a reward, you'll see the question **"How should the discount be managed?"** with two options.
### Created in Mention Me
Choose this option to have Mention Me create discounts directly in your Shopify store. This is the recommended approach for most merchants - it reduces manual steps and keeps discount configuration in one place alongside your reward setup.
When you select this option, you configure:
| Setting | Description |
| - | - |
| **Shopify store** | Which connected Shopify store to create the discount in |
| **Discount applies to** | All products, specific collections, or specific products |
| **Combine with** | Whether the discount can be combined with order, product, or shipping discounts |
| **Who can redeem** | All customers, new customers only, or specific customer segments |
| **Code prefix** | A text prefix for the generated discount code (e.g. `REF`) |
| **Random length** | The number of random characters appended to the prefix |
| **Personalised template** | Optionally, build codes from the referrer's name instead of prefix + random. See [Personalised discount codes](/knowledge/shopify/discount-code-templates) |
| **Limit to one use per customer** | Whether each customer can redeem the discount only once |
### Managed in Shopify
Choose this option if you prefer to create and configure discounts directly in your Shopify admin. You'll select an existing discount node from a dropdown, and Mention Me will issue codes against it.
This is the original Shopify fulfilment flow and may suit merchants who need full control over discount configuration in Shopify. For help creating and configuring discounts in your Shopify admin, see Shopify's [Managing discounts](https://help.shopify.com/en/manual/discounts/managing-discounts) guide.
## Setting up a reward created in Mention Me
**1. Navigate to reward settings**
Go to **Campaigns**, select your campaign, and open a draft experiment. Click **Design & Settings** then **Rewards**.
**2. Select Shopify fulfilment**
Create a new reward or edit an existing one. Set the **Fulfilment** method to **Shopify**.
**3. Choose Created in Mention Me**
Under **"How should the discount be managed?"**, select **Created in Mention Me (we create the discount in your store)**.
**4. Select your Shopify store**
Choose the connected Shopify store from the dropdown. Only stores with active connections and discount creation permissions are shown.
**5. Configure item scope**
Choose which products the discount applies to:
* **All products** - The discount applies to everything in the store
* **Specific collections** - Type to search and select one or more collections
* **Specific products** - Type to search and select one or more products
The collection and product pickers search your live Shopify catalogue. Draft or unpublished items are excluded.
> [!NOTE]
>
> For free delivery rewards, the item scope setting does not apply since free delivery discounts apply to shipping, not items.
**6. Set combination rules**
Under **Combine with**, tick the discount types this reward can be used alongside:
* Order discounts
* Product discounts
* Shipping discounts
**7. Set customer eligibility**
Choose who can redeem the discount:
* **All customers** - Any customer can use the code
* **New customers only** - Only first-time customers can redeem
* **Specific customer segments** - Select one or more Shopify customer segments
> [!NOTE]
>
> For referrer rewards, "New customers only" is not suitable because a referrer is always an existing customer. The form will display a warning if you select this option on a referrer reward.
**8. Configure the discount code format**
Set a **Code prefix** (e.g. `REF` or `FRIEND`) and **Random length** (the number of random characters appended). These determine the format of the generated discount code.
For example, a prefix of `REF` with a random length of 8 might produce codes like `REF4KX9M2PL`.
Alternatively, switch to a **personalised template** to build memorable codes from the referrer's name (e.g. `THANKS-SAM20`) instead of a prefix plus random string. See [Personalised discount codes](/knowledge/shopify/discount-code-templates) for the available tokens and rules.
**9. Save the reward**
Click **Save**. The discount configuration is stored with the reward and will be used when the reward is allocated to a customer.
## Editing managed rewards
Once a reward is live, the Shopify discount management settings (store, scope, eligibility, combination rules) are locked and cannot be changed. To modify these settings, [create a new draft experiment](/knowledge/referral/offers/setup-reward) with updated reward configuration.
The code prefix and random length settings remain editable.
## Switching between management options
The two management options are mutually exclusive. Switching from one to the other clears the previous option's configuration:
* Switching to **Created in Mention Me** removes any linked Shopify discount node
* Switching to **Managed in Shopify** removes the store selection, scope, eligibility and combination settings
## Related guides
> [card] [Set up a reward](/knowledge/referral/offers/setup-reward)
>
> Step-by-step guide to creating rewards for campaign experiments.
> [card] [Reward fulfilment](/knowledge/referral/offers/fulfilment)
>
> Overview of all fulfilment methods including coupon codes, links and webhooks.
> [card] [Install the Shopify app](/knowledge/shopify/app-installation)
>
> How to install and configure the Mention Me Shopify app.
> [card] [Troubleshooting rewards](/knowledge/referral/offers/troubleshooting-rewards)
>
> Common reward issues and how to resolve them.
# Time-Limited Offers & Competitions
Source: https://docs.mention-me.com/knowledge/referral/offers/time-limited-offers
How to plan and launch a time-limited referral promotion or competition to drive customer acquisition during key events.
Running a time-bound campaign is a proven way to boost referrals during specific periods, such as holidays, sales events, or product launches.
## Define Your Promotion
### Your Special Offer
Design an offer more compelling than your usual referral incentive:
* Entry into a prize draw
* Higher-value reward (e.g. £20 instead of £10)
* A free gift with purchase
* Tickets to an event
* Exclusive or early access to a sale or product launch
* Extended reward validity period
* Co-branded or partner rewards
### The Promotion Period
Clearly define campaign timeframes:
* **Start and end dates** for showing the promotion to customers (when referrers see the promotion)
* **Friend purchase/sign-up deadline** - the last date referees can complete a qualifying action. Often set a few days after the official end to give customers time to complete a purchase.
For after-purchase rewards with approval (common in finance, utilities, and insurance), the referee receives the promotional reward if they sign up before the deadline. The transaction date determines eligibility, not the approval date.
**Example:** A promotion runs 1st Jan to 31st Jan. Alice tells Bob, who creates an account on 15th Jan. Bob doesn't meet eligibility criteria until 2nd Feb. Bob receives the promotional reward because his account was created before the deadline. If Bob had created his account after 1st Feb, he would receive the standard offer.
### Qualification Criteria
Decide what's required from both parties. By default, a promotional offer uses the same criteria as your regular offers. Consider additional criteria sparingly - stricter requirements can harm effectiveness:
* Do referred friends need to purchase above a specific value?
* Do referrers need to introduce more than one friend for the better reward?
### How You'll Promote It
Determine your awareness channels:
* Email newsletter
* Dedicated promotional email campaigns
* Homepage banners or popups
* Social media posts and paid ads
* In-app notifications or website messaging
During the promotional period, push referrers to engage. Make qualification criteria and deadlines clear.
## After the Promotion Ends
Set a "follow-up" offer to continue referral activity - this can be your previous standard offer.
* Referrers who share after the promotion period are automatically moved to the follow-up offer
* Referees who transact after the purchase deadline are automatically moved to the follow-up offer
* For competitions, use the Reports for Download section to select a winner
If you don't set a follow-up offer, your referral programme will pause at the end of the promotion.
## Ready to Launch?
When you're ready, [fill out the promotion request form](https://help.mention-me.com/hc/en-gb/requests/new?ticket_form_id=10217603621789) and the Operations Team will handle setup.

An example time-limited referral offer from Huel featuring a competition entry.
Other brands run similar promotions built around a mystery bundle prize.

An example time-limited referral offer featuring a mystery bundle prize.
An enhanced reward value is another common way to make a promotion stand out.

An example time-limited referral offer featuring an enhanced reward.
# Troubleshooting Rewards
Source: https://docs.mention-me.com/knowledge/referral/offers/troubleshooting-rewards
Common reasons why referral rewards may not work or be received, and how to resolve them.
This guide covers the most common reasons referral rewards may not work as expected or may not be received by customers.
## Reward Codes Not Working
Mention Me's role is limited to distributing the referral codes your team creates. Mention Me does not set up, configure, or manage how codes work on your website.
If a customer's code isn't working, check the following:
1. **Terms and conditions** - Make sure the purchase meets the offer's requirements.
2. **Promotion stacking** - Confirm the customer isn't combining the code with another promotion.
3. **Extra spaces** - Check there are no spaces before or after the code when entered.
If a customer needs a new code because they used it and then cancelled or returned their order, [submit a request](https://help.mention-me.com/hc/en-gb/requests/new?ticket_form_id=1900000712373).
If GiftCloud, Runa (WeGift), or Shopify manages your rewards, reach out to your account manager for a new code. Mention Me cannot provide one in these cases.
## Customer Has Not Received Their Reward
There are several reasons a referrer might not receive their reward after a friend makes a purchase.
### Scenario 1: Accounts Not Linked
The referee didn't follow the referral link or enter the referrer's name correctly. You'll need to [connect their accounts manually](/knowledge/referral/customers/search-add-link).
Before linking accounts:
* Check the referrer has an active account on the platform. If not, [manually register or enrol the referrer](/knowledge/referral/customers/search-add-link).
* Collect the referee's name and email from the referrer.
* If the details match, link the accounts using the "add friend" feature to issue rewards.
### Scenario 2: Email Mismatch
The referee used different email addresses to claim the offer and make the purchase. [Follow the steps to manually confirm a purchase](/knowledge/referral/customers/check-referral-status).
### Scenario 3: Reward Delay
There may be a time delay in issuing the reward. Check the customer activity log to see if the referrer or referee is in a grace period.
# Understanding What Makes a Good Reward
Source: https://docs.mention-me.com/knowledge/referral/offers/what-makes-a-good-reward
Strategic guidance on choosing the right referral rewards, including industry-specific recommendations and best practices.
Getting your reward strategy right is key to a high-performing referral programme.
## Always Offer a Reward
There are two reasons why it's essential:
1. Rewards provide a direct incentive for the referrer - the brand is paying them to advocate.
2. Rewards add value for the referee, so the referrer feels they're genuinely helping a friend.
You should not run referral without either a referrer or referee reward. It rarely works.
## Choose the Right Type
* **Retail:** Discounts (percentage or fixed amount) work well - they're clear and create urgency.
* **Subscription, Travel, Insurance:** Gift cards or vouchers tend to land better, as purchases are less frequent and more considered.
## Match Rewards to Buying Habits
* **Frequent purchases** (fashion, food, beauty): Discounts feel relevant and encourage quick repeat buys.
* **Infrequent or high-value purchases** (travel, finance): Gift cards feel more worthwhile and better match expectations.
## Make Your Referral Offer Stand Out
Referral rewards should be your best offer. If customers can find a better deal elsewhere on your site (newsletter signup, basket abandonment, affiliate offers), they're unlikely to refer others.
## Keep It Fair for Both People
Referrers and referees don't need the exact same reward, but the value should feel balanced. If the rewards aren't fair, either the referrer will feel they're benefiting at their friend's expense, or feel they're being taken advantage of. Both suppress performance.
## You Must Be Able to Fulfil the Reward
For any referral reward, you need to know exactly how you will deliver it. For 80% of schemes, this means sending a voucher code via email. But sometimes you may want to post something, credit an account, or run a competition.
Figure out how to get the reward to the customer before you start offering it.
## Consider Automation
Using a reward platform can save time, avoid mistakes, and ensure a smooth customer experience. [Get started with one of our integrations](https://mention-me.com/merchant/~/reward-providers/).
## Delay Rewards When It Makes Sense
For some categories, it's smart to wait before sending rewards:
* **Travel:** Send rewards after the trip takes place
* **Subscriptions:** Wait until month two or when a contract is confirmed
* **Retail with high returns:** Only issue rewards after the return window
Make sure your definition of a "new customer" is clear and reflected in your setup. [Contact the team for help with eligibility checks](https://help.mention-me.com/hc/en-gb/requests/new?ticket_form_id=13993974953885).
## Industry Recommendations
| Example Brand | Industry | Buying Cycle | Recommended Reward | Notes |
| - | - | - | - | - |
| Fashion eCommerce | Retail | Short, high frequency | % or £ off (e.g. 20% off) | Frequent repeat purchases make instant discounts effective |
| Meal Kit Subscription | Subscription / Food | Medium, subscription-based | 3rd party voucher (e.g. £20 Amazon) | Voucher feels more tangible than money off next delivery |
| Online Furniture Store | Retail (High Purchase) | Long, infrequent | 3rd party voucher (e.g. £20 Amazon) | Rare purchases - external rewards have higher perceived value |
| Home Insurance Provider | Financial Services | Yearly/renewal-based | 3rd party voucher (e.g. £50 Amazon) | Discount irrelevant - gift cards better align with motivation |
| Mobile Phone Network | Subscription / Telecom | Monthly subscription | Credit on account or 3rd party voucher | Ongoing service makes bill credit effective |
| Travel Booking Platform | Travel / Services | Infrequent, seasonal | 3rd party voucher (after trip) | Post-booking voucher ensures quality leads |
| Online Fitness App | Digital Subscription | Monthly / Annual | 3rd party voucher (e.g. Amazon) | Digital brands work well with external reward flexibility |
| Consumer Tech Retailer | Retail / Electronics | Medium to infrequent | £ or % off, or 3rd party voucher | Higher AOV often suits vouchers |
# Overview
Source: https://docs.mention-me.com/knowledge/referral/overview
Everything you need to manage your Mention Me referral programme - offers, campaigns, design, customers, and more.
This section covers all aspects of running a referral programme on Mention Me. Whether you're setting up for the first time or fine-tuning an existing programme, you'll find everything you need here.
## What You'll Find Here
> [card] [Offers & Rewards](/knowledge/referral/offers/reward-types)
>
> Set up compelling offers, configure reward types, and manage fulfilment for referrers and referees.
> [card] [Campaigns](/knowledge/referral/campaigns/organise-and-run)
>
> Organise your referral campaigns, configure triggering rules, and run parallel campaigns.
> [card] [Design & Copy](/knowledge/referral/design/journey-design)
>
> Customise your referral journey design, manage images, fonts, CSS, and share messages.
> [card] [Customers](/knowledge/referral/customers/search-add-link)
>
> Search, manage, and support your referral customers, including status changes and data requests.
> [card] [Gaming & Fraud](/knowledge/referral/gaming/managing-gaming)
>
> Detect and manage suspicious referral activity with gaming controls and suspect review tools.
> [card] [Promoting Referral](/knowledge/referral/promoting/recommended-touchpoints)
>
> Drive awareness with promotional touchpoints across email, homepage, dashboard, and more.
> [card] [Psychology of Referral](/knowledge/referral/psychology/social-capital-and-social-risk)
>
> Understand the psychological drivers, like social capital and social risk, behind why customers refer.
> [card] [Vouchers](/knowledge/referral/vouchers/upload-vouchers)
>
> Upload, extend, and assign voucher codes to your referral offers.
# Understanding Product Referral
Source: https://docs.mention-me.com/knowledge/referral/product-referral/product-referral
Understand what Product Referral does, how the mm_rf URL parameter powers passive attribution, how it differs from Brand Referral, and what is involved in getting it integrated.
> [!NOTE]
>
> Using **Mention Me**? Product Referral is now a campaign type you set up
> yourself, and it can run with a reward. See [what product referral
> is](/knowledge-app/referral/campaigns/product-referral/what-product-referral-is).
> The page below describes Product Referral in Classic, where it is
> tracking-only.
Product Referral is a Mention Me feature that surfaces and measures the natural sharing behaviour already happening on your site: the everyday moments when a customer shares a product link with a friend by WhatsApp, text, email, or any other channel. No reward, opt-in, or formal referral programme is required.
You may also see this behaviour described as *unincentivised referral*. It captures the word-of-mouth that has always been there but has been invisible in your analytics until now.
> [!NOTE]
>
> Unlike Brand Referral, which is an acquisition tool designed to drive
> incremental new customers, Product Referral is an attribution tool. It does
> not create new sharing; it makes existing sharing visible, attributable, and
> actionable. Tracking is passive and frictionless, and customers do not need to
> sign up, receive an offer, or know they are part of a programme.
## What Product Referral Does
Every day, customers recommend products by copying a link from a product page and sending it to a friend. Traditionally this activity is completely invisible: the resulting traffic lands in your analytics as *direct* or *organic*, with no way to tell that it came from a personal recommendation.
Product Referral closes that gap. From the moment it is live, it tells you which products your customers share most, how much traffic and revenue that sharing drives, and who your most active organic advocates are once they make a purchase.
## How It Works
When a customer visits a product page, the Product Referral tag appends a parameter called `mm_rf` to the page URL. This parameter is an anonymous fingerprint generated from browser and device signals such as browser details, screen size, user agent, and IP address. It contains no personally identifiable information.
If the customer copies that link and shares it, and someone else clicks it, Mention Me connects the original sharer to the new visitor. When either person makes a purchase, the anonymous fingerprint is linked to a customer profile, building full share-to-purchase attribution, all without enrolment, a campaign, or a reward.
### The mm_rf URL Parameter
This is the single most important thing to understand about Product Referral.
The `mm_rf` parameter is added to the end of every product page URL, for every visitor, whether or not they arrived from a referral. This is by design. It is the mechanism that makes passive attribution possible: without it, a shared link would be an ordinary URL with no way to connect it back to the person who shared it.
> [!NOTE]
>
> The `mm_rf` parameter appearing on your product page URLs is expected and
> intentional. It is appended in an SEO-friendly way and does not interfere with
> your own analytics or reporting. Your existing tracking continues to work
> exactly as before, and GA4 can be configured to read the `mm_rf` parameter if
> you want to report on organic sharing directly.
Here is what a shared product URL looks like once the parameter has been appended:
```text theme={null}
https://www.yourbrand.com/products/example-product?mm_rf=a1b2c3d4e5f6
```
> [!WARNING]
>
> Because the parameter is what carries the sharer's identity, attribution
> breaks if it is removed. If your site uses aggressive URL rewriting or
> redirect rules that strip query parameters, make sure they preserve `mm_rf` on
> product page URLs.
If you also use a share button, share-button clicks are tracked through a separate `mm_sl` parameter, so you can tell button-driven shares apart from organic copy-and-paste shares.
> [!NOTE]
>
> Tracking is based on browser and device signals, so a share that moves across
> significantly different devices may not always be linked. Attribution works
> best within the same browsing environment.
## How It Appears to Your Customers
For your customers, Product Referral is effectively invisible. There is no pop-up, no prompt, and no change to how they browse or share. They copy and share a product link exactly as they always have. The only visible difference is the `mm_rf` parameter added to the URL, which most customers never notice and which does not affect the page they land on.
An optional share button can be added to product pages, but it is not required. Around 99% of sharing happens through customers simply copying the URL rather than clicking a share button, so the core tracking works whether or not a button is present. If you do add a button, it can be styled to match your site or made invisible entirely.
## Product Referral vs Brand Referral
The two features share some underlying technology but serve different purposes. Running both gives you the fullest picture of word-of-mouth.
| | Product Referral (unincentivised) | Brand Referral (incentivised) |
| - | - | - |
| **Purpose** | Attribute natural sharing behaviour | Drive new customer acquisition |
| **Claims incrementality?** | Not in Classic. In Mention Me, an incentivised campaign holds back a control group to measure it | Yes |
| **Requires enrolment?** | No, anyone can share | Yes, the customer must be enrolled |
| **Reward or incentive?** | Not required. Optional in Mention Me | Yes, typically involves an offer |
| **What it measures** | Views, orders, and revenue from sharing | New customers via referral links |
| **Best used for** | Insight and attribution | Acquisition and growth |
## Key Metrics and Reporting
Product Referral reporting is available in the programme reporting section of your Mention Me dashboard, in its own dedicated area separate from Brand Referral. Current metrics include:
* Views
* Orders
* Revenue
* Average Order Value (AOV)
* Share type: organic shares (URL copied) versus share button clicks
> [!NOTE]
>
> Across early Product Referral adopters, around 15% of product page views have
> been found to originate from shared links, traffic that was previously
> attributed to organic or direct sources.
Enhanced insights, including top shared products and a sharer leaderboard, are on the roadmap.
## Use Cases
### Understanding Natural Sharing
Product Referral reveals the layer of organic advocacy that happens between marketing campaigns. You can see which products are generating word-of-mouth and correlate sharing trends with launches or campaigns.
### Identifying High-Value Customers
Some customers never use Brand Referral but generate significant revenue through organic product sharing. Product Referral makes these advocates visible, so you can treat them as a distinct, high-value segment.
### Micro-Influencer Identification
An upcoming leaderboard will let you identify your highest-performing organic sharers, so you can engage them as micro-influencers or reward them through a commission or loyalty scheme.
### Staff Sharing Discovery
Sometimes internal team members appear among your top sharers. This can open up opportunities for staff advocacy rewards.
### Segmentation and Activation
The roadmap includes integrations with tools such as [Bloomreach](https://www.bloomreach.com) for segmentation and Meta Ads for lookalike audiences, enabling actions such as automatically thanking sharers, enrolling anonymous visitors into loyalty programmes on return visits, and creating targeted audiences based on sharing behaviour.
## Getting Integrated
### Prerequisites
* Your Mention Me programme must be active
* An integration method should be agreed with your Mention Me contact before tag placement
* No customer PII is required for the core tag, only locale and product ID
### Integration Methods
There are two ways to place the product page tag.
| Method | Description | Best For |
| - | - | - |
| Shopify app | Add a product page block via the Shopify app | Shopify merchants |
| Single tag | Paste a single product page tag directly into your site code | Non-Shopify or custom builds |
### What Integration Involves
Integration consists of up to three components. The first two are strongly recommended; the third is optional.
| Step | Component | Description |
| - | - | - |
| 1 (Required) | Product page tag | Places the `mm_rf` fingerprint parameter into product page URLs |
| 2 (Recommended) | Purchase data tag tweak | Sends granular purchase data (product IDs, SKUs, prices) |
| 3 (Optional) | Share button | Adds a visible share button to the product page |
> [!NOTE]
>
> Tracking works without the share button. It is an engagement layer, not a
> requirement.
### Customising the Share Button
If you opt into the share button:
* Button text can be edited on the onsite content page, under the product injection point section
* Text can be translated per locale
* The button inherits your existing site CSS by default
* Advanced styling is possible via a custom Product Referral stylesheet
## Privacy and Data
Product Referral is designed to be privacy-friendly:
* It is cookie-less, so it works regardless of a visitor's cookie consent preferences or browser restrictions
* The core tag requires only locale and product ID, and collects only anonymous browser and device signals at the point of sharing, not personally identifiable information
* Sharing data stays pseudonymised until it is linked to a known customer identity at the point of purchase
If your compliance team needs detailed documentation, such as a data processing agreement or data protection impact assessment, your Mention Me contact can provide this on request.
## Frequently Asked Questions
> [accordion] Why would we want Product Referral if we already have Brand Referral?
>
> Brand Referral drives new customer acquisition and claims incrementality. Product Referral complements it by revealing the organic sharing that is already happening on your site.
> [accordion] What is the business value of knowing about natural sharing?
>
> It reattributes traffic you might currently classify as organic or SEO, and
> helps you identify high-value customers, potential micro-influencers, products
> generating word-of-mouth, and products that may benefit from a referral push.
> [accordion] Why is a parameter being added to all of our product page URLs?
>
> The `mm_rf` parameter is added to every product page URL by design, for every
> visitor, whether or not they were referred. It is the anonymous identifier
> that makes passive attribution work. It is appended in an SEO-friendly way and
> does not interfere with your own analytics or reporting.
> [accordion] Does it affect SEO or our own reporting?
>
> No. The `mm_rf` parameter is appended in an SEO-friendly way, and your
> existing analytics continue to work as normal. GA4 can be configured to read
> the parameter if you want to report on organic sharing directly.
> [accordion] Does it tell us who our best advocates are?
>
> Yes. Identified sharers appear in your dashboard once they make a purchase,
> and an upcoming leaderboard will rank sharers by views or revenue.
> [accordion] Does Product Referral claim incrementality?
>
> In Classic, no. It is strictly an attribution tool that tracks sharing which would have happened anyway.
>
> In Mention Me you can run an incentivised product referral campaign, which rewards the referred customer and holds back a control group so the uplift can be measured. See [the holdout](/knowledge-app/referral/campaigns/product-referral/the-holdout).
> [accordion] Can we use it to run a reward-based referral programme?
>
> Not in Classic, where Product Referral is insight-led. Brand Referral is the right solution there, though Product Referral data can help inform who to invite into a referral or loyalty programme.
>
> In Mention Me a product referral campaign can carry a reward for the referred customer. See [campaign modes](/knowledge-app/referral/campaigns/product-referral/campaign-modes).
> [accordion] Does the customer need to sign up or enrol?
>
> No. Tracking is passive and does not require enrolment, account creation, or
> offer acceptance.
> [accordion] What data does it collect? Does it require PII?
>
> The core tag requires only locale and product ID. Anonymous sharers are
> tracked using browser and device fingerprinting (browser details, screen size,
> user agent, IP). Email addresses are only associated once a purchase is made
> and the customer identifies themselves.
> [accordion] Can the share button be translated?
>
> Yes. Button text can be set per locale within the onsite content page, under
> the Product Referral injection point.
> [accordion] What does the share button do? Is it required?
>
> The share button is optional. It provides a visible call to action to
> encourage sharing, but tracking works without it.
> [accordion] Can it track across different devices?
>
> Tracking is based on browser and device signals. Shares across significantly
> different devices may not always be linked, which is a current limitation.
> [accordion] How long does setup take?
>
> Shopify app integration is often under an hour. Custom integrations depend on your development team's capacity. The product page tag and purchase data tag are the core requirement; the share button is optional.
## See Also
> [card] [How to Set Up Product Referral Sharing](/knowledge/shopify/product-referral)
>
> How to install the Mention Me theme app extension to add a Share button on your Shopify product pages.
> [card] [Product Referral Tag](/developer-docs/integration/entry-points/product-referral)
>
> Enable product-level referral tracking so customers can share specific
> products, for non-Shopify or custom builds.
> [card] [Product Referral in Mention Me](/knowledge-app/referral/campaigns/product-referral/what-product-referral-is)
>
> Product referral as a campaign type in Mention Me, with optional rewards and a holdout.
## Questions or Feedback?
Contact your Mention Me team.
# Conversion Message Banner
Source: https://docs.mention-me.com/knowledge/referral/promoting/conversion-banner
Display a personalised announcement banner that reminds referred customers about their discount to drive more purchases.
## What Is the Conversion Message Banner?
The Conversion Message is a personalised announcement banner displayed on your website. It reminds referees or new customers with an active coupon code that they can get a discount on their first order because they have been referred.
## Why Enable It?
* Achieve an average **20% increase in purchase rate** amongst clients using it
* Personalise your message to include the referrer name, the incentive, or the reward validity period
* Customise the design to match your brand and look native to your site
* A/B test both the copy and the design
## How to Set It Up
Setting up the conversion message is straightforward. An additional tag needs to be placed on the page where you wish the message to be displayed.
We normally recommend displaying this on your homepage, but you can choose to have it visible anywhere you get a lot of traffic.
You'll find the integration instructions in the Mention Me dashboard under **Settings & Tools > Integration Instructions > Recommended integration > Conversion message**.
# Promote on Dashboard
Source: https://docs.mention-me.com/knowledge/referral/promoting/dashboard
Integrate a referral dashboard into your My Account area to promote sharing and let customers track their referrals.
## When to Widen Promotion
Typically, we look to widen promotion 6 weeks from going live. This allows time to drive volume through your referral channel and to start running experiments that optimise performance.
## Referral Dashboard in the My Account Area
If you have a "My Account" area or similar behind a login on your website, you can integrate an additional tag to further promote your scheme and let logged-in customers track their referrals and send additional invites.
## Two Main Purposes
1. **Show your referral offer** to logged-in customers who haven't yet enrolled in your referral programme (i.e. haven't purchased and seen the referral overlay on your post-purchase page)
2. **Let enrolled customers** track the progress of their referrals and send additional referral invites to friends
## Implementation
This should be a much quicker integration as there's only one mandatory parameter in the JavaScript snippet: `situation=dashboard`.
Head to your [bespoke dashboard tag integration page](https://docs.mention-me.com/developer-docs/integration/dashboard) to forward the instructions to your web development team or agency.
# Promote in Email
Source: https://docs.mention-me.com/knowledge/referral/promoting/email
Set up referral promotion in your emails with landing page links, customer data parameters, and tracking.
Promoting your referral programme through email is one of the most effective ways to increase engagement and drive more referrals. It reaches customers who may not have discovered your programme yet while reminding others to share.
## Creating a Landing Page
Create your own landing page on your site (e.g. `https://www.yoursite.com/refer-a-friend`). This is where customers will be sent when they click the referral link in your email.
## Linking from Emails
By default, customers who reach your referral landing page will be asked to enter their name and email address before they can share. To remove this step, pass additional data in parameters.
Four parameters are required:
* **firstname** - the customer's first name
* **surname** - the customer's surname
* **email** - the customer's email address
* **situation** - indicates where the customer saw the link (e.g. `email-newsletter-jan23`)
Add these parameters to the landing page link:
```
https://www.yoursite.com/refer-a-friend?firstname=FIRSTNAME&surname=SURNAME&email=EMAIL&situation=SITUATION
```
Example:
```
https://www.yoursite.com/refer-a-friend?firstname=Barnabas&surname=Fortescue&email=barney@mention-me.com&situation=email-solus-jan23
```
## Testing Offers While Promoting in Emails
Customers who follow your email link will be randomly assigned to an offer in the latest experiment. To send them to a specific offer (note: this will bias experiment results), add `?variation=0` (or 1, 2, 3 etc.) to the URL:
```
https://www.yoursite.com/refer-a-friend?variation=0&situation=email-solus-jan23
```
## Types of Emails to Consider
* **Dedicated referral solus emails** - send at least once every 2-3 months
* **Newsletter or regular marketing email** - include referral as a section
* **"Always-on" inclusion** - link, icon, or button in the header or footer of all marketing emails
* **Dedicated email in your journey** - e.g. new customer/post-purchase email journey, welcome journey
# Promote on Homepage
Source: https://docs.mention-me.com/knowledge/referral/promoting/homepage
Drive customer acquisition by promoting your referral programme on your homepage using headers, tiles, corner peels, and overlays.
Promoting referrals on your homepage can account for up to **60% of new sign-ups**. Most homepage promotion methods require a landing page where customers can register and share the referral offer.
## 1. Site Header (Link to Landing Page)
A dedicated banner below the site header is one of the easiest options. Add a link or CTA to the landing page, and enable it on other pages across your website.

A referral banner displayed below the site header.
The same approach also works well when applied consistently across other pages on the site:

A referral banner promotion applied to the site header on another page.
If you're running A/B tests, avoid specifying the reward in the copy. Use a generic message like "Earn rewards by sharing with friends".
To track performance, append a situation parameter:
```text theme={null}
www.example.com/refer-a-friend?situation=homepage_header_promo
```
For multiple campaigns with different segments or locales, add those parameters too:
```text theme={null}
www.example.com/refer-a-friend?situation=homepage_banner_promo&segment=VIP&locale=en_US
```
## 2. Homepage Tile (Link to Landing Page)
No new tag required - just append a situation parameter to the landing page link:
```text theme={null}
www.example.com/refer-a-friend?situation=homepage_banner_promo
```

Homepage tile promoting referral programme
## 3. Homepage Corner Peel
The corner peel is easy to implement and shows a referral overlay when clicked. It requires only a tag.

Corner peel referral overlay example
> [!NOTE]
>
> This option isn't ideal if you have multiple campaigns triggered by segments.
* Replace `PARTNERCODE` with your Mention Me partner code (found in your dashboard)
* Mention Me will create an injection point of type "Corner Peel Overlay" and situation `homepage_banner_link`
Add this script to your homepage:
```html theme={null}
```
## 4. Link to Overlay
Shows the referral overlay when clicked, letting customers register without leaving the homepage. You can customise the link to look like a button, incorporate it with a banner, image, or any other element.

Link to overlay referral promotion example
**1. Create the Placeholder Div**
Create an empty div with the ID `mmWrapper`:
```html theme={null}
```
**2. Add the Tag**
Add the tag:
```html theme={null}
```
We'll customise the link style to match your site. The CTA will display the overlay when clicked.
# Promotion Points & Situation Parameters
Source: https://docs.mention-me.com/knowledge/referral/promoting/promotion-points
Track promotion performance using situation parameters on referral URLs and analyse effectiveness via the Promotion Points report.
## How It Works
Mention Me allows you to track promotion performance using `situation` parameters added to referral touchpoint URLs. This enables you to compare the effectiveness of various marketing channels via the **Promotion Points** report.
## The Basics
Use the `?situation=` parameter on your referral URLs to define where the touchpoint took place.
```
https://www.yoursite.com/refer-a-friend?situation=homepage_header
```
This will appear as **homepage_header** in your reports.
To view performance, go to **Reporting > Conversion & Funnel > Promotion Points** in the Mention Me portal.

Promotion Points report in the Mention Me portal
## Default Promotion Points
Common default situation parameters used within the system:
* **postpurchase:** Customer sees the offer post-checkout
* **landingpage:** Promo triggered from dedicated landing page
* **dashboard:** Customer accesses dashboard directly
* **dashboard-register:** Redirected to offer page (no active campaign)
* **dashboard-first-time-register:** Registered and redirected to dashboard
* **manually:** Customer added manually (e.g. via support)
* **externallink:** Referral initiated via static URL (e.g. blog or FAQ page)
* **\[x]-parallel-campaign:** User enrolled in parallel campaigns
* **batch-enrolled:** Customer uploaded via batch import
* **tag-batch-register / tag-batch-register-silently:** Batch registered via CSV/tag
* **existingcustomerreferee:** Customer tries to refer themselves or is already a customer
* **checkout:** Catch-all when no referrer can be matched
## Creating Custom Promotion Points
Tailor situation names to track specific emails, banners, page sections, and other promotional touchpoints:
```
.../refer-a-friend?situation=get_free_homepage
```

A custom promotion point being used to track a specific touchpoint.
## How to Structure Situation Parameters
Use consistent and descriptive naming:
```
main-touchpoint_secondary-touchpoint_optional-extra
```
### Main Touchpoints
* Homepage
* Email
* Social
* Other
### Recommended Secondary Touchpoints
* **Homepage:** Header, Footer, Banner
* **Email:** Newsletter, Lifecycle, Solus
* **Social:** Post, Ad
* **Other:** Insert, Catalogue, Direct Mail
### Examples
* `situation=homepage_header`
* `situation=email_newsletter_lapsedcustomer`
* `situation=social_ad_facebook`
## Full Tracking URL Example
A fully tracked referral URL might include both the situation parameter and Google Analytics (UTM) tracking:
```
https://www.yoursite.com/refer-a-friend?situation=homepage_header&utm_source=mentionme&utm_medium=referral&utm_campaign=referafriend
```
## Integrating Google Analytics Parameters
For deeper insight, combine Mention Me tracking with your own GA setup. Append `utm_source`, `utm_medium`, and `utm_campaign` to referral URLs.
Read the [Google Analytics integration guide](/knowledge/tags/google-analytics) for more detail.
# How to Promote Using QR Codes & Leaflets
Source: https://docs.mention-me.com/knowledge/referral/promoting/qr-codes-leaflets
Boost your referral programme offline using QR codes and printed links on flyers, product boxes, and other physical materials.
**1. Create or use a campaign**
You can create a new campaign just for your leaflet promotion, or use an existing one if the offer isn't channel-specific. Go to the **Campaigns** section, create a campaign and set up the rewards as usual, then use the **Triggering Rules** section to define who should see this offer.
**2. Set up a situation parameter for tracking**
Choose a unique situation parameter to track where your referrals come from. For example: `situation = box-promo`
* Set this condition in the campaign by adding a triggering rule: **Situation is equal to box-promo**
* If you serve multiple countries, add a locale code (e.g. `en-GB`) to show the campaign to the right customer group
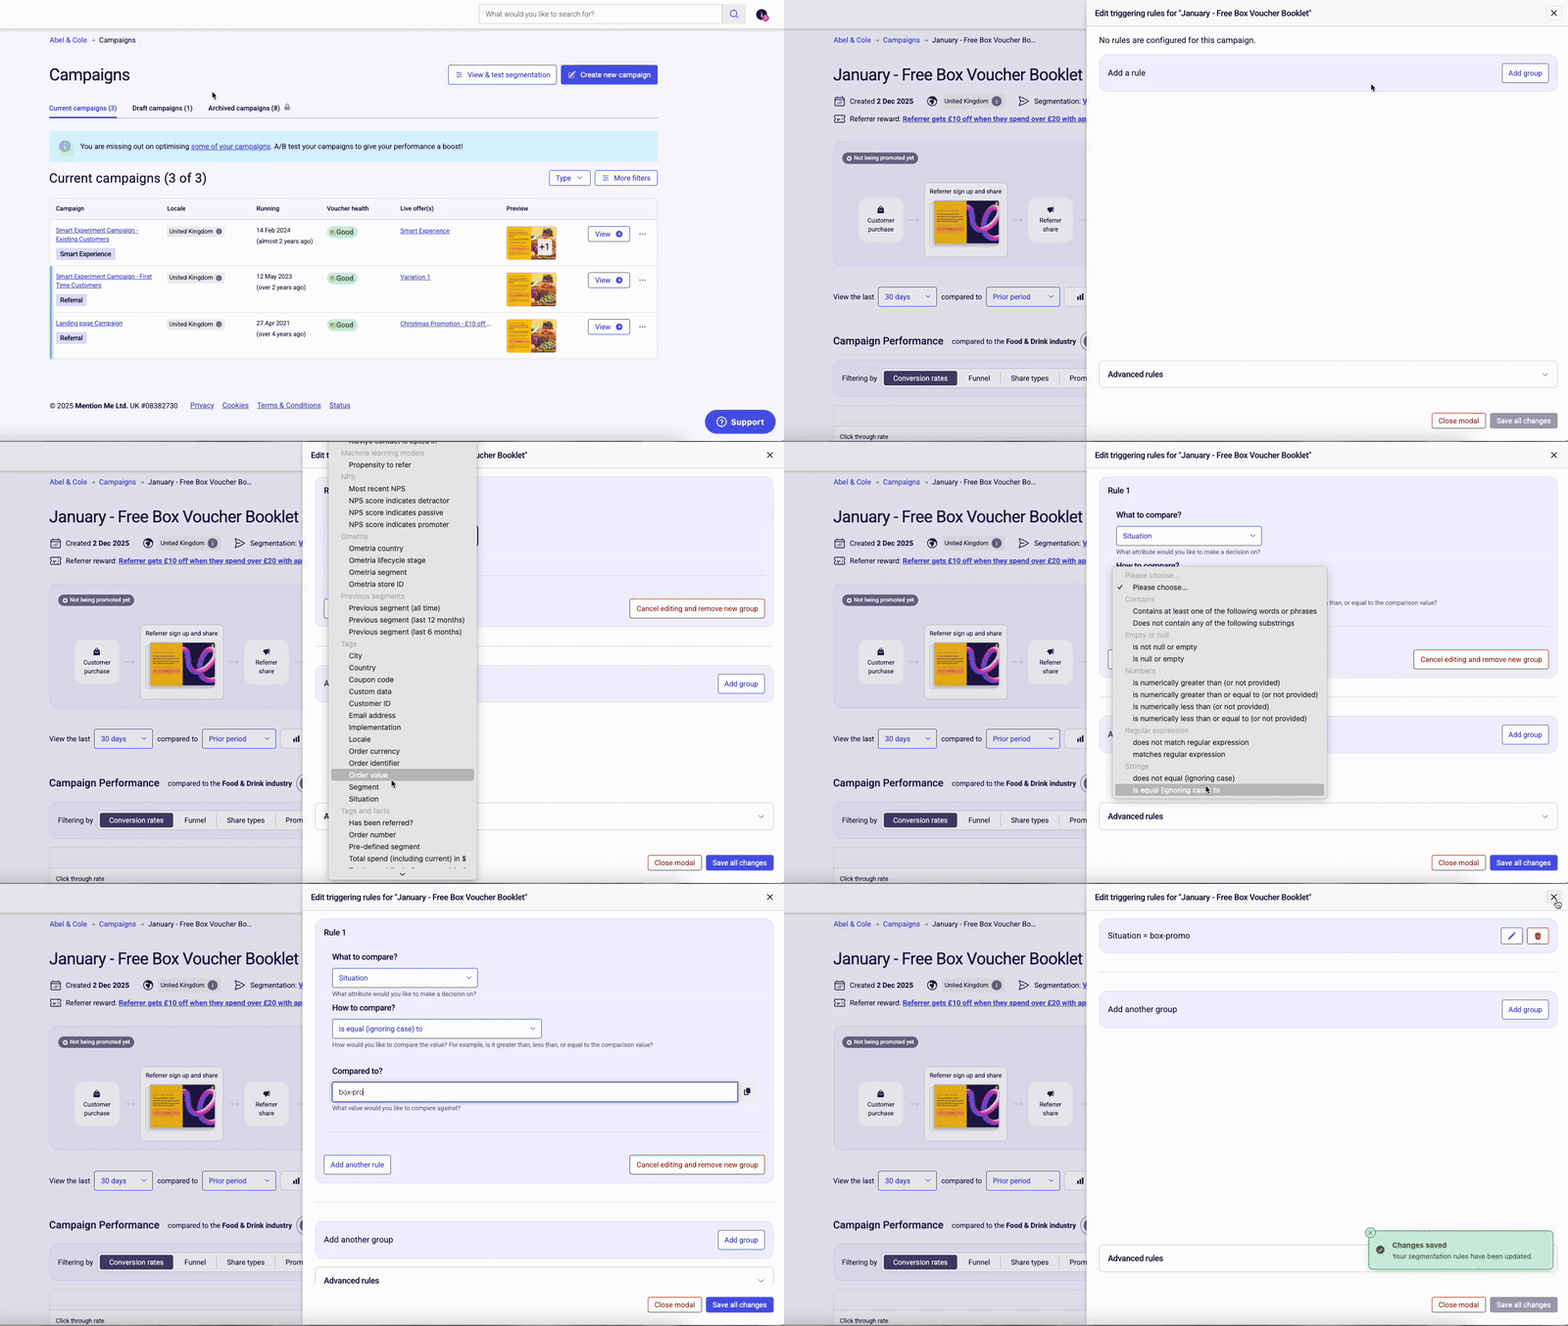
Setting up campaign triggering rules for leaflet promotion.
**3. Launch the campaign**
When your campaign rules are in place, set your campaign live.
**4. Get the hosted enrolment page**
Click the three-dot menu next to your campaign and select **Visit Enrolment Page** to open your campaign's hosted, shareable landing page.

The Visit Enrolment Page option in the campaign menu.
Edit the end of the URL to make sure the situation parameter is added. If you used a locale code in your triggering rules, include the locale code too.
Example enrolment page URL:
```
https://mention-me.com/me/referral/register/mmf4a3d761/RBPAWGOK?situation=box-promo
```
With locale code:
```
https://mention-me.com/me/referral/register/mmf4a3d761/RBPAWGOK?situation=box-promo&locale=en_GB
```
The link is only accessible while the campaign is live, and only people with the link can use this specific offer (as long as you don't use the situation elsewhere).
**5. Create a QR code or use the link**
Paste your enrolment page URL into a QR code generator to create a printable code for your flyer, box insert, or shop display.
* Generate a QR code for your printed materials
* Or copy and share the link directly
No extra segmentation, CRM steps, or email targeting needed - this is a standalone experience ideal for offline promotion.
## Track and Optimise
Use your chosen situation parameter to track effectiveness. Choose situation values (like `box-promo` or `leaflet-june24`) that are clear and easy to tell apart.
# Recommended Touchpoints
Source: https://docs.mention-me.com/knowledge/referral/promoting/recommended-touchpoints
Maximise your referral programme's reach by promoting it across all available touchpoints.
## Why Promote Your Referral Scheme?
* Customers share brands **35% more** when referral is promoted at two or more touchpoints, compared to just one
* For best-performing clients, maximising awareness outside of the post-purchase overlay drives **40-50% of referrals**
Wherever you promote your scheme, set up unique tracking with [situation parameters](/knowledge/referral/promoting/promotion-points) so you can assess the effectiveness of each touchpoint.
## Where to Promote
### Post-Purchase
After a customer makes a purchase, it's a great opportunity to encourage them to refer friends and family. A post-purchase full overlay improves the chances of customers engaging with and enrolling in your referral program.

An example of a post-purchase referral overlay.
### Homepage
Depending on your monthly website traffic, homepage promotion can be responsible for a large percentage of your referral acquisitions, and some clients get more than 50% of their referrals from an effective homepage strategy.
Methods include site headers, homepage tiles, corner peels, and link-to-overlay options. See the full [homepage promotion guide](/knowledge/referral/promoting/homepage).

An example of homepage referral promotion.
### Email
Promoting referral in email on a regular basis boosts results by reaching customers who may not have visited your website recently:
* Dedicated solus email at least once a quarter (on average, share rate increases by 5%)
* Banners in newsletters promoting new products/ranges
* Banners in transactional emails (order confirmation, shipping confirmation)
* Anniversary emails triggered several days after delivery
* Banners or dedicated emails in post-purchase or welcome series
* NPS emails - follow up positive reviews with a referral reminder
See the full [email promotion guide](/knowledge/referral/promoting/email).

An example of referral promotion within an email.
### Dashboard
A dashboard in your customer accounts is a personalised way to encourage sharing. It reminds customers every time they log in, shows referrals in progress, and makes sharing easy.
See the full [dashboard promotion guide](/knowledge/referral/promoting/dashboard).

A referral dashboard shown within a customer account.
### SMS
Engaging customers through targeted SMS messages offers an alternative way to cut through the noise. Use your referral insights to identify your best brand advocates and send relevant text messages.

An example of referral promotion sent via SMS.
### Social Media
If you have a large set of followers, reminding them of your referral programme semi-regularly (once every 1-2 months) can reach customers who aren't necessarily visiting your website.

An example of referral promotion on social media.
Individual posts can also carry the referral message directly:

An example of a social media post promoting referral.
### In App
If you have an app, consider:
* In-app notifications / push notifications
* Inclusion in a "My Account" area
* A menu item on the navigation
* A tile within the app
If you need technical support with including referral within your app, [get in touch](https://help.mention-me.com/hc/en-gb/requests/new).

An example of in-app referral promotion.
### Parcel Inserts
Offline promotion through leaflets, parcel inserts, and brochures gets your referral program in front of customers at a moment of delight. See the [QR codes & leaflets guide](/knowledge/referral/promoting/qr-codes-leaflets).

An example of referral promotion via a parcel insert.
## Customise It
Consider your own unique customer journey. What are the points of delight in your customer's experience? Promoting referral at that moment engages customers at one of their happiest points.
# Understanding Social Capital and Social Risk in Referral
Source: https://docs.mention-me.com/knowledge/referral/psychology/social-capital-and-social-risk
Understand why customers weigh social reward against social risk when deciding whether to recommend your brand, and how this shapes a successful referral programme.
The secret behind every successful referral is making customers feel they have more to gain than lose. This is the first article in a three-part series on the psychology of referral. It explores the concept of social capital versus social risk, and how it influences your customers' buying decisions.
In this article, you'll learn:
* Why the decision to recommend is often driven more by a desire for recognition and belonging than by a financial reward
* Why it's key to build confidence in the social benefits of recommending your brand
* The questions in a customer's head that you'll need to answer to create a successful scheme
## We're Born to Be Social
> "More than features, more than benefits, we are driven to become a member in good standing of the tribe. We want to be respected by those we aspire to connect with, we want to know what we ought to do to be part of that circle." - Seth Godin
Human beings are inherently social. A craving for social connection is hardwired into our psychology, and this is just as true today as it was thousands of years ago. The emotional reward of feeling part of "our tribe" is irresistible, and we'll gladly accept the risks involved in social actions to obtain it.
But there's a limit. If the risk of not receiving a positive response to a social action feels higher than the potential reward, reluctance kicks in and we're more inclined to stay quiet.
At the heart of this social dynamic is one key element: trust.
## Do I Trust This?
When we weigh up whether to take a social action, the following internal narrative occurs, whether we're aware of it or not: how large is the risk of my action being socially ignored or rejected, and how confident am I that it will be socially recognised and rewarded?
This same psychological dynamic is at play in referral marketing. Recommending a product or service to friends is an act of social belonging, reciprocity and trust.
At Mention Me, we help brands build quality, long-term relationships with their customers. Our referral programmes focus not only on finding the right financial incentive, but also on understanding the power of the social reward.
Our in-depth knowledge of the key psychological enablers and barriers of referral is rooted in working with [500+ brands](https://www.mention-me.com/our-case-studies). We use a metaphor of balloons and weights to describe the psychology behind a customer's decision-making. Let's explore this in more detail, or check out our [guide to the psychology of referral](https://www.mention-me.com/mention-me-psychology-of-referral-whitepaper).
## Psychological Balloons and Weights
Two key factors increase the chances of a customer committing to a referral programme. These are the psychological balloons.
On the other side, two key factors decrease the chances of a successful referral. We call these psychological weights.
The more you can inflate the psychological balloons for your customers and lighten the psychological weights, the more likely customers are to refer your brand.

Balloon and weights visual metaphor for social drivers and barriers in referral decision-making.
## Referrer Incentive: Do I Really Want This?
### Incentives Must Hit the Sweet Spot
Incentives have to hit the customer's sweet spot and be something they genuinely want. You can experiment with offering different rewards, such as discounts, third-party gift vouchers or loyalty points, to find the one that's most effective. Generally, discounts tend to perform well, but every customer base is different. Start with a hypothesis about which offers work for your audience, then continuously A/B test to refine and optimise that offer for conversion.
### Reduce Effort to Reduce the Barrier to Commitment
Effort is a barrier to commitment. The easier you make it for customers to get your offer, the more likely they are to do so. Creating a frictionless user experience is key. How many steps do customers need to complete to sign up, and are each of these steps absolutely necessary? Streamline your process as much as possible.
### Social Capital Is the Key to Successful Campaigns
Even more than incentives and a smooth experience, social capital is the absolute key to successful referral campaigns. Make your customers feel confident about looking good and getting a reward, and you'll reap results.
It all comes down to instilling and reinforcing, via your referral campaign's copy, design and positioning, feelings such as:
* My friends will love this product/service
* My friends will be impressed that I know this brand
* My friends will perceive me as knowledgeable and ahead of the trend
* My friends will appreciate my generosity, via the reward they'll receive, rather than my self-interest, via the reward I'll receive
### Social Risk Weighs Down Conversion
Social risk weighs down your conversion rate. If your customers feel the risk of recommending your brand outweighs the reward, they won't do it. Social risk is characterised by feelings of reluctance and tension, including feelings such as:
* My friends will see this as self-serving, and I don't want to be seen as profiting from them
* I won't look cool sharing this
* I'm worried this will make me look like a spammer
* I don't want to be judged as the cheapskate "special offer" person
## Key Takeaways
* The attraction of refer-a-friend programmes isn't only financial. It taps into a much deeper human need for social recognition and belonging
* To convince customers to share a referral offer, brands need to understand how to instil trust and belief in its social benefits
* Companies that succeed at referral marketing hit their customers' sweet spot by presenting enticing rewards with compelling messaging that instils a sense of increased social capital
* Social capital is the most influential psychological trigger to referral success, so don't overlook it
* Companies are too often laser-focused on the mechanics of the incentive itself and on creating a seamless user journey around it. They miss out on the "heart and soul" of the offer: the emotion-fuelled psychological factors that really convince customers to share it with their friends
Remember: more than benefits, more than features, we are driven to become a member in good standing of the tribe.
# How to Assign Vouchers to Offers
Source: https://docs.mention-me.com/knowledge/referral/vouchers/assign-to-offers
Assign listed and non-listed voucher batches to campaign rewards, including during onboarding.
Only users with **Marketing** or **Administrator** access can assign vouchers.
A guided walkthrough of assigning vouchers to offers in the Mention Me platform.
## Assigning a Listed Batch
> [accordion] See each step in detail
>
> **1. Check voucher health**
>
> In the left-hand menu, click **Campaigns**. The **Voucher health** column shows whether each campaign has enough codes, and flags anything that needs attention.
>
> **2. Find the reward**
>
> In the left-hand menu, open **Content**, then **Rewards**. Each reward card shows its ID, how many offers use it, and how many vouchers are left. Use the filters to narrow the list, for example by **Voucher status** to find rewards with none left.
>
> **3. Select and assign batches**
>
> On the reward, open **Add vouchers** and choose **Select from uploaded**. You'll see the batches that match this reward, with how many codes each has left. Tick the batches you want, check the number of reward codes selected, then click **Assign reward codes**.
>
> 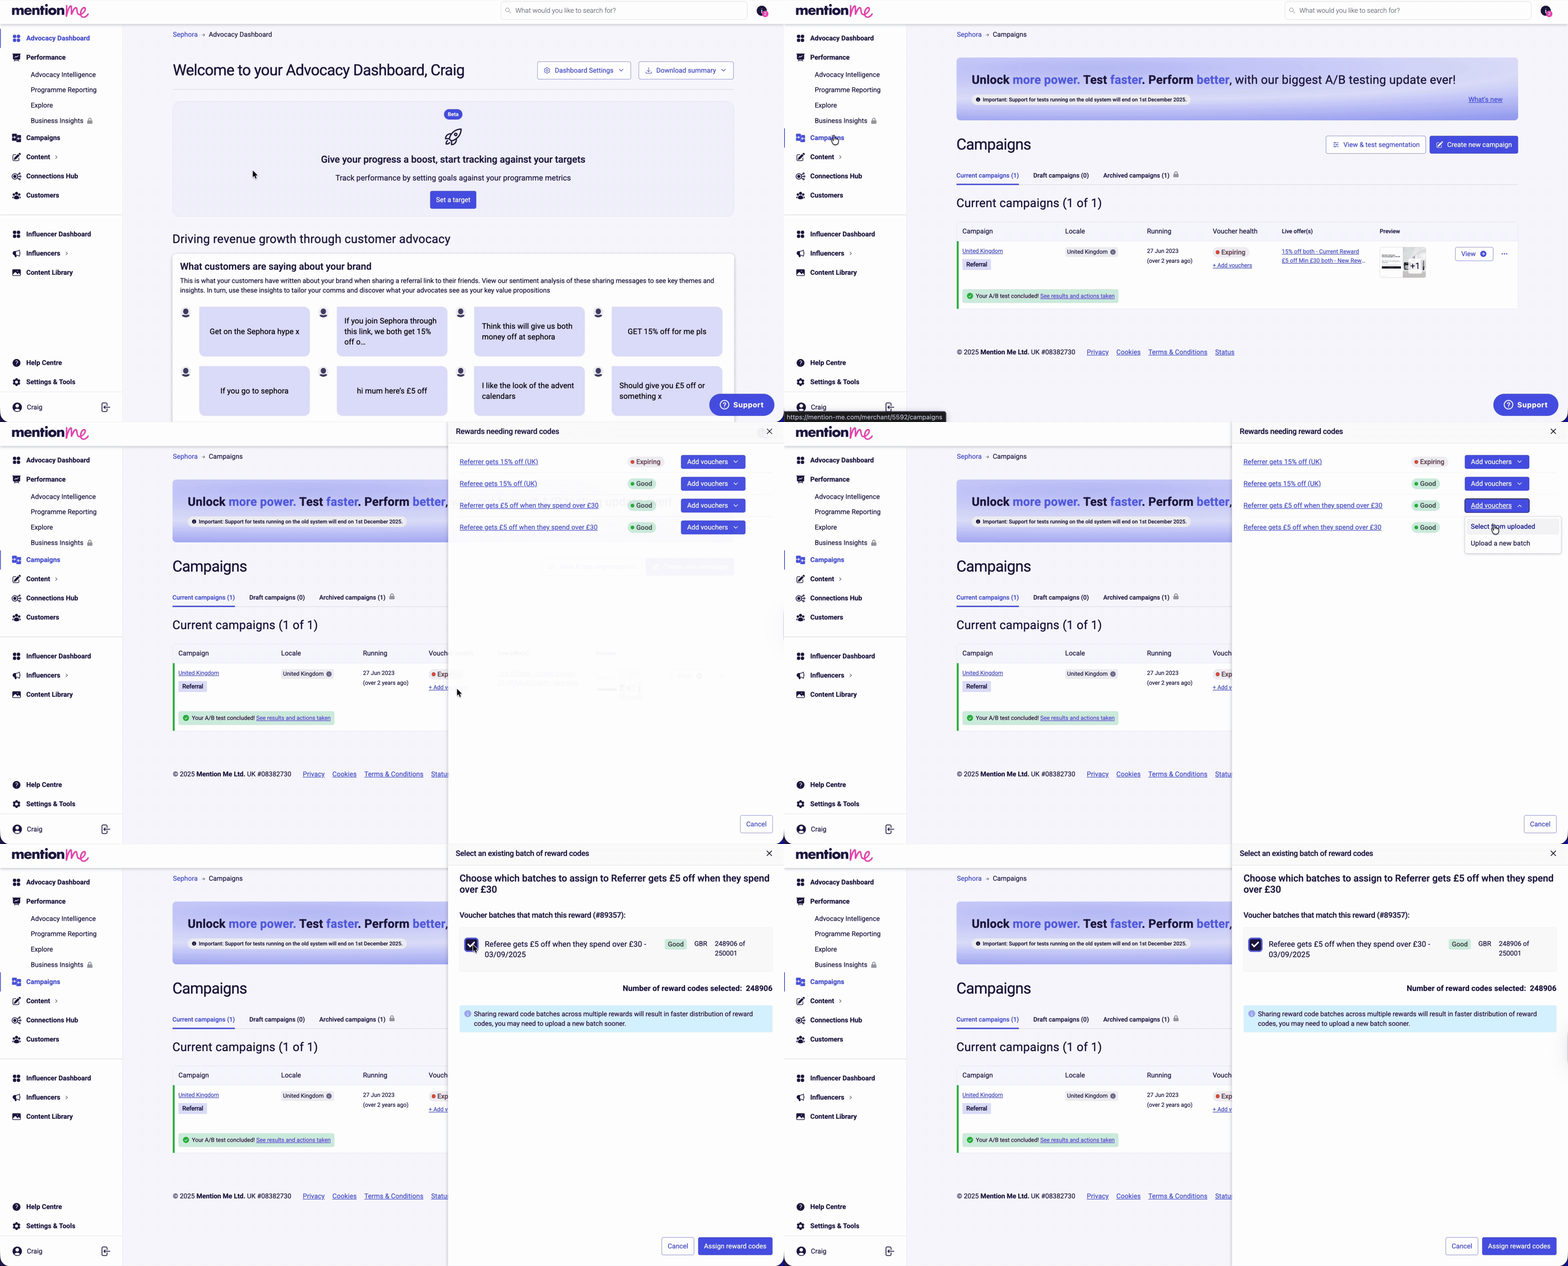
>
> Assigning a listed voucher batch to a campaign reward.
## Assigning a Non-Listed Voucher Batch
Use this approach when a batch doesn't appear in the "Select an existing batch" sidebar - for example, if vouchers were uploaded to the wrong offer or an old batch is being re-purposed.
> [accordion] See each step in detail
>
> **1. Find the voucher batch ID**
>
> Click **Campaigns**, click the relevant campaign name, then click the name of the relevant reward. Make a note of the batch ID.
>
> 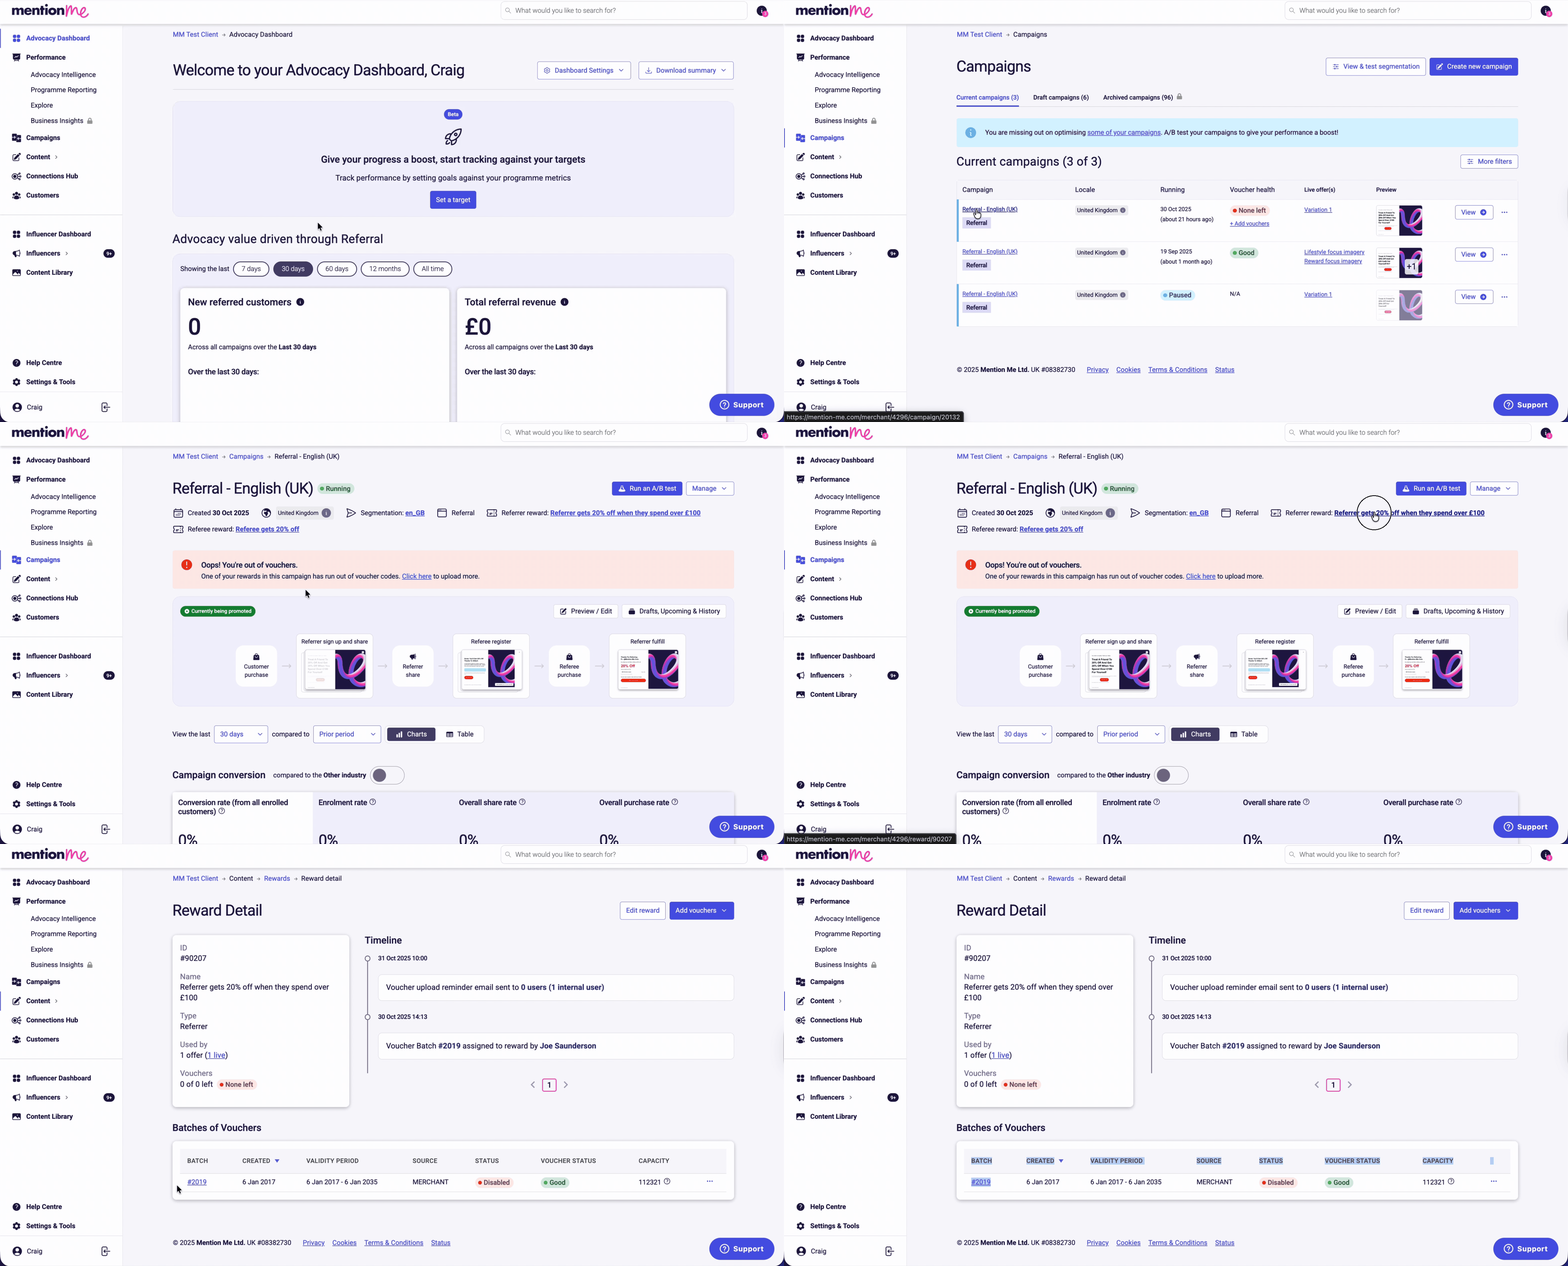
>
> Finding the voucher batch ID in the reward view.
>
> **2. Assign the batch to the reward**
>
> Click **Campaigns**, click the name of the relevant campaign you want to assign the vouchers to, then click the relevant reward name. Click **Edit reward**. Under **Coupon batches able to fulfil this reward**, tick and untick the batches that you want to apply to the offer, and click **Save** at the bottom of the page.
>
> 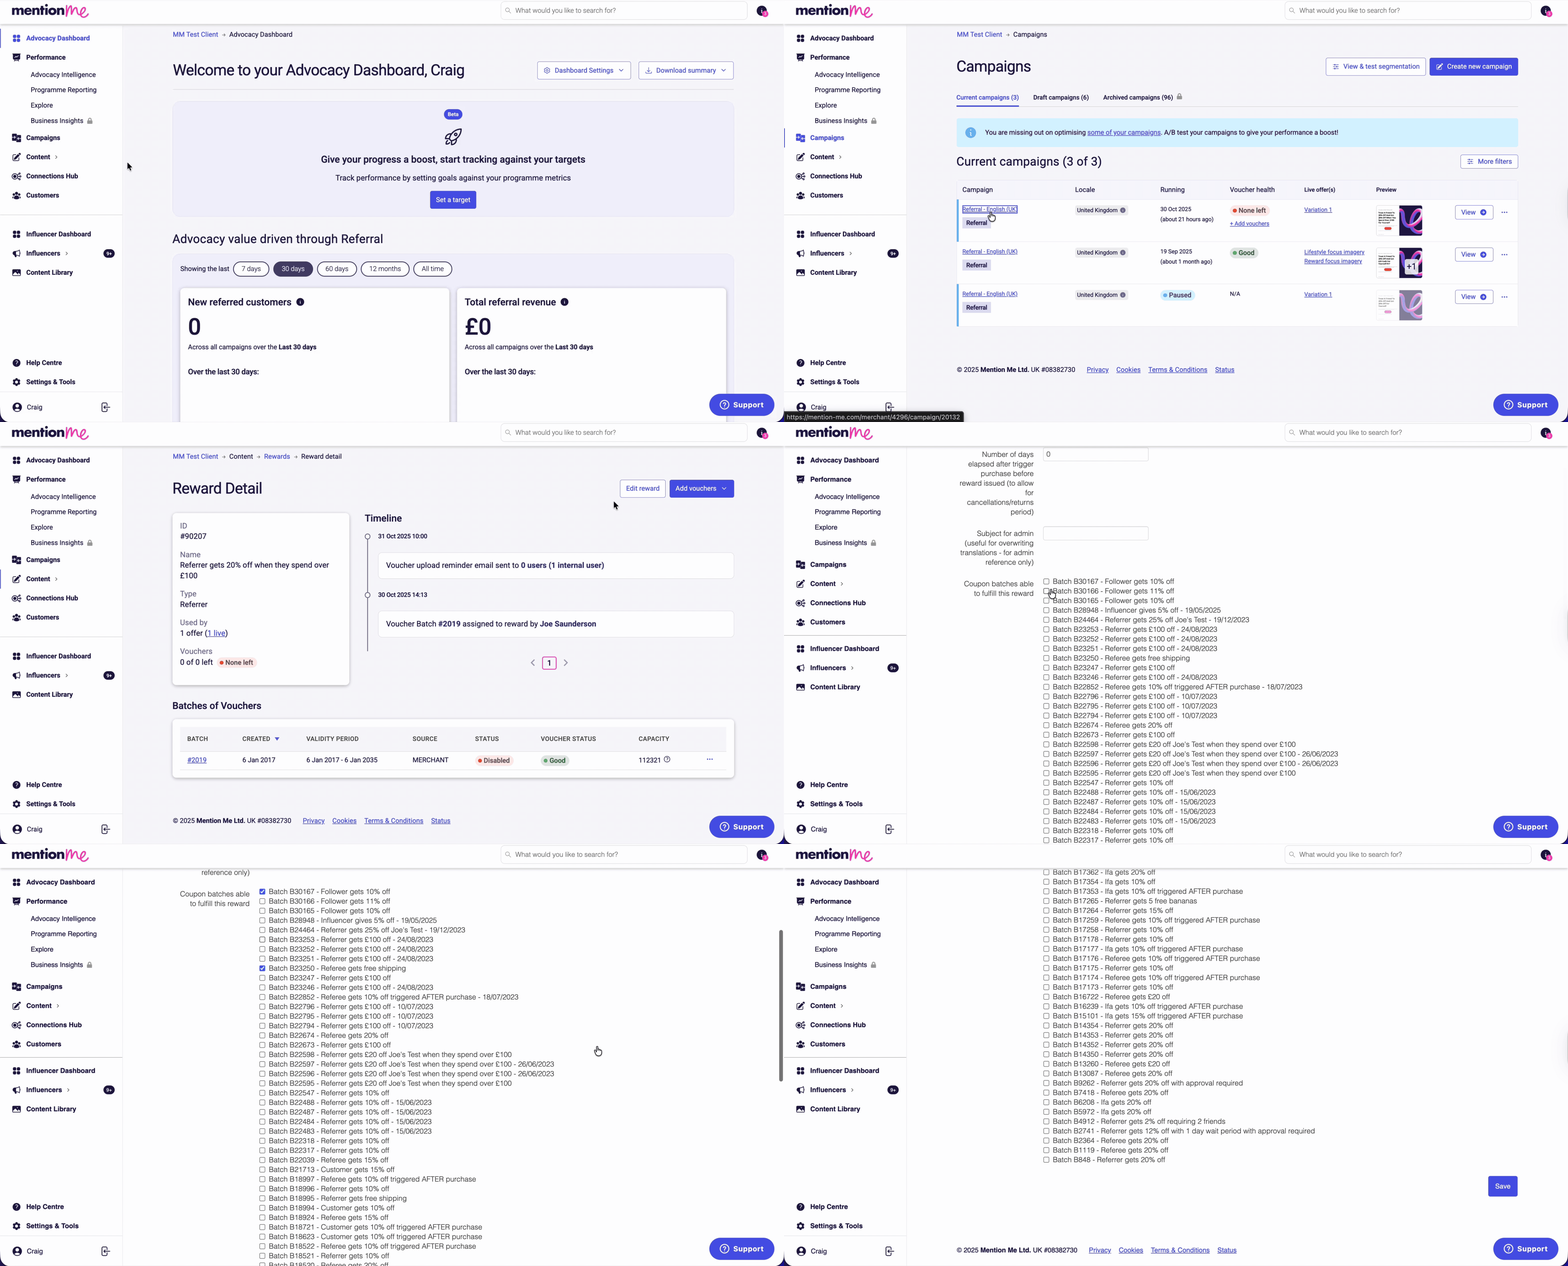
>
> Editing a reward to assign voucher batches.
### Alternative: Find via Content Page
If you need to locate the reward from the Content page:
> [accordion] See each step in detail
>
> **1. Locate the Reward**
>
> Go to **Content > Rewards**. Locate the matching reward using its reward ID code (typically 5 digits, visible on the experiment overview page). Use Ctrl/Cmd+F to search, or filter by:
>
> * Reward Type (who the reward is for)
> * Fulfilment Type (how rewards are distributed)
> * Voucher Status (Good or None Left)
> * Used By (Live, Draft, or Previous experiments)
> * Amount (the value of the reward)
>
> **2. Edit the Reward**
>
> Click **Manage** on the reward, then click **Edit reward** in the top right corner.
>
> **3. Assign the Batch**
>
> Under **Coupon batches able to fulfil this reward**, find the batch by its batch ID, tick the checkbox, and click **Save** at the bottom of the page.
## Assigning During Onboarding
> [accordion] See each step in detail
>
> **1. Navigate to the draft experiment**
>
> Go to your **Draft** campaign section. Click the campaign name, then the experiment name.
>
> **2. Open the reward**
>
> Click the notification under the preview: "Referrer reward / Referee reward has no means of fulfilment". This takes you to a filtered view of **Content > Rewards** for the specific reward.
>
> **3. Assign voucher batches**
>
> Click **Add vouchers** > **Select from uploaded**. Select applicable batches and click **Assign reward codes**.
Repeat this process for each campaign or territory as needed.
# How to Check Your Reward Validity Period
Source: https://docs.mention-me.com/knowledge/referral/vouchers/check-validity-period
Find the referrer and referee offer validity period for any campaign in the Mention Me platform.
Validity periods can vary between campaigns and between experiments, so it's worth checking the current setting before you plan a voucher upload or a promotion.
A guided walkthrough of checking your reward validity period in the Mention Me platform.
> [accordion] See each step in detail
>
> **1. Open Campaigns**
>
> In the left-hand menu, click **Campaigns**.
>
> **2. Select Your Campaign**
>
> Click the name of the campaign you want to review.
>
> **3. Open the Editor**
>
> Click **Preview / Edit**.
>
> **4. Open Design and Settings**
>
> Click **Design and settings**.
>
> **5. Open Offer Validity**
>
> Click **Offer validity**. The **Referee offer validity period** shows straight away: it's how long a friend has to use their reward once they've received it.
>
> On a live offer, this is read only, so make any changes on a draft.
>
> **6. Check the referrer validity**
>
> Open **Referrer (advanced)** to see the **Referrer offer validity period**. Adjusting the referee validity is usually more effective at driving purchases, so we recommend leaving this as it is unless you're specifically testing the referrer side.
>
> 
>
> Steps to view the reward validity period in the Mention Me platform.
## Related Articles
> [card] [Understanding Validity Periods](/knowledge/referral/vouchers/validity-periods)
>
> What validity periods control and how they're set.
> [card] [How to Upload Vouchers](/knowledge/referral/vouchers/upload-vouchers)
>
> Add a batch of voucher codes for use as rewards.
> [card] [How to Extend Vouchers](/knowledge/referral/vouchers/extend-vouchers)
>
> Push back the expiry date on vouchers already issued.
# How to Extend Vouchers
Source: https://docs.mention-me.com/knowledge/referral/vouchers/extend-vouchers
Extend the validity period for existing referral campaign vouchers instead of uploading new codes.
If vouchers are flagged as "expiring soon" and you want to continue using them, you can update their expiration date instead of uploading new codes.
Only users with **Marketing** or **Administrator** access can extend voucher validity.
A guided walkthrough of extending your vouchers in the Mention Me platform.
## Extending from the Campaigns Tab
> [accordion] See each step in detail
>
> **1. Navigate to the Reward**
>
> In the left-hand menu, click **Campaigns**, click the name of the relevant campaign, then click the name of the relevant reward (e.g. "Referrer gets 20% off when they spend over £100"). You can also find it in **Content** > **Rewards** by clicking **Manage**.
>
> **2. Find the Batch**
>
> Scroll to **Batches of Vouchers**. Each row is an uploaded batch, with its validity period and voucher status. Click a batch ID to see its codes.
>
> **3. Adjust Validity**
>
> Open the batch options menu (the three dots) and click **Adjust validity**. Choose the start date and the new end date from the calendar, then click **Adjust validity** to save your changes. The new dates apply to the batch and any codes that haven't been given out yet.
>
> 
>
> Adjusting voucher validity from the Campaigns tab.
## Extending from the Reward Email Notification
When you receive a reward alert email:
> [accordion] See each step in detail
>
> **1. Review the Email**
>
> The email highlights experiments needing attention and shows which reward is impacted and its current status.
>
> 
>
> A reward alert email showing voucher status.
>
> **Voucher status definitions:**
>
> * **Critical:** Stock is very low; immediate action required
> * **Run Out:** No vouchers remain
> * **Expiring:** Vouchers are close to end of valid usage
> * **Expired:** Vouchers can no longer be issued
>
> **2. Access the Affected Reward**
>
> Use the **Add Vouchers Now** buttons from the email. The button under each reward directly navigates to the specific reward (recommended). Click **Manage** next to the affected reward inside the platform.
>
> 
>
> Navigating to the specific reward from the email.
>
> **3. View Voucher Batches**
>
> Scroll to the **Batches of Vouchers** section. Each row shows an uploaded batch. Click the Batch ID to view individual codes, or click the 3-dot menu to manage a batch.
>
> **4. Adjust Validity**
>
> In the 3-dot menu, choose **Adjust Validity**. Choose the new expiration date from the calendar and click **Adjust Validity** to save.
>
> 
>
> The date picker for setting a new voucher expiration date.
>
> Your validity changes are saved, and vouchers will re-enter circulation with the new expiration date.
## Need Help?
Start a conversation with the in-platform Support widget in the bottom-right corner of your dashboard - it can usually answer this straight away. If it can't, raise a request via the [request form](https://mention-me.zendesk.com/hc/en-gb/requests/new?ticket_form_id=5268418076701).

The in-platform Support widget starting an AI-assisted conversation.
# How to Upload Vouchers
Source: https://docs.mention-me.com/knowledge/referral/vouchers/upload-vouchers
Upload new voucher codes to the Mention Me platform via the Campaigns tab, Content page, reward email notification, or during onboarding.
Only users with **Marketing** or **Administrator** access can upload new codes. Please ensure vouchers are uploaded to the [Mention Me Live platform](https://mention-me.com/login).
A guided walkthrough of uploading voucher codes in the Mention Me platform.
## Where to Access the Upload Module
You can upload vouchers from several places in the platform:
### From the Campaigns Page
> [accordion] See each step in detail
>
> **1. Open the Campaigns Section**
>
> In the left-hand menu, click **Campaigns**. The overview displays voucher health per campaign and highlights which ones need updates.
>
> **2. Upload a New Batch**
>
> Click **+ Add vouchers**, find your reward, and click **Upload a new batch**.
>
> 
>
> The Campaigns page showing a voucher health overview.
>
> From there, add vouchers to the reward that needs them:
>
> 
>
> Adding vouchers from the Campaigns page.
### From the Experiment Page
Click **Campaigns**, select the campaign that requires new vouchers, choose the relevant reward (e.g. "Referrer gets 20% off when they spend over £100"), then click **Add vouchers** > **Upload a new batch**.
### From the Reward Email Notification
When you receive an email alerting that your rewards are running low, expiring, or expired:
> [accordion] See each step in detail
>
> **1. Review the Alert Email**
>
> The email highlights which experiments need attention and the current status.
>
> 
>
> A reward alert email highlighting experiments needing attention.
>
> **Voucher status meanings:**
>
> * **Critical:** Stock is almost depleted
> * **Run Out:** No vouchers remain
> * **Expiring:** Vouchers are nearing expiry
> * **Expired:** Vouchers are no longer being distributed
>
> **2. Use the Add Vouchers Now Button**
>
> Use the **Add Vouchers Now** buttons in the email. Individual reward buttons give the quickest access.
>
> 
>
> The Add Vouchers Now buttons in the alert email.
>
> Each individual reward button takes you directly to the reward that needs attention:
>
> 
>
> Individual reward buttons for quick access.
>
> **3. Upload a New Batch**
>
> Click **Add vouchers** > **Upload a new batch**.
### During Onboarding
> [accordion] See each step in detail
>
> **1. Navigate to Rewards**
>
> Navigate to **Content > Rewards** and click **Add vouchers** on the relevant reward.
>
> 
>
> The Add vouchers button during onboarding.
>
> **2. Upload a New Batch**
>
> Select **Upload a new batch**.
## Steps to Upload Your New Vouchers
> [accordion] See each step in detail
>
> **1. Start a New Batch Upload**
>
> Open the reward from any of the routes above, then click **Add vouchers** > **Upload a new batch**.
>
> **2. Configure Settings**
>
> On the **Validity & name** step, configure the following:
>
> * **Valid from:** when the codes are valid from
> * **Expiry date:** whether to set a date to stop sharing these codes. The expiry date controls when we stop giving out codes, so match it to your own system. If it's less than 12 months away, you'll see a warning. Choose **No** if the codes don't expire
> * **Code Usage:** single-use or multi-use. We recommend single use
> * **Case Sensitivity:** whether codes like "ABC" and "abc" count as the same code
> * **Batch name:** a clear, descriptive name for referencing later
>
> Then click **Next**.
>
> 
>
> The voucher upload configuration settings.
>
> > [!NOTE]
> >
> > Code validity determines the distribution window, not the offer duration. Match your CRM expiry settings. Codes should ideally be valid for one year or more.
>
> **Recommended settings:**
>
> * Codes valid for at least 1 year
> * Single-use codes only
> * Codes should be non-stackable
> * Codes set to target referrer vs referee use cases
>
> Ensure Mention Me settings match your CRM system. Changes here don't affect external platforms.
>
> **3. Upload Your File**
>
> On the **Select & map** step, check the summary of your new batch, then drop your file in or click to select one. Your file must include a **Reward Code** column header. Download the sample CSV if you need one.
>
> 
>
> A CSV file format with a Reward Code column header.
>
> Complete the mapping to confirm the upload format, then click **Upload**.
>
> 
>
> The upload confirmation message.
>
> **4. Review Results**
>
> You'll see the result for each code, with success or failure. Choose to upload another file or finish.
>
> 
>
> Upload progress showing success and failure counts.
## Sharing Voucher Batches Between Rewards
During onboarding, you can share a single voucher batch across multiple rewards (only works when batch values match exactly):
> [accordion] See each step in detail
>
> **1. Open the Second Reward**
>
> Click **Add vouchers** under a second reward.
>
> **2. Select Existing Batch**
>
> Select **Select from uploaded**, tick the batch(es) you'd like to assign, and click **Assign reward codes**.
>
> 
>
> Selecting uploaded voucher batches to share.
>
> Once assigned, the shared codes become available to the second reward:
>
> 
>
> Assigning shared reward codes to another reward.
Repeat for any other rewards using the same voucher batch.
# Understanding Validity Periods
Source: https://docs.mention-me.com/knowledge/referral/vouchers/validity-periods
Understand how customer-facing and platform validity periods work together to keep your referral rewards reliable.
Voucher validity has two different meanings depending on who you ask. Understanding both, and how they interact, helps you avoid broken promises, expired codes, and a poor experience for your customers.
## Why Mention Me Might Ask You for More Vouchers
Mention Me sends automated alerts when a reward's voucher supply needs attention, so you can top it up before it disrupts your customers' rewards. We get in touch for one of three reasons:
* **Running low:** your existing batch of voucher codes is nearly used up
* **Expired or short validity:** your current codes have expired, or are close to expiring
* **Multi-use voucher issues:** shared codes are running out quickly or carry a higher fraud risk

An automated alert email showing critical voucher status for referee and referrer rewards.
The rest of this article explains how voucher validity works, so you can reduce how often you need to top up.
## What Is a Voucher Validity Period?
The answer depends on perspective.
From a customer's point of view, voucher validity means how long they have to redeem their reward. From the platform's point of view, it means how long the system is allowed to issue codes from a specific batch.
Both the **Referrer** (the person sharing your offer) and the **Referee** (the person accepting it) are affected by these rules. To make sense of how validity works, it helps to split it into two distinct types:
* Customer-facing validity: what the customer sees
* Platform validity: what happens behind the scenes in the referral system
### Customer-Facing Validity
This is the validity period you promise to the customer: how long they have to use their voucher once it's been issued. Think of it as a commitment, or a "promise period."
For example: "This voucher is valid for one month from the date of issue."
This promise applies to Referrers and Referees alike, and it's what appears in your messaging, emails, and terms and conditions.
This matters because if a customer tries to use their reward after the promised time limit, the code won't work. Setting, and sticking to, a clear redemption window builds trust and improves the customer experience.
### Platform Validity
This is the timeframe during which the platform is allowed to issue vouchers from a specific batch. You set it when you upload your voucher codes.
For example: you upload a batch of codes valid for distribution between 1 January and 31 December. That's a platform validity of 12 months.
This matters because a customer might earn a reward on 30 December, but if your customer-facing promise is "one month to redeem," they need to be able to use their code until 30 January, which falls after the platform validity ends. Without careful planning, this can lead to a broken promise.
### How the Two Work Together
Platform validity must always account for customer-facing validity.
Consider this scenario: today is 1 January, and your vouchers are promised to last for six months, but the end of their platform validity is set to 31 December. In that case, you cannot distribute these vouchers after 1 July. This is because a voucher issued on 1 July, plus its six-month promise, would extend beyond 1 January the following year, when the batch becomes invalid. Any voucher issued after that date would not give customers the full six months you promised.
> [!TIP]
>
> Always set your platform validity to extend beyond your customer-facing validity, ideally by several weeks or months, so the system can safely keep issuing codes even near the end of a campaign.
Customer-facing windows are often short (for example, 7 to 30 days), but platform validity typically spans much longer (for example, 6 to 12 months) to keep reward distribution running smoothly.
You can check the current validity period for any campaign in the Mention Me platform. See [How to Check Your Reward Validity Period](/knowledge/referral/vouchers/check-validity-period) for step-by-step instructions.
## Estimating How Many Voucher Codes to Upload
When you're deciding how many codes to upload for your next batch, Mention Me can help you estimate demand. This estimate is based on:
* How many codes you've uploaded previously
* How long that batch lasted before running out
* Your referrer reward's validity period
### Platform Distribution Period by Validity
Codes are assumed to have a 12-month life span by default. Because of this, your referrer reward validity period and the platform's distribution period for that batch always add up to 12 months, so the longer your reward validity, the shorter the window the platform needs to distribute codes from that batch:
| Referrer Reward Validity | Platform Distribution Period |
| - | - |
| 3 months | 9 months |
| 6 months | 6 months |
| 9 months | 3 months |
### Worked Examples
These examples show how we'd translate past voucher usage into a recommended upload for your next batch:
* If you had 1,000 codes that lasted 6 months, we'd suggest raising your upload to 2,000 codes for a full 12-month cycle
* If 1,000 codes were used up in just 3 months, we'd suggest 4,000 codes next time
* If you provided 10,000 codes but only 5,000 were used, we'd suggest 5,000 codes for your next batch
### Default Validity Assumptions
For most clients, Mention Me assumes your voucher codes are valid for 12 months unless you tell us otherwise.
> [!NOTE]
>
> Amazon rewards are an exception to this default: they must remain valid for 10 years.
> [!TIP]
>
> If your referrer reward validity is 6 months or longer, we recommend setting a 2-year expiry on your voucher codes. This reduces how often you need to upload new batches.
## Multi-Use Vouchers
We recommend avoiding multi-use voucher codes where possible:
* **Fraud risk:** a generic code such as "SUPERSALE15" can be shared widely with people who were never referred
* **High depletion risk:** a limited pool of uses means the code can run out quickly
If you do need to use a multi-use code, provide at least 15 to 20 codes to allow for expected reward claims.
## Why Long-Life Vouchers Work Better
Where possible, use vouchers without an expiry date. Long-life vouchers offer several benefits:
* Avoid needing frequent voucher uploads
* Prevent voucher expiry errors
* Create a better customer experience
* Reduce admin burden for your team
## Key Takeaways
* **Customer-facing validity** is the time a customer has to redeem their voucher
* **Platform validity** is the time the system can issue a voucher to a successful Referrer or Referee
To prevent problems:
* Always make platform validity longer than customer-facing validity
* Upload codes with long life spans where possible
## Need Help?
Start a conversation with the in-platform Support widget in the bottom-right corner of your dashboard - it can usually answer this straight away. If it can't, raise a request via the [request form](https://mention-me.zendesk.com/hc/en-gb/requests/new?ticket_form_id=5268418076701).

The in-platform Support widget starting an AI-assisted conversation.
# Understanding Mention Me and Classic
Source: https://docs.mention-me.com/which-platform
Why there are two platforms, what each is for, and how to choose which one to open.
Mention Me is in the middle of a redesign. For a while you will have two dashboards, both talking to the same underlying programme.
**Mention Me** at app.mention-me.com is the new dashboard. **Classic** at mention-me.com is the dashboard teams have used until now. Classic stays fully supported while Mention Me is rolled out.
Your data does not live in one place or the other. Campaigns, customers, rewards and history are the same programme. What changes is which screen you use to work with them.
## Why There Are Two
Mention Me is rebuilt around the work people actually do: finding a customer, editing a campaign, reading a dashboard. It is being given to accounts gradually, so not every team sees every screen yet.
Until a given area has moved, Classic is still the place to do that job. That is why the two dashboards overlap, rather than one replacing the other overnight.
## Which One To Open
Use **Mention Me** when you have access and you are doing day-to-day referral work: browsing customers, running campaigns, building reports, or uploading data.
Use **Classic** when the thing you need has not moved yet. That includes the **Influencer** product, and any referral screen you cannot find in Mention Me. If a section is missing for your account, Classic is the right place, not a broken link.
If you are not sure you have access, or a screen you need is not there, speak to your Mention Me contact. The [Start Guide](/knowledge-app/getting-started/overview) is the named starting point for Mention Me.
For a capability-by-capability split, see [Understanding What Has Moved](/knowledge-app/getting-started/whats-where).
Tag integration, the API, and webhooks are the same whichever dashboard you log in to. Those docs are shared.
| You need to | Open |
| - | - |
| Work with customers, campaigns, reporting, or uploads, and you have access | [Mention Me docs](/knowledge-app/getting-started/overview) |
| Use Influencer, or a referral screen that is not in Mention Me yet | [Classic docs](/knowledge/getting-started/overview) |
| Implement tags, call the API, or set up webhooks | Either. Start from [Home](/) |
## Moving Between Them
When a task still lives in Classic, Mention Me shows a **Take me to classic** link, usually with a trailing arrow. Following it opens Classic in the same tab. There is no new window.
Once you are in Classic, a banner at the top of the page says **You're in Mention Me Classic**. The **Exit Classic** button on that banner takes you back to Mention Me, again in the same tab. The banner stays put. It is how you know you left Mention Me, and how you return.
You only see these links and the banner when Classic links are on for your workspace. If they are missing, speak to your Mention Me contact.
## How The Docs Follow Along
The version dropdown at the top of these docs matches the two dashboards. **Mention Me docs** covers app.mention-me.com. **Classic docs** covers mention-me.com.
Home, Documentation, and API & Webhooks are shared. Guides change with the version, because the products do. If the page you are on is not in the other version, the dropdown opens that version's Guides.
## See Also
> [card] [Understanding What Has Moved](/knowledge-app/getting-started/whats-where)
>
> Which capabilities live in Mention Me, which still finish in Classic, and
> which are shared.
> [card] [Mention Me docs](/knowledge-app/getting-started/overview)
>
> The new dashboard at app.mention-me.com. Customers, campaigns, reporting,
> and uploads.
> [card] [Classic docs](/knowledge/getting-started/overview)
>
> Current guides for the Classic dashboard at mention-me.com.
# Understanding Referral Intelligence Benchmarks
Source: https://docs.mention-me.com/knowledge/ab-testing/benchmarking-test-ideas
Understand how Referral Intelligence benchmarking compares your metrics to industry averages, and discover targeted A/B test ideas for each stage of the referral funnel.
A/B testing is one of the most effective ways to improve the performance of your referral programme. Strategic, ongoing testing can significantly increase new customer acquisition - some programmes see up to 4x growth in new customers within the first six months.
This article explains how to use the Referral Intelligence benchmarking feature in the Mention Me platform to compare your metrics with industry peers, identify areas for improvement, and prioritise what to test. It also covers targeted test ideas for each stage of the referral journey, from increasing impressions and enrolments through to boosting shares, conversions, and purchases.
## Comparing Your Performance to Industry Benchmarks
Referral Intelligence, found in the **Benchmark** tab under **Performance**, compares your referral metrics against the industry average across every stage of the funnel. Use it to spot where your programme is under-performing against peers and prioritise tests accordingly.
## Funnel Metrics and Test Ideas
### Impressions per Order
The ratio of offer impressions to the number of orders. For every order tracked by Mention Me, how often is referral shown?
* This metric should be above 100%, indicating referral visibility outside the post-purchase overlay.
**Recommendation:** promote the referral programme more widely.
* Do you have a [homepage promotion](/knowledge/referral/promoting/homepage) live? This can drive up to 60% of referral acquisitions.
* Download a report of customers who enrolled but haven't shared, and remind them to share.
### Enrolment Rate
The percentage of customers who enrolled in the referral programme compared to total impressions.
* Customers can only enrol once per offer. Multiple impressions do not equal multiple enrolments.
**Recommendation:** promote referral beyond post-purchase overlays.
* Send regular [email promotions](/knowledge/referral/promoting/email) to keep the programme top-of-mind for customers.
### Share Rate
The percentage of eligible customers who share the referral offer.
**Recommendation:** focus on referrer incentives and sharing methods.
* Test increasing the incentive, lowering the minimum spend, or adding a bonus (e.g. a chance to win). [Request a test setup](https://help.mention-me.com/hc/en-gb/requests/new).
* Reorder or trial different sharing options (e.g. native share vs. name share).
### Shares per Sharer
A measure of how frequently the average sharer shares with others.
**Recommendation:** encourage sharing with more than one friend.
* Test copy that uses plural language, such as "Share with friends".
* Launch competitions, such as a chance to win a gift card, for those who share with multiple friends. See [example ideas](https://docs.google.com/presentation/d/1jorAjeME2M_-4xY8sya3kf6dGbpEnUrT4w3Lczu5CdU/edit?usp=sharing).
### Responses per Share
Compares how many share responses (e.g. link clicks, name searches) are generated per share.
**Recommendation:** encourage more referee interaction.
* Allow customers to personalise the message they send when sharing the offer to increase engagement.
### Incented per Response
Out of the customers who responded to a share, how many entered their email and received an incentive?
**Recommendation:** build trust and reinforce value at the point of registration.
* Add social proof, such as [Trustpilot scores and reviews](https://docs.google.com/presentation/d/1qkadSrhW8Ww45IljpcM9546noxCHARrTq4edZZqjZLQ/edit?usp=sharing), to increase trust and motivation.
* Test CTA variations, for example "Get 10% off" vs. "Get 10% off our award-winning furniture".
* Add USPs to the registration page, such as "100-day free returns", "5-star Trustpilot rating", or awards won.
### Purchases per Incented
How many incentivised referees go on to purchase?
**Recommendation:** reinforce your brand's value at the point of fulfilment.
* Reinforce your brand's value on the fulfil or promise page by highlighting service guarantees or other benefits.
### Purchase Rate
The percentage of shares that result in qualified new customer purchases.
**Recommendation:** optimise the referee experience.
* Test shorter incentive validity periods, for example 14 days vs. 7 days, to drive urgency.
> [!TIP]
>
> Running A/B tests is vitally important to improving the effectiveness of your referral scheme. Use the benchmarking data above to decide where to focus first.
## Video: Introducing Benchmarking Intelligence
[Introducing Benchmarking Intelligence](https://www.youtube-nocookie.com/embed/mwwQAHKOHlM)
Video showing the Benchmarking Intelligence feature.
# Best Practices for A/B Testing
Source: https://docs.mention-me.com/knowledge/ab-testing/best-practices
Planning principles, proven test templates, and optimisation tips for getting the most from A/B testing in Mention Me.
## Planning Your A/B Test
### Test One Thing at a Time
Focus on a single variable - imagery, copy, or incentive type - to ensure you can isolate the cause of any performance changes.
* Test 7-day vs. 14-day validity periods
* Test branded vs. lifestyle imagery
* Avoid changing both incentives and visuals at once
### Prioritise What to Test
* **Impact:** Will the change likely drive major results?
* **Ease:** Is it quick and simple to implement?
* **Volume:** Do you have enough traffic to support a test?
### Always Be Testing
Treat A/B testing as an ongoing optimisation process. Continually test and iterate to find new insights.
### Promote Your Referral Programme Widely
* Ensure both test variations get equal exposure
* Include referral promotions in emails, homepage, and post-purchase flows
### Common Pitfalls to Avoid
* Avoid testing too many things at once
* Don't stop the test too early
* Act only on results from completed tests
* Don't cherry-pick data - look at the full picture
## Test Templates
The templates below are sorted by effort and impact level. Use them to identify what drives the greatest performance uplift.
### Reduce Share Methods (Lower Effort)
Test name + native + link vs. offering all share methods.
**Result:** +43% Share Rate

The reduced share methods test increased share rate by 43% compared to offering all share methods.
### Remove Meta Sharing (Lower Effort)
Remove Facebook and Messenger in favour of higher-performing options.
**Result:** +14% Share Rate, +18% Conversion Rate

Removing Facebook and Messenger sharing increased share rate by 14% and conversion rate by 18%.
### Add WhatsApp Sharing (Lower Effort)
Add WhatsApp to the mobile share options.
**Result:** +24.5% Share Rate
### Reward Framing: Give vs. Get (Lower Effort)
Test CTA: "Give 20% Off" vs. "Get 20% Off".
**Result:** +12% Share Rate when "Give" used

Framing the reward as Give rather than Get increased share rate by 12%.
### Add Brand USPs (Lower Effort)
Highlight brand strengths to add motivation. Requires copy changes on referrer page, corner peel, and messaging.
### Lifestyle vs. Product Imagery (Higher Impact)
Lifestyle (social scenes) vs. product-only images.
**Result:** +21% Share Rate and +5% Conversion Rate with product focus

Product-focused imagery increased share rate by 21% and conversion rate by 5% compared to lifestyle imagery.
### Lifestyle vs. Reward Focus Imagery (Higher Impact)
Ideal for service-led brands.
### Money vs. Percentage Off (Higher Impact)
Example: £20 off vs. 55% discount (min £30 spend).
**Result:** +20% Share Rate and +100% Purchase Rate for % discount

Offering a percentage discount increased share rate by 20% and purchase rate by 100% compared to a fixed amount off.
### Reducing Reward Value (Higher Impact)
Test reward value sensitivity to optimise ROI.
### Adjusting Minimum Spend (Lower Effort)
Test with vs. without minimum spend requirement.
**Result:** +45% Share Rate when removed

Removing the minimum spend requirement increased share rate by 45%.
### Shorten Offer Validity (Lower Effort)
Increase urgency by reducing offer duration.
**Result:** 3-day expiry vs. 7-day - +28% Purchase Rate

A 3-day offer expiry increased purchase rate by 28% compared to a 7-day expiry.
### Extend Offer Validity (Lower Effort)
Beneficial for high-consideration purchases.
## Referral Best Practice (When A/B Testing Isn't Feasible)
Even without formal A/B testing, you can analyse and optimise your programme using funnel data, benchmarking, and engagement metrics.
### Understand the Referral Funnel
1. Customer purchases and sees referral prompt
2. Refers a friend
3. Friend clicks the link and visits your referral page
4. Friend registers to redeem the offer
5. Friend completes a purchase
6. Referrer receives the reward
### Optimise Using Benchmarking and Explore
Use the **Benchmark** tab under **Performance** to compare your funnel metrics against the industry average and see where to focus first. For a full breakdown of each metric and targeted test ideas, see [Understanding Referral Intelligence Benchmarks](/knowledge/ab-testing/benchmarking-test-ideas).
**Explore section analysis dimensions:**
* Promotion point (e.g. homepage vs. post-purchase)
* Share method (WhatsApp, Name Share, etc.)
* Audience segment
* Device (mobile vs. desktop)
### Practical Optimisation Tips
**1. Maximise promotion points**
* Use homepage banners, corner peels, and email placement to ensure visibility
* Email campaign examples:
* +107% Share Rate from Solus email launch
* +336% Referrals from Valentine's Day promo
* 50% Open Rate with targeted reminder email
**2. Improve referrer experience**
* Enable native share buttons
* Allow message personalisation
* Encourage multiple shares per referrer
**3. Improve referee experience**
* Use social proof (e.g. Trustpilot)
* Highlight key USPs at every touchpoint
* Offer exploration CTAs
* Test offer duration for urgency impact
**4. Enhance tracking**
* Use "situation" tags to track performance by placement
* Run cohort or device-type analysis
* Link referral journeys to customer value outcomes
# Understanding Propensity to Refer
Source: https://docs.mention-me.com/knowledge/ab-testing/propensity-to-refer
How Mention Me's Propensity to Refer data model segments customers by their likelihood to refer and optimises their post-purchase experience.
The Propensity to Refer data model is a customer segmentation tool that predicts each customer's likelihood to refer at the point of purchase.

Propensity to Refer model segmentation flowchart
## How Does It Work?
Each customer is segmented into one of two groups: those with a High Propensity to Refer and those with a Low Propensity to Refer.
The model updates weekly to use the most relevant and up-to-date information. It adapts dynamically to changing customer behaviour.
These groups are shown different experiences optimised for conversion: **High Propensity to Refer** customers are shown referral offers, while **Low Propensity to Refer** customers are shown alternative actions based on business goals.
## Example Drivers Used to Predict Customer Behaviour
| Driver | Impact on Prediction |
| - | - |
| Currency | Very high |
| Number of past orders | High |
| Marketing opt-in status | High |
| Operating system | Medium |
| Revenue from most recent order | Medium |
| Number of past shares | Low |
### Alternative Actions Are Based on 3 Business Goals
* Show a discount on the next order to increase repeat revenue
* Show a newsletter sign-up to grow the marketing database
* Present incentives tailored to each segment to optimise referrals and increase revenue
### Key Terminology
* **High Propensity to Refer (High PTR):** Customers most likely to refer. Usually shown a referral offer.
* **Low Propensity to Refer (Low PTR):** Customers least likely to refer. Usually shown an alternative option (e.g. IFA, NPS).
* **Control:** Customers who qualify as Low PTR but are shown a referral offer. Used for experimental comparison:
* Measures effectiveness of alternate actions and revenue trade-offs.
* Improves future predictive model accuracy by observing reaction to referral offer.
## How Do We Calculate the Additional Value?
We compare the performance of the **Low PTR** group receiving an alternative action with the **Control** group receiving a referral offer.
## How Are Your Customers Being Segmented?
The following example shows an aggregated view of the proportion of customers by propensity group. Proportions may vary at the experiment level.

Customer segmentation by propensity group
# How to Set Up an A/B Test
Source: https://docs.mention-me.com/knowledge/ab-testing/setup
Step-by-step guide to creating, launching, and analysing A/B tests in Mention Me using templates or custom configurations.
Running A/B tests is one of the most effective ways to optimise your referral campaigns. With the updated test creation flow, you can launch smart experiments in minutes using proven templates or create custom tests tailored to your goals.
A guided walkthrough of setting up an A/B test in the Mention Me platform.
## Step-by-Step Guide
> [accordion] See each step in detail
>
> **1. Navigate to the Right Campaign**
>
> In the left-hand menu, click **Campaigns**, then click **View** on the campaign you'd like to test. On the campaign dashboard, click **Run an A/B test** at the top of the page.
>
> 
>
> The Run an A/B Test button at the top of the campaign dashboard.
>
> **2. Choose a Test Template or Create a Custom One**
>
> Select one of the 12 pre-built test templates based on high-performing examples from other brands. Templates are labelled:
>
> * **Higher impact**: Proven to deliver strong uplift
> * **Lower effort**: Quick and easy to implement
>
> Filter templates using the toggles at the top of the gallery.
>
> 
>
> The A/B test template gallery, showing templates labelled by impact and effort.
>
> For more flexibility, choose **Custom test** to configure your own experience.
>
> 
>
> The Custom Test option for configuring your own experience.
>
> Once you've selected a template, click **Create A/B test**.
>
> **3. Configure the Variant Experience**
>
> The variant is pre-filled with best-performing defaults, for example a reduced share panel. Use **Full preview** to see exactly what each variation looks like.
>
> To customise the variant further, click **Select share methods**, pick up to six share options, then close the panel.
>
> 
>
> The variant experience configuration screen with share method selection.
>
> **4. Check the Test Parameters**
>
> Configure how your A/B test will run. Tell us how many unique orders you typically see in a week (less or more than 200), and smart defaults are applied to save time:
>
> * **Confidence Level:** 90%
> * **Success Metric:** Defaults to variation conversion rate
>
> 
>
> The Running the A/B Test panel, with weekly order volume, confidence level and success metric.
>
> Use the success metric dropdown to choose a different metric.
>
> **5. Check Test Outcomes**
>
> Control what happens when the test ends. The test ends automatically and your campaign updates:
>
> * **If a winner is found:** the winning variation is chosen
> * **If a better variation is found (but no winner):** the better variation is chosen
> * **If no substantial difference is found:** the variation you choose here takes over
>
> All traffic then goes to the chosen variation. You can still switch the variant manually once the test has ended.
>
> 
>
> The test outcome settings showing the default auto-conclude options.
>
> **6. Launch Your Test**
>
> When you're ready, click **Run test**, then choose **Set live now** or **Schedule for later**.
>
> After launch:
>
> * The campaign page will show your live test
> * Click **View A/B Test Details** to monitor real-time performance
>
> 
>
> The live test shown on the campaign page, with the option to view A/B test details.
>
> **7. When the Test Concludes**
>
> You'll receive an outcome email (e.g. winner found, inconclusive). Final traffic will be routed to your selected variant.
>
> Use the Campaign Dashboard to:
>
> * **View Detailed Results**
> * **Use a Different Variant** (manually redirect traffic)
>
> 
>
> The concluded test results screen with options to view results or switch variants.
## What Happens Next? Keep Testing
To achieve long-term gains, continue testing. As soon as one experiment concludes, we recommend launching another.
# Understanding Variation Metrics
Source: https://docs.mention-me.com/knowledge/ab-testing/variation-metrics
How Mention Me's updated variation metrics for A/B testing differ from campaign-level metrics and why they provide more accurate experiment evaluation.
As part of the improvements to A/B testing introduced in summer 2025, Mention Me updated the metrics used to evaluate test performance. This article explains the changes, why they were introduced, and how they differ from existing metrics.
## What Changed?
Mention Me introduced three new metrics for tests:
* Variation share rate
* Variation purchase rate
* Variation conversion rate
These are used specifically within A/B tests or single variant testing. The existing share, purchase, and conversion rates remain unchanged at the campaign, market, and programme levels.
The original metrics are calculated from a broader user base - those enrolled in any offer - regardless of which variation they saw. The new metrics only consider customers who were shown a specific test variant, offering more targeted and reliable insights during experiment evaluation.
## Metric Comparison
| Metric | Existing | New |
| - | - | - |
| Share Rate | Shares from enrolled customers / Total enrolled customers | Shares from customers with an impression / Unique impressions |
| Purchase Rate | Purchases from shares / Shares from enrolled customers | Purchases from shares / Shares from customers with an impression |
| Conversion Rate | Purchases from shares / Enrolled customers | Purchases from shares / Unique impressions |
## How Does This Help?
The new metrics more accurately measure the impact of a specific offer by exclusively tracking users who:
* Were shown that exact variant
* Decided to refer (share)
* Earned purchases from their shared offers
This filtering prevents unrelated impressions, enrolments, and conversions from skewing test results. In A/B testing, this reduces noise and allows faster, clearer conclusions.
While the new metrics are used within experiments only, the original metrics still serve as a complete picture of campaign success and continue to be used in programme-level reporting.
You may notice that unique impressions can exceed total enrolments. Along with the metric changes, this might result in numerical differences compared to what you're used to - but is expected and more accurate for experimentation.
## Why Would a Customer See One Offer and Be Enrolled in Another?
Referral links are valid for a set period (typically 3-6 months). If a referee visits after this time, they're shown the most current offer - so they may convert via a different offer than the referrer originally promoted.
In A/B testing, this leads to an attribution ambiguity: should the original offer be credited, or the new one shown? For experiment integrity, Mention Me's updated metrics attribute only to the experience actually displayed to the customer. This makes A/B test evaluation more precise.
These scenarios are still valuable and are fully included in overall campaign metrics outside of test performance reports.

Rolled-forward example: how offer attribution works across time
# Overview
Source: https://docs.mention-me.com/knowledge/admin/overview
Manage your Mention Me account settings, user access, platform tools, and tag implementation.
The Platform Reference section covers the tools and settings available in the Mention Me dashboard - from locating your partner code and managing customer data to implementing and troubleshooting Mention Me tags on your website.
## Platform Administration
> [card] [How to Find Your Partner Code](/knowledge/admin/partner-code)
>
> Locate your unique Partner Code for integrations, support requests, and technical setup.
> [card] [How to Upload a Batch of Tags](/knowledge/admin/upload-tags)
>
> Upload eligibility data and other tags to the platform using the Upload Tags tool.
> [card] [Understanding the Customers Section](/knowledge/admin/customers-section)
>
> Overview of the Customers section in the dashboard, including available actions and related guides.
> [card] [Browser & Device Support](/knowledge/admin/browser-support)
>
> Supported browsers, email clients, devices, and TLS protocols for the dashboard and referral experience.
> [card] [How to Disable Your Ad Blocker](/knowledge/admin/disable-ad-blocker)
>
> Steps to disable or whitelist your ad blocker so Mention Me referral features work correctly.
## Tag Implementation
The Tag Implementation section covers everything you need to integrate Mention Me tags, from understanding where each tag goes to advanced setups for SPAs, multiple regions, and third-party checkout platforms.
### Getting Started
> [card] [Where and Why to Implement Tags](/knowledge/tags/where-and-why)
>
> Understand the two key tags that power the referral journey and where to place them on your site.
> [card] [Google Tag Manager](/developer-docs/integration/setup/tag-containers)
>
> Configure your data layer and implement Mention Me tags using GTM.
### Advanced Setup
> [card] [Single Page Applications](/knowledge/tags/spa-implementation)
>
> Handle Mention Me tags on SPAs built with React, Angular, or Vue.
> [card] [Global-e Checkout Integration](/knowledge/tags/global-e)
>
> Add Mention Me tags into Global-e checkouts, including Shopify + Global-e setups.
> [card] [Locales, Languages and Currencies](/knowledge/tags/locales-languages-currencies)
>
> Configure locales to segment referral campaigns by customer region, language, and currency.
> [card] [Google Analytics Parameters](/knowledge/tags/google-analytics)
>
> Integrate UTM parameters with Mention Me to track referral traffic alongside other channels.
### Troubleshooting & Reference
> [card] [Debug Dashboard](/knowledge/tags/debug-dashboard)
>
> Check that data is flowing correctly into Mention Me and troubleshoot integration issues.
> [card] [Common Error Codes](/developer-docs/integration/reference/error-codes)
>
> Troubleshoot HTTP and JavaScript errors in your Mention Me tag integration.
> [card] [Replatforming Checklist](/knowledge/tags/replatforming)
>
> Essential steps for moving your Mention Me tags when switching platforms.
> [card] [Platform IP Addresses](/knowledge/tags/ip-addresses)
>
> IP addresses for whitelisting webhooks, newsletter sign-ups, and API traffic.
# How to Find Your Partner Code
Source: https://docs.mention-me.com/knowledge/admin/partner-code
How to locate your unique Partner Code in the Mention Me platform for integrations, support requests, and technical setup.
Your Partner Code is a unique identifier for your Mention Me account. You need it for technical integrations, support requests, and troubleshooting.
A guided walkthrough of finding your Partner Code in the Mention Me platform.
## From Your Account Menu
> [accordion] See each step in detail
>
> **1. Open your account menu**
>
> At the bottom of the left-hand menu, click your account name.
>
> **2. Copy your Partner Code**
>
> The account menu opens, with your Partner Code just under your account name. Click the copy icon next to it, and it's ready to paste into technical integrations, support requests or troubleshooting.
>
> 
>
> The account menu, with the Partner Code and copy icon under the account name.
## In the Integration Instructions
Your Partner Code also appears in your integration instructions. To open them, go to **Settings & Tools** in the left-hand menu, then **Demo & integration > Integration instructions**. This takes you to the [integration overview](/developer-docs/integration/overview) in these docs.
If you're logged into the Mention Me platform when you open that page, your Partner Code fills in automatically.
# How to Upload a Batch of Tags
Source: https://docs.mention-me.com/knowledge/admin/upload-tags
How to upload eligibility data and other tags to the Mention Me platform using the Upload Tags tool.
> [!NOTE]
>
> Using **Mention Me**? See [Upload a CSV](/knowledge-app/data/uploads) instead.
> The page below describes the legacy Upload Tags tool. Concepts are unchanged,
> only the UI is different.
The Upload Tags tool lets you upload data directly to the Mention Me platform. If SFTP isn't an option for transferring data such as an eligibility feed, this feature processes eligibility data with a simple file upload and field mapping.
A guided walkthrough of uploading a batch of tags in the Mention Me platform.
## Steps to Upload Tags
> [accordion] See each step in detail
>
> **1. Open Upload Tags**
>
> In the left-hand menu, click **Settings**. You'll find **Upload tags** under **Data & Reporting**.
>
> 
>
> Upload tags under Data & Reporting in the Settings & tools panel.
>
> You can also search for "Upload tags" in the search bar at the top and select the first result.
>
> 
>
> Search results for Upload tags.
>
> **2. Select a Tag Type**
>
> Click **Select a type** to see every tag you can upload, from orders and customer exclusions to referee eligibility and registrations. For example, **Register Silently** enrols a list of customers into your referral programme so they can start referring friends, without sending them a registration email.
>
> 
>
> The list of available tag types to upload.
>
> > [!TIP]
> >
> > If you're importing a large list of past customers, use the [historical customers upload](https://mention-me.com/merchant/~/upload/customers) instead.
>
> **3. Prepare Your CSV**
>
> The document to upload must be a **CSV file**. The first row should always include the required headers. For a list of emails (e.g., new customers who qualified for a reward), select the option from the dropdown and download the sample document.
>
> 
>
> The dropdown used to select a tag type and download the sample CSV.
>
> The sample file contains all required headers and one example under each for your reference. When your file is ready, drop it onto the page or click to select it.
>
> 
>
> A sample CSV file showing the required headers and example data.
>
> **4. Map Your Fields**
>
> You can map your own headers to mandatory and optional fields before each upload. This step appears right after dropping your file onto the page. For each field, pick the matching column from your file.
>
> 
>
> The field mapping interface shown after a file upload.
>
> Mandatory fields are always visible during mapping. Optional fields, like a phone number or merchant customer ID, might be available depending on your upload choice, but these are hidden by default. Click the **Optional fields** bar to see and map these.
>
> 
>
> The optional fields section expanded during mapping.
>
> **5. Fix Any Validation Errors**
>
> Mapping fields triggers the first stage of validation. If your data format is incorrect, you'll see a red error message straight away.
>
> 
>
> A validation error shown during field mapping.
>
> The tool checks the first \~100 rows in your file and shows you any errors, like an invalid email address. If you continue, the rest of the rows are validated on our servers. Any row with an issue will be skipped during processing.
>
> To fix an error, correct your file, click **change file** and drop it in again.
>
> **6. Upload**
>
> When all fields are mapped and there are no validation errors, click **Upload** to start processing your file.
## What Happens Next?
Once the process finishes, you'll see a confirmation popup showing how many rows failed and how many were processed successfully.

The confirmation popup showing how many rows failed and how many were processed successfully.
Valid rows are sent to the Tag queue, ready for use in your campaign. A summary of the results is also available for review.

A summary of the upload results, showing processed and failed rows.
# How to Activate the Coupon Reminder Journey in Attentive
Source: https://docs.mention-me.com/knowledge/esp-crm/attentive/coupon-reminders
Activate the prebuilt Attentive journey to remind referrers to use their Mention Me coupon codes via SMS.
## About the Prebuilt Journey
With this **prebuilt Attentive journey**, you can remind your existing customers to use the coupon codes they received after successfully referring a friend to your brand.
This helps increase repeat purchase rates by prompting referrers to redeem their reward.
This does not replace the initial reward email that Mention Me sends to the customer upon a successful referral. This journey is an additional touchpoint to boost re-engagement.
## Basic Workflow
1. A customer receives a coupon via SMS after referring a friend.
2. If they haven't made a purchase, another SMS will remind them of their coupon code.
Reminders are sent at strategic intervals to encourage redemption.
## Activating the Journey
### Prerequisites
* An active Mention Me referral program
* An active Attentive account
* Mention Me / Attentive integration enabled
### Steps to Activate
**1. Open Prebuilt Journeys**
Log in to your [Attentive](https://ui.attentivemobile.com/home) account and navigate to **Journeys > Prebuilt Journeys**.
**2. Install the Coupon Reminder journey**
Select the **Mention Me -- Coupon Reminder** journey to install it.

The Mention Me Coupon Reminder prebuilt journey in Attentive.
**3. Confirm the journey trigger**
**Received a Referrer Reward from Mention Me** is the pre-selected journey trigger.

The Received a Referrer Reward trigger in Attentive.
**4. Update the wait periods**
Update wait periods to align with your coupon validity. Defaults are included.

Wait period configuration for the coupon reminder messages.
**5. Label each message**
Label each message for easy tracking.

Labelling messages for tracking in Attentive.
**6. Review or customise the message content**
Mention Me provides default message content with suggested personalisation variables. You can use these or write your own message.

Default coupon reminder message with personalisation variables.
If writing your own message, include the following variables:
| Personalisation Variable | Description | Example |
| - | - | - |
| `{{triggerEvent.custom['Firstname']}}` | First name of the referrer | Jason |
| `{{triggerEvent.custom['Surname']}}` | Surname of the referrer | Johnson |
| `{{triggerEvent.custom['Referee First Name']}}` | First name of the referee | Samantha |
| `{{triggerEvent.custom['Referee Last Name']}}` | Surname of the referee | Jones |
| `{{triggerEvent.custom['Referrer Reward']}}` | Reward issued to the referrer | £30 or 15% |
| `{{triggerEvent.custom['Coupon Code']}}` | Coupon code the referrer received | XYZ-123455 |
| `{{triggerEvent.custom['Formated Coupon Expiry']}}` | Coupon expiry date (formatted to region). UK: 31/01/2023, US: 01/31/2023 | See example |
| `{{triggerEvent.custom['Call to Action URL']}}` | Where the referrer can redeem their reward | [www.mention-me.com](http://www.mention-me.com) |
Use the **Preview** option in Attentive to check your message before launch.

An SMS preview of the coupon reminder message.
**7. Activate the journey**
Activate the journey in Attentive.
### Example SMS Messages

An example coupon reminder SMS message sent to a referrer.
A follow-up message continues the reminder sequence:

A second example coupon reminder SMS message sent to a referrer.
# Attentive Data Reference
Source: https://docs.mention-me.com/knowledge/esp-crm/attentive/data-reference
Reference for Mention Me data visible in your Attentive account, including subscriber attributes and custom events.
## Overview
SMS amplifies referral performance and enhances the customer experience. Engage your best customers with relevant text messages that drive brand advocacy, increase ROI, and boost revenue.
### What the Integration Enables
* Grow your contact database by sending real-time email opt-ins to Attentive
* Enhance referral data for personalised SMS campaigns and coupon reminders
* Improve segmentation using first-party referral and advocacy data
## Data Sets Sent to Attentive
With the Mention Me integration, three categories of data are sent to Attentive:
1. Email opt-ins
2. Subscriber profile attributes
3. Custom events
### Email Opt-In Statuses
Mention Me does not collect mobile numbers during registration and will only send email opt-ins for referees who choose to opt in.

The email opt-in status in Attentive.
Attentive will match profiles using the email and merge it with the corresponding phone number, if available.
When emails are passed to Attentive, they appear in the customer profile tagged as **Status: Collected** and **Source: Mention Me**.

An email status showing Collected from the Mention Me source.
### Subscriber Profile Attributes
Mention Me sends attributes for each subscriber to help with segmentation and targeting within Attentive.

Subscriber profile attributes in Attentive.
| Attentive Contact Attribute | Description | Example |
| - | - | - |
| Mention Me Share link | Referrer's personal share link | [https://demo.mention-me.com/m/ol/xz3uz-joel-mcfly](https://demo.mention-me.com/m/ol/xz3uz-joel-mcfly) |
| Mention Me Dashboard link | Referrer dashboard showing referral history | [https://demo.mention-me.com/d/2674816/9c34b0c2](https://demo.mention-me.com/d/2674816/9c34b0c2) |
| Mention Me Referrals | Number of successful referrals | 5 |
| Mention Me Total Shares | Total number of shares | 10 |
| Mention Me Shares Email | Email-based shares | 2 |
| Mention Me Shares Facebook | Facebook shares | 2 |
| Mention Me Shares Facebook Messenger | Messenger shares | 1 |
| Mention Me Shares Name Sharing | Shares via name-sharing | 1 |
| Mention Me Shares WhatsApp | Shares via WhatsApp | 3 |
| Mention Me Shares Source | Source channel of the referee | OPEN-LINK |
| Mention Me Propensity to Refer | Referral likelihood (Smart Experiment only). Values: High / Low | High |
| Mention Me ECR Activity | Extended Customer Revenue Activity. Values: Active, Dormant, Lapsed | Active |
| Mention Me ECR Status | ECR Status (12-month value). Values: High, Medium, Low | High |
| Mention Me ECR 12m Predicted | Predicted ECR segment 12 months from now. Values: High, Medium, Low, Lapsed | High |
| Mention Me Network ID | Unique ID for customer's referral network | N-5051-153480685 |
| Mention Me First Share Date | Date of first share | 04.10.2022 |
| Mention Me First Referral Date | Date of first successful referral | 12.10.2022 |
| Mention Me Last Share Date | Date of most recent share | 06.09.2023 |
| Mention Me Last Referral Date | Most recent referral success | 09.10.2023 |
| Mention Me Referrer Engaged | Set when the referrer has accepted referral terms | True |
### Custom Events
Custom events can be used to trigger journeys or create segments for deeper targeting.

A list of custom events available in Attentive.
Selecting an event shows its details:

The details view for a custom event in Attentive.
Prebuilt journeys or custom-created ones can use events to trigger personalised SMS.

Prebuilt and custom Attentive journeys using Mention Me events.
Subscriber event activity can be viewed in their profiles.

Subscriber event activity shown in an Attentive profile.
Events will only appear in Attentive after at least one matching customer triggers them.
#### Custom Event Reference
| Custom Event Name | Description | Fields Available |
| - | - | - |
| Registered as Referrer from Mention Me | Customer registers as a referrer | Campaign Name, Customer Segment, Dashboard Link, Experiment Name, First name, Offer Call to Action Copy, Offer Name, Offer Subject Copy, Offer Type, Referee Reward, Referrer Reward, Share Link, Surname |
| Registered as Referee from Mention Me | Customer joins your program as a referee | Campaign Name, Experiment Name, First name, Fulfilled By, Offer Name, Offer Subject Copy, Offer Type, Reward Amount, Referee Reward, Referrer Reward, Share Source, Surname, Reward Type |
| Received Referee Reward from Mention Me | Referee received reward after first purchase | Call to Action URL, Campaign Name, Coupon Code, Coupon Expiry, Currency Symbol, Experiment Name, First name, Formated Coupon Expiry, Fulfilled By, Offer Call to Action Copy, Offer Name, Offer Subject Copy, Offer Type, Referrer First Name, Referrer Last Name, Referee Reward, Referrer Reward, Reward Amount, Reward Type |
| Received Referrer Reward from Mention Me | Referrer receives reward after referee purchases | Call to Action URL, Campaign Name, Coupon Code, Coupon Expiry, Currency Symbol, Experiment Name, First name, Formated Coupon Expiry, Fulfilled By, Offer Call to Action Copy, Offer Name, Offer Subject Copy, Offer Type, Referee First Name, Referee Last Name, Referee Reward, Referrer Reward, Reward Amount, Reward Type, Surname |
| Opted-in to Marketing Consent from Mention Me | Referee opts into marketing during registration | Campaign Name, Experiment Name, First name, Offer Call to Action Copy, Offer Name, Offer Subject Copy, Offer Type, Surname, Source |
| Propensity to Refer from Mention Me | Propensity score calculated (Smart Experiment only) | Campaign Name, Experiment Name, First name, Offer Call to Action Copy, Offer Name, Offer Subject Copy, Offer Type, Surname, Propensity to Refer |
# How to Activate the Promote Referral Journey in Attentive
Source: https://docs.mention-me.com/knowledge/esp-crm/attentive/promote-referral
Activate the prebuilt Attentive journey to promote your referral programme and encourage customers to share via SMS.
## About the Prebuilt Journey
With this **prebuilt Attentive journey**, you can promote your referral programme and encourage enrolled customers to share.
This does not replace the initial emails that Mention Me sends after customer enrollment. It acts as an additional touchpoint to encourage sharing.
## Basic Workflow
1. An existing customer registers for your referral program and receives their unique share link via SMS.
2. If they've made a purchase, a thank-you SMS is sent with the share link and a prompt to keep sharing.
3. If they've **not** made a purchase, a reminder SMS is sent with the share link.
Reminders are sent at different times to prompt continued sharing.
## Activating the Journey
### Prerequisites
* An active Mention Me referral programme
* An active Attentive account
* Mention Me / Attentive integration enabled
### Steps to Activate
**1. Open Prebuilt Journeys**
Log in to your [Attentive](https://ui.attentivemobile.com/home) account and navigate to **Journeys > Prebuilt Journeys**.
**2. Install the Promote Referral journey**
Select **Mention Me - Promote Referral** and install the journey.

The Mention Me Promote Referral prebuilt journey in Attentive.
**3. Confirm the journey trigger**
The journey trigger **Registered as a Referrer from Mention Me** is pre-set.

The Registered as a Referrer trigger in Attentive.
**4. Adjust the wait times**
Adjust the wait times according to your strategy. Default delays are included.

Wait time configuration in the Attentive journey.
**5. Name each message**
Name each message clearly to aid tracking.

Naming messages in the Attentive journey.
**6. Review or customise the message content**
You can use the default SMS suggestions or customise your own. If creating custom messages, include the personalisation variables listed below.

A default SMS message with personalisation variables.
| Personalisation Variable | Description | Example |
| - | - | - |
| `{{triggerEvent.custom['Firstname']}}` | Referrer's first name | Jason |
| `{{triggerEvent.custom['Surname']}}` | Referrer's surname | Johnson |
| `{{triggerEvent.custom['Referrer Reward']}}` | Referrer reward shown in message | £30 or 15% |
| `{{triggerEvent.custom['Share Link']}}` | Unique referral link | [https://mention-me.com/m/ole/cj6qx-john-doe](https://mention-me.com/m/ole/cj6qx-john-doe) |
Use the **Preview** feature to test how personalisation appears in real messages.

An SMS preview with personalised referral content.
**7. Activate the journey**
Activate your journey inside Attentive.
### Example SMS Messages

An example promote referral SMS message sent to a referrer.
A second message follows in the sequence:

A second example promote referral SMS message sent to a referrer.
A final reminder completes the sequence:

A third example promote referral SMS message sent to a referrer.
# How to Set Up Attentive with Mention Me
Source: https://docs.mention-me.com/knowledge/esp-crm/attentive/setup
Connect your Attentive account to Mention Me to sync referral data and enable SMS-powered advocacy.
## About the Integration
SMS amplifies referral performance and improves the customer experience. Engage your best customers with personalised text messages to drive brand advocacy, increase ROI, and boost long-term revenue.
## Integration Capabilities
* Grow your contact database by sending real-time email marketing opt-ins to Attentive
* Enhance referral data for personalised SMS campaigns and coupon reminders
* Improve your segmentation with first-party referral and advocacy data
## Prerequisites
* **Attentive** - Request a unique `signUpSourceId` for Mention Me from Attentive. Contact your Attentive CSM or email [whiteglove@attentivemobile.com](mailto:whiteglove@attentivemobile.com).
> [!NOTE]
>
> A new signUpSourceId must be requested. Do not reuse an existing ID.
* **Attentive login** - Credentials for the [Attentive platform](https://ui.attentivemobile.com/signin). Make sure you're logged into the correct account if you manage multiple environments.
* **Mention Me** - Access to the [Mention Me platform](https://mention-me.com/login) or request it from your CSM.
**1. Log into Attentive**
Sign into your [Attentive account](https://ui.attentivemobile.com/subscribers/sign-up-units) and navigate to Sign-up Units. Look for the Mention Me entry and note the ID.
If it hasn't been created, request it from Attentive.

The Mention Me sign-up unit in Attentive.
**2. Log into Mention Me**
Navigate to [Mention Me Integrations](https://mention-me.com/merchant/~/integrations/attentive) and click **Connect**.

The Mention Me Attentive integration connect page.
**3. Agree to terms**
If prompted, agree to allow Mention Me to send data to Attentive. If already accepted, this step is skipped.

The terms and conditions acceptance screen for the Attentive integration.
**4. Enter your signUpSourceId**
Enter the 6-digit numeric ID you retrieved in Step 1, then click **Next**.

Entering the signUpSourceId for Attentive.
**5. Create a new authentication**
Create a new authentication and name your connection. This is recommended if you manage multiple Attentive accounts.
**6. Log in with your Attentive credentials**
Log in with your Attentive credentials, if not already logged in.
> [!NOTE]
>
> Ensure you're logged into the correct Attentive account based on the country or brand you're integrating (e.g. US vs. UK).

Creating a new authentication for the Attentive integration.
**7. Grant Mention Me permission**
Grant Mention Me permission to access your Attentive account.

Granting Mention Me access to the Attentive account.
**8. Select countries to sync**
Select the country/countries you want to sync contact data from.

Selecting countries to sync with Attentive.
> [!NOTE]
>
> You can limit data sync to specific regions depending on your Mention Me country-enabled setup.
**9. Finalise the installation**
Click **Finish** to complete the setup. A success message will appear to confirm integration is active.

The Attentive integration success confirmation.
Mention Me events and contacts will begin syncing to your Attentive account, allowing you to create SMS journeys immediately. If you need support, reach out to your CSM.
### Multiple Account Setup (Optional)
To connect to additional Attentive accounts (e.g., UK, US), click **Connect Another Account** and repeat the steps above.

The Connect Another Account option for multiple Attentive accounts.
# How to Set Up Coupon Reminder Scenarios in Bloomreach
Source: https://docs.mention-me.com/knowledge/esp-crm/bloomreach/coupon-reminders
Create Bloomreach scenarios to remind referrers and referees to use their Mention Me coupon codes.
## About These Scenarios
These Bloomreach scenarios remind customers to use their Mention Me coupon codes. The referee scenario targets prospective customers, while the referrer scenario targets existing customers who earned a reward for referring a friend.
Built using Mention Me data and Bloomreach's [Scenarios functionality](https://documentation.bloomreach.com/engagement/docs/introduction-to-scenarios).
> [!NOTE]
>
> You can also import these scenarios as pre-built initiatives. See [How to Install Mention Me Pre-Built Referral Initiatives in Bloomreach](/knowledge/esp-crm/bloomreach/promote-referral#installing-pre-built-initiatives).
## Prerequisites
1. Active Mention Me referral programme
2. Mention Me / Bloomreach integration enabled
3. ESP integrated with your Bloomreach environment
4. Basic understanding of [Bloomreach Jinja](https://documentation.bloomreach.com/engagement/docs/filters#date--time-processing)
## Supported Channels
* Email
## Referee Scenario
Remind prospective customers (referees) to use the coupon codes they received after being introduced to your brand.
Goals:
* **Drive first purchase**
* **Increase average order value**
### Basic Workflow
1. The referee receives a coupon via Mention Me's initial email.
2. If no purchase is made, follow-up reminder emails encourage them to redeem.
3. More reminders are sent if the referee still hasn't completed a purchase.

The referee coupon reminder scenario flow in Bloomreach.
### Step 1: Create the Scenario Flow
**1. Set the trigger**
Set trigger as **On Event**: `received_a_referee_reward`

The On Event trigger set to received_a_referee_reward.
**2. Segment the audience**
Segment for contacts with email + marketing consent.

The segmentation filter for contacts with email and consent.
**3. Add an A/B test**
Add an A/B test (90/10 split) to monitor impact.

The A/B test configuration with a 90/10 split.
**4. Add wait periods**
Add wait periods between emails:
* 1st email - 2 days after event trigger
* 2nd email - 6 days after 1st email
* 3rd email - 4 days after 2nd email

The wait period configuration between referee emails.
If you are unsure about reward validity, contact your Mention Me CSM or [Mention Me Support](https://help.mention-me.com/hc/en-gb/requests/new).
**5. Add a conditional split**
Include a conditional split to check if a purchase has been made within a given period:
* 1st email - check for purchases within 2 days
* 2nd email - check within 6 days
* 3rd email - check within 4 days

The conditional split to check for purchases.
**6. Add the email action**
In the "No" branch, add Email Action for contacts who haven't purchased.

The Email Action added on the No branch for unpurchased contacts.
Repeat Steps 2-4 for each follow-up reminder email.
### Step 2: Add Email Content
1. Update content and styling for brand consistency
2. Add product recommendations to increase conversion
3. Under Email Settings, set correct consent category

The consent category setting in the referee email settings.
#### Preview Images
Reminder 1:

Referee coupon reminder email 1 preview.
Reminder 2:

Referee coupon reminder email 2 preview.
Reminder 3:

Referee coupon reminder email 3 preview.
### Jinja Variables
| Variable | Description | Example |
| - | - | - |
| `{{ event.referrer_first_name }}` | First name of the referrer | Ryder |
| `{{ event.referee_reward }}` | Reward available to the referee | £15 or 30% |
| `{{ event.coupon_code }}` | Coupon code assigned to the referee | 10USDOFF-RXAAURVZ |
| `{{ ((event.coupon_expiry \| to_timestamp - time) / (24*60*60)) \| int }}` | Days remaining until coupon expiry | 8 |
| `{{ event.coupon_expiry \| to_timestamp \| from_timestamp('%A, %d of %B %Y') }}` | Coupon expiry date formatted for reader | Wednesday, 19 of July 2023 |
| `{{ event.call_to_action_url }}` | Destination URL for redemption | [www.mention-me.com](http://www.mention-me.com) |
### Step 3: Preview the Email
**1. Open the Design Test tab**
Open the Design **Test** tab.

The Design Test tab for the referee email preview.
**2. Select a test contact**
Select a contact who triggered the event.

Selecting a test contact for the referee email preview.
**3. Preview the email**
Preview the email message with event data.
Example reminder previews:

Referee reminder 1 preview with populated data.
The second reminder shows the same event data further along the flow:

Referee reminder 2 preview with populated data.
The third reminder confirms the final set of populated variables:

Referee reminder 3 preview with populated data.
### Step 4: Activate the Scenario
Once testing is complete, click **Start** to activate the Scenario.

The Start button to activate the referee scenario.
## Referrer Scenario
Remind existing customers (referrers) to use the coupon codes they received after referring a friend. It uses Mention Me referral data integrated within Bloomreach Scenarios.
Goals:
* **Increase active customer revenue**
* **Drive premium customer revenue**
* **Improve retention**
### Basic Workflow
1. Referrers automatically receive a coupon (sent by Mention Me).
2. Reminder email is sent (if opt-in + no purchase).
3. Further reminders are sent at scheduled intervals.

The referrer coupon reminder scenario flow.
### Step 1: Build the Scenario Flow
**1. Set the trigger**
Set trigger as **On Event** with event name: `received_a_referrer_reward`

The On Event trigger set to received_a_referrer_reward.
**2. Add segmentation**
Add segmentation to ensure contacts have a valid email + consent.

The segmentation filter for referrer contacts.
**3. Add an A/B test**
Add an A/B Test (90/10 split) to measure scenario impact.

The A/B test configuration for the referrer scenario.
**4. Insert wait periods**
Insert wait periods before sending each email:
* 1st email - wait 7 days after coupon sent
* 2nd email - wait 14 days after 1st email
* 3rd email - wait 14 days after 2nd email

The wait period configuration between referrer emails.
If you're unsure of your coupon validity period, contact your Mention Me CSM or [Mention Me Support](https://help.mention-me.com/hc/en-gb/requests/new).
**5. Add a conditional split**
Add a conditional split to check if the referrer has made a purchase:
* 1st email - purchased in the last 7 days
* 2nd email - purchased in the last 14 days
* 3rd email - purchased in the last 14 days

The conditional split for referrer purchase checking.
**6. Add the email action**
Add an Email Action on the "No" branch (didn't purchase).

The Email Action added on the No branch for referrers.
Repeat steps 2-4 for each additional reminder email.
### Step 2: Add Email Content
1. Customise imagery and styling to align with your brand
2. Include optional product recommendations
3. Set the appropriate consent category in the email Settings

The consent category setting in the referrer email settings.
#### Live Email Previews
**Reminder 1:**

Referrer coupon reminder email 1 preview.
**Reminder 2:**

Referrer coupon reminder email 2 preview.
**Reminder 3:**

Referrer coupon reminder email 3 preview.
### Useful Jinja Variables
| Jinja Syntax | Description | Example |
| - | - | - |
| `{% if customer.first_name %}{{customer.first_name}}{% else %}there{% endif %}` | Customer's first name with fallback | "Ryder" or "there" |
| `{{ event.referrer_reward }}` | Referrer's reward display text | £15 or 30% |
| `{{ event.coupon_code }}` | Referrer's unique coupon code | 10USDOFF-RXAAURVZ |
| `{{ ((event.coupon_expiry \| to_timestamp - time) / (24*60*60)) \| int }}` | Days left until coupon expiry | 8 days |
| `{{ event.coupon_expiry \| to_timestamp \| from_timestamp('%A, %d of %B %Y') }}` | Formatted expiry date | Wednesday, 19 of July 2023 |
| `{{ event.call_to_action_url }}` | Destination URL to redeem the voucher | mention-me.com |
### Step 3: Test the Email
**1. Open the Design Test tab**
Open email **Design**, go to **Test** tab.

The Design Test tab for the referrer email preview.
**2. Select a test customer**
Filter and select a customer who matches the event trigger.
**3. Preview with live values**
Preview the email with live values.

Referrer reminder preview 1 with live data.
The second reminder shows the same live data further along the flow:

Referrer reminder preview 2 with live data.
### Step 4: Activate the Scenario
Once you've reviewed and finalised your designs, click **Start** to activate the scenario.

The Start button to activate the referrer scenario.
# Bloomreach Data Reference
Source: https://docs.mention-me.com/knowledge/esp-crm/bloomreach/data-reference
Reference for all Mention Me data sent to Bloomreach, including contact profile attributes, custom events, and ECR data import.
## Overview
The Mention Me integration with Bloomreach allows you to receive referral and advocacy-related events into your Bloomreach platform in real time.
### What the Integration Enables
* Send contact data and opt-ins from Mention Me referred customers to Bloomreach in real time
* Use referral data to trigger coupon email reminders
* Enhance marketing performance by segmenting and targeting high-value customers using referral and advocacy data
During setup, Mention Me automatically creates the necessary Customer Attributes and Custom Events in Bloomreach. No manual configuration is required.
Event and attribute data is pushed based on customer ID (typically email address). Mention Me sends profile and event data for any prospect or customer who triggers a Mention Me event, regardless of their opt-in status in Bloomreach.
### How Contact Matching Works
* If a customer **already exists** in Bloomreach:
* Append Mention Me attributes to their profile
* Add Mention Me events to their profile
* If a customer **does not exist** in Bloomreach:
* Create their contact profile using email as the ID
* Append Mention Me attributes to the profile
* Add relevant Mention Me events
* Add a consent event only if explicitly captured during a Mention Me journey
## Contact Data
### How Contacts Are Created
* Mention Me first checks if the customer already exists using email as the identifier.
* If the contact **does not** exist, a **new contact** will be created.
* If the contact **does** exist, Mention Me will update them with Mention Me-specific attributes only.
* Mention Me will only set the `email` field if no value is already present in Bloomreach.
### Customer Consent
Mention Me can capture newsletter opt-in consent directly and send it to Bloomreach, eliminating the need to export CSVs.
When a customer consents through the referee journey or the post-purchase newsletter overlay, an opt-in tracking event is automatically sent to Bloomreach.

A customer consent opt-in overlay from Mention Me.
The opt-in is captured using Bloomreach's [Consent Tracking Event](https://documentation.bloomreach.com/engagement/docs/tracking-consent) under the consent category chosen during [integration setup](/knowledge/esp-crm/bloomreach/setup).
Consent metadata includes when and where it was captured:
* `mention_me_referee` = Referee journey opt-in
* `mention_me_newsletter` = Post-purchase newsletter overlay
A customer may have opted in via other sources. Mention Me is not the source of truth for all consent data.

A consent tracking event in Bloomreach.
### Customer Profile Attributes
The following custom attributes are created or updated on the customer profile in Bloomreach:
| Bloomreach Customer Field | Description | Example |
| - | - | - |
| registered | Unique ID (usually email) | [jason.jones@mention-me.com](mailto:jason.jones@mention-me.com) |
| email | Email address (set only if no value exists) | [jason.jones@mention-me.com](mailto:jason.jones@mention-me.com) |
| mention_me_share_link | Referrer's personal share URL to send to friends | [https://demo.mention-me.com/m/ol/xz3uz-joel-mcfly](https://demo.mention-me.com/m/ol/xz3uz-joel-mcfly) |
| mention_me_dashboard_link | Referrer's dashboard showing referred friends | [https://demo.mention-me.com/d/2674816/9c34b0c2](https://demo.mention-me.com/d/2674816/9c34b0c2) |
| mention_me_share_source | Channel used for share | OPEN-LINK |
| mention_me_referrals | Total successful referrals (includes historical) | 5 |
| mention_me_total_shares | Total shares across all channels (includes historical) | 10 |
| mention_me_email_shares | Email shares count | 2 |
| mention_me_facebook_shares | Facebook shares count | 2 |
| mention_me_facebook_messenger_shares | Messenger shares count | 2 |
| mention_me_name_sharing_shares | Name sharing count | 1 |
| mention_me_whatsapp_shares | WhatsApp shares count | 3 |
| mention_me_nps_score | NPS score at post-purchase | 8 |
| mention_me_propensity_to_refer | Score from Smart Experiment (High or Low) | High |
| mention_me_ecr_activity | ECR activity segment: Active, Dormant, Lapsed | Active |
| mention_me_ecr_status | ECR value status: High, Medium, Low | High |
| mention_me_network_id | Unique Network ID from Mention Me | N-5051-153480685 |
| mention_me_first_share_date | Date of customer's first referral share | 2024-06-03T16:19:08.000Z |
| mention_me_first_referral_date | Date of customer's first successful referral | 2024-06-03T16:19:08.000Z |
| mention_me_last_share_date | Date when last share was made | 2024-06-03T16:19:08.000Z |
| mention_me_last_referral_date | Date when last successful referral occurred | 2024-06-03T16:19:08.000Z |
| mention_me_ecr_12m_predicted | Predicted ECR status 12 months from now: High, Medium, Low, Lapsed | High |
| mention_me_referrer_engaged | True if referrer accepted terms and engaged with the offer | Yes |
## Events
The Mention Me integration uses Bloomreach's custom events functionality to enable trigger-based workflows for email campaigns, segmentation, and automation. These events are automatically created in Bloomreach during setup and are associated with customer profiles via their email (registered ID).

Custom events from Mention Me in Bloomreach
Custom events are how scenario segmentations in Bloomreach can be linked to external triggers. They can be used to add contacts to a scenario, trigger email campaigns, or create dynamic segments.
### Summary of Events Sent to Bloomreach
| Mention Me Event Name | Bloomreach Event Name | When It Triggers |
| - | - | - |
| Registered as a Referee from Mention Me | registered_as_referee | When a customer has registered as a referee |
| Registered as a Referrer from Mention Me | registered_as_referrer | When a customer has registered as a referrer |
| Received a Referee Reward from Mention Me | received_referee_reward | When a customer obtained a reward as a referrer's friend |
| Received a Referrer Reward from Mention Me | received_referrer_reward | When a customer obtained a reward for referring a friend |
| Submitted an NPS Score from Mention Me\*\* | submitted_nps_score | When a customer has supplied an NPS score at post-purchase |
| Received a discount on next order from Mention Me\*\* | received_reward_next_order | When a customer has received a discount to use on their next order |
| Propensity to Refer from Mention Me\*\* | propensity_to_refer | Each time a customer has their propensity to refer calculated |
\*\* If you have the Mention Me add-on enabled
### How to Use Mention Me Data in Email Templates
The Mention Me data can be inserted into email campaigns to create a personalised email experience using the [Bloomreach Jinja syntax](https://documentation.bloomreach.com/engagement/docs/jinja). You can use the data in the email Body, Subject line, Sender email, Sender name, Pre-header, and UTM parameters.
### Registered as a Referrer (`registered_as_referrer`)
Each time a customer registers as a referrer, a registration event will be triggered and the associated data will be sent to Bloomreach.
| Field Name | Bloomreach Jinja Syntax | Description | Example |
| - | - | - | - |
| email | `{{ event.email }}` | Email used to register | [rydercollins742@mention-me.com](mailto:rydercollins742@mention-me.com) |
| firstname | `{{ event.firstname }}` | First name | Ryder |
| surname | `{{ event.surname }}` | Surname | Collins |
| customer_segment | `{{ event.customer_segment }}` | Segment from Mention Me tags | VIP |
| source | `{{ event.source }}` | System source | mention_me |
| share_link | `{{ event.share_link }}` | Referrer's share link | [https://demo.mention-me.com/m/ol/xz3uz-joel-mcfly](https://demo.mention-me.com/m/ol/xz3uz-joel-mcfly) |
| dashboard_link | `{{ event.dashboard_link }}` | Referrer's tracking dashboard | [https://demo.mention-me.com/d/2674816/9c34b0c2](https://demo.mention-me.com/d/2674816/9c34b0c2) |
| campaign_name | `{{ event.campaign_name }}` | Internal campaign name | UK Campaign |
| locale_code | `{{ event.locale_code }}` | Locale code | en_GB |
| experiment_name | `{{ event.experiment_name }}` | Internal experiment name | AB Test - Current Vs New Imagery - July 2023 |
| offer_name | `{{ event.offer_name }}` | Internal offer name | Variation A |
| offer_type | `{{ event.offer_type }}` | Type of offer | referral |
| offer_subject_copy | `{{ event.offer_subject_copy }}` | Customer-friendly offer description | Treat a friend to 20% off and get 20% off for yourself |
| offer_call_to_action_copy | `{{ event.offer_call_to_action_copy }}` | Customer-friendly CTA | Give 20% off |
| referrer_reward | `{{ event.referrer_reward }}` | Reward for the referrer | 20% |
| referee_reward | `{{ event.referee_reward }}` | Reward for the referee | £15 |
### Registered as a Referee (`registered_as_referee`)
Each time a customer registers as a referee, a registration event will be triggered and the associated data will be sent to Bloomreach.
| Field Name | Bloomreach Jinja Syntax | Description | Example |
| - | - | - | - |
| email | `{{ event.email }}` | Referee's email | [jojohnson378@mention-me.com](mailto:jojohnson378@mention-me.com) |
| firstname | `{{ event.firstname }}` | First name (if supplied) | Joe |
| surname | `{{ event.surname }}` | Surname (if supplied) | Johnson |
| source | `{{ event.source }}` | System source | mention_me |
| share_source | `{{ event.share_source }}` | Share method used | FORWARDED-EMAILED-LINK |
| campaign_name | `{{ event.campaign_name }}` | Internal campaign name | UK Campaign |
| locale_code | `{{ event.locale_code }}` | Locale Code | en_GB |
| experiment_name | `{{ event.experiment_name }}` | Internal experiment name | AB Test - Current Vs New Imagery - July 2023 |
| offer_name | `{{ event.offer_name }}` | Internal offer name | Variation A |
| offer_type | `{{ event.offer_type }}` | Type of offer | referral |
| offer_subject_copy | `{{ event.offer_subject_copy }}` | Customer-friendly offer description | Treat a friend to 20% off and get 20% off for yourself |
| offer_call_to_action_copy | `{{ event.offer_call_to_action_copy }}` | Customer-friendly CTA | Give 20% off |
| fulfilled_by | `{{ event.fulfilled_by }}` | Reward issuance method | coupon |
| reward_amount | `{{ event.reward_amount }}` | Reward amount | 20 |
| reward_type | `{{ event.reward_type }}` | Type of reward | percent |
| referrer_reward | `{{ event.referrer_reward }}` | Reward for the referrer | 20% |
| referee_reward | `{{ event.referee_reward }}` | Reward for the referee | £15 |
### Received a Referee Reward (`received_referee_reward`)
Each time a referee obtains a reward for being a referrer's friend, a referee fulfilment event will be triggered.
| Field Name | Bloomreach Jinja Syntax | Description | Example |
| - | - | - | - |
| email | `{{ event.email }}` | Referee's email | [jojohnson378@mention-me.com](mailto:jojohnson378@mention-me.com) |
| firstname | `{{ event.firstname }}` | First name | Joe |
| surname | `{{ event.surname }}` | Surname | Johnson |
| source | `{{ event.source }}` | System source | mention_me |
| referrer_first_name | `{{ event.referrer_first_name }}` | First name of the referrer | Ryder |
| referrer_last_name | `{{ event.referrer_last_name }}` | Surname of the referrer | Collins |
| campaign_name | `{{ event.campaign_name }}` | Internal campaign name | UK Campaign |
| locale_code | `{{ event.locale_code }}` | Locale Code | en_GB |
| currency_symbol | `{{ event.currency_symbol }}` | Currency symbol | £ |
| experiment_name | `{{ event.experiment_name }}` | Internal experiment name | AB Test - Current Vs New Imagery - July 2023 |
| offer_name | `{{ event.offer_name }}` | Internal offer name | Variation A |
| offer_type | `{{ event.offer_type }}` | Type of offer | referral |
| offer_subject_copy | `{{ event.offer_subject_copy }}` | Customer-facing offer summary | Treat a friend to 20% off and get 20% off for yourself |
| offer_call_to_action_copy | `{{ event.offer_call_to_action_copy }}` | Customer-friendly CTA | Give 20% off |
| fulfilled_by | `{{ event.fulfilled_by }}` | Reward issuance method | coupon |
| reward_amount | `{{ event.reward_amount }}` | Reward amount | 20 |
| reward_type | `{{ event.reward_type }}` | Type of reward | percent |
| referrer_reward | `{{ event.referrer_reward }}` | Reward for the referrer | 20% |
| referee_reward | `{{ event.referee_reward }}` | Reward for the referee | £15 |
| coupon_code | `{{ event.coupon_code }}` | Coupon code issued to the referee | 10USDOFF-RXAAURVZ |
| coupon_expiry | `{{ event.coupon_expiry }}` | Coupon expiry date. Use [Jinja conversion](https://documentation.bloomreach.com/engagement/docs/filters#date--time-processing) for formatting. | 2024-09-03T16:19:19.000Z |
| call_to_action_url | `{{ event.call_to_action_url }}` | URL where the customer can spend their reward | [www.mention-me.com](http://www.mention-me.com) |
### Received a Referrer Reward (`received_referrer_reward`)
Each time a referrer obtains a reward for referring a friend, a referrer fulfilment event will be triggered.
| Field Name | Bloomreach Jinja Syntax | Description | Example |
| - | - | - | - |
| email | `{{ event.email }}` | Referrer's email | [jojohnson378@mention-me.com](mailto:jojohnson378@mention-me.com) |
| firstname | `{{ event.firstname }}` | First name | Joe |
| surname | `{{ event.surname }}` | Surname | Johnson |
| source | `{{ event.source }}` | System source | mention_me |
| referee_first_name | `{{ event.referee_first_name }}` | First name of the referred friend | Ryder |
| referee_last_name | `{{ event.referee_last_name }}` | Surname of the referred friend | Collins |
| campaign_name | `{{ event.campaign_name }}` | Internal campaign name | UK Campaign |
| locale_code | `{{ event.locale_code }}` | Locale Code | en_GB |
| currency_symbol | `{{ event.currency_symbol }}` | Currency symbol | £ |
| experiment_name | `{{ event.experiment_name }}` | Internal experiment name | AB Test - Current Vs New Imagery - July 2023 |
| offer_name | `{{ event.offer_name }}` | Internal offer name | Variation A |
| offer_type | `{{ event.offer_type }}` | Type of offer | referral |
| offer_subject_copy | `{{ event.offer_subject_copy }}` | Customer-facing offer summary | Treat a friend to 20% off and get 20% off for yourself |
| offer_call_to_action_copy | `{{ event.offer_call_to_action_copy }}` | Customer-friendly CTA | Give 20% off |
| fulfilled_by | `{{ event.fulfilled_by }}` | Reward issuance method | coupon |
| reward_amount | `{{ event.reward_amount }}` | Reward amount | 20 |
| reward_type | `{{ event.reward_type }}` | Type of reward | percent |
| referrer_reward | `{{ event.referrer_reward }}` | Reward for the referrer | 20% |
| referee_reward | `{{ event.referee_reward }}` | Reward for the referee | £15 |
| coupon_code | `{{ event.coupon_code }}` | Coupon code issued to the referrer | 10USDOFF-RXAAURVZ |
| coupon_expiry | `{{ event.coupon_expiry }}` | Coupon expiry date. Use [Jinja conversion](https://documentation.bloomreach.com/engagement/docs/filters#date--time-processing) for formatting. | 2024-09-03T16:19:19.000Z |
| call_to_action_url | `{{ event.call_to_action_url }}` | URL where the referrer can spend their reward | [www.mention-me.com](http://www.mention-me.com) |
### Submitted an NPS Score (`submitted_nps_score`)
Each time a customer submits an NPS Score via the Mention Me NPS feature, their response will be sent to Bloomreach.
| Field Name | Bloomreach Jinja Syntax | Description | Example |
| - | - | - | - |
| email | `{{ event.email }}` | Email used to submit | [jojohnson378@mention-me.com](mailto:jojohnson378@mention-me.com) |
| firstname | `{{ event.firstname }}` | First name | Joe |
| surname | `{{ event.surname }}` | Surname | Johnson |
| source | `{{ event.source }}` | System source | mention_me |
| campaign_name | `{{ event.campaign_name }}` | Internal campaign name | UK Campaign |
| locale_code | `{{ event.locale_code }}` | Locale Code | en_GB |
| experiment_name | `{{ event.experiment_name }}` | Internal experiment name | AB Test - Current Vs New Imagery - July 2023 |
| offer_name | `{{ event.offer_name }}` | Internal offer name | Collect NPS Feedback |
| offer_type | `{{ event.offer_type }}` | Type of offer | nps-only |
| offer_subject_copy | `{{ event.offer_subject_copy }}` | Customer-facing offer description | Treat a friend to 20% off and get 20% off for yourself |
| offer_call_to_action_copy | `{{ event.offer_call_to_action_copy }}` | Customer-friendly CTA | Give 20% off |
| customer_segment | `{{ event.customer_segment }}` | Segment from Mention Me tags | VIP |
| nps_score | `{{ event.nps_score }}` | NPS score submitted | 8 |
### Received a Discount on Next Order (`received_reward_next_order`)
Each time a customer obtains a reward from a non-referral post-purchase message, a discount on next order fulfilment event will be triggered.
| Field Name | Bloomreach Jinja Syntax | Description | Example |
| - | - | - | - |
| email | `{{ event.email }}` | Customer's email | [jojohnson378@mention-me.com](mailto:jojohnson378@mention-me.com) |
| firstname | `{{ event.firstname }}` | First name | Joe |
| surname | `{{ event.surname }}` | Surname | Johnson |
| source | `{{ event.source }}` | System source | mention_me |
| campaign_name | `{{ event.campaign_name }}` | Internal campaign name | UK Campaign |
| locale_code | `{{ event.locale_code }}` | Locale Code | en_GB |
| currency_symbol | `{{ event.currency_symbol }}` | Currency symbol | £ |
| experiment_name | `{{ event.experiment_name }}` | Internal experiment name | AB Test - Current Vs New Imagery - July 2023 |
| offer_name | `{{ event.offer_name }}` | Internal offer name | Variation A |
| offer_type | `{{ event.offer_type }}` | Type of offer | referral |
| offer_subject_copy | `{{ event.offer_subject_copy }}` | Customer-facing offer description | Treat a friend to 20% off and get 20% off for yourself |
| offer_call_to_action_copy | `{{ event.offer_call_to_action_copy }}` | Customer-friendly CTA | Give 20% off |
| fulfilled_by | `{{ event.fulfilled_by }}` | Reward issuance method | coupon |
| reward_amount | `{{ event.reward_amount }}` | Reward amount | 20 |
| reward_type | `{{ event.reward_type }}` | Type of reward | percent |
| discount_reward | `{{ event.discount_reward }}` | Combined reward description | 20% |
| coupon_code | `{{ event.coupon_code }}` | Coupon code | 10USDOFF-RXAAURVZ |
| coupon_expiry | `{{ event.coupon_expiry }}` | Coupon expiry date. Use [Jinja conversion](https://documentation.bloomreach.com/engagement/docs/filters#date--time-processing) for formatting. | 2024-09-03T16:19:19.000Z |
| call_to_action_url | `{{ event.call_to_action_url }}` | URL where the customer can redeem their reward | [www.mention-me.com](http://www.mention-me.com) |
### Propensity to Refer (`propensity_to_refer`)
Each time a customer has their propensity to refer calculated, their propensity value will be sent to Bloomreach. Only sent if running a Mention Me Smart Experiment.
| Field Name | Bloomreach Jinja Syntax | Description | Example |
| - | - | - | - |
| email | `{{ event.email }}` | Customer's email | [jojohnson378@mention-me.com](mailto:jojohnson378@mention-me.com) |
| firstname | `{{ event.firstname }}` | First name | Joe |
| surname | `{{ event.surname }}` | Surname | Johnson |
| source | `{{ event.source }}` | System source | mention_me |
| campaign_name | `{{ event.campaign_name }}` | Internal campaign name | UK Campaign |
| experiment_name | `{{ event.experiment_name }}` | Internal experiment name | AB Test - Current Vs New Imagery - July 2023 |
| offer_name | `{{ event.offer_name }}` | Internal offer name | Variation A |
| offer_type | `{{ event.offer_type }}` | Type of offer | referral |
| offer_subject_copy | `{{ event.offer_subject_copy }}` | Customer-facing offer description | Treat a friend to 20% off and get 20% off for yourself |
| offer_call_to_action_copy | `{{ event.offer_call_to_action_copy }}` | Customer-friendly CTA | Give 20% off |
| propensity_segment | `{{ event.propensity_segment }}` | Propensity segment. Values: High or Low | High |
## ECR Data Import
Mention Me can automatically send your customers' [Extended Customer Revenue (ECR)](/knowledge/reporting/advocacy/ecr) data to your Bloomreach account. ECR is only calculated for customers who have made a successful referral.
This data is sent on a **weekly** basis and only includes customers whose ECR segment has **changed** from the previous week.
The following steps explain how to import a full set of ECR data into Bloomreach as a one-off setup before automated syncing begins.
### Step 1: Download ECR Data from Mention Me
**1. Navigate to Customer Revenue**
Log in to the [Mention Me Platform](https://mention-me.com/login?) and go to **Customer Revenue** under the **Advocacy Intelligence** section.

Navigating to the Customer Revenue page in Mention Me.
**2. Download customer segments**
Click the **Download customer segments** button. If you can't see the button, contact your Mention Me CSM.

The Download customer segments button in Mention Me.
**3. Generate the file**
Select all segments and click **Generate**.

Selecting ECR segments to generate the CSV.
This may take up to 15 minutes to generate. You'll receive an email when it's ready.
**4. Download the CSV file**
Click the download link in the email (you may need to log in again to Mention Me). Alternatively, go to **Settings & Tools > Secure File Sharing** to download the file.

The Secure File Sharing page in Mention Me.
### Step 2: Create a CSV File for Bloomreach
Use any spreadsheet tool, such as Excel or Google Sheets.
**1. Open the CSV file**
Open the downloaded CSV file.
**2. Remove the header rows**
Remove the first **three rows** so only the headers remain.
**3. Remove unused columns**
Delete the following columns:
* Individual Revenue
* Revenue Referred
* Friends ECR Value
* Report Currency Code
* First Name
* Surname
**4. Rename the remaining columns**
Rename the following columns:
* Email address to **email**
* Activity Status to **mention_me_ecr_activity**
* Ecr Segment to **mention_me_ecr_status**
> [!NOTE]
>
> Column names are case-sensitive. Incorrect names will cause duplicates in Bloomreach.
**5. Reorder the Email column**
Ensure the **email** column is first. Your CSV file should now look like this:

A formatted CSV column layout for the Bloomreach import.
**6. Save the file**
Save the file as .csv
### Step 3: Upload Your CSV to Bloomreach
For more guidance, see [Bloomreach's guide to importing customers](https://documentation.bloomreach.com/engagement/docs/customers-1).
**1. Navigate to New Import**
In Bloomreach, go to **Data & Assets > Imports > New Import**.

The Bloomreach Imports New Import navigation.
**2. Select Customers**
Select **Customers**.

Selecting the Customers import type in Bloomreach.
**3. Upload your CSV**
Click **Upload a file** and select your prepared CSV.

Uploading the CSV file for the Bloomreach import.
**4. Proceed to mapping**
The preview will load automatically. Click **Next** to proceed to mapping.

The import preview screen in Bloomreach.
**5. Configure the data mapping**
Configure the data mapping:
* **De-select** the checkbox next to the email field (do not import as a property)
* **Drag** email to the `hard_id` identifier column
* **Leave** the two custom ECR fields as is - they'll be added as customer properties

The data mapping screen with email set as the hard_id identifier.
**6. Run the import**
Click **Run Import**.
All customers who have successfully referred someone will now have an ECR segment and activity attribute added to their profile in Bloomreach. From here on, Mention Me's weekly ECR export will only update customers whose ECR status has changed.
# How to Promote Referral from Bloomreach
Source: https://docs.mention-me.com/knowledge/esp-crm/bloomreach/promote-referral
Add a personalised referral CTA link to your Bloomreach emails and install pre-built referral initiatives.
With the Mention Me integration into Bloomreach, you can insert a CTA link in your emails to direct customers to a referral landing page. This helps amplify referral performance by surfacing the programme to more users and encouraging repeat shares.
The personalised link enables customers to skip the referral registration step. Bloomreach will populate the referral landing page with the customer's name and email address.
## Prerequisites
You must have an existing referral landing page implemented on your website with the Mention Me referral tag included.
## Types of Emails to Consider
* Dedicated referral emails (recommended sending 1 every 2-3 months)
* Inclusion within newsletters or regular campaign emails
* Always-on placement in header/footer of all marketing emails
* Dedicated email in lifecycle journeys (e.g. welcome, post-purchase)
## How It Works
1. You promote the referral programme in an email and add a CTA link to the personalised referral landing page.
2. The customer clicks the link and lands directly on their personalised landing page.
3. The page is pre-filled with their personal information from Bloomreach, and they are auto-registered upon clicking the referral button.
4. They share the referral offer with a friend using their preferred method.
## How to Add the Personalised Landing Page Link
**1. Add a CTA**
In your campaign, add a CTA link or button.

Adding a CTA link in the Bloomreach email editor.
**2. Set the base URL**
In the button/link settings, input the base URL of your referral landing page, followed by a `?`. Example: `https://www.yourwebsite.com/refer-a-friend?`

Adding the referral landing page URL to the CTA.
**3. Append the parameters**
Append the following personalisation parameters to the end of the URL. Separate each with `&`:
| Parameter | Value / Variable | Notes |
| - | - | - |
| firstname | `{{ customer.firstname }}` | Use Bloomreach's personalisation variable for first name |
| surname | `{{ customer.lastname }}` | Use Bloomreach's variable for last name |
| email | `{{ customer.email }}` | Use the customer's email variable |
| situation | `Bloomreach-newsletter-jan23` | Indicates the campaign placement. Use `channel-type-date` format to help analyse traffic in your Mention Me dashboard. |
| segment | `loyalty` | Optional parameter to target specific campaign rules (e.g. by customer type or locale). |
| locale | `en_GB` | |
### Final Example URL
```text theme={null}
https://www.yoursite.com/refer-a-friend?email={{ customer.email }}&firstname={{ customer.firstname }}&surname={{ customer.lastname }}&situation=Bloomreach-newsletter-jan23&locale=en_GB&segment=loyalty
```

A final personalised referral URL with parameters in Bloomreach.
## Installing Pre-Built Initiatives
With Bloomreach Initiatives and Mention Me's integration, you can access pre-built scenarios and segments to quickly activate advocacy data and target your fans with personalised messaging.
### Pre-Built Scenarios
These ready-to-go scenarios contain suggested copy and personalised variables from Mention Me events:
* **Boost New Customer Acquisition:** Automatically [remind referred users to make their first purchase](/knowledge/esp-crm/bloomreach/coupon-reminders).
* **Drive Repeat Purchases:** Remind referrers to return and [use their earned rewards](/knowledge/esp-crm/bloomreach/coupon-reminders#referrer-scenario).
* **Increase Customer Engagement:** Encourage brand advocates to [share referral links with more friends](/knowledge/esp-crm/bloomreach/share-again).
### Pre-Built Segments
These segments help identify actionable referral cohorts, ideal for future campaigns and analysis:
* **Shares:** Identify your top sharers, medium sharers, and customers who haven't yet shared.
* **Referrals:** Spot your top referrers, average performers, and those yet to refer.
These segments will begin populating from the time the integration is enabled, capturing live referral activity.
### Prerequisites for Initiatives
1. An active Mention Me referral programme
2. Mention Me / Bloomreach integration is activated
3. Your Bloomreach account must be integrated with your ESP
4. Basic understanding of [Bloomreach Jinja](https://documentation.bloomreach.com/engagement/docs/filters#date--time-processing)
An overview of the pre-built initiatives available in Bloomreach.
### Step 1: Download the Initiatives
Download the JSON file attached at the bottom of this guide.
### Step 2: Import into Bloomreach
**1. Log in to Bloomreach**
Log in at [Bloomreach](https://app.exponea.com/login).
**2. Open Initiatives**
Click on **Initiatives**.

The Initiatives page in Bloomreach.
**3. Click Import**
Click **Import** at the top right.

The Import button in Bloomreach Initiatives.
**4. Upload the JSON file**
Upload your JSON file and click **Import**.

Uploading the JSON file for the initiative import.
#### Troubleshooting: Incompatible Version Error
If you receive the error `"Imported JSON definition has incompatible version"`:
**1. Open the JSON file**
Open the JSON file in a text editor like Notepad or TextEdit.
**2. Find the version line**
Scroll to the end and find the line that includes `"version": "1.265.3"`.

The version number line in the JSON file.
**3. Check your Bloomreach release version**
In Bloomreach, click the Help icon in the top toolbar and locate your Release Notes version number.

Finding the Bloomreach release version in the Help menu.
**4. Update the version number**
Update the version number in the JSON to match your current Bloomreach platform version (e.g. 1.276).
**5. Save and re-upload**
Save the file without changing its name or extension, then re-upload and import.
Need help? Reach out to your Mention Me CSM or [submit a support request](https://help.mention-me.com/hc/en-gb/requests/new).
### Step 3: Configure Scenarios
With your initiatives imported, finalise by configuring them:
* Update imagery and copy to match your brand.
* Set the "From" email name and address.
* Assign the correct ESP integration to emails.
* Define the correct consent type for each email journey.
* Test each flow with a contact who has the relevant event triggers.
# How to Set Up Bloomreach with Mention Me
Source: https://docs.mention-me.com/knowledge/esp-crm/bloomreach/setup
Connect your Bloomreach account to Mention Me to sync referral data, opt-ins, and activate pre-built scenarios.
## About the Integration
Activate your biggest fans by feeding first-party advocacy data directly into Bloomreach to enable higher engagement, retention, and revenue across your customer base.
## Integration Capabilities
* Send contact data and opt-ins from Mention Me referred customers to Bloomreach in real time
* Use referral data to power coupon email reminders
* Segment and target high-value customers with referral and advocacy data to enhance other marketing channels
## Prerequisites
* **Bloomreach** - Access to [create private API keys](https://documentation.bloomreach.com/engagement/reference/prerequisites).
* **Mention Me** - Access to the [Mention Me platform](https://mention-me.com/login). If not, contact your Mention Me CSM or [submit a support request](https://help.mention-me.com/hc/en-gb/requests/new).
## Step 1: Create Mention Me Events in Bloomreach (Optional)
Only required if your Bloomreach project prevents 3rd parties from creating events via the API. If you're unsure, check with your Bloomreach Admin.
**1. Log in to Bloomreach**
[Log in](https://app.exponea.com/login) to Bloomreach.
**2. Navigate to Events in Data Manager**
Navigate to **Data & Assets > Data Manager > Events**.

The Bloomreach Data Manager Events navigation.
Create the following events (case-sensitive):
* `registered_as_referee`
* `registered_as_referrer`
* `received_referee_reward`
* `received_referrer_reward`
* `submitted_nps_score`
* `received_reward_next_order`
* `propensity_to_refer`
## Step 2: Create API Keys in Bloomreach
**1. Log in to Bloomreach**
[Log in](https://app.exponea.com/login) to Bloomreach.
**2. Go to API access management**
Go to **Project Settings > Access Management > API**.
See [Bloomreach's guide to private API access](https://documentation.bloomreach.com/engagement/reference/authentication#private-api-access) for more detail.

The Bloomreach API access management navigation.
**3. Create a new API group**
Create a new API group for Mention Me with private access.

Creating a new API group for Mention Me in Bloomreach.
**4. Copy the API Secret**
Copy the **API Secret** (you'll only see it once).

Copying the API Secret from Bloomreach.
**5. Copy API Key, Project Token, and Base URL**
Copy your:
* API Key
* Project Token
* Base URL

The API Key and Project Token fields in Bloomreach.
The Base URL is shown alongside your project settings:

The Base URL configuration screen in Bloomreach.
**6. Set API access permissions**
Set the API access permissions under **Customer Properties** and **Events**.
### Customer Properties

The first Customer Properties permissions screen in Bloomreach.
Continue configuring the remaining customer property permissions:

The second Customer Properties permissions screen in Bloomreach.

The third Customer Properties permissions screen in Bloomreach.
| Property | Get | Set | Notes |
| - | - | - | - |
| New Properties | Yes | Yes | |
| Other Properties | Yes | Yes | |
| Email | Yes | Yes | If not included in Other Properties |
### Events

The first Events permissions screen in Bloomreach.
Continue configuring the remaining event permissions:

The second Events permissions screen in Bloomreach.
| Event | Get | Set | Notes |
| - | - | - | - |
| New / Other Events | Yes | Yes | If you prevent 3rd party event creation, these must be created manually as outlined in Step 1. |
| consent | Yes | Yes | |
| registered_as_referee | Yes | Yes | |
| registered_as_referrer | Yes | Yes | |
| received_referee_reward | Yes | Yes | |
| received_referrer_reward | Yes | Yes | |
| submitted_nps_score | Yes | Yes | |
| propensity_to_refer | Yes | Yes | |
## Step 3: Set Up the Integration in Mention Me
**1. Connect on Mention Me platform**
Log in to [Mention Me](https://mention-me.com/merchant/~/integrations/bloomreach) and click **Connect**.

The Mention Me Bloomreach integration connect page.
**2. Accept terms and conditions**
Agree to Mention Me's Terms and Conditions if required.

The terms and conditions acceptance screen for the Bloomreach integration.
**3. Click New Authentication**
Click **New Authentication**.

The New Authentication button in Mention Me.
**4. Name the authentication and project**
Name the authentication and project for clear identification.

Naming the Bloomreach authentication in Mention Me.
**5. Enter API credentials**
Enter:
* API Key
* API Secret
* Project Token
* Base URL

Entering Bloomreach API credentials in Mention Me.
**6. Click Next**
Click **Next**.

Proceeding to the next step after entering credentials.
**7. Select the Consent Category**
Select the **Consent Category** opt-ins should map to.

Selecting the Consent Category for opt-ins.
> [!NOTE]
>
> Mention Me captures opt-ins during the referee or post-purchase flow.
**8. Configure custom identifier**
If using a custom identifier (instead of the default 'registered'), enter it; otherwise click **Authorise**.

The custom identifier configuration screen for Bloomreach.
> [!NOTE]
>
> If this value is incorrect, contacts won't be created or updated.
**9. Select countries to sync**
Select the country/countries you want to sync.

Selecting countries to sync with Bloomreach.
**10. Finalise the connection**
Click **Connect** to finalise setup.

The Bloomreach integration success confirmation screen.
Once connected, Mention Me events and customer data will flow into Bloomreach. Use this data in Scenarios and segmentation.
For help, contact your Mention Me CSM or [submit a support request](https://help.mention-me.com/hc/en-gb/requests/new).
## Step 4: Install Pre-Built Initiatives
Mention Me provides ready-made Scenarios and Segments you can use instantly within Bloomreach.
Follow [these instructions](/knowledge/esp-crm/bloomreach/promote-referral#installing-pre-built-initiatives) to import and activate them in your account.
# How to Set Up the Share Again Reminder Scenario in Bloomreach
Source: https://docs.mention-me.com/knowledge/esp-crm/bloomreach/share-again
Create a Bloomreach scenario to encourage referrers to keep sharing with friends and earn additional rewards.
## About This Scenario
Use this scenario to encourage your brand advocates to continue sharing with friends in order to receive additional rewards.
This initiative supports:
* Increasing active customer revenue
* Growing premium customer revenue
* Boosting retention
It uses Mention Me data passed through the Bloomreach integration and builds on the [Scenarios](https://documentation.bloomreach.com/engagement/docs/introduction-to-scenarios) functionality.
## Prerequisites
1. An active Mention Me referral programme that rewards existing customers
2. Integration between Mention Me and Bloomreach must be enabled
3. ESP provider integrated with Bloomreach
4. Familiarity with [Bloomreach Jinja](https://documentation.bloomreach.com/engagement/docs/filters#date--time-processing)
## Supported Channels
* Email
## Basic Workflow
1. A customer refers a friend through Mention Me.
2. A reminder email (subject to consent) is sent encouraging them to refer again via their personal share link.

The share again reminder scenario workflow in Bloomreach.
## Steps to Create the Scenario
### Step 1: Create the Scenario Flow
**1. Set the trigger**
Set the trigger as **On Event** with event name `received_a_referrer_reward`.

The On Event trigger set to received_a_referrer_reward.
**2. Add segmentation**
Add segmentation to filter contacts with email addresses and appropriate consent.

The segmentation filter for contacts with email and consent.
**3. Include an A/B test**
Include an A/B Test (e.g. 90/10 split) to monitor performance impact.

The A/B test configuration with a 90/10 split.
**4. Add wait periods**
Add wait periods before emails:
* 1st email: 4 days after trigger
* 2nd email: 14 days after 1st email

The wait period configuration between emails.
**5. Add an email action**
Add an email action immediately after each wait period.

The email action node in the scenario.
**6. Repeat for follow-up emails**
Repeat the segmentation, wait, and email logic for any follow-up emails.
### Step 2: Add Content to Each Email
1. Customise images and styling per your brand
2. Specify the relevant consent category in email **Settings**

The consent category setting in the email configuration.
Mention Me provides sample content and Jinja variables to help.
#### Reminder Examples
| Reminder 1 | Reminder 2 |
| - | - |
| **Subject:** Keep on sharing, you've referred `{{ customer.mention_me_referrals }}` friends | **Subject:** Don't forget to keep sharing! |
Fully rendered examples:
**Reminder 1:**

Share again reminder email 1 preview.
**Reminder 2:**

Share again reminder email 2 preview.
### Jinja Variables
| Jinja Syntax | Description | Example |
| - | - | - |
| `{% if customer.first_name %}{{ customer.first_name }}{% else %}there{% endif %}` | Fallback if first name is not available | Ryder or there |
| `{{ customer.mention_me_referrer_share_link }}` | Unique referral link | [https://demo.mention-me.com/m/olb/se8fp-adrian-parris](https://demo.mention-me.com/m/olb/se8fp-adrian-parris) |
| `{{ customer.mention_me_referrals }}` | Total successful referrals | 5 |
| `{{ event.offer_subject_copy }}` | Offer message from referral content | Treat a friend to 10% off and get £10 |
### Step 3: Test the Email
**1. Open the Test tab**
Enter the **Design** section and click the **Test** tab.

The Test tab in Bloomreach email design.
**2. Select a test contact**
Select a contact that matches the event criteria.

Selecting a test contact for the email preview.
The previewed email will show event data fully rendered:

Previewed share again email 1 with live data.
The second reminder preview shows the same live data further along the flow:

Previewed share again email 2 with live data.
### Step 4: Activate the Scenario
Once all content is tested and finalised, click **Start** to activate the scenario.

The Start button to activate the scenario.
# How to Set Up Coupon Reminder Canvases in Braze
Source: https://docs.mention-me.com/knowledge/esp-crm/braze/coupon-reminders
Create Braze canvases to remind referrers and referees to use their Mention Me coupon codes.
## About These Canvases
These Braze canvases remind customers to use their Mention Me coupon codes. The referee canvas targets prospective customers, while the referrer canvas targets existing customers who earned a reward for referring a friend.
The canvases use data sent from Mention Me to Braze through the integration and Braze's [Canvas](https://www.braze.com/docs/user_guide/engagement_tools/canvas/get_started/the_basics) functionality.
## Prerequisites
1. An active Mention Me referral programme
2. Mention Me and Braze integration enabled
3. Familiarity with [Liquid Templating](https://www.braze.com/docs/user_guide/personalization_and_dynamic_content/liquid)
## Supported Channels
* Email
## Referee Canvas
Remind prospective customers (referees) to use their coupon codes received from being introduced to your brand.
Goals:
* **Drive first purchase**
* **Increase average order value**
### Basic Workflow
1. Customer receives a coupon via Mention Me after referral.
2. If no purchase is made, a reminder email is sent (with consent).
3. Further reminders encourage usage of the coupon.

An overview of the referee coupon reminder canvas flow.
### Step 1: Create the Canvas Flow
**1. Set the entry schedule**
Set the Entry Schedule to an **Action-Based Trigger** using the `received_referee_reward` custom event.

The Braze canvas entry schedule set to the received_referee_reward trigger.
**2. Set the target audience filters**
Set the Target Audience Filters:
* Email Available = true

The Braze target audience filter with email available set to true.
Then set the Exit Criteria to **Make Any Purchase**:

The Braze exit criteria set to Make Any Purchase.
**3. Set the send settings**
Set Send Settings so Subscription is **opted-in users only**.

The Braze send settings with opted-in users only selected.
**4. Build the canvas editor content**
Add 3 emails with 3 wait periods:
* 1st email: 2 days after trigger
* 2nd email: 6 days after 1st
* 3rd email: 4 days after 2nd

The Braze canvas editor with 3 emails and wait periods for referee reminders.
Need help with reward validity? Reach out via your Mention Me CSM or [support](https://help.mention-me.com/hc/en-gb/requests/new).
### Step 2: Add Email Content
1. Brand your email design and images
2. Include product recommendations
3. Add suggested Liquid variables (see table below)
4. Set CTA link using: `{{canvas_entry_properties.${call_to_action_url}}}`

The Braze email editor with a CTA link using canvas entry properties.
#### Email Template Examples
| Reminder 1 | Reminder 2 | Reminder 3 |
| - | - | - |
| **Subject:** Claim your `{{canvas_entry_properties.${referee_reward}}}` discount! | **Subject:** Don't forget your `{{canvas_entry_properties.${referee_reward}}}` discount! | **Subject:** Hurry, your discount expires soon! |
#### Visual Reminder Examples

Referee coupon reminder email template example 1.
The second reminder follows the same layout with updated copy:

Referee coupon reminder email template example 2.
The final reminder highlights the approaching expiry:

Referee coupon reminder email template example 3.
#### Canvas Variables
| Liquid Variable | Description | Example |
| - | - | - |
| `{{canvas_entry_properties.${referrer_first_name}}}` | First name of the referrer | Ryder |
| `{{canvas_entry_properties.${referrer_last_name}}}` | Last name of the referrer | Collins |
| `{{canvas_entry_properties.${referee_reward}}}` | Value of reward offered to the referee | £15 or 30% |
| `{{canvas_entry_properties.${coupon_code}}}` | Coupon code for the referee | 10USDOFF-RXAAURVZ |
| `{{canvas_entry_properties.${coupon_expiry} \| date: '%A, %d %B %Y'}}` | Expiry date of the coupon | Wednesday, 19 July 2023 |
| `{{canvas_entry_properties.${call_to_action_url}}}` | Destination URL for the referee | [www.mention-me.com](http://www.mention-me.com) |
### Step 3: Test the Emails
Braze does not support previewing custom event properties directly. You must launch the Canvas to yourself and trigger a referral event. Learn more about testing in [Braze's testing guide](https://learning.braze.com/how-to-test-custom-event-properties/1781995#).
**Compiled reminder examples:**

Compiled referee reminder email 1 with populated variables.
**Reminder 2:**

Compiled referee reminder email 2 with populated variables.
**Reminder 3:**

Compiled referee reminder email 3 with populated variables.
### Step 4: Launch the Canvas
Once you're happy with the content and tests are successful, launch the canvas to production.
Remove any test segments and adjust wait periods before launching.
## Referrer Canvas
Remind existing customers (referrers) to use their coupon codes received from referring a friend.
Goals:
* **Increase active customer revenue**
* **Increase premium customer revenue**
* **Increase retention**
### Basic Workflow
1. Referrer receives a coupon upon successful referral (email sent by Mention Me).
2. Reminder email is sent if no purchase is made (based on consent).
3. Additional reminders follow, encouraging coupon usage.

An overview of the referrer coupon reminder canvas flow.
### Step 1: Create the Canvas Flow
**1. Set the entry schedule**
In **Entry Schedule**, choose the Action-Based Trigger: `received_referrer_reward`

The Braze canvas entry schedule set to the received_referrer_reward trigger.
**2. Set the target audience**
In **Target Audience**, set Email available is true.

The Braze target audience with the email available filter.
Then set the Exit Criteria to **Make Any Purchase**:

The Braze exit criteria set to Make Any Purchase for the referrer canvas.
**3. Set the send settings**
In **Send Settings**, select "opted-in users only".

The Braze send settings with opted-in users only for the referrer canvas.
**4. Build the canvas editor content**
In the canvas editor, add 3 x Emails with 3 x Wait periods:
* 1st email: 7 days after trigger
* 2nd email: 14 days after 1st email
* 3rd email: 14 days after 2nd email

The Braze canvas editor with 3 emails and wait periods for referrer reminders.
Not sure about your reward validity period? Contact your Mention Me CSM or [Mention Me support](https://help.mention-me.com/hc/en-gb/requests/new).
### Step 2: Add Content to Each Email
1. Update images and style to match your brand
2. Include product recommendations
3. Use default Mention Me variables in subject and body
4. Add `{{canvas_entry_properties.${call_to_action_url}}}` to CTA button

The Braze email editor with a CTA link for the referrer canvas.
#### Example Reminder Templates
| Reminder 1 | Reminder 2 | Reminder 3 |
| - | - | - |
| **Subject:** Claim your `{{canvas_entry_properties.${referrer_reward}}}` discount! | **Subject:** Don't Forget Your `{{canvas_entry_properties.${referrer_reward}}}` Discount! | **Subject:** Hurry, Your Discount Expires Soon! |
#### Visual Examples

Referrer coupon reminder email template example 1.
The second reminder follows the same layout with updated copy:

Referrer coupon reminder email template example 2.
The final reminder highlights the approaching expiry:

Referrer coupon reminder email template example 3.
#### Available Liquid Variables
| Variable | Description | Example |
| - | - | - |
| `{{canvas_entry_properties.${referrer_reward}}}` | Reward value for referrer | £15 or 30% |
| `{{canvas_entry_properties.${coupon_code}}}` | Coupon code issued to referrer | 10USDOFF-RXAAURVZ |
| `{{canvas_entry_properties.${coupon_expiry} \| date: '%A, %d %B %Y'}}` | Valid until date of coupon | Wednesday, 19 July 2023 |
| `{{canvas_entry_properties.${call_to_action_url}}}` | Link to use coupon | [www.mention-me.com](http://www.mention-me.com) |
### Step 3: Test the Emails
Braze does not support previewing custom event properties. You must launch the canvas (to yourself only) and trigger a test event. See [Braze's guide to testing custom event properties](https://learning.braze.com/how-to-test-custom-event-properties/1781995#).
**Compiled examples:**

Compiled referrer reminder email 1 with populated variables.
**Reminder 2:**

Compiled referrer reminder email 2 with populated variables.
**Reminder 3:**

Compiled referrer reminder email 3 with populated variables.
### Step 4: Launch the Canvas
Once testing is complete and content is finalised, launch your canvas.
Don't forget to remove test segments and update wait times before going live.
# Braze Data Reference
Source: https://docs.mention-me.com/knowledge/esp-crm/braze/data-reference
Reference for all Mention Me data sent to Braze, including contact profile attributes and custom events.
## Overview
The Mention Me integration with Braze allows you to gather insights related to referrals and advocacy directly within your Braze platform in real time.
### What the Integration Enables
* Send contact data and opt-ins from Mention Me referred customers to Braze instantly
* Utilise referral data to create coupon email reminders
* Improve the effectiveness of your marketing channels by using referral and advocacy data to segment and target valuable customers
During setup, Mention Me creates the necessary customer attributes and events in Braze. No manual configuration is required.
Events and custom attributes linked to customers in Braze are matched by their email address. Mention Me sends data for any customer (prospect or existing), regardless of opt-in status, who has triggered an event through the Mention Me platform.
Braze handles the customer profile as follows:
* **If the customer already exists**:
* Append Mention Me-specific attributes to their profile
* Add Mention Me-related events to their profile
* **If the customer does not exist**:
* Create the contact using their email address
* Assign Mention Me-specific attributes
* Add events from Mention Me
* Optionally set email channel subscription status if consented through Mention Me journeys
### Using External ID as Customer Identifier
If you're using an external ID (instead of an email) as the primary identifier in Braze:
* If a customer already exists in Braze with both external ID and email, Mention Me data will augment the existing contact.
* If Mention Me creates the profile first (e.g. when the customer refers someone), it won't include the external ID.
* When your system adds a new profile using the external ID, Braze will not merge it with the Mention Me-created profile, creating a duplicate.
To avoid duplicate profiles, use Braze's [Bulk Merge](https://www.braze.com/docs/user_guide/engagement_tools/segments/user_profiles/duplicate_users/#scheduled-merging) feature, which can be scheduled daily.
## Contact Data
### Customer Consent
You may collect newsletter opt-in consent through the Mention Me journey. This consent is auto-forwarded to Braze without the need for CSV uploads.
If a customer agrees to receive your newsletter during the Mention Me referee journey or post-purchase overlay, the opt-in is automatically sent to Braze.

A Braze customer profile showing newsletter opt-in consent from Mention Me.
Customers who consent will be marked as **opted-in** on the email channel. Those who do not will still be signed up, but set to **subscribed**.

A Braze customer profile showing email subscription status.
A custom event called `marketing_consent` will be added to their Braze profile to indicate newsletter opt-in via Mention Me.
Customers may also give consent through other sources outside Mention Me, so Mention Me may not be the sole source of consent data.
### Customer Profile Attributes
Mention Me creates or updates the following fields in Braze:

Mention Me custom attributes on a Braze customer profile.
| Braze Customer Field | Description | Example |
| - | - | - |
| mention_me_share_link | Referral link for referrers to share. Set when a Referrer contact is created or updated. | [https://demo.mention-me.com/m/ol/xz3uz-joel-mcfly](https://demo.mention-me.com/m/ol/xz3uz-joel-mcfly) |
| mention_me_dashboard_link | Dashboard link for referrers to track performance. | [https://demo.mention-me.com/d/2674816/9c34b0c2](https://demo.mention-me.com/d/2674816/9c34b0c2) |
| mention_me_share_source | Original sharing method used by the referee. | OPEN-LINK |
| mention_me_referrals | Total successful referrals made by the user (historical + recent). | 5 |
| mention_me_total_shares | Total number of shares (all channels, all time). | 10 |
| mention_me_email_shares | Shares made via email. | 2 |
| mention_me_fb_shares | Shares made via Facebook. | 2 |
| mention_me_fb_mess_shares | Shares made via Facebook Messenger. | 2 |
| mention_me_name_shares | Shares made by entering a name directly. | 1 |
| mention_me_whatsapp_shares | Shares made via WhatsApp. | 3 |
| mention_me_native_shares | Shares made using the device's native sharing function. | 4 |
| mention_me_nps_score | NPS score submitted by the customer post-purchase. | 8 |
| mention_me_propensity_to_refer | Smart Experiment value indicating referral tendency (High/Low). | High |
| mention_me_referrer_engaged | Set if the referrer agreed to T\&Cs when engaging a referral offer. | True |
| mention_me_first_share_date | The date of the first referral share. | Apr 16 2025 8:33 am -04:00 |
| mention_me_first_referral_date | Date of the first successful referral. | Apr 16 2025 8:33 am -04:00 |
| mention_me_last_share_date | Most recent date the referrer shared a link. | Apr 16 2025 8:33 am -04:00 |
| mention_me_last_referral_date | Last successful referral date. | Apr 16 2025 8:33 am -04:00 |
| mention_me_ecr_predicted | Predicted ECR segment in 12 months. Values: High, Medium, Low, Lapsed | High |
| mention_me_ecr_activity | ECR activity segment. Values: Active, Dormant, Lapsed | Active |
| mention_me_ecr_status | Current ECR status segment. Values: High, Medium, Low | High |
| mention_me_network_id | Unique network ID identifier for the customer's referral network. | N-5051-153480685 |
## Events
The Mention Me integration uses Braze custom events functionality for trigger-based scenarios to generate email campaigns or segmentations.
Mention Me automatically sets the custom events in Braze as part of the integration setup.
Events are associated with a customer profile based on their email address and show under the Custom Events section of the profile.

Mention Me custom events on a Braze customer profile.
### Summary of Events
| Braze event name | When it triggers |
| - | - |
| registered_as_referee | When a customer has registered as a referee |
| registered_as_referrer | When a customer has registered as a referrer |
| received_referee_reward | When a customer obtained a reward as a referrer's friend |
| received_referrer_reward | When a customer obtained a reward for referring a friend |
| marketing_consent | When an existing or prospective customer has opted-in to receive marketing during the referee journey or at post-purchase |
| submitted_nps_score | When a customer has supplied an NPS score at post-purchase |
| received_reward_next_order | When a customer has received a discount to use on their next order |
| propensity_to_refer\*\* | Each time a customer has their propensity to refer calculated |
\*\* If you have the Mention Me add-on enabled
### How to Use Mention Me Data in Canvas Email Templates
The Mention Me data can be inserted into Canvas email campaigns to create a personalised email experience using [Liquid Scripting](https://www.braze.com/docs/user_guide/personalization_and_dynamic_content/liquid) as **canvas_entry_properties**.
You can use the data in a drag-and-drop email Body and subject line.
### Registered as a Referrer (`registered_as_referrer`)
Each time a customer registers as a referrer, a registration event will be triggered and the associated data will be sent to Braze.
| Field name | Description | Example |
| - | - | - |
| customer_segment | Segment value passed via Mention Me tags | VIP |
| source | System source for this event | mention_me |
| share_link | Referrer's share link to invite friends | [https://demo.mention-me.com/m/ol/xz3uz-joel-mcfly](https://demo.mention-me.com/m/ol/xz3uz-joel-mcfly) |
| dashboard_link | Referrer dashboard for tracking referrals | [https://demo.mention-me.com/d/2674816/9c34b0c2](https://demo.mention-me.com/d/2674816/9c34b0c2) |
| campaign_name | Internal campaign name (not for customer-facing emails) | UK Campaign |
| locale_code | Locale (country) where the referrer enrolled | en_GB |
| experiment_name | Internal experiment name (not customer-facing) | AB Test - Current Vs New Imagery - July 2023 |
| offer_name | Internal offer name (not customer-facing) | Variation A |
| offer_type | Type of offer (referral or incentive) | referral |
| offer_subject_copy | Customer-friendly offer description | Treat a friend to 20% off and get 20% off for yourself |
| offer_call_to_action_copy | Customer-friendly offer CTA | Give 20% off |
| referrer_reward | Reward the referrer will receive (combined types) | 20% |
| referee_reward | Reward the referee will receive (combined types) | £15 |
### Registered as a Referee (`registered_as_referee`)
Each time a customer registers as a referee, a registration event will be triggered and the associated data will be sent to Braze.
| Field name | Description | Example |
| - | - | - |
| source | System source | mention_me |
| share_source | Share method by which the referee was introduced | FORWARDED-EMAILED-LINK |
| campaign_name | Internal campaign name | UK Campaign |
| locale_code | Locale Code | en_GB |
| experiment_name | Internal experiment name | AB Test - Current Vs New Imagery - July 2023 |
| offer_name | Internal offer name | Variation A |
| offer_type | Type of offer | referral |
| offer_subject_copy | Customer-friendly offer description | Treat a friend to 20% off and get 20% off for yourself |
| offer_call_to_action_copy | Customer-friendly offer CTA | Give 20% off |
| fulfilled_by | Reward issuance method | coupon |
| reward_amount | Reward amount offered | 20 |
| reward_type | Type of reward (percent, amount, free gift) | percent |
| referrer_reward | Reward for the referrer | 20% |
| referee_reward | Reward for the referee | £15 |
### Received a Referee Reward (`received_referee_reward`)
Each time a referee obtains a reward for being a referrer's friend, a referee fulfilment event will be triggered.
| Field name | Description | Example |
| - | - | - |
| source | System source | mention_me |
| referrer_first_name | First name of the referring friend | Ryder |
| referrer_last_name | Surname of the referring friend | Collins |
| campaign_name | Internal campaign name | UK Campaign |
| locale_code | Locale Code | en_GB |
| currency_symbol | Currency symbol | £ |
| experiment_name | Internal experiment name | AB Test - Current Vs New Imagery - July 2023 |
| offer_name | Internal offer name | Variation A |
| offer_type | Type of offer | referral |
| offer_subject_copy | Customer-facing offer summary | Treat a friend to 20% off and get 20% off for yourself |
| offer_call_to_action_copy | Customer-friendly CTA | Give 20% off |
| fulfilled_by | Reward issuance method | coupon |
| reward_amount | Reward amount | 20 |
| reward_type | Type of reward | percent |
| referrer_reward | Reward for the referrer | 20% |
| referee_reward | Reward for the referee | £15 |
| coupon_code | Coupon code for the referee's reward | 10USDOFF-RXAAURVZ |
| coupon_expiry | Expiry date (UTC). Use [Liquid conversion](https://www.braze.com/docs/user_guide/personalization_and_dynamic_content/liquid) for formatting. | 2024-09-03T16:19:19.000Z |
| call_to_action_url | URL where the customer can spend their reward | [www.mention-me.com](http://www.mention-me.com) |
### Received a Referrer Reward (`received_referrer_reward`)
Each time a referrer obtains a reward for referring a friend, a referrer fulfilment event will be triggered.
| Field name | Description | Example |
| - | - | - |
| source | System source | mention_me |
| referee_first_name | First name of the referred friend | Ryder |
| referee_last_name | Surname of the referred friend | Collins |
| campaign_name | Internal campaign name | UK Campaign |
| locale_code | Locale Code | en_GB |
| currency_symbol | Currency symbol | £ |
| experiment_name | Internal experiment name | AB Test - Current Vs New Imagery - July 2023 |
| offer_name | Internal offer name | Variation A |
| offer_type | Type of offer | referral |
| offer_subject_copy | Customer-facing offer copy | Treat a friend to 20% off and get 20% off for yourself |
| offer_call_to_action_copy | Customer-friendly CTA | Give 20% off |
| fulfilled_by | Reward issuance method | coupon |
| reward_amount | Reward amount | 20 |
| reward_type | Type of reward | percent |
| referrer_reward | Reward for the referrer | 20% |
| referee_reward | Reward for the referee | £15 |
| coupon_code | Coupon code for the referrer's reward | 10USDOFF-RXAAURVZ |
| coupon_expiry | Expiry date (UTC). Use [Liquid conversion](https://www.braze.com/docs/user_guide/personalization_and_dynamic_content/liquid) for formatting. | 2024-09-03T16:19:19.000Z |
| call_to_action_url | URL where the referrer can spend their reward | [www.mention-me.com](http://www.mention-me.com) |
### Marketing Consent (`marketing_consent`)
When a referee requests to receive your newsletter at signup or if an existing customer has signed up post-purchase, an event will be sent to Braze.
| Field name | Description | Example |
| - | - | - |
| source | System source | mention_me |
| campaign_name | Internal campaign name | UK Campaign |
| locale_code | Locale Code | en_GB |
| experiment_name | Internal experiment name | AB Test - Current Vs New Imagery - July 2023 |
| offer_name | Internal offer name | Variation 1 |
| offer_type | Type of offer | nps-only |
| offer_subject_copy | Customer-facing offer description | Treat a friend to 20% off and get 20% off for yourself |
| offer_call_to_action_copy | Customer-friendly CTA | Give 20% off |
| customer_segment | Segment value from Mention Me tags | VIP |
| consent_source | Source of the newsletter sign-up (newsletter-signup or referee-registration) | referee-registration |
### Submitted an NPS Score (`submitted_nps_score`)
Each time a customer submits an NPS Score via the Mention Me NPS feature, their response will be sent to Braze.
| Field name | Description | Example |
| - | - | - |
| source | System source | mention_me |
| campaign_name | Internal campaign name | UK Campaign |
| locale_code | Locale Code | en_GB |
| experiment_name | Internal experiment name | AB Test - Current Vs New Imagery - July 2023 |
| offer_name | Internal offer name | Collect NPS Feedback |
| offer_type | Type of offer | nps-only |
| offer_subject_copy | Customer-facing offer description | Treat a friend to 20% off and get 20% off for yourself |
| offer_call_to_action_copy | Customer-friendly CTA | Give 20% off |
| customer_segment | Segment value from Mention Me tags | VIP |
| nps_score | The NPS response submitted | 8 |
### Received a Discount on Next Order (`received_reward_next_order`)
Each time a customer obtains a reward from a non-referral post-purchase message, a discount on next order fulfilment event will be triggered.
| Field name | Description | Example |
| - | - | - |
| source | System source | mention_me |
| campaign_name | Internal campaign name | UK Campaign |
| locale_code | Locale Code | en_GB |
| currency_symbol | Currency symbol | £ |
| experiment_name | Internal experiment name | AB Test - Current Vs New Imagery - July 2023 |
| offer_name | Internal offer name | Variation A |
| offer_type | Type of offer | referral |
| offer_subject_copy | Customer-facing offer description | Treat a friend to 20% off and get 20% off for yourself |
| offer_call_to_action_copy | Customer-friendly CTA | Give 20% off |
| fulfilled_by | Reward issuance method | coupon |
| reward_amount | Reward amount | 20 |
| reward_type | Type of reward | percent |
| discount_reward | Combined reward description | 20% |
| coupon_code | Coupon code | 10USDOFF-RXAAURVZ |
| coupon_expiry | Coupon expiry date. Use [Liquid conversion](https://www.braze.com/docs/user_guide/personalization_and_dynamic_content/liquid) for formatting. | 2024-09-03T16:19:19.000Z |
| call_to_action_url | URL where the customer can redeem their reward | [www.mention-me.com](http://www.mention-me.com) |
### Propensity to Refer (`propensity_to_refer`)
Each time a customer has their propensity to refer calculated, their propensity value will be sent to Braze. Only sent if you are running a Mention Me **Smart Experiment**.
| Field name | Description | Example |
| - | - | - |
| source | System source | mention_me |
| campaign_name | Internal campaign name | UK Campaign |
| experiment_name | Internal experiment name | AB Test - Current Vs New Imagery - July 2023 |
| offer_name | Internal offer name | Variation A |
| offer_type | Type of offer | referral |
| offer_subject_copy | Customer-facing offer description | Treat a friend to 20% off and get 20% off for yourself |
| offer_call_to_action_copy | Customer-friendly CTA | Give 20% off |
| propensity_segment | Propensity segment. Values: High or Low | High |
# How to Promote Referral from Braze
Source: https://docs.mention-me.com/knowledge/esp-crm/braze/promote-referral
Add a personalised referral CTA link to your Braze emails that sends customers directly to a pre-filled referral landing page.
With the Mention Me and Braze integration, you can insert a CTA link in your emails that takes customers to a personalised referral landing page. This promotes sharing and ensures the referral offer is seen and acted on.
The personalised link pre-fills the referral page using Braze profile attributes, allowing customers to skip registration and share effortlessly.
## Prerequisites
Your referral landing page must already be implemented and include the Mention Me tag.
## Email Types to Consider
* Dedicated referral solus emails - recommended every 2-3 months
* Inclusion within newsletters or promotional emails
* Persistent CTA (e.g. link or icon) in header/footer of all emails
* Dedicated step in your customer journey (e.g. post-purchase, welcome series)
## How It Works
1. You launch a referral promotion or campaign, including a CTA button/link.
2. The recipient clicks the CTA and lands on the referral page.
3. The referral page is automatically populated using Braze-provided customer details.
4. They're registered and can share the offer right away.
5. They share the offer with their friend through their preferred method.
## How to Add the Personalised Landing Page Link
**1. Insert a CTA**
In your campaign composer, insert a CTA link or button.

The Braze email composer with a CTA button being inserted.
**2. Set the base URL**
In the URL field of your button/link, input the base URL of your referral landing page followed by `?`. Example: `https://www.yourwebsite.com/refer-a-friend?`

The Braze button URL field with the referral landing page base URL.
**3. Append the personalisation parameters**
Append the following personalisation parameters after the `?`, separated by `&`.
| Parameter | Value / Braze Variable | Notes |
| - | - | - |
| firstname | `{{${first_name} \| url_encode}}` | Use your Braze variable for the contact's first name |
| surname | `{{${last_name} \| url_encode}}` | Use your Braze variable for the contact's last name |
| email | `{{${email_address} \| url_encode}}` | Use the customer's email address in Braze |
| situation | `Braze-newsletter-jan23` | Indicates the campaign context. Format suggestion: `channel-type-timestamp`. This enables filtering and tracking in Mention Me. |
| segment | `loyalty` | Use if targeting specific customer groups or locales to ensure the right offer appears. |
| locale | `en_GB` | |
### Example Final URL
```text theme={null}
https://www.yourwebsite.com/refer-a-friend?email={{${email_address} | url_encode}}&surname={{${last_name} | url_encode}}&firstname={{${first_name} | url_encode}}&situation=Braze-newsletter-jan23&locale=en_GB&segment=loyalty
```

An example referral email with a personalised CTA button in Braze.
# How to Set Up Braze with Mention Me
Source: https://docs.mention-me.com/knowledge/esp-crm/braze/setup
Connect your Braze account to Mention Me to sync referral data, opt-ins, and enable pre-built canvases.
## About the Integration
Engage your top fans by integrating first-party advocacy data into Braze to boost engagement, retention, and revenue.
## Integration Capabilities
* Real-time transfer of contact data and opt-ins from Mention Me referrals to Braze
* Create personalised coupon reminder emails using referral data
* Improve marketing efficiency through audience segmentation and targeting based on referral activity
## Prerequisites
* **Braze** - Ability to [create API keys](https://www.braze.com/docs/api/basics/#about-rest-api-keys). Know your Braze Instance URL / Region (visible in the browser URL after logging in).
* **Mention Me** - Access to the [Mention Me platform](https://mention-me.com/login). Contact your CSM or [submit a support request](https://help.mention-me.com/hc/en-gb/requests/new) if needed.
An overview of the Braze integration setup process.
## Step 1: Create an API Key in Braze
**1. Log in to Braze**
[Log in](https://dashboard.braze.com/developers/sign_in) to Braze with appropriate permissions.
**2. Select the workspace**
Select the Workspace where the API key should be created.
**3. Navigate to API Keys**
Go to **Settings > APIs and Identifiers > API Keys**.

The Braze Settings menu navigating to APIs and Identifiers.
**4. Create a new API key**
Create a new API Key with:
* **Name:** Mention Me
* **Permissions:** `templates.email.create`, `users.track`

Creating a new Braze API key with the Mention Me name and required permissions.
> [!NOTE]
>
> Make sure you set the correct permissions. They cannot be edited later.
**5. Copy the API key**
Copy the API key for use in Step 2.

A newly created Braze API key ready to be copied.
## Step 2: Set Up the Integration in Mention Me
**1. Open the integration page**
On the [Mention Me Braze Integration Page](https://mention-me.com/merchant/~/integrations/braze), click **Connect**.

The Mention Me Braze integration page with the Connect button.
**2. Accept terms and conditions**
Agree to the Terms & Conditions (if not already accepted).

The Mention Me terms and conditions acceptance screen for the Braze integration.
**3. Click New Authentication**
Click **New Authentication**.

The Mention Me New Authentication button for Braze.
**4. Name your authentication**
Provide a recognisable name (e.g. "Braze - EU Workspace").
**5. Enter API credentials**
Enter details from Step 1:
* API Key
* Select your Braze Instance / Region

The Mention Me authentication name and API key input fields for Braze.
Next, select the region that matches your Braze instance:

The Braze instance region selection screen in Mention Me.
> [!NOTE]
>
> Make sure the selected region matches your account. For example, URL "03.braze.eu" = Region EU-03.
**6. Authorise the connection**
Click **Authorise**.
**7. Select countries to sync**
Select the country(ies) you want to sync to Braze.

The country selection screen for Braze data sync in Mention Me.
**8. Complete the setup**
Click **Connect** to finish integration setup.

The Mention Me Braze integration setup confirmation screen.
From here, Mention Me events and contacts will begin syncing with your Braze environment, enabling usage in Canvases and segmentation. For assistance, contact your CSM or [submit a support request](https://help.mention-me.com/hc/en-gb/requests/new).
## Step 3: Implement Suggested Canvases
With referral data flowing into Braze, unlock valuable engagement opportunities:
* **Boost New Customer Acquisition** - [Remind referred users to complete their first purchase](/knowledge/esp-crm/braze/coupon-reminders).
* **Drive Repeat Purchases** - [Remind referrers to redeem earned vouchers](/knowledge/esp-crm/braze/coupon-reminders).
* **Increase Customer Engagement** - [Encourage advocates to share referral links again](/knowledge/esp-crm/braze/share-again).
# How to Set Up the Share Again Reminder Canvas in Braze
Source: https://docs.mention-me.com/knowledge/esp-crm/braze/share-again
Create a Braze canvas to encourage referrers to keep sharing with friends and earn additional rewards.
## About This Canvas
This Braze canvas encourages your top brand advocates to continue sharing with friends to earn additional rewards.
Implementing this flow helps:
* **Increase active customer revenue**
* **Increase premium customer revenue**
* **Improve retention**
The canvas uses data passed from Mention Me and triggered using [Braze Canvas](https://www.braze.com/docs/user_guide/engagement_tools/canvas/get_started/the_basics).
## Prerequisites
1. Active Mention Me referral programme (referrer-based rewards enabled)
2. Mention Me / Braze integration activated
3. Familiarity with [Liquid scripting](https://www.braze.com/docs/user_guide/personalization_and_dynamic_content/liquid)
## Supported Channels
* Email
## Canvas Workflow Overview
1. Customer successfully refers a friend.
2. Reminder emails (with consent) are sent encouraging further sharing, including their personalised referral link.

The share again canvas flow with two reminder emails.
## Steps to Create the Canvas
### Step 1: Build the Canvas Flow
**1. Set the entry schedule**
Set the **Entry Schedule** to trigger `received_referrer_reward` via a custom event.

The Braze canvas entry schedule set to the received_referrer_reward trigger.
**2. Configure the target audience**
Configure the **Target Audience** with Email is available = true.

The Braze target audience with the email available filter.
**3. Set the send settings**
Under **Send Settings**, send only to **opted-in** users.

The Braze send settings with opted-in users only.
**4. Configure the canvas editor**
Configure the Canvas editor with:
* Two email nodes
* Wait steps before each email
* Timing suggestions:
* Reminder 1 - after 4 days
* Reminder 2 - after 14 days from email 1

The Braze canvas editor with 2 reminder emails and wait steps.
### Step 2: Add Email Content
1. Customise content to match your brand (images, colours, fonts)
2. Use Liquid variables to dynamically populate referral data
#### Reminder Examples with Liquid Variable Placeholders
| Example Reminder 1 | Example Reminder 2 |
| - | - |
| **Subject:** Keep on sharing, you've referred `{{custom_attribute.${mention_me_referrals}}}` friends! | **Subject:** Don't forget to keep on sharing! |
#### Rendered Email Examples

Rendered share again reminder email 1.
The second reminder uses simpler follow-up copy:

Rendered share again reminder email 2.
#### Supported Liquid Variables
| Liquid Syntax | Description | Example |
| - | - | - |
| `{{custom_attribute.${mention_me_share_link}}}` | Referrer's unique URL to share with friends | [https://demo.mention-me.com/m/olb/se8fp-adrian-parris](https://demo.mention-me.com/m/olb/se8fp-adrian-parris) |
| `{{custom_attribute.${mention_me_referrals}}}` | Total referrals completed by the customer | 5 |
| `{{canvas_entry_properties.${offer_subject_copy}}}` | Offer messaging shown on referral page | Treat a friend to 10% off and get £10 |
### Step 3: Test the Emails
**1. Open the preview tab**
Open the **Canvas Editor > Preview** tab.
**2. Enter a test contact**
Enter the email of a contact who has triggered `received_referrer_reward`.
**3. Verify the variables**
Verify variable values render correctly.

The Braze canvas editor preview tab for testing email variables.
#### Test Output Examples
**Reminder 1:**

Test output for share again reminder email 1.
**Reminder 2:**

Test output for share again reminder email 2.
### Step 4: Launch the Canvas
Once email content has been tested and approved, click **Launch** to activate your Braze canvas.
# How to Set Up Coupon Reminder Programs in Dotdigital
Source: https://docs.mention-me.com/knowledge/esp-crm/dotdigital/coupon-reminders
Create Dotdigital programs to remind referrers and referees to use their Mention Me coupon codes.
## About These Programs
These Dotdigital programs remind customers to use their Mention Me coupon codes. The referee program targets prospective customers, while the referrer program targets existing customers who earned a reward for referring a friend.
The programs utilise data sent from Mention Me to Dotdigital through the integration and the [Program builder](https://support.dotdigital.com/en/articles/8198961-program-builder) functionality of Dotdigital.
## Prerequisites
1. An active Mention Me referral program
2. A Mention Me / Dotdigital enabled integration
3. Knowledge of [Liquid Scripting](https://support.dotdigital.com/en/articles/8198939-personalisation-with-liquid-overview)
## Supported Channels
* Email
## Referee Program
Remind prospective customers (referees) to use their coupon codes received from being introduced to your brand.
Goals:
* Drive first purchase
* Increase average order value
### Basic Workflow
1. A prospective customer gets a coupon when their friend introduces them (email sent by Mention Me).
2. A reminder email (subject to consent) is sent to use the coupon if they have not purchased yet.
3. Further reminders are sent at different times to encourage coupon usage.

Referee coupon reminder program flow
### Step 1: Create the Program Flow
**1. Set the enrolment schedule**
Create the Start Criteria with the following settings.
**Enrolment schedule:** Set to run daily at 23:00 to pick up customers who received their reward that day.

The enrolment schedule set to run daily at 23:00.
**2. Set the enrolment rule**
**Enrolment rule:** Base on a segment (called *MM Referee Rewarded today*) to look for customers who received their referee reward today from the insight collection `mm-received_referee_reward`.

An enrolment rule based on the MM Referee Rewarded segment.
**3. Set enrolment limits**
**Enrolment limits:** Set to only enrol the first time they meet the criteria, since referees can only receive this type of reward once.

Enrolment limits set to first time only.
**4. Add wait delays**
Add wait delays before and after emails:
* Before 1st send: Mention Me sends the first email immediately, so include a delay to avoid duplicate emails.
* After each send: Wait to check if they have purchased.
Suggested wait periods:
* 1st email - 2 days after the segment trigger
* 2nd email - 6 days after the 1st email
* 3rd email - 4 days after the 2nd email

Wait delay configuration between emails.
If you are unsure of your reward validity period, reach out to your Mention Me CSM or [Mention Me support](https://help.mention-me.com/hc/en-gb/requests/new).
**5. Add a decision split**
Add a Decision split to check that the referee has purchased in the last x days:
* 1st email - Purchased in last 2 days
* 2nd email - Purchased in last 6 days
* 3rd email - Purchased in last 4 days
* Add an Exit Program node on the Yes branch
* Referees meeting the No criteria move to the next step

A decision split to check for recent purchases.
The full configuration for the decision split is shown below:

Decision split configuration details in Dotdigital.
**6. Add the email campaign**
Add an Email campaign and select one of the pre-configured emails that Mention Me created. The 3 pre-configured emails can be found under Triggered Emails:

Pre-configured triggered emails created by Mention Me.
Select the relevant email campaign from the list:

Selecting a pre-configured triggered email campaign.
**7. Add an exit program node**
Add an Exit Program node after the last email sent.

An Exit Program node placed after the last email.
Repeat the previous two steps for each email being sent.
### Step 2: Add Content to Each Email
As part of the Mention Me Dotdigital integration setup, 3 pre-configured triggered email campaigns are created. The templates use data from the Insights collection `mm-received_referee_reward`.
The Mention Me data creates a personalised email experience using [Liquid Scripting](https://support.dotdigital.com/en/articles/8198939-personalisation-with-liquid-overview).

Pre-configured triggered emails created by Mention Me.
### Step 3: Test the Preview
**1. Open the preview**
Click the Preview button in the email editor.

The Preview button in the Dotdigital email editor.
**2. Select a test customer**
Select a customer from the filter who has met the trigger criteria.

An enrolment rule based on the MM Referee Rewarded segment.
**3. Review the populated email**
The email will be populated with the relevant event information.

A previewed email populated with event data.
### Step 4: Activate the Program
Once you are happy with the content and have tested the emails, activate the program.

The Activate program button in Dotdigital.
## Referrer Program
Remind existing customers (referrers) to use their coupon codes received from introducing a friend to your brand.
Goals:
* Increase active customer revenue
* Increase premium customer revenue
* Increase retention
### Basic Workflow
1. An existing customer gets a coupon when they successfully introduce a friend (email sent by Mention Me).
2. A reminder email (subject to consent) is sent to use the coupon if they have not purchased yet.
3. Further reminders are sent at different times to encourage coupon usage.

Referrer coupon reminder program flow
### Step 1: Create the Program Flow
**1. Set the enrolment schedule**
Create the Start Criteria with the following settings.
**Enrolment schedule:** Set to run daily at 23:00.

The referrer enrolment schedule configuration.
**2. Set the enrolment rule**
**Enrolment rule:** Base on a segment (called "Mention Me Referrer Rewarded today") to look for customers who received their referrer reward today from the insight collection `mm-received_referrer_reward`.

The enrolment rule for the referrer rewarded segment.
**3. Set enrolment limits**
**Enrolment limits:** Set to Re-enrol contacts after 1 day, since customers could refer more than one friend.

The re-enrol contacts after 1 day setting.
**4. Add wait delays**
Add wait delays before and after emails:
* Before 1st send: Mention Me sends the first email immediately, so delay slightly.
* After each send: Check if the user already purchased.
Suggested wait periods:
* 1st email - 7 days after the segment trigger
* 2nd email - 14 days after the 1st email
* 3rd email - 14 days after the 2nd email

Wait delay settings for referrer reminders.
If you are unsure of your reward validity period, reach out to your Mention Me CSM or [Mention Me support](https://help.mention-me.com/hc/en-gb/requests/new).
**5. Add a decision split**
Add a Decision split to check that the referrer has purchased:
* 1st email - Purchased in last 7 days
* 2nd email - Purchased in last 14 days
* 3rd email - Purchased in last 14 days
* Add an Exit Program node on Yes branch
* Referrers who didn't purchase (No branch) continue to next emails

The referrer decision split for purchase checking.
The full configuration for the decision split is shown below:

Referrer decision split configuration details in Dotdigital.
**6. Add the email campaign**
Add an Email campaign and select one of the pre-configured emails:

Selecting the referrer triggered email campaign.
The full configuration for the email campaign selection is shown below:

Referrer email campaign selection details.
**7. Add an exit program node**
Add an Exit Program node after the last email send.

An Exit Program node placed after the last referrer email.
Repeat the previous two steps for each email being sent.
### Step 2: Add Content to Each Email
As part of the Mention Me Dotdigital integration setup, 3 pre-configured triggered email campaigns are created. The templates use data from the Insights collection `mm-received_referrer_reward`.

The pre-configured referrer triggered emails.
**1. Update the imagery and styling**
Update the emails to include your imagery and styling.
**2. Adjust the tone of voice**
Change the tone of voice to suit your brand.
**3. Add product recommendations**
Include product recommendations to increase conversion.
#### Template Content
Each email includes a Liquid markup block:
```liquid theme={null}
{% assign last_referrer_reward = contact.insight.mm-received_referrer_reward | last %}
{% if contact.data.firstname %}
{% assign customer_name = contact.data.firstname %}
{% else %}
{% assign customer_name = "there" %}
{% endif %}
```

The Liquid markup block used in the email template.
#### Reminder Examples Using Liquid Variables
| Reminder 1 | Reminder 2 | Reminder 3 |
| - | - | - |
| **Subject:** Claim your discount! | **Subject:** Don't forget, you have a discount! | **Subject:** Hurry, your discount expires soon! |
#### Liquid Variables
| Liquid syntax | Description | Example |
| - | - | - |
| `{{customer_name}}` | The first name of the referrer if known, otherwise "there" | John or "there" |
| `{{last_referrer_reward.referrer_reward}}` | The reward (can vary by campaign) | £15 or 30% |
| `{{last_referrer_reward.coupon_code}}` | The coupon code to be used at checkout | 10USDOFF-RXAAURVZ |
| `{{last_referrer_reward.coupon_expiry \| date: "%A, %d %B %Y"}}` | The expiration date of the coupon | Thursday, 24 October 2024 |
### Step 3: Test the Preview
**1. Open the preview**
Click the Preview button in the email editor.

The Preview button in the referrer email editor.
**2. Select a test customer**
Select a customer who meets the trigger segment.

The enrolment rule for the referrer rewarded segment.
**3. Review the populated email**
The previewed email will show relevant data.

A referrer preview email with populated data.
### Step 4: Activate the Program
Once you are satisfied with the content and test previews, activate the program.

The Activate referrer program button in Dotdigital.
# Dotdigital Data Reference
Source: https://docs.mention-me.com/knowledge/esp-crm/dotdigital/data-reference
Reference for all Mention Me data sent to Dotdigital, including contact profile attributes and insight collections.
## Overview
The Mention Me integration with Dotdigital allows you to gather insights related to referrals and advocacy directly within your Dotdigital platform in real-time.
### What the Integration Enables
* Send contact data and opt-ins from Mention Me referred customers to Dotdigital instantly
* Utilise referral data to create coupon email reminders
* Improve the effectiveness of other marketing channels by using referral and advocacy data to segment and target valuable customers
During setup, Mention Me creates the Customer attributes and Insight collections. No manual configuration is required beforehand.
Insight collections and custom attributes linked to customers in Dotdigital are based on their email addresses. Mention Me sends insight collection and contact profile attributes for any prospect or existing customer (regardless of opt-in status) who has triggered an event via Mention Me.
When contact data is sent to Dotdigital:
* If a customer **already exists** in Dotdigital:
* Append their customer profile with Mention Me specific attributes
* Add Mention Me associated insight collections to their profile
* If a customer **does not exist** in Dotdigital:
* Create the contact profile using their email address
* Append their customer profile with Mention Me specific attributes
* Add Mention Me associated insight collections to their profile
* Set the email channel subscription status (only if explicitly captured through specific Mention Me journeys)
Mention Me utilises Dotdigital's [Unified Contacts](https://support.dotdigital.com/en/articles/8198701-understand-unified-contacts) functionality, meaning contact profile attributes will still be updated even if the contact is suppressed.
## Contact Data
### How Contacts Are Created
* If the customer **does not** exist in your Dotdigital account, a **new** contact will be created.
* If the customer **does** exist, the **existing** contact will be updated with Mention Me-specific fields **only**. All other fields will **not** be changed by Mention Me.
### Customer Consent
If a customer agrees to receive your newsletter through the Mention Me referee journey or a newsletter post-purchase overlay, the opt-in request will be automatically forwarded to Dotdigital.

The newsletter opt-in consent overlay.
Customers who have consented will be automatically **subscribed** to the email channel and added to a list or address book specified during the installation setup.

Subscribed contacts shown in a Dotdigital address book.
Customers who have **not** consented will still be sent to Dotdigital but will be **Unsubscribed** from the email channel. Their information will be stored but not searchable until they subscribe via another source.
A dedicated Mention Me Insight data collection *(mm-marketing_consent)* will be linked to the customer profile indicating newsletter opt-in through Mention Me. The **consent_source** field shows where consent originated:
* **referee-registration** - From the referee journey
* **newsletter-signup** - From a post-purchase journey
A customer can also consent through other channels outside of Mention Me.

The marketing consent insight collection in Dotdigital.
### Customer Profile Attributes
| **Dotdigital Customer Field** | **Description** | **Example** |
| - | - | - |
| email | Customer's email address. Only set if new contact is created. | [jason.jones@mention-me.com](mailto:jason.jones@mention-me.com) |
| mm_share_link | Referrer's link to invite friends to the referral programme | [https://demo.mention-me.com/m/ol/xz3uz-joel-mcfly](https://demo.mention-me.com/m/ol/xz3uz-joel-mcfly) |
| mm_dashboard_link | Dashboard link for referral stats | [https://demo.mention-me.com/d/2674816/9c34b0c2](https://demo.mention-me.com/d/2674816/9c34b0c2) |
| mm_share_source | Method the referee used to access the referral | OPEN-LINK |
| mm_referrals | Number of successful referrals (includes historic data) | 5 |
| mm_total_shares | All-time total shares (all channels, historic) | 10 |
| mm_email_shares | Shares made via email | 2 |
| mm_fb_shares | Shares made via Facebook | 2 |
| mm_fb_mess_shares | Shares made via Facebook Messenger | 2 |
| mm_name_shares | Shares made by sharing the referrer's name | 1 |
| mm_whatsapp_shares | Shares made via WhatsApp | 3 |
| mm_native_shares | Shares made via native mobile share sheet | 4 |
| mm_nps_score | NPS score submitted by the customer | 8 |
| mm_propensity_to_refer | Propensity classification from Smart Experiments. Values: High / Low | High |
| mm_referrer_engaged | Set to 'Yes' if referrer engaged with offer and accepted T\&Cs | Yes |
| mm_first_share_dt | Date of first share | 2024-06-03T16:19:08.000Z |
| mm_first_referral_dt | Date of first successful referral | 2024-06-03T16:19:08.000Z |
| mm_last_share_dt | Date of most recent share | 2024-06-03T16:19:08.000Z |
| mm_last_referral_dt | Date of most recent successful referral | 2024-06-03T16:19:08.000Z |
| mm_ecr_predicted | Predicted ECR segment: High, Medium, Low, Lapsed | High |
| mm_ecr_activity | ECR activity segment: Active, Dormant, Lapsed | Active |
| mm_ecr_status | ECR status segment: High, Medium, Low | High |
| mm_network_id | Unique network ID from Mention Me | N-5051-153480685 |
| mm_country | Country where the customer registered | UK |
## Events
The Mention Me integration uses Dotdigital **contact level** insight collections functionality for trigger-based programs to generate email campaigns or segmentations.
Mention Me automatically sets the Insight Collections events in Dotdigital as part of the integration setup. Events are associated with a customer profile based on their email address and show under the **Insight Data** section of the profile.

The Insight Data section shown on a Dotdigital customer profile.
Insight Collections allows you to store and organise various information about contacts, like purchases or custom events, which can be used for segmentation and email personalisation.
Mention Me Contact insight collections could count towards your Dotdigital data allowance. You could add a **3-month** data retention policy for each insight collection by following [this guide](https://support.dotdigital.com/en/articles/8199279-the-non-developers-guide-to-insight-data).

Data retention policy settings for an insight collection.
### Summary of Insight Collections
| Mention Me event name | Dotdigital insight collection | When it triggers |
| - | - | - |
| Registered as a Referee from Mention Me | mm-registered_as_referee | When a customer has registered as a referee |
| Registered as a Referrer from Mention Me | mm-registered_as_referrer | When a customer has registered as a referrer |
| Received a Referee Reward from Mention Me | mm-received_referee_reward | When a customer obtained a reward as a referrer's friend |
| Received a Referrer Reward from Mention Me | mm-received_referrer_reward | When a customer obtained a reward for referring a friend |
| Opted into Marketing Consent from Mention Me | mm-marketing_consent | When a customer opted-in to marketing during the referee journey or post-purchase |
| Submitted an NPS Score from Mention Me\*\* | mm-submitted_nps_score | When a customer has supplied an NPS score at post-purchase |
| Received a discount on next order from Mention Me\*\* | mm-received_reward_next_order | When a customer has received a discount to use on their next order |
| Propensity to Refer from Mention Me\*\* | mm-propensity_to_refer | Each time a customer has their propensity to refer calculated |
\*\* If you have the Mention Me add-on enabled
### How to Use Mention Me Data in Email Templates
The Mention Me data can be inserted into email campaigns using [Liquid Scripting](https://support.dotdigital.com/en/articles/8198939-personalisation-with-liquid-overview). You can use the data in an HTML email Body and Subject line.
### Registered as a Referrer (mm-registered_as_referrer)
Each time a customer registers as a referrer, a registration event will be triggered and sent to Dotdigital.
| Field name | Description | Example |
| - | - | - |
| created_date | Date and time the record was created | 2024-09-26T14:35:52.478 |
| customer_segment | Segment from Mention Me tags | VIP |
| source | System source | mention_me |
| share_link | Referrer's share link | [https://demo.mention-me.com/m/ol/xz3uz-joel-mcfly](https://demo.mention-me.com/m/ol/xz3uz-joel-mcfly) |
| dashboard_link | Referrer's tracking dashboard | [https://demo.mention-me.com/d/2674816/9c34b0c2](https://demo.mention-me.com/d/2674816/9c34b0c2) |
| campaign_name | Internal campaign name | UK Campaign |
| locale_code | Locale code | en_GB |
| experiment_name | Internal experiment name | AB Test - Current Vs New Imagery - July 2023 |
| offer_name | Internal offer name | Variation A |
| offer_type | Type of offer | referral |
| offer_subject_copy | Customer-friendly offer description | Treat a friend to 20% off and get 20% off for yourself |
| offer_call_to_action_copy | Customer-friendly CTA | Give 20% off |
| referrer_reward | Reward for the referrer | 20% |
| referee_reward | Reward for the referee | £15 |
### Registered as a Referee (mm-registered_as_referee)
| Field name | Description | Example |
| - | - | - |
| created_date | Record creation date/time | 2024-09-26T14:35:52.478 |
| source | System source | mention_me |
| share_source | Share method used by the referee | FORWARDED-EMAILED-LINK |
| campaign_name | Internal campaign name | UK Campaign |
| locale_code | Locale Code | en_GB |
| experiment_name | Internal experiment name | AB Test - Current Vs New Imagery - July 2023 |
| offer_name | Internal offer name | Variation A |
| offer_type | Type of offer | referral |
| offer_subject_copy | Customer-friendly offer description | Treat a friend to 20% off and get 20% off for yourself |
| offer_call_to_action_copy | Customer-friendly CTA | Give 20% off |
| fulfilled_by | Reward issuance method | coupon |
| reward_amount | Reward amount | 20 |
| reward_type | Type of reward | percent |
| referrer_reward | Reward for the referrer | 20% |
| referee_reward | Reward for the referee | £15 |
### Received a Referee Reward (mm-received_referee_reward)
| Field name | Description | Example |
| - | - | - |
| created_date | Record creation date/time | 2024-09-26T14:35:52.478 |
| source | System source | mention_me |
| referrer_first_name | First name of the referrer | Ryder |
| referrer_last_name | Surname of the referrer | Collins |
| campaign_name | Internal campaign name | UK Campaign |
| locale_code | Locale Code | en_GB |
| currency_symbol | Currency symbol | £ |
| experiment_name | Internal experiment name | AB Test - Current Vs New Imagery - July 2023 |
| offer_name | Internal offer name | Variation A |
| offer_type | Type of offer | referral |
| offer_subject_copy | Customer-facing offer summary | Treat a friend to 20% off and get 20% off for yourself |
| offer_call_to_action_copy | Customer-friendly CTA | Give 20% off |
| fulfilled_by | Reward issuance method | coupon |
| reward_amount | Reward amount | 20 |
| reward_type | Type of reward | percent |
| referrer_reward | Reward for the referrer | 20% |
| referee_reward | Reward for the referee | £15 |
| coupon_code | Coupon code for the referee | 10USDOFF-RXAAURVZ |
| coupon_expiry | Coupon expiry date. Use [Liquid conversion](https://support.dotdigital.com/en/articles/8198944-filter-liquid-outputs) for formatting. | 2024-09-03T16:19:19.000Z |
| call_to_action_url | URL to redeem the reward | [www.mention-me.com](http://www.mention-me.com) |
### Received a Referrer Reward (mm-received_referrer_reward)
Same structure as referee reward, but with referee_first_name and referee_last_name instead of referrer names. All other fields are identical.
| Field name | Description | Example |
| - | - | - |
| created_date | Record creation date/time | 2024-09-26T14:35:52.478 |
| source | System source | mention_me |
| referee_first_name | First name of the referred friend | Ryder |
| referee_last_name | Surname of the referred friend | Collins |
| campaign_name | Internal campaign name | UK Campaign |
| locale_code | Locale Code | en_GB |
| currency_symbol | Currency symbol | £ |
| experiment_name | Internal experiment name | AB Test - Current Vs New Imagery - July 2023 |
| offer_name | Internal offer name | Variation A |
| offer_type | Type of offer | referral |
| offer_subject_copy | Customer-facing offer summary | Treat a friend to 20% off and get 20% off for yourself |
| offer_call_to_action_copy | Customer-friendly CTA | Give 20% off |
| fulfilled_by | Reward issuance method | coupon |
| reward_amount | Reward amount | 20 |
| reward_type | Type of reward | percent |
| referrer_reward | Reward for the referrer | 20% |
| referee_reward | Reward for the referee | £15 |
| coupon_code | Coupon code for the referrer | 10USDOFF-RXAAURVZ |
| coupon_expiry | Coupon expiry date. Use [Liquid conversion](https://support.dotdigital.com/en/articles/8198944-filter-liquid-outputs) for formatting. | 2024-09-03T16:19:19.000Z |
| call_to_action_url | URL to redeem the reward | [www.mention-me.com](http://www.mention-me.com) |
### Opted into Marketing Consent (mm-marketing_consent)
| Field name | Description | Example |
| - | - | - |
| created_date | Record creation date/time | 2024-09-26T14:35:52.478 |
| source | System source | mention_me |
| campaign_name | Internal campaign name | UK Campaign |
| locale_code | Locale Code | en_GB |
| experiment_name | Internal experiment name | AB Test - Current Vs New Imagery - July 2023 |
| offer_name | Internal offer name | Variation 1 |
| offer_type | Type of offer | nps-only |
| offer_subject_copy | Customer-facing offer description | Treat a friend to 20% off and get 20% off for yourself |
| offer_call_to_action_copy | Customer-facing CTA | Give 20% off |
| customer_segment | Segment from Mention Me tags | VIP |
| consent_source | Source of newsletter sign-up (newsletter-signup or referee-registration) | referee-registration |
### Submitted an NPS Score (mm-submitted_nps_score)
| Field name | Description | Example |
| - | - | - |
| created_date | Record creation date/time | 2024-09-26T14:35:52.478 |
| source | System source | mention_me |
| campaign_name | Internal campaign name | UK Campaign |
| locale_code | Locale Code | en_GB |
| experiment_name | Internal experiment name | AB Test - Current Vs New Imagery - July 2023 |
| offer_name | Internal offer name | Collect NPS Feedback |
| offer_type | Type of offer | nps-only |
| offer_subject_copy | Customer-facing offer description | Treat a friend to 20% off and get 20% off for yourself |
| offer_call_to_action_copy | Customer-facing CTA | Give 20% off |
| customer_segment | Segment from Mention Me tags | VIP |
| nps_score | NPS score submitted | 8 |
### Received a Discount on the Next Order (mm-received_reward_next_order)
| Field name | Description | Example |
| - | - | - |
| created_date | Record creation date/time | 2024-09-26T14:35:52.478 |
| source | System source | mention_me |
| campaign_name | Internal campaign name | UK Campaign |
| locale_code | Locale Code | en_GB |
| currency_symbol | Currency symbol | £ |
| experiment_name | Internal experiment name | AB Test - Current Vs New Imagery - July 2023 |
| offer_name | Internal offer name | Variation A |
| offer_type | Type of offer | referral |
| offer_subject_copy | Customer-facing offer description | Treat a friend to 20% off and get 20% off for yourself |
| offer_call_to_action_copy | Customer-facing CTA | Give 20% off |
| fulfilled_by | Reward issuance method | coupon |
| reward_amount | Reward amount | 20 |
| reward_type | Type of reward | percent |
| discount_reward | Combined reward description | 20% |
| coupon_code | Coupon code | 10USDOFF-RXAAURVZ |
| coupon_expiry | Coupon expiry date. Use [Liquid conversion](https://support.dotdigital.com/en/articles/8198944-filter-liquid-outputs) for formatting. | 2024-09-03T16:19:19.000Z |
| call_to_action_url | URL to redeem the reward | [www.mention-me.com](http://www.mention-me.com) |
### Propensity to Refer (mm-propensity_to_refer)
Only sent if running a Mention Me Smart Experiment.
| Field name | Description | Example |
| - | - | - |
| created_date | Record creation date/time | 2024-09-26T14:35:52.478 |
| source | System source | mention_me |
| campaign_name | Internal campaign name | UK Campaign |
| experiment_name | Internal experiment name | AB Test - Current Vs New Imagery - July 2023 |
| offer_name | Internal offer name | Variation A |
| offer_type | Type of offer | referral |
| offer_subject_copy | Customer-facing offer description | Treat a friend to 20% off and get 20% off for yourself |
| offer_call_to_action_copy | Customer-facing CTA | Give 20% off |
| propensity_segment | Propensity segment. Values: High or Low | High |
# How to Promote Referral from Dotdigital
Source: https://docs.mention-me.com/knowledge/esp-crm/dotdigital/promote-referral
Add a personalised referral CTA link to your Dotdigital emails that sends customers directly to a pre-filled referral landing page.
With the Mention Me integration into Dotdigital, you can insert a CTA link in your emails to direct customers to a referral landing page. This puts your scheme in front of customers who may not have seen it yet, and reminds those who have to share with friends.
The personalised link allows customers to skip the referral registration page, as Dotdigital will insert customer details to pre-populate the referral landing page with their name and email address.
## Prerequisites
* You must have an existing referral landing page on your website with the Mention Me referral tag included.
## Types of Emails to Consider
* Dedicated referral solus emails (recommended at least once every 2-3 months)
* Inclusion in a newsletter or regular marketing email
* "Always-on" inclusion in all marketing emails (e.g. as a link, icon, or button in the header or footer)
* Referral as a dedicated email in your journey (e.g. new customer/post-purchase, welcome journey)
## How It Works
1. You promote your referral program via dedicated emails or a specific campaign and add the personalised landing page link as the CTA.
2. The customer clicks the link and is taken to the landing page.
3. The customer lands on a referral offer page with their personal information from Dotdigital. They are automatically registered when they click the offer button.
4. The customer shares the offer with their friend via their preferred method.
## Adding the Personalised Landing Page Link
**1. Add a CTA link or button**
In your campaign promoting referral, add a CTA link/button.

Adding a CTA link in the Dotdigital email editor.
**2. Add the landing page URL**
In the URL section of the button/link, add in the URL of your landing page with `?` added (e.g. `www.yourwebsite.com/refer-a-friend?`).

Adding the referral landing page URL to the CTA.
**3. Add the tracking parameters**
Add the following parameters to the end of the URL, separated by `&`:
| Parameter | Value / Variable | Note |
| - | - | - |
| firstname | `{{ contact.data.firstname }}` | Use the personalisation attribute you use in Dotdigital for first name. |
| surname | `{{ contact.data.lastname }}` | Use the personalisation attribute you use in Dotdigital for last name. |
| email | `{{ contact.data.email }}` | |
| situation | `Dotdigital-newsletter-jan23` | Indicates where the customer saw the link. Structure: channel-type-date. Provides impact analysis in the Mention Me Platform. |
| segment | `loyalty` | Use if you have multiple campaigns with different segments or locales. |
| locale | `en_GB` | |
#### Final Example URL
```text theme={null}
https:///referrals?email={{ contact.data.email }}&surname={{ contact.data.lastname }}&firstname={{ contact.data.firstname }}&situation=Dotdigital-newsletter-jan23&locale=en_GB&segment=loyalty
```

The final personalised referral URL with parameters in Dotdigital.
# How to Set Up Dotdigital with Mention Me
Source: https://docs.mention-me.com/knowledge/esp-crm/dotdigital/setup
Connect your Dotdigital account to Mention Me to sync referral data, opt-ins, and enable pre-built programs.
## About the Integration
Engage your top fans by integrating first-party advocacy data into Dotdigital, boosting engagement, retention, and revenue.
## Integration Capabilities
* Real-time transfer of contact data and opt-ins from Mention Me referrals to Dotdigital
* Create coupon email reminders using referral data
* Enhance marketing channel performance by targeting high-value customers with referral data
## Prerequisites
* **Dotdigital** - Ability to [create API Users](https://developer.dotdigital.com/docs/setting-up-an-api-user).
* **Mention Me** - Access to the [Mention Me platform](https://mention-me.com/login). Contact your Mention Me CSM or [submit a support request](https://help.mention-me.com/hc/en-gb/requests/new) if needed.
An overview of the Dotdigital integration.
## Step 1: Create an API Key in Dotdigital
**1. Log in to Dotdigital**
[Log in](https://login.dotdigital.com/) to Dotdigital with API User creation access.
**2. Navigate to API users**
Navigate to **Settings > Access > API users**. [Learn more about creating your API user](https://developer.dotdigital.com/docs/setting-up-an-api-user).

The Dotdigital API users navigation.
**3. Create and save API user**
Click **Create API User** and fill in:
* Use the pre-filled email
* Description: *Mention Me*
* Create a password
* Set Rate Limiting to **Tiered**
* Status: **enabled**
* Note the API User email and Password for Step 2
* Click **Save**

Creating a new API user in Dotdigital.
## Step 2: Set Up the Integration in Mention Me
**1. Open the integration page**
On the [Mention Me platform](https://mention-me.com/merchant/~/integrations/dotdigital), click **Connect**.

The Mention Me Dotdigital integration connect page.
**2. Accept terms and conditions**
Agree to the Terms and Conditions for data transfer to Dotdigital (if not done previously).

The terms and conditions acceptance screen for the Dotdigital integration.
**3. Click New Authentication**
Click **New authentication**.

The New Authentication button in Mention Me.
**4. Name your authentication**
Name your authentication for easy recognition, especially if using multiple Dotdigital accounts.

Naming the Dotdigital authentication in Mention Me.
**5. Enter API credentials**
Enter the information from Step 1 and click **Create**:
* API User
* API Password
* Your Dotdigital Environment / Region (r1, r2, or r3)
> [!NOTE]
>
> If you do not know your Dotdigital region, you can leave it blank and the integration will fill it in for you.

Entering Dotdigital API credentials in Mention Me.
**6. Choose newsletter list**
Choose the newsletter list for Mention Me opt-ins.

Choosing the newsletter list for opt-ins.
**7. Select countries to sync**
Select the country(ies) to sync with your Dotdigital account.

Selecting countries to sync with Dotdigital.
**8. Complete the setup**
Click **Connect** to complete the setup. A confirmation message will confirm it's successfully connected.

The Dotdigital integration success confirmation message.
Mention Me events and contacts will now sync with your Dotdigital account, allowing you to utilise Mention Me data in Programs and segmentation. For further assistance, contact your Mention Me CSM or [submit a support request](https://help.mention-me.com/hc/en-gb/requests/new).
## Step 3: Implement Suggested Program Automations
Pre-built templates make it easy to activate your advocacy data through Dotdigital:
* **Boost New Customer Acquisition** - Automatically [remind referred users to make their first purchase](/knowledge/esp-crm/dotdigital/coupon-reminders).
* **Drive Repeat Purchases** - Remind referrers to return and [use their earned rewards](/knowledge/esp-crm/dotdigital/coupon-reminders).
* **Increase Customer Engagement** - Encourage brand advocates to [share referral links with more friends](/knowledge/esp-crm/dotdigital/share-again).
# How to Set Up the Share Again Reminder Program in Dotdigital
Source: https://docs.mention-me.com/knowledge/esp-crm/dotdigital/share-again
Create a Dotdigital program to encourage referrers to keep sharing with friends and earn additional rewards.
## About This Program
With this program, you can encourage your top brand advocates to keep sharing with friends to receive additional rewards.
By implementing this program, you can:
* Increase active customer revenue
* Increase premium customer revenue
* Increase retention
The program utilises data sent from Mention Me to Dotdigital through the integration and the [Program builder](https://support.dotdigital.com/en/articles/8198961-program-builder) functionality of Dotdigital.
## Prerequisites
1. An active Mention Me referral program that rewards existing customers
2. A Mention Me / Dotdigital enabled integration
3. Knowledge of [Liquid Scripting](https://support.dotdigital.com/en/articles/8198939-personalisation-with-liquid-overview)
## Supported Channels
* Email
## Basic Workflow
1. An advocate of your brand successfully refers a friend and gets their reward.
2. A reminder email (subject to consent) is sent to share again with their unique share link.

Share again reminder program workflow
## Steps to Create the Program
### Step 1: Create the Program Flow
**1. Set the enrolment schedule and rule**
Create the **Start Criteria** with the following settings.
**Enrolment schedule:** Set to run daily at **23:00**.

The enrolment schedule set to daily at 23:00.
**2. Set the enrolment rule**
**Enrolment rule:** Base on a segment called "Mention Me Referrer Rewarded today" that looks for customers who received their referrer reward today from the insight collection `mm-received_referrer_reward`.

The enrolment rule for the referrer rewarded segment.
**3. Set enrolment limits**
**Enrolment limits:** Set to Re-enrol contacts after **1 day** to allow ongoing reminders for additional sharing and rewards.

The re-enrol contacts after 1 day setting.
**4. Add wait delays**
Add wait delays before and after emails:
* Before 1st send: Include delay if segment overlaps with another reminder program
* After 1st send: Add wait before sending a follow-up email
Suggested wait periods:
* 1st email - 4 days after the segment trigger
* 2nd email - 14 days after the 1st email

Wait delay configuration for share again reminders.
**5. Add the email campaign**
Add an **Email campaign** and select one of the **Pre-configured emails** from Mention Me. The two pre-configured emails can be found under **Triggered Emails**:

Selecting a pre-configured share again email.
The full configuration for the email campaign selection is shown below:

Share again triggered email campaign selection details.
**6. Add an exit program node**
Add an Exit Program node after the last email send.

An Exit Program node placed after the last share again email.
Repeat the previous two steps for each email being sent.
### Step 2: Add Content to Each Email
During the Mention Me Dotdigital integration, 2 triggered email campaigns are created using:
* A Dotdigital insight collection called `mm-received_referrer_reward`
* Liquid Scripting to personalise the email content

A share again email template using Liquid scripting.
**1. Update the imagery and styling**
Update the emails to include your imagery and styling.
**2. Adjust the tone of voice**
Adjust the tone of voice to suit your brand.
#### Template Content
Each email includes a Liquid markup block to identify the latest referral event:
```liquid theme={null}
{% assign last_referrer_reward = contact.insight.mm-received_referrer_reward | last %}
{% if contact.data.firstname %}
{% assign customer_name = contact.data.firstname %}
{% else %}
{% assign customer_name = "there" %}
{% endif %}
```

The Liquid markup block used in the share again email template.
#### Reminder Examples Using Liquid Variables
| Reminder 1 | Reminder 2 |
| - | - |
| **Subject:** Keep on sharing, you have referred @MM_REFERRALS@ friends! | **Subject:** Don't forget to keep on sharing, you have referred @MM_REFERRALS@ friends! |
#### Liquid Variables
| Liquid syntax | Description | Example |
| - | - | - |
| `{{customer_name}}` | Displays contact's first name or "there" if missing | John or "there" |
| `@MM_SHARE_LINK@` | The contact's unique referral link | [https://demo.mention-me.com/m/olb/se8fp-adrian-parris](https://demo.mention-me.com/m/olb/se8fp-adrian-parris) |
| `@MM_REFERRALS@` | Number of successful referrals by contact | 5 |
| `{{last_referrer_reward.offer_subject_copy}}` | The offer description from the last successful referral | Treat a friend to 10% off and get £10 off for yourself |
### Step 3: Test the Preview
**1. Open the preview**
Click the **Preview** button in the email editor.

The Preview button in the share again email editor.
**2. Select a test contact**
Select a contact that meets the segment enrolment criteria.

The enrolment rule for the referrer rewarded segment.
**3. Review the populated email**
Review the email populated with real event data.

A previewed share again email with populated data.
### Step 4: Activate the Program
Once you are happy with the email content and testing, activate the program to begin sending emails.

The Activate share again program button in Dotdigital.
# Emarsys Data Reference
Source: https://docs.mention-me.com/knowledge/esp-crm/emarsys/data-reference
Reference for all Mention Me data sent to Emarsys, including contact profile attributes, external events, and ECR fields.
## Overview
The Mention Me integration with Emarsys enables you to receive referral and advocacy-related events in your Emarsys platform in real-time.
### What the Integration Enables
* Grow your contact database by sending marketing opt-ins to Emarsys in real time
* Use referral data for personalised email campaigns and coupon reminders
* Improve segmentation with first-party referral data
As part of the Emarsys integration setup, Mention Me automatically creates the Customer Profile attributes and the External Events needed. No manual configuration is required before enabling the integration.
## Contact Data
### How Contacts Are Created
* If the customer **does not** exist in your Emarsys instance, a **new** contact will be created.
* If the customer **does** exist, the **existing** contact will be updated with Mention Me-specific fields only.
### Customer Opt-ins
When a customer opts into your newsletter via the referee journey or through a post-purchase overlay, the opt-in request will automatically be sent to Emarsys:
* Emarsys opt-in property is set to **True only** if the user opts-in at registration or post-purchase.
* If they do not opt-in, the opt-in value will not be set (null).
* This will not be set for new Referrers.
* A marketing consent event is sent.
* A [dedicated external event](/knowledge/esp-crm/emarsys/data-reference) (mm:marketing_opt_in) is triggered.

The newsletter opt-in overlay shown by Mention Me.
### Customer Profile Attributes
**System fields** - Mention Me will only update the specific system fields listed below. **Custom fields** - Mention Me will create the custom contact fields during integration setup and update them whenever applicable data is sent.
| Emarsys Contact Field | Field Type | Description | Example |
| - | - | - | - |
| Email | System | Customer's email address. Set only if a new contact is created. | [jason.jones@mention-me.com](mailto:jason.jones@mention-me.com) |
| First Name | System | First name. Only for new Referrer contacts. Not updated if value exists. | Jason |
| Last Name | System | Last name. Only for new Referrer contacts. Not updated if value exists. | Jones |
| Country | System | Mention Me locale code mapped to Emarsys country. Only set on creation. | France |
| Language | System | Mention Me locale code mapped to Emarsys language. Only set on creation. | English |
| Opt-In | System | Set to TRUE only if customer opts in during referee journey or post-purchase newsletter. Not set for new Referrers. | TRUE |
| Contact Source | System | Always "Manual Input" for contacts created by Mention Me. | Manual Input |
| Registered Date | System | Only set on contact creation. | 24.02.2023 |
| IETF | System | Mention Me locale mapped to Emarsys IETF tag. Only set on creation. | en-FR |
| Mention Me Referred by Customer ID | Custom | ID of the referrer who referred this referee. | 86277 |
| Mention Me Referred by | Custom | Referrer's name for display to the referee. | Henry |
| Mention Me Share link | Custom | Referrer's share link to invite friends. | [https://demo.mention-me.com/m/ol/xz3uz-joel-mcfly](https://demo.mention-me.com/m/ol/xz3uz-joel-mcfly) |
| Mention Me Dashboard link | Custom | Referrer's dashboard for viewing performance. | [https://demo.mention-me.com/d/2674816/9c34b0c2](https://demo.mention-me.com/d/2674816/9c34b0c2) |
| Mention Me Customer ID | Custom | Unique ID assigned by Mention Me. | 33175 |
| Mention Me Referrer ID | Custom | Unique ID of the Referrer. Only set for referrer contacts. | 86277 |
| Mention Me Referee ID | Custom | Unique ID of the Referee. Only set for referee contacts. | 96453 |
| Mention Me Created | Custom | TRUE if the contact was created by Mention Me. | TRUE |
| Mention Me Is customer a Referee? | Custom | TRUE if the customer has registered as a Referee. | TRUE |
| Mention Me Is customer a Referrer? | Custom | TRUE if the customer has registered as a Referrer. | TRUE |
| Mention Me Referee Source | Custom | Method used to refer (e.g. OPEN-LINK, EMAIL). | OPEN-LINK |
| Mention Me Successful Referrals | Custom | Total count of first-time purchases made via this referrer. | 5 |
| Mention Me Total Shares | Custom | Number of times customer shared the referral offer. | 10 |
| Mention Me NPS Score | Custom | NPS score submitted at post-purchase. | 8 |
| Mention Me Propensity to Refer | Custom | Only sent via Smart Experiment. Values: High or Low | High |
| Mention Me ECR Activity | Custom | ECR activity segment: Active, Dormant, Lapsed | Active |
| Mention Me ECR Status | Custom | ECR status: High, Medium, Low | High |
| Mention Me ECR 12m Predicted | Custom | Predicted ECR segment in 12 months. Values: High, Medium, Low, Lapsed | High |
| Mention Me Network ID | Custom | Reference to customer's Mention Me Network | N-5051-153480685 |
| Mention Me First Share Date | Custom | Date of first share with a friend | 04.10.2022 |
| Mention Me First Referral Date | Custom | Date of first successful referral | 12.10.2022 |
| Mention Me Last Share Date | Custom | Date of last share | 06.09.2023 |
| Mention Me Last Referral Date | Custom | Date of last successful referral | 09.10.2023 |
| Mention Me Referrer Engaged | Custom | Set if referrer has engaged with an offer and accepted T\&Cs. | TRUE |
## Events
The Mention Me integration uses Emarsys external events functionality for trigger-based workflows to generate email campaigns. Mention Me automatically sets the external events in Emarsys as part of the integration setup.
External events are how programs and campaigns in Emarsys can be linked to external triggers. They can be associated with actions outside Emarsys, and can be used to add contacts to an automated program or trigger mobile or email campaigns.
### Summary of Events Sent to Emarsys
| Mention Me event name | Emarsys event name | When it triggers |
| - | - | - |
| Registered as a Referee | mm:referrer_registration | When a customer has registered as a referee |
| Registered as a Referrer | mm:referee_registration | When a customer has registered as a referrer |
| Received a Referee Reward | mm:referee_fulfillment | When a customer obtained a reward as a referrer's friend |
| Received a Referrer Reward | mm:referrer_fulfillment | When a customer obtained a reward for referring a friend |
| Opted into Marketing | mm:marketing_opt_in | When a referee has requested to receive your newsletter at signup or post-purchase |
| Submitted an NPS Score\*\* | mm:nps_score | When a customer has supplied an NPS score at post-purchase |
| Received a discount on next order\*\* | mm:discount_on_next_order_fulfillment | When a customer has received a discount to use on their next order |
| Propensity to Refer\*\* | mm:propensity_to_refer | Each time a customer has their propensity to refer calculated |
\*\* If you have the Mention Me add-on enabled
### How to Use Mention Me Data in Email Templates
The Mention Me data can be inserted into email campaigns using the [Emarsys Scripting Language (ESL)](https://help.emarsys.com/hc/en-us/articles/115004090589). You can use ESL in the email body, header, preheader, subject, from name, and anywhere [personalisation](https://help.emarsys.com/hc/en-us/articles/115004090589#personalization) is supported.
### Registered as a Referrer (mm:referrer_registration)
Each time a customer registers as a referrer, a registration event will be triggered and the associated data will be sent to Emarsys.
| Attribute | Emarsys ESL Field | Description | Example |
| - | - | - | - |
| **Customer** | `{{event.customer.customerId}}` | External customer ID | MI9795903142 |
| | `{{event.customer.email}}` | Email | [rydercollins742@mention-me.com](mailto:rydercollins742@mention-me.com) |
| | `{{event.customer.firstname}}` | First Name | Ryder |
| | `{{event.customer.surname}}` | Surname | Collins |
| **Customer offer** | `{{event.customerOffer.id}}` | Offer ID | 105 |
| | `{{event.customerOffer.createdDate}}` | Offer start date | 2020-04-03T09:39:08+01:00 |
| | `{{event.customerOffer.expiryDate}}` | Offer expiry date | 2020-04-03T09:39:08+01:00 |
| | `{{event.customerOffer.segment}}` | Segment | VIP |
| | `{{event.customerOffer.situation}}` | Where the offer was shown | postpurchase |
| | `{{event.customerOffer.shareLink}}` | Share link | [https://demo.mention-me.com/m/ol/xz3uz-joel-mcfly](https://demo.mention-me.com/m/ol/xz3uz-joel-mcfly) |
| | `{{event.customerOffer.dashboardLink}}` | Dashboard link | [https://demo.mention-me.com/d/2674816/9c34b0c2](https://demo.mention-me.com/d/2674816/9c34b0c2) |
| **Campaign** | `{{event.campaign.id}}` | Campaign ID | 233023 |
| | `{{event.campaign.shortName}}` | Internal campaign name | UK Campaign |
| | `{{event.campaign.state}}` | Campaign state | Running |
| **Campaign Locale** | `{{event.campaign.locale.localeCode}}` | Locale Code | en_GB |
| | `{{event.campaign.locale.currencySymbol}}` | Currency symbol | £ |
| **Experiment** | `{{event.experiment.name}}` | Internal experiment name | AB Test - Current Vs New Imagery - July 2023 |
| **Offer** | `{{event.offer.shortName}}` | Internal offer name | Variation A |
| | `{{event.offer.type}}` | Offer type | referral |
| | `{{event.offer.referrer.headline}}` | Customer-facing offer description | Treat a friend to 20% off and get 20% off for yourself |
| | `{{event.offer.referrer.cta}}` | Call-to-action copy | Give 20% off |
| **Reward** | `{{event.reward.fulfilledBy}}` | Reward delivery method | coupon |
| | `{{event.reward.amount}}` | Reward amount | 20 |
| | `{{event.reward.type}}` | Reward type | percent |
| | `{{event.reward.referrerReward}}` | Reward for referrer | 20% |
| | `{{event.reward.referreeReward}}` | Reward for referee | £15 |
### Registered as a Referee (mm:referee_registration)
Each time a customer registers as a referee, a registration event will be triggered and the associated data will be sent to Emarsys.
| Attribute | Emarsys ESL Field | Description | Example |
| - | - | - | - |
| **Referee** | `{{event.referee.email}}` | Email | [jojohnson378@mention-me.com](mailto:jojohnson378@mention-me.com) |
| | `{{event.referee.firstname}}` | First Name | Joe |
| | `{{event.referee.surname}}` | Surname | Johnson |
| | `{{event.referee.shareSource}}` | Share method used | FORWARDED-EMAILED-LINK |
| **Referrer** | `{{event.referrer.email}}` | Referrer's email | [rydercollins742@mention-me.com](mailto:rydercollins742@mention-me.com) |
| | `{{event.referrer.firstname}}` | First Name | Ryder |
| | `{{event.referrer.surname}}` | Surname | Collins |
| **Campaign** | `{{event.campaign.shortName}}` | Internal campaign name | UK Campaign |
| **Offer** | `{{event.offer.shortName}}` | Internal offer name | Variation A |
| | `{{event.offer.type}}` | Offer type | referral |
| | `{{event.offer.referrer.headline}}` | Customer-facing headline | Treat a friend to 20% off and get 20% off for yourself |
| | `{{event.offer.referrer.cta}}` | Call-to-action | Give 20% off |
| **Reward** | `{{event.reward.fulfilledBy}}` | Reward issuance method | coupon |
| | `{{event.reward.amount}}` | Reward amount | 20 |
| | `{{event.reward.type}}` | Reward type | percent |
| | `{{event.reward.referrerReward}}` | Reward for the referrer | 20% |
| | `{{event.reward.referreeReward}}` | Reward for the referee | £15 |
### Received a Referee Reward (mm:referee_fulfillment)
Each time a referee obtains a reward for being a referrer's friend, a referee fulfilment event will be triggered and the associated data will be sent to Emarsys. Includes all fields from referee registration plus:
| Attribute | Emarsys ESL Field | Description | Example |
| - | - | - | - |
| **Reward** | `{{event.reward.couponCode}}` | Coupon code issued to the referee | 10USDOFF-RXAAURVZ |
| | `{{event.reward.expiryDate\|localized_date(contact.12, 'full')}}` | Expiry date formatted with ESL. See [ESL docs](https://help.emarsys.com/hc/en-us/articles/115004090589). | Tuesday 24 October 2034 |
| | `{{event.reward.expiryDate\|localized_date('en','g') - 'now'\|localized_date('en','g')}}` | Days remaining until expiry | 8 |
| | `{{event.reward.callToActionUrl}}` | URL where the customer can spend their reward | [www.mention-me.com](http://www.mention-me.com) |
### Received a Referrer Reward (mm:referrer_fulfillment)
Each time a referrer obtains a reward for referring a friend, a referrer fulfilment event will be triggered. Same structure as referee fulfilment but with referrer-specific fields (referee_first_name, referee_last_name instead of referrer names).
### Opted into Marketing (mm:marketing_opt_in)
Each time a referee requests to receive your newsletter at signup or post-purchase, a dedicated event is sent to Emarsys.
| Attribute | Field | Description | Example |
| - | - | - | - |
| **Customer** | `{{event.customer.email}}` | Email address | [rydercollins742@mention-me.com](mailto:rydercollins742@mention-me.com) |
| | `{{event.customer.marketingOptIn}}` | Marketing opt-in flag | True |
| **Marketing** | `{{event.marketing.source}}` | Source of the sign-up (newsletter-signup or referee-registration) | referee-registration |
### Submitted an NPS Score (mm:nps_score)
Each time a customer submits an NPS Score via the Mention Me NPS feature, their response will be sent to Emarsys.
| Attribute | Field | Description | Example |
| - | - | - | - |
| **NPS** | `{{event.nps.score}}` | NPS score submitted | 8 |
| | `{{event.nps.situation}}` | Context where score was collected | postpurchase |
| | `{{event.nps.segment}}` | Customer segment | VIP |
### Discount on Next Order Fulfilment (mm:discount_on_next_order_fulfillment)
Each time a customer obtains a reward from a non-referral post-purchase message, a discount on the next order fulfilment event will be triggered.
Key fields include incentive-specific offer headline (`{{event.offer.incentive.headline}}`), CTA (`{{event.offer.incentive.cta}}`), coupon code, expiry, and call-to-action URL.
### Propensity to Refer (mm:propensity_to_refer)
Each time a customer has their propensity to refer calculated (Smart Experiment only), the propensity value will be sent to Emarsys.
| Attribute | Field | Description | Example |
| - | - | - | - |
| **Propensity** | `{{event.propensity.segment}}` | Propensity segment. Values: High or Low | High |
## ECR Data Import
Mention Me can automatically send your customers' Extended Customer Revenue (ECR) data to your Emarsys account, on a **weekly** basis, for customers whose ECR has **changed** from the previous week and who have made a successful referral. See [How to Import ECR Data into Emarsys](/knowledge/esp-crm/emarsys/ecr-data-import) for the one-off steps to import ECR data before the weekly updates begin.
# How to Import ECR Data into Emarsys
Source: https://docs.mention-me.com/knowledge/esp-crm/emarsys/ecr-data-import
Download ECR data from Mention Me, format it into a CSV, and import it into your Emarsys account.
Mention Me can automatically send your customers' Extended Customer Revenue (ECR) data to your Emarsys account. ECR is only calculated for customers who have made a successful referral.
This data is sent on a **weekly** basis and only for customers whose ECR has **changed** from the previous week.
The following steps explain how to import ECR data as a one-off prior to beginning the weekly updates.
For details on the ECR fields sent to Emarsys, see [Emarsys Data Reference](/knowledge/esp-crm/emarsys/data-reference).
## Step 1: Download ECR Data from Mention Me
**1. Navigate to Customer Revenue**
Log in to the [Mention Me Platform](https://mention-me.com/login?) and go to the **Customer Revenue** page in the **Advocacy Intelligence** section.

Navigating to the Customer Revenue page in Mention Me.
**2. Download customer segments**
Click **Download customer segments** (if not visible, contact your CSM).

The Download customer segments button in Mention Me.
**3. Generate the file**
Select all segments and click **Generate**.

Selecting ECR segments to generate a CSV in Mention Me.
A CSV file will be generated (up to 15 minutes). You'll receive an email notification when it's ready.
**4. Download the CSV file**
Click the link in the email to download (login required). You can also find the file under **Settings > Secure file transfer**.

The Secure file transfer page in Mention Me.
## Step 2: Create a CSV File for Emarsys
**1. Open the downloaded file**
Open the file using Excel, Google Sheets, or a similar tool.
**2. Remove the header rows**
Remove the first 3 rows (keep headers only).
**3. Delete unused columns**
Delete these columns: Individual Revenue, Revenue Referred, Friends ECR Value, Report Currency Code, First Name, Surname.
**4. Rename the remaining columns**
Rename columns:
* Email address to Email
* Activity Status to Mention Me ECR Activity
* ECR Segment to Mention Me ECR Status
> [!NOTE]
>
> Column names must be an exact match (case-sensitive), or duplicates may be created.
**5. Reorder the Email column**
Move the Email column to the first position.

The formatted CSV column layout for the Emarsys import.
**6. Save the file**
Save your final CSV file.
## Step 3: Upload Your CSV File to Emarsys
**1. Navigate to Data Import**
Go to **Contacts > Data Import** in Emarsys.

The Contacts Data Import navigation in Emarsys.
**2. Import a file**
Click **Import File**.

The Import File button in Emarsys.
**3. Import manually**
Click **Import file manually**.

The Import file manually option in Emarsys.
**4. Select your CSV**
Click **Select a file** and upload your formatted CSV.

Selecting the CSV file for upload in Emarsys.
**5. Configure import settings**
On the Settings screen, configure:
* Unique Identifier = Email
* Opt-in declarations = Status not defined

Import settings with the unique identifier and opt-in configuration in Emarsys.
**6. Set advanced settings**
Click **Show Advanced Settings** and select **Update only**.

Advanced settings showing the Update only option in Emarsys.
> [!NOTE]
>
> No need to match columns - Mention Me fields are already created during integration.
**7. Proceed to the next step**
Click **Next step**.

The column matching step in the Emarsys import.
**8. Confirm and continue**
Click **Next step** again.
**9. Name and start the import**
Name the import **ECR Import**, then click **Start Import**.

Naming and starting the ECR import in Emarsys.
Once the import completes, the Mention Me ECR segment and activity will be available in Emarsys.
# How to Promote Referral from Emarsys
Source: https://docs.mention-me.com/knowledge/esp-crm/emarsys/promote-referral
Add a personalised referral CTA link to your Emarsys emails and test Mention Me powered Tactics.
With the Mention Me integration into Emarsys, you can insert a CTA link in your emails to direct customers to a referral landing page. This puts your scheme in front of customers who may not have seen it yet, and reminds those who have to share with friends.
The personalised link allows customers to skip the referral registration page, as Emarsys will insert customer details to pre-populate the referral landing page with their name and email address.
## Prerequisites
* You must have an existing referral landing page on your website with the Mention Me referral tag included.
## Types of Emails to Consider
* Dedicated referral solus emails (recommended at least once every 2-3 months)
* Inclusion in a newsletter or regular marketing email
* "Always-on" inclusion in all marketing emails (e.g. as a link, icon, or button in the header or footer)
* Referral as a dedicated email in your journey (e.g. post-purchase, welcome flow)
## How It Works
1. You promote your referral program via dedicated emails or a specific campaign and add the personalised landing page link as the CTA.
2. The customer clicks the link and is taken to the landing page.
3. The customer lands on a referral offer page with pre-filled information pulled from Emarsys.
4. They are automatically registered when they click the offer button.
5. The customer shares the offer with their friend via their preferred method.
## Adding the Personalised Landing Page Link
**1. Add a CTA button**
In your campaign promoting referral, add a CTA button:

Adding a CTA button in the Emarsys email editor.
**2. Add the landing page URL**
In the URL of the CTA/button, add the base URL of your referral landing page including `?` at the end, for example `www.yourwebsite.com/refer-a-friend?`.

Adding the referral landing page URL to the CTA button.
**3. Add the tracking parameters**
Add the following parameters to the end of the URL, separated by `&`:
| Parameter | Value / Variable | Note |
| - | - | - |
| firstname | `{{ contact.1 }}` | Use the personalisation field you have set in Emarsys for first name. |
| surname | `{{ contact.2 }}` | Use the personalisation field you use in Emarsys for last name. |
| email | `{{ contact.3 }}` | |
| situation | `Emarsys-newsletter-jan23` | Used to identify the source of a click. Use structure: `--`. Helps with performance analysis in Mention Me. |
| segment | `loyalty` | Use for differentiating offers/campaigns for customers across segments or regions. |
| locale | `en_GB` | |
#### Final Example URL
```text theme={null}
https:///referrals?email={{ contact.3 }}&surname={{ contact.2 }}&firstname={{ contact.1 }}&situation=Emarsys-newsletter-jan23&locale=en_GB&segment=loyalty
```

The final personalised referral URL with parameters in Emarsys.
## Testing Mention Me Tactics in Emarsys
This section covers how to test Mention Me Tactics in Emarsys to ensure all ESL variables and customer properties display correctly before going live.
The following Tactics can be tested:
* [Referee Coupon Reminder Tactic](https://help.emarsys.com/hc/en-us/articles/13050990023569-Coupon-Reminder-Referee-Friend-)
* [Referrer Coupon Reminder Tactic](https://help.emarsys.com/hc/en-us/articles/13051005105041-Coupon-Reminder-Referrer-Existing-Customer-)
* [Referrer Share Again Reminder Tactic](https://help.emarsys.com/hc/en-us/articles/13050919664529-Share-again)
You can test any of these emails based on a recent event sent to your email address to verify the ESL variables are rendering correctly. The following test steps apply to both the Referee/Referrer Coupon Reminder and the Reminder to Share Again Tactics.
### Prerequisites for Testing
* Your email address must be in Emarsys as an existing contact.
* The email campaigns for the selected Automation nodes must be Active to begin testing.
### Testing Steps
**1. Open the tactic**
Open the relevant tactic (Referee Coupon Reminder / Referrer Coupon Reminder / Reminder to Share Again) in Emarsys.
**2. Set the status to Test**
Set the Status to **Test**.

Setting the Emarsys tactic status to Test.
**3. Configure the test node settings**
Configure the test node settings as follows:
* Select "Only Test Contacts, Sent Manually"
* Skip the Wait Nodes
* Ignore the Wait Events and select the "No" Path
* Ignore the Participation Events and select the "No" Path

Configuring test node settings in Emarsys.
**4. Send the test event**
Click **Send Event**.

The Send Event button in Emarsys test mode.
**5. Enter your test email address**
Enter your test email address and click Next.
* A recent event will be detected and used to populate your test email.
* The appropriate Test Event type will be selected based on the Automation.
* The email will only be sent to the specified test email address.

Entering a test email address for Emarsys event testing.
**6. Review and send**
Review the Send Event summary and click **Send Event**.
* A test email will be sent with your data variables populated. All wait/trigger events will be skipped in test mode.

The Send Event summary confirmation in Emarsys.
**7. Activate the tactic**
Once you've received your test email and verified the data, update Status to **Activate**.
For more information on testing interactions events in Emarsys, visit [this guide](https://help.emarsys.com/hc/en-us/articles/5871445983889-Testing-Sending-test-events-to-an-Interactions-program#event-data).
# How to Set Up Emarsys with Mention Me
Source: https://docs.mention-me.com/knowledge/esp-crm/emarsys/setup
Connect your Emarsys account to Mention Me to sync referral data, opt-ins, and power automated tactics.
## About the Integration
Activate your biggest fans by feeding first-party advocacy data directly into Emarsys to deliver higher engagement, retention, and revenue across your customer base.
## Integration Capabilities
* Send contact data and opt-ins from Mention Me referred customers to Emarsys in real-time
* Use referral data to create coupon email reminders
* Enhance other marketing channels by using referral and advocacy data to segment and target high-value customers
## Prerequisites
* **Emarsys** - Ability to [create private API Users](https://help.emarsys.com/hc/en-us/articles/115004740329-Your-account-Security-Settings#api-users).
* **Mention Me** - Access to the [Mention Me platform](https://mention-me.com/login). Contact your CSM or [submit a support request](https://help.mention-me.com/hc/en-gb/requests/new) if needed.
## Step 1: Create an API User and Secret for Mention Me
**1. Log in to Emarsys**
Log in to [Emarsys](https://login.emarsys.net/bootstrap.php?r=customer/Login) as the **Account Owner**.
**2. Navigate to API settings**
Navigate to **Management > Security Settings > API**.

The Emarsys Security Settings API navigation.
**3. Create your API User**
Select **Create your API User**.

The Create API User button in Emarsys.
**4. Select WSSE authentication type**
Select **WSSE** as the Authentication Type.

Selecting WSSE as the authentication type in Emarsys.
**5. Set API user permissions**
Set the following permissions for the created API User(s):

API user permissions configuration in Emarsys, part 1.
Continue setting the remaining permissions as shown below:

API user permissions configuration in Emarsys, part 2.

API user permissions configuration in Emarsys, part 3.

API user permissions configuration in Emarsys, part 4.

API user permissions configuration in Emarsys, part 5.
> [!NOTE]
>
> You must set up these permissions to implement and run the Mention Me and Emarsys integration.
[Learn more about creating your API key and secret.](https://help.emarsys.com/hc/en-us/articles/115004740329-security-settings#api-users)
**6. Save credentials for Step 2**
Save these credentials for use in Step 2.
> [!NOTE]
>
> If you have multiple Emarsys accounts, create an API Username and Secret Key for each.
## Step 2: Set Up the Integration in Mention Me
**1. Connect on Mention Me platform**
On the [Mention Me platform](https://mention-me.com/merchant/~/integrations/emarsys), click **Connect**.

The Mention Me Emarsys integration connect page.
**2. Accept terms and conditions**
Agree to the Terms and Conditions to allow Mention Me to transfer data to Emarsys on your behalf.

The terms and conditions acceptance screen for the Emarsys integration.
**3. Click New authentication**
Click **New authentication**.

The New Authentication button in Mention Me.
**4. Name your authentication**
Name your authentication. If you have multiple Emarsys accounts, name the connection per account, or leave the default.
**5. Enter API Key and Secret**
Enter the following values from Step 1:
* API Key (User)
* API Secret
**6. Enter the Base URL**
Enter the following in the Base URL:
```text theme={null}
api.emarsys.net
```
**7. Create the authentication**
Press **Create** to finish.

Entering Emarsys API credentials in Mention Me.
**8. Select countries to sync**
Select the country/countries you want to sync to Emarsys.

Selecting countries to sync with Emarsys.
> [!NOTE]
>
> Depending on which countries you use Emarsys in, select only the specific Mention Me enabled markets.
**9. Finalise the connection**
Click **Connect** to finalise the setup. All properties and events will be created automatically inside Emarsys.

The Connect button to finalise the Emarsys integration.
**10. Confirm successful integration**
A confirmation message will appear showing the integration completed successfully.

The Emarsys integration success confirmation message.
Mention Me events and contacts will now begin syncing to your Emarsys account for use in Tactics and segmentation. If you need help, contact your CSM or [submit a support request](https://help.mention-me.com/hc/en-gb/requests/new).
### Multiple Account Setup (Optional)
If you would like to integrate another Emarsys account (e.g. for different regions such as UK/US), click **Connect Another Account** and repeat the above steps.

The Connect Another Account option for multiple Emarsys accounts.
## Supplying Emarsys Credentials for Opt-in Triggering Rules (Optional)
Use this section if you have requested to enable checking of customers' opt-in status before showing a newsletter sign-up overlay. This is separate from the full Emarsys integration above.
### Prerequisites
* **Emarsys** - Ability to [create private API Users](https://help.emarsys.com/hc/en-us/articles/115004740329-Your-account-Security-Settings#api-users).
* **Mention Me** - Access to the [Mention Me platform](https://mention-me.com/login).
### Step 1: Provide Emarsys API Key and Secret
**1. Log in to Emarsys**
Log in to [Emarsys](https://login.emarsys.net/bootstrap.php?r=customer/Login) as the **Account Owner**.
**2. Navigate to API settings**
Go to **Management > Security Settings > API**.

The Emarsys API navigation for opt-in triggering.
**3. Create API credentials**
Create your API Username and API Secret Key.
> [!NOTE]
>
> If you have multiple Emarsys accounts, create an API Username and Secret Key for each account.

Creating an API username and secret in Emarsys.
**4. Save credentials securely**
Save these credentials as plain text or in a PDF file (so you can upload them to Mention Me).
**5. Update API user permissions**
Click the edit button to update the API User Permissions and only enable the following for the newly created API User(s):

API user permissions for opt-in checking in Emarsys, part 1.
The remaining permissions to enable are shown below:

API user permissions for opt-in checking in Emarsys, part 2.

API user permissions for opt-in checking in Emarsys, part 3.
[Learn more about creating your API key and secret.](https://help.emarsys.com/hc/en-us/articles/115004740329-security-settings#api-users)
### Step 2: Send the Account ID, API Key, and Secret Securely to Mention Me
**1. Log in to Mention Me**
Log in to the [Mention Me platform](https://mention-me.com/login).
**2. Navigate to Secure file transfer**
Navigate to the **Secure file transfer** option under the **Settings & Tools** tab.

The Secure file transfer navigation in Mention Me.
**3. Upload the credentials file**
Click **Upload secure file**, then upload the PDF file containing your API key and secret to the secure area.

Uploading a secure file with API credentials in Mention Me.
**4. Notify your CSM**
Email your Mention Me Client Success Manager to let them know you've uploaded this information.
## Granting Your Mention Me CSM Access to Your Emarsys Account
Granting Mention Me view-only access to your Emarsys account allows your CSM to provide recommendations on where advocacy data can fit into your segmentation or contact strategy.
The permissions are **view-only** for specific functions and do **not** include access to personally identifiable customer data.
### What Mention Me Will Have Permission to View
* Automation Performance
* Email Campaign Performance
* Strategic Dashboard
* Tactics Enabled
### Prerequisites
You must have an **Account Owner** role in Emarsys to create new roles and users.
### Step 1: Create a New Mention Me Role in Emarsys
[Learn more about creating Roles in Emarsys.](https://help.emarsys.com/hc/en-us/articles/360015594914-User-roles-and-permissions)
**1. Log in to Emarsys**
Log in to [Emarsys](https://login.emarsys.net/bootstrap.php?r=customer/Login) as the **Account Owner**.
**2. Navigate to User Management Roles**
Go to **Management > User Management > Roles**.

The Emarsys User Management Roles navigation.
**3. Create a new role**
Click **Create Role**.
**4. Name and describe the role**
Name the Role "Mention Me" and include a description.
**5. Set role permissions**
Set the Role permissions as follows:

Mention Me role permissions configuration in Emarsys, part 1.
The remaining permissions are shown below:

Mention Me role permissions configuration in Emarsys, part 2.

Mention Me role permissions configuration in Emarsys, part 3.
**6. Save the role**
Save the Role.
### Step 2: Create a New Mention Me User in Emarsys
[Learn more about creating Users in Emarsys.](https://help.emarsys.com/hc/en-us/articles/115004735805-Creating-and-managing-users)
**1. Log in to Emarsys**
Log in to [Emarsys](https://login.emarsys.net/bootstrap.php?r=customer/Login) as the **Account Owner**.
**2. Navigate to User Management Users**
Go to **Management > User Management > Users**.

The Emarsys User Management Users navigation.
**3. Create a new user**
Create a new user.
**4. Enter CSM details**
Enter your Mention Me CSM details.

Creating a new Mention Me user in Emarsys.
**5. Select the Mention Me role**
Select the **Mention Me** Role from the Access Roles dropdown.

Selecting the Mention Me role for the new user in Emarsys.
**6. Confirm user creation**
Click **Next** and confirm the user creation.
# How to Set Up Coupon Reminder Flows in Klaviyo
Source: https://docs.mention-me.com/knowledge/esp-crm/klaviyo/coupon-reminders
Set up pre-built Klaviyo flows to remind referrers and referees to use their Mention Me coupon codes.
## About These Flows
These Klaviyo flows remind customers to use their Mention Me coupon codes. The referee flow targets prospective customers who received a referral coupon, while the referrer flow targets existing customers who earned a reward for referring a friend.
The flows use Mention Me event data passed to Klaviyo through the integration, leveraging Klaviyo's [Flows feature](https://help.klaviyo.com/hc/en-us/articles/115002774932). Pre-built flows include suggested copy and variables from [Mention Me events](/knowledge/esp-crm/klaviyo/data-reference) and [customer attributes](/knowledge/esp-crm/klaviyo/data-reference).
## Prerequisites
1. An active Mention Me referral programme that rewards customers.
2. The latest version of the Mention Me x Klaviyo integration is enabled. Check the integration status [here](https://mention-me.com/merchant/~/integrations/klaviyo):
* **Enabled** - you're all set.
* **Not Connected** - follow [this guide](/knowledge/esp-crm/klaviyo/setup).
3. Familiarity with [Klaviyo personalisation variables](https://help.klaviyo.com/hc/en-us/articles/4408802648731).
## Supported Channels
* Email
## Referee Flow
This flow helps you remind prospective customers (referees) to use their coupon codes after being referred to your brand.
By implementing this flow, you can:
* Drive first purchase
* Increase average order value
### Basic Workflow
1. The referee receives a coupon in the initial email sent by Mention Me. Due to GDPR, Mention Me cannot send follow-ups, so set those up in Klaviyo.
2. If the referee hasn't purchased yet, send reminder emails.
3. Continue reminders if they remain inactive.

The referee coupon reminder flow in Klaviyo.
### Step 1: Install the Flow
**1. Open the Flows library**
Log in to Klaviyo and go to [Flows](https://www.klaviyo.com/flows/create).
**2. Select Mention Me**
Select Mention Me under Integrations.
**3. Choose the flow**
Choose **Referee Coupon Reminder**.

The Klaviyo flow library with Mention Me Referee Coupon Reminder selected.
### Step 2: Add a "Placed Order" Filter
**1. Edit the trigger block**
Edit the Trigger block.
**2. Add the filter**
Add a filter: users who have placed **0 orders** since entering the flow. This ensures emails go only to referees who've not yet converted.

The Klaviyo flow trigger with a Placed Order zero times filter.
### Step 3: Add Email Content
1. Update email branding: images, fonts, colours.
2. Use Mention Me default copy with dynamic variables.
3. Add product recommendations to increase conversion.
#### Dynamic Variables
| Variable | Description | Example |
| - | - | - |
| `{{ first_name\|default:'there' }}` | Referee's first name fallback | "Ryder" or "there" |
| `{{ event\|lookup:'Referee Reward'\|default:'' }}` | Award value offered | £15 |
| `{{ event\|lookup:'Coupon Code' }}` | The unique coupon code assigned | 10USDOFF-RXAAURVZ |
| `{{ event\|lookup:'Coupon Expiry'\|format_date_string\|date:'d F o' }}` | Coupon expiry in reader-friendly format | Wednesday, 19 July 2023 |
| `{{ event\|lookup:'Call to Action URL' }}` | Direct reward landing URL (for CTA button) | [www.mention-me.com](http://www.mention-me.com) |
### Step 4: Preview the Email
**1. Open Preview and Test**
Select **Preview & Test**.
**2. Choose a test profile**
Choose a test profile who has met trigger conditions.
**3. Confirm the content**
Confirm dynamic content is accurate before continuing.

Klaviyo Preview and Test with dynamic variables populated.
### Step 5: Activate the Flow
Once you're satisfied, activate by clicking **Review and turn on**.

The Klaviyo Review and Turn On button to activate the flow.
If you need assistance, please [contact the Support team](https://help.mention-me.com/hc/en-gb/requests/new?ticket_form_id=8840645829405).
## Referrer Flow
This flow reminds existing customers (referrers) to use their coupon codes received after referring a friend.
By implementing this flow, you can:
* Increase active customer revenue
* Increase premium customer revenue
* Improve long-term retention
### Basic Workflow
1. The referrer gets a coupon when referring a friend (initial email is sent by Mention Me). Per GDPR, Mention Me cannot send follow-up emails, so set those up in Klaviyo.
2. Reminder emails are sent (subject to marketing consent) if no purchase has been made.
3. Additional reminders are sent at different intervals if the coupon remains unused.
Suggested wait times are longer than for referees due to longer coupon expiry windows, but you can adjust as needed for your brand.

The referrer coupon reminder flow in Klaviyo.
### Step 1: Install the Flow
**1. Open the Flows section**
Log in to Klaviyo and go to the [Flows section](https://www.klaviyo.com/flows/create).
**2. Select Mention Me**
Select **Mention Me** from the Integrations menu.
**3. Choose the flow**
Choose **Referrer Coupon Reminder**.

The Klaviyo flow library with Mention Me Referrer Coupon Reminder selected.
### Step 2: Add a Placed Order Filter
**1. Edit the flow trigger**
Edit the flow trigger.
**2. Add the profile filter**
Add a profile filter to include only referrers who have **Placed Order = 0** times since entering the flow. Use the **Placed Order** event from your eCommerce platform (e.g. Shopify, BigCommerce).

The Klaviyo flow trigger with a Placed Order filter for the referrer flow.
### Step 3: Add Email Content
1. Update design and branding: add your own images, colour, layout.
2. Include Mention Me recommended variables (see below).
3. Add product recommendations if relevant.
#### Dynamic Variables
| Variable | Description | Example |
| - | - | - |
| `{{ first_name\|default:'there' }}` | Pulls the referrer's name. Defaults to "there" | Ryder or "there" |
| `{{ event\|lookup:'Referrer Reward' }}` | The reward the referrer received | £15 or 30% |
| `{{ event\|lookup:'Coupon Code' }}` | The actual coupon code granted | 10USDOFF-RXAAURVZ |
| `{{ event\|lookup:'Coupon Expiry'\|format_date_string\|timeuntil }}` | Time left until expiry | 1 week and 5 days |
| `{{ event\|lookup:'Coupon Expiry'\|format_date_string\|date:'d F o' }}` | Date of expiry in full format | Wednesday, 19 July 2023 |
| `{{ event\|lookup:'Call to Action URL' }}` | URL where the discount can be used | [www.mention-me.com](http://www.mention-me.com) |
### Step 4: Test Each Email
**1. Preview and test**
Click **Preview & Test** for each email in the flow.
**2. Select a test user**
Select a test user who meets the flow criteria.
**3. Confirm the output**
Confirm personalisation and formatting appears as expected.

Klaviyo Preview and Test for referrer coupon reminder emails.
### Step 5: Activate the Flow
Once you've tested and approved all the content, click **Review and Turn On**.

The Klaviyo Review and Turn On button for the referrer flow.
Need more help? Contact our [Support Team](https://help.mention-me.com/hc/en-gb/requests/new?ticket_form_id=8840645829405).
# Klaviyo Data Reference
Source: https://docs.mention-me.com/knowledge/esp-crm/klaviyo/data-reference
Reference for all Mention Me data sent to Klaviyo, including contact profile attributes, custom events, and ECR data import.
## Overview
The Mention Me integration with Klaviyo sends referral and advocacy-related events into your Klaviyo platform in real-time.
### What the Integration Enables
* Send contact data and opt-ins from Mention Me referred customers to Klaviyo in real-time
* Use referral data to create coupon email reminders
* Enhance the performance of other marketing channels by using referral and advocacy data to segment and target high-value customers
As part of the setup, Mention Me automatically creates the customer attributes and custom events needed. No manual configuration is required before the integration is enabled.
Events and custom attributes associated with the customer in Klaviyo are based on their email address. Mention Me sends event and contact profile attributes for any prospect or existing customer (irrespective of opt-in status) that has triggered an event via Mention Me. This is because they could have opted in via another channel.
When contact data is sent to Klaviyo:
* If a customer **already exists** in Klaviyo:
* Append their customer profile with Mention Me specific attributes
* Add Mention Me associated events to their profile
* If a customer **does not exist** in Klaviyo:
* Create the contact profile
* Append their customer profile with Mention Me specific attributes
* Add Mention Me associated events to their profile
* Add an email consent (only if explicitly captured via specific Mention Me journeys)
## Contact Data
### How Contacts Are Created
The following rules apply when sending contact information to Klaviyo:
* Mention Me first checks if the customer already exists (using email as the identifier)
* If the customer **does not** exist on your Klaviyo account, a **new** contact will be created
* If the customer **does** exist on your Klaviyo account, the **existing** contact will be updated with only Mention Me specific fields
### Customer Consent
Mention Me captures opt-ins during the referee journey or at post-purchase for a specific newsletter sign-up offer, and they can be added to a Newsletter list in Klaviyo as part of the Mention Me integration. Whenever a contact is added to the relevant newsletter list, the **Source** will be shown as Mention Me.

A Klaviyo contact list showing Mention Me as the source.
If your list has Double opt-in enabled, then the contact will only be added to the list once the customer has confirmed the opt-in.
The consent is tracked using the Klaviyo [subscribe tracking event](https://help.klaviyo.com/hc/en-us/articles/360037101072#h_01HRSE3YTMJ8MGF4350GCQ1ABE) based on your selected newsletter list when you [set up the integration](/knowledge/esp-crm/klaviyo/setup).
A customer can also consent to receive your newsletter via other channels outside of Mention Me, so Mention Me is not the source of truth for all your consent.

A Klaviyo subscribe tracking event generated from Mention Me consent.
### Customer Profile Attributes
The following customer information is created/updated on the Klaviyo platform and can be seen on the Klaviyo profile page:

Mention Me custom properties on a Klaviyo customer profile
| **Klaviyo Custom Property** | **Description** | **Example** |
| - | - | - |
| Mention Me Share link | For referrer contacts only. This is the link that referrers can use to send to their friends to join your referral program. Set if a **Referrer** contact is created/updated. | [https://demo.mention-me.com/m/ol/xz3uz-joel-mcfly](https://demo.mention-me.com/m/ol/xz3uz-joel-mcfly) |
| Mention Me Dashboard link | For referrer contacts only. This is the link that referrers can use to see how many successful referees they have had. Set if a **Referrer** contact is created/updated. | [https://demo.mention-me.com/d/2674816/9c34b0c2](https://demo.mention-me.com/d/2674816/9c34b0c2) |
| Mention Me Share Source | The name of the share method the referee came from | OPEN-LINK |
| Mention Me Referrals | Total number of successful referrals a contact has made (successful referral is defined as when the referee has made their first purchase). Includes historical referrals. | 5 |
| Mention Me Total Shares | The **total** number of shares a customer has done. Includes historical shares and all sharing methods. | 10 |
| Mention Me Shares Email | Populated if the referral has shared via this share type | 2 |
| Mention Me Shares Facebook | Populated if the referral has shared via this share type | 2 |
| Mention Me Shares Facebook Messenger | Populated if the referral has shared via this share type | 2 |
| Mention Me Shares Name Sharing | Populated if the referral has shared via this share type | 1 |
| Mention Me Shares WhatsApp | Populated if the referral has shared via this share type | 3 |
| Mention Me NPS Score | The NPS score submitted by the customer at post-purchase | 8 |
| Mention Me Propensity to Refer | Only sent if running a Mention Me **Smart Experiment**. Values: High or Low | High |
| Mention Me ECR Activity | The [Extended Customer Revenue (ECR)](/knowledge/reporting/advocacy/ecr) activity segment. Values: Active, Dormant, Lapsed | Active |
| Mention Me ECR Status | The [ECR](/knowledge/reporting/advocacy/ecr) status segment. Values: High, Medium, Low | High |
| Mention Me Network ID | Unique identifier of the [Network](/knowledge/reporting/advocacy/network-insights) that your customer belongs to | N-5051-153480685 |
| Mention Me First Share Date | Date when the referrer made their first share | 2024-06-03T16:19:08.000Z |
| Mention Me Last Share Date | Date when the referrer last shared with a friend | 2024-06-03T16:19:08.000Z |
| Mention Me First Referral Date | Date when the referrer first successfully introduced someone | 2024-06-03T16:19:08.000Z |
| Mention Me Last Referral Date | Date when the referrer last successfully introduced someone | 2024-06-03T16:19:08.000Z |
| Mention Me ECR 12m Predicted | The [Predicted ECR segment](/knowledge/reporting/advocacy/ecr) in 12 months' time. Values: High, Medium, Low, Lapsed | High |
| Mention Me Referrer Engaged | Set if the referrer has actively engaged with a referral offer and accepted T\&Cs | Yes |
| Mention Me enrolled | Set when someone registered as a referee or a referrer. Can be used to create segments identifying who has enrolled. Only set for customers created after integration was enabled. | True |
## Events
The Mention Me integration uses Klaviyo custom events (metrics) functionality for trigger-based flows to generate email campaigns or segmentations.
Mention Me automatically sets the custom events in Klaviyo as part of the integration setup.
Events are associated with a customer profile based on their email address and show under the Events section of the profile.

Mention Me custom events on a Klaviyo customer profile
### Summary of Events Sent to Klaviyo
| Mention Me event name | When it triggers |
| - | - |
| Registered as a Referee from Mention Me | When a prospective customer has registered as a referee |
| Registered as a Referrer from Mention Me | When a customer has registered as a referrer |
| Received a Referee Reward from Mention Me | When a prospective customer obtained a reward as a referrer's friend |
| Received a Referrer Reward from Mention Me | When a customer obtained a reward for referring a friend |
| Opted-in to Marketing Consent from Mention Me | When an existing or prospective customer has opted-in to receive your marketing during the referee journey or at post-purchase for a specific newsletter sign-up offer |
| Submitted an NPS Score from Mention Me\*\* | When a customer has supplied an NPS score at post-purchase |
| Received a discount on next order from Mention Me\*\* | When a customer has received a discount to use on their next order |
| Propensity to Refer from Mention Me\*\* | Each time a customer has their propensity to refer calculated, their propensity value will be sent to Klaviyo |
\*\* If you have the Mention Me add-on enabled
### How to Use Mention Me Data in Email Templates
The Mention Me data can be inserted into email flows to create a personalised email experience using the [Klaviyo Event Variables](https://help.klaviyo.com/hc/en-us/articles/115002779071).
You can use the data in the email Body, Subject line, Sender email, Sender name, and Pre-header.
### Registered as a Referrer from Mention Me
Each time a customer registers as a referrer on the Mention Me platform, a registration event will be triggered, and the associated data will be sent to Klaviyo.
| Field name | Klaviyo event variable | Description | Example |
| - | - | - | - |
| Campaign Name | `{{ event\|lookup:'Campaign Name' }}` | Campaign Name - not for customer-facing emails. Can be used as a filter. | UK Campaign |
| Experiment Name | `{{ event\|lookup:'Experiment Name' }}` | Experiment Name - not customer-facing. Can be used as a filter. | AB Test - Current Vs New Imagery - July 2023 |
| Offer Name | `{{ event\|lookup:'Offer Name' }}` | Offer Name - not customer-facing. Can be used as a filter. | Variation A |
| Offer Type | `{{ event\|lookup:'Offer Type' }}` | Type of offer being given (referral or incentive) | referral |
| Offer Subject Copy | `{{ event\|lookup:'Offer Subject Copy' }}` | Customer-friendly offer description visible on the referral offer page | Treat a friend to 20% off and get 20% off for yourself |
| Call to Action Copy | `{{ event\|lookup:'Offer Call to Action Copy' }}` | Customer-friendly offer CTA | Give 20% off |
| Referrer Reward | `{{ event\|lookup:'Referrer Reward'\|default:'' }}` | Reward the referrer will receive, combining multiple reward types | 20% |
| Referee Reward | `{{ event\|lookup:'Referee Reward'\|default:'' }}` | Reward the referee will receive, combining multiple reward types | £15 |
### Registered as a Referee from Mention Me
Each time a customer registers as a referee on the Mention Me platform, a registration event will be triggered and the associated data will be sent to Klaviyo.
| Field name | Klaviyo event variable | Description | Example |
| - | - | - | - |
| Share Source | `{{ event\|lookup:'Share Source' }}` | The share method by which the referee was introduced | FORWARDED-EMAILED-LINK |
| Campaign Name | `{{ event\|lookup:'Campaign Name' }}` | Campaign Name - not for customer-facing emails | UK Campaign |
| Experiment Name | `{{ event\|lookup:'Experiment Name' }}` | Experiment Name - not customer-facing | AB Test - Current Vs New Imagery - July 2023 |
| Offer Name | `{{ event\|lookup:'Offer Name' }}` | Offer Name - not customer-facing | Variation A |
| Offer Type | `{{ event\|lookup:'Offer Type' }}` | Type of offer being given | referral |
| Offer Subject Copy | `{{ event\|lookup:'Offer Subject Copy' }}` | Customer-friendly offer description | Treat a friend to 20% off and get 20% off for yourself |
| Call to Action Copy | `{{ event\|lookup:'Offer Call to Action Copy' }}` | Customer-friendly offer CTA | Give 20% off |
| Fulfilled By | `{{ event\|lookup:'Fulfilled By' }}` | The method by which the reward is issued | coupon |
| Reward Amount | `{{ event\|lookup:'Reward Amount' }}` | The reward amount being offered | 20 |
| Reward Type | `{{ event\|lookup:'Reward Type' }}` | Type of reward (percent, amount, free gift) | percent |
| Referrer Reward | `{{ event\|lookup:'Referrer Reward'\|default:'' }}` | Reward the referrer will receive | 20% |
| Referee Reward | `{{ event\|lookup:'Referee Reward'\|default:'' }}` | Reward the referee will receive | £15 |
### Received a Referee Reward from Mention Me
Each time a referee obtains a reward for being a referrer's friend, a referee fulfilment event will be triggered and the associated data will be sent to Klaviyo.
| Field name | Klaviyo event variable | Description | Example |
| - | - | - | - |
| Referrer First Name | `{{ event\|lookup:'Referrer First Name'\|default:'' }}` | First name of the friend who referred the referee | Ryder |
| Referrer Last Name | `{{ event\|lookup:'Referrer Last Name'\|default:'' }}` | Surname of the friend who referred the referee | Collins |
| Campaign Name | `{{ event\|lookup:'Campaign Name' }}` | Internal campaign name | UK Campaign |
| Currency Symbol | `{{ event\|lookup:'Currency Symbol' }}` | Currency symbol of the reward | £ |
| Experiment Name | `{{ event\|lookup:'Experiment Name' }}` | Internal experiment name | AB Test - Current Vs New Imagery - July 2023 |
| Offer Name | `{{ event\|lookup:'Offer Name' }}` | Internal offer name | Variation A |
| Offer Type | `{{ event\|lookup:'Offer Type' }}` | Type of offer | referral |
| Offer Subject Copy | `{{ event\|lookup:'Offer Subject Copy' }}` | Customer-facing offer summary | Treat a friend to 20% off and get 20% off for yourself |
| Call to Action Copy | `{{ event\|lookup:'Offer Call to Action Copy' }}` | Customer-friendly CTA text | Give 20% off |
| Fulfilled By | `{{ event\|lookup:'Fulfilled By' }}` | Fulfilment mechanism for the reward | coupon |
| Reward Amount | `{{ event\|lookup:'Reward Amount' }}` | Numerical value of the reward | 20 |
| Reward Type | `{{ event\|lookup:'Reward Type' }}` | Type of reward | percent |
| Referrer Reward | `{{ event\|lookup:'Referrer Reward'\|default:'' }}` | Reward the referrer receives | 20% |
| Referee Reward | `{{ event\|lookup:'Referee Reward'\|default:'' }}` | Reward the referee receives | £15 |
| Coupon Code | `{{ event\|lookup:'Coupon Code' }}` | Coupon code assigned to the referee's reward | 10USDOFF-RXAAURVZ |
| Coupon Expiry | `{{ event\|lookup:'Coupon Expiry'\|format_date_string\|date:'d F o' }}` | Expiry date of the coupon. See [Klaviyo Date Variables](https://help.klaviyo.com/hc/en-us/articles/115005257788-How-to-Format-Date-Variables-in-Templates#populate-date-as-event-variable-in-flow-email1) to adjust formatting. | 2024-09-03T16:19:19.000Z |
| Call to Action URL | `{{ event\|lookup:'Call to Action URL' }}` | Destination URL where a customer can redeem their reward | [www.mention-me.com](http://www.mention-me.com) |
### Received a Referrer Reward from Mention Me
Each time a referrer obtains a reward for referring a friend, a referrer fulfilment event will be triggered and the associated data will be sent to Klaviyo.
| Field name | Klaviyo event variable | Description | Example |
| - | - | - | - |
| Referee First Name | `{{ event\|lookup:'Referee First Name'\|default:'' }}` | First name of the friend that the referrer introduced | Ryder |
| Referee Last Name | `{{ event\|lookup:'Referee Last Name'\|default:'' }}` | Surname of the friend that the referrer introduced | Collins |
| Campaign Name | `{{ event\|lookup:'Campaign Name' }}` | Internal campaign name | UK Campaign |
| Currency Symbol | `{{ event\|lookup:'Currency Symbol' }}` | Currency symbol | £ |
| Experiment Name | `{{ event\|lookup:'Experiment Name' }}` | Internal experiment name | AB Test - Current Vs New Imagery - July 2023 |
| Offer Name | `{{ event\|lookup:'Offer Name' }}` | Internal offer name | Variation A |
| Offer Type | `{{ event\|lookup:'Offer Type' }}` | Type of offer | referral |
| Offer Subject Copy | `{{ event\|lookup:'Offer Subject Copy' }}` | Customer-facing offer copy | Treat a friend to 20% off and get 20% off for yourself |
| Call to Action Copy | `{{ event\|lookup:'Offer Call to Action Copy' }}` | CTA text | Give 20% off |
| Fulfilled By | `{{ event\|lookup:'Fulfilled By' }}` | Reward issuance method | coupon |
| Reward Amount | `{{ event\|lookup:'Reward Amount' }}` | Numeric reward value | 20 |
| Reward Type | `{{ event\|lookup:'Reward Type' }}` | Reward type (percentage, fixed amount, gift) | percent |
| Referrer Reward | `{{ event\|lookup:'Referrer Reward'\|default:'' }}` | Reward for the referrer | 20% |
| Referee Reward | `{{ event\|lookup:'Referee Reward'\|default:'' }}` | Reward for the referee | £15 |
| Coupon Code | `{{ event\|lookup:'Coupon Code' }}` | Unique coupon code issued to the referrer | 10USDOFF-RXAAURVZ |
| Coupon Expiry | `{{ event\|lookup:'Coupon Expiry'\|format_date_string\|date:'d F o' }}` | Expiry date of the coupon reward. See [Klaviyo Date Variables](https://help.klaviyo.com/hc/en-us/articles/115005257788-How-to-Format-Date-Variables-in-Templates#populate-date-as-event-variable-in-flow-email1). | 2024-09-03T16:19:19.000Z |
| Call to Action URL | `{{ event\|lookup:'Call to Action URL' }}` | Link to where the reward can be used | [www.mention-me.com](http://www.mention-me.com) |
### Submitted an NPS Score from Mention Me
Each time a customer submits an NPS Score via the Mention Me NPS feature, their response will be sent to Klaviyo.
| Field name | Klaviyo event variable | Description | Example |
| - | - | - | - |
| Campaign Name | `{{ event\|lookup:'Campaign Name' }}` | Internal campaign reference | UK Campaign |
| Experiment Name | `{{ event\|lookup:'Experiment Name' }}` | Internal experiment label | AB Test - Current Vs New Imagery - July 2023 |
| Offer Name | `{{ event\|lookup:'Offer Name' }}` | Internal offer name | Collect NPS Feedback |
| Offer Type | `{{ event\|lookup:'Offer Type' }}` | Type of offer | nps-only |
| Offer Subject Copy | `{{ event\|lookup:'Offer Subject Copy' }}` | Customer-facing offer description | Treat a friend to 20% off and get 20% off for yourself |
| Call to Action Copy | `{{ event\|lookup:'Offer Call to Action Copy' }}` | Customer-facing CTA text | Give 20% off |
| Customer Segment | `{{ event\|lookup:'Customer Segment'\|default:'' }}` | Custom segment value from Mention Me data tags | VIP |
| NPS Score | `{{ event\|lookup:'NPS Score'\|default:'' }}` | Net Promoter Score (0 to 10) | 8 |
### Received a Discount on Next Order from Mention Me
Each time a customer obtains a reward from a non-referral post-purchase message, a "discount on next order" fulfilment event will be triggered and the associated data will be sent to Klaviyo.
| Field name | Klaviyo event variable | Description | Example |
| - | - | - | - |
| Campaign Name | `{{ event\|lookup:'Campaign Name' }}` | Internal campaign identifier | UK Campaign |
| Currency Symbol | `{{ event\|lookup:'Currency Symbol' }}` | Symbol of the reward currency | £ |
| Experiment Name | `{{ event\|lookup:'Experiment Name' }}` | Internal A/B test identifier | AB Test - Current Vs New Imagery - July 2023 |
| Offer Name | `{{ event\|lookup:'Offer Name' }}` | Internal offer label | Variation A |
| Offer Type | `{{ event\|lookup:'Offer Type' }}` | Type of offer | referral |
| Offer Subject Copy | `{{ event\|lookup:'Offer Subject Copy' }}` | Customer-facing name for the offer | Treat a friend to 20% off and get 20% off for yourself |
| Call to Action Copy | `{{ event\|lookup:'Offer Call to Action Copy' }}` | Customer-facing CTA prompt | Give 20% off |
| Fulfilled By | `{{ event\|lookup:'Fulfilled By' }}` | Reward issuance mechanism | coupon |
| Reward Amount | `{{ event\|lookup:'Reward Amount' }}` | Numeric value of the reward | 20 |
| Reward Type | `{{ event\|lookup:'Reward Type' }}` | Reward type | percent |
| Discount Reward | `{{ event\|lookup:'Discount Reward'\|default:'' }}` | Combined reward description | 20% |
| Coupon Code | `{{ event\|lookup:'Coupon Code' }}` | Unique coupon code | 10USDOFF-RXAAURVZ |
| Coupon Expiry | `{{ event\|lookup:'Coupon Expiry'\|format_date_string\|date:'d F o' }}` | Coupon expiry date. See [Klaviyo Date Variables](https://help.klaviyo.com/hc/en-us/articles/115005257788-How-to-Format-Date-Variables-in-Templates#populate-date-as-event-variable-in-flow-email1). | 2024-09-03T16:19:19.000Z |
| Call to Action URL | `{{ event\|lookup:'Call to Action URL' }}` | Link to where the reward can be redeemed | [www.mention-me.com](http://www.mention-me.com) |
### Propensity to Refer from Mention Me
Each time a customer has their propensity to refer calculated, their propensity value will be sent to Klaviyo. This is only sent if you are running a Mention Me Smart Experiment.
| Field name | Klaviyo event variable | Description | Example |
| - | - | - | - |
| Campaign Name | `{{ event\|lookup:'Campaign Name' }}` | Internal campaign reference | UK Campaign |
| Experiment Name | `{{ event\|lookup:'Experiment Name' }}` | A/B test or experimental setup name | AB Test - Current Vs New Imagery - July 2023 |
| Offer Name | `{{ event\|lookup:'Offer Name' }}` | Internal offer identifier | Variation A |
| Offer Type | `{{ event\|lookup:'Offer Type' }}` | Type of offer | referral |
| Offer Subject Copy | `{{ event\|lookup:'Offer Subject Copy' }}` | Customer-facing offer copy | Treat a friend to 20% off and get 20% off for yourself |
| Call to Action Copy | `{{ event\|lookup:'Offer Call to Action Copy' }}` | Customer-facing CTA | Give 20% off |
| Propensity to Refer | `{{ event\|lookup:'Propensity to Refer'\|default:'' }}` | Calculated propensity group. High or Low. | High |
## ECR Data Import
Mention Me can automatically send your customers' Extended Customer Revenue (ECR) data to your Klaviyo account. ECR is only calculated for customers who have made a successful referral.
This data is scheduled to be sent on a **weekly** basis and will only send ECR data for customers whose ECR has **changed** from the previous week.
The following steps explain how to import all your customers' ECR data into Klaviyo as a one-off **before** Mention Me sends the weekly updates.
### Step 1: Download ECR Data from Mention Me
**1. Navigate to Customer Revenue**
Login to the [Mention Me Platform](https://mention-me.com/login) and navigate to the **Customer Revenue** page in the **Advocacy Intelligence** section.

The Mention Me platform Customer Revenue page navigation.
**2. Download customer segments**
Click the **Download customer segments** button. If you cannot see the Download button, reach out to your CSM for help.

The Mention Me Download customer segments button.
**3. Generate the file**
Select all segments and click **Generate**.

The Mention Me ECR segment selection screen with the Generate button.
This will generate a CSV file that may take up to 15 minutes. You will be emailed when it's ready.
**4. Download the CSV file**
Click the link in the email to download the CSV file (you may be asked to log in). You can also find the file by navigating to **Settings > Secure file transfer**.

The Mention Me secure file transfer page for downloading the ECR CSV.
### Step 2: Create a CSV File for Klaviyo
Use Excel, Google Sheets, or another spreadsheet tool to format the CSV.
**1. Open the CSV file**
Open the CSV file downloaded from Mention Me.
**2. Remove the header rows**
Remove the first 3 rows so only the headers remain.
**3. Remove unused columns**
Remove the following columns:
* Individual Revenue
* Revenue Referred
* Friends Ecr Value
* Report Currency Code
* First Name
* Surname
**4. Rename the remaining columns**
Rename the following columns:
* Email address to Email
* Activity Status to Mention Me ECR Activity
* Ecr Segment to Mention Me ECR Status
> [!NOTE]
>
> Column names are case sensitive. Mismatched names may create duplicates in Klaviyo.
**5. Reorder the Email column**
Move the Email column to the first column. Your CSV file should now look like this:

A formatted CSV file with Email, ECR Activity, and ECR Status columns.
**6. Save the file**
Save your CSV file.
### Step 3: Upload Your CSV to Klaviyo
For more information, refer to [Klaviyo's guide to importing consented contacts](https://help.klaviyo.com/hc/en-us/articles/1260806293150).
**1. Navigate to Lists and Segments**
Navigate to **Audience > Lists & Segments** in Klaviyo.

The Klaviyo Audience menu navigating to Lists and Segments.
**2. Create the list**
Click **Create List / Segment** and choose **List**, then name it **ECR import**.

The Klaviyo Create List dialog with the ECR import name entered.
**3. Upload contacts**
Click **Upload Contacts**.

The Klaviyo Upload Contacts button on the list page.
**4. Select the CSV file**
Click **Upload** and select the CSV file you created.

The Klaviyo CSV upload dialog.
**5. Create new fields if needed**
If the Mention Me ECR fields do not exist, click **Create New Field**.

The Klaviyo Create New Field option for ECR properties.
**6. Set the field data type**
Use the default name with data type set to **text** for each new field.

A Klaviyo new field with the text data type selected.
**7. Confirm the field mapping**
Your mapped fields should appear like this. Click **Next**.

The Klaviyo field mapping showing ECR fields mapped correctly.
Repeat the previous two steps for each Mention Me ECR field.
**8. Import without updating subscription status**
Choose **No, import without updating subscription status** and click **Import**.

The Klaviyo import settings with no subscription status update selected.
**9. Confirm the import is complete**
Your import is now complete.
All your customers who have made a successful referral will now have an ECR segment and activity assigned in Klaviyo. Going forward, Mention Me will automatically update only those customers whose ECR values have changed.
# How to Promote Referral from Klaviyo
Source: https://docs.mention-me.com/knowledge/esp-crm/klaviyo/promote-referral
Add a personalised referral CTA link to your Klaviyo emails that sends customers directly to a pre-filled referral landing page.
With the Mention Me integration into Klaviyo, you can add a CTA link to your emails that sends customers directly to a personalised referral landing page. This improves visibility of your referral programme, boosts engagement, and reminds existing customers to keep sharing.
The personalised link allows customers to skip referral registration, as Klaviyo will automatically pass their email and name to pre-fill the referral page.
## Prerequisites
* A working referral landing page on your website with the Mention Me referral tag implemented
## Types of Emails to Consider
* Dedicated referral solus emails (recommended every 2-3 months)
* Inclusion in a standard newsletter or promotional email
* An "always-on" presence in email headers or footers
* Integration into automated email journeys (e.g. Welcome, Post-purchase)
## How It Works
1. You promote your referral programme in an email, including the personalised CTA link.
2. The customer clicks the button and reaches the referral landing page.
3. The referral page is pre-filled with their first name, last name, and email.
4. They are auto-registered when they click "Get Reward".
5. They share the offer with friends via their preferred method.
## How to Add the Personalised Link
**1. Add a CTA**
Add a CTA button or text link to your promotional email campaign.
**2. Start the URL parameters**
In the button/link URL field, begin with your referral landing page address and include a `?` to start parameters.
**3. Append the parameters**
Append the following parameters, separated by `&`.

A referral landing page URL with personalisation parameters appended.
The same parameters can be added directly in the Klaviyo email editor:

The Klaviyo email editor showing the referral CTA link configuration.
### Personalisation Parameters
| Parameter | Value / Klaviyo Variable | Notes |
| - | - | - |
| firstname | `{{ person.first_name }}` | Use the personalisation tag from your Klaviyo setup |
| surname | `{{ person.last_name }}` | Ensure this matches your data field in Klaviyo |
| email | `{{ person.email }}` | |
| situation | `Klaviyo-newsletter-jan23` | Customise with your own naming: channel_type_date (e.g. Klaviyo_solus_jan23) |
| segment | `loyalty` | Use if you run segmented or localised referral campaigns. This will map to the correct audience in Mention Me. |
| locale | `en_GB` | |
### Final Example URL
```text theme={null}
https://www.yourwebsite.com/refer-a-friend?email={{ person.email }}&surname={{ person.last_name }}&firstname={{ person.first_name }}&situation=Klaviyo-newsletter-jan23&locale=en_GB&segment=loyalty
```

An example referral email with a personalised CTA button.
# How to Set Up Klaviyo with Mention Me
Source: https://docs.mention-me.com/knowledge/esp-crm/klaviyo/setup
Connect your Klaviyo account to Mention Me to sync referral data, opt-ins, and enable pre-built flows.
## About the Integration
Activate your biggest fans by feeding first-party advocacy data directly into Klaviyo to deliver higher engagement, retention, and revenue across your customer base.
## Integration Capabilities
* Send contact data and opt-ins from Mention Me referred customers to Klaviyo in real-time
* Use referral data to create coupon email reminders
* Enhance other marketing channels by using referral and advocacy data to segment and target high-value customers
## Prerequisites
* **Mention Me** - Access to the [Mention Me platform](https://mention-me.com/login). If you do not have access, reach out to your Mention Me CSM or [submit a support request](https://help.mention-me.com/hc/en-gb/requests/new).
## Step 1: Set Up the Integration in Mention Me
Overview of the Klaviyo integration setup process.
**1. Log into Mention Me**
Log in to the [Mention Me platform](https://mention-me.com/merchant/~/integrations/klaviyo).
**2. Click Connect to begin setup**
Click **Connect** to begin the setup process.

The Mention Me Klaviyo integration page showing the Connect button.
**3. Agree to Terms and Conditions**
Agree to the Terms and Conditions to allow Mention Me to transfer data to Klaviyo.

The Mention Me terms and conditions acceptance screen for the Klaviyo integration.
**4. Click New authentication**
Click **New authentication**.

The Mention Me New Authentication button for Klaviyo.
**5. Name your authentication**
Name your authentication.

The authentication name input field in Mention Me.
**6. Log in with Klaviyo details**
Log in with your Klaviyo details.

The Klaviyo login page for authentication.
**7. Select the account to link**
Select the account you wish to link Mention Me to.

The Klaviyo account selection screen for the Mention Me integration.
> [!NOTE]
>
> If you have multiple Klaviyo accounts, ensure you select the correct one (e.g. US vs UK).
**8. Grant Mention Me permission**
Grant Mention Me permission to access your Klaviyo account.

The Klaviyo permissions grant screen for Mention Me access.
**9. Select the newsletter list**
Select the newsletter list for opt-ins.

The newsletter list selection screen for Klaviyo opt-ins.
**10. Choose or create a list for opt-ins**
Mention Me captures opt-ins during the referee journey or post-purchase. You may use an existing list or create a new one.

A Klaviyo list showing Mention Me as the contact source.
**11. Verify the contact source**
The `$source` for contacts will show as Mention Me.
> [!NOTE]
>
> If your list has Double Opt-in enabled, the contact must confirm before being added.
**12. Select countries to sync**
Select the country(s) you want to sync.

The country selection screen for Klaviyo data sync in Mention Me.
> [!NOTE]
>
> Send data only from relevant Mention Me enabled countries.
**13. Click Connect to finish setup**
Click **Connect** to finish setup.

The Mention Me Klaviyo integration setup confirmation screen.
**14. Confirm events are syncing**
Mention Me events will now sync with Klaviyo for use in flows and segmentation.
**15. Contact support if needed**
For support, contact your CSM or [submit a support request](https://help.mention-me.com/hc/en-gb/requests/new).
### Multiple Account Setup (Optional)
To integrate a second Klaviyo account, click **Connect Another Account** and repeat the setup steps.

The Mention Me Connect Another Account option for linking multiple Klaviyo accounts.
## Step 2: Enable Pre-Configured Flows
Mention Me provides pre-built flows with email templates you can activate in Klaviyo:
1. [Referee Coupon Reminder](/knowledge/esp-crm/klaviyo/coupon-reminders) - 3-email series encouraging referees to use their first-purchase coupon.
2. [Referrer Coupon Reminder](/knowledge/esp-crm/klaviyo/coupon-reminders) - 3-email sequence nudging referrers to redeem their reward.
3. [Reminder to Share Again](/knowledge/esp-crm/klaviyo/share-again) - 2-email flow motivating past customers to refer again.
## Supplying Klaviyo Credentials for Opt-In Triggering Rules (Optional)
Use this section if you have requested to enable checking of customers' opt-in status before showing a newsletter sign-up overlay. This is separate from the full Klaviyo integration above.
### Prerequisites
* **Klaviyo** - Ability to [create private API Keys](https://help.klaviyo.com/hc/en-us/articles/7423954176283).
* **Mention Me** - Access to the [Mention Me platform](https://mention-me.com/login).
### Step 1: Provide Klaviyo Private API Key
**1. Log into Klaviyo**
Log in to [Klaviyo](https://www.klaviyo.com/login).
**2. Navigate to API Keys**
Navigate to **Your Brand Name > Settings > Account > API Keys**.

The Klaviyo Settings menu navigating to API Keys.
The API Keys settings page then displays your existing keys:

The Klaviyo API Keys settings page.
**3. Create a Read-Only API key**
Create a Private API Key with **Read-Only** permissions.
> [!NOTE]
>
> If you have multiple Klaviyo accounts, create a Private API Key for each account.

Creating a Private API Key with Read-Only permissions in Klaviyo.
**4. Download the credentials**
Download the credentials so you can upload them to Mention Me.
### Step 2: Send the API Key Securely to Mention Me

The Mention Me platform showing secure file transfer navigation.
**1. Log into Mention Me**
Log in to the [Mention Me platform](https://mention-me.com/login).
**2. Navigate to Secure file transfer**
Navigate to the **Secure file transfer** option under the **Settings & Tools** tab.

The Mention Me secure file transfer page under Settings and Tools.
**3. Upload your API key file**
Click **Upload secure file**, then upload the file containing your API key.

The Mention Me Upload secure file button.
**4. Notify your CSM**
Email your Mention Me Client Success Manager to let them know you've uploaded this information.
# How to Set Up the Share Again Reminder Flow in Klaviyo
Source: https://docs.mention-me.com/knowledge/esp-crm/klaviyo/share-again
Set up a pre-built Klaviyo flow to encourage referrers to keep sharing with friends and earn more rewards.
## About This Flow
This Klaviyo flow nudges your top brand advocates (referrers) to continue sharing with friends to earn additional rewards.
By implementing this flow, you can:
* Increase active customer revenue
* Increase premium customer revenue
* Increase retention
The flow uses Mention Me event data passed into Klaviyo via the integration. It leverages Klaviyo's [Flows functionality](https://help.klaviyo.com/hc/en-us/articles/115002774932). The pre-built flows include:
* Suggested copy
* Variables from [Mention Me events](/knowledge/esp-crm/klaviyo/data-reference)
* Customer [profile attributes](/knowledge/esp-crm/klaviyo/data-reference)
## Prerequisites
1. An active Mention Me referral programme that rewards customers.
2. The latest version of the Mention Me x Klaviyo integration is enabled. [Check integration status](https://mention-me.com/merchant/~/integrations/klaviyo):
* **Enabled** - you are good to go.
* **Not Connected** - follow [this setup guide](/knowledge/esp-crm/klaviyo/setup).
3. Working knowledge of [Klaviyo personalisation variables](https://help.klaviyo.com/hc/en-us/articles/4408802648731).
## Supported Channels
* Email
## Basic Workflow
1. A customer refers a friend and receives a reward.
2. After 4 days, an email reminder is sent (with consent), encouraging further sharing via their share link.
3. After 14 days, a second reminder email is sent.
> [!NOTE]
>
> Mention Me cannot legally send these reminders due to GDPR, so you must configure them in Klaviyo.

An overview of the share again reminder flow.
The flow detail view shows the individual email steps and the wait periods between them:

Flow detail showing email steps and wait periods.
## Steps to Create the Flow
### Step 1: Install the Flow
**1. Open Klaviyo Flows**
Log into [Klaviyo Flows](https://www.klaviyo.com/flows/create).
**2. Select Mention Me**
Select **Mention Me** from the integrations.
**3. Select the flow**
Select **Referrer Share Again Reminder**.

The Klaviyo flow library with Mention Me Referrer Share Again Reminder selected.
### Step 2: Add Content to Reminder Emails
1. Update images, logos, and styles to match your brand.
2. Use Mention Me recommended variables where possible.
#### Reminder Examples
| 1st Reminder | 2nd Reminder |
| - | - |
| **Subject:** Keep sharing! You've referred `{{ person\|lookup:'Mention Me Referrals' }}` friends | **Subject:** Don't forget to keep sharing - `{{ person\|lookup:'Mention Me Referrals' }}` friends |
#### Populated Email Examples

A populated share again reminder email at the first reminder stage.
The second reminder follows the same format with updated copy:

A populated share again reminder email at the second reminder stage.
#### Personalisation Variables
| Variable | Description | Example |
| - | - | - |
| `{{ first_name\|default:'there' }}` | Customer's name fallback | "Ryder" or "there" |
| `{{ person\|lookup:"Mention Me Share link"\|default:'' }}` | Unique share link | [https://demo.mention-me.com/m/olk/se8fp-adrian-parris](https://demo.mention-me.com/m/olk/se8fp-adrian-parris) |
| `{{ person\|lookup:'Mention Me Referrals' }}` | Total successful referrals made by customer | 5 |
| `{{ event\|lookup:'Offer Subject Copy'\|default:'' }}` | Current offer text for referring more friends | Treat a friend to 10% off and get £10 off |
### Step 3: Test the Preview
**1. Preview and test**
Click **Preview & Test**.
**2. Select a matching profile**
Select a profile who matches the trigger criteria.

Klaviyo Preview and Test for the first share again reminder.
Repeat the preview for the second reminder email:

Klaviyo Preview and Test for the second share again reminder.
### Step 4: Activate the Flow
Once everything is tested and finalised, click **Review and Turn On** in the flow design screen.

The Klaviyo Review and Turn On button to activate the share again flow.
Need help? Reach out to our Support or On Demand team using the [support form](https://help.mention-me.com/hc/en-gb/requests/new?ticket_form_id=8840645829405).
# mParticle Data Reference
Source: https://docs.mention-me.com/knowledge/esp-crm/mparticle/data-reference
Reference for all Mention Me data sent to mParticle, including contact profile attributes and custom events.
## Overview
The Mention Me integration with mParticle enables you to receive referral and advocacy-related events into your mParticle CDP in real time.
### What the Integration Enables
* Grow your marketing database by sending opt-ins/contacts in real-time to mParticle
* Activate Mention Me data across various downstream systems and marketing tools integrated with mParticle (email platforms, ad networks, CRM systems)
* Enhance the performance of other marketing channels by using referral data to segment and target high-value customers
As part of setup, Mention Me automatically creates the Customer attributes and Custom Events needed. No manual configuration is required.
Events and custom attributes associated with the customer in mParticle are based on their email address. Mention Me sends event and contact profile attributes for any prospect or existing customer (irrespective of opt-in status) that has triggered an event via Mention Me.
When contact data is sent to mParticle:
* If a customer **already exists** in mParticle:
* Append their customer profile with Mention Me specific attributes
* Add Mention Me associated events to their profile
* If a customer **does not exist** in mParticle:
* Create the contact profile (with their email address as their ID)
* Append their customer profile with Mention Me specific attributes
* Add Mention Me associated events to their profile
* Add a consent purpose (only if explicitly captured via specific Mention Me journeys)
## Contact Data
### How Contacts Are Created
* If the customer **does not** exist on your mParticle instance, a **new** contact will be created
* If the customer **does** exist, the **existing** contact will be updated with only Mention Me specific fields
### Customer Consent
If a customer consents to your newsletter either via the Mention Me referee journey or via a newsletter post-purchase overlay, the opt-in request will automatically be sent to mParticle.
The consent is tracked using the GDPR consent purpose based on the consent category selected when you [set up the integration](/knowledge/esp-crm/mparticle/setup).
A consent event will be shown against the customer profile in mParticle.

An mParticle customer profile showing GDPR consent from Mention Me.
A customer can also consent via other channels outside of Mention Me.
### Customer Profile Attributes
The attributes will be grouped in the Mention Me section:
| mParticle User Attribute | Description | Example |
| - | - | - |
| share_link | Referrer's share link to invite friends. Set if a **Referrer** contact is created/updated. | [https://demo.mention-me.com/m/ol/xz3uz-joel-mcfly](https://demo.mention-me.com/m/ol/xz3uz-joel-mcfly) |
| dashboard_link | Referrer's dashboard for tracking referrals. Set if a **Referrer** contact is created/updated. | [https://demo.mention-me.com/d/2674816/9c34b0c2](https://demo.mention-me.com/d/2674816/9c34b0c2) |
| share_source | Share method the referee came from | OPEN-LINK |
| referrals | Total successful referrals (includes historical) | 5 |
| total_shares | Total shares across all channels (includes historical) | 10 |
| email_shares | Shares via email | 2 |
| facebook_shares | Shares via Facebook | 2 |
| facebook_messenger_shares | Shares via Facebook Messenger | 2 |
| name_sharing_shares | Shares via name sharing | 1 |
| whatsapp_shares | Shares via WhatsApp | 3 |
| nps_score | NPS score submitted at post-purchase | 8 |
| propensity_to_refer | Smart Experiment value. High or Low | High |
| ecr_activity | [ECR](/knowledge/reporting/advocacy/ecr) activity segment: Active, Dormant, Lapsed | Active |
| ecr_status | [ECR](/knowledge/reporting/advocacy/ecr) status segment: High, Medium, Low | High |
| network_id | Unique [Network](/knowledge/reporting/advocacy/network-insights) identifier | N-5051-153480685 |
| first_share_date | Date of first share | 2024-06-03T16:19:08.000Z |
| first_referral_date | Date of first successful referral | 2024-06-03T16:19:08.000Z |
| last_share_date | Date of last share | 2024-06-03T16:19:08.000Z |
| last_referral_date | Date of last successful referral | 2024-06-03T16:19:08.000Z |
| ecr_12m_predicted | [Predicted ECR segment](/knowledge/reporting/advocacy/ecr) in 12 months. Values: High, Medium, Low, Lapsed | High |
| referrer_engaged | Set if the referrer engaged with a referral offer and accepted T\&Cs | Yes |
## Events
Mention Me automatically sends custom events to mParticle as they are triggered, and the events are automatically created when sent. Events are associated with a customer profile based on their email address.

An mParticle customer profile showing Mention Me custom events.
### Summary of Events Sent to mParticle
| **Mention Me event name** | **When it triggers** |
| - | - |
| Registered as a Referee | When a customer has registered as a referee |
| Registered as a Referrer | When a customer has registered as a referrer |
| Received a Referee Reward | When a customer obtained a reward as a referrer's friend |
| Received a Referrer Reward | When a customer obtained a reward for referring a friend |
| Submitted an NPS Score\*\* | When a customer has supplied an NPS score at post-purchase |
| Received a discount on next order\*\* | When a customer has received a discount to use on their next order |
| Propensity to Refer\*\* | Each time a customer has their propensity to refer calculated |
\*\* If you have the Mention Me add-on enabled
### Registered as a Referrer
| Event Attribute | Description | Example |
| - | - | - |
| firstname | First name | Ryder |
| surname | Surname | Collins |
| customer_segment | Segment from Mention Me tags | VIP |
| source | System source | mention_me |
| share_link | Referrer's share link | [https://demo.mention-me.com/m/ol/xz3uz-joel-mcfly](https://demo.mention-me.com/m/ol/xz3uz-joel-mcfly) |
| dashboard_link | Referrer's tracking dashboard | [https://demo.mention-me.com/d/2674816/9c34b0c2](https://demo.mention-me.com/d/2674816/9c34b0c2) |
| campaign_name | Internal campaign name | UK Campaign |
| locale_code | Locale code | en_GB |
| experiment_name | Internal experiment name | AB Test - Current Vs New Imagery - July 2023 |
| offer_name | Internal offer name | Variation A |
| offer_type | Type of offer | referral |
| offer_subject_copy | Customer-friendly offer description | Treat a friend to 20% off and get 20% off for yourself |
| offer_call_to_action_copy | Customer-friendly CTA | Give 20% off |
| referrer_reward | Reward for the referrer | 20% |
| referee_reward | Reward for the referee | £15 |
### Registered as a Referee
| Event Attribute | Description | Example |
| - | - | - |
| firstname | First name (if supplied) | Joe |
| surname | Surname (if supplied) | Johnson |
| source | System source | mention_me |
| share_source | Share method used | FORWARDED-EMAILED-LINK |
| campaign_name | Internal campaign name | UK Campaign |
| locale_code | Locale Code | en_GB |
| experiment_name | Internal experiment name | AB Test - Current Vs New Imagery - July 2023 |
| offer_name | Internal offer name | Variation A |
| offer_type | Type of offer | referral |
| offer_subject_copy | Customer-friendly offer description | Treat a friend to 20% off and get 20% off for yourself |
| offer_call_to_action_copy | Customer-friendly CTA | Give 20% off |
| fulfilled_by | Reward issuance method | coupon |
| reward_amount | Reward amount | 20 |
| reward_type | Type of reward | percent |
| referrer_reward | Reward for the referrer | 20% |
| referee_reward | Reward for the referee | £15 |
### Received a Referee Reward
| Event Attribute | Description | Example |
| - | - | - |
| firstname | First name | Joe |
| surname | Surname | Johnson |
| source | System source | mention_me |
| referrer_first_name | First name of the referrer | Ryder |
| referrer_last_name | Surname of the referrer | Collins |
| campaign_name | Internal campaign name | UK Campaign |
| locale_code | Locale Code | en_GB |
| currency_symbol | Currency symbol | £ |
| experiment_name | Internal experiment name | AB Test - Current Vs New Imagery - July 2023 |
| offer_name | Internal offer name | Variation A |
| offer_type | Type of offer | referral |
| offer_subject_copy | Customer-facing offer summary | Treat a friend to 20% off and get 20% off for yourself |
| offer_call_to_action_copy | Customer-friendly CTA | Give 20% off |
| fulfilled_by | Reward issuance method | coupon |
| reward_amount | Reward amount | 20 |
| reward_type | Type of reward | percent |
| referrer_reward | Reward for the referrer | 20% |
| referee_reward | Reward for the referee | £15 |
| coupon_code | Coupon code issued | 10USDOFF-RXAAURVZ |
| coupon_expiry | Coupon expiry date | 2024-09-03T16:19:19.000Z |
| call_to_action_url | URL to redeem the reward | [www.mention-me.com](http://www.mention-me.com) |
### Received a Referrer Reward
Same structure as referee reward, but with referee_first_name and referee_last_name instead of referrer names.
### Submitted an NPS Score
| Event Attribute | Description | Example |
| - | - | - |
| firstname | First name | Joe |
| surname | Surname | Johnson |
| source | System source | mention_me |
| campaign_name | Internal campaign name | UK Campaign |
| locale_code | Locale Code | en_GB |
| experiment_name | Internal experiment name | AB Test - Current Vs New Imagery - July 2023 |
| offer_name | Internal offer name | Collect NPS Feedback |
| offer_type | Type of offer | nps-only |
| offer_subject_copy | Customer-facing offer description | Treat a friend to 20% off and get 20% off for yourself |
| offer_call_to_action_copy | Customer-facing CTA | Give 20% off |
| customer_segment | Segment from Mention Me tags | VIP |
| nps_score | NPS score submitted | 8 |
### Received a Discount on Next Order
| Event Attribute | Description | Example |
| - | - | - |
| firstname | First name | Joe |
| surname | Surname | Johnson |
| source | System source | mention_me |
| campaign_name | Internal campaign name | UK Campaign |
| locale_code | Locale Code | en_GB |
| currency_symbol | Currency symbol | £ |
| experiment_name | Internal experiment name | AB Test - Current Vs New Imagery - July 2023 |
| offer_name | Internal offer name | Variation A |
| offer_type | Type of offer | referral |
| offer_subject_copy | Customer-facing offer description | Treat a friend to 20% off and get 20% off for yourself |
| offer_call_to_action_copy | Customer-facing CTA | Give 20% off |
| fulfilled_by | Reward issuance method | coupon |
| reward_amount | Reward value | 20 |
| reward_type | Type of reward | percent |
| discount_reward | Combined reward description | 20% |
| coupon_code | Coupon code | 10USDOFF-RXAAURVZ |
| coupon_expiry | Coupon expiry date | 2024-09-03T16:19:19.000Z |
| call_to_action_url | URL to redeem the reward | [www.mention-me.com](http://www.mention-me.com) |
### Propensity to Refer
Only sent if running a Mention Me **Smart Experiment**.
| Event Attribute | Description | Example |
| - | - | - |
| firstname | First name | Joe |
| surname | Surname | Johnson |
| source | System source | mention_me |
| campaign_name | Internal campaign name | UK Campaign |
| experiment_name | Internal experiment name | AB Test - Current Vs New Imagery - July 2023 |
| offer_name | Internal offer name | Variation A |
| offer_type | Type of offer | referral |
| offer_subject_copy | Customer-facing offer description | Treat a friend to 20% off and get 20% off for yourself |
| offer_call_to_action_copy | Customer-facing CTA | Give 20% off |
| propensity_segment | Propensity segment. Values: High or Low | High |
# How to Set Up mParticle with Mention Me
Source: https://docs.mention-me.com/knowledge/esp-crm/mparticle/setup
Connect your mParticle account to Mention Me to sync referral and advocacy data into your CDP.
## About the Integration
Put advocacy data at the heart of your core CDP so you can drive more value from your base by nurturing and retaining your biggest fans.
## Integration Capabilities
* Grow your marketing database by sending opt-ins and contacts in real-time to mParticle
* Activate Mention Me data across downstream systems and marketing tools integrated with mParticle (email platforms, ad networks, CRM systems)
* Enhance other marketing channels by using referral data to segment and target high-value customers
## Prerequisites
* **mParticle** - Ability to [create Access Credentials](https://docs.mparticle.com/guides/getting-started/create-an-input/#create-access-credentials). Know the name of your [GDPR Consent Purposes](https://docs.mparticle.com/guides/data-privacy-controls/#common-uses-of-data-privacy-controls) used for email opt-ins.
* **Mention Me** - Access to the [Mention Me platform](https://mention-me.com/login). Contact your CSM or [submit a support request](https://help.mention-me.com/hc/en-gb/requests/new) if needed.
## Step 1: Add Mention Me Feed Input to mParticle
**1. Log in to mParticle**
[Log in](https://app.mparticle.com/login?) to mParticle with access to add **Inputs**.
**2. Select the main workspace**
If you have more than one workspace, select the main workspace that stores your customer data.
**3. Navigate to Add Feed Input**
Go to **Setup > Inputs > Add Feed Input**.

The mParticle Setup menu navigating to Inputs and Add Feed Input.
**4. Select Mention Me feed**
Select **Mention Me** from the drop-down. If Mention Me is not available, select **Custom Event**.

The mParticle feed input drop-down with Mention Me selected.
**5. Configure and save the feed**
Fill in the following details and press **Save**:
* Configuration Name
* Set Feed to **Active**
* Set Permissions to **Create & Update Profiles**

The mParticle feed configuration with name, active status, and permissions.
**6. Copy server-to-server credentials**
Copy the following values before pressing **Close**:
* Server-to-Server Key
* Server-to-Server Secret

The mParticle server-to-server key and secret credentials.
## Step 2: Set Up the Integration in Mention Me
**1. Open the integration page**
Log in to the [Mention Me platform](https://mention-me.com/merchant/~/integrations/mparticle) and click **Connect**.

The Mention Me mParticle integration page with the Connect button.
**2. Accept terms and conditions**
Agree to the Terms and Conditions to allow Mention Me to transfer data to mParticle (if prompted).

The Mention Me terms and conditions acceptance screen for the mParticle integration.
**3. Click New Authentication**
Click **New Authentication**.

The Mention Me New Authentication button for mParticle.
**4. Name your authentication**
Name your authentication. For multi-account setups, use descriptive names; otherwise, use the default.
**5. Enter API credentials**
Enter the following from Step 1 and click **Save**:
* API Key
* API Secret

The Mention Me authentication form with API key and secret fields.
**6. Set GDPR consent purpose**
Enter the name of the GDPR consent purpose category to assign opt-ins from Mention Me. [Learn more about consent purposes](https://docs.mparticle.com/guides/data-privacy-controls/#common-uses-of-data-privacy-controls).

The GDPR consent purpose category field in Mention Me.
> [!NOTE]
>
> Mention Me captures opt-ins during the referee journey or at post-purchase for a specific newsletter sign-up offer.
**7. Select countries to sync**
Select the country or countries to sync to your mParticle account.

The country selection screen for mParticle data sync in Mention Me.
> [!NOTE]
>
> If you operate in multiple countries, you can choose to sync opt-in data from specific Mention Me enabled countries.
**8. Complete the setup**
Click **Connect** to finalise setup. You will see a confirmation message once complete.

The Mention Me mParticle integration setup confirmation message.
From this point, Mention Me events and contacts will begin syncing to your mParticle account. You can start using Mention Me data in mParticle to sync with other downstream tools.
For further help, contact your Mention Me Client Success Manager or [submit a support request](https://help.mention-me.com/hc/en-gb/requests/new).
# Ometria Data Reference
Source: https://docs.mention-me.com/knowledge/esp-crm/ometria/data-reference
Reference for all Mention Me data sent to Ometria, including contact profile attributes, custom events, and ECR data import.
## Overview
The Mention Me integration with Ometria enables you to receive referral and advocacy-related events into your Ometria platform in real time.
### What the Integration Enables
* Send contact data and opt-ins from Mention Me referred customers to Ometria in real-time
* Use referral data to create coupon email reminders
* Enhance the performance of other marketing channels by using referral and advocacy data to segment and target high-value customers
As part of setup, Ometria creates the customer attributes and custom events needed. No manual configuration is required before requesting the integration.
Events and custom attributes are based on the customer's email address. Mention Me sends event and contact profile attributes for any prospect or existing customer (regardless of opt-in status) who triggers an event via Mention Me.
When contact data is sent to Ometria:
* If a customer **already exists** in Ometria:
* Append their customer profile with Mention Me specific attributes
* Add Mention Me associated events to their profile
* If a customer **does not exist** in Ometria:
* Create the contact profile with their email address
* Append their customer profile with Mention Me specific attributes
* Add Mention Me associated events to their profile
* Set the email subscription status (only if explicitly captured via specific Mention Me journeys)
## Contact Data
### How Contacts Are Created
* Mention Me first checks if the customer already exists (using email as the identifier)
* If the customer **does not** exist, a **new** contact will be created
* If the customer **does** exist, the **existing** contact will be updated with only Mention Me specific fields
### Customer Consent
If a customer consents to your newsletter via the Mention Me referee journey or via a newsletter post-purchase overlay, the opt-in request will automatically be sent to Ometria.

An Ometria customer profile showing newsletter opt-in consent from Mention Me.
During installation setup, your Mention Me CSM/Support Team will ask which Segment you'd like Mention Me-sourced opt-ins added to. New opt-ins will automatically be added to the segment.
A dedicated event called **Opted in to Marketing Consent (Mention Me)** is sent to Ometria. The consent source values are:
* **mention_me_referee** = From the referee journey
* **mention_me_newsletter** = From a post-purchase journey
A customer can also consent via other channels outside of Mention Me.
### Customer Profile Attributes
| Ometria Field ID | Ometria Field Name | Description | Example |
| - | - | - | - |
| mm:share_link | Share link (Mention Me) | Referrer's share link to invite friends | [https://demo.mention-me.com/m/ol/mr4lk-alicia-winder](https://demo.mention-me.com/m/ol/mr4lk-alicia-winder) |
| mm:dashboard_link | Dashboard link (Mention Me) | Referrer's dashboard for tracking referrals | [https://demo.mention-me.com/d/2252151/58fde3c14a72](https://demo.mention-me.com/d/2252151/58fde3c14a72)... |
| mm:referred_by_firstname | Referred by name (Mention Me) | First name of the person who referred the referee | John |
| mm:referrals | Total referrals (Mention Me) | Total successful referrals (first-time purchases by referee) | 10 |
| mm:total_shares | Total shares (Mention Me) | Total shares since registering as a referrer | 15 |
| mm:share_email | Shares email (Mention Me) | Shares made via email | 3 |
| mm:share_facebook | Shares facebook (Mention Me) | Shares via Facebook | 4 |
| mm:share_fbmessenger | Shares facebook messenger (Mention Me) | Shares via Facebook Messenger | 5 |
| mm:share_name | Shares name sharing (Mention Me) | Shares from Name Sharing | 2 |
| mm:share_whatsapp | Shares whatsapp (Mention Me) | Shares via WhatsApp | 1 |
| mm:share_native | Shares native (Mention Me) | Shares from Native Sharing | 2 |
| mm:last_share_date | Last share date (Mention Me) | Last time the referrer shared | 2024-09-12T14:55:58.000Z |
| mm:first_share_date | First share date (Mention Me) | Date of first share | 2024-09-12T14:55:58.000Z |
| mm:last_referral_date | Last referral date (Mention Me) | Last successful referral date | 2024-09-12T14:55:58.000Z |
| mm:first_referral_date | First referral date (Mention Me) | Date of first successful referral | 2024-09-12T14:55:58.000Z |
| mm:referrer_engaged | Referrer engaged (Mention Me) | True if referrer engaged with offer and accepted terms | True |
| mm:propensity_to_refer | Propensity to refer (Mention Me) | Propensity value: High or Low | High |
| mm:nps_score | NPS score (Mention Me) | NPS Score submitted | 8 |
| mm:ecr_status | ECR status (Mention Me) | ECR segment: High, Medium, Low | High |
| mm:ecr_activity | ECR activity (Mention Me) | ECR activity: Active, Dormant, Lapsed | Active |
| mm:12m_predicted | ECR predicted (Mention Me) | Predicted ECR in 12 months: High, Medium, Low, Lapsed | Lapsed |
| mm:network_id | Network ID (Mention Me) | Mention Me Network identifier | N-4339-5558776 |
## Events
The Mention Me integration uses Ometria custom events functionality for trigger-based scenarios to generate email campaigns or segmentations. Ometria creates the Custom Events during setup.
Events are associated with a customer profile based on their email address.
Custom events can be used to add contacts to an Automation, trigger email campaigns, or create dynamic segments.
The Mention Me data can be inserted into email campaigns using [Ometria Merge Tags](https://support.ometria.com/hc/en-gb/articles/360011269837-Merge-tags-in-Ometria).
### Summary of Events Sent to Ometria
| Ometria event name | Ometria event ID | When it triggers |
| - | - | - |
| Registered as a referee (Mention Me) | mm:registration_referee | When a customer has registered as a referee |
| Registered as a referrer (Mention Me) | mm:registration_referrer | When a customer has registered as a referrer |
| Obtained a reward as a referee (Mention Me) | mm:fulfillment_referee | When a customer obtained a reward as a referrer's friend |
| Obtained a reward for referring a friend (Mention Me) | mm:fulfillment_referrer | When a customer obtained a reward for referring a friend |
| Opted in to Marketing Consent (Mention Me) | mm:marketing_consent | When a customer has opted-in to receive marketing |
| Submitted NPS Score (Mention Me)\*\* | mm:nps_score | When a customer has supplied an NPS score at post-purchase |
| Obtained a Reward for next order (Mention Me)\*\* | mm:discount_next_order | When a customer has received a discount to use on their next order |
| Propensity to Refer (Mention Me) | mm:propensity_to_refer | Each time a customer's propensity to refer is calculated |
\*\* If you have the Mention Me add-on enabled
### Registered as a Referrer (Mention Me)
| Field name | Ometria Merge Tag | Description | Example |
| - | - | - | - |
| mm:campaign_id | `{{ event['mm:campaign_id'] }}` | Campaign ID | 33463 |
| mm:campaign_short_name | `{{ event['mm:campaign_short_name'] }}` | Internal campaign name | Referral Landing Page |
| mm:offer_id | `{{ event['mm:offer_id'] }}` | Offer ID | 115912 |
| mm:offer_short_name | `{{ event['mm:offer_short_name'] }}` | Internal offer name | Variation 1 |
| mm:offer_summary | `{{ event['mm:offer_summary'] }}` | Internal offer summary | Referrer gets £10 off. Referee gets 15% off |
| mm:experiment_name | `{{ event['mm:experiment_name'] }}` | Internal experiment name | New Imagery March 2021 |
| mm:locale | `{{ event['mm:locale'] }}` | Website locale | en_GB |
| mm:reward:amount | `{{ event['mm:reward:amount'] }}` | Reward amount | 20 |
| mm:referrer_reward | `{{ event['mm:referrer_reward'] }}` | Reward for the referrer | 20% |
| mm:reward:type | `{{ event['mm:reward:type'] }}` | Type of reward | percent |
| mm:offer_cta_copy | `{{ event['mm:offer_cta_copy'] }}` | Customer-friendly CTA | Get £10 off |
| mm:offer_subject_copy | `{{ event['mm:offer_subject_copy'] }}` | Customer-facing offer description | Treat a friend to 15% off and get £10 off for yourself |
| mm:offer_type | `{{ event['mm:offer_type'] }}` | Type of offer | referral |
| mm:referee_reward | `{{ event['mm:referee_reward'] }}` | Reward for the referee | 20% |
| mm:dashboard_link | `{{ event['mm:dashboard_link'] }}` | Referrer's tracking dashboard | [https://demo.mention-me.com/d/2252151/58fde3c1](https://demo.mention-me.com/d/2252151/58fde3c1)... |
| mm:share_link | `{{ event['mm:share_link'] }}` | Referral share link | [https://demo.mention-me.com/m/ol/mr4lk-alicia-winder](https://demo.mention-me.com/m/ol/mr4lk-alicia-winder) |
| mm:segment | `{{ event['mm:segment'] }}` | Segment from Mention Me tags | VIP |
### Registered as a Referee (Mention Me)
| Field name | Ometria Merge Tag | Description | Example |
| - | - | - | - |
| mm:campaign_id | `{{ event['mm:campaign_id'] }}` | Campaign ID | 33463 |
| mm:campaign_short_name | `{{ event['mm:campaign_short_name'] }}` | Internal campaign name | Referral Landing Page |
| mm:experiment_name | `{{ event['mm:experiment_name'] }}` | Internal experiment name | New Imagery March 2021 |
| mm:offer_id | `{{ event['mm:offer_id'] }}` | Offer ID | 115912 |
| mm:locale | `{{ event['mm:locale'] }}` | Website locale | en_GB |
| mm:offer_short_name | `{{ event['mm:offer_short_name'] }}` | Internal offer name | Variation 1 |
| mm:reward:amount | `{{ event['mm:reward:amount'] }}` | Reward amount | 20 |
| mm:referee_reward | `{{ event['mm:referee_reward'] }}` | Reward for the referee | 20% |
| mm:offer_summary | `{{ event['mm:offer_summary'] }}` | Internal offer summary | Referrer gets £10 off. Referee gets 15% off |
| mm:offer_subject_copy | `{{ event['mm:offer_subject_copy'] }}` | Customer-facing description | Treat a friend to 15% off and get £10 off for yourself |
| mm:offer_cta_copy | `{{ event['mm:offer_cta_copy'] }}` | Customer-friendly CTA | Get £10 off |
| mm:offer_type | `{{ event['mm:offer_type'] }}` | Type of offer | referral |
| mm:fufilled_by | `{{ event['mm:fufilled_by'] }}` | Reward issuance mechanism | coupon |
| mm:reward:type | `{{ event['mm:reward:type'] }}` | Type of reward | percent |
| mm:referrer_reward | `{{ event['mm:referrer_reward'] }}` | Reward for the referrer | 20% |
| mm:share_source | `{{ event['mm:share_source'] }}` | Share method used | WHATSAPP |
### Obtained a Reward as a Referee (Mention Me)
| Field name | Ometria Merge Tag | Description | Example |
| - | - | - | - |
| mm:call_to_action_url | `{{ event['mm:call_to_action_url'] }}` | URL to redeem reward | [http://www.mention-me.com](http://www.mention-me.com) |
| mm:reward:amount | `{{ event['mm:reward:amount'] }}` | Reward amount | 20 |
| mm:reward:type | `{{ event['mm:reward:type'] }}` | Type of reward | Percent |
| mm:coupon | `{{ event['mm:coupon'] }}` | Coupon code | DEMO-58983 |
| mm:coupon_link | `{{ event['mm:coupon_link'] }}` | Link to retrieve coupon | [http://spend.reward.com/85544-456544-65455-555](http://spend.reward.com/85544-456544-65455-555) |
| mm:coupon_expiry | `{{ event['mm:coupon_expiry'] }}` | Coupon expiry date | 2020-07-30T18:26:07+01:00 |
| mm:campaign_short_name | `{{ event['mm:campaign_short_name'] }}` | Internal campaign name | Referral Landing Page |
| mm:offer_id | `{{ event['mm:offer_id'] }}` | Offer ID | 115912 |
| mm:offer_summary | `{{ event['mm:offer_summary'] }}` | Internal offer summary | Referrer gets £10 off. Referee gets 15% off |
| mm:campaign_id | `{{ event['mm:campaign_id'] }}` | Campaign ID | 33463 |
| mm:referred_by_firstname | `{{ event['mm:referred_by_firstname'] }}` | Referrer's first name | Jonathan |
| mm:referred_by_customer_id | `{{ event['mm:referred_by_customer_id'] }}` | Referrer's customer ID | CI5990618295 |
| mm:offer_short_name | `{{ event['mm:offer_short_name'] }}` | Internal offer name | Variation 1 |
| mm:experiment_name | `{{ event['mm:experiment_name'] }}` | Internal experiment name | New Imagery March 2021 |
| mm:locale | `{{ event['mm:locale'] }}` | Locale | en_GB |
| mm:referee_reward | `{{ event['mm:referee_reward'] }}` | Aggregated referee reward | 20% |
| mm:referred_by_lastname | `{{ event['mm:referred_by_lastname'] }}` | Referrer's last name | Smith |
| mm:offer_subject_copy | `{{ event['mm:offer_subject_copy'] }}` | Customer-facing offer description | Treat a friend to 15% off and get £10 off for yourself |
| mm:offer_cta_copy | `{{ event['mm:offer_cta_copy'] }}` | Customer-facing CTA | Get £10 off |
| mm:offer_type | `{{ event['mm:offer_type'] }}` | Type of offer | referral |
| mm:fufilled_by | `{{ event['mm:fufilled_by'] }}` | Fulfilment method | coupon |
| mm:referrer_reward | `{{ event['mm:referrer_reward'] }}` | Reward for the referrer | 20% |
| mm:currency | `{{ event['mm:currency'] }}` | Currency symbol | £ |
### Obtained a Reward for Referring a Friend (Mention Me)
| Field name | Ometria Merge Tag | Description | Example |
| - | - | - | - |
| mm:call_to_action_url | `{{ event['mm:call_to_action_url'] }}` | URL to redeem reward | [http://www.mention-me.com](http://www.mention-me.com) |
| mm:reward:amount | `{{ event['mm:reward:amount'] }}` | Reward amount | 20 |
| mm:reward:type | `{{ event['mm:reward:type'] }}` | Type of reward | Percent |
| mm:coupon | `{{ event['mm:coupon'] }}` | Coupon code | DEMO-58983 |
| mm:coupon_link | `{{ event['mm:coupon_link'] }}` | Link to retrieve coupon | [http://spend.reward.com/85544-456544-65455-555](http://spend.reward.com/85544-456544-65455-555) |
| mm:coupon_expiry | `{{ event['mm:coupon_expiry'] }}` | Coupon expiry date | 2020-07-30T18:26:07+01:00 |
| mm:campaign_short_name | `{{ event['mm:campaign_short_name'] }}` | Internal campaign name | Referral Landing Page |
| mm:offer_id | `{{ event['mm:offer_id'] }}` | Offer ID | 115912 |
| mm:offer_summary | `{{ event['mm:offer_summary'] }}` | Internal offer summary | Referrer gets £10 off. Referee gets 15% off |
| mm:campaign_id | `{{ event['mm:campaign_id'] }}` | Campaign ID | 33463 |
| mm:offer_short_name | `{{ event['mm:offer_short_name'] }}` | Internal offer name | Variation 1 |
| mm:experiment_name | `{{ event['mm:experiment_name'] }}` | Internal experiment name | New Imagery March 2021 |
| mm:locale | `{{ event['mm:locale'] }}` | Locale | en_GB |
| mm:referrer_reward | `{{ event['mm:referrer_reward'] }}` | Total referrer reward | 20% |
| mm:offer_subject_copy | `{{ event['mm:offer_subject_copy'] }}` | Customer-facing offer description | Treat a friend to 15% off and get £10 off for yourself |
| mm:offer_cta_copy | `{{ event['mm:offer_cta_copy'] }}` | Customer-facing CTA | Get £10 off |
| mm:offer_type | `{{ event['mm:offer_type'] }}` | Type of offer | referral |
| mm:fufilled_by | `{{ event['mm:fufilled_by'] }}` | Fulfilment method | coupon |
| mm:referee_reward | `{{ event['mm:referee_reward'] }}` | Reward for the referee | 20% |
| mm:currency | `{{ event['mm:currency'] }}` | Currency symbol | £ |
| mm:referee_first_name | `{{ event['mm:referee_first_name'] }}` | Referee's first name | Jonathan |
| mm:referee_last_name | `{{ event['mm:referee_last_name'] }}` | Referee's last name | Jones |
### Submitted NPS Score (Mention Me)
| Field name | Ometria Merge Tag | Description | Example |
| - | - | - | - |
| mm:campaign_short_name | `{{ event['mm:campaign_short_name'] }}` | Internal campaign name | Referral Landing Page |
| mm:campaign_id | `{{ event['mm:campaign_id'] }}` | Campaign ID | 33463 |
| mm:experiment_name | `{{ event['mm:experiment_name'] }}` | Internal experiment name | New Imagery March 2021 |
| mm:locale | `{{ event['mm:locale'] }}` | Website locale | en_GB |
| mm:nps_score | `{{ event['mm:nps_score'] }}` | NPS score submitted | 8 |
| mm:offer_id | `{{ event['mm:offer_id'] }}` | Offer ID | 115912 |
| mm:offer_short_name | `{{ event['mm:offer_short_name'] }}` | Internal offer name | Variation 1 |
| mm:segment | `{{ event['mm:segment'] }}` | Segment from Mention Me tags | VIP |
| mm:offer_cta_copy | `{{ event['mm:offer_cta_copy'] }}` | Customer-friendly CTA | Get £10 off |
| mm:offer_subject_copy | `{{ event['mm:offer_subject_copy'] }}` | Customer-facing offer description | Treat a friend to 15% off and get £10 off for yourself |
| mm:offer_summary | `{{ event['mm:offer_summary'] }}` | Internal offer summary | Referrer gets £10 off. Referee gets 15% off |
| mm:offer_type | `{{ event['mm:offer_type'] }}` | Type of offer | nps-only |
### Obtained a Reward for the Next Order (Mention Me)
| Field name | Ometria Merge Tag | Description | Example |
| - | - | - | - |
| mm:coupon | `{{ event['mm:coupon'] }}` | Coupon code | DEMO-58983 |
| mm:coupon_expiry | `{{ event['mm:coupon_expiry'] }}` | Coupon expiry date | 2020-07-30T18:26:07+01:00 |
| mm:campaign_short_name | `{{ event['mm:campaign_short_name'] }}` | Internal campaign name | Referral Landing Page |
| mm:offer_id | `{{ event['mm:offer_id'] }}` | Offer ID | 115912 |
| mm:campaign_id | `{{ event['mm:campaign_id'] }}` | Campaign ID | 33463 |
| mm:experiment_name | `{{ event['mm:experiment_name'] }}` | Internal experiment name | New Imagery March 2021 |
| mm:locale | `{{ event['mm:locale'] }}` | Website locale | en_GB |
| mm:offer_short_name | `{{ event['mm:offer_short_name'] }}` | Internal offer name | Variation 1 |
| mm:incentive_reward | `{{ event['mm:incentive_reward'] }}` | Reward for the customer | 20% |
| mm:call_to_action_url | `{{ event['mm:call_to_action_url'] }}` | URL to redeem reward | [http://www.mention-me.com](http://www.mention-me.com) |
| mm:reward:amount | `{{ event['mm:reward:amount'] }}` | Reward amount | 20 |
| mm:reward:type | `{{ event['mm:reward:type'] }}` | Type of reward | percent |
| mm:offer_summary | `{{ event['mm:offer_summary'] }}` | Internal offer summary | Referrer gets £10 off. Referee gets 15% off |
| mm:offer_subject_copy | `{{ event['mm:offer_subject_copy'] }}` | Customer-facing offer description | Treat a friend to 15% off and get £10 off for yourself |
| mm:offer_cta_copy | `{{ event['mm:offer_cta_copy'] }}` | Customer-facing CTA | Get £10 off |
| mm:offer_type | `{{ event['mm:offer_type'] }}` | Type of offer | referral |
| mm:fufilled_by | `{{ event['mm:fufilled_by'] }}` | Fulfilment method | coupon |
| mm:currency | `{{ event['mm:currency'] }}` | Currency symbol | £ |
### Propensity to Refer (Mention Me)
Only sent if running a Mention Me Smart Experiment.
| Field name | Ometria Merge Tag | Description | Example |
| - | - | - | - |
| mm:campaign_id | `{{ event['mm:campaign_id'] }}` | Campaign ID | 33463 |
| mm:locale | `{{ event['mm:locale'] }}` | Website locale | en_GB |
| mm:offer_short_name | `{{ event['mm:offer_short_name'] }}` | Internal offer name | Variation 1 |
| mm:propensity_to_refer | `{{ event['mm:propensity_to_refer'] }}` | Propensity segment. Values: High or Low | High |
| mm:campaign_short_name | `{{ event['mm:campaign_short_name'] }}` | Internal campaign name | Referral Landing Page |
| mm:experiment_name | `{{ event['mm:experiment_name'] }}` | Internal experiment name | New Imagery March 2021 |
| mm:offer_cta_copy | `{{ event['mm:offer_cta_copy'] }}` | Customer-friendly CTA | Get £10 off |
| mm:offer_id | `{{ event['mm:offer_id'] }}` | Offer ID | 115912 |
| mm:offer_subject_copy | `{{ event['mm:offer_subject_copy'] }}` | Customer-facing offer description | Treat a friend to 15% off and get £10 off for yourself |
| mm:offer_summary | `{{ event['mm:offer_summary'] }}` | Internal offer summary | Referrer gets £10 off. Referee gets 15% off |
### Opted in to Marketing Consent (Mention Me)
| Field name | Ometria Merge Tag | Description | Example |
| - | - | - | - |
| mm:campaign_id | `{{ event['mm:campaign_id'] }}` | Campaign ID | 33463 |
| mm:locale | `{{ event['mm:locale'] }}` | Website locale | en_GB |
| mm:offer_id | `{{ event['mm:offer_id'] }}` | Offer ID | 115912 |
| mm:consent_source | `{{ event['mm:consent_source'] }}` | Source: newsletter-signup or referee-registration | newsletter-signup |
| mm:campaign_short_name | `{{ event['mm:campaign_short_name'] }}` | Internal campaign name | Referral Landing Page |
| mm:experiment_name | `{{ event['mm:experiment_name'] }}` | Internal experiment name | New Imagery March 2021 |
| mm:offer_cta_copy | `{{ event['mm:offer_cta_copy'] }}` | Customer-facing CTA | Get £10 off |
| mm:offer_short_name | `{{ event['mm:offer_short_name'] }}` | Internal offer name | Variation 1 |
| mm:offer_subject_copy | `{{ event['mm:offer_subject_copy'] }}` | Customer-facing offer description | Treat a friend to 15% off and get £10 off for yourself |
| mm:offer_summary | `{{ event['mm:offer_summary'] }}` | Internal offer summary | Referrer gets £10 off. Referee gets 15% off |
## ECR Data Import
Mention Me can automatically send your customers' [Extended Customer Revenue (ECR)](/knowledge/reporting/advocacy/ecr) data to your Ometria account. ECR is only calculated for customers who have made a successful referral.
This data is scheduled to be sent on a **weekly** basis and will only send ECR data for customers whose ECR has **changed** from the previous week.
The following steps explain how to import all your customers' ECR data into Ometria as a one-off **before** Mention Me begins weekly updates.
### Step 1: Download ECR Data from Mention Me
**1. Navigate to Customer Revenue**
Log in to the [Mention Me Platform](https://mention-me.com/login?) and navigate to the **Customer Revenue** page in the **Advocacy Intelligence** section.

The Mention Me platform navigation to the Customer Revenue page.
**2. Download customer segments**
Click the **Download customer segments** button. If it isn't visible, contact your CSM.

The Mention Me Download customer segments button.
**3. Generate the segment file**
Select all segments and click **Generate**.

The Mention Me ECR segment selection screen with the Generate button.
The CSV file will take around 15 minutes to generate. You will receive an email when it's ready.
**4. Download the file**
Click the link in the email to download the file (login may be required), or download it from [Settings > Secure file transfer](https://mention-me.com/merchant/~/files).
### Step 2: Create a CSV File for Ometria
**1. Open the downloaded file**
Open the file downloaded from Mention Me.
**2. Remove the header rows**
Remove the first 3 rows so only the column headers remain.
**3. Remove unused columns**
Remove the following columns: Individual Revenue, Revenue Referred, Friends ECR Value, Report Currency Code, First Name, Surname.
**4. Rename the remaining columns**
Rename the columns:
* Email address -> email
* Activity Status -> properties.mm:ecr_activity
* Ecr Segment -> properties.mm:ecr_status
> [!NOTE]
>
> Column names are case sensitive. Incorrect names may cause duplicates.
**5. Reorder the email column**
Move the **email** column to be the first column.

A formatted CSV file with email, ECR activity, and ECR status columns for Ometria.
**6. Save the file**
Save your CSV file.
### Step 3: Upload Your CSV to Ometria
For more information, [read this guide](https://support.ometria.com/hc/en-gb/articles/360011284598-CSV-Upload).
**1. Open Contact Upload**
In the Ometria platform, navigate to **Account Name > Contact Upload**.
**2. Select your CSV file**
Click **Select CSV File** and locate your saved file.
**3. Skip adding to a segment**
Select **No** to adding contacts to a Segment.
**4. Keep Merge Mode ticked**
Leave **Merge Mode** ticked. This only updates ECR fields and preserves other data.
**5. Preserve the subscription status**
Select **Unchanged** for Email and Subscription mode to preserve the customer's opt-in status.

Ometria CSV upload settings with Merge Mode and Unchanged subscription.
**6. Confirm data privacy checkboxes**
Confirm both Data Privacy checkboxes.
**7. Upload the file**
Press **Upload**. It may take up to 24 hours to complete, and Ometria will notify you by email.
**8. Complete the import**
Your import is now complete.
All customers who have made a successful referral will now have an ECR segment and activity reflected in their Ometria profile.
# How to Promote Referral from Ometria
Source: https://docs.mention-me.com/knowledge/esp-crm/ometria/promote-referral
Send customers to a personalised referral landing page from your Ometria emails and configure your Mention Me campaign to recognise them.
When sending emails via Ometria, you may want to promote your referral programme. You can direct customers to your landing page, but if the link isn't personalised, the customer will need to enter their name and email address before they can take part.
As Ometria already holds this information, you can use a special Ometria and Mention Me link to give your customers a personalised experience instead.
To set this up, you need to:
1. Include the link in your Ometria email template.
2. Make sure your Mention Me campaign triggering rules will show the right offer.
## Prerequisites
* A working referral landing page on your website with the Mention Me referral tag implemented
## The Link
Include the following link in your Ometria email:
```text theme={null}
https://api.ometria.com/connect/mentionme/{{ email.account_hash }}/redirect?profile={{ profile.hash }}
```
Ometria automatically updates this link for each customer, so no further configuration is needed in the email itself.
## The Campaign Triggering Rules
When a customer clicks the link, they're sent to a Mention Me landing page with their name and email address already filled in.
The link also passes through the following values from Ometria:
* Ometria Country Code
* Ometria Store ID
* Ometria Lifecycle
* Ometria Segments
You can use these values in the [Triggering Rules](/knowledge/referral/campaigns/triggering-rules) section of the Mention Me platform to automatically show the right campaign to each customer.
For example, the campaign below is shown to a customer when *either* the Locale is `en_GB` *or* the Ometria Country Code is `GB`.

Triggering rules showing a campaign served when Locale is en_GB or Ometria Country Code is GB.
With this combination of rules, the campaign is shown to customers with an `en_GB` locale outside of Ometria, for example on your landing page or post-purchase pages. When a customer arrives from Ometria, the campaign is shown as long as their country code is GB, regardless of locale.
# How to Set Up Ometria with Mention Me
Source: https://docs.mention-me.com/knowledge/esp-crm/ometria/setup
Connect your Ometria account to Mention Me to sync referral data and opt-ins.
## About the Integration
Activate your biggest fans by feeding first-party advocacy data directly into Ometria to deliver higher engagement, retention, and revenue across your customer base.
## Integration Capabilities
* Send contact data and opt-ins from Mention Me referred customers to Ometria in real-time
* Use referral data to create coupon email reminders
* Enhance other marketing channels using referral and advocacy data to segment and target high-value customers
## Prerequisites
* **Ometria** - Ability to [create private API Keys](https://support.ometria.com/hc/en-gb/articles/9882706389917-Creating-a-new-API-key).
* **Mention Me** - Access to the [Mention Me platform](https://mention-me.com/login). Contact your Mention Me CSM or [submit a support request](https://help.mention-me.com/hc/en-gb/requests/new) if needed.
## Step 1: Sign the Contract Amendment
This step is only required in some cases. Mention Me will let you know if it applies.
## Step 2: Create an API Key for Mention Me
**1. Log into Ometria as Admin**
Log in to [Ometria](https://app.ometria.com/login) as an Admin.
**2. Navigate to API Keys**
Go to **Settings > API Keys**.
Navigating to API Keys settings in Ometria.
**3. Create an API key for Mention Me**
Create an API Key for Mention Me. Name the API Key **Mention Me** for clarity.
**4. Click Create to generate the key**
Click **Create**. Your new API key will appear in the list.

An Ometria API key created for Mention Me.
**5. Save the key for upload**
Save the key into a text file or PDF to upload it securely to Mention Me.
## Step 3: Create a Segment for Capturing Mention Me Opt-Ins
You can capture customer opt-in consent during the Mention Me journey, and this data is sent directly to Ometria. These opt-ins can be added to a Segment in Ometria to help identify the source.
* Create a new Segment, or reuse an existing one
* Use a dedicated Mention Me Segment to help track opt-in performance

Creating a segment in Ometria for Mention Me opt-ins.
Save the segment name or ID in the text file or PDF alongside your API key.
## Step 4: Send the API Key and Segment Name Securely to Mention Me
**1. Log into Mention Me**
Log in to the [Mention Me platform](https://mention-me.com/merchant/~/files).
**2. Upload the secure file**
Click **Upload secure file** and upload your file containing the API Key and Segment name.

The Mention Me secure file upload page.
**3. Notify your CSM**
Email your Mention Me Client Success Manager or let the support team know the file has been uploaded.
Mention Me will confirm when your setup is complete. Data will start syncing with your Ometria account right away.
# Overview
Source: https://docs.mention-me.com/knowledge/esp-crm/overview
Connect Mention Me with your email, SMS, and marketing automation platforms to activate first-party advocacy data.
> [!NOTE]
>
> Using **Mention Me**? Open these integrations from **Settings >
> Integrations**. Setup still finishes in Classic. See
> [Integrations](/knowledge-app/integrations/overview).
Mention Me integrates with leading ESP and CRM platforms, enabling you to feed first-party referral and advocacy data directly into your marketing stack. Use this data to power segmentation, trigger automated journeys, and drive higher engagement across your customer base.
## What You'll Find Here
> [card] [Klaviyo](/knowledge/esp-crm/klaviyo/setup)
>
> Set up the Klaviyo integration, sync referral data, trigger coupon reminders, and promote your referral programme via email and SMS.
> [card] [Braze](/knowledge/esp-crm/braze/setup)
>
> Connect Braze to Mention Me, reference referral data fields, and build
> automated coupon and share-again flows.
> [card] [Bloomreach](/knowledge/esp-crm/bloomreach/setup)
>
> Integrate Bloomreach with Mention Me for data sync, coupon reminders, and
> referral promotion campaigns.
> [card] [Emarsys](/knowledge/esp-crm/emarsys/setup)
>
> Set up the Emarsys integration and use referral data fields to power
> personalised marketing.
> [card] [Salesforce Marketing Cloud](/knowledge/esp-crm/sfmc/setup)
>
> Connect SFMC to Mention Me and build coupon reminder and share-again journeys
> using referral data.
> [card] [Dotdigital](/knowledge/esp-crm/dotdigital/setup)
>
> Integrate Dotdigital with Mention Me for data sync, automated coupon flows,
> and referral promotion.
> [card] [mParticle](/knowledge/esp-crm/mparticle/setup)
>
> Set up the mParticle integration and reference the available Mention Me data
> fields.
> [card] [Ometria](/knowledge/esp-crm/ometria/setup)
>
> Connect Ometria to Mention Me, reference the available referral data fields,
> and promote your referral programme via email.
> [card] [Attentive](/knowledge/esp-crm/attentive/setup)
>
> Set up the Attentive SMS integration, sync referral data, and build coupon reminder flows.
# How to Set Up Coupon Reminder Journeys in SFMC
Source: https://docs.mention-me.com/knowledge/esp-crm/sfmc/coupon-reminders
Create Salesforce Marketing Cloud journeys to remind referrers and referees to use their Mention Me coupon codes.
## About These Journeys
These SFMC journeys remind customers to use their Mention Me coupon codes. The referee journey targets prospective customers, while the referrer journey targets existing customers who earned a reward for referring a friend.
The journeys utilise data sent from Mention Me to SFMC through the integration and the Journey Builder functionality of SFMC.
## Prerequisites
1. An active Mention Me referral program
2. A Mention Me / SFMC enabled integration
3. Knowledge of [SFMC AMPscript Variables](https://developer.salesforce.com/docs/marketing/marketing-cloud-ampscript/overview)
## Supported Channels
* Email
## Referee Journey
Remind prospective customers (referees) to use their coupon codes received from being introduced to your brand.
Goals:
* Drive first purchase
* Increase average order value
### Basic Workflow
1. A prospective customer gets a coupon when their friend introduces them (email sent by Mention Me).
2. A reminder email (subject to consent) is sent to use the coupon if they have not purchased yet.
3. Further reminders are sent at different times to encourage coupon usage (if you have purchase events flowing into SFMC).

Referee coupon reminder journey flow
### Step 1: Create the Journey Flow
**1. Add the API Event trigger**
Add an **API Event** as the Trigger type with **Received Referee reward from Mention Me** as the trigger event.

The API Event trigger configured with Received Referee reward.
**2. Set the default email address**
In Journey Settings, set the Default Email address to be from **Entry Source**.

Journey Settings showing the default email address set from Entry Source.
The Entry Source field itself is configured as shown below:

The email address Entry Source setting.
**3. Add wait periods before each email**
Add a wait period before the email. Suggested wait periods:
* 1st email - 2 days after the event trigger
* 2nd email - 6 days after the 1st email is sent
* 3rd email - 4 days after the 2nd email is sent
If you are unsure of your reward validity period, reach out to your Mention Me CSM or [Mention Me support](https://help.mention-me.com/hc/en-gb/requests/new).
**4. Add a conditional split**
Add a conditional split to check that the referee has purchased in the last x days (if you have purchase events flowing into SFMC).
### Step 2: Add Content to Each Email
**1. Match your brand**
Update the images and styling to suit your brand.
**2. Add product recommendations**
Include product recommendations to increase conversion.
**3. Set the personalisation data extension**
Under **Add content**, set the data extension to **Received Referee reward from Mention Me** to allow for message personalisation.

The Add content panel with the referee reward data extension selected.
#### Example Reminders
| Example Reminder 1 | Example Reminder 2 | Example Reminder 3 |
| - | - | - |
| **Subject:** Claim your %%Referee Reward%% discount! | **Subject:** Don't forget, you have a %%Referee Reward%% discount! | **Subject:** Last chance, your %%Referee Reward%% discount expires soon! |

Example Reminder 1 for the referee coupon reminder journey.
The second reminder follows the same format with updated copy:

Example Reminder 2 for the referee coupon reminder journey.
The third and final reminder is shown below:

Example Reminder 3 for the referee coupon reminder journey.
#### SFMC Variables
| SFMC variable | Description | Example |
| - | - | - |
| `%%Referrer First Name%%` | The first name of the friend who referred the referee | Ryder |
| `%%Referrer Last Name%%` | The surname of the friend who referred the referee | Collins |
| `%%Referee Reward%%` | Combined reward shaping variable showing discount or benefit | £15 or 30% |
| `%%Coupon Code%%` | The generated coupon given to the referee | 10USDOFF-RXAAURVZ |
| `%%[Output(Format([Coupon Expiry],"d MMMM, yyyy"))]%%` | The expiry date of the coupon. See [SFMC Date Formatting](https://developer.salesforce.com/docs/marketing/marketing-cloud/guide/dateTimeFormatting.html) | 19 July 2023 |
| `%%Call to Action URL%%` | Link that directs user to make purchase | [www.mention-me.com](http://www.mention-me.com) |
### Step 3: Test the Preview
**1. Open the preview and test tab**
Test each email in the Preview and Test tab under **Edit Email**.

The Preview and Test tab in the SFMC email editor.
**2. Select a test entry**
Use the **Received Referee reward from Mention Me** Data Extension and filter to a qualified test entry.

Selecting a test entry from the referee reward data extension.
**3. Check the populated fields**
Ensure fields populate correctly from the journey event.
Example Reminder 1:

Referee reminder 1 preview with populated fields.
Example Reminder 2:

Referee reminder 2 preview with populated fields.
Example Reminder 3:

Referee reminder 3 preview with populated fields.
### Step 4: Activate the Journey
**1. Confirm everything is ready**
Confirm all content, logic, and tests pass.
**2. Activate the journey**
Click the **Activate** button.

The Activate journey button in SFMC.
## Referrer Journey
Remind existing customers (referrers) to use their coupon codes received from introducing a friend to your brand.
Goals:
* Increase active customer revenue
* Increase premium customer revenue
* Increase retention
### Basic Workflow
1. An existing customer gets a coupon when they introduce a friend (email sent by Mention Me).
2. A reminder email (subject to consent) is sent to use the coupon if they have not purchased yet.
3. Further reminders are sent at different times to encourage coupon usage.

Referrer coupon reminder journey flow
### Step 1: Create the Journey Flow
**1. Add the API Event trigger**
Add an **API Event** as the Trigger type with **Received Referrer reward from Mention Me** as the trigger event.

The API Event trigger configured with Received Referrer reward.
**2. Set the default email address**
In Journey Settings, set the Default Email address to be from **Entry Source**.

Journey Settings showing the default email address set from Entry Source for the referrer journey.
The Entry Source field itself is configured as shown below:

The email address Entry Source setting for the referrer journey.
**3. Add wait periods before each email**
Add a wait period before the email. Suggested wait periods:
* 1st email - 7 days after the event trigger
* 2nd email - 14 days after the 1st email is sent
* 3rd email - 14 days after the 2nd email is sent
If you are unsure of your reward validity period, reach out to your Mention Me CSM or [Mention Me support](https://help.mention-me.com/hc/en-gb/requests/new).
**4. Add a conditional split**
Add a conditional split to check that the referrer has purchased in the last x days (if you have purchase events flowing into SFMC).
### Step 2: Add Content to Each Email
**1. Match your brand**
Update the images and styling to suit your brand.
**2. Add product recommendations**
Include product recommendations to increase conversion.
**3. Set the personalisation data extension**
Under **Add content**, set the data extension to **Received Referrer reward from Mention Me** to allow for message personalisation.

The Add content panel with the referrer reward data extension selected.
#### Example Reminders
| Example Reminder 1 | Example Reminder 2 | Example Reminder 3 |
| - | - | - |
| **Subject:** Claim your %%Referrer Reward%% discount! | **Subject:** Don't forget, you have a %%Referrer Reward%% discount! | **Subject:** Last chance, use your %%Referrer Reward%% discount! |

Example Reminder 1 for the referrer coupon reminder journey.
The second reminder follows the same format with updated copy:

Example Reminder 2 for the referrer coupon reminder journey.
The third and final reminder is shown below:

Example Reminder 3 for the referrer coupon reminder journey.
#### SFMC Variables
| SFMC variable | Description | Example |
| - | - | - |
| `%%Referrer First Name%%` | The first name of the referrer | Ryder |
| `%%Referrer Last Name%%` | The surname of the referrer | Collins |
| `%%Referree Reward%%` | The reward the referrer will receive | £15 or 30% |
| `%%Coupon Code%%` | The coupon code the referrer receives | 10USDOFF-RXAAURVZ |
| `%%[Output(Format([Coupon Expiry],"d MMMM, yyyy"))]%%` | The expiry date of the coupon. See [SFMC Date Formatting](https://developer.salesforce.com/docs/marketing/marketing-cloud/guide/dateTimeFormatting.html). | 19 July 2023 |
| `%%Call to Action URL%%` | The destination URL to spend the coupon | [www.mention-me.com](http://www.mention-me.com) |
### Step 3: Test the Preview
**1. Open the preview and test tab**
Test each email in the Preview and Test tab in the **Edit Email** section.

The Preview and Test tab for referrer emails.
**2. Select a test entry**
Select the **Received Referrer reward from Mention Me** Data Extension and filter by a customer who matches the trigger criteria.

Selecting a test entry from the referrer reward data extension.
**3. Check the populated fields**
The email will be populated with the relevant event information.

Referrer reminder 1 preview with populated fields.
The second and third reminders populate in the same way:

Referrer reminder 2 preview with populated fields.

Referrer reminder 3 preview with populated fields.
### Step 4: Activate the Journey
**1. Confirm everything is ready**
Once you are happy with the content and have tested the emails, activate the journey.
**2. Activate the journey**
Click the **Activate** button.

The Activate referrer journey button in SFMC.
# Salesforce Marketing Cloud (SFMC) Data Reference
Source: https://docs.mention-me.com/knowledge/esp-crm/sfmc/data-reference
Reference for all Mention Me Data Extensions in SFMC and ECR data import.
## Data Extensions
The Mention Me integration uses the SFMC Data Extensions functionality to store event data from Mention Me. This data can be used for trigger-based journeys to generate email campaigns or segmentations.
Mention Me automatically sets up the Data Extension events in SFMC as part of the integration setup.
A Data Extension is a table within the application database that contains your data. You can use the data to run queries, pull information, and send it to a subset of subscribers.
### Summary of Mention Me Data Extensions in SFMC
| Data Extension Name | External Key | When it updates |
| - | - | - |
| Mention Me Custom Fields | MENTION_ME_CUSTOM_FIELDS | When there are specific updates to custom properties of a customer profile |
| Opted-in to Marketing Consent from Mention Me | MENTION_ME_MARKETING_OPT_IN_EVENT | When a customer has opted-in to your marketing during referee or newsletter journeys |
| Registered as a Referee from Mention Me | MENTION_ME_REFEREE_REGISTRATION_EVENT | When a customer has registered as a referee |
| Registered as a Referrer from Mention Me | MENTION_ME_REFERRER_REGISTRATION_EVENT | When a customer has registered as a referrer |
| Received a Referee Reward from Mention Me | MENTION_ME_REFEREE_FULFILLMENT_EVENT | When a customer received a reward as a referee |
| Received a Referrer Reward from Mention Me | MENTION_ME_REFERRER_FULFILLMENT_EVENT | When a customer received a reward for referring a friend |
| Submitted an NPS Score from Mention Me\*\* | MENTION_ME_NPS_SCORE_EVENT | When a customer submits an NPS score post-purchase |
| Received a discount on next order from Mention Me\*\* | MENTION_ME_DISCOUNT_ON_NEXT_ORDER_FULFILLMENT_EVENT | When a customer receives a discount to use on their next order |
| Propensity to Refer from Mention Me\*\* | MENTION_ME_PROPENSITY_TO_REFER_EVENT | Each time a customer has their propensity to refer calculated |
\*\* If you have the Mention Me add-on enabled
### How to Use Mention Me Data in Email Templates
Mention Me data stored in Data Extensions can be used in email campaigns to personalise communications using standard merge fields or [AMPscript syntax](https://developer.salesforce.com/docs/marketing/marketing-cloud/guide/syntaxGuide.html). This includes personalisation in the email body, subject line, sender name, or sender email address.
### Mention Me Custom Fields
Mention Me sends updates to custom properties of a customer profile to the Mention Me Custom Fields Data Extension.
| Field name | Description | Example |
| - | - | - |
| Email | Email address (set only when new contact is created) | [jason.jones@mention-me.com](mailto:jason.jones@mention-me.com) |
| Referrer Share link | Unique share link for referrers | [https://demo.mention-me.com/m/ol/xz3uz-joel-mcfly](https://demo.mention-me.com/m/ol/xz3uz-joel-mcfly) |
| Referrer Dashboard link | Link for referrers to see status of their referees | [https://demo.mention-me.com/d/2674816/9c34b0c2](https://demo.mention-me.com/d/2674816/9c34b0c2) |
| Share Source | The method from which the referral originated | OPEN-LINK |
| Referrals | Total number of successful referrals | 5 |
| Total Shares | Total quantity of all shares (historical + integration-enabled) | 10 |
| Email Shares | Number of shares made via email | 2 |
| Facebook Shares | Number of shares made via Facebook | 2 |
| Facebook Messenger Shares | Shares made over Facebook Messenger | 2 |
| Name Sharing Shares | Number of shares using name entry method | 1 |
| WhatsApp Shares | Number of shares made via WhatsApp | 3 |
| NPS Score | NPS score provided by customer post-purchase | 8 |
| Propensity to Refer | Estimated referral likelihood (only with Smart Experiment) | High |
| ECR Activity | [ECR](/knowledge/reporting/advocacy/ecr) lifecycle segment: Active, Dormant, Lapsed | Active |
| ECR Status | [ECR](/knowledge/reporting/advocacy/ecr) performance tier: High, Medium, Low | High |
| Created by Mention Me | TRUE if contact was created by Mention Me | True |
| Network ID | Mention Me Network the customer belongs to | N-5051-153480685 |
| First Share Date | Date of the customer's first share | 10/14/2022 |
| First Referral Date | Date of first successful referral | 10/20/2022 |
| Last Share Date | Date of the most recent share | 09/15/2023 |
| Last Referral Date | Date of the most recent successful referral | 10/22/2023 |
| Referrer engaged | TRUE if referrer accepted T\&Cs of the referral offer | True |
### Opted-in to Marketing Consent from Mention Me
Each time a referee requests to receive your newsletter at signup, or post-purchase, a dedicated event is sent to SFMC.
| Field name | Description | Example |
| - | - | - |
| Email | Email used during registration | [rydercollins742@mention-me.com](mailto:rydercollins742@mention-me.com) |
| Source | Source of sign-up (newsletter-signup or referee-registration) | referee-registration |
| Campaign Name | Internal campaign name for filtering | UK Campaign |
| Experiment Name | Internal experiment name | AB Test - Current Vs New Imagery - July 2023 |
| Offer Name | Internal offer name | Variation A |
| Offer Type | Type of offer | referral |
| Offer Subject Copy | Customer-facing offer description | Treat a friend to 20% off and get 20% off for yourself |
| Offer Call to Action Copy | Customer-facing CTA | Give 20% off |
### Registered as a Referrer from Mention Me
| Field name | Description | Example |
| - | - | - |
| Email | Email used during registration | [rydercollins742@mention-me.com](mailto:rydercollins742@mention-me.com) |
| Firstname | First name provided | Ryder |
| Surname | Surname provided | Collins |
| Customer Segment | Segment from Mention Me tags | VIP |
| Campaign Name | Internal campaign name | UK Campaign |
| Experiment Name | Internal experiment name | AB Test - Current Vs New Imagery - July 2023 |
| Offer Name | Internal offer name | Variation A |
| Offer Type | Type of offer | referral |
| Offer Subject Copy | Customer-facing offer summary | Treat a friend to 20% off and get 20% off for yourself |
| Offer Call to Action Copy | Customer-facing CTA | Give 20% off |
### Registered as a Referee from Mention Me
| Field name | Description | Example |
| - | - | - |
| Email | Referee's email | [jojohnson378@mention-me.com](mailto:jojohnson378@mention-me.com) |
| Firstname | First name (if provided) | Joe |
| Surname | Surname (if provided) | Johnson |
| Share Source | Share method used | FORWARDED-EMAILED-LINK |
| Campaign Name | Internal campaign name | UK Campaign |
| Experiment Name | Internal experiment name | AB Test - Current Vs New Imagery - July 2023 |
| Offer Name | Internal offer name | Variation A |
| Offer Type | Type of offer | referral |
| Offer Subject Copy | Customer-facing offer description | Treat a friend to 20% off and get 20% off for yourself |
| Offer Call to Action Copy | Customer-facing CTA | Give 20% off |
| Fulfilled By | Reward issuance method | coupon |
| Reward Amount | Reward value | 20 |
| Reward Type | Type of reward | percent |
### Received a Referee Reward from Mention Me
| Field name | Description | Example |
| - | - | - |
| Email | Referee's email | [jojohnson378@mention-me.com](mailto:jojohnson378@mention-me.com) |
| Firstname | First name | Joe |
| Surname | Surname | Johnson |
| Referrer First Name | First name of the referring friend | Ryder |
| Referrer Last Name | Last name of the referring friend | Collins |
| Campaign Name | Internal campaign name | UK Campaign |
| Currency Symbol | Currency symbol | £ |
| Experiment Name | Internal experiment name | AB Test - Current Vs New Imagery - July 2023 |
| Offer Name | Internal offer name | Variation A |
| Offer Type | Type of offer | referral |
| Offer Subject Copy | Customer-facing offer description | Treat a friend to 20% off and get 20% off for yourself |
| Offer Call to Action Copy | Customer-facing CTA | Give 20% off |
| Fulfilled By | Reward fulfilment method | coupon |
| Reward Amount | Reward quantity | 20 |
| Reward Type | Type of reward | percent |
| Referrer Reward | Reward for the referrer | 20% |
| Referee Reward | Reward for the referee | £15 |
| Coupon Code | Unique coupon code | 10USDOFF-RXAAURVZ |
| Coupon Expiry | Coupon expiration. Use [SFMC Date Formatting](https://developer.salesforce.com/docs/marketing/marketing-cloud/guide/dateTimeFormatting.html) for display. | 2023-08-08T12:32:58+01:00 |
| Call to Action URL | URL to redeem the reward | [www.mention-me.com](http://www.mention-me.com) |
### Received a Referrer Reward from Mention Me
| Field name | Description | Example |
| - | - | - |
| Email | Referrer's email | [jojohnson378@mention-me.com](mailto:jojohnson378@mention-me.com) |
| Firstname | First name | Joe |
| Surname | Surname | Johnson |
| Referee First Name | First name of the referred friend | Ryder |
| Referee Last Name | Last name of the referred friend | Collins |
| Campaign Name | Internal campaign name | UK Campaign |
| Currency Symbol | Currency symbol | £ |
| Experiment Name | Internal experiment name | AB Test - Current Vs New Imagery - July 2023 |
| Offer Name | Internal offer name | Variation A |
| Offer Type | Type of offer | referral |
| Offer Subject Copy | Customer-facing offer description | Treat a friend to 20% off and get 20% off for yourself |
| Offer Call to Action Copy | Customer-facing CTA | Give 20% off |
| Fulfilled By | Reward issuance method | coupon |
| Reward Amount | Reward value | 20 |
| Reward Type | Type of reward | percent |
| Referrer Reward | Combined referrer reward value | 20% |
| Referee Reward | Combined referee reward value | £15 |
| Coupon Code | Coupon code for redemption | 10USDOFF-RXAAURVZ |
| Coupon Expiry | Coupon expiry. Use [SFMC Date Formatting](https://developer.salesforce.com/docs/marketing/marketing-cloud/guide/dateTimeFormatting.html). | 2023-08-08T12:32:58+01:00 |
| Call to Action URL | URL to redeem the reward | [www.mention-me.com](http://www.mention-me.com) |
### Submitted an NPS Score from Mention Me
| Field name | Description | Example |
| - | - | - |
| Email | Respondent's email | [jojohnson378@mention-me.com](mailto:jojohnson378@mention-me.com) |
| Firstname | First name | Joe |
| Surname | Surname | Johnson |
| Campaign Name | Internal campaign name | UK Campaign |
| Experiment Name | Internal experiment name | AB Test - Current Vs New Imagery - July 2023 |
| Offer Name | Internal offer name | Collect NPS Feedback |
| Offer Type | Type of offer | nps-only |
| Offer Subject Copy | Customer-facing offer line | Treat a friend to 20% off and get 20% off for yourself |
| Offer Call to Action Copy | CTA text | Give 20% off |
| Customer Segment | Segment from Mention Me tags | VIP |
| NPS Score | Rating submitted (0-10) | 8 |
### Discount on Next Order Fulfilment
| Field name | Description | Example |
| - | - | - |
| Email | Customer's email | [jojohnson378@mention-me.com](mailto:jojohnson378@mention-me.com) |
| Firstname | First name | Joe |
| Surname | Surname | Johnson |
| Campaign Name | Internal campaign name | UK Campaign |
| Currency Symbol | Currency symbol | £ |
| Experiment Name | Internal experiment name | AB Test - Current Vs New Imagery - July 2023 |
| Offer Name | Internal offer name | Variation A |
| Offer Type | Type of offer | referral |
| Offer Subject Copy | Customer-facing offer description | Treat a friend to 20% off and get 20% off for yourself |
| Offer Call to Action Copy | Customer-facing CTA | Give 20% off |
| Fulfilled By | Reward distribution method | coupon |
| Reward Amount | Reward value | 20 |
| Reward Type | Type of reward | percent |
| Discount Reward | Composite reward description | 20% |
| Coupon Code | Coupon for redemption | 10USDOFF-RXAAURVZ |
| Coupon Expiry | Coupon expiry. Use [SFMC Date Formatting](https://developer.salesforce.com/docs/marketing/marketing-cloud/guide/dateTimeFormatting.html). | 2023-08-08T12:32:58+01:00 |
| Call to Action URL | URL to redeem the reward | [www.mention-me.com](http://www.mention-me.com) |
### Propensity to Refer from Mention Me
Only sent if running a Mention Me Smart Experiment.
| Field name | Description | Example |
| - | - | - |
| Email | Customer's email | [jojohnson378@mention-me.com](mailto:jojohnson378@mention-me.com) |
| First Name | First name | Joe |
| Surname | Surname | Johnson |
| Propensity Segment | Referral likelihood segment. Values: High or Low | High |
## ECR Data Import
Mention Me can automatically send your customers' Extended Customer Revenue (ECR) data to your SFMC account. ECR is only calculated for customers who have made a successful referral.
This data is scheduled to be sent on a **weekly** basis and will only send ECR data for customers whose ECR has **changed** from the previous week.
The following steps explain how to import all your customers' ECR data into SFMC as a one-off **before** Mention Me sends the weekly updates.
### Step 1: Download ECR Data from Mention Me
**1. Navigate to Customer Revenue**
Log in to the [Mention Me Platform](https://mention-me.com/login?) and navigate to the **Customer Revenue** page in the **Advocacy Intelligence** section.

Navigating to the Customer Revenue page in Mention Me.
**2. Download customer segments**
Click the **Download customer segments** button (if not visible, contact your CSM).

The Download customer segments button in Mention Me.
**3. Generate the file**
Select all segments and click **Generate**.

Selecting ECR segments to generate a CSV in Mention Me.
A CSV file will be generated and emailed to you once ready (within 15 minutes).
**4. Download the CSV file**
Click the link in the email to download (login may be required). You can also retrieve it under **Settings > Secure file transfer**.

The Secure file transfer download page in Mention Me.
### Step 2: Create a CSV File for SFMC
Use Excel or Google Sheets to format the downloaded CSV file.
**1. Open the downloaded file**
Open the downloaded CSV file.
**2. Remove the header rows**
Remove the first 3 rows so only column headers remain.
**3. Remove unused columns**
Remove the columns: Individual Revenue, Revenue Referred, Friends Ecr Value, Report Currency Code, First Name, Surname.
**4. Rename the remaining columns**
Rename the remaining columns:
* Email address to Email
* Activity Status to ECR Activity
* ECR Segment to ECR Status
**5. Reorder the Email column**
Move the "Email" column to the first column.

The formatted CSV column layout for the SFMC import.
**6. Save the file**
Save your CSV file.
### Step 3: Upload Your CSV to SFMC
Upload the CSV to the **Mention Me Custom Fields** Data Extension in SFMC. For steps on importing files, see: [Import into Data Extension](https://help.salesforce.com/s/articleView?id=sf.mc_es_import_into_de.htm\&type=5).
**1. Navigate to Data Extensions**
Go to **Audience Builder > Contact Builder > Data Extensions** in SFMC.

The Contact Builder Data Extensions navigation in SFMC.
**2. Select Mention Me Custom Fields**
Click **Mention Me Custom Fields**.

Selecting the Mention Me Custom Fields data extension.
**3. Start the import**
Click **Import**.

The Import button in the data extension.
**4. Confirm the import method**
Click **Import Into Data Extension** and confirm.

The Import Into Data Extension confirmation dialog.
**5. Choose your file**
Click **Choose File** and upload your saved CSV file.

The Choose File option for uploading the CSV.
**6. Set the import settings**
Under **Import Settings**, set:
* Import type = *Add and Update*
* Import options = *Skip rows in the import file with bad data*

Import settings with the Add and Update option selected.
**7. Proceed to field mapping**
Click **Next**.
**8. Map the fields**
Map the fields ensuring accuracy:
* Email = Email
* ECR Status = ECR Status
* ECR Activity = ECR Activity

Field mapping for the ECR data import.
> [!NOTE]
>
> No need to create fields if using the Mention Me integration - required fields should already exist.
**9. Finish the import**
Review and click **Finish**.

Reviewing and finishing the ECR import.
All customers who've made a successful referral will now have an ECR segment and activity within the Mention Me Custom Fields Data Extension in SFMC.
# How to Set Up Salesforce Marketing Cloud (SFMC) with Mention Me
Source: https://docs.mention-me.com/knowledge/esp-crm/sfmc/setup
Connect your SFMC account to Mention Me to sync referral data, opt-ins, and link data extensions.
## About the Integration
Seamlessly integrate high-quality, first-party referral data into Salesforce Marketing Cloud (SFMC) to enhance customer segmentation and campaign performance. Use Mention Me data - like next-best action, propensity to refer, and Extended Customer Revenue - to target high-value customer segments more effectively.
The integration is self-serve, requires no major IT effort, and can be fully set up in under 10 minutes.
## Integration Capabilities
* Send contact data and opt-ins from Mention Me referred customers to SFMC in real time
* Create coupon email reminders using referral data
* Use referral data to boost targeting across other marketing channels
## Prerequisites
* **Salesforce Marketing Cloud** - You must have *Administrator* or *Marketing Cloud Administrator* roles.
* **Mention Me** - Access to the [Mention Me platform](https://mention-me.com/login). Contact your Mention Me CSM if needed.
## Step 1: Create a Mention Me App in Salesforce Marketing Cloud
Log in to your Salesforce Marketing Cloud admin account to set up a Mention Me App integration:
**1. Verify permissions**
Ensure you have **Installed Package > Administrator** permissions.
**2. Navigate to Installed Packages**
Go to **Setup > Apps > Installed Packages**.

The SFMC Setup Installed Packages navigation.
**3. Create a new package**
Click **New** and name the package **Mention Me**.

Creating a new Mention Me package in SFMC.
**4. Save the package**
Click **Save**.
**5. Add a component**
Under Components, click **Add Component**.
**6. Configure API Integration**
Set the Component Type to **API Integration** with Integration Type **Server-to-Server**.

Selecting the API Integration component type in SFMC.
Then set the integration type to Server-to-Server:

Setting the Server-to-Server integration type in SFMC.
**7. Enable required permissions**
Click **Edit** and enable the following permissions:
* Journeys > Read & Write
* List and Subscribers > Read & Write
* Data Extensions > Read & Write

Enabling required API permissions in SFMC.
**8. Save permissions**
Click **Save**.
**9. Note down app credentials**
Note down the following values from the created app:
* **Client ID**
* **Client Secret**
* **Subdomain** (from the REST Base URI, between `https://` and `.rest`)

The SFMC app showing the Client ID.
The Client Secret is shown alongside it:

The SFMC app showing the Client Secret.

The SFMC app showing the REST Base URI used to identify the Subdomain.
## Step 2: Set Up the Integration in Mention Me
**1. Connect on Mention Me platform**
Go to the [Mention Me platform](https://mention-me.com/merchant/~/integrations/salesforce_marketing_cloud) and click **Connect**.

The Mention Me SFMC integration connect page.
**2. Accept terms and conditions**
Accept the terms and conditions if prompted.

The terms and conditions acceptance screen for the SFMC integration.
**3. Click New authentication**
Click **New authentication**.

The New Authentication button in Mention Me.
**4. Enter API credentials**
Fill in the following values gathered in Step 1:
* Client ID
* Client Secret
* Subdomain

Entering SFMC API credentials in Mention Me.
**5. Create the authentication**
Click **Create**.
**6. Configure Contact Key setting**
If your SFMC Contact Key is not an email, **untick** the email option.

The Contact Key email option in the SFMC integration.
**7. Authorise the integration**
Click **Authorise**.
**8. Select countries to sync**
Select the countries for which you want Mention Me data synced.

Selecting countries to sync with SFMC.
> [!NOTE]
>
> Only data from selected Mention Me countries will be synced to Salesforce.
**9. Finalise the connection**
Click **Connect**.
Mention Me will now complete the integration and create relevant Data Extensions in Salesforce. This setup may take up to 1 minute to complete before moving to the final step.
## Step 3: Link the Mention Me Data Extension
Once the integration is set up, you need to link the data extension that Mention Me created to your email contact data. This enables Mention Me customer attributes to sync with your contacts for use across Marketing Cloud journeys and campaigns.
### Navigate to Contact Builder
**1. Log in to SFMC**
Log in to Salesforce Marketing Cloud.
**2. Open Contact Builder**
Click **Audience Builder > Contact Builder**.

Navigating to Contact Builder in SFMC.
**3. Click Email Data**
Click **Email Data**.
### Link the Data Extension
**1. Go to Data Extensions**
Go to **Data Extensions**.
**2. Click Link**
Click **Link**.

The Link Data Extension button in Contact Builder.
**3. Expand Data Extensions folder**
Expand the Data Extensions folder.
**4. Select Mention Me Custom Fields**
Select the **Mention Me Custom Fields** Data Extension.

Selecting the Mention Me Custom Fields data extension.
**5. Map the Email field**
Map the Mention Me Email field to your system's Email Address field.

Mapping the Mention Me Email field to the Email Address field.
**6. Save the link**
Click **Save**.
Saving the data extension link in SFMC.
Your Mention Me customer attributes are now successfully linked to your Marketing Cloud contact data using the email address.
# How to Set Up the Share Again Reminder Journey in SFMC
Source: https://docs.mention-me.com/knowledge/esp-crm/sfmc/share-again
Create an SFMC journey to encourage referrers to keep sharing with friends and earn additional rewards.
## About This Journey
With this journey, you can encourage your top brand advocates to keep sharing with friends to receive additional rewards.
By implementing this journey, you can:
* Increase active customer revenue
* Increase premium customer revenue
* Increase retention
The journey utilises data sent from Mention Me to SFMC through the integration and the Journey Builder functionality of SFMC.
## Prerequisites
1. An active Mention Me referral program that rewards existing customers
2. A Mention Me / SFMC enabled integration
3. Knowledge of [SFMC AMPscript Variables](https://developer.salesforce.com/docs/marketing/marketing-cloud-ampscript/overview)
## Supported Channels
* Email
## Basic Workflow
1. An advocate of your brand successfully refers a friend.
2. A reminder email (subject to consent) is sent to them to share again with their unique share link.

Share again reminder journey flow
## Steps to Create the Journey
### Step 1: Create the Journey Flow
**1. Add the API Event trigger**
Add an **API Event** as the Trigger type with **Received Referrer reward from Mention Me** as the trigger event.

The API Event trigger configured with Received Referrer reward.
**2. Set the default email address**
In Journey Settings, set the Default Email address to be from **Entry Source**.

Journey Settings showing the default email address set from Entry Source.
The Entry Source field itself is configured as shown below:

The email address Entry Source setting.
**3. Add wait periods before each email**
Add a wait period before the email. Suggested wait periods:
* 1st email - 4 days after the event trigger
* 2nd email - 14 days after the 1st email is sent
### Step 2: Add Content to Each Email
**1. Match your brand**
Update the images and styling to suit your brand.
**2. Set the personalisation data extension**
Under **Add content**, set the data extension to **Received Referrer reward from Mention Me** to allow for message personalisation.

The Add content panel with the referrer reward data extension selected.
#### Example Reminders
| Example Reminder 1 | Example Reminder 2 |
| - | - |
| **Subject:** Keep on sharing, you have referred `%%=Lookup('Mention Me Custom Fields','Referrals','Email',emailaddr)=%%` friends | **Subject:** Don't forget to keep on sharing, you have referred `%%=Lookup('Mention Me Custom Fields','Referrals','Email',emailaddr)=%%` friends |

Share again example reminder email 1.
The second reminder follows the same format with updated copy:

Share again example reminder email 2.
#### SFMC Variables
| SFMC variable | Description | Example |
| - | - | - |
| `%%Firstname%%` | The first name of the referrer | Ryder |
| `%%=Lookup('Mention Me Custom Fields','Referrals','Email',emailaddr)=%%` | The total number of successful referrals | 5 |
| `%%=Lookup('Mention Me Custom Fields','Referrer Share link','Email',emailaddr)=%%` | The unique referral share link | [https://demo.mention-me.com/m/olb/se8fp-adrian-parris](https://demo.mention-me.com/m/olb/se8fp-adrian-parris) |
| `%%Offer Subject Copy%%` | Customer-friendly offer description shown on the referrer offer page | Treat a friend to 10% off and get £10 off for yourself |
### Step 3: Test the Preview
**1. Open the preview and test tab**
Test each email in the Preview and Test tab in the **Edit Email** section.

The Preview and Test tab in the SFMC email editor.
**2. Select a test entry**
Select the **Received Referrer reward from Mention Me** Data Extension and a customer who meets the criteria.

Selecting a test entry from the referrer reward data extension.
**3. Check the populated fields**
The email will be populated with the relevant event information.
Example Reminder 1:

Share again reminder 1 preview with populated fields.
Example Reminder 2:

Share again reminder 2 preview with populated fields.
### Step 4: Activate the Journey
**1. Confirm everything is ready**
Once you are happy with the content and have tested the emails, activate the journey.
**2. Activate the journey**
Click the **Activate** button.

The Activate share again journey button in SFMC.
# Google Ads Audience Builder
Source: https://docs.mention-me.com/knowledge/integrations/audience-builders/google-ads
Create seed audiences from your first-party referral data, sync them with Google Ads, and use them as signals for Performance Max campaigns.
## About Audience Builder
Audience Builder lets you create seed audiences from your first-party referral data, synchronise them with Google, and use them as a signal for Performance Max campaigns in Google Ads.
> [!NOTE]
>
> Audience Builder is available as an add-on. Reach out to your Mention Me Account Manager to learn more and upgrade if needed.
## Prerequisites
* At least **Admin** permission for your Google Ads account.
* Access to the [Mention Me platform](https://mention-me.com/login) (contact your CSM if you do not have access).
## Step 1 - Connect Your Google Ads Account
On the [Mention Me platform](https://mention-me.com/merchant/~/audiences/new), select **Google** and click **Connect**.

The Audience Builder connect button with Google selected.
**1. Agree to the Terms and Conditions**
Allow Mention Me to transfer data to Google on your behalf.

The Terms and Conditions screen for Google data transfer.
**2. Create a new authentication**

The dialog for creating a new authentication.
**3. Name your authentication and select Create**

Naming the Google authentication before creating it.
**4. Log in with your Google credentials**

The Google login screen.
**5. Grant Mention Me permission**

Granting Mention Me permission to access Google.
**6. Authorise the authentication**
**7. Select the Google Ads Account**
Choose which account to send your Mention Me data to.

Selecting the Google Ads account to send data to.
## Step 2 - Build Your Audience
**1. Select the country(s)**
Choose which countries to build the audience from.

The country selection screen for building an audience.
> [!TIP]
>
> Select one country per seed audience for best results. If contact numbers are low, select multiple countries in similar markets.
**2. Select the dataset and click Next**
We recommend **Existing customers who have successfully referred a friend**. If you have fewer than 1,000 contacts, choose the next dataset in the list.

The dataset selection screen with audience options and contact counts.
Audience data is collected from your best customers over the last 12 months:
| Audience data set | Description |
| - | - |
| Highest value successful referrers (ECR) | Advocates with the greatest revenue when accounting for both their spend and their friends' spending. [Learn more about ECR](/knowledge/reporting/advocacy/ecr) |
| Active referrers (ECR) | Advocates who have either referred or purchased recently. [Learn more about ECR](/knowledge/reporting/advocacy/ecr) |
| Existing customers who successfully referred a friend | Our **recommended** data set - your biggest brand advocates. |
| Existing customers who have shared | Highly engaged advocates. |
| Existing customers who have joined the referral programme | Customers on the path to becoming advocates. |
| Referred customers who have placed their first orders | New customers gained from your advocates. |
## Step 3 - Name Your Audience
Name your audience and click **Next**.
* A default name is created automatically. This name appears in your Google Ads Manager.
* Use a naming convention that is easy to identify.

Naming the Google Ads audience.
## Step 4 - Confirm Consent and Review
Confirm that you have the relevant consents required by law or by Google to enable Mention Me to process this data.
* You can edit the audience name directly on this page.
* The build starts immediately but can take 24-48 hours for Google to process.
* Email addresses are [hashed](https://developers.google.com/google-ads/api/docs/remarketing/audience-types/customer-match) before being sent to Google.

The consent confirmation and audience review screen.
Once the build starts, the summary screen lets you view all audiences with contact counts and build new audiences.
Your audience updates **weekly** with new customers meeting the selection criteria.

The audience summary showing all audiences with contact counts.
Any created audience appears as a **Customer Match** in Google (in Audience Builder).
> [!TIP]
>
> * Effective audiences need a minimum of 1,000 contacts, but aim for 5,000+ as a realistic starting point due to variable match rates.
> * If your recommended audience is too small, create another based on the next valuable dataset.
## Step 5 - Use Audiences in Performance Max Campaigns
Google retired [Similar Audiences](https://support.google.com/google-ads/answer/7151628?hl=en-GB) in August 2023, replacing them with [Performance Max](https://support.google.com/google-ads/answer/12080169?sjid=8713563842293849397-EU). You can use your Mention Me Customer Matches as a signal to start campaigns with Performance Max.
# Meta Audience Builder
Source: https://docs.mention-me.com/knowledge/integrations/audience-builders/meta
Create seed audiences from your first-party referral data, sync them with Meta, and target lookalike audiences.
## About Audience Builder
Audience Builder lets you create seed audiences from your first-party referral data, synchronise them with Meta, and target more people like them via lookalike audiences.
> [!NOTE]
>
> Audience Builder is available as an add-on. Reach out to your Mention Me Account Manager to learn more and upgrade if needed.
## Prerequisites
* At least **Advertiser** or **Admin** permission for your Meta Ads account with **Full Control** permission.
* Log in to your [Meta Business Manager account settings](https://business.facebook.com/settings/ad-accounts)
* Go to **Users > People**, select your user account
* Select the ad account you want to create audiences in
* Ensure **Manage ad account** is enabled

Meta Business Manager ad account permissions, with Manage ad account enabled.
* Access to the [Mention Me platform](https://mention-me.com/login) (contact your CSM if you do not have access).
## Step 1 - Connect Your Ads Account
On the [Mention Me platform](https://mention-me.com/merchant/~/audiences/new), click **Connect** to begin.

The Audience Builder connect button with Meta selected.
**1. Agree to the Terms and Conditions**
Allow Mention Me to transfer data to Meta on your behalf.

The Terms and Conditions screen for Meta data transfer.
**2. Create a new authentication**

The dialog for creating a new authentication.
**3. Name your authentication and select Create**

Naming the Meta authentication before creating it.
**4. Log in with your personal Meta credentials**

The Meta login screen.
**5. Grant Mention Me permission**
Mention Me cannot post anything to your page.

Granting Mention Me permission to access Meta.
**6. Select the Meta Ad Account**
Choose the account you want to send your Mention Me data to.

Selecting the Meta ad account to send data to.
## Step 2 - Build Your Audience
**1. Select the country(s)**
Choose which countries to build the audience from.

The country selection screen for building an audience.
> [!TIP]
>
> Select one country per seed audience for best results. If contact numbers are low, select multiple countries in similar markets.
**2. Select the dataset and click Next**
We recommend **Existing customers who have successfully referred a friend**. If you have fewer than 1,000 contacts, choose the next dataset in the list.

The dataset selection screen with audience options and contact counts.
Audience data is collected from your best customers over the last 12 months:
| Audience data set | Description |
| - | - |
| Highest value successful referrers (ECR) | Advocates with the greatest revenue when accounting for both their spend and their friend's spend. [Learn more about ECR](/knowledge/reporting/advocacy/ecr) |
| Active referrers (ECR) | Advocates who have either referred or purchased recently. [Learn more about ECR](/knowledge/reporting/advocacy/ecr) |
| Existing customers who successfully referred a friend | Our recommended data set - your biggest brand advocates. |
| Existing customers who have shared | Highly engaged advocates. |
| Existing customers who have joined the referral programme | Customers on the path to becoming advocates. |
| Referred customers who have placed their first orders | New customers gained from your advocates. |
## Step 3 - Name Your Audience
Name your audience and click **Next**.
* A default name is created automatically. This name appears in Meta Ads Manager.
* The countries you selected also appear in the audience description in Meta Ads Manager.

Naming the Meta audience.
> [!TIP]
>
> Use a naming convention that is easy to identify, e.g. `MM - UK - Successful Referrers`.

An example of a clear audience naming convention.
## Step 4 - Confirm Consent and Review
Confirm that you have the relevant consent required by law or Meta to enable Mention Me to process this data.

The consent confirmation and audience review screen.
Review your audience details and click **Build** to start the sync.
* You can edit the audience name directly on this page.
* The build starts immediately but can take 24-48 hours for Meta to process.
* Email addresses are [hashed](https://developers.facebook.com/docs/marketing-api/audiences/guides/custom-audiences/#example_sha256) before being sent to Meta.
Once the build starts, the summary screen lets you view all audiences with contact counts and build new audiences.
Your audience updates weekly with new customers meeting the selection criteria.

Audience summary with contact counts and build status
> [!TIP]
>
> Effective audiences need a minimum of 1,000 contacts, but aim for 5,000+ as a realistic starting point due to variable match rates. If your recommended audience is too small, create another based on the next valuable dataset.
## Step 5 - Build Lookalike Audiences in Meta
Once the audience has synced, [create a lookalike audience](https://www.facebook.com/business/help/465262276878947?id=401668390442328) to find new customers that "look like" your best customers.
**1. Go to your Audiences**
Open your [Audiences](https://www.facebook.com/ads/manage/audiences.php) (you can also create a Lookalike Audience during ad creation in Ads Manager).
**2. Select Create audience > Lookalike Audience**

The Meta Audiences page with the Create Lookalike Audience option.
**3. Choose the Mention Me Custom Audience**
From **Other Sources**, select the Custom Audience you created.

Selecting the Mention Me Custom Audience as a lookalike source.
**4. Choose the target country**
> [!NOTE]
>
> Meta only creates lookalike audiences based on a single country. If your Custom Audience contains contacts from multiple countries, create a separate lookalike audience for each.
**5. Choose your desired audience size**
Keep the reach between **1-3%** for best results.
**6. Select Create Audience**
> [!TIP]
>
> * It may take 6-24 hours for your Lookalike Audience to be created.
> * Your audience refreshes every 3-7 days with new Audience Builder contacts.
> * You don't need to wait for updates to use your Lookalike Audience.
## Step 6 - Create an Ad Using Lookalike Audiences
Create a Meta Ad using your new lookalike audience.
> [!TIP]
>
> * Keep ad copy the same as previous campaigns to compare results.
> * Meta excludes contacts from your source audience but cannot identify your customers from other sources. Set up a [Meta exclusion](https://www.facebook.com/business/help/165516217407801?id=1913105122334058) to avoid targeting existing customers.
> * Experiment with multiple audiences to find the best performers.
> * Compare performance against previous purchase and CRM-based audiences.
## Re-Authorising Meta Authentication
There may be occasions where your Meta authentication needs to be re-authorised. You will see an error on the Audience Builder page:
> "Your Meta authentication has expired and you need to re-authenticate the integration"

The Meta authentication expired error message.
### Why Does This Happen?
1. **Access token expired** - Meta only allows Mention Me access for **60 days** at a time. You must re-authorise to keep audiences syncing.
2. **Password changed** - Changing your Meta password requires re-authentication.
3. **User access revoked** - The user who set up the connection no longer has access to your Meta Business Manager account.
### How to Re-Authorise
Mention Me sends email notifications 10 days and 5 days before expiry, and again when it has expired. Click the **Re-Authorise** link directly in the email.

The re-authorisation email notification with link.
#### Manual Re-Authentication
**1. Log in to the Mention Me Platform**
Go to [mention-me.com/login](https://mention-me.com/login).
**2. Go to Connections Hub > Audience Builder**
**3. Select the Re-Authenticate link**
Find it under the Audience name or in the notification at the top of the page.

The Re-Authenticate link on the Audience Builder page.
**4. View the authentication in edit mode**
You will see the authentication that needs re-authorising.

The authentication edit mode for re-authorisation.
**5. Leave the name as-is and click Save**

Saving the authentication to trigger the Meta login popup.
**6. Re-authorise via the Meta popup**
A Meta/Facebook authentication popup will appear. Enter your login details to re-authorise.
> [!NOTE]
>
> Re-authorisations can take up to 1 hour to be reflected on the Audience Builder pages.
# TikTok Audience Builder
Source: https://docs.mention-me.com/knowledge/integrations/audience-builders/tiktok
Create seed audiences from your first-party referral data, sync them with TikTok, and target lookalike audiences.
## About Audience Builder
Audience Builder lets you create seed audiences from your first-party referral data, synchronise them with TikTok, and target more people like them via lookalike audiences.
> [!NOTE]
>
> Audience Builder is available on specific packages or as an add-on. Reach out to your Mention Me Account Manager to learn more and upgrade if needed.
## Prerequisites
* At least **Admin** permission for your TikTok Business Ads account.
* Log in to your [TikTok Business Centre account settings](https://business.tiktok.com/manage/account?)
* Go to **Assets > Advertiser Accounts**, select the ad account you want to create audiences in
* Select your user account
* Access to the [Mention Me platform](https://mention-me.com/login) (contact your CSM or [log a support request](https://help.mention-me.com/hc/en-gb/requests/new) if you do not have access).
## Step 1 - Connect Your Ads Account
**1. Click Connect and select TikTok**
On the [Mention Me platform](https://mention-me.com/merchant/~/audiences/new), click **Connect**.

The Audience Builder connect button with TikTok selected.
**2. Agree to the Terms and Conditions**
Allow Mention Me to transfer data to TikTok on your behalf.

The Terms and Conditions screen for TikTok data transfer.
**3. Create a new authentication**

The dialog for creating a new authentication.
**4. Name your authentication and select Create**

Naming the TikTok authentication before creating it.
**5. Log in with your TikTok account details**

The TikTok login screen.
**6. Grant Mention Me permission**
Mention Me cannot post anything to your page.

Granting Mention Me permission to access TikTok.
**7. Select Authorise to complete the authentication**

The TikTok authorise confirmation screen.
**8. Select the TikTok Ad Account**
Choose which account to send your Mention Me data to and press **Next**.

Selecting the TikTok ad account to send data to.
## Step 2 - Build Your Audience
**1. Select the country(s)**
Choose which countries to build the audience from.

The country selection screen for building an audience.
> [!TIP]
>
> Select one country per seed audience for best results. If contact numbers are low, select multiple countries in similar markets.
**2. Select the dataset and click Next**
We recommend **Existing customers who have successfully referred a friend**. If you have fewer than 1,000 contacts, choose the next dataset in the list.

The dataset selection screen with audience options and contact counts.
Audience data is collected from your best customers over the last 12 months:
| Audience data set | Description |
| - | - |
| Highest value successful referrers (ECR) | Advocates with the greatest revenue when accounting for both their spend and their friend's spend. [Learn more about ECR](/knowledge/reporting/advocacy/ecr) |
| Active referrers (ECR) | Advocates who have either referred or purchased recently. [Learn more about ECR](/knowledge/reporting/advocacy/ecr) |
| Existing customers who successfully referred a friend | Our recommended data set - your biggest brand advocates. |
| Existing customers who have shared | Highly engaged advocates. |
| Existing customers who have joined the referral programme | Customers on the path to becoming advocates. |
| Referred customers who have placed their first orders | New customers gained from your advocates. |
## Step 3 - Name Your Audience
**1. Name your audience and click Next**
A default name is created automatically. This name appears in your [TikTok Ads Manager](https://ads.tiktok.com/help/article/tiktok-ads-manager-intro?lang=en).

Naming the TikTok audience.
**2. Use a naming convention that is easy to identify**

An example of a clear audience naming convention.
## Step 4 - Confirm Consent and Review
**1. Confirm consent**
Confirm that you have the relevant consents required by law or by TikTok to enable Mention Me to process this data.

The consent confirmation and audience review screen.
**2. Review and click Build**
Review your audience details and click **Build** to start the sync.
* You can edit the audience name directly on this page.
* The build starts immediately but can take 24-48 hours for TikTok to process.
* Email addresses are [hashed](https://ads.tiktok.com/help/article/list-of-supported-ids-and-formats-for-a-customer-file) before being sent to TikTok.
**3. View your audiences**
Once the build starts, the summary screen lets you view all audiences with contact counts and build new audiences.
Your audience updates **weekly** with new customers meeting the selection criteria.

The audience summary showing all audiences with contact counts.
> [!TIP]
>
> Effective audiences need a minimum of 1,000 contacts, but aim for 5,000+ as a realistic starting point due to variable match rates. If your recommended audience is too small, create another based on the next valuable dataset.
## Step 5 - Build Lookalike Audiences in TikTok
Once the audience has synced, [create a lookalike audience](https://ads.tiktok.com/help/article/create-lookalike-audience?lang=en) to find new customers that "look like" your best customers.

Creating a TikTok lookalike audience.
> [!TIP]
>
> * It may take 6-24 hours for your Lookalike Audience to be created.
> * You don't need to wait for updates to use your Lookalike Audience.
## Step 6 - Create an Ad Using Lookalike Audiences
Create a [TikTok Ad](https://ads.tiktok.com/i18n/perf/campaign?) using your new lookalike audience.
> [!TIP]
>
> * Keep ad copy the same as previous campaigns to compare results.
> * Experiment with multiple audiences to find the best performers.
> * Compare performance against previous purchase and CRM-based audiences.
# CRM Feed Format
Source: https://docs.mention-me.com/knowledge/integrations/data-feeds/crm-feed-format
Understand the structure, fields, and delivery of the CRM feed from the Mention Me platform.
The CRM feed captures both referee and referrer activity in a structured format, delivered daily or weekly. It shows who was referred, who did the referring, share counts, and whether rewards were issued.
## What Is the CRM Feed?
An exportable file containing structured referral data, designed for integration into your CRM or marketing automation platform. It includes:
* **Referees** - those who were referred
* **Referrers** - those who did the referring
* Key event timestamps (share, sign-up, reward)
* Referral methods, channels, and opt-in statuses
## Delivery Frequency
* Delivered daily or weekly, depending on your preference
* Includes customers who, in the past 7 days:
* Were referred
* Referred others
* Shared a referral link
## How to Use the Feed
* Update records using Customer Email or Merchant Customer ID
* Add new contacts for any unknown email addresses
* Use segments (e.g. VIP or LoyaltyTier) to personalise campaigns
* Track referral effectiveness by channel or campaign
## Field Reference
Each row represents one customer. Both referee and referrer actions are captured where applicable.
| Field Name | Description | Format |
| - | - | - |
| Customer Firstname / Surname | Name of the customer | Text (nullable) |
| Customer Email | Unique identifier of the customer | Text (required) |
| Merchant Customer ID | Your internal ID for this customer | Text (nullable) |
| Customer Recognised Date | When Mention Me identified this user as your customer | DateTime |
| Referred By Customer Email | Email of the referrer (if applicable) | Text (nullable) |
| Referred By Merchant Customer ID | Internal ID for the referrer | Text (nullable) |
| Opted In To Marketing Email | 1 = opted in, 0 = not opted in | Boolean |
| Referred Date | Date the referee clicked a link or entered a friend's name | DateTime (nullable) |
| Referred Signed Up Date | When the referee signed up or placed an order | DateTime (nullable) |
| Referred Rewarded Date | When a reward was issued for the referral | DateTime (nullable) |
| Referred Qualified Date | When the referee was confirmed as a new customer | DateTime (nullable) |
| Referred Situation | Referral channel (e.g. postpurchase, homepage) | Text (nullable) |
| Referred Share Type | Method used by referrer (e.g. EMAIL, FACEBOOK) | Text (nullable) |
| Referred Segment | Segment assigned to the referee (e.g. VIP) | Text (nullable) |
| Is Referrer | 1 = customer has referred; 0 = has not | Boolean |
| Referrer Segments | Segments for referrer (comma-separated) | Text (nullable) |
| Referring Share Count | Number of referral shares | Integer (nullable) |
| Referring Successful Referrals Count | Number of shares resulting in successful referrals | Integer (nullable) |
## Example Data
| Column | Example 1 | Example 2 |
| - | - | - |
| Customer Firstname | James | Susan |
| Customer Surname | Brandon | Smith |
| Customer Email | [james@example.com](mailto:james@example.com) | [susan@example.com](mailto:susan@example.com) |
| Merchant Customer ID | ABC12345 | DEF65432 |
| Customer Recognised Date | 14 April 2020 18:16:55 | 19 April 2020 18:16:55 |
| Referred By Customer Email | [fred-johnson99@example.com](mailto:fred-johnson99@example.com) | [freida123@example.com](mailto:freida123@example.com) |
| Referred By Merchant Customer ID | 12345 | |
| Opted In To Marketing Email | 1 | 0 |
| Referred Date | 1 May 2020 18:16:55 | 30 April 2020 18:16:55 |
| Referred Signed Up Date | 2 May 2020 18:16:55 | 1 May 2020 18:16:55 |
| Referred Rewarded Date | 3 May 2020 18:16:55 | 2 May 2020 18:16:55 |
| Referred Qualified Date | 3 May 2020 18:16:55 | 2 May 2020 18:16:55 |
| Referred Situation | postpurchase | landing-page |
| Referred Share Type | EMAIL | FACEBOOK |
| Referred Segment | VIP | |
| Is Referrer | 0 | 1 |
| Referrer Segments | Employee, Red | |
| Referring Share Count | 0 | 2 |
| Referring Successful Referrals Count | 0 | 1 |
## Common Use Cases
* Identify top-performing advocates and reward them
* Track new customers from referrals
* Segment loyalty campaigns by engagement
* Analyse channel performance (email, Facebook, etc.)
* Monitor opt-in consent for marketing emails
## Next Steps
If you're not yet receiving the CRM feed, contact your Mention Me CSM or [support team](https://help.mention-me.com/hc/en-gb/requests/new) to set up daily or weekly delivery.
# Email Vouchers in BAU Emails
Source: https://docs.mention-me.com/knowledge/integrations/data-feeds/email-vouchers-in-bau
Insert Mention Me voucher codes into your Bloomreach BAU emails to remind customers about unused vouchers.
This guide walks through adding Mention Me voucher codes into your Bloomreach BAU emails to remind customers about unused vouchers.
You can also use [pre-built initiatives](/knowledge/esp-crm/bloomreach/setup) to automate email reminders. Importing the initiative into Bloomreach generates:
* [Aggregates](https://documentation.bloomreach.com/engagement/docs/aggregates-and-running-aggregates)
* Example banners
* Segments used to display voucher content based on referral activity
## Aggregates
All aggregates are calculated using the last issued voucher (either to a referrer or referee) with a future expiry date.
| Aggregate Name | Description |
| - | - |
| last_mention_me_referee_voucher_code | Referee's latest voucher code. Example: `10USDOFF-RXAAURVZ` |
| last_mention_me_referee_voucher_expiry | Referee voucher expiry date. Example: `2024-09-03T16:19:19.000Z` |
| last_mention_me_referee_voucher_value | Referee's voucher value. Example: `20%` or `10 GBP` |
| last_mention_me_referrer_voucher_code | Referrer's latest voucher code. Example: `10USDOFF-RXAAURVZ` |
| last_mention_me_referrer_voucher_expiry | Referrer voucher expiry date. Example: `2024-09-03T16:19:19.000Z` |
| last_mention_me_referrer_voucher_value | Referrer's voucher value. Example: `20%` or `10 GBP` |
To format expiry dates for customer-facing display:
```jinja theme={null}
{{ aggregates['aggregate_id'] | to_timestamp | from_timestamp('%A, %d of %B %Y') }}
```
## Example Banners
Two example banners (referrer and referee) are provided with pre-inserted aggregates.

An example referrer banner in Bloomreach with pre-inserted aggregates.
The referee banner follows the same layout, tailored to the referee journey:

An example referee banner in Bloomreach with pre-inserted aggregates.
## Pre-Built Segments
These segments control banner visibility and only display content to customers with voucher rewards.
## Prerequisites
1. An active Mention Me referral programme that rewards referees and referrers
2. Mention Me and Bloomreach integration enabled
3. Email Service Provider (ESP) integrated with your Bloomreach account
4. Understanding of [Bloomreach Jinja](https://documentation.bloomreach.com/engagement/docs/filters#date--time-processing)
## Step 1 - Download Banner Aggregates
Download the JSON file linked at the bottom of this guide.
## Step 2 - Import Into Bloomreach
**1. Log in to Bloomreach**
Log in to [Bloomreach](https://app.exponea.com/login).
**2. Navigate to Initiatives**
Navigate to **Initiatives**.

The Initiatives navigation in Bloomreach.
**3. Click Import**
Click **Import**.

The Import button in Bloomreach.
**4. Upload and import the file**
Upload the downloaded file and click **Import**.

The file upload and import dialog in Bloomreach.
## Step 3 - Add a Banner to Emails
You have two options:
### Using the Pre-Built Banner
**1. Add a custom row**
Add a new row in your email design and choose **Custom**.
**2. Insert a banner**
Insert either the referrer or referee banner.

Adding a custom banner row in Bloomreach email design.
**3. Customise the banner**
Update banner copy and imagery to match your brand.
### Using Your Own Banner with Aggregates
**1. Add a personalisation tag**
In your email, add a new personalisation tag using **Customer attribute**.
**2. Select a Mention Me aggregate**
Select an aggregate starting with `last_mention_me`.

Selecting a Mention Me aggregate as a personalisation tag.
For expiry dates, use Jinja formatting:
```jinja theme={null}
{{ aggregates['aggregate_id'] | to_timestamp | from_timestamp('%A, %d of %B %Y') }}
```

A Jinja formatted expiry date shown in Bloomreach.
# SFTP Setup
Source: https://docs.mention-me.com/knowledge/integrations/data-feeds/sftp-setup
Request and configure an SFTP connection with the Mention Me platform.
A guided walkthrough of setting up SFTP in the Mention Me platform.
## Request SFTP Setup
> [accordion] See each step in detail
>
> **1. Open the SFTP page**
>
> In the left-hand menu, click **Settings**, then choose **SFTP** under **Data & Reporting**. You can also go straight to the [SFTP page](https://mention-me.com/merchant/~/sftp/).
>
> **2. Open the authentication tab**
>
> Open the **Authentication and IP allow list** tab, then click **Add IP address**.
>
> **3. Enter your IP addresses and SSH keys**
>
> Enter the **IP addresses** you'll connect from, one per line. You can use a single address or a range in CIDR notation. Then paste in your **SSH public keys**, again one per line.
>
> **4. Send your request**
>
> Click **Send request** to submit your details. Our team will approve them and let you know once they're live.
>
> 
>
> The Add or edit IP addresses and SSH keys panel, ready to send.
## Add Your Folders
Once you've sent your authentication details, add the **folders** for your SFTP integration yourself. See [SFTP data formats](/developer-docs/integration/sftp-data-formats) for folder and file examples.
> [accordion] See each step in detail
>
> **1. Open Configuration and data**
>
> On the SFTP page, open the **Configuration and data** tab.
>
> **2. Add a folder**
>
> Click **Add an inbound folder** for data you send us, or **Add an outbound folder** for data we send you.
>
> **3. Name and describe the folder**
>
> Give the folder a name that reflects the data, for example `offline_orders`. Then add a short description, so you'll remember what it's for.
>
> **4. Choose whether to encrypt it**
>
> To require PGP encryption, turn on **Mark this folder as encrypted**. Only do this if every file will be encrypted, as the folder rejects anything that isn't.
>
> **5. Create the folder**
>
> Click **Create folder**.
>
> 
>
> The Add a new folder panel, with a name, description and encryption turned on.
> [!NOTE]
>
> Adding a folder raises a request for the Mention Me team to set it up on the SFTP server, so a new folder does not appear straight away. This usually takes up to three working days, and we will notify you once it is ready. If you are still waiting after that, email us at [support@mention-me.com](mailto:support@mention-me.com).
If you encrypt a folder, it needs a key before files can move through it. For an **inbound** folder, generate a key and encrypt your files with its public key before uploading. For an **outbound** folder, import your public key, as nothing is delivered until you do. Generate or import a key for the folder from the [Encryption keys tab](https://mention-me.com/merchant/~/sftp/encryption-keys). See [SFTP File Encryption](/developer-docs/integration/sftp-encryption).
> [!NOTE]
>
> Adding folders and managing encryption keys requires the **Administrator** role. See [User Management](/knowledge/security/account/user-management) for more on permission levels.
If you need Mention Me to generate any reports on a scheduled basis, let the Support Team know via the [Help form](https://help.mention-me.com/hc/en-gb/requests/new?ticket_form_id=8840645829405).
## Your Folder Structure
Once setup is complete, your **username** and **file paths** are visible in the **Configuration and data** section of the SFTP page. See [SFTP connection](/developer-docs/integration/sftp-connection) for connection details.
You can track all files sent and received, check for processing confirmation, and view logs under the created inbound and outbound folders.
The SFTP configuration and data section showing username and file paths.
## Updating Your SFTP Setup
To update your SSH Key or IP allow list, return to the **Authentication and IP allow list** tab on the [SFTP page](https://mention-me.com/merchant/~/sftp/), update the relevant information, and click **Send request**.
Our team will review the update and contact you if anything further is needed.
To add a new folder, use **Add an inbound folder** or **Add an outbound folder** in the **Configuration and data** section of the SFTP page. To manage encryption keys for a folder, use the [Encryption keys tab](https://mention-me.com/merchant/~/sftp/encryption-keys) (see [SFTP File Encryption](/developer-docs/integration/sftp-encryption)).
## Need Help?
Start a conversation with the in-platform Support widget in the bottom-right corner of your dashboard - it can usually answer this straight away. If it can't, raise a request via the [request form](https://help.mention-me.com/hc/en-gb/requests/new?ticket_form_id=8840645829405).

The in-platform Support widget starting an AI-assisted conversation.
# Overview
Source: https://docs.mention-me.com/knowledge/integrations/overview
Connect Mention Me with your advertising, rewards, and data platforms to put first-party referral data to work across your stack.
> [!NOTE]
>
> Using **Mention Me**? Shopify and reward automation now connect in Mention Me.
> Catalogue integrations still open Classic for setup. See
> [Integrations](/knowledge-app/integrations/overview).
Mention Me integrates with the platforms you already use for advertising, rewards, and data. This section covers each integration in turn; for email, SMS, and marketing automation platforms, see [ESP & CRM Integrations](/knowledge/esp-crm/overview).
## Audience Builders
Create seed audiences from your first-party referral data and sync them with your advertising platforms.
> [card] [Meta](/knowledge/integrations/audience-builders/meta)
>
> Sync seed audiences with Meta and target lookalike audiences.
> [card] [TikTok](/knowledge/integrations/audience-builders/tiktok)
>
> Sync seed audiences with TikTok and target lookalike audiences.
> [card] [Google Ads](/knowledge/integrations/audience-builders/google-ads)
>
> Sync seed audiences with Google Ads and use them as signals for Performance Max campaigns.
## Reviews & Rewards
Ingest review data and deliver voucher and gift card rewards through third-party providers.
> [card] [Trustpilot](/knowledge/integrations/reviews-rewards/trustpilot)
>
> Set up the Trustpilot integration with Mention Me to ingest review data.
> [card] [Love2Shop](/knowledge/integrations/reviews-rewards/love2shop)
>
> Set up the Love2Shop voucher integration and manage API secret key rotation.
> [card] [Giftcloud](/knowledge/integrations/reviews-rewards/giftcloud)
>
> Deliver digital gift card rewards through your referral programme with
> Giftcloud.
> [card] [Runa](/knowledge/integrations/reviews-rewards/runa)
>
> Issue gift card rewards through your referral programme with Runa.
## Data Feeds
Move referral data between Mention Me and your own systems on a schedule.
> [card] [CRM Feed Format](/knowledge/integrations/data-feeds/crm-feed-format)
>
> Understand the structure, fields, and delivery of the CRM feed from the Mention Me platform.
> [card] [SFTP Setup](/knowledge/integrations/data-feeds/sftp-setup)
>
> Request and configure an SFTP connection with the Mention Me platform.
> [card] [Email Vouchers in BAU Emails](/knowledge/integrations/data-feeds/email-vouchers-in-bau)
>
> Insert Mention Me voucher codes into your BAU emails to remind customers about unused vouchers.
## ESP & CRM Integrations
> [card] [ESP & CRM Integrations](/knowledge/esp-crm/overview)
>
> Connect Mention Me with your email, SMS, and marketing automation platforms
>
> * Klaviyo, Braze, Bloomreach, Emarsys, Salesforce Marketing Cloud,
> Dotdigital, mParticle, Ometria, and Attentive.
# Giftcloud
Source: https://docs.mention-me.com/knowledge/integrations/reviews-rewards/giftcloud
Set up the Giftcloud integration to deliver digital gift card rewards through your referral programme.
## About the Integration
The Giftcloud integration lets you automatically deliver digital gift cards as referral programme rewards, with support for standard or custom-branded options across multiple territories.
## Prerequisites
Before connecting platforms, speak with your Mention Me contact and a Giftcloud representative about:
* Which gift cards you want to use
* Reward denominations (e.g. 10 GBP, 25 USD, 50 EUR)
* Reward validation window (how long after friend purchase the reward is issued)
* Territory-specific rewards if running campaigns across multiple countries or languages
Once your contract with Giftcloud is finalised, their support team will provide credentials and campaign information.
## Step 1 - Add Giftcloud Credentials in Mention Me
**1. Add Giftcloud as a provider**
Go to the [Mention Me platform](https://mention-me.com/merchant/~/reward-providers), navigate to **Connections > Reward Providers**, and click **Set-up new 3rd Party Provider**. Select **Giftcloud**.

The Set-up New 3rd Party Provider dialog with Giftcloud selected.
**2. Enter credentials**
Enter the required fields:
* Name
* Username
* Password

The Giftcloud credential entry form in Mention Me.
**3. Create the provider**
Click **Create**.
> [!NOTE]
>
> If you operate in multiple locales (e.g. UK, Germany, France), repeat the process and store separate credentials for each territory.
## Step 2 - Share Giftcloud Campaign ID(s)
Once credentials are saved, send your Giftcloud Campaign ID(s) to your Mention Me onboarding project manager, CSM, or the [Support team](https://help.mention-me.com/hc/en-gb/requests/new).
If supporting multiple locales or different reward denominations, provide a separate Campaign ID for each.
Mention Me will complete the setup on your behalf, and your referral programme will be ready to issue digital gift cards.
# Love2Shop
Source: https://docs.mention-me.com/knowledge/integrations/reviews-rewards/love2shop
Set up the Love2Shop voucher integration with Mention Me and manage API secret key rotation.
## About the Integration
Integrating with Love2Shop lets you issue Love2Shop vouchers as part of your referral programme rewards in real-time via the Mention Me platform.
## Setting Up the Integration
### Step 1 - Request API Credentials
Send an email to your Love2Shop representative requesting the following credentials:
> Dear Love2Shop,
>
> We hereby authorise Mention Me to call the Love2Shop voucher API to issue voucher codes in real-time.
>
> Please can you create the relevant credentials for Mention Me.
>
> Can you please supply us with the following information:
>
> * Client Id
> * Client Secret
> * Account Id
> * Subscription Key
Love2Shop will generate the credentials and send them via a secure method.
> [!NOTE]
>
> If you have multiple brands with Love2Shop:
>
> * **Single Love2Shop account across all brands** - the API credentials can be used across all brands in Mention Me.
> * **Separate Love2Shop account per brand** - credentials for each account need to be requested individually.
### Step 2 - Save Credentials in Mention Me
**1. Add Love2Shop as a provider**
On the [Mention Me platform](https://mention-me.com/merchant/~/reward-providers), navigate to **Connections > Reward Providers**, and click **Set-up new 3rd Party Provider**. Select **Love2Shop**.

The Set-up New 3rd Party Provider dialog with Love2Shop selected.
**2. Enter credentials**
Enter a name and the credentials from Step 1, then click **Create**.

The Love2Shop credential entry form in Mention Me.
**3. Notify Mention Me**
Inform your Mention Me onboarding project manager, CSM, or [Mention Me support](https://help.mention-me.com/hc/en-gb/requests/new) so they can complete the setup.
## Updating the API Secret Key
Love2Shop rotates its API secret every **12 months**. When it's time to update, you will receive an email from Love2Shop with a **one-time link** to your new secret key. Update it promptly to avoid interruptions to reward delivery.
**1. Access Love2Shop on Mention Me**
Log in to the [Mention Me platform](https://mention-me.com/merchant/~/reward-providers) and click **View** next to your Love2Shop Reward Provider.

The Love2Shop Reward Provider view button on the Mention Me platform.
**2. Set a new secret**
In the **Client Secret** section, click the padlock icon to set a new secret.

The Client Secret padlock icon used to update the secret.
**3. Retrieve the new secret**
Open the link from your Love2Shop email to access the new secret. This link can only be accessed once.
> [!NOTE]
>
> If the link has expired, contact the Love2Shop API Team at [APITeam@love2shop.co.uk](mailto:APITeam@love2shop.co.uk).
**4. Update in Mention Me**
Paste the new secret into the **Client Secret** box. Ensure all other settings remain unchanged, then press **Save changes**.

The updated Client Secret saved in Mention Me.
**5. Repeat as necessary**
Repeat these steps for each Mention Me account connected to Love2Shop for voucher issuance.
# Runa
Source: https://docs.mention-me.com/knowledge/integrations/reviews-rewards/runa
Set up the Runa voucher integration to issue gift card rewards through your referral programme.
## About the Integration
Integrating with Runa lets you choose from a selection of standard gift cards or create your own, which are then passed to the Mention Me platform as referral rewards.
To proceed, you need to:
1. Create Runa API Keys and save them in the Mention Me platform
2. Provide voucher Product Codes to Mention Me (either as a Payout Link Template ID or a Single Product Code)
3. Optionally provide a User Redemption Template if required
Contact your Mention Me onboarding project manager or CSM with any questions.
## Step 1 - Create API Key in Runa
**1. Log in to Runa**
[Log in](https://app.runa.io/) to Runa with an account that has permissions to create API Keys.
**2. Navigate to API Key creation**
Navigate to **API > Create API Key**. [Learn more about creating API keys](https://developer.runa.io/docs/getting-an-api-key).

The Runa API Key creation page.
**3. Select Production Key**
Select **Production Key**.
**4. Create the key**
Enter a name for the key (e.g. `Mention_Me`) and press **Create Key**.
> [!WARNING]
>
> Save the credentials immediately - you will only see them once.
## Step 2 - Save Runa API Key in Mention Me
**1. Add Runa as a provider**
Go to the [Mention Me platform](https://mention-me.com/merchant/~/reward-providers), navigate to **Connections > Reward Providers**, and click **Set-up new 3rd Party Provider**. Select **Runa**.

The Set-up New 3rd Party Provider dialog with Runa selected.
**2. Enter API Key**
Enter a name and paste the **API Key** from Step 1. Click **Create**.

The Runa API Key entry form in Mention Me.
## Step 3 - Share Runa Product Codes
Based on your campaign setup, you can use either a single product order or a payout link.
Email these codes to Mention Me Support, your CSM, or Onboarding Project Manager.
### Single Product Orders
Identify and copy the product code of the specific voucher to be issued, then send to Mention Me.

The Runa product catalogue showing voucher product codes.
### Payout Links
**1. Create a payout template**
Create a payout template by following [these instructions](https://runapay.zendesk.com/hc/en-gb/articles/16748251131037-How-to-create-payout-selection-templates).
**2. Share the Template ID**
Copy the **Template ID** (begins with `PT`) and send it to Mention Me.

A Runa payout template with the Template ID.
## Step 4 - Share Runa User Redemption Template ID (Optional)
If using a custom redemption page:
**1. Create a redemption template**
Follow [these steps](https://runapay.zendesk.com/hc/en-gb/articles/16748212211101-How-to-create-redemption-templates) to create a redemption template.
**2. Share the Template ID**
Copy the **Template ID** (starts with `DT`) and share with Mention Me.

A Runa user redemption template with the Template ID.
Send this code to Mention Me Support, your CSM, or Onboarding Project Manager so they can configure your reward.
# Trustpilot
Source: https://docs.mention-me.com/knowledge/integrations/reviews-rewards/trustpilot
Set up the Trustpilot integration with Mention Me to ingest review data.
## Before You Begin
To set up Trustpilot with Mention Me, you need access to the [Trustpilot API](https://support.trustpilot.com/hc/en-us/articles/207309867-How-to-use-Trustpilot-APIs). This is only accessible on the Enterprise Plan or as a Connect add-on module on Premium or Advanced Plans. [Find out more about Trustpilot plans](https://business.trustpilot.com/plans).
> [!NOTE]
>
> If you run multiple Mention Me merchant accounts (for example separate accounts per brand or region), this integration must be set up individually on each merchant account. There is no way to copy or bulk-apply a Trustpilot integration across accounts, so repeat both steps below for every merchant account that needs it.
## Step 1 - Create Authentication in Trustpilot
**1. Navigate to API settings**
In your [account page](https://businessapp.b2b.trustpilot.com/integrations/developers), go to **Integrations > Developers** and click **APIs**.

The Trustpilot Integrations page showing Developers and APIs.
**2. Create an application**
Create an application with the following details:
* **Application Name:** `Mentionme` (or any name you prefer, see note below)
* **Redirect URLs:**
```text theme={null}
mention-me.com
demo.mention-me.com
```
Put each URL on a new line without commas.

Creating a Mentionme application in Trustpilot with redirect URLs.
> [!NOTE]
>
> The Application Name is just a label for your own reference in your Trustpilot developer console. Trustpilot doesn't validate it against anything on Mention Me's side, so you can rename it (for example to match a specific brand or merchant account) if it helps you tell multiple applications apart. The Redirect URLs above are fixed and required regardless of what you name the application.
**3. Save the application**
Press **Create Application** to save.
**4. Get the API key and Secret**
Scroll down to your newly created Mentionme application in the "Your applications" section. Click the arrow on the right to reveal your credentials.

The Trustpilot Your Applications section showing the Mentionme app.
Expanding the application reveals the API key and Secret:

The Trustpilot API key and Secret credentials.
Copy your Trustpilot API key and Secret (you will need them in Step 2).
**5. Get your BusinessUnitID**
* Navigate to your Trustpilot review page: `https://uk.trustpilot.com/review/`
* Right-click anywhere on your review page and select **View Source**
* Search for the text `BusinessUnitID`
* Copy the BusinessUnitID value (you will need it in Step 2)

Finding the BusinessUnitID in Trustpilot page source.
## Step 2 - Create Authentication in Mention Me
**1. Add new Trustpilot Integration**
On the [Mention Me platform](https://mention-me.com/merchant/~/settings/integrations), click **Add new Trustpilot Integration**.

The Mention Me platform Add New Trustpilot Integration button.
**2. Enter API Key and authenticate**
Enter the API Key from Step 1 and press **Login to Trustpilot**.

Entering the Trustpilot API Key and the Login to Trustpilot button.
**3. Log in to Trustpilot**
You will be directed to the Trustpilot login to authenticate Mention Me.

The Trustpilot authentication login screen.
Once authenticated, you will be redirected back to the Mention Me platform.
**4. Enter remaining credentials**
Enter the following from Step 1:
* API Secret
* Business Unit ID
* Short Description to identify this account (e.g. "Trustpilot UK")

Entering the API Secret, Business Unit ID and description in Mention Me.
**5. Notify Mention Me**
Inform your Mention Me CSM or [log a support request](https://help.mention-me.com/hc/en-gb/requests/new) so they can complete the remaining setup.
# Advocacy Dashboards
Source: https://docs.mention-me.com/knowledge/reporting/advocacy/dashboards
An overview of the Advocacy Dashboard, Advocacy Intelligence, and Programme Reporting pages in Mention Me.
Advocacy Dashboards give you a new way to track performance, both for overall advocacy and individual campaigns. They provide a holistic view of advocacy for your business and let you monitor revenue growth over time, with actionable insights for data-driven decisions.
## Where to Find the Dashboards
The main navigation includes three dashboards, each focused on a different part of the platform. You'll find them in the left-hand navigation menu.

The left-hand navigation menu showing the three dashboard options.
The Advocacy Dashboard replaces the old Executive Dashboard. Performance has been split into new sections: one focused on Advocacy, and one focused on the programmes you run through Mention Me.
The previous Executive Dashboard can now be found as **Programme Reporting** in the left-hand navigation. You can set it as your homepage with the **Dashboard Settings** feature.

Programme Reporting in the navigation, alongside the Dashboard Settings option.
The **Overall Performance** tab in Programme Reporting lets you customise which metrics are shown for fast access and reporting.

The Overall Performance tab with its customisable metric display.
## Advocacy Dashboard
The Advocacy Dashboard gives headline information on the overall value of advocacy and Mention Me. It lets you quickly access deeper insights to share with decision makers.

The Advocacy Dashboard with sentiment, Earned Growth, ECR, and referral metrics
On this page, you can find:
* **Recent customer sentiment**: A quick view of how customers feel about your brand. [Learn more about Sentiment Analysis](/knowledge/reporting/advocacy/sentiment-analysis).
* **Earned Growth Score**: Top-level advocacy progress and its financial impact. [Learn more about Earned Growth](/knowledge/reporting/advocacy/earned-growth).
* **Average ECR**: Month-to-month trends for the value of your advocates.
* **Referral Metrics**: How many new customers and how much revenue is generated by Mention Me.
* **NPS Split**: How much of your customer base has a positive or negative experience.
* **Integrations Setup**: Confirmation of which parts of your Martech stack are integrated with Mention Me.
* **Contacts & Opt Ins**: First-party contacts and marketing opt-ins being captured.
## Advocacy Intelligence
This dashboard provides deeper detail on advocacy metrics and activities, bringing together Earned Growth, ECR, and Sentiment on one page.

Advocacy Intelligence with Earned Growth breakdown, ECR segments, and Best Network
On this page, you can find:
* **Earned Growth Breakdown**: The components that make up your Earned Growth score.
* **ECR Segment Sizes**: The size of each segment to target the most valuable customers.
* **Predicted ECR segments** (Optimise, Advanced, Ultimate only): Spot and act on trends in your customer segments.
* **Best Network**: How networks form and the compounding effect of advocacy.
## Programme Reporting
The Programme Reporting dashboard is for campaign owners seeking deeper detail on referral campaign performance.

Programme Reporting with revenue breakdowns and key referral metrics
On this page, you can find:
* **Revenue Breakdowns**: Where referral campaign revenue comes from - new customers, repeat purchases, and subsequent orders.
* **Key Referral Metrics**: New Customers, Share Rate, and Conversion to understand where you're succeeding and where to focus.
* **Campaign Comparisons**: Quickly identify which campaigns may be underperforming.
## Downloading Dashboards
You can save a screenshot or PDF of any dashboard to share offline, right from the top of the page.

The download button at the top of the dashboard for saving screenshots or PDFs.
## FAQ
### What package is it?
Access to Advocacy Dashboards is available in all packages, with guidance in the platform on setting up the new advocacy features needed for them to populate.
### How do I provide feedback?
Contact our [support team](https://help.mention-me.com/hc/en-gb/requests/new) to send feedback.
# Understanding Earned Growth
Source: https://docs.mention-me.com/knowledge/reporting/advocacy/earned-growth
Understanding Earned Growth - a metric for measuring organic growth from retention and advocacy, developed by the creator of NPS.
## What is Earned Growth?
Earned Growth is a metric for measuring your business's organic growth rate. It reflects how fast your business grows each year from retention and advocacy alone, excluding revenue from customers acquired through paid channels.
A high Earned Growth rate signals sustainable growth and demonstrates how much your customers value your brand.
Earned Growth was developed by [Fred Reichheld](https://en.wikipedia.org/wiki/Fred_Reichheld), creator of Net Promoter Score, and Bain & Company. It was first published in [Winning on Purpose (2021)](https://www.netpromotersystem.com/books/winning-on-purpose/) and summarised in the Harvard Business Review as NPS 3.0.
## How Earned Growth Can Transform Your Business
By measuring and optimising for Earned Growth, you gain:
1. **Sustainable organic growth** - reduces reliance on paid marketing, creating a robust business model.
2. **Enhanced profitability** - lower ad costs free up budget or boost profit.
3. **Competitive edge** - advocates spend more, refer friends, and return more often, creating a virtuous cycle that transforms your economics.
## How Your Earned Growth Score Is Calculated
Your Earned Growth score is the sum of growth from retained and referred customers.
Revenue over the last 12 months is split into three origin sources:
1. From existing customers (Growth from Retained Revenue)
2. From new customers acquired via advocacy (Growth from Earned Acquisition)
3. From new customers acquired via paid marketing (Growth from Bought Acquisition)
Advocacy (including outside of Mention Me) is measured using a customer origin survey to estimate how much of your new customer revenue is earned.
All revenue numbers are given as a percentage of the prior 12 months' revenue, showing their contribution to year-on-year growth:
* **Growth from Retained Revenue** = Revenue from existing customers (including reactivated) in the last 12 months / Revenue from all customers in the prior 12 months
* **Growth from Earned Acquisition** = Revenue from new customers in the last 12 months (estimated from survey) / Revenue from all customers in the prior 12 months
* **Earned Growth** = Growth from Retained Revenue + Growth from Earned Acquisition
All revenue is calculated excluding returns/cancellations.
## The Earned Growth Dashboard
### Requirements
To see your Earned Growth score, you need:
* At least 2 years of continuous historical order data
* A running customer origin survey (shown to a small percentage of first-time customers) with at least 1,000 responses
Navigate to **Advocacy Intelligence > Earned Growth**.

Earned Growth dashboard under Advocacy Intelligence
If you don't have the required data, a notification will show at the top of the screen with next steps. Or contact our [support team](https://help.mention-me.com/hc/en-gb/requests/new) for further help.

A notification showing the missing data requirements for Earned Growth.
Until your data is ready, the dashboard includes dummy data visuals to help you understand how Earned Growth works:

The Earned Growth dashboard shown with dummy data visuals.
### What the Dashboard Can Do
* Track your organic growth rate (Earned Growth score)
* Identify opportunities to improve your score
* Monitor the impact of any changes you make
### Earned Growth Revenue Projection

Revenue Projection calculator showing five-year gross profit scenarios
This calculator shows what happens to gross profit (revenue minus marketing costs) over the next five years if you improve your Earned Growth score. Two scenarios illustrate the real financial impact.
The projection assumes:
* Revenue from bought new customers stays constant (no paid marketing growth)
* Earned customers are 50% more likely to refer, spend 20% more, and are 20% more likely to be retained than bought customers
* The same proportion of existing customers is earned each year
* Margin of 20% for bought customer revenue
## Estimating Time Until Earned Growth Is Calculated
When setting up a customer origin survey, you need to balance populating your dashboard quickly against the impact on your referral scheme. The higher the percentage of first-time customers who see the survey, the quicker you get results, but the bigger the monthly impact on referrals.
Customers who see a survey before seeing a referral offer are slightly less likely to refer (about 80% of your typical conversion rate).
The platform uses past data to predict:
* How many customers you can expect per month
* How many are first-time customers
* How many will see the survey (based on the percentage split selected during setup)
* How likely they are to answer (based on data from other merchants)

A time-to-results prediction based on monthly customer survey volume.
1,000 responses are required to calculate your Earned Growth. The time-to-results prediction is based on your estimated monthly customers seeing a survey, multiplied by the likelihood of answering.
## FAQs
### How do you recommend engaging senior stakeholders with Earned Growth?
Share Earned Growth insights in regular reports and meetings. Highlight rate changes and take snapshots of dashboard graphs. Earned Growth helps to show the value of advocacy.
### How do you tell which customers come from bought channels vs earned channels?
Set up a customer origin survey shown post-purchase to a sample of first-time customers. The survey asks how they discovered your brand, with options indicating "earned" (recommendations, reviews, reputation, previous use) or "bought" (ads, search engines). "Other" responses are classified individually.

A customer origin survey asking how the customer discovered the brand.
After responding, the customer can refer a friend. Initial data shows minimal referral cannibalisation.
### I already have a customer origin survey. Why should I use Mention Me's version?
The Mention Me platform is the only solution able to calculate your Earned Growth score. The question is consistent for reliable benchmarking, and clients see 50%+ response rates. Every customer who answers the origin survey goes on to see a referral offer.
### What package is Earned Growth available on?
It's available across all packages.
### Will the customer origin survey work with smart experiments?
Yes. If you're unsure of setup, please contact our [support team](https://help.mention-me.com/hc/en-gb/requests/new).
### How do I provide feedback?
Contact our [support team](https://help.mention-me.com/hc/en-gb/requests/new) to send feedback.
Earned Growth is a service mark of Bain & Company, Inc.
# Understanding Extended Customer Revenue (ECR)
Source: https://docs.mention-me.com/knowledge/reporting/advocacy/ecr
Understanding Extended Customer Revenue - how ECR measures the full value of advocates, including segments, performance tracking, predicted data, and subscription considerations.
## What is Extended Customer Revenue?
Extended Customer Revenue (ECR) is the revenue a customer spends (their Individual Customer Revenue, or ICR) plus the revenue generated by their referred friends.

ECR = Individual Customer Revenue + revenue from referred friends
## Why is ECR Important?
Brands that only focus on their highest spenders could be missing out on their most valuable customers: their brand advocates. ECR allows you to track the additional revenue brought by customers who refer their friends, revealing previously unrecognised value.

Advocates generate more total value than high spenders alone
## ECR Performance
To view ECR performance, navigate to the **Customer Revenue** page in the Performance section of the [Mention Me platform](https://mention-me.com/login?).
### The Acquisition Filter
The acquisition filter determines the time period for calculating individual spend and referred friend spend, starting from the acquisition date of the original customer. You can select 30, 90, or 180 day periods.
The longer the time period, the more time there is for the original customer to make additional purchases and refer more friends, and for those friends to purchase.

The acquisition filter with 30, 90, and 180 day period options.
### Reading the Chart

The ECR chart, with pink bars for referrer spend, shaded bars for referred friend revenue, and navy bars for non-referrers.
* **Solid pink bar**: The amount customers spend within the selected time period from their first purchase (Individual Customer Revenue / ICR).
* **Shaded pink bar**: Revenue from referred friends within the selected time period.
* **Navy bar**: Individual revenue of non-referrers.
These values are grouped by acquisition month so you can track changes over time.

ECR values grouped by acquisition month, showing changes over time.
## High, Medium, and Low ECR Segments
Customers and referrers are segmented into three buckets based on their ECR:
### High ECR Customers
Threshold calculated using the revenue brought by your top 5% non-referring customers.
### Medium ECR Customers
Lower threshold based on your top 25% non-referring customers; upper threshold based on the top 5%.
### Low ECR Customers
Threshold calculated using the revenue brought by your top 25% non-referring customers.

The High, Medium, and Low ECR segment breakdown with threshold definitions.
### Finding Your ECR Values
The tooltip on the tile shows your ECR value.

The tooltip showing the ECR value on the segment tile.
### Downloading Customer Segments
> [!NOTE]
>
> This feature is only available on the Optimise, Advanced, or Ultimate package.
**1. Open the download dropdown**
Click the **Download customer segments** dropdown in the "Breakdown of your referrers by ECR" section.

The Download customer segments dropdown.
**2. Select segments and generate**
Select the segments you want to download and click **Generate**.

The segment selection screen with the Generate button.
**3. Receive the CSV**
A CSV file with the relevant data will be emailed to you within 15 minutes.
### Active, Dormant, and Lapsed Periods
The active/dormant/lapsed time periods are unique to your business, based on your customers' purchase cycles. You can see the exact values in the "How we've defined Active, Dormant and Lapsed" table at the bottom of the page.
For a customer to fall into active, dormant, or lapsed, they must make either a purchase or a referral within the specified time period.
The periods are calculated using the cumulative sum of subsequent orders in relation to time since the previous order, as a proxy for the average probability of repeat purchases. The Dormant and Lapsed states are found at the intersection of the probability curves with specific statistical thresholds.
## Predicted ECR
> [!NOTE]
>
> Predicted ECR requires the Optimise, Advanced, or Ultimate package.
Predicted ECR is a machine learning model designed to forecast how advocacy is likely to evolve over the next 12 months within your existing customer base.
You can use Predicted ECR to see:
* Which fans are likely to keep advocating
* Which fans are likely to stop advocating
* Who your future advocates are likely to be
### How It Is Calculated
Historical patterns are used to predict customer lapsing, purchase, and referral behaviour in the next 12 months. This gives personalised propensities for each customer, enabling calculation of how the make-up of your base might change. The prediction takes into account recency, frequency, and value (RFV) for both orders and referrals.
### Viewing Predicted Advocacy Shift
Navigate to **Advocacy Intelligence > Customer Revenue** and scroll down past the current ECR breakdown.

The Predicted Advocacy Shift section under Advocacy Intelligence, Customer Revenue.
The Sankey chart visualises what is expected to happen in a year's time to your existing customers, showing movement between segments.

Sankey chart showing predicted customer movement between ECR segments over 12 months
> [!NOTE]
>
> Predictions are only for existing customers. New customers acquired in the next 12 months are not included since there is no data to predict from.
### Key Predicted Segments

The key predicted segments: Future Advocates, Likely to Lapse, and Future High Advocates.
Click **Take Action** to download the customers in these segments:
1. **Future Advocates**: Most likely to advocate this year. Target with calls to action.
2. **Likely to Lapse**: Predicted to stop purchasing or referring. Target with reactivation campaigns.
3. **Future High Advocates**: Your most valuable advocates. Give them a great experience to maintain advocacy.

The Take Action button used to download customers in predicted segments.
### Data Requirements for Predicted ECR
* At least 100k customers (distinct emails) in your data
* 3 years (no gaps) of order data
* 90 days of referral data
* Predictions for subscription businesses are not currently supported
## Subscription Data for ECR
If your business model is subscription-based (or partly so), additional data is needed to get full value from ECR, Network Insights, and Earned Growth. The existing tag integration only captures the initial purchase or signup, meaning subsequent subscription revenue is not visible.
### What Is Needed
Send each renewal as a new order so that modelling can calculate the true value of a customer and their referrals.
### Next Steps
> [card] [Upload historical orders](/knowledge/security/data-management/historical-order-upload)
>
> Provide subscription orders not captured through tags (e.g. renewals).
Then set up a regular SFTP transfer of those orders on a daily or weekly basis. Check your Integration Instructions for SFTP setup guides, or reach out via the [help form](https://help.mention-me.com/hc/en-gb/requests/new).
## FAQ
### What package is required?
* ECR charts are available on any package.
* Predicted ECR and segment downloads require Optimise, Advanced, or Ultimate.
### How do I provide feedback?
Contact our [support team](https://help.mention-me.com/hc/en-gb/requests/new).
# Understanding Network Insights
Source: https://docs.mention-me.com/knowledge/reporting/advocacy/network-insights
How Network Insights reveals hidden networks of fans in your customer base and helps you drive more value from advocacy.
## What is Network Insights?
Network Insights reveals hidden networks of fans growing in your customer base by adding the lens of referral data. It allows you to see and communicate with your customers in a different way, helping you identify, grow, and nurture profitable groups of fans who will help grow your brand sustainably.
## Accessing the Dashboard
Navigate to **Advocacy Intelligence > Network Insights**.

The Advocacy Intelligence navigation with Network Insights selected.
The top of the page shows key information about the number of networks and customers in each network. Below this, you can see visualisations of your best ten networks.

Network Insights overview with network count, customer totals, and top ten visualisations.
## How Best Networks Are Ranked
Networks are ranked using multiple characteristics including: Network Revenue, Average Number of Orders per Customer, Average ICR, Network Size, and Longest Referral Chain. The ranking formula uses a weighting and ranking system aimed at identifying the most valuable networks that nurture advocacy.
## Network Characteristics
* **Network Revenue**: The sum of revenue from each individual in the network (all time).
* **Average Number of Orders per Customer**: Total orders in the network (all time) divided by Network Size.
* **Average ICR** (Individual Customer Revenue): Network Revenue divided by Network Size.
* **Network Size**: The number of customers in the network.
* **Longest Referral Chain**: The longest continuous referral chain within the network. Long chains indicate that referred customers are keen on advocating further.
## Reading Network Visualisations
### Dandelion Referrers

A single referrer responsible for an explosion of referrals.
A single referrer responsible for an explosion of referrals in a network. These are key individuals to pull out and target from your customer database - they are influencers in the network and worth treating as VIPs.
### Long Chains

Sequential referrals forming a chain, with each referee referring one person.
Each referee refers one person in a chain of sequential referrals. This indicates that referees are happy to refer again. However, if the average order is only one and there are no other shapes in the chain, it could indicate gaming worth investigating.
## Using the Data
### Network Characteristics Download

The Network Characteristics download button.
The download itself looks like this:

The Network Characteristics download showing all networks with starter details.
> [!NOTE]
>
> Available on Optimise, Advanced, and Ultimate packages.
The portal shows the top ten networks. For deeper exploration, the download provides all networks and details, including who started each one.
### Network Customers Download

The Network Customers download button.
The download itself looks like this:

The Network Customers download showing customer-to-network mapping for CRM upload.
> [!NOTE]
>
> Available on Optimise, Advanced, and Ultimate packages.
This download lets you extract who is in which network. Upload into your CRM or CDP to understand what makes top network customers tick and begin targeting them with personalised experiences.
## Data Requirements
* 1 year (no gaps) of order data
* 90 days of referral data
* For subscription-based businesses, a regular feed of subscription orders (e.g. renewals) is additionally required
## FAQ
### What package is required?
* Network Insights charts are available on any package.
* Access to downloads requires Optimise, Advanced, or Ultimate.
### How do I provide feedback?
Contact our [support team](https://help.mention-me.com/hc/en-gb/requests/new).
# Understanding Sentiment Analysis
Source: https://docs.mention-me.com/knowledge/reporting/advocacy/sentiment-analysis
Understanding share message sentiment analysis and NPS sentiment analysis in Mention Me, including setup, AI insights, and how to drive action from customer feedback.
Mention Me provides two forms of sentiment analysis:
* **Share message sentiment analysis**: Analysis of what referrers say to their friends (the sharing message), giving unique insights into what your brand advocates really think. Use this to optimise your referral and wider marketing.
* **NPS sentiment analysis**: Analysis of what customers think about your brand via Net Promoter Score surveys. Use this to identify pain points and improve customer experience, which drives advocacy.
## Share Message Sentiment Analysis
### Why It Matters
Share Message Analysis gives you real insights shared by your customers when they recommend your brand -- insights you cannot get elsewhere. For the first time, you can monitor and analyse how customers speak to their friends and learn what messages resonate.
Mention Me's generative AI-powered sentiment analysis analyses share messages and pulls out key insights, giving you instant feedback on your USPs to improve tone of voice, marketing campaigns, and positioning.
### Setup Requirements
For share message sentiment analysis, you need:
* "Native share message capture" set up as one of your sharing methods
* At least 20 share messages of 5 words or longer
To request native share message capture setup, use this [form](https://help.mention-me.com/hc/en-gb/requests/new?ticket_form_id=14561653328797) and the Operations team will be in touch.
More information on [native share message capture](/knowledge/referral/offers/sharing-methods) is available.
### Can I See Which Customer Left the Share Message?
Due to PII requirements, this data is anonymised.
### Can We Use Quotes for Social Proof?
As a general rule, this is not possible unless you use your own privacy notice that allows it.
## NPS Sentiment Analysis
### What is NPS?
Net Promoter Score (NPS) is a customer satisfaction metric that measures how likely customers are to recommend a product or service to others.
Customers are asked: "How likely are you to recommend \[your brand] to a friend?" and score on a scale of 0-10. Based on responses, customers are categorised into:
* **Promoters (9 or 10)**: Highly satisfied customers likely to recommend.
* **Passives (7 or 8)**: Neutral customers.
* **Detractors (6 or below)**: Dissatisfied customers.
The NPS score is calculated by subtracting the percentage of detractors from the percentage of promoters.
### Why NPS Sentiment Analysis Matters
NPS helps you understand what customers think about your brand so you can take action to address pain points and improve the customer experience.
Mention Me's generative AI-powered sentiment analysis summarises customer comments into themes with areas to explore, so you can start improving the customer experience straight away.
### Using the Dashboard to Drive Action
**1. Understand themes**
Use the "Key Customer Insights" section to understand customer pain points (e.g. website navigation, customer service, price, delivery). Themes are prioritised by comment volume.
**2. Explore improvement ideas**
Review the provided suggestions for addressing pain points, and examine customer sentiment to understand exactly what customers are saying.
**3. Take action**
Address the identified pain points.
**4. Track impact**
Monitor NPS score by month. Use NPS distribution charts to check whether the percentage of promoters is increasing and detractors decreasing over time.
### Setting Up NPS Sentiment Analysis
**1. Navigate to Advocacy Intelligence**
Go to **Performance > Advocacy Intelligence** in the left-hand navigation.
**2. Open Sentiment Analysis**
Select **Sentiment Analysis** from the top navigation.
**3. Set up an NPS survey**
Scroll down to the "NPS score and feedback" section and click **Set up an NPS survey**. This opens a wizard that guides you through the steps to get the NPS survey live. Setup should take around 3 minutes.

The Set up an NPS survey button.
## Estimating Time Until AI Insights Are Available
When setting up an NPS survey, you need to balance populating your dashboard quickly against the impact on your referral scheme.
20 responses of at least three words are required to produce AI insights. The platform estimates this timeline based on:
* Predicted monthly returning customers
* The percentage split selected during survey setup
* Historical response rate data from other merchants

The estimated timeline for AI insights, based on survey response predictions.
### Impact on Referrals
Customers who see a survey before a referral offer are slightly less likely to refer (about 80% of typical conversion rate). During setup, you can set the NPS threshold for seeing a referral offer to either **7 or above** or **9 or above**. The recommendation is **7 or above** to maximise the number of customers who see referral.
Customers who leave a low NPS score are generally not shown a referral offer, as seeing one after leaving a low score can make the customer feel unheard.

The NPS threshold setting for referral offer visibility.
# How to Use the Comparison Groups Report
Source: https://docs.mention-me.com/knowledge/reporting/creative-insights/comparison-groups
How to use the Comparison Groups report to build and compare custom segments of ads in Creative Insights.
The Comparison Groups report enables you to construct individual segments of ads using advanced filters and compare them against each other. Use it to build hypotheses, evaluate A/B test results, or define your next creative approach.
## Creating a Comparison Groups Report
**1. Create the report**
Click **Create Report** and select **Comparison Groups**.

Creating a report with Comparison Groups selected.
**2. Select account and timeframe**
At the top of the report, select which account and timeframe you want to segment ads for.
**3. Define ad groups**
Select the platform from the dropdown on the left of the first row, then name your segment (e.g. "Static", "Video", "Product").
**4. Add filters**
Using the **Add filter** button, select filters to capture the ads you want in each segment (e.g. Ad Types for each segment).
**5. Add more groups**
Click **Add Group** to add as many segments as you want.
## Using the Report
Once you've defined your segments, the reporting UI below the segment editing section provides the same tools as the Top Performers report:
* Choose a visualisation: Grid view (default), bar chart, or time series.
* Scroll down to see a data table.
* Click into any group in Grid view to see a side panel of the ads in that group.
* Add or change metrics at the top of the visualisation.
As with the Top Performers report, you can save and share your report using the buttons at the top right. For more on the reporting UI features, see the [Top Performers Report](/knowledge/reporting/creative-insights/top-performers).
# How to Connect Ad Accounts
Source: https://docs.mention-me.com/knowledge/reporting/creative-insights/connect-ad-accounts
How to authorise and connect your Facebook and TikTok ad accounts to Mention Me Creative Insights.
This article explains how to connect your Meta (Facebook) and TikTok ad accounts to Mention Me Creative Insights.
## Before You Start
For Meta, the user connecting the ad accounts requires **Full Control** access privileges on Meta Business Manager to the Ad Account and Page.
## Steps to Connect
**1. Log in to Creative Insights**
Go to [the Creative Insights platform](https://creative-insights.mention-me.com/).
**2. Open Settings**
Click **Settings** in the lower left of the side panel, then click **Connect** next to the platform you wish to connect.

The Settings panel with Connect buttons for each platform.
**3. Authorise access**
Login to the platform you are connecting. Meta or TikTok will ask you to authorise Creative Insights for access to your Business Accounts and request the permissions needed to connect and sync your data.
**4. Select Ad Accounts**
Once authorisation is complete, you will be redirected back to Creative Insights and prompted to select the Ad Accounts you want to display. Select the accounts you wish to connect.
Once account connection is complete, you will see a confirmation prompt and data syncing will begin. The data syncing process can take around 48 hours. Once it has completed successfully, you will be contacted so you can log in and start using Creative Insights.
# How to Create and Share Custom Reports
Source: https://docs.mention-me.com/knowledge/reporting/creative-insights/custom-reports
How to create, save, and share custom reports in Mention Me Creative Insights.
This article explains how to create reports and collaborate with your team by sharing insights in seconds.
## Getting Started
Start a fresh report from scratch using any of the available report types by clicking the **Create Report** button in the left side panel.

The Create Report button in the left side panel.
## Types of Reports
* **Top Performers Report**: Find your top performing segments of ads with visual reports and advanced filters that help you drive meaningful insights in seconds.
* **Launch Analysis Report**: Instantly see which ads are scaling, winning, or need attention, so you can amplify what's working whilst mitigating wasted spend before it becomes an issue.
* **Comparison Groups Report**: Build segments of ads with any filter you like so you can evaluate hypotheses, A/B tests, and use these to drive improvements in your creative briefs.
## Saving Reports
Once you've made changes to your report, hit the save button at the top right of your screen. Saved reports appear in the left side panel and are visible to other users in your workspace.
To share a specific report with a colleague who has access to Creative Insights, copy the URL from the address bar and send it to them. They will be able to review and manipulate the report.
Alternatively, you can share a static snapshot (see below).
## Sharing Report Snapshots
You can share a Report Snapshot with anyone, whether or not they have access to Creative Insights. This is useful for collaborating with external agencies or sharing an insight without requiring a login. Report Snapshots are fixed views that cannot be filtered or manipulated.
**1. Click Share**
Click **Share** in the top right of the report you want to snapshot.

The Share button.
**2. Create the snapshot**
Give your snapshot a name and click **Create snapshot**.
**3. Copy the link**
You will be provided with a shareable link. Click the icon next to it to copy and share with your colleague.

The snapshot creation dialog.
# Naming Rule Tags
Source: https://docs.mention-me.com/knowledge/reporting/creative-insights/naming-rule-tags
How to set up and use Naming Rule Tags to transform ad naming structures into valuable performance breakdowns in Creative Insights.
Naming Rule Tags let you transform your Ad, Ad Set, and Campaign naming structures into valuable performance breakdowns in Creative Insights.
## Why Use Naming Rule Tags?
A consistent naming convention is crucial because the details in your ad names allow you to filter, compare, and analyse variables not available directly on paid ad platforms. A good convention lets you analyse what matters most, such as which products, creative concepts, or influencers perform best.
## What Are Naming Rule Tags?
A Naming Rule Tag works by identifying a specific part of your ad name and extracting that parameter.
**Example:**
In the ad name below, "Harry" is the influencer's name:
`HK: the problem with_DUR: 13_INF: Harry_SRC: XYZ Agency`
By knowing the position of the influencer's name in the ad name, or using a code identifier (like `INF:`), Creative Insights can create an "Influencer" breakdown that groups performance data by all the different influencers in your campaigns.
## How to Use Naming Rule Tags
Once set up, access your Naming Rule Tags from any report:
**1. Click Group by**
Open the **Group by** dropdown in your report.
**2. Select a Tag**
Select the desired Tag from the list.

The Group by dropdown showing available Naming Rule Tags.
These can then be viewed using any of the visualisations or in the data table. They're particularly useful in bar chart format for clear visual comparison of segment performance.

A bar chart view showing performance comparison by Naming Rule Tag segments.
## How to Request Naming Rule Tags Creation
**1. Open the request form**
Open this [request form](https://docs.google.com/spreadsheets/d/12HwlRxCYOCPoJyOr77M22Tj8R22nv3DedcUSTAPblpA/edit?usp=sharing).
**2. Make a copy**
Make a copy of the form.
**3. Fill it out**
Fill out the yellow boxes using the instructions provided.
**4. Submit**
Share it via the [support form](https://help.mention-me.com/hc/en-gb/requests/new).
# New Launches Report
Source: https://docs.mention-me.com/knowledge/reporting/creative-insights/new-launches
How to use the New Launches report to instantly identify winning and losing ads and cut optimisation time.
The New Launches report gives you an overview of all your recent ads, allowing you to optimise and take action instantly. Set it up with your company goal benchmarks to quickly see what's performing well, without manually building and filtering reports.
## Creating a New Launches Report
**1. Create the report**
Click **Create report** and select the **New Launches** report type, or select the pre-made version from the side panel.
**2. Choose a timeframe**
Select a timeframe - this is used to find all ads launched within it, as indicated by the locked filter.
**3. Add filters (optional)**
Optionally add filters (e.g. only show campaigns containing "prospecting" in the name).

The New Launches report with filters applied.
Click through the report tabs to see which ads are scaling, winning (performing well), or declining in performance (found under the "Stop" tab).
## Setting Goal Thresholds
You can update the metrics that automatically filter your New Launches report so that displayed ads match your performance expectations.
**1. Open Settings**
Select **Settings** in the lower left of the side panel.
**2. Go to Thresholds**
Select **Thresholds**, then choose to set thresholds for Meta or TikTok.
**3. Configure your thresholds**
Set your thresholds based on your chosen metric and value.
### Available Thresholds
* **Scaled threshold**: How much your ads should spend before they are considered to have scaled successfully.
* **Winner threshold**: The metric for star performers. Use your preferred benchmark (e.g. CPA \< 30 or ROAS > 5).
* **Loser threshold**: The benchmark for poor performers. Ads meeting this criteria appear in the "Stop" tab.
* **Account Overrides** (optional): Define unique thresholds for specific accounts (e.g. a UK regional account).

The Settings panel showing threshold configuration for Meta and TikTok.
# Top Performers Report
Source: https://docs.mention-me.com/knowledge/reporting/creative-insights/top-performers
How to use the Top Performers report to analyse your highest-performing creatives with advanced filters, metrics, and groupings.
The Top Performers report helps you drive meaningful insights at scale by analysing your highest-performing creatives using advanced filters, key metrics, and segment groupings.
## Creating a Top Performers Report
**1. Create the Report**
Click **Create Report** and select **Top Performers**.

The Create Report menu with Top Performers selected as the report type.
**2. Select a Platform**
Select which platform (Meta or TikTok) you want to create it for.
## Using the Report

The Top Performers report with date picker, metrics, and filter options.
* Select your timeframe using the date picker.
* Choose metrics to include by clicking the **+ add** button.
* Add filters and group your ads in a variety of ways (see below).
## Grouping Performance Variables
To the right of the date picker, **Group by** lets you select any campaign variable to aggregate your data. This gives you a deeper understanding of key performance drivers and lets you compare segments quickly.
* **Group by Ad/Adset/Campaign setup variables**: See which ad names perform best or which campaign objectives are driving the most scale.
* **Group by Copy elements**: Find out which headlines perform best.
* **Group by Naming Rule Tags**: [How to set up and use Naming Rule Tags](/knowledge/reporting/creative-insights/naming-rule-tags).
* **Group by Creative Breakdowns**: AI-driven categories to help you understand how human presence, logo, and text prominence impact performance. Available for paid customers upon request; contact your Account Management team.
## Advanced Filters
Click **+ Add filter** to slice your data.
* Choose any field - campaign structure variables (e.g. format, campaign name) or metrics (e.g. CPA, CPC).
* Set conditions: for metrics, filter by greater than or less than values. For campaign variables, use text matching (e.g. campaign "contains X") or select specific values.
* Remove filters by clicking the **x** next to the metric name above the visualisation.

Advanced filter options for slicing data by campaign variables and metrics.
## Visualisation Options
Select Grid, Bar chart, or Timeline views.
* **Grid view** (default): Quantitative and qualitative view of your creatives so you can make changes without searching for a preview.
* **Bar chart view**: Thumbnail for easier comparison of metric performance by ad or segment.
* **Timeline view**: Visualise peaks and troughs of performance. Useful with CTR vs Spend metrics to spot ad fatigue.

Grid, bar chart, and timeline visualisation options for the Top Performers report.
## Templated Reports
Pre-built reports are available in the side panel for both Meta and TikTok:
* **Top Creatives**: Grouped at creative level to see your highest performers.
* **All Active**: Shows what's live now.
* **Top Hooks**: Which ads are best at stopping the scroll.
* **Top Clicks**: Which ads generate the most clicks.
* **Top Copy**: An overview of messaging to drive improvements in copy.
# Available Influencer Metrics
Source: https://docs.mention-me.com/knowledge/reporting/influencer/available-metrics
Understanding brand-level and individual influencer reporting available in the Mention Me dashboard.
This article explains the reporting available for influencers, their content, and the revenue generated through your influencer programme.
## Accessing Brand-Level Reporting
You can access brand-level influencer reporting directly in the dashboard. [Go to Influencer Reporting Overview](https://mention-me.com/merchant/~/influencers/overview).
## Reporting Sections
Brand-level reporting is split into three sections, each covering a different aspect of your influencer programme.
With all reporting, you can select from pre-defined periods or create a custom period using the date range selector.
### Influencer Metrics
An overview of the people in your programme: registrations, approvals, engagement, and audience size.
| Metric | Definition |
| - | - |
| Total registrations | Total number of influencers who have signed up to participate. |
| Total approved | Number of registered influencers who have been reviewed and approved. |
| Participation rate | Percentage of approved influencers who have created at least one brand-related story, post, reel, or video. |
| Potential reach | Total number of followers for all approved influencers across all channels. |
### Content Metrics
Activity and output of approved influencers, showing how much branded content is being created and where it's published.
| Metric | Definition |
| - | - |
| Total content published | Number of stories, posts, reels, and videos created by influencers tagging your brand across all channels. |
| Published content per channel | Number of Instagram stories, posts, and TikToks created by your influencers tagging your brand, broken down by channel. |
### Revenue Metrics
The business impact driven by your influencers, covering revenue, customers, orders, and commission.
| Metric | Definition |
| - | - |
| Revenue generated | Total revenue from orders placed by customers introduced by an influencer. |
| Commission | Total commission earned by influencers based on actions such as new customer purchases or content creation. |
| Customers acquired | Number of first-time and reactivated customers introduced by influencers. |
| Orders placed | Total number of orders made by customers introduced via influencers. |
## Individual Influencer Performance
You can download detailed metrics on how individual influencers are performing for more granular insight.
### How to Download
**1. Select a time period**
Choose the time period you want to report on.
**2. Download the report**
Press the **Download individual influencers** button. A report will be generated, and you'll receive an email when it's ready.
**3. Analyse the data**
Import the report into a spreadsheet for further analysis.
### Downloaded Report Metrics
| Metric | Definition |
| - | - |
| New Customers Acquired | Number of first-time and reactivated customers introduced by the influencer. |
| New Signups (Subscription Businesses only) | Net new customers who signed up following the influencer's recommendation. |
| Total Revenue | Revenue from orders placed by customers introduced by the influencer. |
| Brand Posts | Total pieces of content (stories, posts, reels) created by the influencer across all channels. |
| Total Number of Followers | Combined number of followers the influencer has across all channels. |
# Reporting Overview
Source: https://docs.mention-me.com/knowledge/reporting/overview
An introduction to reporting across referral, advocacy, influencer, and creative insights in the Mention Me platform.
> [!NOTE]
>
> Using **Mention Me**? Custom dashboards now live in Mention Me. See
> [Reporting](/knowledge-app/referral/reporting/overview). Advocacy, influencer,
> and downloadable programme reports still live in Classic, as described below.
Mention Me provides comprehensive reporting across four key areas, each designed to surface the insights you need to measure performance, understand customer behaviour, and drive growth.
> [card] [Referral Reporting](/knowledge/reporting/referral/metrics-glossary)
>
> End-to-end referral funnel tracking - impressions, enrolment, shares,
> conversions, and revenue. Build custom reports, export data, and compare
> markets.
> [card] [Advocacy Reporting](/knowledge/reporting/advocacy/dashboards)
>
> Measure the broader value of customer advocacy with Earned Growth, ECR,
> Network Insights, and Sentiment Analysis.
> [card] [Influencer Reporting](/knowledge/reporting/influencer/available-metrics)
>
> Track influencer programme performance - registrations, content output,
> audience reach, and revenue at brand and individual level.
> [card] [Creative Insights](/knowledge/reporting/creative-insights/connect-ad-accounts)
>
> Paid ad analytics for Meta and TikTok. Identify winning creatives, spot ad
> fatigue, and inform creative strategy.
# How to Analyse Referral Data
Source: https://docs.mention-me.com/knowledge/reporting/referral/analyse-referral-data
How to track, analyse, and interpret your referral programme performance using the Mention Me Explore tool.
This guide walks you through how to track, analyse, and interpret your referral programme performance using the Mention Me platform.
By the end of this guide, you'll be able to:
* Understand key referral funnel stages
* Build custom reports in the Explore section
* Break down data by promotion point, share method, customer segments, and more
* Measure the value of experiments, campaigns, and device usage
* Gain actionable insights to improve referral conversion
## The Referral Funnel: Key Stages
The referral funnel tracks a customer's journey from being enrolled as a referrer through to a purchase made by their friends (referees). You can view performance across this funnel in the Benchmark tab under Performance, including how each metric compares to the industry average. For test ideas based on these metrics, see [Understanding Referral Intelligence Benchmarks](/knowledge/ab-testing/benchmarking-test-ideas).

The referral funnel from enrolment to purchase in the Benchmark tab.
The typical flow:
**1. Impression**
Referrer makes a purchase and sees the referral offer.
**2. Share**
Referrer chooses to share and sends an invite via email, social, etc.
**3. Click**
Referee clicks the share link and visits the referral landing page.
**4. Registration**
Referee registers their email and unlocks the referral incentive.
**5. Purchase**
Referee completes a purchase and becomes a qualified new customer.
**6. Reward**
Referrer receives their reward.
Tracking drop-off or success at each stage helps you spot what's working, what's not, and where to focus improvements.
## Using Explore for Deeper Insights
To uncover deeper insights:
**1. Open Explore**
Navigate to **Performance > Explore** in the platform.
**2. Select metrics**
Choose the metrics you want to analyse (e.g. impressions, clicks, shares, registrations, purchases).
**3. Create a report**
Click **Create Report** to generate a chart or data table.
**4. Add breakdowns**
Choose your breakdown (called "splits") to filter and segment your data.

The Explore interface with metric selection, chart creation, and split options.
## Key Dimensions to Split Data by
### Promotion Point (Situation)
* Shows where the referrer first saw your referral offer (e.g. post-purchase page, email campaign, homepage banner).
* Mention Me tracks this via the "situation" parameter in your referral links.
* Use this dimension to assess the performance of different marketing channels and placements.
* [Learn more about tracking situations](/knowledge/referral/promoting/promotion-points).
### Share Method
* See how referees engaged via different sharing channels (e.g. email, Facebook, WhatsApp, Messenger).
* Only tracked after the referrer has actively shared.
### Segment
* Set up via the Mention Me tag on your pages.
* Define your own values (e.g. VIPs, loyalty tier, country, product type).
* Enables campaign targeting and reporting by customer group.
### Campaign / Experiment / Offer
* Break down performance by the specific referral Campaign, Experiment, or Offer.
* The labels reflect your in-platform naming at the time of analysis.
## Other Filters and Splits
### Currency
* Orders
* Revenue from new customer first orders
* Revenue from new customer subsequent orders
* Revenue from rewarded referrers
### Device Type (Mobile/Desktop)
* Tracked from "Customers Enrolled" onwards.
* Helps you optimise user experience based on where users interact most (e.g. if enrolment occurs mostly on desktop but purchases on mobile, optimise accordingly).
## Tips for Effective Analysis
* Start at the top of the funnel with Impressions, and work your way down to Revenue.
* Use time-based filters to identify month-over-month or seasonal trends.
* Tie performance insights back to customer value.
* Use A/B experiments to test ideas, based on your findings in Explore.
## Getting Started
Head to **Performance > Explore** in your Mention Me dashboard and experiment with building your own reports.
Reach out to your Client Success Manager for hands-on support or tailored analysis suggestions.
# Available Reports
Source: https://docs.mention-me.com/knowledge/reporting/referral/available-reports
A complete list of every downloadable report in the Mention Me platform, with descriptions of the data each provides.
This article lists every available report for download from the Mention Me platform. For each report, you'll find a brief description of the data it provides, helping you select the right report for your analysis or export needs.
Animated overview of the available reports download interface.
> [!NOTE]
>
> Programme Reporting offers two ways to run these reports: **Reports Over Time** (a rolling date range across all cohorts) and **Reports for a Specific Cohort** (a single campaign, experiment, or offer). Some reports are only offered from one of these two views. Reports marked **(Cohort tab only)** below are only available from **Programme Reporting > Reports for a Specific Cohort**, and were not previously documented in this article.
## Available Reports and Their Data
### All About Referrers
* **All enrolled referrers (for competitions)**: Everyone enrolled with a referral offer within a specific campaign or experiment. Columns: Enrolled Date, Merchant, Cohort, Situation, Email, Firstname, Surname.
* **All enrolled referrers (with share and dashboard links)** *(Cohort tab only)*: Everyone enrolled in a specific campaign, experiment, or offer, including their name and email alongside their share links for each channel and a link to their dashboard. Useful for sending promotional emails to referrers with direct links for them to act on. Columns: MMCustomer Id, Client Customer Id, Email, Firstname, Surname, Offer Id, Offer, Campaign, Merchant, Situation, Quick Link Code, Slug. Can be filtered by offer, experiment, campaign, merchant, client account, and registration date.
* **All referrers who have introduced at least one new customer (for competitions)**: Referrers whose invitees have qualified as new customers. Columns: Enrolled Date, Engaged Date, Qualified Referee Date, Merchant, Cohort, Situation, Referrer and Referee details.
* **All referrers who have introduced at least one new or potential customer (for competitions)**: Similar to the above, but includes all referrers who've introduced at least one new or potential customer, regardless of purchase.
* **All sharing customers (for competitions)**: Anyone who made at least one share of a referral offer. Columns: Enrolled Date, Merchant, Cohort, Situation, Email, Firstname, Surname, Number Of Shares.
* **All enrolled customers who have not yet shared**: All actively enrolled referrers (who enrolled for the first time during the report date range) who have not yet shared, along with the rewards on offer. Where a customer is enrolled in more than one offer, the most recent offer is shown. Columns: Customer Email, First Enrolment Date, First Active Enrolment Date, Most Recent Enrolment Date, Referrer Reward, Referee Reward.
* **Enrolled customers who have not shared yet**: Recent referrers who have not shared. Includes: Referrer Email, Referrer Reward, Referee Reward.
* **Recent successful referrers and the total amount spent by their friends**: Latest 10,000 referrers and spend by their referees. Columns: first_registration_date, email, firstname, surname, number_of_offers, number_of_referrals, value_of_referrals.
* **Sharing customers and their share behaviour**: Sharing customers with email, customer ID, which offers they've shared, share type and volume, enrolment and share dates, segment, locale.
* **Successful referrers with their thank you vouchers**: Referrers rewarded with a voucher code (still valid). Includes: Referrer details, Reward Expiry, Voucher ID, Reward Amount, list of referees, whether voucher has been used, segment.
* **Top sharing customers**: The 100 top sharers by shares made and responses. Columns: Customer Name, Email, Counted Shares, Counted Share Responses, First Share Date, Last Share Date.
* **Top successful referrers**: The 100 top referrers by new customers introduced. Columns: Customer Name, Email, First Referral Date, Last Referral Date, Total Referrals.
### All About Referees
* **New and potential customers ordered by purchase date**: Referred and new customers by purchase date. Includes: Registered Date, Purchased Date, Merchant Customer Id, Email, Name, Status, Referrer, Offer, Order Ids, Order Total, Currency, Opt In, custom fields.
* **New and potential customers ordered by registration date**: Same as above, ordered by registration date.
* **New and potential customers with marketing opt-in**: Customers who have given marketing permission. Columns: Customer Email, Creation Date, Referee Registration Date, Referee Segment, Locale, Referrer Segments.
* **New and potential customers with marketing opt-in and coupons**: Same as above, with voucher code, referee expiry date, status, and reward info.
* **New and potential customers with marketing opt-in and referee registration timestamp**: Gives timestamp for registration. Columns: Customer Email, Creation Date, Referee Registration Timestamp, Segments, Campaign.
* **New customers with their first order details**: New referred customers and their first order data. Columns: Order Date, Merchant Name, Referee Email, Referee User Id, Ids, Order Identifier, Currency, Total, Coupon Code, Custom Field.
* **Potential customers who have not purchased yet**: Referred or new customers with valid incentives but no purchase. Columns: Referee Email, Reward Description, Reward Name, Expiry, Referrer First Name, Marketing Opt In, Client Coupon Id.
* **Potential customers who have not purchased yet (including expired rewards)**: Same as above, including expired incentives.
### Referrers and Referees Together
* **CRM Feed**: Export of referral data for CRM integration. Columns: CustomerFirstname, CustomerSurname, CustomerEmail, MerchantCustomerID, CustomerRecognisedDate, ReferredByCustomerEmail, ReferredByMerchantCustomerID, Opted In To Received Merchant Marketing Email, Referred Dates, Situation, ShareType, Segment, SignedUp, Rewarded, Qualified Dates, IsReferrer, ReferrerSegments, Share Counts, Successful Referrals.
* **New customers and their referrer**: New customers and referrer details. Columns: Order Date, Merchant Name, Referee Email, Referee Ids, Referrer Email, Referrer Ids, Campaign Name & Id, Currency, Total, Order Ids.
### NPS Responses
* **NPS aggregated score**: Merchant/campaign/offer/experiment NPS performance. Columns: Merchant, Offer, Experiment, Campaign, % Promoters, % Detractors, % Passives, NPSScore.
* **NPS quantitative feedback**: Detailed customer feedback for NPS. Columns: Feedback Date, Merchant, Campaign, Experiment, Offer, Email, First Name, Surname, Answer, NPSClass, Feedback.
### Orders and Transactions
* **Order / transaction extract**: Extract of all received transaction data. Columns: Merchant Order Id, Currency, Total, Order Date, Hashed Email.
### Fulfilment Feeds
* **Reward audit report**: Which customers received which rewards. Columns: Reward Date, Customer Type, Email, Name, Order Ids, Reason, Reward, Amount, Type, Referrer and Referee Info, Fulfilment Type, Coupon Id.
* **Reward fulfilment feed**: List of rewards to fulfil (client-fulfilled only). Columns: Reward Date, Customer Type, Email, Name, Order Identifiers, Reason, Reward, Amount, Type, Currency, Referrer and Referee Info.
* **Reward fulfilment feed for incentivised actions**: As above, for non-purchase rewards. Adds Incentivised Action Identifier.
### Aggregate Customer Insights
* **Referees converting to referrers**: Tracks how many new customers go on to participate as referrers, share, refer, and their conversion rate. Columns: Merchant Name, Qualified Referees, Who Engage As Referrer, Who Share At Least Once, Who Refer Successfully, Various Percentages.
* **Time between referee given voucher (before purchase) and referee qualified as new customer** *(Cohort tab only)*: Distribution of referrals by how long it took from giving the referee a coupon to that referee becoming a qualified new customer. Use this report to understand the dynamics of before-purchase referral.
* **Time between referrer registration and referee purchased** *(Cohort tab only)*: Distribution of referrals by how long it took from the referrer enrolling in the offer to their referee purchasing for the first time. Use this report to understand the dynamics of end-to-end referral.
* **Time between referrer registration and referee qualified as new customer** *(Cohort tab only)*: Distribution of referrals by how long it took from the referrer enrolling in the offer to their referee being qualified as a new customer for the first time. Use this report to understand the dynamics of end-to-end referral.
* **Time between referrer registration and referee voucher fulfilment** *(Cohort tab only)*: Distribution of referrals by how long it took from the referrer entering their email address to their referee being rewarded. Use this report to understand the dynamics of after-purchase referrals.
* **Time between share response (click) and referee purchased** *(Cohort tab only)*: Distribution of referrals by how long it took from the referee following a share link (or entering a name at checkout) to that referee purchasing for the first time.
* **Time between share response (click) and referee qualified as new customer** *(Cohort tab only)*: Distribution of referrals by how long it took from the referee following a share link (or entering a name at checkout) to that referee becoming a qualified new customer. Use this report to understand the dynamics of those responding to sharing.
All six "time between" reports above can be filtered by offer, experiment, campaign, merchant, and client account, and by start and end date.
### Devices
* **Referee devices**: Device type, experience, and conversion figures per device for referees. Columns: Merchant, Major Device, Experience, Registered Referees, Incented Referees, Qualified Referees.
* **Referee screen sizes**: Screen width, height, and conversion figures. Columns: Merchant, Screen Width, Average Screen Height, Experience, Registered Referees, Incented, Qualified.
* **Referrer devices**: As above, but for referrer enrolment/sharing.
* **Referrer screen sizes**: As above, focusing on referrers.
### Managing Abuse
* **All referees and referrers pending approval**: A list of all referees and referrers currently pending approval, including those flagged by gaming rules and those requiring standard approval. Approvals can be made in the customer section of the platform or via a feed. Columns: Type, Id, Created Date, Purchase Confirmed Date, Referee Email, Referee Firstname, Referee Surname, Referee Customer Identifier, Referee Order Identifier, Offer Id, Offer Short Name, Requires Approval Reason, Is Gaming, Gaming Score, Referrer Email, Referrer Name.
* **Gaming score distribution**: Shows how gaming (fraud) scores are distributed and who purchased/registered. Columns: Merchant, Cohort Descriptor, Bucketed Gaming Score, Number Of Referrals, Referee Purchased.
### Information Security
* **Audit log**: Details of user actions and changes within the account, including usernames, email, changes, and timestamps.
* **Audit user permissions**: List of all users with account access, roles, last login, and status (locked/unlocked).
* **Security summary and actions**: Summary of key or at-risk actions within your account, who took those actions, and suggested remediation.
Most reports can be filtered by campaign, merchant, client account, segment, or time period. You can download results as CSV for your own analysis or upload into external systems.
## Still Unsure Which Report to Use?
If you need help or a custom export, please contact [Mention Me support](https://help.mention-me.com/hc/en-gb/requests/new) for guidance.
# How to Export Data
Source: https://docs.mention-me.com/knowledge/reporting/referral/export-data
How to extract, generate, and export data from the Mention Me platform, including manual downloads, automated reports, and order/transaction exports.
This guide covers all the ways to get data out of Mention Me, whether you need a quick one-time export, a recurring automated report, or a transaction-level data extract for reconciliation.
## Manually Downloading Reports
Watch how to download reports and order data from Classic.
> [accordion] See each step in detail
>
> **1. Navigate to Reports for Download**
>
> Log in to your dashboard. In the left-hand menu, click **Reporting** > **Programme Reporting**, then open **More Reports** and click **Reports for download**.
>
> 
>
> The Reports for Download navigation menu.
>
> **2. Choose report type and period**
>
> Choose between **reports over time** or **reports for a specific cohort per campaign**, then specify the period you want the report to cover. You can also group the results by day, week or month, and add a campaign column.
>
> 
>
> The report type selection options.
>
> **3. Select a date range**
>
> Choose from preset ranges (e.g. last 7 days, last 30 days) or pick custom start and end dates from the calendar.
>
> 
>
> The date range selector.
>
> **4. Run the report**
>
> Under **Choose a report**, click a report to expand it and see what it includes, with sample data. Download the sample CSV if you want to check the columns first, then click **Start running this report now**.
>
> 
>
> The list of available reports.
>
> **5. Monitor and download**
>
> Your report appears under **Reports processing** on the right-hand side, where you can ask to be emailed when it's ready. Once it's done, it moves to **Reports generated**. Click the download icon to save it.
>
> 
>
> The report queue panel.
## Automatically Generated Reports
Many of the reports under Reports for Download can be automatically generated and delivered, along with others not listed in that section.
These reports can be sent to:
* The **Secure File Transfer** area of the Mention Me platform
* Via **email** to nominated team members (sending customer data via email is not recommended)
* Via **SFTP** to your own systems
You can choose how often data is delivered (e.g. daily, weekly, monthly).
You can see any reports already set up under **Scheduled reports** in the **More Reports** menu. To arrange automatically generated reports, contact your Client Success Manager.
## Order/Transaction Data Exports
Order/Transaction Exports give you visibility into the transactions Mention Me has received and recorded. Use them alongside your own database to identify:
* Differences in transaction volume
* Order value discrepancies
* Missed orders
* Integration issues where Mention Me may not be receiving expected data
### Data Sources
Order/transaction data can be provided to Mention Me through:
* JavaScript tags
* SFTP order imports
* Order API
Regardless of the source, all orders are processed uniformly and stored as a single type.
### Creating an Order Data Export
> [accordion] See each step in detail
>
> **1. Navigate to Reports for Download**
>
> In the left-hand menu, click **Reporting** > **Programme Reporting**, then open **More Reports** and click **Reports for download**.
>
> 
>
> The Reports for Download page.
>
> **2. Select a time frame**
>
> Use the **Period selector** to choose a time frame (e.g. last 7 days, last whole x months, or a specific range). Ensure dates reflect when orders were placed for accurate alignment with your data.
>
> 
>
> The Period selector.
>
> **3. Choose the Orders & transactions report**
>
> Scroll to **Orders & transactions** and expand **Order transaction extract** to see the fields it includes. Download the sample file if you want to check the format, then click **Start running this report now**.
>
> 
>
> The Orders and transactions section.
>
> **4. Download the report**
>
> Once started, the report appears under **Reports processing**. When it's done, it moves to **Reports generated**. Click the download icon to save it.
>
> 
>
> The Reports Processing and Reports Generated sections.
### Important Notes
* **Email Addresses**: Exported emails are [hashed](/knowledge/security/data-management/hashing), as stored in the database.
* **Order ID**: Use the order ID for investigations; it matches your identifier provided to Mention Me.
* **Support**: For questions about your data, click **Help** in the left-hand menu, or contact the Technical Operations team using the [Help Form](https://help.mention-me.com/hc/en-gb/requests/new?ticket_form_id=8840645829405).
# How to Use Market Insights
Source: https://docs.mention-me.com/knowledge/reporting/referral/market-insights
How to use Market Insights to view and compare referral performance across multiple markets and regions.
Market Insights allows you to see at a glance how the referral programme is performing across all of your markets within the Mention Me platform.
Using the reporting filters, you can:
* Group campaigns into markets (such as the UK, France, or the US) and further into market groupings (such as Europe or North America)
* View and analyse key referral metrics split by different markets or market groupings
* Identify what's working well in certain markets so you can replicate across others
## Where to Find Market Insights
In the left-hand menu, click **Reporting** > **Programme Reporting**. Market Insights sits on the **Summary** tab, in the campaign filter, under **Markets** and **Market Groups**.
## Setting Up a Market
To access the market filters, you first need to set up your markets:
Watch how to set up your markets and compare referral performance in Classic.
> [accordion] See each step in detail
>
> **1. Open market management**
>
> On the Programme Reporting **Summary** tab, open the campaign filter (it shows **all campaigns** by default) and choose **Manage all markets** ([or go straight there](https://mention-me.com/merchant/~/markets)).
>
> 
>
> The Manage all markets page.
>
> **2. Review suggested markets**
>
> Review suggested markets based on your current campaigns. Confirm or discard any of the suggestions.
>
> 
>
> Adding a new market from the suggested markets list.
>
> **3. Add new markets**
>
> Click **Add a new market** and follow the steps to configure.
>
> 
>
> Confirmation screen after setting up a new market.
>
> **4. Access your markets**
>
> Re-access your markets via the Programme Reporting Summary tab or by going to **Settings & Tools > Account Settings > Markets**.
## Setting Up a Market Grouping
Use market groupings to group different markets together for aggregated reporting across regions like Europe and North America.
> [accordion] See each step in detail
>
> **1. Access market groupings**
>
> Access Market Groupings via the Programme Reporting Summary filter or **Settings & Tools > Account Settings > Markets**. Or [go straight there](https://mention-me.com/merchant/~/market-groups).
>
> **2. Add a new grouping**
>
> Go to **Market Groups** and click **Add new market grouping**.
>
> **3. Select markets**
>
> Select the markets you wish to group together.
>
> **4. Create the grouping**
>
> Name your grouping and click **Create market grouping**.
>
> 
>
> The Market Groups page showing how to create a new market grouping.
## Using Market Filters to View Referral Performance
Once you've set up your markets and groupings, open the campaign filter on the Programme Reporting **Summary** tab, hover over **Markets** (or **Market Groups**) and tick the ones you want to see.
Your selected markets appear below the filter, and every referral KPI updates to match. You can compare up to 12 markets or market groupings side by side.
Turn on **Show market proportions** to see how much each market contributes to each KPI. If you're not sure how the numbers work, click **How do we report on markets?**

Referral KPIs displayed side by side per market on the Programme Reporting Summary.
## FAQs
### What criteria can I use for creating a market?
Markets are based on the countries used in each campaign; each country can only exist in one market. You can only create a market for a country if a campaign is set up in that country.
### Is the reporting by market available for referral KPIs only?
Yes, at the moment only referral KPIs can be split by market.
### Can I still view Programme Reporting by campaign?
Yes, campaigns are still available as a filter for the Programme Reporting dashboard, but they cannot be compared side by side.
### What can I compare on the dashboard?
Markets can be compared to Markets; Market Groupings can be compared to Market Groupings. Markets cannot be compared to Market Groupings.
### How many markets can I compare at once?
You can compare up to 12 Markets or Market Groupings in the dashboard at one time.
# Referral Metrics Glossary
Source: https://docs.mention-me.com/knowledge/reporting/referral/metrics-glossary
Definitions for every metric tracked across the referral funnel, from impressions and enrolment through to conversions and revenue.
This glossary covers the metrics recorded across the referral funnel. Understanding each stage of the referral journey is essential for analysing performance, making informed decisions, and identifying opportunities for improvement.
## Referral Funnel Overview
The end-to-end journey consists of two main participants:
* **Referrers**: Your brand advocates - existing customers who share your referral offer.
* **Referees**: Their friends - the people receiving your referral offer and being encouraged to become new customers.
The funnel tracks volume, performance, and conversions at each step. Key measures fall into three categories:
1. **Volume metrics**: impressions, shares, orders
2. **Conversion metrics**: share rate, purchases per sharer
3. **Revenue metrics**: first order revenue, lifetime value
## Core Metrics
### Orders
The foundation of your business. This metric highlights important trends such as the impact of promotional events, seasonality, and year-on-year growth.
An order is defined as having a customer (email), value and currency, and a unique order ID.
### Impressions and Exposure
* **Impressions / Shown**: The number of times a referral offer is displayed by Mention Me. This only includes pages served by Mention Me, not external email marketing or banners.
* **Unique Impressions**: The number of unique customers who saw a referral offer within a 24-hour period. Running a report over a week will not simply sum daily unique impressions, since the same customer may appear on multiple days.
* **Seen**: The number of unique customers eligible and registered to share referral offers, either actively or passively.
### Customer Enrolment
* **Enrolled**: Customers enrolled in your referral scheme through automatic enrolment (e.g. post-purchase overlay) or manual sign-up. Enrolments into distinct offers are counted separately - if a referrer enrols into two offers in one day, that counts as two enrolments. However, seeing the same offer more than once only counts as one enrolment.
* **Actively Enrolled**: Customers who click on a referral offer at post-purchase or register directly via a landing page. All of these customers receive a Referral Registration email.
### Sharing Activity
* **Sharers / Sharing Customers**: Unique referrers who shared the offer during a given time period, via email, social links, or by entering their name during checkout. This metric considers unique sharers within the selected period - if a referrer shares on Monday and Wednesday, the weekly count is still 1.
* **Shares**: The total number of shares made across any channel (email, WhatsApp, Facebook, Name Share, etc.). A single customer can send multiple shares.
* **Shares per Sharer**: Average number of times each customer shares. Higher figures suggest sharing across multiple platforms or to multiple friends.
> [!NOTE]
>
> Mention Me takes a conservative approach to counting shares. A share is only counted when there is confidence it was sent:
>
> * **Email sharing**: counted when someone clicks the link in the email
> * **Social media sharing**: counted when the social network follows the link (evidence it was posted)
> * **Name sharing**: counted only when the referee uses the referrer's name during checkout
### Referee Response
* **Share Responses**: The number of actions taken on a shared offer (e.g. link clicks or entering a friend's name at checkout). There is no deduplication - multiple clicks by the same person are all counted.
* **Responses per Share**: Engagement rate calculated by dividing share responses by total shares.
### Referee Registration and Incentives
* **Registered / Incented Friends**: The number of referees who enter their email and receive an incentive or promise of a reward. To reach this step, the email must be valid. Not everyone who registers will receive an incentive - some may be held in gaming queues, or vouchers may have run out. Unless you experience significant gaming, registered and incented counts should be roughly equal.
* **Incented per Response**: The likelihood that referees who click a referral link register for the offer and claim their incentive. A target of 50%+ is considered healthy.
### Conversions and Outcomes
* **Confirmed Purchases**: Referees who place an order after engaging with the referral offer. Only transactions tracked via Mention Me order tags are included.
* **New / Qualified Customers**: Referees who make their first purchase and meet your qualification criteria for rewards (e.g. product category rules or subscription completion).
* **Purchases per Incented**: Conversion rate from incentivised referees to actual customers.
* **New Customers**: Distinct referees who complete their first order, matched by email.
* **Unique Successful Referrers**: Referrers who introduced at least one friend who became a new customer.
* **Rewarded Referrers**: Referrers who received a reward because a referee completed the necessary action.
### Revenue Metrics
Revenue figures associated with referred purchases are split into three categories:
* **Revenue from New Customers**: First orders from referees.
* **Revenue from New Customers' Subsequent Orders**: Orders made by referees beyond their first.
* **Revenue from Rewarded Customers**: Purchases made by referrers within 45 days of receiving a reward.
**Total Revenue** is the sum of all three categories above.
> [!NOTE]
>
> Revenue is the order value passed to Mention Me through the tags. It should be net of shipping, discount, and taxes. All revenue is displayed in a single reporting currency (usually GBP by default), configured at the account level. Orders can be placed in any currency, but the platform converts them using up-to-date exchange rates. The reporting currency cannot be changed dynamically by campaign.
## Conversion Ratios to Monitor
* **Overall Customer Share Rate**: Sharing customers / unique customers. Strong programmes reach 30%.
* **Purchase Rate (Purchases per Sharer)**: New customers / sharers. Mature programmes average 15-20%.
To compare these metrics against industry averages and find test ideas for improving them, see [Understanding Referral Intelligence Benchmarks](/knowledge/ab-testing/benchmarking-test-ideas).
## FAQs
### Why is there no order data per campaign?
The campaign is determined after the order occurs. The funnel order is:
Order -> Offer Impression (Campaign Assigned) -> Enrolled -> Shared
The concept of a campaign only exists at the Offer Impression level, not the Order level. The order happens before the campaign is selected, so orders cannot be reported by campaign.
### What currency is reporting displayed in?
Reporting supports a single currency per account. Revenue data across all orders is converted to your configured reporting currency using real-time exchange rates. It is not possible to show multiple currencies per report. The reporting currency is set at the account level and does not change dynamically based on campaign selection.
# Understanding the Overall Performance Report
Source: https://docs.mention-me.com/knowledge/reporting/referral/overall-performance
Understand what each metric in the Overall Performance report measures, how the referral funnel connects end to end, and what typical benchmarks look like.
Programme Reporting includes a summary page showing all of your key metrics at a glance. However, the metrics on that summary page aren't easy to edit or customise, so most people go straight to the **Overall Performance** page instead, which offers more control over what you see.

The Overall Performance report, showing the campaign selector, date picker, and default metric set.
On this page you have:
* A **campaign selector**, so you can view all campaigns together or filter down to one (for example, if a merchant runs separate UK, France, and Spain campaigns)
* A **date picker**, with preset windows or the option to enter a custom date range
* The ability to add a **comparison** to any metric, either against the **prior year** or the **prior period** (the equivalent number of days immediately before your selected window)
* A **metric selector**, so you can add or remove metrics from the default view
Every metric also has a hover definition. Some of these definitions are more useful than others, which is where this article comes in. For a full reference of every metric tracked across the referral funnel, see the [Referral Metrics Glossary](/knowledge/reporting/referral/metrics-glossary).
## The Referral Funnel: End to End
The most useful way to read these metrics is end to end, as a funnel: each metric represents a stage further along the referral journey, from a customer seeing a referral offer through to a new customer completing their first order.
| Metric | What It Measures |
| - | - |
| Orders | The total number of orders placed on the merchant's website in the selected window, regardless of whether they came through referral. This gives context on the overall size of the business. |
| Unique Impressions | How many individual customers have seen a referral offer, deduplicated to unique sessions. |
| Enrolled Customers | Customers who have seen a referral offer and been registered for referral, whether automatically ("silently") or by actively enrolling. |
| Actively Enrolled Customers | The subset of enrolled customers who actively chose to enrol, rather than being enrolled silently. |
| Customers Who Shared | Enrolled customers who have gone on to share their referral link. |
| Clicks | People who have clicked a shared link, or entered the name of the person who referred them. |
| Incented | Referees who have entered their email address and been given their incentive. This only means they've claimed it, not that they've used it. |
| Referee First Order | Referees who have gone on to place their first order - the final step in the funnel. |
A few of these are worth explaining further.
### Unique Impressions vs Impressions
Impressions and unique impressions are similar, but impressions are not deduplicated. If a customer refreshes the page showing the referral popup three times, that counts as four impressions but only one unique impression. Because unique impressions ties activity to unique sessions rather than counting every page load, it's the more reliable of the two metrics to use.
### Enrolled Customers vs Actively Enrolled Customers
At the post-purchase point, Mention Me automatically captures a customer's name and email address and registers them for referral without any action from the customer. This is called a **silent enrolment**.
Enrolled Customers is the combined total of:
* Customers who were silently enrolled at post-purchase
* Customers who actively enrolled, either by clicking through the post-purchase overlay or by manually registering on a landing page or dashboard
Actively Enrolled Customers counts only the second group: customers who have shown some level of engagement with the programme, rather than simply having a referral offer appear in front of them.
Comparing the two numbers is useful. If Enrolled Customers is far higher than Actively Enrolled Customers, it tells you that most customers have been registered but haven't yet meaningfully engaged with the programme.
> [!NOTE]
>
> Customers Who Shared can be under-reported. If a referrer tells a friend about a discount in conversation rather than through a formal share, that activity isn't automatically captured. If the referee later enters the referrer's name at checkout, Mention Me retrospectively credits that share.
Looking at Clicks alongside Customers Who Shared can also be revealing: roughly three clicks per share suggests a healthy amount of engagement with each share, though an unusually high ratio can also indicate that referral links are being posted somewhere public, such as a voucher code forum, rather than shared one-to-one.
## Revenue Metrics
The revenue metrics build on top of the funnel to show the financial impact of referral.
| Metric | What It Measures |
| - | - |
| Revenue From All Customers | Revenue from every order on the merchant's website, referral and non-referral combined. |
| Revenue From New Customers | Revenue from a referee's first order. |
| Revenue From New Customers' Subsequent Orders | Revenue from a referee's second, third, and later orders. |
| Revenue From Rewarded Referrers | Revenue generated by a referrer within 45 days of receiving their own reward. |
| Total Referral Revenue | Revenue From New Customers + Revenue From New Customers' Subsequent Orders + Revenue From Rewarded Referrers. |
Total Referral Revenue is the headline figure typically shared with a client: for example, "over the last 30 days, Mention Me generated you £17,000, made up of £5,000 from new customer revenue, £12,000 from referees' subsequent orders, and a small amount from rewarded referrers."
At onboarding, clients are asked to share order values net of discounts and VAT, so revenue metrics should reflect revenue before discount. In practice, clients don't always set this up correctly on their side.
> [!TIP]
>
> If you need to check whether a client's revenue figures include discounts, find a recent referral order in the Reports for Download section, look up its order number in the debug dashboard, and share that order number with the client. Ask them to confirm whether the value shown is before or after their discount. This is a reliable way to verify how their feed is configured.
Revenue From Rewarded Referrers has no direct link to the referrer's reward itself - it simply measures whatever the referrer spent within 45 days of receiving it. For clients whose referrer reward is a small, fixed-value gift card (for example, a £20 Amazon voucher from an insurer), this metric may not be especially meaningful, since the reward isn't tied to a purchase.
## Conversion Metrics
Conversion metrics express the funnel above as ratios.
**Share Rate** is Customers Who Shared as a percentage of Enrolled Customers. For example, a merchant with 35,000 enrolled customers and 1,600 who shared has a share rate of roughly 5%.
**Purchase Rate** is Referee First Orders as a percentage of shares. For example, a merchant generating 100 new customers from 1,600 shares has a purchase rate of roughly 6%.
**Conversion Rate** is Referee First Orders as a percentage of Enrolled Customers, showing overall drop-off across the whole journey.
Share Rate and Conversion Rate are both calculated from total Enrolled Customers, not from Actively Enrolled Customers. This is deliberate: both metrics are meant to show, of everyone who *could* share because they've been enrolled, how many actually did. Measuring from Actively Enrolled Customers alone would inflate the picture, since customers in that group have already shown intent to engage.
As a rough guide:
* A Share Rate of around 5% is acceptable; 10% is better
* A Purchase Rate of 20-30% is typical for a healthy programme
* A Conversion Rate of around 1% is a reasonable expectation
If Purchase Rate is low, the issue is more likely to sit on the referee's side of the journey than the referrer's, since Share Rate is about the referrer and Purchase Rate is about the referee. This is a useful place to focus when planning an A/B test. The reporting platform's Benchmarking section covers this in more detail - see [Understanding Referral Intelligence Benchmarks](/knowledge/ab-testing/benchmarking-test-ideas).
## Average Order Value
**New Customer AOV** is the average value of a referee's first order - Revenue From New Customers divided by the number of new referred customers.
**Non-Referred Customer AOV** is the average order value of orders that weren't placed as a result of referral.
Comparing the two is a useful story to tell a client, even when referral volumes are modest. If New Customer AOV is consistently higher than Non-Referred Customer AOV, it shows that the customers referral is generating spend more, on average, than the merchant's other customers.
## The Promotion Points Report
Alongside Overall Performance, the Promotion Points report shows where in the referral funnel activity is happening, broken down by touchpoint - for example, post-purchase, a banner in the account area, or a dedicated landing page. Touchpoints are tracked using `situation` parameters on referral URLs - see [Promotion Points & Situation Parameters](/knowledge/referral/promoting/promotion-points) for how these are set up.

The Promotion Points report, showing funnel metrics broken down by touchpoint.
This report is useful for spotting imbalance. If the large majority of impressions (for example, 96%) are happening at a single touchpoint such as post-purchase, that suggests referral isn't being promoted enough elsewhere - in emails, on dedicated pages, or in other places on the site. Talking about referral in more places is generally a good sign.
It's also worth checking where new customers are actually coming from, not just impressions. A touchpoint that isn't promoted heavily, such as an account-area banner or a landing page, can still contribute a disproportionate share of new customers relative to how little it's used, which is a signal that it's worth investing in further.
As a rough guide, if post-purchase accounts for 60% or less of new customers generated through referral, that's a good sign: it means the other 40% or more is coming from other touchpoints, which shows referral is being promoted well across the site.
> [!NOTE]
>
> The Overall Performance report also includes a set of graphs, which visualise the metrics covered in this article over time.
## See Also
> [card] [Referral Metrics Glossary](/knowledge/reporting/referral/metrics-glossary)
>
> Definitions for every metric tracked across the referral funnel, from impressions and enrolment through to conversions and revenue.
> [card] [Understanding Referral Intelligence Benchmarks](/knowledge/ab-testing/benchmarking-test-ideas)
>
> Compare your funnel metrics against industry averages and find targeted test ideas for improving them.
> [card] [How to Analyse Referral Data](/knowledge/reporting/referral/analyse-referral-data)
>
> Build custom reports in the Explore section and break performance down by promotion point, share method, and segment.
> [card] [Promotion Points & Situation Parameters](/knowledge/referral/promoting/promotion-points)
>
> Set up situation parameters on referral URLs so activity can be tracked by touchpoint.
# Content Security Policy
Source: https://docs.mention-me.com/knowledge/security/account/content-security-policy
Recommended Content Security Policy directives for whitelisting Mention Me on your website.
A Content Security Policy (CSP) ensures a browser only loads resources that are explicitly whitelisted, preventing malicious content from being injected into your site.
Mention Me provides recommended CSP directives for you to deploy on your website.
## Non-Production / Test Environment
```yaml theme={null}
script-src:
- https://static-demo.mention-me.com
- https://tag-demo.mention-me.com
frame-src:
- https://demo.mention-me.com
connect-src:
- https://demo.mention-me.com
- https://tag-demo.mention-me.com
```
## Live Environment
```yaml theme={null}
script-src:
- https://static.mention-me.com
- https://tag.mention-me.com
frame-src:
- https://mention-me.com
- https://.mention-me.com
connect-src:
- https://mention-me.com
- https://tag.mention-me.com
```
Replace `` with your subdomain, e.g. **example-client**.mention-me.com. If you are unsure of this value, reach out to the Mention Me team.
# Password Rules
Source: https://docs.mention-me.com/knowledge/security/account/password-rules
Password complexity requirements for accessing the Mention Me platform.
Mention Me strongly advises using a password manager for the password(s) used to access your dashboard.
## Requirements
Passwords must be at least ten characters and contain at least one character from each of these groups:
* English uppercase characters (A-Z)
* English lowercase characters (a-z)
* Base 10 digits (0-9)
* Non-alphanumeric characters: `! " $ % ^ & * ( ) - _ = + [ ] { } ; : ' @ # ~ , < . > / ? \ |`
## Best Practices
In the absence of a password manager, passwords should follow best practices:
* Avoid common terms or words (e.g. birthdays, job titles, company names, addresses).
* Use a collection of words rather than a single phrase.
See the [National Cyber Security Centre guidance](https://www.ncsc.gov.uk/collection/top-tips-for-staying-secure-online/use-a-strong-and-separate-password-for-email) for recommended approaches.
# Revoke User Access
Source: https://docs.mention-me.com/knowledge/security/account/revoke-access
How to revoke or change user access in the Mention Me platform to maintain data security.
Maintaining secure access controls protects your business from data breaches, unnecessary exposure to sensitive information, and compliance risks.
## Best Practices
1. **Regular access audits** -- Periodically review all users who have access and check that permissions align with their current role.
2. **Remove or downgrade access immediately** -- As soon as someone leaves the company or changes roles, update or revoke their access.
3. **Inactive account locking** -- The Mention Me platform automatically locks accounts after 90 days of inactivity.
## How to Revoke or Change User Access
> [!NOTE]
>
> Only users with full Administrator access can make changes to user accounts.
**1. Open Settings & Tools**
Click **Settings & tools**.
**2. Open Manage Users**
Click **Manage users**.
**3. Open the user settings menu**
Click the user settings menu (3 dots).
**4. Disable the account**
Click **Disable account**.
**5. Confirm the account is disabled**
A notification confirms that the account has been disabled.
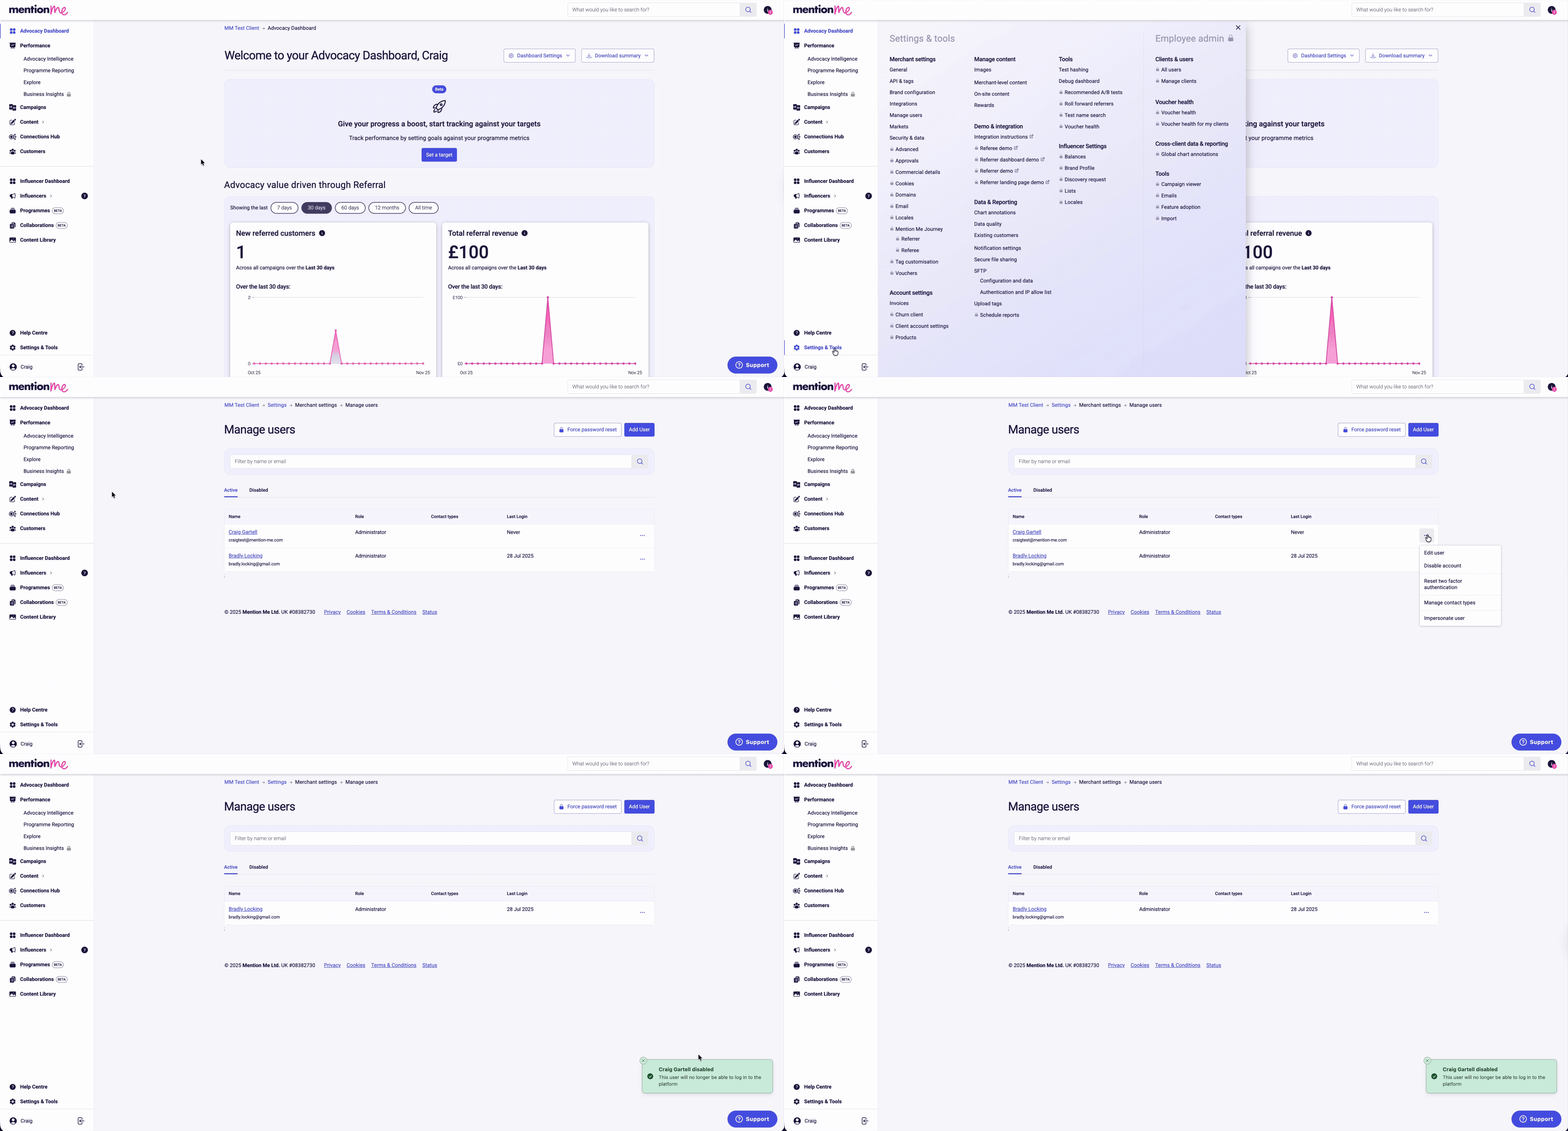
Disabling a user account in Manage Users.
If you have questions or need support updating access, reach out to your Client Success Manager or submit a query through the support portal.
# Understanding Security Responsibilities
Source: https://docs.mention-me.com/knowledge/security/account/security-responsibilities
Your responsibilities as a client for maintaining security on the Mention Me platform.
Keeping your data safe is a shared endeavour. Mention Me takes many technical and organisational measures to protect your customers' confidential data as detailed in our DPA. But you also need to manage your account securely and use the tools we provide carefully.
The three areas of risk are:
* **Client-customer data** we store for managing referral
* **Vouchers** you upload that we issue to customers
* **Client-confidential performance data** that we collect
## Your Responsibilities
* Appoint **Administrators** who understand their responsibility to manage user permissions and your internal security policies.
* Nominate at least one Administrator with security duties.
* Regularly review the list of users who have access to your account.
* Immediately revoke access for any users who leave your organisation.
* Regularly review user permissions and aim for least privilege.
* Review business processes within your customer support and marketing team for adding referrals, approving rewards, and giving out vouchers.
* Avoid sharing accounts -- each user should have a unique email address.
* Educate employees on basic internet security: choosing and protecting passwords, protecting against phishing, and not sharing confidential data insecurely.
## Tools Mention Me Provides
* **Manage & Add Users** -- Review all users from the platform.
* **Lock / edit permissions** -- Lock individual accounts or edit permissions with immediate effect.
* **SSO** -- Set up [single sign-on](/knowledge-app/settings/organisation/single-sign-on) on Mention Me (Google, Okta, Microsoft Entra, or Auth0). Verify each email domain before the connection can be configured. An organisation that already has single sign-on on Classic moves it from **Security & Data**. See [Updating Your SSO Connection](/knowledge/security/account/sso-migration).
* **Password enforcement** -- Users must change their password on account creation to one that is at least 10 characters and suitably complex.
* **IP range restriction** -- Restrict admin user access to a specific IP range (e.g. your office network).
* **90-day password rotation** -- Optionally enable automatic password rotation for employees.
* **Automatic account lockout** -- Users inactive for 90 days are automatically disabled.
* **Audit tool** -- Review specific behaviours of admin users (e.g. who is adding users, changing permissions, viewing voucher codes, creating and approving referrals).
* **Full audit log** -- Download a complete audit log of sensitive user transactions on an ad-hoc or scheduled basis.
* **Secure File Transfer** -- A platform mechanism for controlled sharing of confidential data.
# Updating Your SSO Connection
Source: https://docs.mention-me.com/knowledge/security/account/sso-migration
How to move an existing Okta, Auth0, Google Workspace, Microsoft Entra, or other OIDC provider's SSO connection to the new Mention Me application.
If the organisation already has single sign-on on Classic, an administrator moves that connection from **Security & Data**, then confirms the switch on Mention Me. If the organisation does not have single sign-on yet, set it up on Mention Me instead. See [How to Set Up Single Sign-On](/knowledge-app/settings/organisation/single-sign-on). Verify each email domain before the connection can be configured.
Mention Me needs a new application in your identity provider. Your existing app is tied to old callback URLs and cannot be reused, even if the provider is the same.
> [!WARNING]
>
> Do not reuse your existing Mention Me application, client ID, or secret.
> Create a new one using the instructions below.
> [tab] Okta
>
> ## Create the Connection
>
> On **Security & Data**, follow the on-screen step to create the new connection. Mention Me gives you an **ACS URL** and an **Entity ID** to use below.
>
> ## Okta Setup
>
> **1. Open the Okta Admin portal**
>
> Go to **Applications**, then **Create App Integration**.
>
> **2. Choose SAML 2.0**
>
> Select **SAML 2.0** as the sign-in method.
>
> **3. Set the ACS URL**
>
> Paste the ACS URL from Mention Me into **Single sign-on URL**.
>
> **4. Set the entity ID**
>
> Paste the entity ID from Mention Me into **Audience URI (SP Entity ID)**.
>
> **5. Add attribute statements**
>
> Add: `mail` = `user.profile.email`, `firstName` = `user.profile.firstName`,
> `lastName` = `user.profile.lastName`.
>
> **6. Assign the app**
>
> On the **Assignments** tab, assign the app to yourself and anyone else who
> will test sign-in.
>
> **7. Download the IdP metadata**
>
> On the **Sign On** tab, download the **Identity Provider metadata** file.
>
> ## Mention Me Setup
>
> Upload the metadata file on **Security & Data**. Once it is saved, you can test the connection (see [Testing Your New Connection](#testing-your-new-connection) below).
> [tab] Google Workspace
>
> ## Create the Connection
>
> On **Security & Data**, follow the on-screen step to create the new connection. Mention Me gives you an **ACS URL** and an **Entity ID** to use below.
>
> ## Google Setup
>
> **1. Open the Google Admin console**
>
> Go to **Apps > Web and mobile apps > Add app > Add custom SAML app**.
>
> **2. Set the ACS URL and entity ID**
>
> Paste the ACS URL from Mention Me into **ACS URL**, and the entity ID into
> **Entity ID**.
>
> **3. Add attribute mapping**
>
> Map **Primary email** to `email`, **First name** to `firstName`, and **Last
> name** to `lastName`.
>
> **4. Set the Name ID**
>
> Set **Name ID format** to `EMAIL` and **Name ID** to **Primary email**.
>
> **5. Turn on user access**
>
> Turn **User access** on for yourself or everyone. Leaving it off for
> everyone causes Google to return `app_not_configured_for_user` at sign-in.
>
> **6. Download the IdP metadata**
>
> Download the **Identity Provider metadata** XML file.
>
> > [!WARNING]
> >
> > If you already created the app before reading this, check the ACS URL and
> > Entity ID still match the values on Mention Me - they change if you start the
> > connection again.
>
> ## Mention Me Setup
>
> Upload the metadata file on **Security & Data**. Once it is saved, you can test the connection (see [Testing Your New Connection](#testing-your-new-connection) below).
> [tab] Microsoft Entra
>
> ## Create the Connection
>
> On **Security & Data**, follow the on-screen step to create the new connection. Mention Me gives you an **ACS URL** and an **Entity ID** to use below.
>
> ## Entra Setup
>
> **1. Open the Microsoft Entra admin centre**
>
> Go to **Enterprise applications > New application > Create your own
> application**.
>
> **2. Choose non-gallery**
>
> Choose **Integrate any other application you don't find in the gallery
> (Non-gallery)**, and give it a new name. Do not reuse your existing Mention
> Me application.
>
> **3. Set up SAML**
>
> Choose **Set up single sign-on with SAML**.
>
> **4. Set the ACS URL**
>
> Paste the ACS URL from Mention Me into **Reply URL (Assertion Consumer
> Service URL)**.
>
> **5. Set the entity ID**
>
> Paste the entity ID from Mention Me into **Identifier (Entity ID)**.
>
> **6. Add attribute mapping**
>
> Map `email`, `firstName`, and `lastName` to the user's email, given name,
> and surname.
>
> **7. Download the federation metadata**
>
> Download the **Federation Metadata** XML file.
>
> > [!WARNING]
> >
> > If the application's Single sign-on page says "OIDC-based Sign-on" instead of
> > offering SAML, you're on the wrong application - go back and create a new one
> > following the non-gallery step above.
>
> > [!WARNING]
> >
> > If you already created the application before reading this, check the Reply
> > URL and Identifier still match the values on Mention Me - they change if you
> > start the connection again.
>
> ## Mention Me Setup
>
> Upload the metadata file on **Security & Data**. Once it is saved, you can test the connection (see [Testing Your New Connection](#testing-your-new-connection) below).
> [tab] Auth0
>
> ## Create the Connection
>
> On **Security & Data**, follow the on-screen step to create the new connection. Mention Me gives you a **redirect URI** to use below.
>
> ## Auth0 Setup
>
> **1. Open the Auth0 Dashboard**
>
> Create a new **Regular Web Application**.
>
> **2. Add the redirect URI**
>
> Add the redirect URI from Mention Me to **Allowed Callback URLs**.
>
> **3. Copy your credentials**
>
> Copy the new **Client ID** and **Client Secret**. Do not reuse the ones from
> your existing Mention Me app.
>
> ## Mention Me Setup
>
> Enter the client ID and secret on **Security & Data**. Once they are saved, you can test the connection (see [Testing Your New Connection](#testing-your-new-connection) below).
> [tab] Other OIDC Providers
>
> ## Create the Connection
>
> On **Security & Data**, follow the on-screen step to create the new connection. Mention Me gives you a **redirect URI** to use below.
>
> ## Provider Setup
>
> **1. Create an OIDC application**
>
> Use the authorisation code grant.
>
> **2. Register the redirect URI**
>
> Add the redirect URI from Mention Me as the callback URL.
>
> **3. Copy your credentials**
>
> Copy the new **Client ID** and **Client Secret**. Do not reuse the ones from
> your existing Mention Me app.
>
> ## Mention Me Setup
>
> Enter the client ID and secret on **Security & Data**. Once they are saved, you can test the connection (see [Testing Your New Connection](#testing-your-new-connection) below).
## Testing Your New Connection
Once your provider details are saved, copy the test link from **Security & Data** and open it to sign in with a few accounts using the new connection. This signs in to Mention Me. Mention Me Classic keeps using your previous SSO app throughout, so testing carries no risk to your current logins.
> [!NOTE]
>
> **This finishes in Mention Me.** After a successful sign-in, an administrator
> sees a prompt on Mention Me with **Keep testing** or **Switch Classic to the
> new connection**. Signing in on its own does not switch anything - only
> confirming that prompt makes Mention Me Classic use the new connection too.
> [!NOTE]
>
> Confirming the switch does not enable sign-in from your identity provider's
> dashboard. Mention Me only supports signing in from
> [app.mention-me.com/sign-in](https://app.mention-me.com/sign-in), so a tile
> that opens the SAML application directly, such as an Okta tile showing a
> missing `RelayState` error, will not work after confirming either. To keep a
> tile, see [Signing In](/knowledge-app/settings/organisation/single-sign-on#signing-in)
> on the single sign-on setup page.
> [!WARNING]
>
> If your provider requires users or groups to be assigned to an application
> before they can sign in (for example Okta), assign the new application to
> everyone who needs access, not just the accounts used for testing, before
> confirming the switch. Anyone left unassigned will be unable to sign in once
> Classic moves over. Providers without this step (for example Google, which
> uses its own User access controls, or Auth0 and other generic OIDC providers)
> should check access is correct in their own provider instead.
## Rolling Back
There is no self-serve rollback. If you need to revert to your previous SSO connection after confirming the switch, [contact support](https://help.mention-me.com/hc/en-gb/requests/new).
# Single Sign-On (SSO) Setup
Source: https://docs.mention-me.com/knowledge/security/account/sso-setup
Set up single sign-on on Mention Me. Classic no longer has the setup form.
If the organisation does not have single sign-on yet, set it up on Mention Me. Classic **Security & Data** no longer has a setup form.
Open **Settings > Single sign-on** and verify each email domain before the connection can be configured. See [How to Set Up Single Sign-On](/knowledge-app/settings/organisation/single-sign-on).
If the organisation already has single sign-on on Classic, an administrator moves that connection from **Security & Data**, then confirms the switch on Mention Me. See [Updating Your SSO Connection](/knowledge/security/account/sso-migration).
## See Also
> [card] [How to Set Up Single Sign-On](/knowledge-app/settings/organisation/single-sign-on)
>
> Verify your email domains, then connect your identity provider.
> [card] [Updating Your SSO Connection](/knowledge/security/account/sso-migration)
>
> Move an existing Classic connection, then confirm the switch on Mention Me.
# Two-Factor Authentication (2FA)
Source: https://docs.mention-me.com/knowledge/security/account/two-factor-auth
How 2FA works on the Mention Me platform, including setup, recovery, and reset procedures.
## What Is 2FA?
2FA is an additional security measure beyond email and password that requires users to provide an authentication code via an authenticator app (e.g. Google Authenticator) to log in. This protects your employees from having their passwords phished.
2FA is automatically turned on for all Mention Me clients during onboarding.
## How 2FA Works
2FA applies to all of your Mention Me admin users. Each user is asked to set up 2FA when they next log in.
The enrolment steps are:
**1. Provide a mobile number**
The user provides a mobile number to receive a recovery code if they cannot access their authenticator app.
**2. Verify the mobile number**
A verification code is sent to this number, which they enter.
**3. Set up the authenticator app**
The user downloads the Google Authenticator App (or another suitable app), scans the QR code, and enters the first test code.
**4. Trust the device (optional)**
If they tick **Trust this device for 30 days**, they will not need to enter another 2FA code for 30 days on that device.
**5. Complete setup**
After setup, they can use the platform as normal.
## Recovery Options
If a user cannot enter a 2FA code when logging in:
**1. Request a recovery code**
Click **Recovery options** and choose to receive a recovery code via SMS.
**2. Enter the recovery code**
If they can receive the SMS, they enter the code and reset their 2FA, following the same setup process.
**3. Contact your administrator**
If they cannot receive SMS, they can contact their administrator (any client administrator), who can trigger a 2FA reset via the **Manage users** page. The administrator should verify the identity of the requester (typically via a phone call or video call) before triggering the reset.
**4. Escalate to Mention Me**
If they cannot reach their administrator, they can escalate to [Mention Me's operations team](https://help.mention-me.com/hc/en-gb/requests/new?ticket_form_id=1900000712373), who can verify their identity and perform a reset.
# User Management
Source: https://docs.mention-me.com/knowledge/security/account/user-management
How to add, unlock, and manage user accounts and permissions in the Mention Me platform.
## Who Can Add or Unlock Users?
Only users with full **Administrator** access can add or unlock user accounts.
## How to Add Users
**1. Open Manage Users**
Click **Settings & tools**, then **Manage users**.
**2. Add a new user**
Click **Add User** and enter the new user's email address, then click **Add user**.
**3. Set user details**
Enter the user's first name and last name and select the appropriate role.
**4. Configure contact type and accounts**
Set a Contact Type to determine whether the user receives communications such as Voucher Alerts. To add users across multiple accounts (e.g. locales or brand names), type the name of additional merchant accounts under **Add user to merchant**.
**5. Save**
Click **Save**.
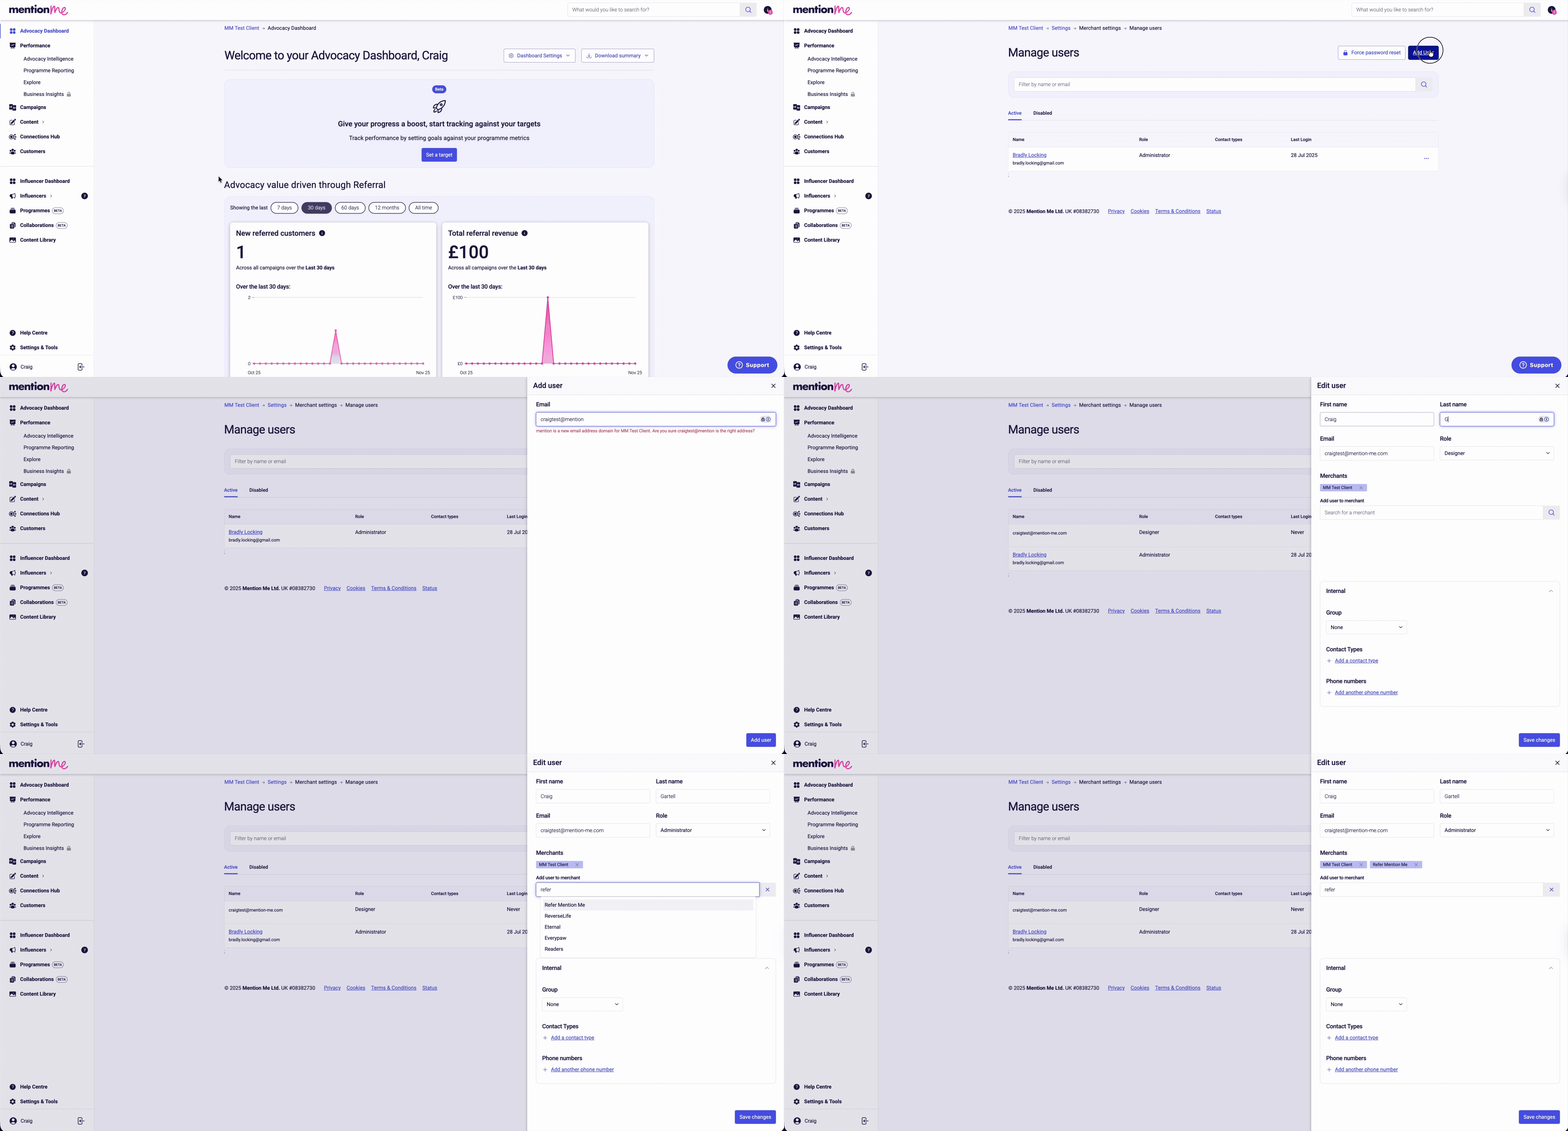
Adding a user in the Mention Me platform
Once added, the user receives a welcome email prompting them to create their login.
## Permission Levels
Mention Me has a hierarchy of roles granting access to different parts of the platform.

Permission levels hierarchy
Users can only amend the permissions of people with a permission level equal to or below their own. For example, Customer Support Supervisors can add or amend other Customer Support staff, but they cannot add Marketing or Administrator users.
If you need your permissions upgraded, speak to the owner of the Mention Me account in your company. The Mention Me team cannot provide access without authorisation from someone in your account with sufficient permissions.
## How to Unlock Users
All user accounts are locked automatically after 90 days of inactivity.
**1. Open Manage Users**
Click **Settings & tools**, then **Manage users**.
**2. Find the disabled account**
Click the **Disabled** tab and locate the disabled account.
**3. Enable the account**
Click the user settings menu (3 dots) and click **Enable account**. A notification will confirm: "This user can log in to the platform again".
**4. Find the account**
> [!NOTE]
>
> If you use **SSO**, the unlocked account can sign in again without resetting their password. Otherwise, send a password reset email:
Click the **Active** tab and locate the enabled account.
**5. Send password reset**
Click the user settings menu (3 dots) and click **Send password reset email**.
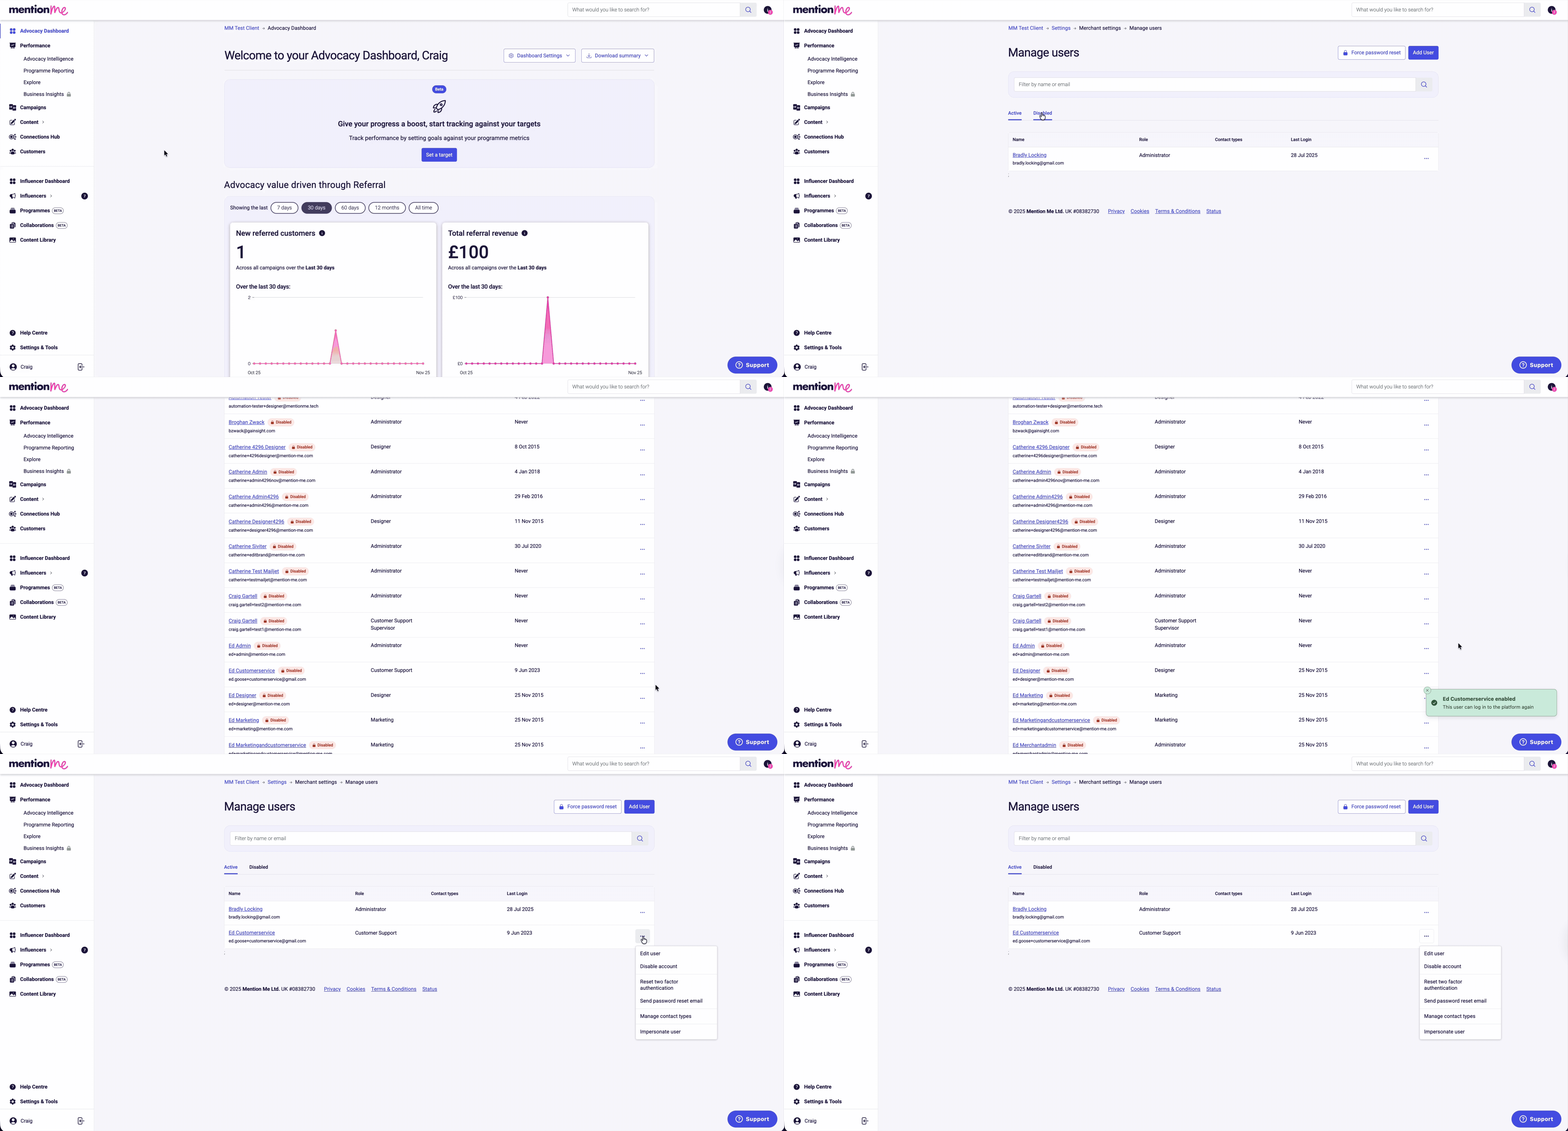
Unlocking a user account in Manage Users
## Why Accounts Get Locked
Accounts are locked to prevent unauthorised access to sensitive data. Reasons include:
* A user was manually locked by editing their profile and ticking **Account is locked**.
* A user was given the **No Login** role.
* Inactivity-based deactivation:
* The user has logged in before but not within the last 6 months.
* The user has never logged in and it has been over 1 month since account creation.
* The user is attached to a churned Merchant (processed at 4:47am on Saturdays).
Both password-based and SSO users can be locked. Only password-based users need a password reset email to regain access.
# How to Exclude Existing Customers
Source: https://docs.mention-me.com/knowledge/security/data-management/exclude-existing-customers
How to upload a list of existing customers to prevent them from receiving new customer referral rewards.
## Why Exclude Existing Customers?
When launching your referral programme, you may want to prevent existing customers from being treated as new customers and receiving referral rewards. Upload a list of customer emails to automatically exclude them from new customer rewards. They can still enrol as referrers and refer friends.
We generally recommend using data covering the last 12 months of trading activity. The data requirements are outlined in the Data Processing Agreement (DPA) in your contract.
## What Does This Do?
After uploading your customer data, only new customers who have not yet made a purchase will be eligible for referral rewards. Existing customers attempting to claim new customer discounts will see a message indicating they are not eligible.

The existing customer ineligibility message shown to returning customers.
## How to Do It
**1. Export Data From Your Site or CRM**
Create or export a CSV file containing email addresses for the period you choose (usually 12 months). The file should have one column with a header row.
| Field | Type | Example |
| - | - | - |
| Customer Email | Email or [hashed email](/knowledge/security/data-management/hash-historical-emails) | [name@xyz.com](mailto:name@xyz.com) |
**2. Upload Your Data to Mention Me**
Using the [historical customer uploader](https://mention-me.com/merchant/~/upload/customers):

The historical customer uploader interface.
1. Select the file you exported.
2. Map the `Email` field to the email column using the mapper.
3. Verify the sample columns match the expected data.
4. Click **Upload**.
# Hash Historical Customer Emails
Source: https://docs.mention-me.com/knowledge/security/data-management/hash-historical-emails
How to hash customer email addresses before sending historical customer records to Mention Me.
If you are concerned about sharing historical customer data for data protection purposes, you can provide the list "pre-hashed". By performing a one-way hash on historical customer email addresses, we can tell if a particular email address is in the list, but we cannot see or discover the original addresses.
We also provide a [Secure Document Transfer](/knowledge/security/data-management/send-data-securely) feature for safely sending and receiving sensitive information.
## Setting Up the Hashes
You will need a shared secret key from Mention Me. Contact your onboarding manager to obtain the secret before continuing.
For each email address:
**1. Lowercase the email**
Lowercase the email address.
**2. Append the secret key**
Append the secret key provided by Mention Me.
**3. Hash with SHA-256**
Hash the combined email address and key using **SHA-256**.
**4. Verify output format**
Ensure the output hash is lowercase.
## Testing the Hashes
Hash a known email address (e.g. your own), then use the **Test Hashing** feature in the platform to compare.
Go to **Settings & Tools > Test Hashing**.

Test Hashing page in Settings and Tools
Enter the email address and the hash value you created. The platform confirms if the hash matches. If it does not match, the platform shows the expected value.

Hash test result showing match confirmation
## Code Examples
### Pseudo-Code
```text theme={null}
HashedEmail = LowerCase(SHA256Hash(Concatenate(LowerCase([EMAIL]), [KEY])))
```
### MySQL
```sql theme={null}
SELECT SHA2(CONCAT(LOWER(u.email), SECRET), 256)
FROM user u;
```
### T-SQL (MS SQL Server)
```sql theme={null}
SELECT LOWER(
CONVERT(
VARCHAR(200),
HASHBYTES(
'SHA2_256',
CONCAT(
LOWER(CAST(u.email AS VARCHAR(256))),
SECRET
)
),
2)
)
FROM user u;
```
### JavaScript
```javascript theme={null}
var crypto = require("crypto");
var input = email.toLowerCase() + secret;
var output = crypto.createHash("sha256").update(input).digest("hex");
console.log(output);
```
# Understanding Hashed Data
Source: https://docs.mention-me.com/knowledge/security/data-management/hashing
What hashed data is, how Mention Me uses it, and how it differs from encryption.
## What Is Hashed Data?
Hashed data refers to information that has undergone a one-way transformation using a hash function. This process takes something like an email address and turns it into a unique set of characters.
### How Hashing Works
* **Consistency** -- The function always produces the same output for the same input. Each email address generates a distinct hash.
* **Irreversibility** -- It is impossible to reverse a hash back to the original email address.
We use "salted" hashes, combining the email address with a secret key before hashing. This makes it harder for outsiders to link hashes to emails.
## How Hashed Data Is Used on the Platform
When you view the Customer section, you may find a hashed record for an email address. We store hashed records in two cases:
* When a client launches with us, we import their existing customer list.
* When someone places an order with one of our clients.
In both cases, we only use the hashed data to indicate that the person has had a relationship with the brand and, as an existing customer, cannot claim a reward. We do not use hashed data for any other purpose.
### What a Hashed Record Looks Like

Hashed customer record in the platform
## Hashing vs Encryption
* **Hashing** -- A one-way process that turns data into a unique string. Irreversible. No keys involved.
* **Encryption** -- A two-way process using a key to transform data. Reversible with the correct key.
## Key Takeaway
We store data in hashed form for security. The original email address cannot be recreated from its hash.
# How to Upload Historical Orders
Source: https://docs.mention-me.com/knowledge/security/data-management/historical-order-upload
How to create and upload a historical order file to Mention Me, including Shopify-specific instructions.
By uploading your customers' historical order data, you can access advanced features such as Extended Customer Revenue (ECR) and Predicted ECR sooner, as the algorithms will have enough data to start segmenting and predicting.
## Standard Upload
**1. Create a CSV File**
Create a CSV file and populate it with data from the past three years using the fields below.
| Field | Type | Example |
| - | - | - |
| Customer Email | Email (can be [hashed](/knowledge/security/data-management/hash-historical-emails)) | [name@xyz.com](mailto:name@xyz.com) |
| Merchant Order ID | Text | Test001 |
| Total | Numeric | 123.00 |
| Currency | [ISO 4217](https://en.wikipedia.org/wiki/ISO_4217) | GBP |
| Order Date String | [ISO 8601](https://en.wikipedia.org/wiki/ISO_8601) | 2023-01-19T12:41:43+00:00 |
> [!WARNING]
>
> Ensure the merchant order IDs match exactly the IDs passed via other integrations.
**2. Upload the File**
Upload the CSV via [Secure Document Transfer](/knowledge/security/data-management/send-data-securely).
**3. Name the File**
Name the file `Brand name - Historical Order`.
**4. Wait for Confirmation**
The Mention Me team will perform the upload and contact you when complete.
## Hashed Emails
If you prefer to send historical order data with hashed emails, see [Hash Historical Customer Emails](/knowledge/security/data-management/hash-historical-emails).
## Shopify Export
If you use Shopify, follow these steps to export order data:
**1. Navigate to Orders and Export**
Go to **Orders** in the left menu of your Shopify Store. Click **Export** above the orders list.

The Shopify Orders page with the Export button.
**2. Select Export Options**
* **Export**: Orders by Date
* **Date range**: Select the start of the month three years ago through to the most recent order date (previous day).
* **Export as**: Plain CSV File
* Click **Export Orders**

The Shopify export orders dialog with date range and CSV options.
Shopify then confirms the export and sends a notification email.

The Shopify export confirmation with email notification.
You will receive an email from Shopify with the CSV file to download.
**3. Upload to Mention Me**
Upload the CSV file to your Mention Me account via [Secure Document Transfer](/knowledge/security/data-management/send-data-securely) or directly at [Secure File Transfer](https://mention-me.com/merchant/~/files).
## Subscription Model
If your business uses a Subscription Model, ensure the true value of your customers and their referrals can be tracked after onboarding. See [Subscription Data for Advocacy Features](/knowledge/reporting/advocacy/ecr) for more information.
# How to Send Data Securely
Source: https://docs.mention-me.com/knowledge/security/data-management/send-data-securely
How to use the Secure Document Transfer feature to share sensitive files with Mention Me.
When sharing sensitive information such as personally identifiable information (PII) or protected data, use the **Secure Document Transfer** feature within the Mention Me platform instead of email or unsecured attachments.
## Access Secure Document Transfer
Once logged in, click **Settings** in the left-hand menu to open Settings and tools. Under **Data & Reporting**, click **Secure file sharing**.
Here you'll see every file shared between your team and Mention Me.

Navigating to Secure File Transfer in Settings and Tools
## Upload Files
Watch how to share files securely with Mention Me in Classic.
> [accordion] See each step in detail
>
> **1. Start a new upload**
>
> On the **Secure file sharing** page, click **Upload files**.
>
> 
>
> The Upload Secure File button on the Secure Document Transfer page.
>
> **2. Select and describe the file**
>
> In the **Share files** panel, add a short description so Mention Me knows what the file is for. Then drop your file into the box, or click **click to select a file**. Files can be up to 500MB.
>
> 
>
> The file upload form with a description field.
>
> **3. Upload**
>
> Click **Upload**. You come back to the **Secure file sharing** page while the file is processed.
>
> 
>
> The file processing status shown after upload.
Once processed, the file shows as a download link for both teams. Click a file name to download it, or use the link icon to copy a link. You can also download files added by your team or by Mention Me.

A processed file available as a downloadable link.
## File Retention
Files added to this area are only available for **2 weeks** before being automatically removed.
# Understanding Why All Transactions Are Required
Source: https://docs.mention-me.com/knowledge/security/data-management/transactions-requirement
Why Mention Me needs all your transaction data to fairly reward referrals and prevent programme abuse.
Mention Me relies on receiving all your transaction data for two key reasons:
* When a friend is referred, we need to know if they have made a transaction so the referrer can be rewarded.
* We need an up-to-date list of existing customers to exclude them from receiving introductory rewards.
## Ensuring Everyone Is Rewarded Fairly
When you share all transaction data:
1. Alice sees the refer-a-friend experience and refers Bob via a Mention Me link.
2. Bob follows the link, receives a coupon code, and makes a purchase.
3. Because Mention Me sees all transactions, we identify Bob as a new customer.
4. Alice is awarded her referral reward.
**Result**: Alice is rewarded for her referral and Bob receives his discount.
### What Happens with Missing Data
If Mention Me does not receive all transactions, we may never see Bob's purchase. Alice does not get her reward even though Bob completed the purchase.
## Preventing Unfair Reward Claims
Complete transaction data also stops people from claiming rewards they are not owed.
### How Blocking Works
1. Bob makes his first purchase via an advert (not through Alice's referral).
2. Mention Me records Bob as an existing customer because we have all transactions.
3. Later, Alice refers Bob via a referral link.
4. Bob tries to use the link but is detected as an existing customer and denied the referral code.
**Result**: The reward is protected, and only genuine new customers receive the introduction benefit.
### What Happens with Incomplete Data
If we do not know Bob is an existing customer, he is wrongly given a referral reward, undermining the fairness of the programme.
## Summary
Sharing all transaction data ensures:
* Referrers are always fairly rewarded when their friends buy
* Existing customers cannot unfairly claim introductory rewards
* Your referral programme delivers accurate, trustworthy results
# Understanding AI and Data
Source: https://docs.mention-me.com/knowledge/security/data-privacy/ai-and-data
How Mention Me uses AI and machine learning, including data handling, model transparency, and ethical considerations.
We use generative AI technology to provide useful information while striving to minimise inaccuracies. We use reasonable efforts to ensure that personal information is not used in this process and, to the extent possible, automatically redact personal information before using AI. We strongly advise end-user consumers not to enter personal information into any AI-powered feature. For questions, contact [legal@mention-me.com](mailto:legal@mention-me.com).
## AI Capabilities
**Generative AI** -- We use generative AI to summarise, categorise, and make actionable the large volumes of verbatim text from your customers' share messages and/or NPS feedback. This helps you optimise advocacy. We are also experimenting with generative AI to support programme optimisation as a platform assistant.
**Machine Learning** -- We use ML techniques for customer segmentation and personalisation predictions.
## Technologies and Frameworks
* **Predictive models**: Individual models are built for each client using only their own data. XGBoost powers Propensity To Refer, predicting a customer's likelihood to refer a friend. Keras powers the predictive elements of Extended Customer Revenue, predicting customer churn and lifetime value.
* **Summarisation and sentiment analysis**: LLM models (ChatGPT 3.5, 4, and later, upgraded as new models are released).
## Controls and Safeguards
* LLM output is never displayed to end customers. Only client employees see generative output.
* Input filters reduce the likelihood of inappropriate content.
* We have completed a DPIA covering our use of generative LLM and are satisfied the risk is low given our use cases, particularly because the risk is significantly lower than if generative AI were used in a live chat format with end users.
* We use a combination of caching, filtering, and monitoring to balance accuracy, performance, and reliability.
## Model Maintenance
* ML models are retrained at least monthly (some weekly) using the latest data.
* Performance is monitored over time against a holdout group with incremental upside reported.
* A team of data engineers monitors and manages pipelines with weekly training schedules.
* We continuously monitor the output of our generative AI models and adopt the latest model features as they become available.
## Transparency and Explainability
* Feature importances are recorded for all ML models.
* The SHAP framework is used to understand individual decisions, though this is not currently surfaced to users or regularly calculated.
## Ethics and Fairness
* Protected characteristics are not used as features in our models.
* We have completed a DPIA covering our use of OpenAI to process share messages and NPS feedback, and are satisfied we take the necessary steps to reduce the risk of personal information being processed and to ensure appropriate accuracy and lack of bias.
* We have covered risks in our DPIA and are satisfied that, because of the use cases we adopt, our use cases carry low risk.
## Performance Metrics
We focus on metrics for production performance and the accuracy of decision-making.
* **Propensity To Refer**: Model ROC AUC, predicted propensities in high and low groups, feature importances, and incremental revenue generated.
# Understanding Contract Termination
Source: https://docs.mention-me.com/knowledge/security/data-privacy/contract-termination
What happens to your data and account access when your business discontinues services with Mention Me.
This guide outlines what happens if your business formally discontinues services with Mention Me.
## Final Billing
Once your account is closed, all billing activity stops as of the Billing End Date.
* Your final invoice is generated based on all activity up to this date.
* After settlement, no further charges are incurred.
## Account Access
Once services have ended, all user access to your Mention Me account is removed, including administrative, reporting, and partner access rights. Users can no longer log in or view any data.
## Data Privacy and PII Removal
* Data is retained for a buffer period of one month after the billing end date for any final queries or reporting needs.
* After this period, all personally identifiable information (PII) linked to your customers is permanently removed from the platform.
* A name change is enforced on the account to break any remaining technical integrations.
Once this process is complete, data recovery is not possible.
## Removal of Tags and Data Integrations (Your Responsibility)
To stop sending customer data to Mention Me, all Mention Me tags and integrations must be removed from your site. Common tag locations:
* **landingpage** -- Promotional pages (e.g. URLs ending in /refer-a-friend, /refer, or /mention-me). Displays an embedded iframe with a referral offer.
* **checkout** -- Checkout page, basket/cart page, or side/mini cart. Invites customers to indicate if they have been referred and triggers a referral overlay.
* **postpurchase** -- Order confirmation page. Communicates customer and transaction data back to Mention Me. Must be removed to stop ongoing data transmission.
* **dashboard** -- Customer account section. Displays a referral dashboard where users track rewards and share offers.
Your development team should review and remove all Mention Me code integrations. If you need assistance identifying tags, our team can help during your offboarding period.
You should also review and remove any reference to Mention Me from your Privacy Policy and any other references to referral or Mention Me in places such as your emails.
## Platform Access and Legacy Data
Approximately one month after billing ends:
* You will no longer be able to access the Mention Me platform.
* Features and integrations will be disabled.
* In some cases, campaign structure and performance summaries (non-personal data) may be retained to simplify reactivation if you return.
If you prefer us to delete this information as well, we can do so on request.
## Long-Term Data Storage
* Daily and weekly performance data is deleted 12 months after the billing end date.
* Aggregated monthly performance summaries may be retained for reference.
If you have further questions during offboarding, please reach out to your Mention Me representative or our support team.
# Going Cookieless
Source: https://docs.mention-me.com/knowledge/security/data-privacy/cookieless
How to run your Mention Me referral programme without cookies, including trade-offs and consent platform guidance.
Mention Me offers a cookieless alternative for clients who cannot justify our cookies within their consent strategy. This removes the need to list Mention Me cookies or tags in your Consent Platform.
Referrals are identified by the email addresses of the two customers involved, so **cookies are not required to track referrals** and reward customers.
## What Does Going Cookieless Mean?
We disable all cookies that Mention Me normally drops for customers of your programmes. No cookies are stored at all during your programme.
This does not require new tags or different logins, and it can be reversed in the future.
If you accept the trade-offs below, you do not need to add our cookies to your Consent Platform, or you can mark them as "not dropped" or "not applicable".
## Trade-Offs
* Roughly 2-5% of referrals normally identified via the mm_id cookie as "self-referral" may bypass gaming restrictions (other mitigations are available).
* Some customers who view Offer A at purchase may see Offer B when returning to your landing page before we identify them via email (less consistent A/B testing).
* Frequency limiting of offers cannot be used since it requires a cookie.
* If a customer closes a corner peel or conversion message, it will reappear on the next page visit instead of being suppressed for the session.
## Consent Platform Configuration
Configuration depends on your Consent Platform:
* Some platforms allow a "Cookieless" bucket that excludes Mention Me from the cookie list.
* Others require adding our cookies but marking them as Strictly Necessary with a note they will not be used.
* Others require marking them as Not Applicable or Not in Use.
Please seek advice from your Consent Platform provider if you are unsure.
## Reactivating Individual Cookies
If you later want to use a feature that requires a cookie (e.g. frequency limiting), we will tell you which cookie to re-enable and help you add it to your Consent Platform.
## Tags and Consent Banners
If you put our tag behind a consent banner so it only fires for customers who consent, you will generally see a significant impact on programme performance:
* Incomplete picture of existing customers, leading to ineligible rewards.
* Missed referral completions, preventing loyal customers from being rewarded.
* Reduced customer enrolment into referral.
This could have a 20%+ impact on the commercial upside of your referral programme, depending on your consent opt-out rate.
## Why You Do Not Need Consent to Share Data via the Tag
### GDPR
Mention Me operates as Data Processor and you are the Data Controller. Because the referral programme needs to track all customers, we operate on the basis of **Legitimate Interest**. You do not need customer consent to transfer name and email address to Mention Me via the tag. [Read more about GDPR.](/knowledge/security/data-privacy/gdpr)
### PECR
PECR applies to cookies stored on the customer's device. The concept of "legitimate interests" does not exist under PECR. Cookies can only be dropped with consent unless strictly necessary. While cookies are not strictly necessary for our service, **tags are strictly necessary** for us to provide the service and for customers to refer each other successfully.
***
If you have further questions, speak to your Onboarding Manager or Client Manager. You can also [contact our Tech Support team.](https://help.mention-me.com/hc/en-gb/requests/new?ticket_form_id=8840645829405)
# Understanding Cookies
Source: https://docs.mention-me.com/knowledge/security/data-privacy/cookies
How Mention Me uses cookies during the referral journey, and how to manage them with your consent platform.
Mention Me uses a limited set of cookies to enhance the user experience during the referral journey. Referrals are primarily tracked through tags and customer emails, not cookies. Our cookies do not track users across other sites.
Mention Me offers a [cookieless solution](/knowledge/security/data-privacy/cookieless) for clients using Cookie Management Platforms, ensuring referral programme functionality is not hindered by cookie miscategorisation.
## Cookies We Use
* **mm_id** -- Identifies unique browsers to control fraudulent use of the referral programme by linking up referrals by the same customer. Strictly necessary for service provision under PECR 6(4)(b).
* **mm_allocation** -- Manages consistency of offers shown during A/B testing. Optional. Without it, a small minority of customers might choose which A/B test variation they see.
* **mm_overlay_suppressed** -- Suppresses a corner peel promotion after the user clicks "x". Without it, the corner peel reappears on page refresh.
* **mm_conversion_message_suppressed** -- Suppresses the conversion message after the user clicks "x". Optional. Without it, the message reappears on page refresh.
* **mm_offer_frequency** -- Tracks how many times a user sees an offer so it is shown in moderation. Optional. Without it, frequency capping is unavailable.
* **Google Analytics** -- Tracks and reports on customer journey performance in aggregate. Optional. Opting out prevents all Google cookies from being dropped.
## Cookie Categorisation
If you categorise our cookies as non-essential in your Cookie Management Platform, it may disrupt tag functions and impact referral tracking and rewards. This could prevent many customers from seeing your referral programme.
If you want a cookieless experience or need to classify our cookies differently, [let us know](https://help.mention-me.com/hc/en-gb/requests/new?ticket_form_id=8840645829405) and we will adjust accordingly.
This is a complex area -- please talk to your Client Manager or [Tech team](https://help.mention-me.com/hc/en-gb/requests/new?ticket_form_id=8840645829405) if you have further questions.
# Understanding Customer Data Storage
Source: https://docs.mention-me.com/knowledge/security/data-privacy/customer-data-stored
What customer data Mention Me stores, how it is transferred, and how it is used to run your referral programme.
## How Does Mention Me Work?
At the heart of Mention Me is our referral platform, which lets existing customers become referrers, share introductory offers with friends, and earn rewards when those friends make a purchase. The platform manages, measures, and optimises referral programmes, including A/B testing different rewards and offers.
To operate the referral programme, we need your customers' first names, surnames, and email addresses to register and communicate with them as referrers. Referral data becomes one of the key signals that help you understand the advocacy of your customers.
## How Does Data Get Transferred to Mention Me?
All data is passed over HTTPS (TLS 1.3+) from JavaScript tags or API calls in your checkout journey, on the order confirmation page, and on other selected landing pages. In some cases, data is transferred via SFTP over SSH as a data feed from your back office systems.
We can also share data back with you via event-driven webhooks or direct integrations with marketing automation providers like Emarsys, Klaviyo, Salesforce, or Ometria. We can also schedule batch feeds of customer data via SFTP for you to process.
## Customer Information Stored by Mention Me
Mention Me stores data only for the purposes of running your referral or advocacy programmes:
| Field | Required | Notes |
| - | - | - |
| Customer name | Yes | Required for communication |
| Customer email address | Yes | Unique identifier for referral |
| Customer ID | No | Connects the user in your systems |
| Order or transaction ID | Yes | Counts and de-duplicates transactions |
| Order total | Yes | Tracks AOV and reports on advocate value |
| Order currency | Yes | Accompanies order total |
| Coupon code | No | |
| IP address | Yes | Collected automatically |
| Cookie identifiers | No | |
| Phone numbers and postal addresses | No | |
# Understanding Data in Transit and at Rest
Source: https://docs.mention-me.com/knowledge/security/data-privacy/data-in-transit
How Mention Me encrypts data in transit and at rest, and where customer data is stored.
## Where Mention Me Stores Data
We store customer data in **Ireland** in multiple, physically and logically separated data centres run by AWS (Amazon Web Services).
We are ISO 27001 certified and run external penetration tests every six months. See more details at [mention-me.com/security](https://www.mention-me.com/security).
We can provide our DPA and information security policy upon request - [raise a support request](https://help.mention-me.com/hc/en-gb/requests/new).
## Encryption in Transit
All data is encrypted in transit via HTTPS (TLS 1.2+) or SFTP (SSH). For SFTP file transfers, an additional layer of PGP file-level encryption is available. See [SFTP File Encryption](/developer-docs/integration/sftp-encryption) for details.
The platform includes a [secure file transfer](/knowledge/security/data-management/send-data-securely) component for transferring files between clients and Mention Me, available in your dashboard under **Settings & Tools > Data & Reporting > Secure File Transfer**.

The Secure File Transfer page in the Mention Me platform.
## Encryption at Rest
The Mention Me platform databases are encrypted at rest with AWS RDS encryption using industry-standard AES-256 ciphers.
[Read more about Encrypting Amazon RDS Resources.](https://docs.aws.amazon.com/AmazonRDS/latest/UserGuide/Overview.Encryption.html)
# Understanding GDPR
Source: https://docs.mention-me.com/knowledge/security/data-privacy/gdpr
How Mention Me complies with GDPR, including data controller/processor roles and handling customer data requests.
At Mention Me, protecting customer data and privacy is essential. As your referral platform, we comply with GDPR. You act as the **Data Controller** and Mention Me acts as the **Data Processor**, collaborating to safeguard customer data through our Data Processing Agreement (DPA).
## Types of Data Requests
### Right to Be Forgotten
Your customer wants to delete all information held on them. [Here's how to do it.](/knowledge/referral/customers/purge-data)
### Unsubscribe
Your customer wants to unsubscribe from receiving any communication relating to the referral programme. This prevents them from receiving reward notifications going forward but does not stop direct communications from you. [Here's how to do it.](/knowledge/referral/customers/unsubscribe)
### Subject Access Request (SAR)
Your customer wants a file with the information we hold on them. [Raise a support request](https://help.mention-me.com/hc/en-gb/requests/new) with the customer details (name and email address). [Here is how to find them.](/knowledge/referral/customers/search-add-link) We will upload the data in PDF format to the secure file transfer area of the platform, where it will be stored for a maximum of 2 weeks, and confirm so you can download it and send it to your customer.
## What Happens When We Receive a Data Request Directly from One of Your Customers
Our customer journey and all emails contain prominent links to our privacy notice. The privacy notice describes all of the rights your customers have in respect of their data and how they may exercise those rights. Customers are directed to our privacy contact form, where they can unsubscribe or make a data request.
**If a customer requests to unsubscribe**, they will automatically be placed on our suppression list for your refer-a-friend programme and/or your marketing programme. The privacy notice makes clear that any unsubscribe applies only to emails sent by Mention Me, not any other marketing emails they may have subscribed to with you. You cannot choose which emails to unsubscribe a customer from -- it is all or none.
# Understanding the Legal Basis for Sharing Data
Source: https://docs.mention-me.com/knowledge/security/data-privacy/legal-basis
The legitimate interest framework under which brands share customer data with Mention Me.
Brands transmit customer data to Mention Me based on a **legitimate interest** framework. Your customers are not required to provide explicit consent for you to share their information with us to facilitate the operation of the referral programme. This approach streamlines the process while ensuring compliance with data protection regulations.
Our Data Processing Agreement (DPA) outlines the specific types of data we receive from you through each tag integration and details the ways we use this data to manage and run your referral programme.
* [Our T\&Cs (including the Data Processing Agreement)](https://mention-me.com/help/tnc_f/site)
* [Our position on GDPR](/knowledge/security/data-privacy/gdpr)
# Understanding Sub-Processors
Source: https://docs.mention-me.com/knowledge/security/data-privacy/sub-processors
Organisations that act as sub-processors of data within the Mention Me platform.
We do not subcontract development of our platform.
> [!NOTE]
>
> The sub-processor list below may be outdated. Contact your Client Manager or [raise a support request](https://help.mention-me.com/hc/en-gb/requests/new) for the current list.
The following organisations are sub-processors of our data:
| Sub-processor | Purpose |
| - | - |
| **AWS (Amazon Web Services)** | Hosts the Mention Me platform |
| **Mailjet** | Sends transactional emails |
| **Tray.io** | Optionally used for integrations with your marketing platform |
We have agreements in place with all sub-processors.
In addition, we use **Google Cloud Platform** to host our analytics platform. No personal data is stored in Google Cloud Platform.
# Overview
Source: https://docs.mention-me.com/knowledge/security/overview
How Mention Me protects customer data, secures account access, and manages data transfers.
Mention Me takes a comprehensive approach to keeping your data safe. We are ISO 27001 certified, encrypt all data in transit and at rest, and run external penetration tests every six months.
For full details on our security posture, see [mention-me.com/security](https://www.mention-me.com/security). To request our DPA or information security policy, [raise a support request](https://help.mention-me.com/hc/en-gb/requests/new).
## What You'll Find Here
> [card] [Data Privacy](/knowledge/security/data-privacy/gdpr)
>
> How we comply with GDPR, what data we store, our cookie policies, sub-processors, and what happens when a contract ends.
> [card] [Account Security](/knowledge/security/account/sso-setup)
>
> Single sign-on setup, two-factor authentication, password rules, user management, and your responsibilities as a client.
> [card] [Data Management](/knowledge/security/data-management/send-data-securely)
>
> How to send data securely, hash customer emails, upload historical orders, and exclude existing customers from your referral programme.
# Get access token
Source: https://docs.mention-me.com/api-reference/auth/auth/get-access-token
/openapi/auth_api.oas.json post /api/oauth/token
Given a `client_id` and `client_secret`, this will return an `access_token` which can be used in the Authorization header of subsequent requests to the Merchant API.
The token provided will last for 3600 seconds (1 hour) and will need to be refreshed after this time.
# Getting an Access Token
Source: https://docs.mention-me.com/api-reference/authentication/access-token
Get an access token using your API key to make authenticated requests to the API.
In this guide, we'll walk you through the process of obtaining an access token. Access tokens are crucial for authorizing your requests to our API.
Follow the steps below to seamlessly integrate access token retrieval into your application.
**1. Request an access token**
Make a `POST` request to our authorization server using your client credentials. You can read our reference data for the API and try it out via our [Auth API Reference](/api-reference/authentication/overview).
```bash theme={null}
curl -XPOST https://demo.mention-me.com/api/oauth/token \
-H 'Content-Type: application/json' \
-d '{ "client_id": "", "client_secret": "", "grant_type": "client_credentials" }'
```
Replace `` and `` with your API key's client ID and secret respectively.
**2. Receive the access token**
Upon a successful request, the authorization server will respond with a JSON Web Token (JWT) in the access token. Here's an example response:
```json theme={null}
{
"access_token": "",
"expires_in": 3600,
"token_type": "bearer"
}
```
* **access_token**: The JWT representing your access token
* **token_type**: The type of token. In this case, it's "bearer"
* **expires_in**: The expiration time of the access token in seconds (e.g., 3600 seconds equals one hour).
## Handling Errors
While obtaining an access token, errors may occur due to various reasons. For a detailed explanation of potential errors and their resolutions, refer to our [Errors Guide](/api-reference/getting-started/errors).
## JWT Explained
Access tokens returned are [JSON Web Tokens](https://jwt.io/introduction), or JWTs. JWTs are a standardised way of representing claims between two parties. In this case, the two parties are your application and Mention Me.
You can use the debug tool at [JWT.io](https://jwt.io/) to debug what access a token has.
A typical access token will have a payload that looks something like:
```json theme={null}
{
"aud": [
"project-test-2da703ca-e983-410e-93d0-442bb05b9b06"
],
"claims": {
"env": "demo",
"merchantId": "4259"
},
"exp": 1706201080,
"iat": 1706197480,
"iss": "stytch.com/project-test-2da703ca-e983-410e-93d0-442bb05b9b06",
"nbf": 1706197480,
"scope": "customers:list",
"sub": "m2m-client-test-3191ab24-133b-4634-a02d-0ec6249dd481"
}
```
The Mention Me specific fields are:
* **claims**: This shows what Environment and Merchant a token can be used for
* **env**: In this case, we have access to the demo environment
* **merchantId**: In this case, this token can be used for Merchant 4259
* **scope**: This shows the [scopes](/api-reference/authentication/scopes) that the token has access to
## Token Expiration
Access tokens have a limited lifespan for security reasons. In our case, tokens expire after **one hour**. It's essential to implement a mechanism to refresh tokens when they expire, ensuring uninterrupted access to the API.
## Next Steps
> [card] [Scopes](/api-reference/authentication/scopes)
>
> Choose the right scope for your application.
# Create an API Key
Source: https://docs.mention-me.com/api-reference/authentication/create-api-key
Create an API key with the correct scopes to access the API.
We'll walk you through the process of creating, managing, and using API keys for authentication. API keys are composed of an ID and a secret, providing a secure way to interact with our API. We've organised this guide into sections to cover key aspects of API key management.
> [!NOTE]
>
> **Administrator role required.** Only users with the **Administrator** role can create and manage API keys. If you don't have the Administrator role, you'll see a disabled "Add new key" button with a message directing you to contact an administrator. See [User Management](/knowledge/security/account/user-management) for more on permission levels.
## Creating an API Key
All API keys are shared by the account, so if you create a key, it will be available to all users of your account.
**1. Access API Key Management**
Visit the API Key section in the platform - it's available [for demo](https://demo.mention-me.com/merchant/~/settings/api-and-tag-integration#api-keys) or for [production](https://mention-me.com/merchant/~/settings/api-and-tag-integration#api-keys). Here, you can view, create, and manage your API keys.
**2. Add a New API Key**
Click on the "Add New API Key" button. Give your API key a descriptive name to easily identify its purpose later.
> [!NOTE]
>
> You should create different API keys for different use cases. There is a limit of three keys that can be active for any one account. If you would like to create more keys than this, please contact your account manager.
**3. Obtain API Key ID and Secret**
Once created, your API key will be assigned a unique ID and a secret. These credentials are essential for authenticating your requests.
## Managing API Keys
### Viewing API Keys
Navigate to the API Key section to view a list of all your created keys. Here, you can see the names, IDs, and manage the lifecycle of each key.
### Deleting API Keys
If you no longer need an API key, simply select the key and choose the option to delete it. Be cautious, as this action is irreversible.
### Recycle API Secret
You cannot currently cycle the secret of a key directly, you should instead create a new key and switch over your application's usage to the new one, and then delete the old one when that step is completed.
## Secrets
You will use both the ID and the secret to make a call to our OAuth2 token endpoint, to get an authentication token.
### Usage and Security
The API key secret is sensitive information and should be treated with utmost care. Ensure that it is securely stored and never exposed in client-side code or public repositories.
### One-Time Viewing
For enhanced security, you can only view the secret once during the creation process. Make sure to store it in a secure location for future use. **If you lose it, you'll need to create a new key.**
### Scopes
Scopes define the permissions associated with your API key. Each API key is assigned specific scopes that determine the actions it can perform.
You cannot adjust the scopes for an API key once it has been created. You should create a new key if you need to change the scopes, and then delete the old unused key once you have updated your application.
### Understanding Scopes
Explore the available scopes in our documentation to understand the level of access each scope provides. Choose scopes that align with the functionality you need for your application.
## Next Steps
> [card] [Get an access token](/api-reference/authentication/access-token)
>
> Use your API key to retrieve a JWT for making authenticated requests.
# Authentication
Source: https://docs.mention-me.com/api-reference/authentication/overview
Understand how to authenticate with the API and make your first authenticated request.
Welcome to the Authentication Guide for Mention Me.
## Getting Started
By the end of this Getting Started guide for authentication, you will have:
* [Created a new API key](/api-reference/authentication/create-api-key)
* [Retrieved an authentication token using the API key](/api-reference/authentication/access-token)
* [Made your first authenticated request to get a customer](/api-reference/merchant-api/first-request)
> [!NOTE]
>
> **Access.** You'll need to have a Mention Me account already set up to use this API. If you don't have access, please contact your account manager.
>
> Creating and managing API keys requires the **Administrator** role. If you don't have this role, contact an administrator within your organisation. See [User Management](/knowledge/security/account/user-management) for details.
## Client Credentials Flow Diagram
Before diving into the details, let's walk through the OAuth2 client credentials flow. Understanding this flow is crucial for a smooth authentication experience.
1. **Key Generation**: Obtain **client credentials** (client ID and client secret) by registering your application on our developer portal in the Mention Me platform.
2. **Authentication Request**: Your application sends a request to our authorization server (the `/oauth/token` endpoint) with the **client credentials**. Upon successful authentication, the authorization server issues an **access token**, valid for one hour.
3. **API Requests**: Use the **access token** to make authorized requests to our API.
Steps (2) and (3) are shown in the following diagram:
```mermaid theme={null}
sequenceDiagram
participant Client
participant /oauth/token
participant MerchantAPI
Client->>/oauth/token: Request token using "client_credentials" OAuth flow
/oauth/token-->>Client: Authentication access token (JWT) returned
Client->>MerchantAPI: Request to get a customer, with JWT in header
MerchantAPI-->>Client: Customer returned (if scopes allowed)
```
## Token Expiration Management
The **access token** provided will last for **1 hour**.
You should implement a mechanism to refresh tokens when they expire to ensure uninterrupted access.
## Next Steps
> [card] [Create an API key](/api-reference/authentication/create-api-key)
>
> Set up your first API key to start making authenticated requests.
# Scopes
Source: https://docs.mention-me.com/api-reference/authentication/scopes
What are scopes and how do they work?
Scopes play a crucial role in securing and controlling access to specific functionalities within our API.
You can think of them as the **permissions** each API key has to access data.
In this guide, we'll delve into what scopes are, why they are used, and how you can effectively manage them to tailor your application's access.
## What Are Scopes?
Scopes define the specific permissions or actions that an API key is allowed to perform. Each scope corresponds to a set of functionalities or resources within the API. By associating scopes with your API key, you can fine-tune the level of access your application has.
Without specifying *any* scope, you won't be able to utilise the API.
## Included Scopes
Each set of API keys only provides access to **one** Mention Me Merchant. This is automatically enforced when you setup your credentials.
They also only allow access to **one** environment.
If you need access to multiple Merchants, e.g. Brand A and Brand B, you will need different API keys.
Equally, if you require access to multiple environments, e.g. `demo.mention-me.com` and `mention-me.com`, you will also need different API keys.
## Scopes You Can Choose
Each API defined in our reference explains which scope(s) are required to use that API.
For example, if you want to create a new customer, you'll need to grant the `customer:write` scope.
Each scope is suffixed with the level of privilege it grants for a particular type of collection, with three levels available:
* `:read` - allows you to read an item in a collection
* `:write` - allows you to create or update an existing item in a collection
* `:delete` - allows you to delete an existing item in a collection
*NB: Not all collections provide all levels.*
## Least Privilege
We recommend following the [principle of least privilege](https://en.wikipedia.org/wiki/Principle_of_least_privilege). This means to provide each set of credentials as little access as possible required to do what is required.
E.g. we recommend for a customer service application is only given `:read` access, whereas a tool for updating data might only be given `:write` - i.e. each application has the minimal permissions required.
## Next Steps
> [card] [Auth API reference](/api-reference/authentication/overview)
>
> View the full Auth API endpoint documentation.
# Order Tracking
Source: https://docs.mention-me.com/api-reference/consumer-api/order-tracking
Record orders via the Consumer API or tracking pixel to attribute referrals.
> [!WARNING]
>
> **Authentication.** Our **[Entry Point API](/api-reference/entry-point-api/overview)** or **[Consumer API](/api-reference/consumer-api/overview)** do not require API Keys.
>
> Our Dashboard Endpoints require an Authentication Token in the request.
Mention Me needs to know if an order (or sign up event) takes place so we can track it and reward the appropriate referrer.
We prefer to combine this with Referrer Promotion where possible - because this allows to best segment your customers - so if you are promoting at the order (or sign up event) then pass us the Order details with that endpoint. Follow the rest of this guide if you need to track orders separately from referrer promotion.
In a transactional business (e.g. ecommerce), this is typically upon "Order confirmation". In a subscription or other business, this is typically after "Customer sign up" or "Registration" when the customer gives their details.
We require the following information:
* Customer’s email address
* Order ID (or transaction/account Id if you are tracking signups)
* Order subtotal (if appropriate, otherwise 0)
* Currency
There are 2 ways you can pass Mention Me this information:
1. Call our [Order API](/api-reference/consumer-api/overview) directly; or
2. Add a direct request to our [Order Tracking pixel](https://demo.mention-me.com/api-demo/v2/generic/instructions/order_tracking/all/pixel), either server side or in app
> [card] [Record Order](/api-reference/consumer-api/order-tracking)
>
> View the Record Order API reference.
# Overview
Source: https://docs.mention-me.com/api-reference/consumer-api/overview
An introduction to our Consumer API
We recommend most brands integrate their app using our Entry Point API which provides links to web views. This enables you to get started quickly, and to rely on the Mention Me platform to provide a rich content editing and branding experience.
In some cases, brands would prefer an "assemble yourself" model, and want to fully customise the experience. The Consumer API provides you the functionality to do this.
> [!NOTE]
>
> Using the Consumer API is significantly more complex than using our Javascript tags or our [EntryPoint API](/api-reference/entry-point-api/overview) and will take more development time to complete.
>
> If you wish to do this, please contact our [support team](https://help.mention-me.com/hc/en-gb/requests/new) so we can best support you.
You can find further documentation about the API endpoints in our [API reference](/api-reference/entry-point-api/overview).
## Share Links
When you enrol a referrer via the Consumer API, the response includes a `shareLinks` array containing pre-built share links for each sharing channel (WhatsApp, Facebook, X, SMS, link copy, and others configured for your offer).
Each share link object includes:
| Field | Description |
| - | - |
| `type` | The sharing channel (e.g. "whatsapp", "facebook", "link") |
| `protocol` | The URL protocol for the share, if applicable |
| `url` | The referral URL to include in the share |
| `defaultShareMessage` | The pre-rendered share message text for this channel |
| `exampleImplementation` | A ready-to-use share URL you can open directly, or adapt to suit your implementation |
### Dynamic Content in Share Messages
The `defaultShareMessage` field returns fully rendered text with all dynamic content placeholders resolved. Any placeholders configured in your offer's share copy - such as the referrer's first name or custom share fields - are automatically populated with real values.
For example, if your WhatsApp share copy is configured as:
```text theme={null}
Hi, it's {{referrer-firstname}}! I recently used [Brand] and was given an offer...
```
The API returns:
```text theme={null}
Hi, it's Henrietta! I recently used [Brand] and was given an offer...
```
You do not need to perform any placeholder rendering on your side. The message is ready to use as-is.
To configure the share copy and available placeholders for each channel, see [Share messages](/knowledge/referral/design/share-messages).
> [card] [Order tracking](/api-reference/consumer-api/order-tracking)
>
> Learn how to pass order data to Mention Me for referral tracking.
# Get dashboard
Source: https://docs.mention-me.com/api-reference/dashboard/get-dashboard
/openapi/entrypoint_api.oas.json post /api/entry-point/{version}/dashboard
Provide a customers' details so we can tell you if we could show them a dashboard (or offer). We'll provide the URL to the web-view for their dashboard.
Provide their full details (name, email, customerId) if you want us to optionally register them if they're not yet a referrer.
For information on how to correctly generate the Authentication Token, please see the documentation: https://docs.mention-me.com/api-reference/entry-point-api/authentication-token
# Enrol referrer
Source: https://docs.mention-me.com/api-reference/enrol-referrer/enrol-referrer
/openapi/consumer_api.oas.json post /api/consumer/{version}/referrer/enrol
Tell us about a customer (and any related order and segmentation details) to enrol them as a referrer and receive an offer to share with them
# Authentication Token
Source: https://docs.mention-me.com/api-reference/entry-point-api/authentication-token
How to Generate the Authentication Token for the Dashboard Endpoint
To send authenticated requests to the **Dashboard** Entry Point API you must include an Authentication Token.
This token is a SHA256 hash, based on the customer's email address being sent in the request, and an Authentication Secret key provided by Mention Me.
## Token Generation Format
`AuthenticationToken = LowerCase( SHA256_Hash( LowerCase(EMAIL) + [AUTHENTICATION_SECRET] ) )`
## Getting Your Salt Key
Your `AUTHENTICATION_SECRET` is unique and provided by Mention Me. It is used on both Demo and Production environments and may differ between those environments. You can find your authentication secret in the **Merchant Settings > Security & Data** page within the Mention Me platform.
## Steps to Generate the Token
**1. Lowercase the email**
Convert the customer’s email address in your API Request to lowercase.
**2. Concatenate with secret**
Concatenate the lowercase email with your Mention Me Authentication Secret.
**3. Generate SHA-256 hash**
Generate a SHA-256 hash of the resulting string.
**4. Lowercase the hash**
Convert the final hash to lowercase (most libraries return lowercase by default).
**5. Include in request**
Include this value in your API request as the AuthenticationToken.
## Testing the Authentication Token
We have a dedicated [Hash Testing tool](https://demo.mention-me.com/merchant/~/tools/test-hash?mode=authentication) you may use. This allows you to test that an Authentication Token you have generated will pass Mention Me's validation when sent as part of a request to the EntryPoint or Consumer APIs.
> [!NOTE]
>
> You will need access to the Mention Me Platform to access this page.
Simply add the email address you have hashed to create the Authentication Token, and the Authentication Token you generated, and the Mention Me platform will confirm if the token is valid.
If the hash does not match, the platform will share with you the expected hashed value.

The Hash Testing tool showing the expected hashed value when a submitted hash does not match.
## What's Next
> [card] [Referrer promotion](/api-reference/entry-point-api/referrer-promotion)
>
> Learn about referrer promotion via the Entry Point API.
# Overview
Source: https://docs.mention-me.com/api-reference/entry-point-api/overview
An introduction to the Entry Point API, its benefits and how to use it
> [!NOTE]
>
> **New here?** If you're not familiar with the different Consumer Journey APIs, we recommend reading our introduction to the [APIs we offer](/api-reference/introduction).
> [!WARNING]
>
> **Authentication.** Our **[Dashboard endpoint](/api-reference/entry-point-api/referrer-dashboard)** requires an Authentication Token in the request. See [how to generate an Authentication Token](/api-reference/entry-point-api/authentication-token).
The Entry Point API is used to transition a user from a native (usually in-app) experience to a web view. The web view is operated by Mention Me and displays the same journey displayed on the web.
## Benefits of Using Our API for Web Links
* Recommended for both web-based and native apps, it's easy and doesn't require too much custom development
* It allows the marketing team to control the content and even enable or disable individual touch points as and when required, directly via the Mention Me platform
* It allows AB testing of customer journeys via the Mention Me platform directly to continuously optimise the programme
## Advice for Android Developers
Android has multiple ways of displaying WebViews. There is an "embedded" web view, and a "in app browsing" web view which a user can open in Chrome from your app.
The "embedded" web view is a **limited** browser and as such does not support the `navigator.share` API. This powers the "share via any app on your phone" method we call "native share". This functionality does not work in the embedded view. This is a [known issue in Chromium](https://issues.chromium.org/issues/40540400). The "share via any app" method is a much nicer experience for users, and allows them to share on apps Mention Me might not directly support today.
We recommend you use the "in app browsing" approach instead. The experience is better for the user, and allows you to use our message capture functionality to see how your customers are talking about your brand.
You can read about these two methods on Android's documentation:
* [Embedded](https://developer.android.com/develop/ui/views/layout/webapps/embed-web-content-in-app?_gl=1*1au59rq*_up*MQ..*_ga*MTM4NjAxNDAzMy4xNzUzNDU5NTY0*_ga_6HH9YJMN9M*czE3NTM0NTk1NjMkbzEkZzAkdDE3NTM0NTk1NjMkajYwJGwwJGgxNDI4MzAxNjUx)
* [In app browsing](https://developer.android.com/develop/ui/views/layout/webapps/in-app-browsing-embedded-web?_gl=1*1mkljez*_up*MQ..*_ga*MTM4NjAxNDAzMy4xNzUzNDU5NTY0*_ga_6HH9YJMN9M*czE3NTM0NTk1NjMkbzEkZzAkdDE3NTM0NTk1NzckajQ2JGwwJGgxNDI4MzAxNjUx)
## How to Use the Entry Point API
**1. Add touch points**
Add links/buttons at various key touch points in your app for the following purposes:
1. [Referrer promotion](/api-reference/entry-point-api/referrer-promotion)
2. [Referee integration for name sharing](/api-reference/entry-point-api/referee-integration)
3. [Order tracking](/api-reference/consumer-api/order-tracking)
4. [Referrer dashboard](/api-reference/entry-point-api/referrer-dashboard)
**2. Get URLs and copy**
Use our Entry Point API to get the URLs and copy for the Calls to Action for these various buttons and links.
> [!WARNING]
>
> **Important.** Use the url `demo.mention-me.com` in your API endpoints when developing and testing.
>
> Switch to the live url `mention-me.com` when you deploy your integration live.
## Frequently Asked Questions
**I have a web-based app, can I use Javascript tags to integrate Mention Me?**
If you have a web-based app and can use Javascript tags within it, then that can be a suitable option. [Follow our web integration guide](https://demo.mention-me.com/api-demo/v2/generic/overview).
**I would like to build the referral journey natively into my app, do you have an API for that?**
Yes, we have a publicly accessible consumer API analogous to our Javascript tag implementation which lets you tell us about various events from your apps.
We provide back the copy to allow you to build the journey. This enables you to build an entire referral journey natively into your app. We recommend proceeding with this integration as a phase 2, once you’re happy with how the programme performs. [See further instructions for our Consumer API](/api-reference/consumer-api/overview).
**Can I integrate the programme in different languages in my app using the API?**
Yes, all the integration options allow you to use a `locale` parameter which can be passed to Mention Me to trigger a specific campaign for the user's language/region and currency. Your locales need to be configured via the Mention Me platform.
## What's Next
> [card] [Authentication Token](/api-reference/entry-point-api/authentication-token)
>
> Learn how to generate an Authentication Token.
# PostMessage Iframe Events
Source: https://docs.mention-me.com/api-reference/entry-point-api/postmessage
Triggering events when someone interacts with a Mention Me iframe
The Mention Me journey is often presented inside an iframe (embedded into your website) or within a "WebView" inside a mobile application.
When a user interacts with the Mention Me journey inside the iframe, it can be useful to update your own site - e.g. tracking events in your analytics.
If you're using our EntryPoint API to show the Mention Me experience inside a "WebView", it is also important for Mention Me to be able to tell you when a user has requested to close a popup.
Using the [postMessage](https://developer.mozilla.org/en-US/docs/Web/API/Window/postMessage) API, we can send you a message when a user completes certain actions.
Common examples include:
* Track when a user actively enrols into the referrer journey
* For clients using the EntryPoint, close the iframe when a user clicks close.
* Update your checkout with a coupon code when a referee is rewarded a coupon.
This solution requires no tags or 3rd party JS dependencies on Mention Me.
Here's some example code you can install in your website (commonly referred to as the "parent"):
```javascript Example message listener theme={null}
window.addEventListener('message', (event) => {
let { data = {} } = event;
// For security, filter for accepted origins here
// Handle IE browser support
if (typeof data === 'string') {
try {
data = window.JSON.parse(data);
} catch (error) {
data = {};
// Handle errors if desired.
}
}
switch (data.action) {
case 'mm:referee:close':
case 'mm:referrer:close':
case 'mm:referrer-share:close':
// This will be triggered whenever the IFRAME needs to be closed
// (by the user or by them reaching the end of the flow in any case)
// You should close the IFRAME here
break;
case 'mm:referrer:consent':
// A referrer has clicked the CTA in the referrer journey to confirm they wish
// to be actively enrolled in the program.
break;
case 'mm:referee:fulfilled':
// This will be triggered whenever the user gets given a coupon at the
// end of the happy path and you should apply the coupon if present
// and possible
break;
default:
// Future post message events may be provided.
// They can be ignored for now.
}
});
```
## Close event: `mm:*:close`
The close event is triggered when a customer clicks the close button inside an iframe hosted by Mention Me.
In the Mention Me Javascript tags, the Mention Me javascript will automatically handle closing the iframe.
If you're using the EntryPoint API to render your own iframe or web page inside a mobile app, you can use this close event to trigger your code to close the iframe/web page and return the user to the page.
An example close event which can be used to detect that the user wishes to close the iframe is below:
```json Close event payload theme={null}
{
"action": "mm:referee:close",
"sourceName": "Referee1577983405347"
}
```
*Note:`sourceName` is our own internal validation mechanism, you can ignore this.*
## Consent event: `mm:referrer:consent`
This event is triggered when a referrer clicks on the CTA to confirm registration in the programme.
In the case of a journey where the users details are pre-populated (e.g. post purchase), this event will fire when the user clicks on the CTA.
In the case of a journey where the users details are not pre-populated (e.g. a landing page), this event will fire when the user has entered their details to register with the programme.
## Referee fulfil event: `mm:referee:fulfilled`
We fire the `mm:referee:fulfilled` event when the referee gets given a coupon (or told they still have a valid coupon) - before they click the final CTA or close icon. So you should be able to apply the coupon as soon as there is one.
Because of this, when the user finishes the flow (by clicking either close or the final CTA to "continue shopping") you will have already handled the coupon and so we will fire the mm:referee:close event.
Note for clients with "after purchase" rewards, since there is no coupon produced by the journey, the only event that will be fired is the mm:referee:close one.
The payload would look something like this in each case:
```json Example payload theme={null}
{
"action": "mm:referee:fulfilled",
"referee": {
"email": "[email protected]"
},
"coupon": {
"couponCode": "REFEREE123",
"securityCode": "CODE456",
"expiryDate": "2021-01-02"
},
"message": "Here is 20% off your first order thanks to John",
"sourceName": "Referee1577983405347"
}
```
*Note:`sourceName` is our own internal validation mechanism, you can ignore this.*
The elements of the payload are to be used how you see fit to optimise conversion in the referee journey - for example telling them how long they have to spend the coupon or using the content to explain why they have received this coupon and encourage conversion.
## Click action event: `clickAction`
For Entry Point API journeys embedded in an iframe on a checkout (or any other page you don't want the customer to navigate away from), the referee experience can send a `clickAction` message so you can close the iframe and keep the customer where they are, instead of following the CTA link.
Mention Me sends this message when the customer clicks the final CTA in the journey:
```json Message payload theme={null}
{
"choice": "clickAction",
"clickAction": "https://www.example.com/",
"clickType": "redirect",
"sourceName": "",
"suffix": "Referee"
}
```
* `clickAction` - the URL the CTA would normally redirect the customer to.
* `suffix` - `"Referee"` or `"Referrer"` depending on which journey the message was sent from.
Listen for this event in the parent page and close the iframe instead of allowing the redirect:
```javascript Parent page listener theme={null}
window.addEventListener('message', function (e) {
var d = e.data;
if (d && d.choice === 'clickAction') {
closeIframe(); // close the iframe and keep the customer on the current page
}
});
```
Replace `closeIframe()` with your own function that hides or removes the Mention Me iframe from the DOM. This is the recommended pattern when the Entry Point API journey is embedded directly in your checkout flow.
> [card] [FAQ](/api-reference/webhooks/faqs)
>
> View frequently asked questions.
# Referee Integration
Source: https://docs.mention-me.com/api-reference/entry-point-api/referee-integration
How to build the "Find a friend" journey in-app
Name sharing is a great way for customers to share your brand with friends via word of mouth. They tell their friends to come to your app or website and enter their name to earn an introductory reward (provided they are a new customer).
Using the Referee API allows you to render a link/button in your customer journey so the prospective customer can find their referrer and get their reward. They will then return to your app via a deep link.
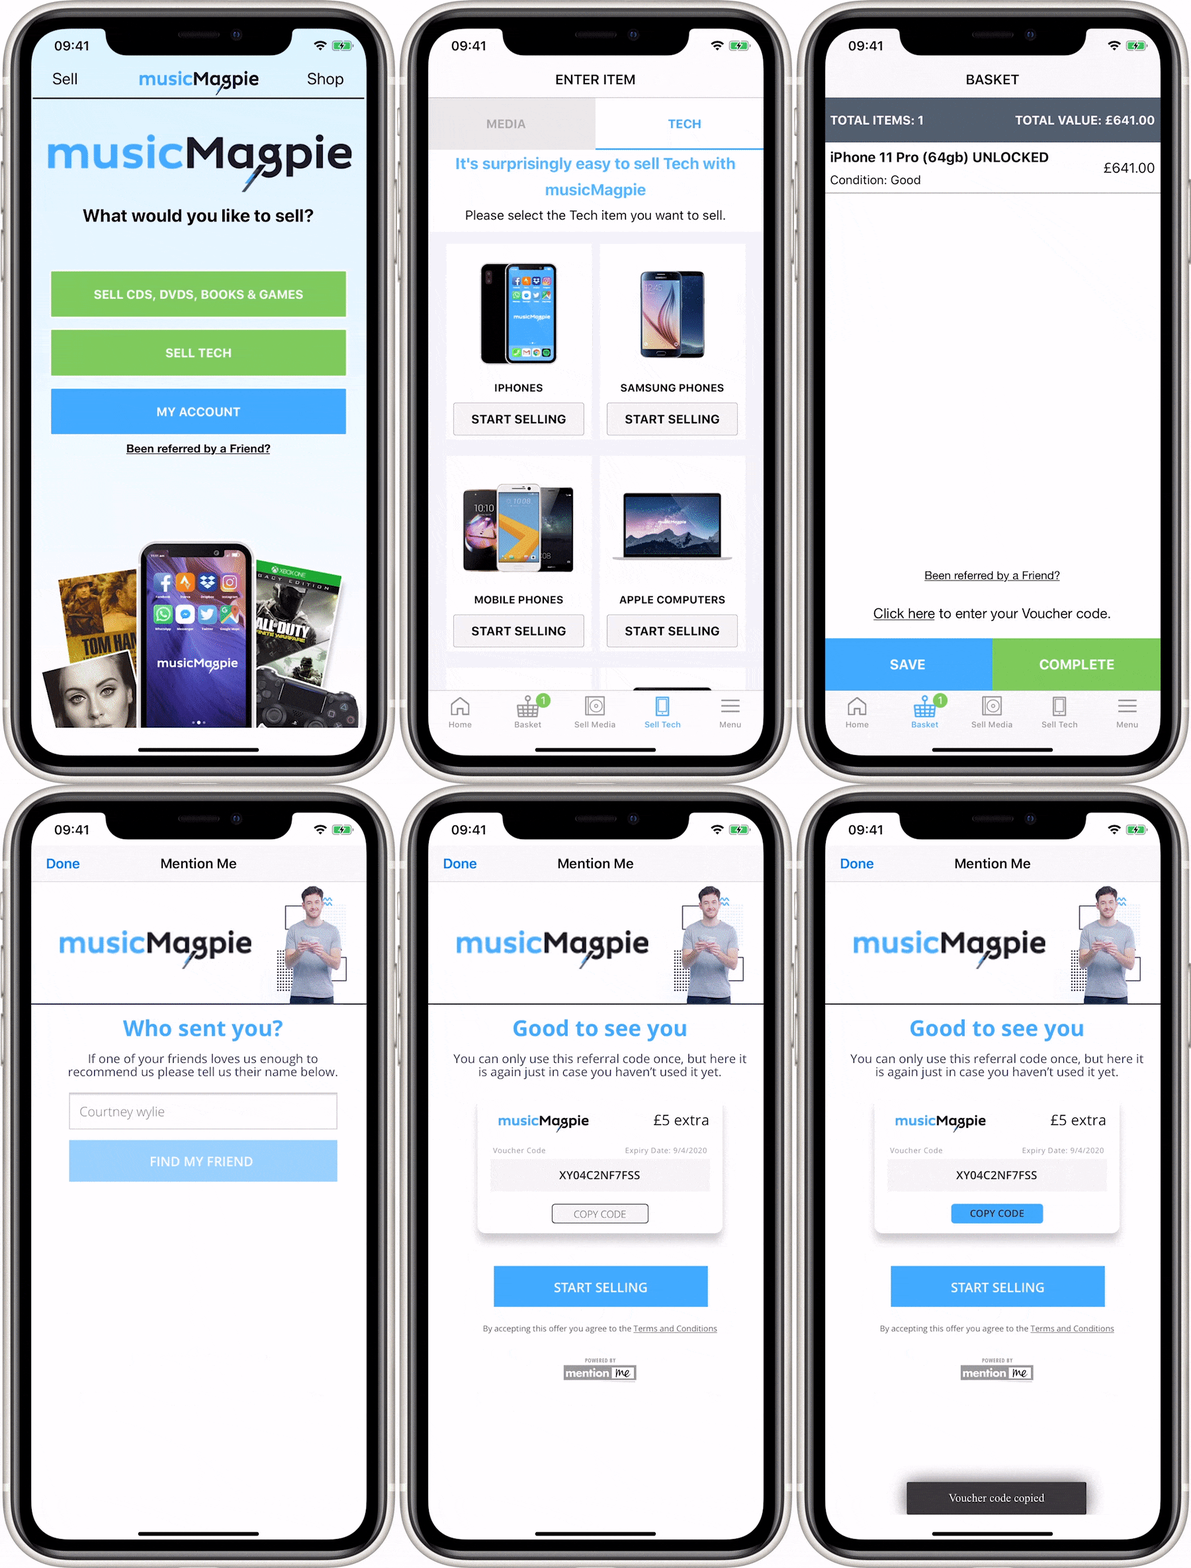
The Find a Friend button as it appears within the musicMagpie app.
## How to Implement Name Sharing
**1. Call the Referee API**
Call the Referee API passing parameters about the customer (if you know any details) and touchpoint. [See the reference instructions for the Referee API](/api-reference/entry-point-api/overview).
**2. Handle the response**
Mention Me returns a URL to the web view and a piece of text which you can use to create a call to action. This would typically say "Been referred by a friend?" and can be edited via the Mention Me platform.
> [!NOTE]
>
> This link copy can't be edited directly in the offer preview - changes need to be requested from the Mention Me support team.
If we return an HTTP error code (e.g. 404) you should not show anything - name sharing is not available for that customer, your account, or that touchpoint.
**3. Return to app**
When the user has finished entering the name of a referrer, they may be asked to register their own email address to earn a reward or the promise of one. After this they will close the web view to return to the app.
If you can support it, we can enable an app-specific deep link call-to-action to go back to your app. Alternatively, the customer can close the web view to return to your app.
For some use cases, we also offer a Javascript postMessage to return the customer from this journey. To learn more, [see our instructions on postMessage](/api-reference/entry-point-api/postmessage).
If the journey is embedded in an iframe on your checkout (or another page you don't want the customer to navigate away from), listen for the [`clickAction` postMessage event](/api-reference/entry-point-api/postmessage#click-action-event-clickaction) to close the iframe instead of allowing the CTA redirect.
## Frequently Asked Questions
**Can I manage the referee journey on the web or in-app without tags?**
Yes, you can invoke our referee name sharing journey via our API within your own IFRAME, and manage closing that IFRAME and applying a coupon when the journey successfully concludes, in your own checkout via postMessage. To learn more, [see our instructions on postMessage](/api-reference/entry-point-api/postmessage).
**When the referred customer arrives in our new customer journey, can we avoid them needing to enter their own email address again?**
Yes, absolutely. We’ll capture their email address and can provide it in the link back to your app or website (base64 encoded if preferred), along with any coupon code, so you can use it to avoid them having to enter it again. Your client success manager can set this up for you.
## What's Next
> [card] [Referrer dashboard](/api-reference/entry-point-api/referrer-dashboard)
>
> Learn about the dashboard journey via the Entry Point API.
# Referrer Dashboard
Source: https://docs.mention-me.com/api-reference/entry-point-api/referrer-dashboard
How to display a referrer their dashboard in-app
You may want to give referrers the ability to see the status of their referrals, the rewards they've earned, and encourage them to share again. The simplest way to do this is to provide a link or button in your app which takes the customer to a dashboard web view hosted by us.
> [!WARNING]
>
> **Authentication.** Our **[Dashboard endpoint](/api-reference/entry-point-api/referrer-dashboard)** requires an Authentication Token in the request. See [how to generate an Authentication Token](/api-reference/entry-point-api/authentication-token).
## How to Add a Link to the Referrer Dashboard
**1. Call the Dashboard API**
Call the Dashboard API passing parameters about the customer and the touchpoint. [See the reference instructions for the Dashboard API](/api-reference/entry-point-api/overview).
**2. Handle the response**
If available, Mention Me returns a URL to the web view and a piece of text which you can use for the call to action.
If we return an HTTP error code (e.g. 404) you should not show anything - the dashboard is not available for that customer, your account, or that touchpoint.
**3. Return to app**
When the user has finished using their dashboard they will close the web view to return to the app.
## What's Next
> [card] [Referrer promotion](/api-reference/entry-point-api/referrer-promotion)
>
> View the Entry Point API reference.
# Referrer Promotion
Source: https://docs.mention-me.com/api-reference/entry-point-api/referrer-promotion
How to promote your referral programme to referrers in app
You can promote referral at any point in your app - normally a "**point of delight**" makes sense - after a successful transaction. We’ll send customers from those touch points via links or buttons to web views hosted by us where they can share the offer with their friends.
Here is an example of how this integration looks in app for two of our clients:
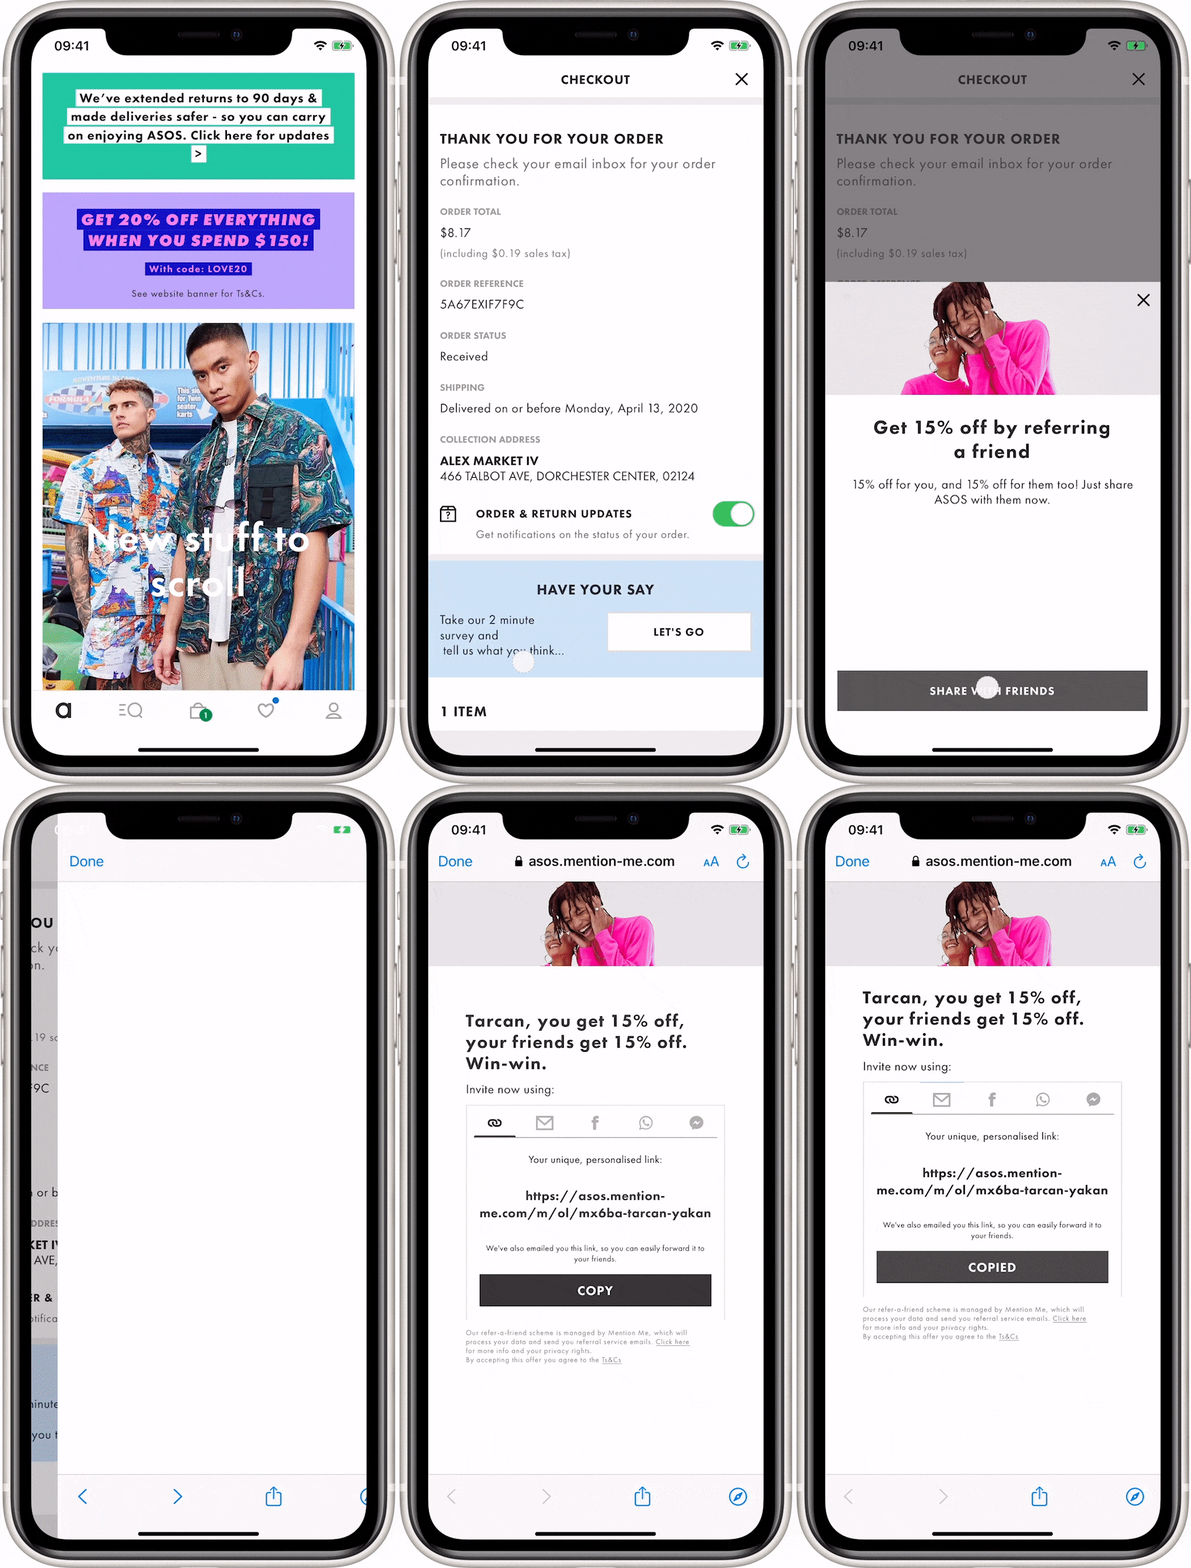
The referral promotion button as it appears within the ASOS app.
The same pattern applied within the Bloom & Wild app:
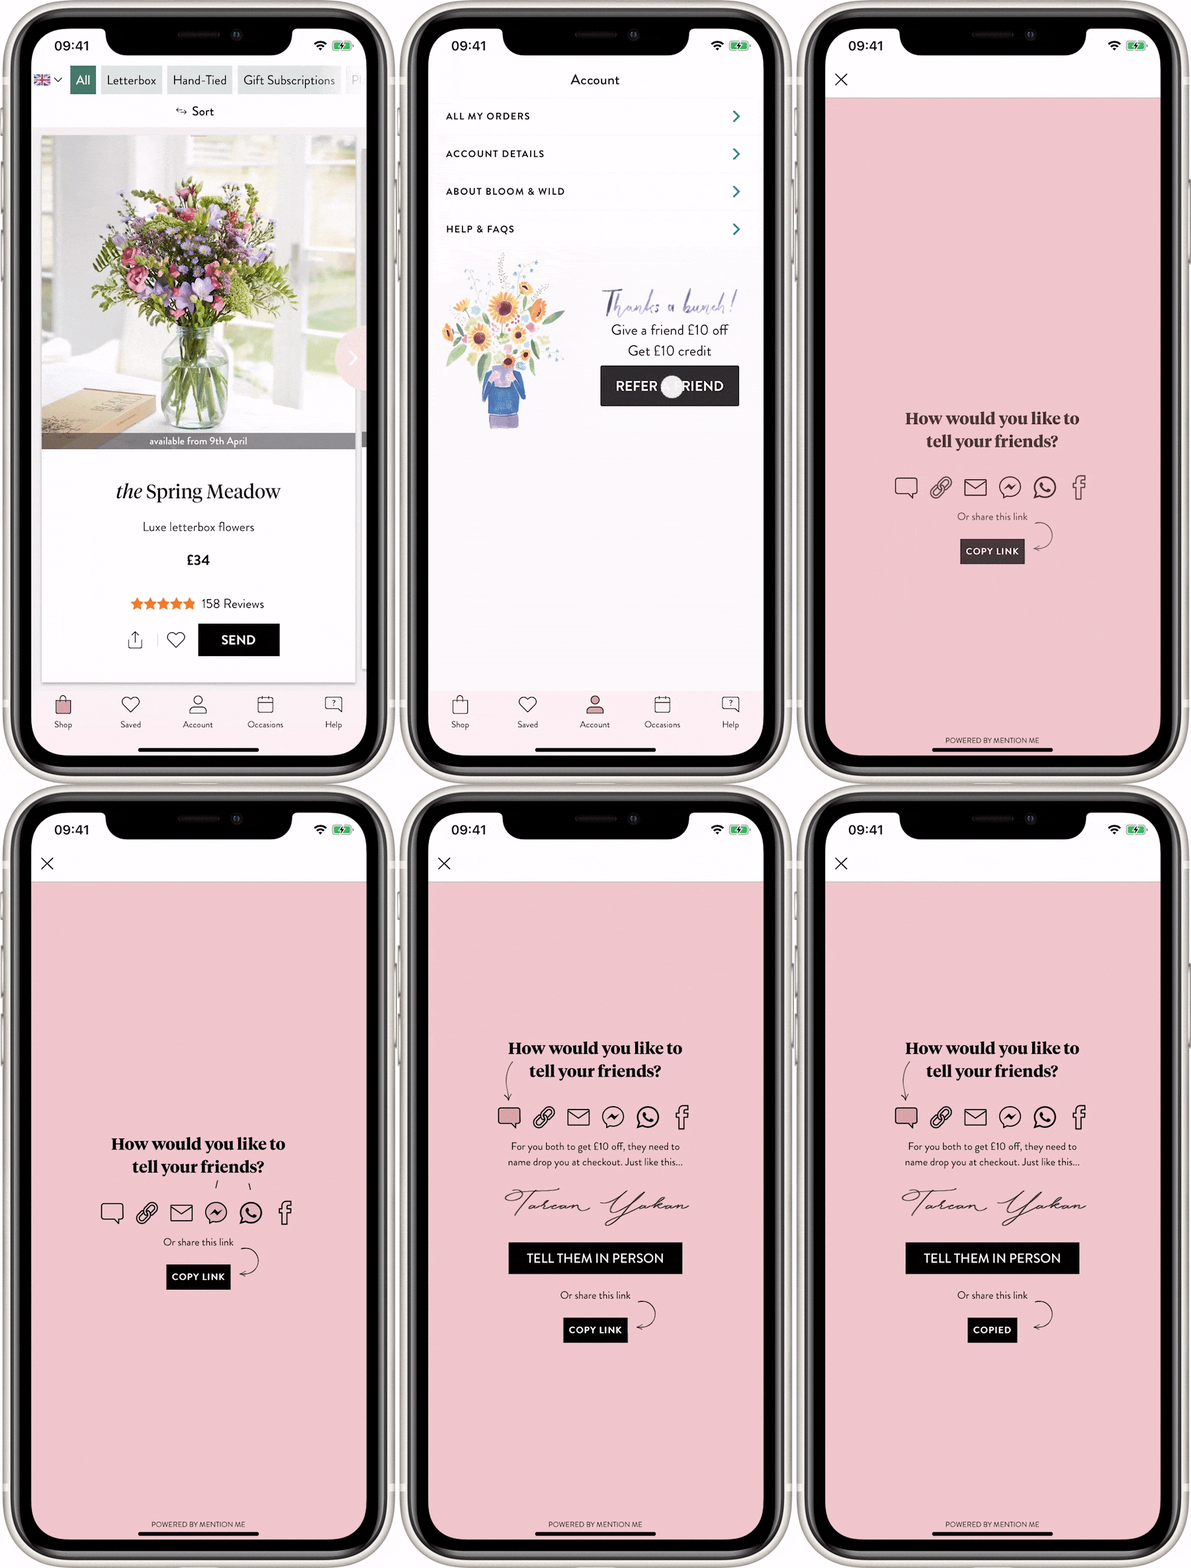
The referral promotion button as it appears within the Bloom & Wild app.
## How to Promote Referral to Your Existing Customers
**1. Call the Referrer API**
Call the [Referrer API](/api-reference/entry-point-api/overview) passing parameters about the customer and touchpoint.
Pass the customer details, any segmentation parameters and the order/transaction/sign-up event details (if it happens at the same time).
**2. Handle the response**
If the touch point is available, Mention Me returns a URL to the web view and content which you can use for the headline, description and call to action.
If we return an HTTP error code (e.g. 404) you should not show anything - enrolment is not available for that customer, your account, or that touchpoint.
**3. Return to app**
When the user has finished sharing they will close the web view to return to the app.
## What's Next
> [card] [Referee integration](/api-reference/entry-point-api/referee-integration)
>
> Learn about the Referee ("find a friend") integration via the Entry Point API.
# Find a friend
Source: https://docs.mention-me.com/api-reference/find-referrer-by-name/find-a-friend
/openapi/consumer_api.oas.json get /api/consumer/{version}/referrer/search
Search for a referrer by name (or email) to allow your customer to find their friend via NameShare.
If an exact match is found, we will return a 200 response. The 200 response will include the `referrerMentionMeIdentifier` and `referrerToken`. You should next collect the referee's details (i.e. their email address) and register them with the "Register referee" API. Completion of the registration with a valid email, `referrerMentionMeIdentifier` and `referrerToken` will allow the referee to gain their reward.
If no exact match is found, we will return a 404 response. A 404 may indicate we didn't find anyone, or it may indicate that we found multiple people with the same name. If we did find multiple people with the same name, we will also set the `foundMultipleReferrers` parameter in the root of the response to true.
If `foundMultipleReferrers` is set to true, the client should prompt the referee to narrow down the search, e.g. by entering the email address of the referrer. The exact narrowing strategy is up to the client.
# Find a friend content
Source: https://docs.mention-me.com/api-reference/find-referrer-by-name/find-a-friend-content
/openapi/consumer_api.oas.json get /api/consumer/{version}/referrer/search/content
Fetch details from Mention Me with which to build a "find a friend" page. This will include an initial CTA, such as "Been referred by a friend?" as well as specific content which you can use to build the page.
Using this API to build your content will allow you to keep your content up to date with the latest content managed in Mention Me.
You should call this API once when your page is loaded, e.g. on the checkout page, and use it to populate the page.
# Get dashboard
Source: https://docs.mention-me.com/api-reference/get-referrer-dashboard/get-dashboard
/openapi/consumer_api.oas.json get /api/consumer/{version}/referrer/dashboard
Get a referrer's dashboard (given a referrer identity, get their dashboard data).
If we respond with a 404 they are not a referrer. Instead, you should Enrol them as a referrer first, then call this endpoint again.
For information on how to correctly generate the Authentication Token, please see the documentation: https://docs.mention-me.com/api-reference/entry-point-api/authentication-token
# Environments
Source: https://docs.mention-me.com/api-reference/getting-started/environments
Which environments you can use for accessing Mention Me
Mention Me has two customer facing environments.
These are known as "demo" and "live".
| Environment | Domain Name | Purpose |
| - | - | - |
| Demo | demo.mention-me.com | Our demo environment is for experimentation, testing, and learning how to use the API. Most clients will use this during the onboarding phase. It can be used at any time, and should **not** contain real customer data. |
| Live | mention-me.com | Our live environment is used for your real customers. It will grant real rewards and is used for all customer facing activity. |
You should conduct all testing against demo.mention-me.com.
For Javascript tags, the domain names are slightly different:
| Environment | Domain Name |
| - | - |
| Demo | tag-demo.mention-me.com |
| Live | tag.mention-me.com |
## Next Steps
> [card] [Errors](/api-reference/getting-started/errors)
>
> Learn about different errors the Mention Me APIs might return.
# Errors
Source: https://docs.mention-me.com/api-reference/getting-started/errors
Errors you might encounter when using the Mention Me APIs.
Understanding and effectively handling errors is crucial for a robust and reliable integration with our API. This guide provides insights into common errors you might encounter and best practices for resolving them. Refer to the table below for detailed information on each error.
## Error Types
| Code | Message |
| - | - |
| `401` | Expired token or other authentication problem |
| `404` | Could not find the resource you were querying |
| `429` | Exceeded a rate limit - slow the number of requests down |
| `500` | Something's wrong on our end, try again shortly |
If you receive a non-`200` response from the API, you should check the response body for more information. The response body will be a JSON object with an `code` key, and a `message` key.
```json theme={null}
{
"code": "401",
"message": "Expired token."
}
```
If the error response is *not* a `401` response, then that means your authentication token is valid, but there is something wrong with your request. You should check the API documentation for more information on the endpoint you're trying to access.
## Best Practices for Handling Errors
> [accordion] Error Handling in Code
>
> Implement robust error handling in your code to gracefully manage different error scenarios. Log error details for troubleshooting purposes.
> [accordion] Retry Mechanism
>
> For transient errors (e.g., 429 or 500), implement a retry mechanism with an exponential backoff strategy.
> [accordion] Rate Limiting
>
> Respect rate limits to avoid being temporarily blocked. Implement rate limiting on your end to prevent reaching these limits.
> [accordion] Detailed Error Messages
>
> Extract and display relevant error messages from the API response to assist in debugging.
> [accordion] Monitoring and Alerts
>
> Set up monitoring tools to track error rates and receive alerts when anomalies occur.
## Next Steps
> [card] [Authentication](/api-reference/authentication/overview)
>
> Learn about authentication with the Mention Me APIs.
# Rate Limits
Source: https://docs.mention-me.com/api-reference/getting-started/rate-limits
Understand rate limits for the Mention Me APIs
Mention Me applies rate limiting to ensure we maintain a high quality of service for all users.
Rate limits are applied for the Merchant API.
## Consumer & EntryPoint API Limits
No rate limiting is applied to the EntryPoint and Consumer APIs - however anti-gaming mechanisms are in place. These are confidential and are unlikely to be met in normal operation.
## Merchant API Limits
The Merchant API applies rate limits over a 5 minute window. You may make as many as N requests in that 5 minute period.
e.g. if the limit is 100 you could:
* Make 20 requests every minute
* Make 100 requests in 1 minute, then no more requests for 4 minutes
If you exceed the limit, a `429` error response will be returned.
We will return the following headers with each request (regardless of whether the limit is exceeded or not):
* `X-RateLimit-Limit` - what is the limit applied to this API endpoint?
* `X-RateLimit-Remaining` - how many requests can you make before you exceed the limit. If the number is 0, you will receive a `429` error
* `X-RateLimit-Reset` - the number of seconds before the rate limit resets
The documentation for each API describes the rate limit that applies to that endpoint.
> [!NOTE]
>
> **Hitting the limit?** If you're regularly hitting our rate limits, please speak to us - we can advise on optimal patterns to deploy or increase your limit depending on your use case.
## Next Steps
> [card] [Errors](/api-reference/getting-started/errors)
>
> Learn about different errors the Mention Me APIs might return.
> [card] [Introduction](/api-reference/merchant-api/overview)
>
> Introduction to the Mention Me Merchant API.
# API Reference
Source: https://docs.mention-me.com/api-reference/introduction
Complete reference documentation for the Mention Me REST APIs
The Mention Me API lets you programmatically manage referral programmes, track conversions, and access customer data. All endpoints use JSON over HTTPS.
## APIs
> [card] [Auth API](/api-reference/authentication/overview)
>
> OAuth2 client credentials flow. Obtain access tokens for authenticating requests to other APIs.
> [card] [Merchant API](/api-reference/merchant-api/overview)
>
> Manage your referral programme, campaigns, and merchant-level configuration.
> [card] [Consumer API](/api-reference/consumer-api/overview)
>
> Track orders, look up customers, and manage referral data at the consumer level.
> [card] [Entrypoint API](/api-reference/entry-point-api/overview)
>
> Server-side alternative to JavaScript tags. Serve referrer offers, referee journeys, and dashboards via API.
## Base URLs
| Environment | Base URL |
| - | - |
| Production | `https://api.mention-me.com` |
| Demo | `https://api-demo.mention-me.com` |
## Authentication
All API requests require a Bearer token obtained via the [Auth API](/api-reference/authentication/overview). See the [authentication guide](/api-reference/authentication/overview) for details on the OAuth2 client credentials flow.
## Common Patterns
* All responses are JSON
* Dates use ISO 8601 format
* Errors return standard HTTP status codes with a JSON error body
* Rate limits apply per access token - see [rate limits](/api-reference/getting-started/rate-limits)
# Register referee
Source: https://docs.mention-me.com/api-reference/link-new-customer-to-referrer/register-referee
/openapi/consumer_api.oas.json post /api/consumer/{version}/referee/register
After a successful response from the "Find friend" API, this endpoint allows you to register a new customer to confirm the relationship between the Referee (the friend) and the Referrer (the person who referred them).
Confirming the registration requires the `referrerMentionMeIdentifier` and `referrerToken` from the search API response.
To complete the registration, you will need to confirm the registration details of the referee via this API. This will grant the referee their reward, or will inform them on how to obtain one if further action is required
(e.g. making a purchase).
# Your First Merchant API Request
Source: https://docs.mention-me.com/api-reference/merchant-api/first-request
Make your first request to the Merchant API.
This section will guide you through the process of constructing a request and handling the API response.
**1. Obtain an access token**
You’ll need an access token to make requests. [Head back to our authentication section if you’ve not done this yet.](/api-reference/authentication/overview)
**2. Make a request**
For each request, pass the access token in the `Authorization` header. The token you’ll have will be a `Bearer` token, so prefix it with `Bearer ` (note the space).
Here’s an example in curl:
```bash theme={null}
curl -XPOST https://mention-me.com/api/merchant/v2/customers \
-H 'Content-Type: application/json' \
-H 'Authorization: Bearer ' \
--data '{}'
```
Replace the URL with your chosen API endpoint, and the token with the one you obtained previously.
**3. Handle the response**
Ensure that your application is prepared to handle different HTTP status codes and response payloads.
Each API will declare the error responses it has, and you can learn more about errors under [errors](/api-reference/getting-started/errors).
Now that you’ve successfully made your first API request, continue exploring the API documentation. If you encounter any challenges or have questions, refer to the [Errors Guide](/api-reference/getting-started/errors) or reach out to our [support team](https://help.mention-me.com/hc/en-gb/requests/new) for assistance.
> [card] [Get customers](/api-reference/merchant-api/overview)
>
> Ready to call our API? Visit our API reference to learn about endpoints available.
# Overview
Source: https://docs.mention-me.com/api-reference/merchant-api/overview
Introduction to the Mention Me Merchant API.
Welcome to the Merchant API guide.
The Merchant API can be used to access data about your customers as well as configuration data for Mention Me.
You can use it to:
* Perform common actions like marking a customer as **eligible for a reward**, or **purging** them
* Retrieve details about a customer, e.g. their segments or how often they've shared
> [!NOTE]
>
> The Merchant API requires **[Authentication](/api-reference/authentication/overview)**.
> [card] [Authentication](/api-reference/authentication/overview)
>
> Learn about authenticating with the Merchant API.
# Validate coupon code
Source: https://docs.mention-me.com/api-reference/merchant/coupons/validate-coupon-code
/openapi/merchant_api.oas.json get /api/merchant/v2/coupons/validate/{coupon_code}
Check whether a single-use coupon code is valid and return details about the reward it is allowed to be redeemed for.
In this case we assume that Mention Me has issued a coupon to a customer or potential customer. This coupon could be a single-use coupon previously given to Mention Me in a batch of coupons. Or it could be a single-use coupon generated directly by Mention Me.
The customer could have been promised the reward as a potential new customer (referee), for referring another customer (referrer) or just because they've been offered an incentive to come to store (incentive for action).
The customer then brings the coupon to the merchant intending to redeem it. This endpoint allows the merchant (or a third party) to check if the coupon is still valid and is capable of being used to redeem a reward at Mention Me.
This endpoint allows you to validate a coupon code before attempting to redeem it. It will check:
- Whether the coupon exists for your merchant
- Whether the coupon is currently valid (not expired, not barred, has started)
- Whether the coupon is attached to an unredeemed reward and hence can be spent
There are three responses (validityResponseCode):
- FOUND_REDEEMABLE - this means the coupon is found, is valid and can be used to spend the provided reward.
- FOUND_NOT_REDEEMABLE - this means the coupon is known to Mention Me - but is either not valid or has already been spent.
- NOT_FOUND - the coupon is not known to Mention Me.
There is also a human-readable description of the response code (validityResponseDescription). Use the validityResponseCode to decide on the outcome (the human-readable description could change).
If the coupon is found, the response will include details about the reward such as the discount amount, type (e.g., percentage or fixed amount), currency, and description.
If the coupon is not redeemable, the validityResponseDescription will indicate why it cannot be used.
If the coupon is not found, the response won't have additional details.
If you find the coupon is valid and then allow the customer to redeem the coupon you should then subsequently tell us about the purchase they made, including the coupon code so that we can mark it as redeemed. Once you've done that the coupon will of course be invalid if requested again.
You can do this using the Record Order API endpoint (if you have the email address of the customer) or the Redeem Coupon API endpoint (if you don't have the email address of the customer).
**Scopes:** `customers:read`, `rewards:read`
**Rate limits:** 300 requests per 5 minutes. Shared across all 'coupons' endpoints.
# Get customer rewards
Source: https://docs.mention-me.com/api-reference/merchant/customers/get-customer-rewards
/openapi/merchant_api.oas.json post /api/merchant/v2/customers/rewards
Returns all rewards a customer has been given.
Rewards that are fulfilled outside of Mention Me will not be returned.
**Scopes:** `customers:read`, `rewards:read`
**Rate limits:** 300 requests per 5 minutes. Shared across all 'rewards' endpoints.
# Get customers
Source: https://docs.mention-me.com/api-reference/merchant/customers/get-customers
/openapi/merchant_api.oas.json post /api/merchant/v2/customers
Returns all customers who match the given set of filters.
When filtering by Customer Id, every customer who matches the identifier will be returned.
When filtering by Email, because it is unique, one customer will be returned for each matching identifier.
If we cannot find a customer provided, we will not include them in the response.
If none of the customers provided can be found, we will return a 404.
You may send 100 customers per request.
**Scopes:** `customers:read`
**Rate limits:** 300 requests per 5 minutes. Shared across all 'customers' endpoints.
# Lapse customers
Source: https://docs.mention-me.com/api-reference/merchant/customers/lapse-customers
/openapi/merchant_api.oas.json post /api/merchant/v2/customers/lapse
A customer who is lapsed is one who you no longer consider an existing customer. This can be used to allow the customer to be referred again. A common use case for this is in subscription businesses where a customer has cancelled their subscription and is no longer a customer - you can mark them as lapsed to enable them to be re-introduced.
Lapsing is a permanent action. It can be reversed by recording a new transaction for the customer.
Lapsing is done on a queue. It may take some time for the customers to be recorded as lapsed. We recommend using the `GET /v2/customers` endpoint to determine if the customer is active or not. Approximate time to lapse is
normally under < 5 minutes, but can be several hours in some cases.
Customers who we were able to queue will be returned in the `accepted` array. Customers who we do not hold a record of or cannot find will be returned in the `errors` array.
**Scopes:** `customers:write`
**Rate limits:** 300 requests per 5 minutes. Shared across all 'customers' endpoints.
# Purge customers
Source: https://docs.mention-me.com/api-reference/merchant/customers/purge-customers
/openapi/merchant_api.oas.json delete /api/merchant/v2/customers
Purge all customers matching the given identifiers.
Purging is a permanent action. Once a customer is purged, they cannot be recovered.
Purging is done on a queue. It may take some time for the customers to be purged. We recommend using the `GET /v2/customers` endpoint to determine if the customers have been purged. Approximate time to purge is
normally under < 5 minutes, but can be several hours in some cases.
Customers who we were able to queue will be returned in the `accepted` array. Customers who we do not hold a record of or cannot find will be returned in the `errors` array.
**Scopes:** `customers:delete`
**Rate limits:** 300 requests per 5 minutes. Shared across all 'customers_purge' endpoints.
# Referee cancellations
Source: https://docs.mention-me.com/api-reference/merchant/referee/referee-cancellations
/openapi/merchant_api.oas.json post /api/merchant/v2/referee/cancellation
Mark all customers matching the given identifiers as cancelled. i.e. they've cancelled their order or have failed to fulfil all necessary steps in order to be given a reward.
Only customers who could be eligible for a reward will be marked as cancelled. Any other customers included
(e.g. customers who might order in the future) will be ignored and discarded.
We strongly suggest you pass us _all_ customers who cancelled - as you may not know who was introduced by a friend. We will discard any customers details who do not need cancellation.
Cancellation is completed on a queue. It may take some time for the customers to be marked as cancelled. Approximate time to mark someone as cancelled is normally under < 5 minutes, but can be several hours in some cases.
Customers who we were able to queue will be returned in the `accepted` array. Customers who we do not hold a record of or cannot find will be returned in the `errors` array.
You may send 100 customers per request.
**Scopes:** `customers:write`
**Rate limits:** 300 requests per 5 minutes. Shared across all 'referee' endpoints.
# Referee eligibility
Source: https://docs.mention-me.com/api-reference/merchant/referee/referee-eligibility
/openapi/merchant_api.oas.json post /api/merchant/v2/referee/eligibility
Mark all customers matching the given identifiers as eligible for a reward - i.e. they've completed all necessary steps in order to be given a reward. For instance, this could be keeping a product for a certain amount of time, completing their first month with a subscription or completing transferring provider for a utility.
Only customers who are eligible for a reward will be marked as eligible. Any other customers included (e.g. customers who were not referred by a friend or those who do not require approval) will be ignored and discarded.
Customers who require approval because they are suspected of gaming the program will not be marked as eligible. You can approve the customers in the Merchant Portal.
We strongly suggest you pass us _all_ customers who complete the eligibility criteria - as you may not know who was introduced by a friend. We will discard any customers details who are not eligible.
Eligibility is completed on a queue. It may take some time for the customers to be marked as eligible. Approximate time to mark someone as eligible is normally under < 5 minutes, but can be several hours in some cases.
Customers who we were able to queue will be returned in the `accepted` array. Customers who we do not hold a record of or cannot find will be returned in the `errors` array.
You may send 100 customers per request.
**Scopes:** `customers:write`
**Rate limits:** 300 requests per 5 minutes. Shared across all 'referee' endpoints.
# Record order
Source: https://docs.mention-me.com/api-reference/record-order/record-order
/openapi/consumer_api.oas.json post /api/consumer/{version}/order
Tell us that an order took place.
We will use the order to:
- Record the customer is an existing customer and no longer eligible for introductory rewards - Reward a referrer if this purchase was as a result of a referral
We will also use the data to optimise your referral scheme.
# Record order with a coupon
Source: https://docs.mention-me.com/api-reference/record-order/record-order-with-a-coupon
/openapi/consumer_api.oas.json post /api/consumer/{version}/coupon_redemption
For In-Store situations where a referral transaction can occur identified by a coupon
and typically without a customer email address.
The coupon must be a single-use coupon. You can validate the coupon code first using the Merchant API -> Validate Coupon Code endpoint if you wish.
If you have an email address and may not have a coupon, use the Record Order endpoint instead.
We will use the order confirmation to:
- Record the customer is an existing customer and no longer eligible for introductory rewards
(and mark their referral as redeemed)
- Reward a referrer if this purchase was as a result of a referral
We will also use the data to optimise your referral scheme.
# Find a friend by name
Source: https://docs.mention-me.com/api-reference/referee/find-a-friend-by-name
/openapi/entrypoint_api.oas.json post /api/entry-point/{version}/referee
Provide some details of a referee (optional - if you have them) and some context (such as locale) so we can tell you if we can serve a name finder journey. We'll provide the URL to the web-view for their journey.
Given a set of input parameters about the referee (and segment etc), decide if we could serve them a referee
name finder journey and give them a link to the web view for doing that.
If you choose to direct the consumer to the URL via an iframe, the closing of the journey and the fulfillment of any coupon is done via postMessage. If you send the consumer to the URL they will close the flow using the browser itself and the CTA at the end is the defined CTA URL to take them to the next step of their journey.
# Enrol a customer in an offer
Source: https://docs.mention-me.com/api-reference/referrer/enrol-a-customer-in-an-offer
/openapi/entrypoint_api.oas.json post /api/entry-point/{version}/offer
Provide a customers' details so we can tell you if we could enrol them into an offer. We'll provide the URL to the web-view for their journey.
Given a set of input parameters about the customer (and segment and any order that has just taken place), decide if we could enrol them as a customer and if so, give you a link to the web view so they can share the offer - whether referral, IFA or NPS - with their friends.
We encourage you to include the details of any order which has just taken place as this helps us with segmentation and propensity modelling. You can tell us about orders separately too.
You can present this as a button, link or broader display panel. We include other useful content which you can choose to present to the customer to give them a richer invitation to join the promotion
programme. A headline and description describe the offer and the default CTA text gives you content to add to the link or button. There is also an optional image URL. There is also an optional privacy information notice if you need it.
Users of the Mention Me platform can configure and edit the content and image returned and those can be AB tested also - for example half the customers see one image and one set of content and half see another so that you can test how offers perform.
Note: you can also use `/api/entry-point/{version}/referrer` as the endpoint, which is an alias of this path
# Track product page view for referral attribution.
Source: https://docs.mention-me.com/api-reference/track-product-page-view-for-referral-attribution
/openapi/consumer_api.oas.json post /api/consumer/{version}/product/view
Request body (JSON): - browserId (string, required): Client-generated browser fingerprint hash (djb2)
- referrerId (string, optional): Referring user's visitorId from mm_rf URL param - currentUrl (string): Full URL of product page - host (string): Hostname - pathname (string): URL path - referrer (string): Document referrer or "$direct" - referringDomain (string): Referrer hostname or "$direct" - os (string): Operating system name - osVersion (string): OS version
- browser (string): Browser name - device (string): Device identifier - deviceType (string): "Mobile", "Tablet", or "Desktop" - browserLanguage (string): Browser language (e.g., "en-GB")
- screenHeight (int): Screen height in pixels - screenWidth (int): Screen width in pixels - viewportHeight (int): Viewport height in pixels - viewportWidth (int): Viewport width in pixels
Response: - visitorId (string): SHA256(browserId + clientIP)
- shareEnabled (bool): Whether the tag should run sharing for this view (campaign-level gate). When false, neither the share link nor the organic `mm_rf` rewrite runs. - resolution (object, optional): { status, message } — the coarse reason this arrival was or wasn't served. Omitted only when resolution could not run at all. - offer (object, optional): { tagUrl } — present only for an exposed visitor with a coupon to reveal
# Track product share action.
Source: https://docs.mention-me.com/api-reference/track-product-share-action
/openapi/consumer_api.oas.json post /api/consumer/{version}/product/share
Request body (JSON): - visitorId (string, required): User's visitorId from /view response - currentUrl (string): Full URL being shared - (+ all tracking properties from viewAction)
Response: }
# Create Destination
Source: https://docs.mention-me.com/api-reference/webhooks/create-destination
Set up a webhook destination in the Mention Me Connections Hub
> [!NOTE]
>
> **Access.** You'll need to have a Mention Me account in order to set up Webhooks. If you don't have access, please contact your account manager.
**1. Open the Connections Hub**
Webhooks can be created in the Connections Hub (for [Demo](https://demo.mention-me.com/merchant/~/webhooks/view), and [Production](https://mention-me.com/merchant/~/webhooks/view)) per account. Once enabled, this will mean any events which occur in *the account* will be delivered to the Destination of your choosing.
Simply click "Create webhook", and begin setting up the Destination.
**2. Choosing a Secret**

The secret field when creating a new webhook destination.
> [!NOTE]
>
> **Tip.** One easy way we recommend to create a secure secret is by using the Terminal. A good command is: `uuidgen | shasum -a 256`
Secrets are the mechanism in which you can ensure the authenticity of a Webhook you receive from us. In other words, the Secret is the security mechanism which ensures that no bad actor is able to send data which looks like a Webhook from Mention Me to your system with malicious intent.
The Secret you choose should be kept confidential and not stored in plaintext, or directly in the code of your external system.
You can read more about how to use the Secret you choose in the [Security section](/api-reference/webhooks/security).
**3. Choosing Events**

The event selection list when creating a webhook destination.
Events are all the types of data your external system can choose to subscribe to receive when they occur for a Customer.
All of the events follow generally the same structure - with parts of the payload changing depending on the event which is being delivered. You can see examples of each payload in the [Events section](/api-reference/webhooks/events).
Once chosen, whenever that event occurs for a Customer in the Mention Me platform, we will, in real-time, deliver a Webhook to you which outlines what happened.
**4. Choosing Locales**

The locale selection list when creating a webhook destination.
Locales are how you choose which regions of Customers your external system should be subscribed to receive events from. For example, you may wish to only receive Webhooks for Customers in the UK, and not ones from other regions.
If you leave all Locales unchecked, events from Customers of all regions will be sent to your external system.
## Next Steps
Once your destination is created, you can [send a test event](/api-reference/webhooks/test-webhook) to verify your endpoint receives and processes payloads correctly before any real customer activity triggers a delivery.
# Disable or Delete a Webhook Connection
Source: https://docs.mention-me.com/api-reference/webhooks/disable-webhook
If a webhook connection is no longer required, you can either disable it (to pause message delivery) or delete it permanently from your account.
## Disable a Webhook
**1. Go to Connections Hub > Webhooks**
Navigate to:
**Connections Hub > Webhooks**

The Webhooks page within the Connections Hub.
**2. Open the menu and select Edit**
Find the webhook you want to update. Click the **⋮** menu, then choose Edit.

The actions menu opened on a webhook destination row.
Choosing **Edit** opens the destination's settings:

The Edit option selected from the actions menu.
**3. Set the webhook to Disabled**
In the "Enabled" dropdown, set the value to Disabled, then click Save.

The Enabled dropdown set to Disabled.
After clicking **Save**, the destination updates to reflect the new status:

The webhook destination after being saved as disabled.
**4. Confirm the webhook is disabled**
You'll see the updated status in the Webhooks dashboard.

The webhook shown with a Disabled status in the Webhooks dashboard.
## Delete a Webhook
**1. Locate the webhook**
From the Webhooks dashboard, locate the webhook you'd like to delete.
**2. Select Delete from the menu**
Click the **⋮** menu on the webhook row, then choose Delete.

The Delete option in the webhook actions menu.
## Need Support?
Contact your integration lead or raise a support ticket via the Admin Portal if you need help managing webhook connections.
# Events
Source: https://docs.mention-me.com/api-reference/webhooks/events
Webhook event types and their payloads.
> [!NOTE]
>
> Some Events are dependent on certain features being enabled.
>
> For instance, Events focussing on NPS or Propensity to Refer require Campaigns for NPS or Smart Experiments to be being actively promoted to Customers respectively.
>
> If you'd like to know more about these features, please speak to your Account Manager.
Events are all the different types of actions Customers can do, which can be subscribed to by external systems.
These events underpin many of our most central Customer actions, like when a Referrer is Registered, or a Referee receives their reward. And can intern drive functionality in your external systems.
For instance, you may wish to update a customer record when a customer successfully refers their friend, send out an email when a customer receives a reward for referring, or apply credit to an account in real-time when a reward is received.
## Examples
### Referrer has been registered
Referrer has been registered (`webhook/registration/referrer`)
This event occurs whenever a customer is registered as a referrer. This may be a silent enrolment, and does not require that the referrer actively interacts with the journey.
It is up to you to determine if you can contact this customer with marketing messages.
```json Example Payload theme={null}
{
"meta": {
"domain": "demo.mention-me.com",
"type": "webhook/registration/referrer",
"isTest": true,
"triggeredAt": "2025-08-27T12:40:18.982+01:00",
"uuid": "139fe691-1819-42ee-b7de-49a458e90c43",
"version": "1"
},
"merchant": {
"id": 0,
"slug": "",
"partnerCode": ""
},
"payload": {
"customerOffer": {
"id": 105,
"createdDate": "2020-04-03T09:39:08+01:00",
"expiryDate": "2020-07-03T09:39:08+01:00",
"segment": "",
"situation": "postpurchase",
"shareLink": "https://demo.mention-me.com/m/ol/ka2bu-ryder-collins",
"dashboardLink": "https://demo.mention-me.com/d/55/1c9925260de8cc0c5d1f5398af9624a3ff798e754dba5891587c2f545ec9192f"
},
"customer": {
"customerId": "MI9795903142",
"email": "[email protected]",
"firstname": "Ryder",
"surname": "Collins",
"metrics": {
"successfulReferrals": 7,
"shareCount": {
"all": 8,
"byWhatsApp": 2,
"byFacebook": 1,
"byFacebookMessenger": 0,
"byName": 2,
"byEmailLink": 1,
"byNativeShare": 0
}
}
},
"campaign": {
"id": 233023,
"shortName": "Campaign",
"locale": {
"id": 323691,
"localeCode": "en_GB",
"shortName": "English UK",
"languageCode": "en",
"currencyCode": "GBP",
"currencySymbol": "£"
},
"state": "Running"
},
"experiment": {
"id": 712100,
"name": "Experiment",
"variationCount": 1,
"isPromotion": false
},
"offer": {
"id": 70171,
"shortName": "Variation",
"type": "referral",
"summary": "Referrer gets £10 off. Referee gets 15% off",
"variation": 0,
"content": {
"referrer": {
"headline": "Treat a friend to 15% off and get £10 off for yourself",
"cta": "Get £10 off"
},
"incentive": {
"headline": null,
"cta": null
}
}
},
"rewards": [
{
"id": 54182,
"fulfilledBy": "coupon",
"amount": 250,
"referrerReward": "$250",
"refereeReward": "20%",
"discountReward": null,
"spendConstraint": 1000,
"minimumFriendsRequired": 0,
"description": "Referrer gets $250 off when they spend over $1000",
"type": "amount"
}
]
}
}
```
### Referrer has engaged during registration
Referrer has engaged during registration (`webhook/registration/referrer_engaged`)
This event occurs whenever a customer actively engages with the referral journey during registration.
It is up to you to determine if you can contact this customer with marketing messages.
```json Example Payload theme={null}
{
"meta": {
"domain": "demo.mention-me.com",
"type": "webhook/registration/referrer_engaged",
"isTest": true,
"triggeredAt": "2025-08-27T12:40:18.983+01:00",
"uuid": "139fe691-1819-42ee-b7de-49a458e90c43",
"version": "1"
},
"merchant": {
"id": 0,
"slug": "",
"partnerCode": ""
},
"payload": {
"customerOffer": {
"id": 105,
"createdDate": "2020-04-03T09:39:08+01:00",
"expiryDate": "2020-07-03T09:39:08+01:00",
"segment": "",
"situation": "postpurchase",
"shareLink": "https://demo.mention-me.com/m/ol/ka2bu-ryder-collins",
"dashboardLink": "https://demo.mention-me.com/d/55/1c9925260de8cc0c5d1f5398af9624a3ff798e754dba5891587c2f545ec9192f"
},
"customer": {
"customerId": "MI9795903142",
"email": "[email protected]",
"firstname": "Ryder",
"surname": "Collins",
"metrics": {
"successfulReferrals": 7,
"shareCount": {
"all": 8,
"byWhatsApp": 2,
"byFacebook": 1,
"byFacebookMessenger": 0,
"byName": 2,
"byEmailLink": 1,
"byNativeShare": 0
}
}
},
"campaign": {
"id": 233023,
"shortName": "Campaign",
"locale": {
"id": 323691,
"localeCode": "en_GB",
"shortName": "English UK",
"languageCode": "en",
"currencyCode": "GBP",
"currencySymbol": "£"
},
"state": "Running"
},
"experiment": {
"id": 712100,
"name": "Experiment",
"variationCount": 1,
"isPromotion": false
},
"offer": {
"id": 70171,
"shortName": "Variation",
"type": "referral",
"summary": "Referrer gets £10 off. Referee gets 15% off",
"variation": 0,
"content": {
"referrer": {
"headline": "Treat a friend to 15% off and get £10 off for yourself",
"cta": "Get £10 off"
},
"incentive": {
"headline": null,
"cta": null
}
}
},
"rewards": [
{
"id": 54182,
"fulfilledBy": "coupon",
"amount": 250,
"referrerReward": "$250",
"refereeReward": "20%",
"discountReward": null,
"spendConstraint": 1000,
"minimumFriendsRequired": 0,
"description": "Referrer gets $250 off when they spend over $1000",
"type": "amount"
}
]
}
}
```
### Referee has been registered
Referee has been registered (`webhook/registration/referee`)
This event occurs whenever a referee provides their email address to confirm they have been referred by a friend.
```json Example Payload theme={null}
{
"meta": {
"domain": "demo.mention-me.com",
"type": "webhook/registration/referee",
"isTest": true,
"triggeredAt": "2025-08-27T12:40:18.982+01:00",
"uuid": "139fe691-1819-42ee-b7de-49a458e90c43",
"version": "1"
},
"merchant": {
"id": 0,
"slug": "",
"partnerCode": ""
},
"payload": {
"referee": {
"customerId": null,
"email": "[email protected]",
"firstname": "",
"surname": "",
"marketingOptIn": true,
"phoneNumbers": ["+447927275988"],
"isVoid": false,
"id": 193,
"shareSource": "WHATSAPP"
},
"referrer": {
"id": 53137,
"customerId": "MI9795903142",
"email": "[email protected]",
"firstname": "Ryder",
"surname": "Collins",
"referrerIsUnknown": false,
"segment": "VIP",
"metrics": {
"successfulReferrals": 7,
"shareCount": {
"all": 8,
"byWhatsApp": 2,
"byFacebook": 1,
"byFacebookMessenger": 0,
"byName": 2,
"byEmailLink": 1,
"byNativeShare": 1
}
}
},
"campaign": {
"id": 14660,
"shortName": "Campaign 1",
"locale": {
"id": 1,
"localeCode": "en_GB",
"shortName": "English (UK)",
"languageCode": "en",
"currencyCode": "GBP",
"currencySymbol": "£"
},
"state": "Running"
},
"experiment": {
"id": 13268,
"name": "Experiment 1",
"variationCount": 1,
"isPromotion": false
},
"offer": {
"id": 86237,
"shortName": "Variation 1",
"type": "referral",
"summary": "Referrer gets £10 off. Referee gets 15% off",
"variation": 0,
"content": {
"referrer": {
"headline": "Treat a friend to 15% off and get £10 off for yourself",
"cta": "Get £10 off"
},
"incentive": {
"headline": null,
"cta": null
}
}
},
"reward": {
"id": 44137,
"fulfilledBy": "coupon",
"amount": 20,
"referrerReward": "20%",
"refereeReward": "20%",
"discountReward": null,
"type": "percent",
"description": "Referee gets 20% off",
"beforePurchase": true
}
}
}
```
### Referrer metrics has been updated
Referrer metrics has been updated (`webhook/metric/referrer`)
This event occurs whenever a customer's behaviour results in their referrer metrics to have. For example, they they actively share, or when their friend signs up.
```json Example Payload theme={null}
{
"meta": {
"domain": "demo.mention-me.com",
"type": "webhook/metric/referrer",
"isTest": true,
"triggeredAt": "2025-08-27T12:40:18.983+01:00",
"uuid": "139fe691-1819-42ee-b7de-49a458e90c43",
"version": "1"
},
"merchant": {
"id": 0,
"slug": "",
"partnerCode": ""
},
"payload": {
"referrer": {
"customerId": null,
"email": "[email protected]",
"firstname": "Kirk",
"surname": "Begby",
"segment": "mock-segment"
},
"metrics": {
"successfulReferrals": 7,
"shareCount": {
"all": 8,
"byWhatsApp": 2,
"byFacebook": 1,
"byFacebookMessenger": 0,
"byName": 2,
"byEmailLink": 1,
"byNativeShare": 0
},
"firstShareDate": "2023-10-23T16:13:21+01:00",
"lastShareDate": "2023-10-23T16:49:09+01:00",
"firstReferralDate": "2023-10-23T15:26:29+01:00",
"lastReferralDate": "2023-10-24T08:59:19+01:00"
},
"campaign": {
"id": 14679,
"shortName": "Campaign 1",
"locale": {
"id": 1,
"localeCode": "en_GB",
"shortName": "English (UK)",
"languageCode": "en",
"currencyCode": "GBP",
"currencySymbol": "£"
},
"state": "Running"
},
"experiment": {
"id": 13355,
"name": "Experiment 1",
"variationCount": 4,
"isPromotion": false
},
"offer": {
"id": 86438,
"shortName": "Variation 1",
"type": "referral",
"summary": "Referrer gets £10 off. Referee gets 15% off",
"variation": 1,
"content": {
"referrer": {
"headline": "Treat a friend to 15% off and get £10 off for yourself",
"cta": "Get £10 off"
},
"incentive": {
"headline": null,
"cta": null
}
}
},
"customerOffer": {
"id": 105,
"createdDate": "2020-04-03T09:39:08+01:00",
"expiryDate": "2020-07-03T09:39:08+01:00",
"segment": "",
"situation": "postpurchase",
"shareLink": "https://demo.mention-me.com/m/ol/ka2bu-ryder-collins",
"dashboardLink": "https://demo.mention-me.com/d/55/1c9925260de8cc0c5d1f5398af9624a3ff798e754dba5891587c2f545ec9192f"
},
}
}
```
### Marketing consent has been given
Marketing consent has been given (`webhook/marketing/consent`)
This event occurs whenever a customer consents to receiving marketing messages from your brand (e.g. for a newsletter).
The option to consent to marketing is only presented to referees when they are signing up after being referred by a friend.
```json Example Payload theme={null}
{
"meta": {
"domain": "demo.mention-me.com",
"type": "webhook/marketing/consent",
"isTest": true,
"triggeredAt": "2025-08-27T12:40:18.984+01:00",
"uuid": "139fe691-1819-42ee-b7de-49a458e90c43",
"version": "1"
},
"merchant": {
"id": 0,
"slug": "",
"partnerCode": ""
},
"payload": {
"customer": {
"customerId": null,
"email": "[email protected]",
"firstname": "Kirk",
"surname": "Begby",
"marketingOptIn": true,
"phoneNumbers": ["+447927275988"]
},
"campaign": {
"id": 14679,
"shortName": "Campaign 1",
"locale": {
"id": 1,
"localeCode": "en_GB",
"shortName": "English (UK)",
"languageCode": "en",
"currencyCode": "GBP",
"currencySymbol": "£"
},
"state": "Running"
},
"experiment": {
"id": 13355,
"name": "Experiment 1",
"variationCount": 4,
"isPromotion": false
},
"offer": {
"id": 86438,
"shortName": "Variation 1",
"type": "incentive",
"summary": "25% off when they sign up to newsletter",
"variation": 1,
"content": {
"referrer": {
"headline": null,
"cta": null
},
"incentive": {
"headline": "Get 20% off when you make another purchase",
"cta": "Get 20% off"
}
}
},
"marketing": {
"source": "newsletter-signup"
}
}
}
```
### Incentive for Action has been fulfilled
Incentive for Action has been fulfilled (`webhook/fulfillment/incentive_for_action`)
This event occurs whenever an action, separate from referral, is completed to earn an individual a reward (e.g. signing up for a newsletter).
```json Example Payload theme={null}
{
"meta": {
"domain": "demo.mention-me.com",
"type": "webhook/fulfillment/incentive_for_action",
"isTest": true,
"triggeredAt": "2025-08-27T12:40:18.981+01:00",
"uuid": "139fe691-1819-42ee-b7de-49a458e90c43",
"version": "1"
},
"merchant": {
"id": 0,
"slug": "",
"partnerCode": ""
},
"payload": {
"reward": {
"id": 200021,
"callToActionUrl": null,
"fulfilledBy": "coupon",
"amount": 20,
"referrerReward": null,
"refereeReward": null,
"discountReward": "£20",
"description": "Referrer gets 20% off",
"type": null,
"expiryDate": "2025-09-03T12:40:18+01:00"
},
"campaign": {
"id": 555960,
"shortName": "Campaign",
"locale": {
"id": 1,
"localeCode": "en_GB",
"shortName": "English (UK)",
"languageCode": "en",
"currencyCode": "GBP",
"currencySymbol": "£"
},
"state": "Running"
},
"experiment": {
"id": 600340,
"name": "Experiment",
"variationCount": 1,
"isPromotion": false
},
"incentivee": {
"customerId": null,
"email": "[email protected]",
"firstname": "Firstname",
"surname": "Surname"
},
"offer": {
"id": 810477,
"shortName": "Variation",
"type": "incentive",
"summary": "Ifa gets 20% off",
"variation": 1,
"offerTermsUrl": "https://mentionme.dev/me/terms/123456/abcdef",
"content": {
"referrer": {
"headline": null,
"cta": null
},
"incentive": {
"headline": "Get 20% off when you make another purchase",
"cta": "Get 20% off"
}
}
}
}
}
```
### Referrer has been fulfilled
Referrer has been fulfilled (`webhook/fulfillment/referrer`)
This event occurs whenever a customer earns a reward for referring their friend, e.g. because a Referee has completed a purchase.
```json Example Payload theme={null}
{
"meta": {
"domain": "demo.mention-me.com",
"type": "webhook/fulfillment/referrer",
"isTest": true,
"triggeredAt": "2025-08-27T12:40:18.981+01:00",
"uuid": "139fe691-1819-42ee-b7de-49a458e90c43",
"version": "1"
},
"merchant": {
"id": 0,
"slug": "",
"partnerCode": ""
},
"payload": {
"reward": {
"id": 23674,
"callToActionUrl": null,
"fulfilledBy": "coupon",
"amount": 33,
"referrerReward": "£33",
"refereeReward": "20%",
"discountReward": null,
"type": "amount",
"description": "Referrer gets £33 off",
"couponCode": "example-coupon-123",
"minimumFriendsRequired": 1,
"maximumFriendsRequired": 1,
"expiryDate": "2025-09-03T12:40:18+01:00"
},
"campaign": {
"id": 14679,
"shortName": "Campaign 1",
"locale": {
"id": 1,
"localeCode": "en_GB",
"shortName": "English (UK)",
"languageCode": "en",
"currencyCode": "GBP",
"currencySymbol": "£"
},
"state": "Running"
},
"experiment": {
"id": 13355,
"name": "Experiment 1",
"variationCount": 4,
"isPromotion": false
},
"offer": {
"id": 86438,
"shortName": "Variation 1",
"type": "referral",
"summary": "Referrer gets £10 off. Referee gets 15% off",
"variation": 1,
"offerTermsUrl": "https://mentionme.dev/me/terms/123456/abcdef",
"content": {
"referrer": {
"headline": "Treat a friend to 15% off and get £10 off for yourself",
"cta": "Get £10 off"
},
"incentive": {
"headline": null,
"cta": null
}
}
},
"referees": [
{
"customerId": "abc123xyz321",
"email": "[email protected]",
"firstname": "Firstname",
"surname": "Surname"
}
],
"referrer": {
"id": 53137,
"customerId": "abc123xyz321",
"email": "[email protected]",
"firstname": "Firstname",
"surname": "Surname",
"referrerIsUnknown": false,
"segment": "VIP",
"metrics": {
"successfulReferrals": 7,
"shareCount": {
"all": 8,
"byWhatsApp": 2,
"byFacebook": 1,
"byFacebookMessenger": 0,
"byName": 2,
"byEmailLink": 1,
"byNativeShare": 0
}
}
}
}
}
```
### Referee has been fulfilled
Referee has been fulfilled (`webhook/fulfillment/referee`)
This event occurs whenever a customer earns a reward for being referred by their friend.
```json Example Payload theme={null}
{
"meta": {
"domain": "demo.mention-me.com",
"type": "webhook/fulfillment/referee",
"isTest": true,
"triggeredAt": "2025-08-27T12:40:18.981+01:00",
"uuid": "139fe691-1819-42ee-b7de-49a458e90c43",
"version": "1"
},
"merchant": {
"id": 0,
"slug": "",
"partnerCode": ""
},
"payload": {
"reward": {
"id": 23668,
"callToActionUrl": "https://demo.mention-me.com/ac/admin/client/merchants/add",
"fulfilledBy": "coupon",
"amount": 20,
"referrerReward": "20%",
"refereeReward": "20%",
"discountReward": null,
"type": "percent",
"description": "Referee gets 20% off",
"beforePurchase": true,
"couponCode": "example-coupon-123",
"expiryDate": "2025-09-03T12:40:18+01:00"
},
"campaign": {
"id": 14679,
"shortName": "Campaign 1",
"locale": {
"id": 1,
"localeCode": "en_GB",
"shortName": "English (UK)",
"languageCode": "en",
"currencyCode": "GBP",
"currencySymbol": "£"
},
"state": "Running"
},
"experiment": {
"id": 13355,
"name": "Experiment 1",
"variationCount": 4,
"isPromotion": false
},
"offer": {
"id": 86438,
"shortName": "Variation 1",
"type": "referral",
"summary": "Referrer gets £10 off. Referee gets 15% off",
"variation": 1,
"offerTermsUrl": "https://mentionme.dev/me/terms/123456/abcdef",
"content": {
"referrer": {
"headline": "Treat a friend to 15% off and get £10 off for yourself",
"cta": "Get £10 off"
},
"incentive": {
"headline": null,
"cta": null
}
}
},
"referee": {
"customerId": null,
"email": "[email protected]",
"firstname": "Firstname",
"surname": "Surname",
"isVoid": false,
"phoneNumbers": ["+447927275988"],
"id": 36,
"shareSource": "WHATSAPP"
},
"referrer": {
"id": 36242,
"customerId": "124124124124",
"email": "[email protected]",
"firstname": "Firstname",
"surname": "Surname",
"referrerIsUnknown": false,
"segment": "VIP",
"metrics": {
"successfulReferrals": 7,
"shareCount": {
"all": 8,
"byWhatsApp": 2,
"byFacebook": 1,
"byFacebookMessenger": 0,
"byName": 2,
"byEmailLink": 1,
"byNativeShare": 0
}
}
}
}
}
```
### NPS feedback has been received
NPS feedback has been received (`webhook/nps/feedback`)
This event occurs whenever a customer submits qualitative feedback to an NPS survey.
The event will only occur for active NPS campaigns.
```json Example Payload theme={null}
{
"meta": {
"domain": "demo.mention-me.com",
"type": "webhook/nps/feedback",
"isTest": true,
"triggeredAt": "2025-08-27T12:40:18.982+01:00",
"uuid": "139fe691-1819-42ee-b7de-49a458e90c43",
"version": "1"
},
"merchant": {
"id": 0,
"slug": "",
"partnerCode": ""
},
"payload": {
"nps": {
"id": 1,
"situation": null,
"segment": null,
"answer": 2,
"feedback": "Could have been better",
"createdDate": "2025-08-27T12:40:18.982+01:00"
},
"customer": {
"customerId": null,
"email": "[email protected]",
"firstname": "Firstname",
"surname": "Surname"
},
"campaign": {
"id": 14733,
"shortName": "1st order campaign",
"locale": {
"id": 1,
"localeCode": "en_GB",
"shortName": "English (UK)",
"languageCode": "en",
"currencyCode": "GBP",
"currencySymbol": "£"
},
"state": "Running"
},
"experiment": {
"id": 13479,
"name": "1st order experiment 1",
"variationCount": 4,
"isPromotion": false
},
"offer": {
"id": 86664,
"shortName": "NPS leading to referral or incentive",
"type": "nps-referral-incentive",
"summary": "Referrer gets £10 off. Referee gets 15% off",
"variation": 1,
"content": {
"referrer": {
"headline": "Treat a friend to 15% off and get £10 off for yourself",
"cta": "Get £10 off"
},
"incentive": {
"headline": null,
"cta": null
}
}
}
}
}
```
### NPS score has been received
NPS score has been received (`webhook/nps/score`)
This event occurs whenever a customer submits an NPS score, before providing qualitative feedback.
The event will only occur for active NPS campaigns.
```json Example Payload theme={null}
{
"meta": {
"domain": "demo.mention-me.com",
"type": "webhook/nps/score",
"isTest": true,
"triggeredAt": "2025-08-27T12:40:18.982+01:00",
"uuid": "139fe691-1819-42ee-b7de-49a458e90c43",
"version": "1"
},
"merchant": {
"id": 0,
"slug": "",
"partnerCode": ""
},
"payload": {
"nps": {
"id": 1,
"situation": "postpurchase",
"segment": null,
"answer": 8,
"createdDate": "2025-08-27T12:40:18.982+01:00"
},
"customer": {
"customerId": null,
"email": "[email protected]",
"firstname": "Firstname",
"surname": "Surname"
},
"campaign": {
"id": 14733,
"shortName": "1st order campaign",
"locale": {
"id": 1,
"localeCode": "en_GB",
"shortName": "English (UK)",
"languageCode": "en",
"currencyCode": "GBP",
"currencySymbol": "£"
},
"state": "Running"
},
"experiment": {
"id": 13479,
"name": "1st order experiment 1",
"variationCount": 4,
"isPromotion": false
},
"offer": {
"id": 86664,
"shortName": "NPS leading to referral or incentive",
"type": "nps-referral-incentive",
"summary": "Referrer gets £10 off. Referee gets 15% off",
"variation": 1,
"content": {
"referrer": {
"headline": "Treat a friend to 15% off and get £10 off for yourself",
"cta": "Get £10 off"
},
"incentive": {
"headline": null,
"cta": null
}
}
}
}
}
```
### Propensity to Refer segment has been updated
Propensity to Refer segment has been updated (`webhook/propensity_to_refer/segment`)
This event occurs whenever a Propensity To Refer score is requested and potentially updated.
The score is only calculated for active Smart Experiments.
```json Example Payload theme={null}
{
"meta": {
"domain": "demo.mention-me.com",
"type": "webhook/propensity_to_refer/segment",
"isTest": true,
"triggeredAt": "2025-08-27T12:40:18.983+01:00",
"uuid": "139fe691-1819-42ee-b7de-49a458e90c43",
"version": "1"
},
"merchant": {
"id": 0,
"slug": "",
"partnerCode": ""
},
"payload": {
"customer": {
"customerId": null,
"email": "[email protected]",
"firstname": "Kirk",
"surname": "Begby"
},
"campaign": {
"id": 14679,
"shortName": "Campaign 1",
"locale": {
"id": 1,
"localeCode": "en_GB",
"shortName": "English (UK)",
"languageCode": "en",
"currencyCode": "GBP",
"currencySymbol": "£"
},
"state": "Running"
},
"experiment": {
"id": 13355,
"name": "Experiment 1",
"variationCount": 4,
"isPromotion": false
},
"offer": {
"id": 86438,
"shortName": "Variation 1",
"type": "referral",
"summary": "Referrer gets £10 off. Referee gets 15% off",
"variation": 1,
"content": {
"referrer": {
"headline": "Treat a friend to 15% off and get £10 off for yourself",
"cta": "Get £10 off"
},
"incentive": {
"headline": null,
"cta": null
}
}
},
"propensity": {
"segment": "High"
}
}
}
```
### Referee qualification has started
Referee qualification has started (`webhook/qualification_start/referee`)
This event occurs whenever a referee completes a transaction, signs up or completes a booking, which confirms they were introduced by their friend successfully.
It is the first step before the referee (and referrer) are eventually rewarded (or cancelled).
```json Example Payload theme={null}
{
"meta": {
"domain": "demo.mention-me.com",
"type": "webhook/qualification_start/referee",
"isTest": true,
"triggeredAt": "2025-08-27T12:40:18.984+01:00",
"uuid": "139fe691-1819-42ee-b7de-49a458e90c43",
"version": "1"
},
"merchant": {
"id": 0,
"slug": "",
"partnerCode": ""
},
"payload": {
"referee": {
"customerId": null,
"email": "[email protected]",
"firstname": "",
"surname": "",
"isVoid": false,
"phoneNumbers": ["+447927275988"],
"id": 193,
"shareSource": "WHATSAPP"
},
"campaign": {
"id": 14660,
"shortName": "Campaign 1",
"locale": {
"id": 1,
"localeCode": "en_GB",
"shortName": "English (UK)",
"languageCode": "en",
"currencyCode": "GBP",
"currencySymbol": "£"
},
"state": "Running"
},
"experiment": {
"id": 13268,
"name": "Experiment 1",
"variationCount": 1,
"isPromotion": false
},
"offer": {
"id": 86237,
"shortName": "Variation 1",
"type": "referral",
"summary": "Referrer gets £10 off. Referee gets 15% off",
"variation": 0,
"content": {
"referrer": {
"headline": "Treat a friend to 15% off and get £10 off for yourself",
"cta": "Get £10 off"
},
"incentive": {
"headline": null,
"cta": null
}
}
},
"order": {
"id": 123456,
"currency": "GBP",
"total": 97.98,
"orderDate": "2020-09-08T11:14:55+00:00",
"confirmedBy": "Matt Stevens"
},
"referrer": {
"id": 53137,
"customerId": "abc123xyz321",
"email": "[email protected]",
"firstname": "Firstname",
"surname": "Surname",
"referrerIsUnknown": false,
"segment": "VIP",
"metrics": {
"successfulReferrals": 7,
"shareCount": {
"all": 8,
"byWhatsApp": 2,
"byFacebook": 1,
"byFacebookMessenger": 0,
"byName": 2,
"byEmailLink": 1,
"byNativeShare": 0
}
}
},
"reward": {
"id": 44137,
"fulfilledBy": "coupon",
"amount": 20,
"referrerReward": "20%",
"refereeReward": "20%",
"discountReward": null,
"type": "percent",
"description": "Referee gets 20% off",
"waitPeriodDays": 5,
"requiresApproval": true
}
}
}
```
# Overview
Source: https://docs.mention-me.com/api-reference/webhooks/overview
An introduction to Webhooks.
> [!NOTE]
>
> Some technical knowledge about webhooks is assumed. If you need help, contact our [support team](https://help.mention-me.com/hc/en-gb/requests/new).
Webhooks are a standard way of receiving near real-time notifications of when events happen in the Mention Me platform.
With the Webhook system, you can create Webhooks which will deliver events to external systems which you control. These external systems can then execute code of your choice whenever one or more events occur.
For instance, you may wish to update a customer record when a customer successfully refers their friend, send out an email when a customer receives a reward for referring, or apply credit to an account in real-time when a reward is received. All of which are great use cases for Webhooks.
## Difference between Webhooks and APIs
Unlike our APIs, where your external systems are *requesting data from us*, Webhooks are a way in which *you can receive data* from us when events occur in real-time.
## Basics
A Webhook is an [HTTPS POST request](https://developer.mozilla.org/en-US/docs/Web/HTTP/Reference/Methods/POST) to a URL of your choice, and any system which can accept an HTTPS request can be used to consume a Webhook from Mention Me.
Any request your external system receives will:
1. Be an HTTP POST request (over SSL).
2. Have data about an event which occurred in the body of the request. This data will be in the JSON format (you can see more in the [Events section](/api-reference/webhooks/events#examples)).
3. (*Optionally, if [a Secret was set during setup](/api-reference/webhooks/create-destination#step-2-choosing-a-secret)*) Have an HTTP Header with a signature for the webhook. This signature helps to validate the authenticity of the Webhook - you can read more in the [Security section](/api-reference/webhooks/security#how-it-works).
## Next Steps
> [card] [Set up a webhook](/api-reference/webhooks/create-destination)
>
> Create a webhook destination and start receiving events.
> [card] [Test a webhook](/api-reference/webhooks/test-webhook)
>
> Send a test event to verify your endpoint is working correctly.
> [card] [FAQs](/api-reference/webhooks/faqs)
>
> Common questions about webhook delivery, retries and formats.
# Test a Webhook
Source: https://docs.mention-me.com/api-reference/webhooks/test-webhook
Send a test event to your webhook destination to verify your integration is working correctly.
Before going live with a webhook integration, you can send a test event from the Mention Me dashboard to verify your endpoint receives and processes webhook payloads correctly.
Test deliveries use the same HTTP client, headers, HMAC signing, and timeout as production deliveries, so a successful test confirms your integration will work in production.
## Sending a Test Event
**1. Open the Webhooks page**
Navigate to **Connections Hub** and find the webhook destination you want to test.
**2. Open the actions menu**
Click the **⋮** menu on the webhook destination row, then choose **Send test**.
**3. Choose an event type**
In the modal that appears, select which event type you would like to test from the dropdown. Only events that the destination is subscribed to are shown.
**4. Send the test**
Click **Send test**. Mention Me will send a sample payload to the destination URL and report the result.
## Understanding the Result
After sending a test, you will see one of three outcomes:
| Outcome | What it means |
| - | - |
| **Success** (2xx response) | Your endpoint received the payload and responded successfully. The integration is working. |
| **Warning** (non-2xx response) | The test reached your endpoint, but it returned an error (e.g. 400, 500). Check your endpoint's logs to diagnose the issue. |
| **Error** (transport failure) | The request never reached your endpoint. Common causes include DNS resolution failure, connection refused, TLS certificate errors, or a request timeout. |
## How Test Deliveries Differ from Production
Test payloads are nearly identical to production deliveries. The key differences are:
* An `X-MentionMe-Test: true` header is included so your system can distinguish test events from real ones.
* The payload uses sample data rather than real customer data.
* Responses are captured and reported back to you in the dashboard. Production deliveries do not surface response details.
> [!NOTE]
>
> If you configured a [Secret](/api-reference/webhooks/security) on this destination, the test payload is HMAC-signed with the same Secret. You can use a test delivery to verify your signature validation logic is working correctly.
## Rate Limiting
Test sends are rate-limited to **10 per minute** per user per destination. If you exceed this limit, wait a moment before trying again.
## Troubleshooting
| Error | Suggested action |
| - | - |
| DNS resolution failed | Verify the destination URL hostname is correct and publicly resolvable. |
| Connection refused | Confirm your endpoint is running and accessible from the internet. Check firewall rules. |
| TLS error | Ensure your endpoint has a valid, non-expired SSL certificate from a trusted certificate authority. |
| Timeout | Your endpoint must respond within 10 seconds. Check for slow processing or network issues. |
| Blocked URL | The destination URL must use HTTPS and resolve to a public IP address. Private, loopback, and link-local addresses are not permitted. |
## Next Steps
> [card] [Events](/api-reference/webhooks/events)
>
> See which webhook events are available and their payload formats.
> [card] [Security](/api-reference/webhooks/security)
>
> Verify webhook signatures to ensure authenticity.
# Conversion Message Tag
Source: https://docs.mention-me.com/developer-docs/integration/conversion-message
Display a reward reminder banner to referred friends and incented customers on your website
## What Is the Conversion Message Used For?
The conversion message embeds a banner on pages of your website (generally the homepage and/or product pages) which is only shown in these cases:
> [card] Mention Me Refer
>
> Shown to referred friends that have a reward but have not purchased yet. The purpose of the message is to remind them of their reward and encourage them to go on to purchase.
> [card] Mention Me Retain
>
> Shown to customers who have been given an incentive to take an action. The purpose of the message is to remind incented customers of their reward and encourage them to take action.
## How to Integrate the Conversion Message
**1. Add the wrapper div**
Include the following `
` into your page where you want the content to appear.
```html theme={null}
```
**2. Add the JavaScript tag**
Include the following JavaScript snippet at the bottom of the `` tag on a landing page or information page. The request includes your unique partner code.
> [!NOTE]
>
> To see code snippets pre-filled with your partner code, [**sign in**](https://app.mention-me.com/sign-in).
```html Demo theme={null}
```
```html Live theme={null}
```
**3. Customise the parameters**
(Optional) Include data parameters passing the customer's details if you have them at the point in the process where you insert the tag - this makes the process smoother for the customer.
&nonce=
```
## Validation
Encryption **must** include a valid email address as one of the encrypted fields, otherwise the request will be rejected.
## Example
Given:
* **Query string**: `email=person%40example.com&firstname=John&surname=Smith`
* **Key**: `1234567890123456789012345678901234567890123456789012345678901234`
* **Nonce**: `123456789012345678901234567890123456789012345678`
The encrypted output would be:
```
mm_e=923173becee4ec7bdcfb6820d1e77026adb54f66c6e00abbee470967b114f8653b3e17e906749214406ff8c1105f48f79a9634d11576c3284c2fbfaa4a281fbdd9b6e05dfb9abe&nonce=123456789012345678901234567890123456789012345678
```
### In a Referrer Tag
Unencrypted:
```html theme={null}
```
Encrypted equivalent:
```html theme={null}
```
Non-personal parameters (order details, situation) can remain unencrypted alongside the `mm_e` parameter.
# Homepage Promotions
Source: https://docs.mention-me.com/developer-docs/integration/entry-points/homepage-promotions
Add referral promotion placements to your homepage with cornerpeel and click-overlay options
## Why You Should Promote Referral on Your Homepage
Homepage promotion is an effective method of driving acquisition. Depending on your number of monthly visitors, it could drive up to 60% of all new customer acquisition.
The most common homepage promotion methods require a [landing page](/developer-docs/integration/entry-points/landing-page) to point customers to and allow them to register and share the referral offer.
## Implementation Options
There are two main ways to enable homepage promotions: via a link to the referral landing page, or via a tag.
> [card] Option 1: Via a link to the referral landing page
>
> Gives you full control over your homepage assets. You can promote your referral programme via a link to the referral landing page and fully control the design, but you cannot mention specific available rewards.
> [card] Option 2: Via a tag
>
> Requires adding a simple tag to your homepage so your marketing team can customise design and copy via the Mention Me platform. Available as a homepage corner peel or a link to an overlay.
## How to Enable Homepage Promotions via a Landing Page
**1. Create a referral landing page**
Ensure you've already created a referral landing page. See [landing page instructions](/developer-docs/integration/entry-points/landing-page).
**2. Create a homepage link**
Create a link on your homepage that points to the referral landing page. This can be in any form you like - a text link, a banner or an image. We recommend creating a dedicated banner below the header or a homepage tile.
**3. Add a situation parameter for tracking**
So you can track performance, add a situation parameter to the landing page link. For example:
```
www.example.com/refer-a-friend?situation=homepage-promo
```
If you're promoting the referral programme in multiple places on the homepage, use a unique situation for each promotion point. This will let you track each one separately.
> [!NOTE]
>
> If you're integrating this homepage promotion option, avoid specifying rewards or any other elements being tested in the copy. Otherwise you risk showing information that doesn't match A/B testing set up in the Mention Me platform by your marketing team.
>
> For example, instead of saying **"Earn £50 credit when you refer"**, use a more generic message such as **"Earn rewards by sharing with friends"**.
## How to Enable Homepage Promotions via a Tag
> [!NOTE]
>
> To see code snippets pre-filled with your partner code, [**sign in**](https://app.mention-me.com/sign-in).
> [tab] Corner peel
>
> The corner peel is one of the best ways to promote referral on your homepage. It's easy to implement, requiring only adding a tag to the page that shows a referral overlay when clicked.
>
> Add the following in the body of the homepage:
>
> ```html Demo theme={null}
>
>
>
> ```
>
> ```html Live theme={null}
>
>
>
> ```
> [tab] Link to an overlay
>
> This option will display a link that shows the referral overlay when clicked. This has the advantage of letting customers register without leaving the homepage. The link can be customised to look like a button, and can be incorporated within a banner, image or another element on the page.
>
> **1. Add the wrapper div**
>
> Create an empty div with the ID `mmWrapper`. This is just a placeholder which is populated via the JavaScript tag.
>
> ```html theme={null}
>
>
>
> ```
>
> **2. Add the tag**
>
> ```html Demo theme={null}
>
>
>
> ```
>
> ```html Live theme={null}
>
>
>
> ```
>
> Mention Me will customise the link style to match the look and feel of your website. The end result will be a CTA which displays the overlay when clicked.
## Parameters
### Mandatory
**situation** `string` *required*
`homepage-cornerpeel` or `homepage-click-overlay`. Example: `homepage-cornerpeel`
### Optional
**locale** `string`
Locale code. Example: `en_GB`
# Landing Page Tag
Source: https://docs.mention-me.com/developer-docs/integration/entry-points/landing-page
Create a dedicated referral landing page for existing customers to register and share
## What Is the Landing Page Used For?
When promoting your refer-a-friend programme, you are likely to want to lead your customers to landing pages on your site which include various pieces of Mention Me functionality. If you send out emails with a referral call to action you can direct your customers to a landing page on your own site. Create that page and embed on it a referrer offer tag.
Unlike the referrer tag, the landing page tag does not require customer or order details - making it suitable for standalone promotional pages, email links, or social campaigns.
## How to Integrate the Landing Page Tag
**1. Create a new page on your website**
Create a dedicated page on your site where customers will land when they click a referral promotion link (e.g. from an email or social post).
**2. Add the wrapper div**
Include the following `
` into your page where you want the referral content to appear.
```html theme={null}
```
This is just a placeholder which is populated via the JavaScript tag. You can optionally apply a class or style to the div, via the Mention Me dashboard, if you wish to control the way the contents are styled. If you need to change the id on the wrapper (for example if you need two tags on one page), you can customise from within the Mention Me dashboard.
**3. Add the JavaScript tag**
Include the following JavaScript snippet at the bottom of the `` tag on your landing page. The request includes your unique partner code.
> [!NOTE]
>
> To see code snippets pre-filled with your partner code, [**sign in**](https://app.mention-me.com/sign-in).
```html Demo theme={null}
```
```html Live theme={null}
```
**4. Customise the parameters**
(Optional) Include data parameters if you have customer details available - this makes the process smoother for the customer.
> [!NOTE]
>
> All parameter values must be [URL-encoded](https://developer.mozilla.org/en-US/docs/Web/JavaScript/Reference/Global_Objects/encodeURIComponent) — for example, `@` → `%40`, spaces → `%20`.
## Mandatory Data Parameters
**situation** `string` *required*
String indicator of where you are including this tag within your site. For landing pages, use `landingpage`. Has a maximum of 50 characters. Example: `landingpage`
**locale** `string` *required*
String representing the required locale for the campaign. Used to show the right locale (language, currency) for the user. The format should be [ISO 639-1](https://en.wikipedia.org/wiki/List_of_ISO_639-1_codes) language code, an underscore (`_`), then the [ISO 3166-1 alpha-2](https://en.wikipedia.org/wiki/ISO_3166-1#Current_codes) country code. Default is empty (which will result in a locale of `en_GB` being assumed). Example: `en_GB`
> [accordion] Optional data parameters
>
> **title** `string`
>
> The customer's title. This allows you to have more formal messaging in your flow. Has a maximum of 20 characters.
>
> **firstname** `string`
>
> The customer's firstname. Pre-fills the form if provided. Please URL encode.
>
> **surname** `string`
>
> The customer's surname. Please URL encode.
>
> **fullname** `string`
>
> The customer's full name. Please URL encode.
>
> **email** `string`
>
> The customer's email address. Please URL encode.
>
> **customer_id** `string`
>
> The unique customer identifier from your system.
>
> **username** `string`
>
> The customer's username. Your account is set up for referrers to share using their username not full name. Please URL encode.
>
> **phone_number** `string`
>
> The customer's phone number(s). Pass as many phone numbers as you have as a comma-separated list. If you are passing any data which is not a digit (e.g. spaces, +'s), these need to be URL encoded.
>
> **custom_field** `string`
>
> Any piece of custom data you wish to pass to us.
>
> **custom_share_field** `string`
>
> A piece of text you can use to pass into sharing widgets, such as what the user bought or how much they saved.
>
> **call_to_action_url** `string`
>
> A URL to send users to after they are rewarded. Only functions on the embedded flow.
>
> **segment** `string`
>
> String representing a customer segment (for example one of: men, women) used to pass segmentation data about your customer to us. Has a maximum of 50 characters.
> [accordion] Optional implementation parameters
>
> **implementation** `string`
>
> Optionally override the way the flow is implemented (one of: `link`, `embed`). Default can also be set in the merchant dashboard. If in doubt, leave out.
# Product Referral Tag
Source: https://docs.mention-me.com/developer-docs/integration/entry-points/product-referral
Enable product-level referral tracking so customers can share specific products
Your customers are already sharing products with friends. Product Referral makes that visible - track which products drive the most word-of-mouth, identify your top advocates, and attribute revenue back to the shares that generated it.
> [!NOTE]
>
> To see code snippets pre-filled with your partner code, [**sign in**](https://app.mention-me.com/sign-in).
> [!NOTE]
>
> **The tag is not enough on its own.** Product referral also needs a live product referral campaign for the language you are integrating. The tag injects the share link and rewrites the URL with `mm_rf` only while a campaign is live for that language, so no share is tracked without one.
>
> On the **Mention Me** dashboard you set that campaign up yourself: see [set up a campaign](/knowledge-app/referral/campaigns/product-referral/set-up-a-campaign). On **Classic**, ask your Mention Me contact to confirm one is in place for each language you are integrating.
Install the tag directly on your product pages (recommended for most platforms). Works with any platform.
**1. Install the tracking tag**
Include the following JavaScript snippet at the bottom of the `` tag on the product page. The request includes your unique partner code. This is the only tag the product page needs: with a live campaign in place, it enables URL-based product sharing and tracking.
```html Demo theme={null}
```
```html Live theme={null}
```
Replace `` with the product ID of the page where this is being shown. This can usually be accessed through a data layer.
> [!NOTE]
>
> The verb in the URL path (`product`) can also be written as `tracking` - both behave identically.
> [!NOTE]
>
> All parameter values must be [URL-encoded](https://developer.mozilla.org/en-US/docs/Web/JavaScript/Reference/Global_Objects/encodeURIComponent) - for example, `@` → `%40`, spaces → `%20`.
**2. Track conversions**
By tracking conversions alongside product shares, you can measure the full impact of word-of-mouth on your sales. This allows you to see which shared products are driving revenue, identify your most influential advocates, and understand the complete customer journey from share to purchase.
> [accordion] New clients without a referrer tag
>
> If you haven't yet integrated a referrer (conversion) tag, you'll need to set one up to track conversions. Visit our [referrer tag integration page](/developer-docs/integration/entry-points/referrer) for full setup instructions. When configuring your referrer tag, include the product parameters listed below to enable product-level conversion tracking from the start.
> [accordion] Existing clients with a referrer tag
>
> If you already have a referrer (conversion) tag integrated, you can enhance it with product data by adding the following parameters to your existing tag. This will associate product information with each conversion, enabling product-level reporting.
>
> Add these parameters to your existing referrer tag query string:
>
> **product_ids** `string`
>
> Comma-separated list of product IDs included in the order.
>
> **product_skus** `string`
>
> Comma-separated list of product SKUs included in the order.
>
> **product_names** `string`
>
> Comma-separated list of product names included in the order.
>
> **product_prices** `string`
>
> Comma-separated list of product prices included in the order.
>
> **product_quantities** `string`
>
> Comma-separated list of product quantities included in the order.
>
> For example, append these to your referrer tag URL: `&product_ids=SKU001,SKU002&product_skus=ABC,DEF&product_names=Widget,Gadget&product_prices=9.99,19.99&product_quantities=1,2`
**3. Add a share button (optional)**
If you want to display a share button on the product page, include the following `
` somewhere in the `` tag, near the product name or description. This is a placeholder which will be populated by the JavaScript tag. If you skip this step, URL-based product sharing and tracking will still work.
```html theme={null}
```
If your technical team is unable to add new elements into the page, we can help by setting up the tag to inject the content next to an existing element. Contact your Onboarding Team and let them know which element should be selected.
You can optionally apply a class or style to the div if you wish to control the way the contents are styled.
> [accordion] Checkout on a different subdomain
>
> If your checkout runs on a different subdomain to the product page (for example product pages on `www.merchant.com` but checkout on `checkout.merchant.com`), append the `storage` parameter to your tag URL. The default behaviour stores the referral identifiers in `sessionStorage`, which is per-origin and won't survive the navigation. This option mirrors them to a cookie scoped to your registrable domain so the bootloader on checkout can read them.
>
> ```html Demo theme={null}
>
>
>
> ```
>
> ```html Live theme={null}
>
>
>
> ```
>
> The cookie is scoped to your registrable domain (e.g. `.merchant.com`), set with `Secure` and `SameSite=Lax`, and expires after 30 days. Cookies cannot bridge a checkout that runs on an entirely different domain (e.g. `www.merchant.com` to `pay.thirdparty.com`). Only different subdomains of the same registrable domain are supported.
>
> > [!WARNING]
> >
> > Setting this cookie is your responsibility under your own privacy policy and consumer-consent process. Only enable `storage=session+cookie` if you have the relevant consent in place on your domain.
### Tag Parameters
#### Mandatory
The following parameters are the minimum required to make the integration work.
**locale** `string` *required*
String representing the required locale. Used to show the right language and currency for the user. The format should be [ISO 639-1](https://en.wikipedia.org/wiki/List_of_ISO_639-1_codes) language code, an underscore (`_`), then the [ISO 3166-1 alpha-2](https://en.wikipedia.org/wiki/ISO_3166-1#Current_codes) country code. Default is `en_GB`. Example: `en_GB`
**product_id** `string` *required*
The unique product identifier from your system. This allows tracking which products are being recommended. Example: `PROD-456`
#### Recommended
Add these data parameters to significantly improve performance.
**product_sku** `string`
The product SKU (Stock Keeping Unit) from your system. This provides an additional identifier for tracking products. Example: `SKU-789`
**product_name** `string`
The name of the product. Please URL encode. Example: `Blue Widget`
**product_price** `string`
The price of the product. Example: `29.99`
> [accordion] Optional data parameters
>
> Pass these additional parameters to enhance tracking and personalisation.
>
> **firstname** `string`
>
> The customer's firstname. Please URL encode.
>
> **surname** `string`
>
> The customer's surname. Please URL encode.
>
> **fullname** `string`
>
> The customer's full name. Please URL encode.
>
> **email** `string`
>
> The customer's email address. Please URL encode.
>
> **customer_id** `string`
>
> The unique customer identifier from your system.
>
> **phone_number** `string`
>
> The customer's phone number(s). Pass as many phone numbers as you have as a comma-separated list.
>
> **segment** `string`
>
> String representing a customer segment (for example one of: men, women) used to pass segmentation data about your customer to us. Has a maximum of 50 characters.
# Referee Tag
Source: https://docs.mention-me.com/developer-docs/integration/entry-points/referee
Integrate the referee tag on your checkout page so referred friends can claim their reward
## What Is the Referee Tag Used For?
Mention Me allows referrers to share with their friends via word of mouth by using their name. The referee tag allows prospective new customers to search for their friend's name and claim an introductory reward.
The copy on the referee link is controlled via the Mention Me platform and can be changed without any development work. Contact your Client Success Manager about this option.
> [!NOTE]
>
> The "Been referred by a friend?" link copy can't be edited directly in the offer preview. Any wording change needs to be requested from the Mention Me support team.
## How to Integrate the Referee Tag
**1. Add the wrapper div**
Include the following `
` somewhere in the `` tag of the checkout page near where you offer coupon entry (and optionally on other pages of your site too).
```html theme={null}
```
This is just a placeholder which is populated via the JavaScript tag. You can optionally apply a class or style to the div if you wish to control the way the contents are styled.
**2. Add the JavaScript tag**
Include the following JavaScript snippet at the bottom of the `` tag on the checkout page (and optionally on other pages of your site too). The request includes your unique partner code.
> [!NOTE]
>
> To see code snippets pre-filled with your partner code, [**sign in**](https://app.mention-me.com/sign-in).
> [tab] Link (default)
>
> Renders a "Been referred by a friend?" link that opens an overlay when clicked.
>
> ```html Demo theme={null}
>
>
>
> ```
>
> ```html Live theme={null}
>
>
>
> ```
> [tab] Embedded form
>
> Renders a small form directly in the div above. When submitted, a modal popup opens over your page, captures the customer's registration for the reward, provides them with the coupon to fulfil their reward and finally closes to deposit them back on your page to complete their purchase.
>
> ```html Demo theme={null}
>
>
>
> ```
>
> ```html Live theme={null}
>
>
>
> ```
> [tab] Embedded iframe
>
> Embeds the full referee journey as an iframe within the wrapper div.
>
> ```html Demo theme={null}
>
>
>
> ```
>
> ```html Live theme={null}
>
>
>
> ```
**3. Customise the parameters**
(Optional) Include data parameters passing the customer's details if you have them at the point in the process where you insert the tag - this makes the process smoother for the customer.
> [!NOTE]
>
> All parameter values must be [URL-encoded](https://developer.mozilla.org/en-US/docs/Web/JavaScript/Reference/Global_Objects/encodeURIComponent) — for example, `@` → `%40`, spaces → `%20`.
## Mandatory Data Parameters
**situation** `string` *required*
String indicator of where you are including this tag within your site (for example: `checkout`, `postpurchase`, `landingpage`). Used for reporting. Has a maximum of 50 characters. Example: `checkout`
**locale** `string` *required*
String representing the required locale for the campaign. Used to show the right locale (language, currency) for the user. The format should be [ISO 639-1](https://en.wikipedia.org/wiki/List_of_ISO_639-1_codes) language code, an underscore (`_`), then the [ISO 3166-1 alpha-2](https://en.wikipedia.org/wiki/ISO_3166-1#Current_codes) country code (e.g. `fr_FR` for French/France). Default is empty (which will result in a locale of `en_GB` being assumed). Example: `en_GB`
> [accordion] Optional data parameters
>
> **firstname** `string`
>
> The customer's firstname. Pre-fills the form if provided. Please URL encode.
>
> **surname** `string`
>
> The customer's surname. Please URL encode.
>
> **fullname** `string`
>
> The customer's full name. Please URL encode.
>
> **email** `string`
>
> The customer's email address. Please URL encode.
>
> **customer_id** `string`
>
> The unique customer identifier from your system.
>
> **phone_number** `string`
>
> The customer's phone number(s). Pass as many phone numbers as you have as a comma-separated list. If you are passing any data which is not a digit (e.g. spaces, +'s), these need to be URL encoded.
>
> **call_to_action_url** `string`
>
> A URL to send users to after they are rewarded. Only functions on the embedded flow.
>
> **segment** `string`
>
> String representing a customer segment (for example one of: men, women) used to pass segmentation data about your customer to us. Has a maximum of 50 characters.
> [accordion] Optional implementation parameters
>
> **implementation** `string`
>
> Optionally override the way the flow is implemented (one of: `link`, `form`, `embed`). Default can also be set in the merchant dashboard. If in doubt, leave out.
## Things to Watch Out For
> [accordion] The tag doesn't seem to be working. What should I do?
>
> You can use the browser Console log to check any potential error states relating to the tag integration.
>
> Further details on error messages and how to resolve them is available in the [error codes and messages](/developer-docs/integration/reference/faqs#common-tag-integration-errors) section.
> [accordion] Why does the 'Been referred by a friend?' link not appear on the page?
>
> This could happen for two reasons:
>
> 1. **The locale is missing** - check if a locale is required for this tag integration
> 2. **The `mmWrapper` div is missing from the page** - check that the div is included somewhere in the `` tag of the checkout
> [accordion] How can I change the wording for the 'Been referred by a friend' link?
>
> The copy on the referee link is controlled via the Mention Me platform and can easily be changed. Ask your Client Success Manager about this option.
>
> > [!NOTE]
> >
> > This copy can't be edited directly in the offer preview - it needs to be requested from the Mention Me support team.
> [accordion] I have a dynamic website - how do I get the referee journey to appear?
>
> The referee tag has a feature to prevent it showing multiple times. In websites built with React, Angular, Vue, or other dynamic frameworks, this can conflict and prevent the tag from appearing when you would expect it to.
>
> If this occurs, you will see a message in the browser developer console similar to:
>
> ```text theme={null}
> A tag has already fired with identifier [linkcheckout] on this page. Suppressing tag
> ```
>
> To prevent this, ensure the Mention Me tag is aware it can re-run without harm. The code below clears the fired tag state before loading the referee tag:
>
> ```html theme={null}
>
>
> ```
>
> This concatenates the implementation (in this case `link`) and situation (in this case `checkout`) and tells the Mention Me tag that it can re-fire for `linkcheckout`.
>
> See [SPA Implementation](/knowledge/tags/spa-implementation) for more details.
# Referrer Tag
Source: https://docs.mention-me.com/developer-docs/integration/entry-points/referrer
Integrate the referrer tag on your order confirmation page to promote referrals and track conversions
## Why the Referrer Tag Matters
Mention Me offers referral and influencer solutions. This essential tag allows us to show promotional offers and track customer activity.
### What Does the Referrer Tag Do?
> [card] Promotes your referral programme
>
> Personalised messages encouraging customers to refer.
> [card] Closes the loop for rewards
>
> Tracks when referred friends buy so referrers get rewarded.
> [card] Tracks influencer campaigns
>
> Logs follower transactions so influencers are rewarded accurately.
> [card] Supports other goals
>
> Follow-up content like discounts or NPS surveys.
## How to Integrate the Referrer Tag
> [!NOTE]
>
> To see code snippets pre-filled with your partner code, [**sign in**](https://app.mention-me.com/sign-in).
> [tab] Popup (default)
>
> **1. Add the JavaScript tag**
>
> Include the following JavaScript snippet at the bottom of the `` tag on the order confirmation page (and optionally on other pages too). The request includes your unique partner code and mandatory customer and order parameters.
>
> ```html Demo theme={null}
>
>
>
> ```
>
> ```html Live theme={null}
>
>
>
> ```
>
> The JavaScript runs after the rest of the page has loaded, populates the div above with the content.
>
> **2. Customise the parameters**
>
> Customise any passed parameters to pass the real data. Don't forget to URL encode your data.
>
> > [!NOTE]
> >
> > All parameter values must be [URL-encoded](https://developer.mozilla.org/en-US/docs/Web/JavaScript/Reference/Global_Objects/encodeURIComponent) — for example, `@` → `%40`, spaces → `%20`.
> [tab] Embedded iframe
>
> **1. Add the wrapper div**
>
> Include the following `
` into your page where you want the iframe to appear.
>
> ```html theme={null}
>
>
>
> ```
>
> This is just a placeholder which is populated via the JavaScript tag. You can optionally apply a class or style to the div, via the Mention Me dashboard, if you wish to control the way the contents are styled. If you need to change the id on the wrapper (for example if you need two tags on one page), you can customise from within the Mention Me dashboard.
>
> **2. Add the JavaScript tag**
>
> Include the following JavaScript snippet at the bottom of the `` tag on the order confirmation page (and optionally on other pages too). The request includes your unique partner code and mandatory customer and order parameters.
>
> ```html Demo theme={null}
>
>
>
> ```
>
> ```html Live theme={null}
>
>
>
> ```
>
> The JavaScript runs after the rest of the page has loaded, populates the div above with the content.
>
> **3. Customise the parameters**
>
> Customise any passed parameters to pass the real data. Don't forget to URL encode your data.
>
> > [!NOTE]
> >
> > All parameter values must be [URL-encoded](https://developer.mozilla.org/en-US/docs/Web/JavaScript/Reference/Global_Objects/encodeURIComponent) — for example, `@` → `%40`, spaces → `%20`.
> [tab] Link to overlay
>
> **1. Add the wrapper div**
>
> Include the following `
` into your page where you want the link to appear.
>
> ```html theme={null}
>
>
>
> ```
>
> This is just a placeholder which is populated via the JavaScript tag. You can optionally apply a class or style to the div, via the Mention Me dashboard, if you wish to control the way the contents are styled. If you need to change the id on the wrapper (for example if you need two tags on one page), you can customise from within the Mention Me dashboard.
>
> **2. Add the JavaScript tag**
>
> Include the following JavaScript snippet at the bottom of the `` tag on the order confirmation page (and optionally on other pages too). The request includes your unique partner code and mandatory customer and order parameters.
>
> ```html Demo theme={null}
>
>
>
> ```
>
> ```html Live theme={null}
>
>
>
> ```
>
> The JavaScript runs after the rest of the page has loaded, populates the div above with the content.
>
> **3. Customise the parameters**
>
> Customise any passed parameters to pass the real data. Don't forget to URL encode your data.
>
> > [!NOTE]
> >
> > All parameter values must be [URL-encoded](https://developer.mozilla.org/en-US/docs/Web/JavaScript/Reference/Global_Objects/encodeURIComponent) — for example, `@` → `%40`, spaces → `%20`.
## Verb Aliases in the URL
The verb in the URL path (`referreroffer`) can be replaced with `offer` or `conversion` - all three behave identically. Pick whichever reads best in your codebase, for example `/api/v2/conversion/YOUR_PARTNER_CODE?...`.
## Mandatory Data Parameters
These are required to ensure that your referral programme runs correctly.
**firstname** `string` *required*
The customer's firstname. Please URL encode. Example: `Franklin`
**surname** `string` *required*
The customer's surname. Please URL encode. Example: `McFly`
**email** `string` *required*
The customer's email address. Please URL encode. Example: `franklinmcfly559@mention-me.com`
**order_number** `string` *required*
The unique order identifier from your system. Has a maximum of 50 characters. Example: `8494024521`
**order_subtotal** `string` *required*
The order subtotal (excluding VAT/taxes and shipping) in the currency indicated by the `order_currency` parameter. If you can't remove VAT, let us know. Example: `106.75`
**order_currency** `string` *required*
The three character (ISO 4217) currency code that the order total is in. Example: `GBP`
**situation** `string` *required*
String indicator of where you are including this tag within your site (for example: `checkout`, `postpurchase`, `landingpage`). Used for reporting. Has a maximum of 50 characters. Example: `postpurchase`
**locale** `string` *required*
String representing the required locale for the campaign. Used to show the right locale (language, currency) for the user. The format should be [ISO 639-1](https://en.wikipedia.org/wiki/List_of_ISO_639-1_codes) language code, an underscore (`_`), then the [ISO 3166-1 alpha-2](https://en.wikipedia.org/wiki/ISO_3166-1#Current_codes) country code (e.g. `fr_FR` for French/France). Default is empty (which will result in a locale of `en_GB` being assumed). When launching your first referral programme, we recommend targeting your main regions/locales first, based on volume. You can also group together and target certain regions with the same campaign if using the same language and currency (e.g. `en_EU` for all countries that have English as their language and Euro as their currency). If your referral programme offers third-party vouchers (e.g. Amazon gift card), check if they can support the locales you're promoting to. Example: `en_GB`
**coupon_code** `string` *required*
The coupon code used by the customer (if any). Example: `ABC4577`
## Extra Parameters to Drive Referral Optimisation
Add these data parameters to significantly improve performance.
**order_discount_amount** `string`
The discount amount - our assumption is this has already been taken off the order subtotal provided. This allows us to calculate the Cost Per Acquisition for referral. Example: `23.49`
**order_item_count** `string`
The number of items in the basket (if applicable). This helps us understand the type of purchase and can be a signal of advocacy. Example: `1`
**order_is_subscription** `string`
Whether this order is for a subscription (recurring). This helps us qualify and categorise the revenue. Example: `false`
**order_is_gift** `string`
Whether this order is a gift (being bought for someone else). Gifts can be signals of advocacy. Example: `false`
**customer_id** `string`
The unique customer identifier from your system. Example: `MI1404024521`
## Extra Parameters for Product Referral
If you are using [Product Referral](/developer-docs/integration/entry-points/product-referral), add these parameters to your referrer tag to enable product-level conversion tracking. See the [product referral instructions](/developer-docs/integration/entry-points/product-referral) for full details.
**product_ids** `string`
Comma-separated list of product IDs included in the order.
**product_skus** `string`
Comma-separated list of product SKUs included in the order.
**product_names** `string`
Comma-separated list of product names included in the order.
**product_prices** `string`
Comma-separated list of product prices included in the order.
**product_quantities** `string`
Comma-separated list of product quantities included in the order.
> [accordion] Optional data parameters
>
> **phone_number** `string`
>
> The customer's phone number(s). Pass as many phone numbers as you have as a comma-separated list. If you are passing any data which is not a digit (e.g. spaces, +'s), these need to be URL encoded.
>
> **title** `string`
>
> The customer's title. This allows you to have more formal messaging in your flow. Has a maximum of 20 characters.
>
> **fullname** `string`
>
> The customer's full name. Please URL encode.
>
> **username** `string`
>
> The customer's username. Your account is set up for referrers to share using their username not full name. Please URL encode.
>
> **segment** `string`
>
> String representing a customer segment (for example one of: men, women) used to pass segmentation data about your customer to us. Has a maximum of 50 characters.
>
> **custom_field** `string`
>
> Any piece of custom data you wish to pass to us.
>
> **address_line1** `string`
>
> The customer's address line 1 (if known).
>
> **address_line2** `string`
>
> The customer's address line 2 (if known).
>
> **address_city** `string`
>
> The customer's address city (if known).
>
> **address_county** `string`
>
> The customer's address county (if known).
>
> **address_postcode** `string`
>
> The customer's address postcode (if known).
>
> **address_country** `string`
>
> The customer's address country (if known).
>
> **custom_share_field** `string`
>
> A piece of text you can use to pass into sharing widgets, such as what the user bought or how much they saved.
>
> **order_date** `string`
>
> The date and time the order was placed. The format must be in ISO 8601 format and URL encoded. If not provided or invalid, we will use the date and time at the point we received the tag.
>
> **mm_encrypted** `string`
>
> In some cases it may be desirable to ensure that email addresses and other information is not in clear text. See [encrypted parameters](/developer-docs/integration/encrypted-parameters).
> [accordion] Optional implementation parameters
>
> **implementation** `string`
>
> Optionally override the way the flow is implemented (one of: `link`, `embed`). Default can also be set in the merchant dashboard. If in doubt, leave out.
>
> **variation** `string`
>
> Integer representing the index of an offer within an experiment. Used to override the dynamic allocation of offers to customers so that, for example, email creative can be set up to show a specific variation. Default is null.
## Example with All Mandatory Parameters Populated
```html Demo theme={null}
```
```html Live theme={null}
```
## Things to Watch Out For
> [accordion] The tag doesn't seem to be working. What should I do?
>
> Check the browser developer console for errors from the Mention Me tag. Most integration issues come down to a missing mandatory parameter, an un-encoded value, or the demo host being left in the live snippet. See the [common tag integration errors](/developer-docs/integration/reference/faqs#common-tag-integration-errors) and [error codes](/developer-docs/integration/reference/error-codes) for the full checklist.
> [accordion] The customer's name isn't populated in the overlay
>
> The most common reasons are that `firstname` and `surname` are not being rendered into the tag URL (the snippet still contains `` / ``), or the values are not URL encoded. Customer names with accented characters or spaces must be URL encoded before being written into the URL.
> [accordion] How do I exclude VAT and shipping from the order total?
>
> `order_subtotal` must be the order subtotal **excluding VAT/taxes and shipping** - this is the figure the referral reward is calculated against. If you cannot remove VAT on your side, let your Client Success Manager know and we can handle the adjustment.
> [accordion] Why are firstname and surname mandatory?
>
> The referrer tag personalises the sharing experience using the customer's real name (for example, "Franklin recommends…"). Without a name we cannot build that sharing message, which dramatically reduces referral performance. If your account is configured to share by username instead, use the `username` parameter - but the referral programme still needs a name for display in some flows.
# Drive Action Tag
Source: https://docs.mention-me.com/developer-docs/integration/incentive-for-action
Incentivise and reward customers for completing specific actions
## Overview
Mention Me can support incentivising customers for taking an action and rewarding them once the action has been completed. This tag allows us to know once customers have completed the action so that we can reward them.
## What Is the Drive Action Tag Used For?
To enable us to reward a customer when an action has been completed. We use the email address as the eligibility criteria.
## How to Integrate the Drive Action Tag
**1. Add the JavaScript tag**
Include the following JavaScript at the bottom of the page where the action has been completed. The request includes your unique partner code and the action ID. Your Client Success Manager will confirm the action ID.
> [!NOTE]
>
> To see code snippets pre-filled with your partner code, [**sign in**](https://app.mention-me.com/sign-in).
```html Demo theme={null}
```
```html Live theme={null}
```
**2. Confirm the action ID**
Ask your Client Success Manager to confirm the action ID for your integration.
**3. Customise the parameters**
Customise the email parameter to pass the real data. Don't forget to URL encode your data.
 width="1" height="1" style="display:none" />
>
> ```
>
> ```html Live theme={null}
>
>
 width="1" height="1" style="display:none" />
>
> ```
>
> The pixel returns:
>
> * **HTTP 204** (No Content) if the request was processed successfully
> * **HTTP 404** (Not Found) if there is a problem with the parameters
>
> In neither case will it cause an error or anything visible on the page.
## Parameters
Both the JavaScript tag and the tracking pixel accept the same parameters.
### Mandatory
**email** `string` *required*
The customer's email address. Please URL encode. Example: `doreen@example.com`
**order_number** `string` *required*
The unique order identifier from your system. Has a maximum of 50 characters. Example: `ORD-12345`
**order_subtotal** `string` *required*
The order subtotal (excluding VAT/taxes and shipping) in the currency indicated by the `order_currency` parameter. If you can't remove VAT, let us know. Example: `49.99`
**order_currency** `string` *required*
The three character (ISO 4217) currency code that the order total is in. Example: `GBP`
**coupon_code** `string` *required*
The coupon code used by the customer (if any). Example: `SAVE10`
### Recommended
**customer_id** `string`
The unique customer identifier from your system. Example: `CUST-789`
**order_item_count** `string`
The number of items in the basket (if applicable). This helps us understand the type of purchase and can be a signal of advocacy. Example: `3`
**order_discount_amount** `string`
The discount amount - our assumption is this has already been taken off the order subtotal provided. This allows us to calculate the Cost Per Acquisition for referral. Example: `5.00`
**segment** `string`
String representing a customer segment (for example one of: men, women) used to pass segmentation data about your customer to us. Has a maximum of 50 characters. Example: `vip`
**order_is_subscription** `string`
Whether this order is for a subscription (recurring). This helps us qualify and categorise the revenue. Example: `true`
**order_is_gift** `string`
Whether this order is a gift (being bought for someone else). Gifts can be signals of advocacy. Example: `false`
> [accordion] Optional parameters
>
> **custom_field** `string`
>
> Any piece of custom data you wish to pass to us.
>
> **address_line1** `string`
>
> The customer's address line 1 (if known).
>
> **address_line2** `string`
>
> The customer's address line 2 (if known).
>
> **address_city** `string`
>
> The customer's address city (if known).
>
> **address_county** `string`
>
> The customer's address county (if known).
>
> **address_postcode** `string`
>
> The customer's address postcode (if known).
>
> **address_country** `string`
>
> The customer's address country (if known).
>
> **custom_share_field** `string`
>
> A piece of text you can use to pass into sharing widgets, such as what the user bought or how much they saved.
>
> **order_date** `string`
>
> The date and time the order was placed. The format must be in ISO 8601 format and URL encoded. If not provided or invalid, we will use the date and time at the point we received the tag.
>
> **mm_encrypted** `string`
>
> In some cases it may be desirable to ensure that email addresses and other information is not in clear text. See [encrypted parameters](/developer-docs/integration/encrypted-parameters).
>
> **locale** `string`
>
> Locale code (e.g. `en_GB`).
## Verb Aliases in the URL
The verb in the URL path (`order`) can be replaced with `booking`, `signup`, or `transaction`, matching whichever term best describes the action on your site. All four verbs behave identically.
The same applies to the pixel form: `orderpixel` can be replaced with `bookingpixel`, `signuppixel`, or `transactionpixel`. Each pixel verb still ends with `/pixel.gif`.
For example, a signup pixel would look like:
```html theme={null}
```
## Parameter Aliases for Non-Ecommerce
If your business tracks bookings or signups rather than orders, you can use alternative parameter names. The tag behaviour is identical - only the parameter names differ.
> [accordion] Booking aliases
>
> **booking_id** `string`
>
> Alias for `order_number`.
>
> **booking_subtotal** `string`
>
> Alias for `order_subtotal`.
>
> **booking_currency** `string`
>
> Alias for `order_currency`.
>
> **booking_date** `string`
>
> Alias for `order_date`.
>
> **booking_item_count** `string`
>
> Alias for `order_item_count`.
>
> **booking_is_subscription** `string`
>
> Alias for `order_is_subscription`.
>
> **booking_is_gift** `string`
>
> Alias for `order_is_gift`.
>
> **booking_discount_amount** `string`
>
> Alias for `order_discount_amount`.
> [accordion] Signup aliases
>
> **signup_id** `string`
>
> Alias for `order_number`.
>
> **transaction_subtotal** `string`
>
> Alias for `order_subtotal`.
>
> **transaction_currency** `string`
>
> Alias for `order_currency`.
>
> **signup_date** `string`
>
> Alias for `order_date`.
>
> **item_count** `string`
>
> Alias for `order_item_count`.
>
> **is_subscription** `string`
>
> Alias for `order_is_subscription`.
>
> **is_gift** `string`
>
> Alias for `order_is_gift`.
>
> **signup_discount_amount** `string`
>
> Alias for `order_discount_amount`.
# Integration Overview
Source: https://docs.mention-me.com/developer-docs/integration/overview
Merchant-specific integration instructions for implementing Mention Me
Welcome to our product integration instructions.
**Mention Me** seamlessly integrates into brands' websites to incentivise, track and reward referrals throughout the customer journey, as well as further enhance the customer experience to turn even more shoppers into brand advocates.
## Choose Your Integration
Pick the platform you're integrating with to jump straight to a tailored Quickstart covering every touchpoint (referrer, referee, landing page, and dashboard).
> [card] [JavaScript Tags](/developer-docs/integration/javascript-overview)
> [card] [Shopify App](/knowledge/shopify/overview)
> [card] [Tag Containers](/developer-docs/integration/setup/tag-containers)
> [card] [SAP Commerce Cloud](/developer-docs/integration/setup/sap-commerce-cloud-referrer)
> [card] [Global-e](/knowledge/tags/global-e)
> [card] [Native Apps](/developer-docs/integration/native-apps)
We require a set of touch points to be implemented on your website. Each point of the customer journey has set parameters which allow you to pass us the data we need such as order details and customer email and name.
## Where to Get Help
If you need help at any time while integrating our tags, contact our [support team](https://help.mention-me.com/hc/en-gb/requests/new).
# Error Codes & Messages
Source: https://docs.mention-me.com/developer-docs/integration/reference/error-codes
Guidance on errors and warnings from Mention Me tags and how to resolve them
The following section provides guidance on the types of errors or warnings that can be received from the Mention Me tags along with examples on how to resolve those issues.
The Mention Me tags can return errors of two types - an **HTTP error** code or a **tag error**.
HTTP errors are normally an indication of the request being malformed (such as wrong URL or missing critical data). These errors will only consist of an HTTP error code.
Tag errors are accompanied by both an HTTP error code and a JavaScript error message which will be rendered within the console of the browser's development tools. This message further assists with debugging.
## HTTP Error Codes
The below summarises the HTTP errors where no further message is available in the console.
**400 - Bad Request** `error`
We have successfully received the request, but it is either malformed or missing important information. Please check the parameters are being passed correctly, and that all mandatory parameters are included.
**403 - Forbidden** `error`
See the section on [integration approval](#content-not-served-due-to-integration-being-disabled-or-not-approved-to-go-live) below.
**404 - Not Found** `error`
Please check the URLs of the tags you're integrating and ensure that your unique partner code is correct.
## Tag Errors
The below summarises example Mention Me specific error conditions which will also render an error into the browser's console.
> [accordion] Content not served due to integration being disabled or not approved to go live
>
> Mention Me tags must be manually approved by you and your Client Success Manager before they become enabled on your live site.
>
> Until your tags are enabled by us on your live environment, you will see this error message in the console. Your customers will see no content, and this error is harmless.
>
> You may also see this as an HTTP 403 error code.
>
> **Affected tags:** All
> [accordion] Content not served due to specific configuration 'situation' being disabled
>
> The situation parameter passed has been disabled. The tag has been received and processed but no content will be shown to the customer as the tag has been disabled from within the Mention Me platform.
>
> **Affected tags:** All
> [accordion] Offer shown recently. Not showing again as frequency limits are in place
>
> The Mention Me platform can limit the number of times a tag is shown to a user either by number of days (i.e. show only once every 3 days) or by number of visits (i.e. only show this offer on the 5th, 10th, 15th, etc. visits).
>
> This offer was seen recently and will not be shown again until the limit is passed.
>
> **Affected tags:** Referrer
> [accordion] Unable to find suitable offer
>
> The Mention Me platform can be configured to serve different Offers to users based on information passed to us within the tag or from information we know about the customer.
>
> In this case, we were unable to choose an appropriate Offer from the information available to us and have opted to show nothing to the user.
>
> This may indicate the triggering rules for your Campaigns are set too narrow and you may wish to add additional Campaigns to target users who are missing out.
>
> **Affected tags:** Referrer
> [accordion] Skipping order tag, will attempt to serve offer
>
> The tag received is missing mandatory order details. Please ensure all mandatory parameters for the order, including `order_currency`, `order_subtotal` and `order_number` are all present.
>
> We will still attempt to serve an Offer to your customer so they can participate in the referral programme.
>
> **Affected tags:** Referrer, Order Tracking
> [accordion] Referee search disabled
>
> The Referee Tag has been disabled within the Mention Me platform. No Referee tag will be served to any users. We advise against disabling the tag as this may harm Referee conversion.
>
> **Affected tags:** Referee
> [accordion] Unable to serve this locale
>
> The `locale` provided does not have a corresponding Campaign setup. Check whether the `locale` is being passed correctly, or consider setting up a new Campaign to allow Referees for this locale to be served correctly.
>
> **Affected tags:** Referee
> [accordion] Dashboard disabled
>
> The Dashboard Tag has been disabled within the Mention Me platform. No Dashboard tag will be served to any users. We advise against disabling the tag as this may prevent users from sharing their offers with friends.
>
> **Affected tags:** Dashboard
> [accordion] Mention Me Tag failed to insert into wrapper
>
> This tag requires a location on the page for the content to be inserted into. The Mention Me tags were unable to find this location. By default, we expect a div with the id `mmWrapper` to be present on the page:
>
> ```html theme={null}
>
> ```
>
> If you are having trouble positioning the wrapper or need advice regarding placing multiple Mention Me elements on the page, please reach out to us and we'll assist you.
>
> **Affected tags:** Referee, Dashboard, Landing Page
# Integration FAQs
Source: https://docs.mention-me.com/developer-docs/integration/reference/faqs
Common questions about Mention Me tag integration, data protection, and troubleshooting
## Frequently Asked Questions
> [accordion] How do you protect customer data?
>
> We use SSL for all JavaScript requests to protect customer personal data.
> [accordion] Will the Mention Me tags slow down my site?
>
> Our JavaScript is executed at the bottom of your page and waits for the rest of the document to finish loading before injecting any elements.
> [accordion] What happens if your service is unavailable?
>
> The tags are designed to fail silently during exceptional conditions - nothing will interfere with your page if something goes wrong (for example, if our service is unavailable or if your campaign is paused).
> [accordion] Why do I get a 403 when loading the tags?
>
> This normally happens when the integration has not been approved by Mention Me. We will approve the integration once the referral programme has been signed off.
> [accordion] How can I encrypt my data? Do I need an encryption key?
>
> Our data is already passed via HTTPS. This means the data you're passing to us will already be encrypted and only visible to you, the user and us. Third parties will not be able to get hold of this information.
>
> If you wish to send users to a landing page and would like to include the users' email address in the link so that they're shown a personalised link (but do not wish to expose the email address in the link), you can follow our instructions on [how to use encrypted parameters to transmit personal data](/developer-docs/integration/encrypted-parameters).
## Common Tag Integration Errors
Most integration problems come down to how the tag URL is built. Run through the checklist below before raising a ticket - each of these has caught out many integrators.
### Referrer Tag
> [accordion] Parameter values are not URL-encoded
>
> All parameter values must be [URL-encoded](https://developer.mozilla.org/en-US/docs/Web/JavaScript/Reference/Global_Objects/encodeURIComponent). Common offenders are `@` in email addresses (must be `%40`), spaces in names (must be `%20`), and `+` or `/` in custom fields. An un-encoded `&` inside a value will look like the start of the next parameter and corrupt everything that follows it.
> [accordion] order_subtotal includes VAT or delivery
>
> `order_subtotal` must be the order subtotal **excluding VAT/taxes and delivery**. Passing the gross total inflates reward calculations and distorts reporting. If you cannot strip VAT on your side, let your Client Success Manager know so we can handle it.
> [accordion] Placeholder values have been left in the tag
>
> If the tag still contains literal `
`, `` or similar placeholders, your templating engine has not rendered the real values into the URL. Nothing will match a real customer.
> [accordion] tag-demo has been left in the live tag
>
> The demo host is `tag-demo.mention-me.com` and is for pre-launch testing only. When you go live, the host must be `tag.mention-me.com`. Forgetting to swap it means live customers hit the demo environment and no real referrals are recorded.
> [accordion] firstname or surname is missing
>
> `firstname` and `surname` are mandatory on the referrer tag. Without them we cannot personalise sharing (which dramatically reduces conversion) and in most configurations the tag will refuse to serve.
> [accordion] locale is missing or invalid
>
> The `locale` parameter must be in the form `xx_YY` (ISO 639-1 language, underscore, ISO 3166-1 alpha-2 country), e.g. `en_GB`. An unknown locale will result in either the default campaign being served or nothing at all.
> [accordion] Partner code is missing or hard-coded incorrectly
>
> The partner-code placeholder in the URL path must be replaced with the partner code issued to your account. If it is missing, mistyped, or copied from another environment, the request will return a 404.
> [accordion] Hardcoded customer or order data
>
> The values passed on the tag must reflect the current customer and their current order. Copying the tag snippet verbatim (with someone else's email or order number) will attribute activity to the wrong customer.
> [accordion] order_currency is missing or not ISO 4217
>
> `order_currency` must be a three-character [ISO 4217](https://en.wikipedia.org/wiki/ISO_4217) code such as `GBP`, `EUR`, or `USD`. Values like `£` or `pounds` will be rejected.
> [accordion] order_number is reused across orders
>
> `order_number` should be unique per order. Duplicate order numbers cause downstream deduplication and make the order look like a refund or replay of an earlier one.
> [accordion] Multiple tags fire but share the same wrapper
>
> If you render more than one Mention Me tag on the same page, each needs its own wrapper `div`. Configure a distinct wrapper id from the Mention Me dashboard rather than reusing `mmWrapper` for all of them.
> [accordion] Tag fires before the DOM is ready in SPAs
>
> In React, Angular, Vue, or other SPA frameworks, inject the tag after the page content has rendered, and clear `window.MentionMeFiredTags` if you need the tag to re-fire on client-side navigations. See the [SPA implementation notes](/knowledge/tags/spa-implementation) for more detail.
### Referee Tag
> [accordion] Locale is missing on the referee tag
>
> The referee tag must be passed a valid `locale` - without one, the "Been referred by a friend?" link will not appear. Check the value is being set for the country your customer is browsing from.
> [accordion] mmWrapper div is missing from the page
>
> The referee tag populates a placeholder `` somewhere in the page ``. If the div is missing, the link or embedded form has nowhere to render. You can also see `Mention Me Tag failed to insert into wrapper` in the console in this case - see the [error codes](/developer-docs/integration/reference/error-codes).
# Dashboard Tag – Google Tag Manager
Source: https://docs.mention-me.com/developer-docs/integration/setup/google-tag-manager-dashboard
Deploy the Mention Me referrer dashboard using GTM
This guide covers deploying the [Dashboard tag](/developer-docs/integration/dashboard) through Google Tag Manager (GTM) in your customer account area.
> [!NOTE]
>
> GTM manages the `
```
This typically needs to be rendered server-side (or hydrated from your logged-in session) since the dashboard requires knowing which customer is viewing the page.
**3. Create Data Layer Variables in GTM**
Create a **Data Layer Variable** for `mmEmail`, `mmFirstname`, `mmSurname`, and `mmLocale`.
**4. Create the Custom HTML tag**
> [!NOTE]
>
> To see code snippets pre-filled with your partner code, [**sign in**](https://app.mention-me.com/sign-in).
```html theme={null}
```
Test against `tag-demo.mention-me.com` before switching to `tag.mention-me.com`.
**5. Set the trigger**
Create a **Custom Event** trigger firing on `mentionMeDashboard`, scoped to your account/dashboard page.
**6. Preview and publish**
Confirm in GTM Preview mode that the dashboard renders for a logged-in customer, then publish.
> [!TIP]
>
> The [Dashboard tag](/developer-docs/integration/dashboard) page also documents a canonical URL form with the email in the path rather than the query string, useful for server-rendered links.
# Landing Page Tag – Google Tag Manager
Source: https://docs.mention-me.com/developer-docs/integration/setup/google-tag-manager-landing-page
Deploy the Mention Me landing page tag using GTM
This guide covers deploying the [Landing page tag](/developer-docs/integration/entry-points/landing-page) through Google Tag Manager (GTM) on your dedicated referral landing page.
> [!NOTE]
>
> GTM manages the `
```
If you localise the landing page by URL path or domain, use a **Lookup Table** or **Custom JavaScript** variable in GTM to set `locale` dynamically instead of hard-coding `en_GB`. Test against `tag-demo.mention-me.com` before switching to `tag.mention-me.com`.
**5. Preview and publish**
Confirm the tag fires only on the landing page URL, then publish.
> [!TIP]
>
> If you have customer details available on this page (e.g. from a logged-in session), pass them as additional query parameters the same way as the [Referrer tag](/developer-docs/integration/entry-points/referrer) to personalise the flow.
# Referee Tag – Google Tag Manager
Source: https://docs.mention-me.com/developer-docs/integration/setup/google-tag-manager-referee
Deploy the Mention Me referee tag on your checkout page using GTM
This guide covers deploying the [Referee tag](/developer-docs/integration/entry-points/referee) through Google Tag Manager (GTM) instead of hard-coding it into your checkout template.
> [!NOTE]
>
> GTM manages the `
```
If you have any known customer details at this point (firstname, email, etc.), include them as additional keys the same way.
**3. Create Data Layer Variables in GTM**
Create a **Data Layer Variable** for `mmLocale` (and any optional customer fields you're passing).
**4. Create the Custom HTML tag**
> [!NOTE]
>
> To see code snippets pre-filled with your partner code, [**sign in**](https://app.mention-me.com/sign-in).
```html theme={null}
```
Test against `tag-demo.mention-me.com` first, then switch to `tag.mention-me.com`.
**5. Set the trigger**
Create a **Custom Event** trigger firing on `mentionMeReferee`, scoped to the checkout page.
**6. Preview and publish**
Confirm in GTM Preview mode that the "Been referred by a friend?" link or form renders on checkout, then publish.
> [!TIP]
>
> Full parameter reference (including the `implementation` options: link, form, embed) is on the [Referee tag](/developer-docs/integration/entry-points/referee) page.
## Troubleshooting
> [accordion] The referee link doesn't appear
>
> Check that the `mentionMeReferee` event is present in the data layer before GTM's trigger evaluates it, and that the `mmWrapper` div exists in the page HTML (not just injected by GTM).
> [accordion] Single-page checkout / dynamic routing
>
> If your checkout is a SPA and the referee tag needs to re-fire on route changes without a full page reload, see [SPA Implementation](/knowledge/tags/spa-implementation) - the same re-fire logic applies whether the tag is deployed directly or via GTM.
# Referrer Tag – Google Tag Manager
Source: https://docs.mention-me.com/developer-docs/integration/setup/google-tag-manager-referrer
Deploy the Mention Me referrer tag on your order confirmation page using GTM
This guide covers deploying the [Referrer tag](/developer-docs/integration/entry-points/referrer) through Google Tag Manager (GTM) instead of hard-coding it into your page template.
> [!NOTE]
>
> GTM manages the `
```
**3. Create Data Layer Variables in GTM**
In GTM, create a **Data Layer Variable** for each field you pushed above (`mmFirstname`, `mmSurname`, `mmEmail`, `mmOrderNumber`, `mmOrderSubtotal`, `mmOrderCurrency`, `mmLocale`, `mmCouponCode`).
**4. Create the Custom HTML tag**
Add a new **Custom HTML** tag in GTM:
> [!NOTE]
>
> To see code snippets pre-filled with your partner code, [**sign in**](https://app.mention-me.com/sign-in).
```html theme={null}
```
Use `tag-demo.mention-me.com` while testing, and switch to `tag.mention-me.com` only once you've verified the integration end-to-end.
**5. Set the trigger**
Create a **Custom Event** trigger that fires on the `mentionMeReferrer` event pushed in step 2, scoped to the order confirmation page.
**6. Preview and publish**
Use GTM's Preview mode to confirm the tag fires on the order confirmation page and the overlay renders correctly, then publish the container.
> [!TIP]
>
> All mandatory and optional parameters are documented on the [Referrer tag](/developer-docs/integration/entry-points/referrer) page - map any of them to data layer variables the same way.
## Troubleshooting
> [accordion] The tag doesn't fire
>
> Use GTM's Preview mode to confirm the trigger condition is being met and the data layer event is firing before the tag executes. Check the browser console for errors from the Mention Me tag - see [common tag integration errors](/developer-docs/integration/reference/faqs#common-tag-integration-errors).
> [accordion] The overlay shows blank or missing data
>
> Confirm each Data Layer Variable in GTM matches the key names pushed to `dataLayer` exactly (case-sensitive), and that the values are URL encoded where needed.
# Dashboard Tag – SAP Commerce Cloud
Source: https://docs.mention-me.com/developer-docs/integration/setup/sap-commerce-cloud-dashboard
Deploy the Mention Me referrer dashboard in your SAP Commerce Cloud account area
This guide covers deploying the [Dashboard tag](/developer-docs/integration/dashboard) in the My Account area on SAP Commerce Cloud.
> [tab] Spartacus storefront
>
> **1. Locate the account component**
>
> Add a new component (or extend an existing one) under the My Account navigation, commonly alongside the coupons or order history sub-pages.
>
> **2. Add the wrapper div**
>
> ```html theme={null}
>
> ```
>
> **3. Inject the tag with the logged in customer's details**
>
> > [!NOTE]
> >
> > To see code snippets pre-filled with your partner code, [**sign in**](https://app.mention-me.com/sign-in).
>
> Resolve the current customer from your account facade service and populate the parameters below.
>
> ```html theme={null}
>
>
>
> ```
> [tab] Accelerator storefront (JSP)
>
> **1. Locate the account JSP**
>
> Typically under the account overview JSP template, or a new tab added to the My Account navigation.
>
> **2. Add the wrapper div and tag**
>
> ```jsp theme={null}
>
>
>
> ```
> [!TIP]
>
> The [Dashboard tag](/developer-docs/integration/dashboard) page also documents a canonical URL form with the email in the path rather than the query string.
> [!WARNING]
>
> This page requires a logged-in customer context. Make sure the component or JSP is only rendered behind your existing account authentication guard.
# Landing Page Tag – SAP Commerce Cloud
Source: https://docs.mention-me.com/developer-docs/integration/setup/sap-commerce-cloud-landing-page
Deploy the Mention Me landing page tag on SAP Commerce Cloud
This guide covers building a dedicated [Landing page tag](/developer-docs/integration/entry-points/landing-page) page on SAP Commerce Cloud.
> [tab] Spartacus storefront
>
> **1. Create a CMS content page**
>
> In SmartEdit (or Backoffice), create a new **Content Page** with its own route (e.g. `/refer-a-friend`) and add a CMS component slot for the referral content.
>
> **2. Add the wrapper div**
>
> Add a custom CMS component (or an `Embedded HTML` / `CMSParagraphComponent` extension) that renders:
>
> ```html theme={null}
>
>
>
> ```
>
> **3. Inject the tag**
>
> > [!NOTE]
> >
> > To see code snippets pre-filled with your partner code, [**sign in**](https://app.mention-me.com/sign-in).
>
> ```html theme={null}
>
>
>
> ```
> [tab] Accelerator storefront (JSP)
>
> **1. Create a CMS content page**
>
> Create a new `ContentPage` item in Backoffice with a dedicated URL, mapped to a JSP template (or reuse `contentPage.jsp` with a new content slot).
>
> **2. Add the wrapper div and tag**
>
> ```jsp theme={null}
>
>
>
>
>
> ```
> [!TIP]
>
> If you have customer details available on this page (e.g. a logged-in session), pass them as additional query parameters - see the full reference on the [Landing page tag](/developer-docs/integration/entry-points/landing-page) page.
# Referee Tag – SAP Commerce Cloud
Source: https://docs.mention-me.com/developer-docs/integration/setup/sap-commerce-cloud-referee
Deploy the Mention Me referee tag on your SAP Commerce Cloud checkout page
This guide covers deploying the [Referee tag](/developer-docs/integration/entry-points/referee) on SAP Commerce Cloud, on both storefront architectures.
> [tab] Spartacus storefront
>
> **1. Locate the checkout component**
>
> Add the placeholder div and tag to the review/payment step component near your coupon or promo code entry field (commonly extended from `CheckoutReviewSubmitComponent` or a custom checkout step component).
>
> **2. Add the wrapper div**
>
> ```html theme={null}
>
>
>
> ```
>
> **3. Inject the tag**
>
> > [!NOTE]
> >
> > To see code snippets pre-filled with your partner code, [**sign in**](https://app.mention-me.com/sign-in).
>
> ```html theme={null}
>
>
>
> ```
>
> Resolve `locale` from the active `OccEndpointsService`/session language rather than hard-coding it if you run multiple storefronts.
> [tab] Accelerator storefront (JSP)
>
> **1. Locate the checkout JSP**
>
> Typically `multiStepCheckoutSummaryPage.jsp` or your custom checkout tag file, near the voucher/coupon entry include.
>
> **2. Add the wrapper div and tag**
>
> ```jsp theme={null}
>
>
>
>
>
> ```
> [!TIP]
>
> Full parameter reference (including `implementation` options: link, form, embed) is on the [Referee tag](/developer-docs/integration/entry-points/referee) page.
> [accordion] Single-page checkout considerations
>
> Spartacus checkout steps can re-render without a full page reload. If the referee tag needs to re-fire after a step change, see [SPA Implementation](/knowledge/tags/spa-implementation) for the re-fire snippet.
# Referrer Tag – SAP Commerce Cloud
Source: https://docs.mention-me.com/developer-docs/integration/setup/sap-commerce-cloud-referrer
Deploy the Mention Me referrer tag on your SAP Commerce Cloud order confirmation page
This guide covers deploying the [Referrer tag](/developer-docs/integration/entry-points/referrer) on SAP Commerce Cloud (formerly Hybris), on both storefront architectures.
> [tab] Spartacus storefront
>
> **1. Locate the order confirmation component**
>
> In a Spartacus storefront the order confirmation page is rendered by the `OrderConfirmationModule` (typically `order-confirmation-thank-you-message.component.ts` / its CMS-mapped component). If you've customised checkout, confirm which component renders the confirmation route in your app.
>
> **2. Add the wrapper div**
>
> Extend or override the confirmation component's template to include:
>
> ```html theme={null}
>
>
>
> ```
>
> **3. Inject the tag with order data**
>
> In the component's TypeScript, once the `Order` object resolves (from `OrderFacade`/`CheckoutService`), dynamically inject the script tag with the order details populated:
>
> > [!NOTE]
> >
> > To see code snippets pre-filled with your partner code, [**sign in**](https://app.mention-me.com/sign-in).
>
> ```html Demo theme={null}
>
>
>
> ```
>
> ```html Live theme={null}
>
>
>
> ```
>
> Map `` placeholders to fields on the resolved `Order` (e.g. `order.deliveryAddress.firstName`, `order.code`, `order.totalPrice.value`, `order.totalPrice.currencyIso`), URL-encoding each value.
> [tab] Accelerator storefront (JSP)
>
> **1. Locate the confirmation JSP**
>
> In the Accelerator (b2c-acceleratorstorefront) architecture, order confirmation is rendered from `orderConfirmationPage.jsp` (or your custom addon's equivalent under `web/webroot/WEB-INF/tags/...`).
>
> **2. Add the wrapper div and tag**
>
> Add the placeholder div and the JavaScript snippet directly into the JSP, using EL/JSTL to populate the order fields from the `orderData` model attribute:
>
> ```jsp theme={null}
>
>
>
>
>
> ```
> [!WARNING]
>
> Always URL-encode dynamic values and test against `tag-demo.mention-me.com` before switching to the live `tag.mention-me.com` host.
> [!TIP]
>
> Full mandatory and optional parameter reference is on the [Referrer tag](/developer-docs/integration/entry-points/referrer) page.
## Troubleshooting
> [accordion] Order data isn't available at render time
>
> In Spartacus, ensure you're subscribing to the resolved `Order` observable rather than reading a snapshot before checkout completes. In Accelerator, confirm `orderData` is populated in the model before the JSP renders (check your controller/facade).
# Tag Containers
Source: https://docs.mention-me.com/developer-docs/integration/setup/tag-containers
How to integrate Mention Me tags using tag container vendors like Google Tag Manager
## Overview
If you have or plan to use a tag container, it can be even easier to integrate with us. Our tags work with most tag container vendors and we've already integrated with Qubit, OpenTag, TagMan, BrightTag, DC-Storm, Tealium and Google Tag Manager.
## Supported Platforms
Specific instructions are available for:
> [card] [Google Tag Manager](/developer-docs/integration/setup/google-tag-manager-referrer)
>
> Detailed instructions for deploying Mention Me tags via GTM.
We support almost any tag manager, including:
> [card] [Qubit](https://www.qubit.com)
> [card] [Tealium](https://tealium.com)
> [card] [BrightTag](https://www.signalco.com)
> [card] [OpenTag](https://www.qubit.com/tag-management)
> [card] [TagMan](https://www.ensighten.com)
> [card] [DC Storm](https://www.dcstorm.com)
## How It Works
Tag containers wrap the same JavaScript snippets documented in our [Javascript integration guide](/developer-docs/integration/javascript-overview). Instead of placing the script tags directly in your page HTML, you configure them within your tag manager and use its triggers to control when they fire.
The Mention Me tags themselves are identical - the tag container simply manages their deployment.
> [!NOTE]
>
> If you're using a tag container, make sure the `mmWrapper` div is still present in your page HTML where needed (e.g. for referee, dashboard, and landing page tags). The tag container only manages the JavaScript - the placeholder div must be in the page source.
For single-page applications (SPAs), see [SPA Implementation](/knowledge/tags/spa-implementation) for additional considerations when using tag containers with dynamic routing.
## Related Guides
> [card] [Google Tag Manager Setup](/developer-docs/integration/setup/google-tag-manager-referrer)
>
> Step-by-step guide for configuring your data layer, variables, and each tag type in GTM.
> [card] [Error Codes Reference](/developer-docs/integration/reference/error-codes)
>
> Troubleshoot HTTP and JavaScript errors from Mention Me tags.
# Testing Your Integration
Source: https://docs.mention-me.com/developer-docs/integration/setup/testing
How to test Mention Me tags before going live, including debug mode and environment setup
## Using the Demo Environment
Always use the URL `tag-demo.mention-me.com` in your tags when developing and testing. The demo server is a production-like version of Mention Me set up with your account and test campaigns that display when you make tag requests.
You can send the demo system test or mocked customer data without the risk of real coupons being given out or cash/rewards changing hands. We can give you access to the client dashboard on the demo server at your request so you can review the state of the integration.
> [!TIP]
>
> Use your browser's Network or Console tabs (filter to `mention-me.com`) to see exactly how the tag is being called and diagnose any issues.
The offers and forms can be disabled at any time from the Mention Me platform without requiring any development work. You can go live with the integration tags before any campaign is designed to start - campaigns can start, change and finish without any further development involvement.
## Debug Mode
Debug mode is a setting on the [Debug Dashboard](/knowledge/tags/debug-dashboard) that switches it from its default near-real-time view to instant, real-time monitoring of incoming tag data. It's especially useful when testing on your live site: without it enabled, live tag requests can return a `403 Forbidden` response before your integration has been approved to go live.
**1. Enable debug mode**
In the Mention Me platform, go to **Settings & Tools > Tools > Debug Dashboard**, then click **Enable debug mode**. See [Debug Dashboard](/knowledge/tags/debug-dashboard) for more detail on what the dashboard shows you.
**2. Inspect tag events**
Check all tag firing events using the browser's Network or Console tabs. These will show you exactly how each tag is being called and allow you to diagnose any issues.
**3. Verify tag content**
The following content should be served for each tag:
* **Referrer tag**: If integrated correctly, content should be served on the order confirmation and landing page.
* **Referee tag**: The "Been referred by a friend?" link should be injected on the page. When clicked, content should be served.
## Publishing to Live
After you've implemented and tested the tags, you can publish them to your live site.
> [!NOTE]
>
> Make sure to switch from `tag-demo.mention-me.com` to the live URL `tag.mention-me.com` when you deploy your integration.
You can publish the tags at any time on your live site - content will only show when the integration is approved by us.
## Step-by-Step Testing Guides
For detailed walkthrough instructions on testing each tag type in both Demo and Live environments:
> [card] [Post-Purchase Tag](/knowledge/onboarding/testing/postpurchase-tag)
>
> Test the referrer tag on order confirmation.
> [card] [Referee Tag](/knowledge/onboarding/testing/referee-tag)
>
> Test the referee tag in checkout.
> [card] [Dashboard Tag](/knowledge/onboarding/testing/dashboard-tag)
>
> Test the dashboard tag in the account area.
## Browser Support
Mention Me supports the following browsers and environments:
> [accordion] Windows (7, 8, 8.1, 10)
>
> * Internet Explorer: 11+
> * Edge: 14+
> * Chrome: Last two versions
> * Firefox: Last two versions
> [accordion] Mac (10.9+ / Mavericks and above)
>
> * Safari: 9+
> * Chrome: Last two versions
> * Firefox: Last two versions
> [accordion] iOS (10.3+)
>
> * Chrome: Last two versions
> * Safari: 9+
> [accordion] Android (v5+ / Lollipop and above)
>
> * Chrome: Last two versions
> * Firefox: Last two versions
> * Android Browser: Last two versions
### TLS Protocols
In line with security best practices, we use secure encryption protocols. Browsers that do not support the following cipher suites will be unable to view our pages:
* TLS v1.2
# SFTP Connection
Source: https://docs.mention-me.com/developer-docs/integration/sftp-connection
How to connect to the Mention Me SFTP server, including authentication, folder structure, and file format requirements
## Overview
Mention Me provides an SFTP server for exchanging data files. This page describes how to connect, the folder structure, and requirements for data transfer.
> [!NOTE]
>
> To set up SFTP, follow the [SFTP Setup](/knowledge/integrations/data-feeds/sftp-setup) guide.
## Authentication
To connect to the Mention Me SFTP server, you need:
1. **One or more SSH public keys** - provided via the [Mention Me platform](https://mention-me.com/merchant/~/sftp/)
2. **One or more IP address ranges** - must be well-defined and restricted; broad cloud provider ranges (e.g. AWS) cannot be whitelisted
## Connection Details
| Setting | Value |
| - | - |
| **Host** | `sftp.mention-me.com` |
| **Username** | Your client account slug (visible in the platform) |
| **Authentication** | SSH key |
Example connection command (Linux/Mac):
```bash theme={null}
sftp -i /path/to/private.key your-account-slug@sftp.mention-me.com
```
You must connect from an IP address range that has been authorised for your account.
## Folder Structure
> [!NOTE]
>
> To see your SFTP folder structure, [**sign in**](https://app.mention-me.com/sign-in).
> [!NOTE]
>
> Test or non-production data must always be placed within the `demo` tree. Production data must only be placed within the `prod` tree. Placing test data in `prod` (or vice versa) may result in unexpected behaviour such as customers being emailed or additional commission fees being charged.
Data to be received by Mention Me, or data extracted by Mention Me for you, must be placed within the `data` subfolder for the relevant data format.
## Data Retention
Files uploaded to the SFTP server are retained for **7 days** before being purged. Pick them up (or replace them) within that window.
## Optional File Encryption
Files transferred via SFTP can be encrypted with PGP in both directions - files you send to Mention Me, and files Mention Me delivers to you. You generate and manage your own dedicated keys yourself from the [Encryption keys tab on the SFTP page](https://mention-me.com/merchant/~/sftp/encryption-keys).
For full details, see [SFTP File Encryption](/developer-docs/integration/sftp-encryption).
## Ingest File Format
Mention Me is strict about the format of data that can be ingested. See [SFTP Data Formats](/developer-docs/integration/sftp-data-formats) for full documentation on accepted file formats.
## Export File Format
Discuss with your Client Success Manager which data feeds you'd like to receive from Mention Me and we can provide example files.
# SFTP Data Formats
Source: https://docs.mention-me.com/developer-docs/integration/sftp-data-formats
Accepted CSV file formats for sending data to Mention Me via SFTP, including order feeds, customer registrations, and coupon redemption
## Overview
This page describes the different types of data that can be sent to Mention Me via SFTP. All data must be in structured CSV format.
> [!NOTE]
>
> For connection details and folder structure, see [SFTP Connection](/developer-docs/integration/sftp-connection).
> [!WARNING]
>
> Column names are **case sensitive** and use PascalCase. Columns whose names do not match the expected values exactly will be ignored on import. The `type` values are also fixed strings: they must match exactly or the row will be rejected.
Columns may be supplied in any order, so `CustomerFirstname,CustomerSurname` is equivalent to `CustomerSurname,CustomerFirstname`.
## Data Types
Mention Me accepts several types of inbound data via SFTP. The `type` column on each row selects which feed the row belongs to.
> [accordion] Order / Transaction Data (type: order)
>
> Used to send order or transaction data for conversion tracking. Each row represents a single order. This is commonly used for orders that cannot be captured by the JavaScript tag, such as orders placed over the phone or in a customer support application.
>
> **Required fields:**
>
> **type** `string` *required*
>
> Must be `order`. Example: `order`
>
> **CustomerEmail** `string` *required*
>
> The customer's email address. Example: `customer@example.com`
>
> **OrderId** `string` *required*
>
> Unique order identifier. Example: `ORD-12345`
>
> **OrderDate** `string` *required*
>
> Date and time of the order (ISO 8601). Example: `2024-01-15T10:30:00Z`
>
> **OrderTotal** `string` *required*
>
> Order total excluding VAT/taxes and delivery. Example: `49.99`
>
> **OrderCurrency** `string` *required*
>
> ISO 4217 currency code. Example: `GBP`
>
> **Recommended fields (improve referral performance):**
>
> **MerchantCouponCode** `string`
>
> The coupon code used by the customer (if any). Example: `REF-ABC123`
>
> **IsSubscription** `string`
>
> Whether this order is for a subscription (recurring). Helps us qualify and categorise the revenue. Example: `false`
>
> **IsFirstOrderInSubscription** `string`
>
> Whether this is the customer's first order initiating a subscription. Example: `false`
>
> **IsGift** `string`
>
> Whether this order is a gift (bought for someone else). Gifts can be signals of advocacy. Example: `false`
>
> **DiscountAmount** `string`
>
> The discount amount, assumed already deducted from the order total. Lets us calculate cost per acquisition. Example: `18.45`
>
> **OrderItemCount** `string`
>
> The number of items in the order. Helps us understand the type of purchase. Example: `3`
>
> **CustomerAddressLine1** `string`
>
> First line of the customer's address. Example: `1-45 Durham Street`
>
> **CustomerAddressLine2** `string`
>
> Second line of the customer's address. Example: `VG01`
>
> **CustomerAddressCity** `string`
>
> City of the customer's address. Example: `London`
>
> **CustomerAddressCounty** `string`
>
> County or state of the customer's address. Example: `London`
>
> **CustomerAddressPostcode** `string`
>
> Postcode or zip code of the customer's address. Example: `SE11 5JH`
>
> **CustomerAddressCountry** `string`
>
> Country of the customer's address. Example: `United Kingdom`
>
> **Optional fields:**
>
> **CustomerId** `string`
>
> Your internal customer identifier. Example: `CUST-789`
>
> **CustomerFirstname** `string`
>
> Customer's first name. Example: `Alice`
>
> **CustomerSurname** `string`
>
> Customer's last name. Example: `Liddell`
>
> **Segment** `string`
>
> The segment this customer is in. Example: `VIPs`
>
> **Locale** `string`
>
> Locale code. Example: `en_GB`
>
> **MerchantCustomField** `string`
>
> Extra custom data used to qualify or segment the order. Example: `NewCustomer|AccountID#1234`
>
> > [!NOTE]
> >
> > For ongoing subscription order data where you prefer not to send any PII, `CustomerEmail` can be replaced with `CustomerHashedEmail`. This requires that you follow the hashing instructions in the [Hashing historical customer emails](https://help.mention-me.com/hc/en-gb/articles/12351227476381-Hashing-historical-customer-emails) guide. When `CustomerHashedEmail` is used, no referees or referrers will be rewarded.
> [accordion] Customer Registrations (type: register / register-silently)
>
> Used to enrol customers into the referral programme, for example customers who have confirmed they wish to take part. The `type` value determines whether a confirmation email is sent: use `register` to send a welcome email, or `register-silently` to register the customer without contacting them.
>
> > [!WARNING]
> >
> > For GDPR compliance, only use this feed if you are certain you have the right to share this data, for example where customers have been told their data is shared for the purpose of running a referral programme. `register-silently` is preferred over `register` unless you have specific consent to send the customer referral emails.
>
> **Required fields:**
>
> **type** `string` *required*
>
> `register` or `register-silently`. Example: `register`
>
> **CustomerEmail** `string` *required*
>
> The customer's email address. Example: `customer@example.com`
>
> **CustomerFirstname** `string` *required*
>
> Customer's first name. Example: `Jane`
>
> **CustomerSurname** `string` *required*
>
> Customer's last name. Example: `Smith`
>
> **Optional fields:**
>
> **CustomerId** `string`
>
> Your internal customer identifier. Example: `CUST-789`
>
> **Locale** `string`
>
> The locale of the referral campaign the customer should be enrolled into. Example: `fr_CA`
>
> **Segment** `string`
>
> The segment this customer is in. Example: `VIPs`
>
> **OrderId** `string`
>
> Associated order. Example: `ORD-12345`
>
> **OrderDate** `string`
>
> Order date. Example: `2024-01-15T10:30:00Z`
>
> **OrderTotal** `string`
>
> Order total. Example: `49.99`
>
> **OrderCurrency** `string`
>
> Currency. Example: `GBP`
>
> **MerchantCouponCode** `string`
>
> Voucher used. Example: `REF-ABC123`
> [accordion] Cancelled Referees (type: referee-cancelled)
>
> Used to notify Mention Me that a new customer has cancelled their order, so any pending referrer reward can be withheld.
>
> **Required fields:**
>
> **type** `string` *required*
>
> Must be `referee-cancelled`. Example: `referee-cancelled`
>
> **CustomerEmail** `string` *required*
>
> Email address of the customer who cancelled their order. Example: `customer@example.com`
>
> **Optional fields:**
>
> **OrderId** `string`
>
> The cancelled order ID. Example: `ORD-12345`
>
> **Example:**
>
> ```csv theme={null}
> type,CustomerEmail
> referee-cancelled,alice.bloggs@example.com
> referee-cancelled,joe.bloggs@example.com
> ```
> [accordion] Eligible Referees (type: referee-eligible)
>
> In many cases the eligibility of a customer to earn a reward depends on more than just making a purchase. For example, the customer may have to keep a subscription for more than 30 days or pass an external fraud check.
>
> The eligibility feed lets you tell Mention Me about each customer who may have met the criteria to be rewarded. It is important that **all** potentially eligible customers are provided, as only Mention Me knows whether they are due a reward.
>
> **Required fields:**
>
> **type** `string` *required*
>
> Must be `referee-eligible`. Example: `referee-eligible`
>
> Plus **one** of the following identifiers for the customer:
>
> **CustomerEmail** `string`
>
> Email address of the potentially eligible customer. Example: `customer@example.com`
>
> **CustomerId** `string`
>
> Your internal ID of the potentially eligible customer. Example: `123456-example`
>
> **OrderId** `string`
>
> The order ID placed by the potentially eligible customer. Example: `O123X4`
>
> **Examples:**
>
> By Customer Email:
>
> ```csv theme={null}
> type,CustomerEmail
> referee-eligible,alice.bloggs@example.com
> referee-eligible,joe.bloggs@example.com
> ```
>
> By Customer ID:
>
> ```csv theme={null}
> type,CustomerId
> referee-eligible,123alice
> referee-eligible,345joe
> ```
>
> By Order ID:
>
> ```csv theme={null}
> type,OrderId
> referee-eligible,O123X4
> referee-eligible,O123C5
> ```
> [accordion] Coupon Redemption (type: coupon-redemption)
>
> Used to confirm referral purchases completed in store via a coupon. Referral can drive customers into your stores to make their first purchase: the referral happens before the purchase and the referee is given a single-use voucher to use in store. This feed sends back confirmation that the code was used and the details of the purchase. Because you may not have the customer's email address, the feed only requires the coupon code plus the transaction details.
>
> If you have collected the customer's email address you may include it, and we will record both the original referee email and the one used to confirm the purchase.
>
> **Required fields:**
>
> **type** `string` *required*
>
> Must be `coupon-redemption`. Example: `coupon-redemption`
>
> **MerchantCouponCode** `string` *required*
>
> The coupon code used by the customer in the transaction. Example: `REF-ABC123`
>
> **OrderId** `string` *required*
>
> Unique order or transaction identifier. Example: `TXN-789`
>
> **OrderDate** `string` *required*
>
> Date and time of the order (ISO 8601). Example: `2024-01-15T10:30:00Z`
>
> **OrderTotal** `string` *required*
>
> Transaction value excluding VAT/taxes and delivery. Example: `75.00`
>
> **OrderCurrency** `string` *required*
>
> ISO 4217 currency code. Example: `GBP`
>
> **Recommended fields (improve referral performance):**
>
> **IsSubscription** `string`
>
> Whether this order is for a subscription (recurring). Example: `false`
>
> **IsFirstOrderInSubscription** `string`
>
> Whether this is the customer's first order initiating a subscription. Example: `false`
>
> **IsGift** `string`
>
> Whether this order is a gift. Example: `false`
>
> **DiscountAmount** `string`
>
> The discount amount, assumed already deducted from the order total. Example: `18.45`
>
> **OrderItemCount** `string`
>
> The number of items in the order. Example: `3`
>
> **Optional fields:**
>
> **CustomerId** `string`
>
> Your internal customer identifier. Example: `CUST-789`
>
> **CustomerEmail** `string`
>
> The customer's email address, if collected. Example: `customer@example.com`
>
> **Segment** `string`
>
> The segment this customer is in. Example: `VIPs`
>
> **Example:**
>
> ```csv theme={null}
> type,MerchantCouponCode,OrderId,OrderDate,OrderTotal,OrderCurrency
> coupon-redemption,PM012422452,INV100032313,2024-01-15T10:30:00Z,17.99,GBP
> coupon-redemption,INSTORE-ABJ124152,INV100032314,2024-01-16T11:00:00Z,44.05,GBP
> ```
> [accordion] Customer Details Changed (type: customer-details-changed)
>
> Used to notify Mention Me of customer account changes, for example a name or email address update, so the customer's referral history is preserved against their new details. This is most common in subscription businesses such as the energy sector.
>
> **Required fields:**
>
> **type** `string` *required*
>
> Must be `customer-details-changed`. Example: `customer-details-changed`
>
> **CustomerEmail** `string` *required*
>
> The current email address of the customer as Mention Me currently knows it. Example: `old@example.com`
>
> Plus **at least one** of the following fields, holding the new value:
>
> **NewCustomerEmail** `string`
>
> The new email address of the customer. Example: `new@example.com`
>
> **CustomerId** `string`
>
> The internal ID Mention Me should use for this customer from now on. Example: `AW79302`
>
> **CustomerFirstname** `string`
>
> The first name Mention Me should use from now on. Example: `Alice`
>
> **CustomerSurname** `string`
>
> The surname Mention Me should use from now on. Example: `Wonderland`
>
> **Example:**
>
> The first row below changes Alice's surname and email address. The second changes only Joe's first name.
>
> ```csv theme={null}
> type,CustomerEmail,NewCustomerEmail,CustomerFirstname,CustomerSurname
> customer-details-changed,alice.liddell@example.com,alice.wonderland@example.com,Alice,Wonderland
> customer-details-changed,joe.bloggs@example.com,,Joseph,
> ```
> [accordion] Lapsed Customers (type: customer-lapsed)
>
> > [!NOTE]
> >
> > Relevant for subscription businesses only.
>
> Used to inform Mention Me that a customer has stopped paying for a service or subscription. This supports models where a lapsed customer can be given a referral offer if they are referred and return as a paying customer after a period of time.
>
> **Required fields:**
>
> **type** `string` *required*
>
> Must be `customer-lapsed`. Example: `customer-lapsed`
>
> **CustomerEmail** `string` *required*
>
> Email address of the customer who has lapsed. Example: `customer@example.com`
>
> **Example:**
>
> ```csv theme={null}
> type,CustomerEmail
> customer-lapsed,alice.bloggs@example.com
> customer-lapsed,joe.bloggs@example.com
> ```
> [accordion] Incentivised Actions (type: incentivised-action)
>
> Used to record when a customer has completed a non-order action that should trigger a reward or progress in your referral programme, for example signing up for a newsletter, leaving a review, or registering an account.
>
> **Required fields:**
>
> **type** `string` *required*
>
> Must be `incentivised-action`. Example: `incentivised-action`
>
> **CustomerEmail** `string` *required*
>
> Email address of the customer who completed the action. Example: `customer@example.com`
>
> **ActionId** `string` *required*
>
> The identifier, provided by Mention Me, that identifies the action performed. Example: `i5d88c29eb14e7`
>
> **Example:**
>
> The following example shows `alice.liddell@example.com` completing action `i5d88c29eb14e7`, which corresponds to an action defined inside Mention Me (for example, completing a review).
>
> ```csv theme={null}
> type,CustomerEmail,ActionId
> incentivised-action,alice.liddell@example.com,i5d88c29eb14e7
> ```
> [accordion] Purge (type: purge)
>
> Used to permanently remove all records of a specific customer, including all Personally Identifiable Information. This can be used to satisfy a data-subject erasure request.
>
> > [!WARNING]
> >
> > This action is irreversible.
>
> **Required fields:**
>
> **type** `string` *required*
>
> Must be `purge`. Example: `purge`
>
> **CustomerEmail** `string` *required*
>
> Email address of the customer to purge. Example: `customer@example.com`
>
> **Example:**
>
> ```csv theme={null}
> type,CustomerEmail
> purge,alice.bloggs@example.com
> purge,joe.bloggs@example.com
> ```
## File Format Requirements
* **Format**: CSV with headers
* **Encoding**: UTF-8
* **Delimiter**: Comma (`,`)
* **Line endings**: Unix (`\n`) or Windows (`\r\n`)
* **Quoting**: Fields containing commas, quotes, or newlines must be double-quoted
* **Column names**: PascalCase, case sensitive. Mis-named columns are silently ignored on import
* **Column order**: Columns may be supplied in any order
* **Mixed feeds**: A single file may contain rows with different `type` values; each row is processed according to its `type`
## File Naming
Any filename can be used, but each file must be unique. We recommend including a date in the filename, for example `Orders-20240115.csv`.
## Errors and Malformed Data
Malformed or incorrect data is handled as follows.
**Missing columns or column headers**
* A file missing a column header will not be processed.
* A file missing a mandatory column, or with the column incorrectly named, will be ignored.
* A file missing an optional column, or with an optional column incorrectly named, will be processed as if the optional column was not present.
**Missing or malformed rows**
Each row is treated as a separate entity, so errors in one row do not affect another. A malformed row (for example, an empty row, or a row with an email address that has no `@` symbol) will be ignored, and the remainder of the file will be processed as normal.
## Need Help?
Start a conversation with the in-platform Support widget in the bottom-right corner of your dashboard - it can usually answer this straight away. If it can't, raise a request via the [request form](https://help.mention-me.com/hc/en-gb/requests/new?ticket_form_id=8840645829405).

The in-platform Support widget starting an AI-assisted conversation.
# SFTP File Encryption
Source: https://docs.mention-me.com/developer-docs/integration/sftp-encryption
How to use PGP encryption for SFTP batch files, including self-serve key management, inbound and outbound encryption, key rotation, and strict mode
## Overview
Mention Me supports OpenPGP encryption for files transferred via SFTP, in both directions:
* **Inbound** (you to Mention Me) - you encrypt files with a public key before uploading them, and Mention Me decrypts them on receipt.
* **Outbound** (Mention Me to you) - Mention Me encrypts reports and data feeds with your public key before delivering them to your SFTP folder.
Inbound files are encrypted with dedicated PGP keys specific to your account, which you generate and manage yourself in the platform. Dedicated keys support per-folder scoping and key rotation.
> [!NOTE]
>
> Encryption is optional and set per folder. You mark a folder as encrypted when you add it on the [SFTP page](https://mention-me.com/merchant/~/sftp/), and manage dedicated keys yourself from the [Encryption keys tab on the SFTP page](https://mention-me.com/merchant/~/sftp/encryption-keys). Contact the Support Team using the [Help form](https://help.mention-me.com/hc/en-gb/requests/new?ticket_form_id=8840645829405) if you would like help setting it up.
## Managing your keys in the platform
Dedicated keys are managed from the [Encryption keys tab on the SFTP page](https://mention-me.com/merchant/~/sftp/encryption-keys). Keys are split into an **Inbound keys** table and an **Outbound keys** table, with one row per scope (a folder, or **Default (all folders)**). Each row shows:
* **Public key** - a **Copy key** button for the scope's current public key.
* **Status** - **Active**, **Grace period** with its end date while an inbound rotation is running, or **No active key**.
* **Created** - when the current key was created, and by whom.
The fingerprint is not shown in the table. Use **Copy fingerprint** in the row's menu to copy it.

The Inbound keys table, with one folder-scoped key active and the default key inside a rotation grace period.
Each row's **...** menu holds that scope's actions: **Rotate key**, **View key history** and **Copy fingerprint**, plus **End grace period early** while a grace period is running.

The actions available on a key's row.
Keys can be set at two levels:
* A **default key** covers every inbound (or outbound) folder that does not have its own key.
* A **dedicated key** applies to a single folder, so different data feeds can use different keys.
A folder's own key is always used before the default key.
> [!NOTE]
>
> It works the other way round from what you might expect: a folder has to be marked as encrypted *before* it can be given a key. Only encrypted folders that do not have a key yet appear in the folder picker when you generate or import one. Mark the folder as encrypted first (see [SFTP Setup](/knowledge/integrations/data-feeds/sftp-setup#add-your-folders)), then give it a key.
### Generate an inbound key
For files you send to Mention Me, generate a dedicated inbound key:
**1. Open Generate inbound key**
In the **Inbound keys** section, click **Generate inbound key**.

The Inbound keys section, before any keys have been generated.
**2. Choose the key's scope**
Turn on **Set as your default key** to cover every inbound folder without its own key, or leave it off and choose a folder. Then click **Generate key**. Mention Me generates a 4096-bit key pair, which can take up to 30 seconds, so keep the window open.

Generating a default inbound key.
**3. Copy or download the public key**
Once the key is generated, click **Copy key to clipboard**, or **Download public key** to save it as an `.asc` file.

The generated key, ready to copy or download.
You can copy the public key again at any time with **Copy key** on the scope's row. Use **Copy fingerprint** in the row's menu if you need the fingerprint.
The private key is held securely by Mention Me and is never displayed or downloadable. Encrypt your uploads with the public key shown here (see [Inbound encryption](#inbound-encryption-you-to-mention-me)).
### Import an outbound key
For files Mention Me sends to you, import your own public key:
**1. Open Import outbound key**
In the **Outbound keys** section, click **Import outbound key**.

The Outbound keys section, before any keys have been imported.
**2. Choose the key's scope**
Turn on **Set as your default key** to cover every outbound folder without its own key, or leave it off and choose a folder.
**3. Paste your public key**
Paste your ASCII-armoured **public key** and click **Import key**. Only the public key is accepted. If you don't have a key pair yet, see [Generating a PGP key pair](#generating-a-pgp-key-pair).
Mention Me validates the key, then encrypts your outbound files with it so you can decrypt them with your private key.
Only ever share your public key. Never send anyone your private key.
> [!NOTE]
>
> Generate and import only create a scope's first key. Once your default key is set and every encrypted folder has its own key, **Generate inbound key** or **Import outbound key** is greyed out. Use **Rotate key** on the row to replace an existing key, or mark another folder as encrypted to add a key for it.

The Outbound keys table. Outbound keys never show a grace period, because delivery always uses the newest key.
### Key history
Every key a scope has ever had is kept. Use **View key history** on the scope's row to see them, newest first, with the status of each: **Active** for the live key, **Active until \[date]** for one inside a grace period, and **Expired \[date]** or **Inactive** for a retired one. Each key also shows when it was created and last modified.
Keys are never deleted, so the history stays a complete record of which key was valid when.

Key history for a folder-scoped key, showing the live key above two retired ones.
## Inbound encryption (you to Mention Me)
When you upload files to Mention Me via SFTP, you can encrypt them with PGP first. Mention Me decrypts them automatically on receipt.
[Generate an inbound key](#generate-an-inbound-key) for the folder from the Encryption keys tab, then encrypt your files with the public key shown when you generated it.
### Encrypting a file before you upload it
You encrypt files on your own systems, before uploading them, with any OpenPGP tool. These steps use [GnuPG](https://gnupg.org/) (`gpg`) on the command line.
**1. Import the public key (one-time setup)**
Import the public key you downloaded when you generated it. The file is named `mm-inbound-public-key-.asc`.
```bash theme={null}
gpg --import mm-inbound-public-key-.asc
```
**2. Encrypt each file**
Encrypt the file to that key, using its fingerprint as the recipient. Use **Copy fingerprint** in the scope's row menu to get it.
```bash theme={null}
gpg --encrypt --armor --recipient Orders-20260715.csv
```
This creates `Orders-20260715.csv.asc` next to the original file.
**3. Upload the encrypted file**
Upload `Orders-20260715.csv.asc` to the folder's `data/` directory via SFTP. Don't upload the original `.csv`, because an encrypted folder rejects unencrypted files (see [Strict mode](#strict-mode)).
If you rotate the key, import the new public key and encrypt to its fingerprint instead.
### Strict mode
When a folder is marked as encrypted, plaintext (unencrypted) files uploaded to it are **rejected** rather than processed. If a file is rejected:
* The file is not ingested.
* A rejection notice is written to the folder's `log/` directory, alongside the `data/` directory you upload to (see [Folder Structure](/developer-docs/integration/sftp-connection#folder-structure)).
* The rejection is final for that file, and it is not retried. Encrypt the file and re-upload it under a **new filename**, because the pipeline treats each filename as processed once.
## Outbound encryption (Mention Me to you)
When outbound encryption is enabled for a folder, Mention Me encrypts reports and data feeds with your public key before delivering them.
1. [Import your outbound key](#import-an-outbound-key) for the folder from the Encryption keys tab.
2. Once imported, all outbound files for that folder are encrypted automatically.
3. Files are ASCII-armoured, with an encryption extension appended to the filename. For example, a report normally delivered as `Fulfilment_20260715.csv` is delivered as `Fulfilment_20260715.csv.asc`.
4. Decrypt the file with your private key.
```bash theme={null}
gpg --decrypt Fulfilment_20260715.csv.asc > Fulfilment_20260715.csv
```
The default extension is `.asc`. If your tooling requires `.pgp` or `.gpg` instead, ask the Support Team to configure it. The file content is always ASCII-armoured regardless of the extension.
> [!NOTE]
>
> If a folder is encrypted but has no active outbound key, files are held rather than sent in plaintext, so encrypted folders never expose unencrypted data. Mention Me is alerted and delivery resumes once a key is in place. If an expected file does not arrive, [contact the Support Team](https://help.mention-me.com/hc/en-gb/requests/new?ticket_form_id=8840645829405).
## Rotating keys
Keys are rotated from the Encryption keys tab using the **Rotate key** action on a key's row. Generate and import only create a scope's first key; after that, use Rotate key to replace it.
### Inbound rotation
Rotating generates a new key pair and asks whether to keep the current key active as a **grace key**, so files encrypted with either the old or the new public key are accepted during the changeover.
Under **Keep the current key active during a grace period?**, choose one of:
* **No, replace it immediately.** All current keys stop being accepted at once. Any file still encrypted with an old key fails to decrypt.
* **Yes, for 7, 14, 30, 60 or 90 days.** The current key stays active alongside the new one for that period. Mention Me decrypts with the latest active key, falling back to the previous one, so files still encrypted with the old key are decrypted successfully.
> [!NOTE]
>
> Grace periods expire on their own. While one is running, the scope's row shows **Grace period** with its end date, and key history shows the outgoing key as **Active until \[date]**. On that date the old key retires itself, with nothing for you to do.
To deactivate the previous key before the grace period ends, select the **End grace period early** action on its row. The older key stops being accepted straight away, and any file still encrypted with it stops decrypting immediately, including files already waiting to be processed. Only end early once your cutover is complete.
An inbound scope holds at most two active keys. Rotating a scope that already has two retires all but the newest, and the newest then carries the grace period you chose.

Choosing a grace period when rotating an inbound key. The dialog confirms the date the old key retires.
### Outbound rotation
Rotating imports a new public key, and Mention Me encrypts new files with it straight away. There is **no grace period** for outbound keys, because Mention Me always encrypts with the newest key: the new key takes over immediately and previous keys stop being used. Keep your old private key until you have decrypted any files already delivered. Your chosen file extension carries over.

Rotating an outbound key. You supply the new public key, and delivery switches to it immediately.
## Generating a PGP key pair
To import an outbound key, you first need your own PGP key pair. We recommend RSA-4096. Example using GPG:
```bash theme={null}
gpg --full-generate-key
# Select: (1) RSA and RSA
# Key size: 4096
# Expiry: set according to your security policy
# Enter your details when prompted
# Export the public key to import into Mention Me
gpg --armor --export your-email@example.com > my-public-key.asc
```
Import `my-public-key.asc` via [Import outbound key](#import-an-outbound-key). Keep the private key safe and never share it.
## Need help?
Contact the Support Team using the [Help form](https://help.mention-me.com/hc/en-gb/requests/new?ticket_form_id=8840645829405).
# Mention Me MCP Server
Source: https://docs.mention-me.com/developer-docs/mcp/setup
Connect your AI assistant to real-time Mention Me reporting data via the Model Context Protocol (MCP).
Connect your AI assistant to real-time Mention Me reporting data. Query referral programme metrics, generate reports, and surface insights directly from your AI tool of choice.
## Server URL
Use the following URL when adding the server to your AI client:
```
https://mcp.mention-me.com
```
## Authentication
> [!NOTE]
>
> On first connect, your AI client opens a browser sign-in with your Mention Me account. No API keys or tokens are needed.
## Connect Your AI Client
Select your AI client below for step-by-step instructions.
> [accordion] Claude Desktop
>
> 1. Open Claude Desktop
> 2. Click **Customise**
> 3. Go to **Connectors**
> 4. Click **Add custom connector**
> 5. Set the name to **Mention Me**
> 6. Paste the URL: `https://mcp.mention-me.com`
> [accordion] ChatGPT
>
> 1. Open the ChatGPT desktop app
>
> 2. Go to **Settings > Plugins**
>
> 3. Click **Browse directory**
>
> 4. Click **Add** in the top right, then **Add custom MCP**
>
> 5. Set the name to **Mention Me**
>
> 6. Paste the URL: `https://mcp.mention-me.com`
>
> 7. Set authentication to **OAuth**
>
> 8. Sign in with your Mention Me account when ChatGPT asks
>
> > [!NOTE]
> >
> > Custom MCP servers are not available on every ChatGPT plan. On a Business or Enterprise workspace, an admin may need to turn them on first.
> [accordion] Claude Code
>
> Run the following command in your terminal:
>
> ```bash theme={null}
> claude mcp add --transport http mention-me https://mcp.mention-me.com
> ```
>
> Then run `/mcp` once you've opened a Claude Code session to go through the authentication flow.
> [accordion] Cursor
>
> 1. Open **Cursor Settings > MCP**
> 2. Click "Add new global MCP server"
> 3. Paste the following configuration:
>
> ```json theme={null}
> {
> "mcpServers": {
> "mention-me": {
> "url": "https://mcp.mention-me.com"
> }
> }
> }
> ```
> [accordion] Visual Studio Code
>
> 1. Open the Command Palette and search for "MCP: Add Server"
> 2. Choose "HTTP" as the server type
> 3. Paste the server URL: `https://mcp.mention-me.com`
>
> Or add it manually to `.vscode/mcp.json`:
>
> ```json theme={null}
> {
> "servers": {
> "mention-me": {
> "type": "http",
> "url": "https://mcp.mention-me.com"
> }
> }
> }
> ```
> [accordion] Windsurf
>
> Add the following to your Windsurf MCP configuration file at `~/.codeium/windsurf/mcp_config.json`:
>
> ```json theme={null}
> {
> "mcpServers": {
> "mention-me": {
> "url": "https://mcp.mention-me.com"
> }
> }
> }
> ```
> [accordion] Codex
>
> The setup is the same whether you use the IDE extension or the CLI, since they share configuration.
>
> Run the following command in your terminal:
>
> ```bash theme={null}
> codex mcp add mention-me --url https://mcp.mention-me.com
> ```
>
> This will automatically prompt you to sign in with your Mention Me account.
>
> If this is the first time you are using an MCP server in Codex, you will need to enable the rmcp feature. Add the following to your `~/.codex/config.toml`:
>
> ```toml theme={null}
> [features]
> experimental_use_rmcp_client = true
> ```
>
> Or configure manually via `~/.codex/config.toml`:
>
> ```toml theme={null}
> [features]
> experimental_use_rmcp_client = true
>
> [mcp_servers.mention-me]
> url = "https://mcp.mention-me.com"
> ```
>
> Then run `codex mcp login mention-me` to authenticate.
> [accordion] Other clients
>
> Hundreds of AI tools now support MCP servers. You can configure them with the following settings:
>
> ```
> Command: npx
> Arguments: -y mcp-remote https://mcp.mention-me.com
> Environment: None
> ```
## Enhance with the Agent Skill
The MCP server gives your AI assistant the tools - the companion skill teaches it how to use them well: picking the right metric, resolving merchants, and building date comparisons correctly. We recommend installing it alongside the server.
> [card] [Download mention-me-reporting.skill](https://mcp.mention-me.com/mention-me-reporting.skill)
>
> Follows the open [Agent Skills](https://agentskills.io) format, supported by most AI clients.
> [accordion] Claude & Claude Desktop
>
> 1. Download the [skill file](https://mcp.mention-me.com/mention-me-reporting.skill)
>
> 2. Go to **Settings > Capabilities > Skills**
>
> 3. Click **Upload skill** and select the downloaded file
>
> > [!TIP]
> >
> > Skills are installed per user. On Claude for Work, an admin can enable the skill for the whole workspace.
> [accordion] Claude Code
>
> Run the following command in your terminal:
>
> ```bash theme={null}
> curl -fsSL https://mcp.mention-me.com/mention-me-reporting.skill -o /tmp/mention-me-reporting.skill \
> && unzip -o /tmp/mention-me-reporting.skill -d ~/.claude/skills
> ```
>
> To share the skill with your team via version control, extract it into `.claude/skills/` in your repository instead.
> [accordion] Codex, Cursor, Copilot & other agents
>
> Most agents - including Codex, Cursor, GitHub Copilot, Windsurf, Amp, and Goose - scan the shared `~/.agents/skills` directory:
>
> ```bash theme={null}
> curl -fsSL https://mcp.mention-me.com/mention-me-reporting.skill -o /tmp/mention-me-reporting.skill \
> && unzip -o /tmp/mention-me-reporting.skill -d ~/.agents/skills
> ```
>
> Gemini CLI uses `~/.gemini/skills` instead. Restart or reload your agent after installing.
## What You Can Do
Once connected, you can ask your AI assistant to:
* Fetch any referral programme metric, with optional date comparison
* Generate time-series reports broken down by day, week, or month
* Split metrics by dimension, such as campaign, market, or locale
* List the campaigns and organisations you have access to
### Available Tools
| Tool | Description |
| - | - |
| `fetch_metric` | Fetch a single metric value (e.g. total referrals this month) |
| `fetch_metric_series` | Fetch a metric as a time series (e.g. daily referrals over 30 days) |
| `fetch_metric_by_dimension` | Fetch a metric split by dimension (campaign, market, locale) |
| `fetch_metric_series_by_dimension` | Fetch a metric over time, split by dimension |
| `fetch_campaigns` | List campaigns with status, type, locale, dates, and triggering rules |
| `list_organizations` | List organisations the authenticated user can access |
The catalog of available metrics is exposed as the `mentionme://metrics` resource.
## Example Prompts
Try asking your AI assistant something like:
* "Show me a weekly breakdown of new Mention Me referrals over the last 3 months"
* "How many successful Mention Me referrals did we get last quarter?"
* "Compare our Mention Me conversion rate this year vs last year"
* "Give me a monthly trend of Mention Me referral revenue for the past 6 months"
## Where to Get Help
If you need help connecting or using the MCP server, contact our [support team](https://help.mention-me.com/hc/en-gb/requests/new).
# Browser, Email Client & Device Support
Source: https://docs.mention-me.com/knowledge/admin/browser-support
Supported browsers, email clients, devices, and TLS protocols for the Mention Me dashboard and end-user referral experience.
Mention Me supports a wide range of browsers and devices, and routinely tests the experience across them. The support matrix below applies to both the **Mention Me dashboard** (used by your team) and the **end-user referral experience** (seen by your customers).
## Recommended Browsers
For the best experience, use any of the following:
* Chrome (latest version)
* Firefox (latest version)
* Edge (latest version)
* Safari (latest version)
If you are using an outdated browser, you can upgrade it at [browsehappy.com](https://www.browsehappy.com/).
## Supported Browsers
The following browsers are supported across desktop and mobile:
| Browser | Minimum Supported Version |
| - | - |
| Chrome | Last 2 versions |
| Firefox | Last 2 versions |
| Safari | 15 and later |
| Microsoft Edge | 90 and later |
Other browsers and older versions may work, but functionality may not be optimal.
> [!NOTE]
>
> The **dashboard** is optimised for desktop use. While it can be accessed on mobile browsers, some admin features may have limited usability on smaller screens.
## Email Client Support
Mention Me supports all major web-based email providers, including Gmail, Yahoo, and Outlook, as well as most applications including mobile versions of Gmail, Outlook, and device-specific providers such as Apple Mail.
Old versions of Outlook that use the Microsoft Word rendering engine (Microsoft Outlook 2007-2019) are **not supported**. Usage of these clients is very low and they require disproportionate levels of support.
## TLS Protocols
In line with security best practices, Mention Me uses secure encryption protocols. Browsers or email clients that do not support the following will be unable to view Mention Me pages:
* TLS v1.2
* TLS v1.3
# Understanding the Customers Section
Source: https://docs.mention-me.com/knowledge/admin/customers-section
Overview of the Customers section in the Mention Me dashboard, including available actions and related guides.
The Customers section in your dashboard allows you or anyone on your team with the right access to perform a range of actions on individual customers.

The Customers section overview in the Mention Me dashboard.
## Available Actions
### Search for a Customer
From a customer's profile, you can:
* Enrol them into an offer
* Mark as suspected of gaming
* Turn emails off for them
* Confirm purchase
* Reissue a coupon code for a reward that has expired, been barred, or is fully used
* Purge them (GDPR deletion)
* Add a friend under their name
### View Customer Information
* **Basic info** - name, email, short link for their share links, customer type, date first seen in Mention Me, who introduced them and on which offer
* **Activity timeline** - dates and times of their interactions with any offers
* **Active offers** - current and expired offers being shared with the customer
* **Offer views** - how many times they have seen an offer
* **Rewards** - reward and voucher codes issued to them
* **Emails** - emails sent to them
* **Pending approvals** - any approval pending for them as referrer, referee, or to drive action
## Related Guides
### Customers
> [card] [Search, Add & Link Customers](/knowledge/referral/customers/search-add-link)
>
> Search for customers, manually add them to campaigns, and link referrers to referees.
> [card] [How to Check Referral Status](/knowledge/referral/customers/check-referral-status)
>
> Review a customer's referral activity timeline, confirm purchases, and handle reward or gaming approvals.
### Rewards
> [card] [Reward Fulfilment](/knowledge/referral/offers/fulfilment)
>
> How to manage reward fulfilment, including self-fulfilment, changing fulfilment methods, and managing email notifications.
> [card] [How to Resend a Reward Email](/knowledge/referral/customers/resend-reward-email)
>
> Resend a previously sent reward, registration, or reminder email to a customer from their profile.
### Reward Upload
> [card] [How to Upload Vouchers](/knowledge/referral/vouchers/upload-vouchers)
>
> Upload new voucher codes to a campaign reward.
> [card] [How to Assign Vouchers to Offers](/knowledge/referral/vouchers/assign-to-offers)
>
> Assign listed and non-listed voucher batches to campaign rewards.
> [card] [How to Extend Vouchers](/knowledge/referral/vouchers/extend-vouchers)
>
> Extend the validity period for existing referral campaign vouchers instead of uploading new codes.
### Gaming
> [card] [Approve or Decline Suspects](/knowledge/referral/gaming/approve-decline-suspects)
>
> Mark customers as suspected of gaming, and approve or decline referrals
> individually or in bulk.
### Data
> [card] [How to Purge Customer Data](/knowledge/referral/customers/purge-data)
>
> Permanently delete customer data individually, in bulk via CSV, or automatically via SFTP.
> [card] [How to Unsubscribe a Customer from Emails](/knowledge/referral/customers/unsubscribe)
>
> Stop all Mention Me referral-related emails for a customer, or re-enable them later.
### Copy
> [card] [How to Manage Your Referral Campaign Copy](/knowledge/referral/design/managing-copy)
>
> Edit your referral campaign copy, leave comments for the Mention Me team,
> and find and fix hardcoded placeholders.
### Account
> [card] [User Management](/knowledge/security/account/user-management)
>
> Add, unlock, and manage user accounts and permissions.
> [card] [Revoke User Access](/knowledge/security/account/revoke-access)
>
> Revoke or change user access to maintain data security.
# How to Disable Your Ad Blocker
Source: https://docs.mention-me.com/knowledge/admin/disable-ad-blocker
Steps to disable or whitelist your ad blocker so Mention Me referral features work correctly.
If you've accidentally blocked Mention Me with your ad blocker, it's a common issue and easy to fix. Because ad blockers vary by browser and provider, follow the general steps below or jump to instructions for your specific ad blocker.
## General Steps to Unblock Mention Me
**1. Locate the Ad Blocker Icon**
Look for the ad blocker icon in your browser's toolbar, usually at the top right. The icon might resemble a stop sign, a power button, or another blocking-related symbol.
**2. Access the Ad Blocker Menu**
Click the ad blocker icon to open its menu.
**3. Find the Disable Option**
Look for options such as "Pause," "Disable on this site," or similar. The exact wording depends on your specific ad blocker.
**4. Disable for the Current Site**
Select the option that disables blocking for the specific website you're on, allowing Mention Me to function without turning off the ad blocker entirely.
## Specific Instructions for Popular Ad Blockers
### Adblock Plus
Follow detailed instructions with screenshots here: [Adblock Plus Guide](https://help.adblockplus.org/hc/en-us/articles/1500002778481-Turn-ABP-on-off-manually)
### Ghostery
For managing trackers on a specific site, see: [Ghostery Guide](https://www.ghostery.com/faq#how-can-i-manage-trackers-while-on-a-site)
### NordVPN's Ad Blocker
Consult their guide here: [NordVPN Ad Blocker Guide](https://nordvpn.com/blog/how-to-turn-off-ad-blocker/)
If you continue to experience difficulties, please reach out to Mention Me support for further assistance.
# Checkout & Sidecart Referee Tag
Source: https://docs.mention-me.com/knowledge/shopify/additional-tags/checkout
Manually add the Mention Me Referee 'Been referred by a friend?' link to your Shopify cart, sidecart, or checkout.liquid.
The Referee Tag displays a **"Been referred by a friend?"** link, enabling customers to identify who referred them.
> [!TIP]
>
> The Referee experience can also be added to your Shopify Checkout using the [Checkout Extensibility App](/knowledge/shopify/app-installation) -- this requires **Shopify Plus**. This manual approach is for adding the tag to Cart, Basket, Side Cart, or `checkout.liquid` pages (and `checkout.liquid` itself is Shopify Plus only).
## Cart / Basket Page
Add a `
width="1" height="1" style="display:none" />
>
> ```
>
> ```html Live theme={null}
>
> width="1" height="1" style="display:none" />
>
> ```
>
> The pixel returns:
>
> * **HTTP 204** (No Content) if the request was processed successfully
> * **HTTP 404** (Not Found) if there is a problem with the parameters
>
> In neither case will it cause an error or anything visible on the page.
## Parameters
Both the JavaScript tag and the tracking pixel accept the same parameters.
### Mandatory
**email** `string` *required*
The customer's email address. Please URL encode. Example: `doreen@example.com`
**order_number** `string` *required*
The unique order identifier from your system. Has a maximum of 50 characters. Example: `ORD-12345`
**order_subtotal** `string` *required*
The order subtotal (excluding VAT/taxes and shipping) in the currency indicated by the `order_currency` parameter. If you can't remove VAT, let us know. Example: `49.99`
**order_currency** `string` *required*
The three character (ISO 4217) currency code that the order total is in. Example: `GBP`
**coupon_code** `string` *required*
The coupon code used by the customer (if any). Example: `SAVE10`
### Recommended
**customer_id** `string`
The unique customer identifier from your system. Example: `CUST-789`
**order_item_count** `string`
The number of items in the basket (if applicable). This helps us understand the type of purchase and can be a signal of advocacy. Example: `3`
**order_discount_amount** `string`
The discount amount - our assumption is this has already been taken off the order subtotal provided. This allows us to calculate the Cost Per Acquisition for referral. Example: `5.00`
**segment** `string`
String representing a customer segment (for example one of: men, women) used to pass segmentation data about your customer to us. Has a maximum of 50 characters. Example: `vip`
**order_is_subscription** `string`
Whether this order is for a subscription (recurring). This helps us qualify and categorise the revenue. Example: `true`
**order_is_gift** `string`
Whether this order is a gift (being bought for someone else). Gifts can be signals of advocacy. Example: `false`
> [accordion] Optional parameters
>
> **custom_field** `string`
>
> Any piece of custom data you wish to pass to us.
>
> **address_line1** `string`
>
> The customer's address line 1 (if known).
>
> **address_line2** `string`
>
> The customer's address line 2 (if known).
>
> **address_city** `string`
>
> The customer's address city (if known).
>
> **address_county** `string`
>
> The customer's address county (if known).
>
> **address_postcode** `string`
>
> The customer's address postcode (if known).
>
> **address_country** `string`
>
> The customer's address country (if known).
>
> **custom_share_field** `string`
>
> A piece of text you can use to pass into sharing widgets, such as what the user bought or how much they saved.
>
> **order_date** `string`
>
> The date and time the order was placed. The format must be in ISO 8601 format and URL encoded. If not provided or invalid, we will use the date and time at the point we received the tag.
>
> **mm_encrypted** `string`
>
> In some cases it may be desirable to ensure that email addresses and other information is not in clear text. See [encrypted parameters](/developer-docs/integration/encrypted-parameters).
>
> **locale** `string`
>
> Locale code (e.g. `en_GB`).
## Verb Aliases in the URL
The verb in the URL path (`order`) can be replaced with `booking`, `signup`, or `transaction`, matching whichever term best describes the action on your site. All four verbs behave identically.
The same applies to the pixel form: `orderpixel` can be replaced with `bookingpixel`, `signuppixel`, or `transactionpixel`. Each pixel verb still ends with `/pixel.gif`.
For example, a signup pixel would look like:
```html theme={null}
```
## Parameter Aliases for Non-Ecommerce
If your business tracks bookings or signups rather than orders, you can use alternative parameter names. The tag behaviour is identical - only the parameter names differ.
> [accordion] Booking aliases
>
> **booking_id** `string`
>
> Alias for `order_number`.
>
> **booking_subtotal** `string`
>
> Alias for `order_subtotal`.
>
> **booking_currency** `string`
>
> Alias for `order_currency`.
>
> **booking_date** `string`
>
> Alias for `order_date`.
>
> **booking_item_count** `string`
>
> Alias for `order_item_count`.
>
> **booking_is_subscription** `string`
>
> Alias for `order_is_subscription`.
>
> **booking_is_gift** `string`
>
> Alias for `order_is_gift`.
>
> **booking_discount_amount** `string`
>
> Alias for `order_discount_amount`.
> [accordion] Signup aliases
>
> **signup_id** `string`
>
> Alias for `order_number`.
>
> **transaction_subtotal** `string`
>
> Alias for `order_subtotal`.
>
> **transaction_currency** `string`
>
> Alias for `order_currency`.
>
> **signup_date** `string`
>
> Alias for `order_date`.
>
> **item_count** `string`
>
> Alias for `order_item_count`.
>
> **is_subscription** `string`
>
> Alias for `order_is_subscription`.
>
> **is_gift** `string`
>
> Alias for `order_is_gift`.
>
> **signup_discount_amount** `string`
>
> Alias for `order_discount_amount`.
# Integration Overview
Source: https://docs.mention-me.com/developer-docs/integration/overview
Merchant-specific integration instructions for implementing Mention Me
Welcome to our product integration instructions.
**Mention Me** seamlessly integrates into brands' websites to incentivise, track and reward referrals throughout the customer journey, as well as further enhance the customer experience to turn even more shoppers into brand advocates.
## Choose Your Integration
Pick the platform you're integrating with to jump straight to a tailored Quickstart covering every touchpoint (referrer, referee, landing page, and dashboard).
> [card] [JavaScript Tags](/developer-docs/integration/javascript-overview)
> [card] [Shopify App](/knowledge/shopify/overview)
> [card] [Tag Containers](/developer-docs/integration/setup/tag-containers)
> [card] [SAP Commerce Cloud](/developer-docs/integration/setup/sap-commerce-cloud-referrer)
> [card] [Global-e](/knowledge/tags/global-e)
> [card] [Native Apps](/developer-docs/integration/native-apps)
We require a set of touch points to be implemented on your website. Each point of the customer journey has set parameters which allow you to pass us the data we need such as order details and customer email and name.
## Where to Get Help
If you need help at any time while integrating our tags, contact our [support team](https://help.mention-me.com/hc/en-gb/requests/new).
# Error Codes & Messages
Source: https://docs.mention-me.com/developer-docs/integration/reference/error-codes
Guidance on errors and warnings from Mention Me tags and how to resolve them
The following section provides guidance on the types of errors or warnings that can be received from the Mention Me tags along with examples on how to resolve those issues.
The Mention Me tags can return errors of two types - an **HTTP error** code or a **tag error**.
HTTP errors are normally an indication of the request being malformed (such as wrong URL or missing critical data). These errors will only consist of an HTTP error code.
Tag errors are accompanied by both an HTTP error code and a JavaScript error message which will be rendered within the console of the browser's development tools. This message further assists with debugging.
## HTTP Error Codes
The below summarises the HTTP errors where no further message is available in the console.
**400 - Bad Request** `error`
We have successfully received the request, but it is either malformed or missing important information. Please check the parameters are being passed correctly, and that all mandatory parameters are included.
**403 - Forbidden** `error`
See the section on [integration approval](#content-not-served-due-to-integration-being-disabled-or-not-approved-to-go-live) below.
**404 - Not Found** `error`
Please check the URLs of the tags you're integrating and ensure that your unique partner code is correct.
## Tag Errors
The below summarises example Mention Me specific error conditions which will also render an error into the browser's console.
> [accordion] Content not served due to integration being disabled or not approved to go live
>
> Mention Me tags must be manually approved by you and your Client Success Manager before they become enabled on your live site.
>
> Until your tags are enabled by us on your live environment, you will see this error message in the console. Your customers will see no content, and this error is harmless.
>
> You may also see this as an HTTP 403 error code.
>
> **Affected tags:** All
> [accordion] Content not served due to specific configuration 'situation' being disabled
>
> The situation parameter passed has been disabled. The tag has been received and processed but no content will be shown to the customer as the tag has been disabled from within the Mention Me platform.
>
> **Affected tags:** All
> [accordion] Offer shown recently. Not showing again as frequency limits are in place
>
> The Mention Me platform can limit the number of times a tag is shown to a user either by number of days (i.e. show only once every 3 days) or by number of visits (i.e. only show this offer on the 5th, 10th, 15th, etc. visits).
>
> This offer was seen recently and will not be shown again until the limit is passed.
>
> **Affected tags:** Referrer
> [accordion] Unable to find suitable offer
>
> The Mention Me platform can be configured to serve different Offers to users based on information passed to us within the tag or from information we know about the customer.
>
> In this case, we were unable to choose an appropriate Offer from the information available to us and have opted to show nothing to the user.
>
> This may indicate the triggering rules for your Campaigns are set too narrow and you may wish to add additional Campaigns to target users who are missing out.
>
> **Affected tags:** Referrer
> [accordion] Skipping order tag, will attempt to serve offer
>
> The tag received is missing mandatory order details. Please ensure all mandatory parameters for the order, including `order_currency`, `order_subtotal` and `order_number` are all present.
>
> We will still attempt to serve an Offer to your customer so they can participate in the referral programme.
>
> **Affected tags:** Referrer, Order Tracking
> [accordion] Referee search disabled
>
> The Referee Tag has been disabled within the Mention Me platform. No Referee tag will be served to any users. We advise against disabling the tag as this may harm Referee conversion.
>
> **Affected tags:** Referee
> [accordion] Unable to serve this locale
>
> The `locale` provided does not have a corresponding Campaign setup. Check whether the `locale` is being passed correctly, or consider setting up a new Campaign to allow Referees for this locale to be served correctly.
>
> **Affected tags:** Referee
> [accordion] Dashboard disabled
>
> The Dashboard Tag has been disabled within the Mention Me platform. No Dashboard tag will be served to any users. We advise against disabling the tag as this may prevent users from sharing their offers with friends.
>
> **Affected tags:** Dashboard
> [accordion] Mention Me Tag failed to insert into wrapper
>
> This tag requires a location on the page for the content to be inserted into. The Mention Me tags were unable to find this location. By default, we expect a div with the id `mmWrapper` to be present on the page:
>
> ```html theme={null}
>
> ```
>
> If you are having trouble positioning the wrapper or need advice regarding placing multiple Mention Me elements on the page, please reach out to us and we'll assist you.
>
> **Affected tags:** Referee, Dashboard, Landing Page
# Integration FAQs
Source: https://docs.mention-me.com/developer-docs/integration/reference/faqs
Common questions about Mention Me tag integration, data protection, and troubleshooting
## Frequently Asked Questions
> [accordion] How do you protect customer data?
>
> We use SSL for all JavaScript requests to protect customer personal data.
> [accordion] Will the Mention Me tags slow down my site?
>
> Our JavaScript is executed at the bottom of your page and waits for the rest of the document to finish loading before injecting any elements.
> [accordion] What happens if your service is unavailable?
>
> The tags are designed to fail silently during exceptional conditions - nothing will interfere with your page if something goes wrong (for example, if our service is unavailable or if your campaign is paused).
> [accordion] Why do I get a 403 when loading the tags?
>
> This normally happens when the integration has not been approved by Mention Me. We will approve the integration once the referral programme has been signed off.
> [accordion] How can I encrypt my data? Do I need an encryption key?
>
> Our data is already passed via HTTPS. This means the data you're passing to us will already be encrypted and only visible to you, the user and us. Third parties will not be able to get hold of this information.
>
> If you wish to send users to a landing page and would like to include the users' email address in the link so that they're shown a personalised link (but do not wish to expose the email address in the link), you can follow our instructions on [how to use encrypted parameters to transmit personal data](/developer-docs/integration/encrypted-parameters).
## Common Tag Integration Errors
Most integration problems come down to how the tag URL is built. Run through the checklist below before raising a ticket - each of these has caught out many integrators.
### Referrer Tag
> [accordion] Parameter values are not URL-encoded
>
> All parameter values must be [URL-encoded](https://developer.mozilla.org/en-US/docs/Web/JavaScript/Reference/Global_Objects/encodeURIComponent). Common offenders are `@` in email addresses (must be `%40`), spaces in names (must be `%20`), and `+` or `/` in custom fields. An un-encoded `&` inside a value will look like the start of the next parameter and corrupt everything that follows it.
> [accordion] order_subtotal includes VAT or delivery
>
> `order_subtotal` must be the order subtotal **excluding VAT/taxes and delivery**. Passing the gross total inflates reward calculations and distorts reporting. If you cannot strip VAT on your side, let your Client Success Manager know so we can handle it.
> [accordion] Placeholder values have been left in the tag
>
> If the tag still contains literal ` ```
## Parameter Aliases for Non-Ecommerce
If your business tracks bookings or signups rather than orders, you can use alternative parameter names. The tag behaviour is identical - only the parameter names differ.
> [accordion] Booking aliases
>
> **booking_id** `string`
>
> Alias for `order_number`.
>
> **booking_subtotal** `string`
>
> Alias for `order_subtotal`.
>
> **booking_currency** `string`
>
> Alias for `order_currency`.
>
> **booking_date** `string`
>
> Alias for `order_date`.
>
> **booking_item_count** `string`
>
> Alias for `order_item_count`.
>
> **booking_is_subscription** `string`
>
> Alias for `order_is_subscription`.
>
> **booking_is_gift** `string`
>
> Alias for `order_is_gift`.
>
> **booking_discount_amount** `string`
>
> Alias for `order_discount_amount`.
> [accordion] Signup aliases
>
> **signup_id** `string`
>
> Alias for `order_number`.
>
> **transaction_subtotal** `string`
>
> Alias for `order_subtotal`.
>
> **transaction_currency** `string`
>
> Alias for `order_currency`.
>
> **signup_date** `string`
>
> Alias for `order_date`.
>
> **item_count** `string`
>
> Alias for `order_item_count`.
>
> **is_subscription** `string`
>
> Alias for `order_is_subscription`.
>
> **is_gift** `string`
>
> Alias for `order_is_gift`.
>
> **signup_discount_amount** `string`
>
> Alias for `order_discount_amount`.
# Integration Overview
Source: https://docs.mention-me.com/developer-docs/integration/overview
Merchant-specific integration instructions for implementing Mention Me
Welcome to our product integration instructions.
**Mention Me** seamlessly integrates into brands' websites to incentivise, track and reward referrals throughout the customer journey, as well as further enhance the customer experience to turn even more shoppers into brand advocates.
## Choose Your Integration
Pick the platform you're integrating with to jump straight to a tailored Quickstart covering every touchpoint (referrer, referee, landing page, and dashboard).
> [card] [JavaScript Tags](/developer-docs/integration/javascript-overview)
> [card] [Shopify App](/knowledge/shopify/overview)
> [card] [Tag Containers](/developer-docs/integration/setup/tag-containers)
> [card] [SAP Commerce Cloud](/developer-docs/integration/setup/sap-commerce-cloud-referrer)
> [card] [Global-e](/knowledge/tags/global-e)
> [card] [Native Apps](/developer-docs/integration/native-apps)
We require a set of touch points to be implemented on your website. Each point of the customer journey has set parameters which allow you to pass us the data we need such as order details and customer email and name.
## Where to Get Help
If you need help at any time while integrating our tags, contact our [support team](https://help.mention-me.com/hc/en-gb/requests/new).
# Error Codes & Messages
Source: https://docs.mention-me.com/developer-docs/integration/reference/error-codes
Guidance on errors and warnings from Mention Me tags and how to resolve them
The following section provides guidance on the types of errors or warnings that can be received from the Mention Me tags along with examples on how to resolve those issues.
The Mention Me tags can return errors of two types - an **HTTP error** code or a **tag error**.
HTTP errors are normally an indication of the request being malformed (such as wrong URL or missing critical data). These errors will only consist of an HTTP error code.
Tag errors are accompanied by both an HTTP error code and a JavaScript error message which will be rendered within the console of the browser's development tools. This message further assists with debugging.
## HTTP Error Codes
The below summarises the HTTP errors where no further message is available in the console.
**400 - Bad Request** `error`
We have successfully received the request, but it is either malformed or missing important information. Please check the parameters are being passed correctly, and that all mandatory parameters are included.
**403 - Forbidden** `error`
See the section on [integration approval](#content-not-served-due-to-integration-being-disabled-or-not-approved-to-go-live) below.
**404 - Not Found** `error`
Please check the URLs of the tags you're integrating and ensure that your unique partner code is correct.
## Tag Errors
The below summarises example Mention Me specific error conditions which will also render an error into the browser's console.
> [accordion] Content not served due to integration being disabled or not approved to go live
>
> Mention Me tags must be manually approved by you and your Client Success Manager before they become enabled on your live site.
>
> Until your tags are enabled by us on your live environment, you will see this error message in the console. Your customers will see no content, and this error is harmless.
>
> You may also see this as an HTTP 403 error code.
>
> **Affected tags:** All
> [accordion] Content not served due to specific configuration 'situation' being disabled
>
> The situation parameter passed has been disabled. The tag has been received and processed but no content will be shown to the customer as the tag has been disabled from within the Mention Me platform.
>
> **Affected tags:** All
> [accordion] Offer shown recently. Not showing again as frequency limits are in place
>
> The Mention Me platform can limit the number of times a tag is shown to a user either by number of days (i.e. show only once every 3 days) or by number of visits (i.e. only show this offer on the 5th, 10th, 15th, etc. visits).
>
> This offer was seen recently and will not be shown again until the limit is passed.
>
> **Affected tags:** Referrer
> [accordion] Unable to find suitable offer
>
> The Mention Me platform can be configured to serve different Offers to users based on information passed to us within the tag or from information we know about the customer.
>
> In this case, we were unable to choose an appropriate Offer from the information available to us and have opted to show nothing to the user.
>
> This may indicate the triggering rules for your Campaigns are set too narrow and you may wish to add additional Campaigns to target users who are missing out.
>
> **Affected tags:** Referrer
> [accordion] Skipping order tag, will attempt to serve offer
>
> The tag received is missing mandatory order details. Please ensure all mandatory parameters for the order, including `order_currency`, `order_subtotal` and `order_number` are all present.
>
> We will still attempt to serve an Offer to your customer so they can participate in the referral programme.
>
> **Affected tags:** Referrer, Order Tracking
> [accordion] Referee search disabled
>
> The Referee Tag has been disabled within the Mention Me platform. No Referee tag will be served to any users. We advise against disabling the tag as this may harm Referee conversion.
>
> **Affected tags:** Referee
> [accordion] Unable to serve this locale
>
> The `locale` provided does not have a corresponding Campaign setup. Check whether the `locale` is being passed correctly, or consider setting up a new Campaign to allow Referees for this locale to be served correctly.
>
> **Affected tags:** Referee
> [accordion] Dashboard disabled
>
> The Dashboard Tag has been disabled within the Mention Me platform. No Dashboard tag will be served to any users. We advise against disabling the tag as this may prevent users from sharing their offers with friends.
>
> **Affected tags:** Dashboard
> [accordion] Mention Me Tag failed to insert into wrapper
>
> This tag requires a location on the page for the content to be inserted into. The Mention Me tags were unable to find this location. By default, we expect a div with the id `mmWrapper` to be present on the page:
>
> ```html theme={null}
>
> ```
>
> If you are having trouble positioning the wrapper or need advice regarding placing multiple Mention Me elements on the page, please reach out to us and we'll assist you.
>
> **Affected tags:** Referee, Dashboard, Landing Page
# Integration FAQs
Source: https://docs.mention-me.com/developer-docs/integration/reference/faqs
Common questions about Mention Me tag integration, data protection, and troubleshooting
## Frequently Asked Questions
> [accordion] How do you protect customer data?
>
> We use SSL for all JavaScript requests to protect customer personal data.
> [accordion] Will the Mention Me tags slow down my site?
>
> Our JavaScript is executed at the bottom of your page and waits for the rest of the document to finish loading before injecting any elements.
> [accordion] What happens if your service is unavailable?
>
> The tags are designed to fail silently during exceptional conditions - nothing will interfere with your page if something goes wrong (for example, if our service is unavailable or if your campaign is paused).
> [accordion] Why do I get a 403 when loading the tags?
>
> This normally happens when the integration has not been approved by Mention Me. We will approve the integration once the referral programme has been signed off.
> [accordion] How can I encrypt my data? Do I need an encryption key?
>
> Our data is already passed via HTTPS. This means the data you're passing to us will already be encrypted and only visible to you, the user and us. Third parties will not be able to get hold of this information.
>
> If you wish to send users to a landing page and would like to include the users' email address in the link so that they're shown a personalised link (but do not wish to expose the email address in the link), you can follow our instructions on [how to use encrypted parameters to transmit personal data](/developer-docs/integration/encrypted-parameters).
## Common Tag Integration Errors
Most integration problems come down to how the tag URL is built. Run through the checklist below before raising a ticket - each of these has caught out many integrators.
### Referrer Tag
> [accordion] Parameter values are not URL-encoded
>
> All parameter values must be [URL-encoded](https://developer.mozilla.org/en-US/docs/Web/JavaScript/Reference/Global_Objects/encodeURIComponent). Common offenders are `@` in email addresses (must be `%40`), spaces in names (must be `%20`), and `+` or `/` in custom fields. An un-encoded `&` inside a value will look like the start of the next parameter and corrupt everything that follows it.
> [accordion] order_subtotal includes VAT or delivery
>
> `order_subtotal` must be the order subtotal **excluding VAT/taxes and delivery**. Passing the gross total inflates reward calculations and distorts reporting. If you cannot strip VAT on your side, let your Client Success Manager know so we can handle it.
> [accordion] Placeholder values have been left in the tag
>
> If the tag still contains literal `
` where the link should appear, then add the JavaScript snippet after it. Locate and edit your cart template (e.g., **cart.liquid**).
**1. Add the Div**
```html theme={null}
```
**2. Add the Script**
```html theme={null}
```
Replace `INSERT_PARTNERCODE` with your actual Mention Me PartnerCode. For locale configuration, see [Shopify: Locales](/knowledge/shopify/locales).
## Sidecart / Popout Cart
If using a slide-out or pop-up cart (e.g., **sidecart.liquid**):

Sidecart with the 'Been referred by a friend?' link
```html theme={null}
```
## Checkout (Shopify Plus Only)
Shopify Plus merchants can modify `checkout.liquid`:

The checkout.liquid editor in the Shopify Plus theme code editor.
```html theme={null}
```
Planning a move to Shopify Checkout Extensions from `checkout.liquid`? Review the [checkout extensibility guide](/knowledge/shopify/checkout-extensibility).
# Referral Dashboard
Source: https://docs.mention-me.com/knowledge/shopify/additional-tags/dashboard
Add the Mention Me referral dashboard to Shopify customer accounts so referrers can track activity, rewards, and share their offer.
The referral dashboard lets signed-in customers view referral activity, track rewards, and share their offer from their account.

Referral dashboard in a Shopify store
## Add the dashboard in customer accounts
Install the [Mention Me Shopify app](/knowledge/shopify/app-installation), then add the **Mention Me Referral Dashboard** block to the Profile page. No theme code.
Shopify's new customer accounts cannot embed our dashboard in the page, so the block opens the hosted dashboard for the logged-in customer.
**1. Open the customer account editor**
In Shopify Admin, go to **Settings > Customer accounts** and click
**Customise**.
**2. Open the Profile page**
Switch to the **Profile** page in the editor.
**3. Add the block**
Click **Add block** and select **Mention Me Referral Dashboard**.
**4. Save**
Click **Save** so the block is on the published customer account.
**5. Test**
Log in as a test customer, open the Profile page, and click through to the
dashboard.
If the block does not appear, confirm the Mention Me app is installed and you are editing **new customer accounts**, not a classic storefront template.
## Classic customer accounts
Use this if your store still uses **classic** customer accounts. To check, go to **Settings > Customer accounts** in Shopify Admin. If your account pages (orders, addresses, loyalty) are built in your theme, you're on classic accounts. New customer accounts should use the Profile block above.
You'll create a dedicated **Referral Dashboard** page that only logged-in customers can use, and link to it from your account navigation. Keep it separate from your [Refer a Friend landing page](/knowledge/shopify/additional-tags/landing-page), so customers go straight to their dashboard without scrolling past landing page content.
> [!WARNING]
>
> The dashboard does not load inside the Shopify theme editor. The code below shows a dashed placeholder in the editor instead, so you can see where the dashboard will appear. Test the real dashboard on your storefront.
### Step 1: Create the page
**1. Add a page**
Go to **Online Store > Pages > Add page**.
**2. Title it and save**
Title it **Referral Dashboard**, which gives it the URL `/pages/referral-dashboard`. Leave the content empty, then click **Save**.
### Step 2: Create the dashboard template
**1. Open the theme editor**
Go to **Online Store > Themes** and click **Customize** on your theme.
**2. Open your account page template**
Open the template your other account pages use, for example your Loyalty page's template. Using the same template keeps your account banner and tabs, so the dashboard feels like part of the account area.
**3. Create the template**
From the page dropdown at the top of the editor, choose **Create template**. Name it `referral-dashboard` and base it on that account template. If you don't have one, base it on **Default page**.
**4. Remove content from the other page**
Remove or hide anything specific to the other page, such as loyalty widgets or the page title section.
**5. Add a Custom Liquid section**
Click **Add section** under the **Template** heading, choose **Custom Liquid**, and paste in the code below.
> [!WARNING]
>
> Don't use **Add section** under **Header**. The header group is shared by every page, so the dashboard would appear across your whole site.
```liquid theme={null}
{% if request.design_mode %}
{% else %}
` with your Mention Me Partner Code (ask your Client Manager).
* Set the `locale`:
* Hardcode a value (e.g. `en_GB`), or
* Dynamically set using Global-e's data layer.
* [Learn more about locales](/knowledge/tags/locales-languages-currencies).
**3. Update Demo to Live URL**
* Use `tag-demo.mention-me.com` when testing.
* Switch to `tag.mention-me.com` for live use.
The live tag URL is disabled by default. Activate it via your Client Manager before customer-facing use. You can preview functionality using the Debug Tool.
## Additional Help
Required Mention Me variables: [Mention Me Referrer Parameters](https://docs.mention-me.com/developer-docs/integration/entry-points/referrer#mandatory-data-parameters)
Global-e variables: [Full Global-e variable list](https://web.global-e.com/merchant/clientapi#ganaadd)
### Referrer Tag in Global-e + Shopify
If using Shopify with Global-e, locate your `globale-tracking.liquid` snippet. It should include the following inside the `OnCheckoutStepLoaded` callback:
```javascript theme={null}
var script = document.createElement("script");
var url = "https://tag.mention-me.com/api/v2/referreroffer/?locale=&situation=postpurchaseglobale";
url += "&email=" + encodeURIComponent(data.details.customerEmail);
url += "&fullname=" + encodeURIComponent(data.details.customerName);
url += "&order_number=" + encodeURIComponent(data.details.OrderReference);
url += "&order_total=" + encodeURIComponent(data.details.totalPriceExclVAT);
url += "&order_currency=" + encodeURIComponent(data.details.customerCurrency);
script.src = url;
document.head.appendChild(script);
```
Ensure you:
* Only run the tag when `data.StepId == data.Steps.CONFIRMATION` and `data.IsSuccess` is true.
* Include your Partner Code and a valid `locale`.

The globale-tracking.liquid snippet with the Mention Me referrer tag added.
Include this in **theme.liquid** to load the Global-e script at checkout:
```liquid theme={null}
{% include "globale-tracking.liquid" %}
```
This should go inside the `` tag in your layout.

The theme.liquid include for the globale-tracking snippet.
### Implementing the Referee Tag
Add the **referee tag** outside of the Global-e checkout (such as on the cart or side cart) so users can enter who referred them.
The referee tag cannot be used within the Global-e checkout environmentdirectly.
# Google Analytics Parameters
Source: https://docs.mention-me.com/knowledge/tags/google-analytics
How to integrate Google Analytics UTM parameters with Mention Me to track referral traffic alongside other marketing channels.
By default, Mention Me tracks traffic through all stages of the referral funnel, and your Client Success Manager will regularly discuss this activity with you. To track referral traffic landing on your site alongside other marketing channels, integrate your Google Analytics parameters into Mention Me.
Send your Google Analytics parameters to your Client Success Manager. They will add these parameters to all links coming from Mention Me to your site.
Example parameters:
```text theme={null}
?utm_source=mentionme
&utm_medium=referral
&utm_campaign=referafriend
```
## Where We Link to Your Site
1. **Your homepage** (or a specific product page) for potential new customers who click through after claiming their introductory reward
2. **Emails**, for customers who didn't complete their purchase during their original journey and come back via the referral email
Example URL with tracking parameters:
```text theme={null}
https://www.yoursite.com/refer-a-friend?situation=homepage_header&utm_source=mentionme&utm_medium=referral&utm_campaign=referafriend
```
## Tracking Your Promotion Points
You can also track your promotion points within the Mention Me reporting platform. See [Tracking your promotion points](/knowledge/referral/promoting/promotion-points) to find out more.
## Revenue Discrepancies Between Mention Me and Google Analytics
Mention Me uses a different attribution model to Google Analytics. GA is based on last click, whereas Mention Me is based on email addresses provided by a referee and then seen on the confirmation page.
Name Share will not be reported correctly in GA. If a referrer shares by name (offline), the referee will type in the website organically or arrive via a paid ad, and GA will attribute the traffic to Organic or Paid Ad rather than referral.
# Platform IP Addresses
Source: https://docs.mention-me.com/knowledge/tags/ip-addresses
Mention Me platform IP addresses for whitelisting webhooks, newsletter sign-ups, and API traffic.
Some clients choose to whitelist Mention Me IP addresses to ensure that traffic from webhooks, newsletter sign-ups, or APIs is verified as originating from the Mention Me platform.
These IP addresses have been static for several years, but additional addresses may be added as Mention Me expands globally. Clients using webhooks, newsletter APIs, or other integrations will be notified if changes occur.
## Current Platform IPs
These IP addresses correspond to the three availability zones in Ireland used by Mention Me for Live and Demo environments:
* `52.215.26.182/32`
* `63.34.248.228/32`
* `34.249.131.13/32`
## SFTP Server IP
* The SFTP server is typically accessed at [sftp.mention-me.com](http://sftp.mention-me.com/).
* If you need an IP address for SFTP, use `54.72.46.203/32`
This SFTP IP address may change. Mention Me reserves the right to update it in the future.
# Locales, Languages and Currencies
Source: https://docs.mention-me.com/knowledge/tags/locales-languages-currencies
How to configure locales to segment your referral campaigns by customer region, language, and currency.
A locale defines the customer's language, region, and currency. For example, the locale for UK English using GBP is `en_GB`.
With Mention Me, you can deliver specific campaigns or referral offers by locale, passed via your integration (JavaScript tags for websites, API calls for apps) using a set format.

An example of the locale parameter format in tag configuration.
You can configure locales within your campaign's triggering or qualifying rules.

Campaign locale triggering rules in the Mention Me platform.
## How to segment customers by locale
Prioritise key regions/locales based on volume or value. If your referral programme offers third-party rewards like Amazon vouchers, ensure those providers cover the relevant locales. Your Client Manager can help define an effective segmentation strategy.
### Different language and currency
Pass the correct locale via tags or API calls:
* British Campaign: `en_GB`
* French Campaign: `fr_FR`
* Spanish Campaign: `es_ES`
* German Campaign: `de_DE`
### Same language, different currency
Serve offers to regions using the same language but different currencies by targeting relevant locales.
Example: English-language campaigns in the UK (GBP) and the US (USD) using `en_GB` and `en_US`.
### Same region and currency, different language
Create localised campaigns for users in a region who select different languages on your site.
Example: Target both `es_ES` (Spanish) and `en_ES` (English) customers within Spain (EUR).
### Group regions by the same language and currency
Target multiple regions under a shared locale if they use the same language and currency.
Example: Use `en_EU` for all English-speaking users in Eurozone countries.
### Group regions with shared language and generic offers
Useful for smaller or less-active markets. Serve a general campaign across several regions using one shared locale with a non-market-specific offer (like a percentage discount or gift with purchase).
If using discount codes, ensure they're valid across all regions. This setup does not support fixed-amount offers (e.g. £10 off) or third-party vouchers. It limits your ability to run A/B tests across locales. Contact your Client Manager for consultation.
## Locale format
The format must follow:
* [ISO 639-1 language code](https://en.wikipedia.org/wiki/List_of_ISO_639-1_codes) + underscore (`_`)
* [ISO 3166-1 alpha-2 country code](https://en.wikipedia.org/wiki/ISO_3166-1#Current_codes)
Examples:
* `fr_FR` = French / France (EUR)
* `en_IE` = English / Ireland (EUR)
* `en_GB` = English / UK (GBP)
Your active locales will be listed in your order form. Contact your Client Manager to add more.
# Replatforming Checklist
Source: https://docs.mention-me.com/knowledge/tags/replatforming
Essential steps for moving your Mention Me tags from one platform or website to another.
If you're moving Mention Me tags from one platform or website to another, follow this checklist to ensure your integration works as expected.
## Tags
During initial onboarding, you implemented tags across your current platform. All implemented tags must be moved to your new platform:
* Landing page
* Referee tag
* Referrer tag
* Dashboard
If you have additional promotional points across your website, the Support Team can help identify them.
Integration instructions by platform:
* [General integration instructions](https://demo.mention-me.com/api-demo/v2/generic/overview)
* [Shopify-specific integration instructions](/knowledge/shopify/app-installation)
* [Google Tag Manager (GTM) specific integration instructions](/developer-docs/integration/setup/tag-containers)
## Vouchers
If you can transfer your vouchers during replatforming and don't need to change anything, no changes are needed in the platform.
If previous voucher codes won't work on your new website, all codes will need to be replaced. Use the self-serve process:
* [Uploading a batch of vouchers to your referral offer](/knowledge/referral/vouchers/upload-vouchers)
* [Assigning your vouchers to multiple offers](/knowledge/referral/vouchers/assign-to-offers)
Contact the Mention Me support team if you need help with replacement codes.
## Order Management
### Order IDs
The Mention Me platform considers two orders with the same ID as identical duplicates, regardless of when the order happens, the amount, or who placed it. Duplicates are ignored.
If your new platform uses a different order ID format (e.g., old: `1001`, new: `uk123`), no further steps are needed.
If your new platform uses the same numbering format or IDs could eventually overlap, create a prefix or suffix for new Order IDs in the tags/SFTP feeds:
* `O1001`, `O1002`, `O1003`
* `1001N`, `1002N`, `1003N`
This is essential to ensure orders are tracked with no risk of lost data.
### Missed Order Upload
If there is any period where order data is not being passed via the postpurchase/order tag, complete an order upload to account for missing data.
Add a copy of all missed orders to your Secure File Transfer, then create a Support Request asking for "Help with Tech", referencing the file name and that you need help with missed orders during replatforming.
Use [How to create a historical order upload document](/knowledge/security/data-management/historical-order-upload) as a guide for the correct format.
# How to Handle Mention Me Tags on Single Page Applications (SPAs)
Source: https://docs.mention-me.com/knowledge/tags/spa-implementation
How to handle Mention Me tags on SPAs built with React, Angular, or Vue, including resetting and validating tags.
Single Page Applications (SPAs) update content without a full page reload. Mention Me tags are designed to prevent being shown more than once per load. On SPAs built with frameworks like React, AngularJS, or VueJS, this can stop tags from reappearing when expected.
## How to Identify This Issue
If affected, you may see a message in your browser's developer console:
```text theme={null}
A tag has already fired with the identifier [linkcheckout] on this page. Suppressing tag
```
## How to Reset a Tag So It Can Re-Fire
To allow a Mention Me tag to re-fire, clear its "fired" state from the browser's memory. Place this snippet above your Mention Me tag script within your SPA's code base or navigation handler.
Change the `situation` and `implementation` values to match your tag setup (for example, `link` and `checkout` for a referral tag on your checkout page).
```html theme={null}
```
You can use this approach with any Mention Me tag. Ensure the `situation` and `implementation` values match the tag you want to reset.
## How to Validate and Inspect Tags
Check that your tags are firing correctly using Chrome DevTools:
**1. Right-Click on the Web Page**
Right-click on the web page.
**2. Select Inspect**
Select **Inspect**.
**3. Open the Console Tab**
Open the **Console** tab.
**4. Run the Validation Command**
Paste the following command and press Enter:
```javascript theme={null}
window.MentionMe.validateTags()
```
This will describe whether your tags are valid and active.
To check which tags have already fired:
```javascript theme={null}
window.MentionMeFiredTags
```
You'll see variable names such as `linkcheckout` to indicate tags that have already fired.
For example, if you see `embeddashboard`, `embed` is the implementation, and `dashboard` is the situation.
# Understanding Where and Why to Implement Referrer and Referee Tags
Source: https://docs.mention-me.com/knowledge/tags/where-and-why
Understand the two key tags that power the Mention Me referral journey and where to place them on your site.
The Mention Me referral journey is powered by two key tags: the **Referrer tag** and the **Referee tag**. These tags promote referrals at optimal touchpoints and capture the information needed to issue rewards.
## Referrer Tag on the Post-Purchase Page
This tag performs two essential roles. It promotes referral to customers on the post-purchase page (the most effective touchpoint) and collects order details so rewards can be issued as applicable.
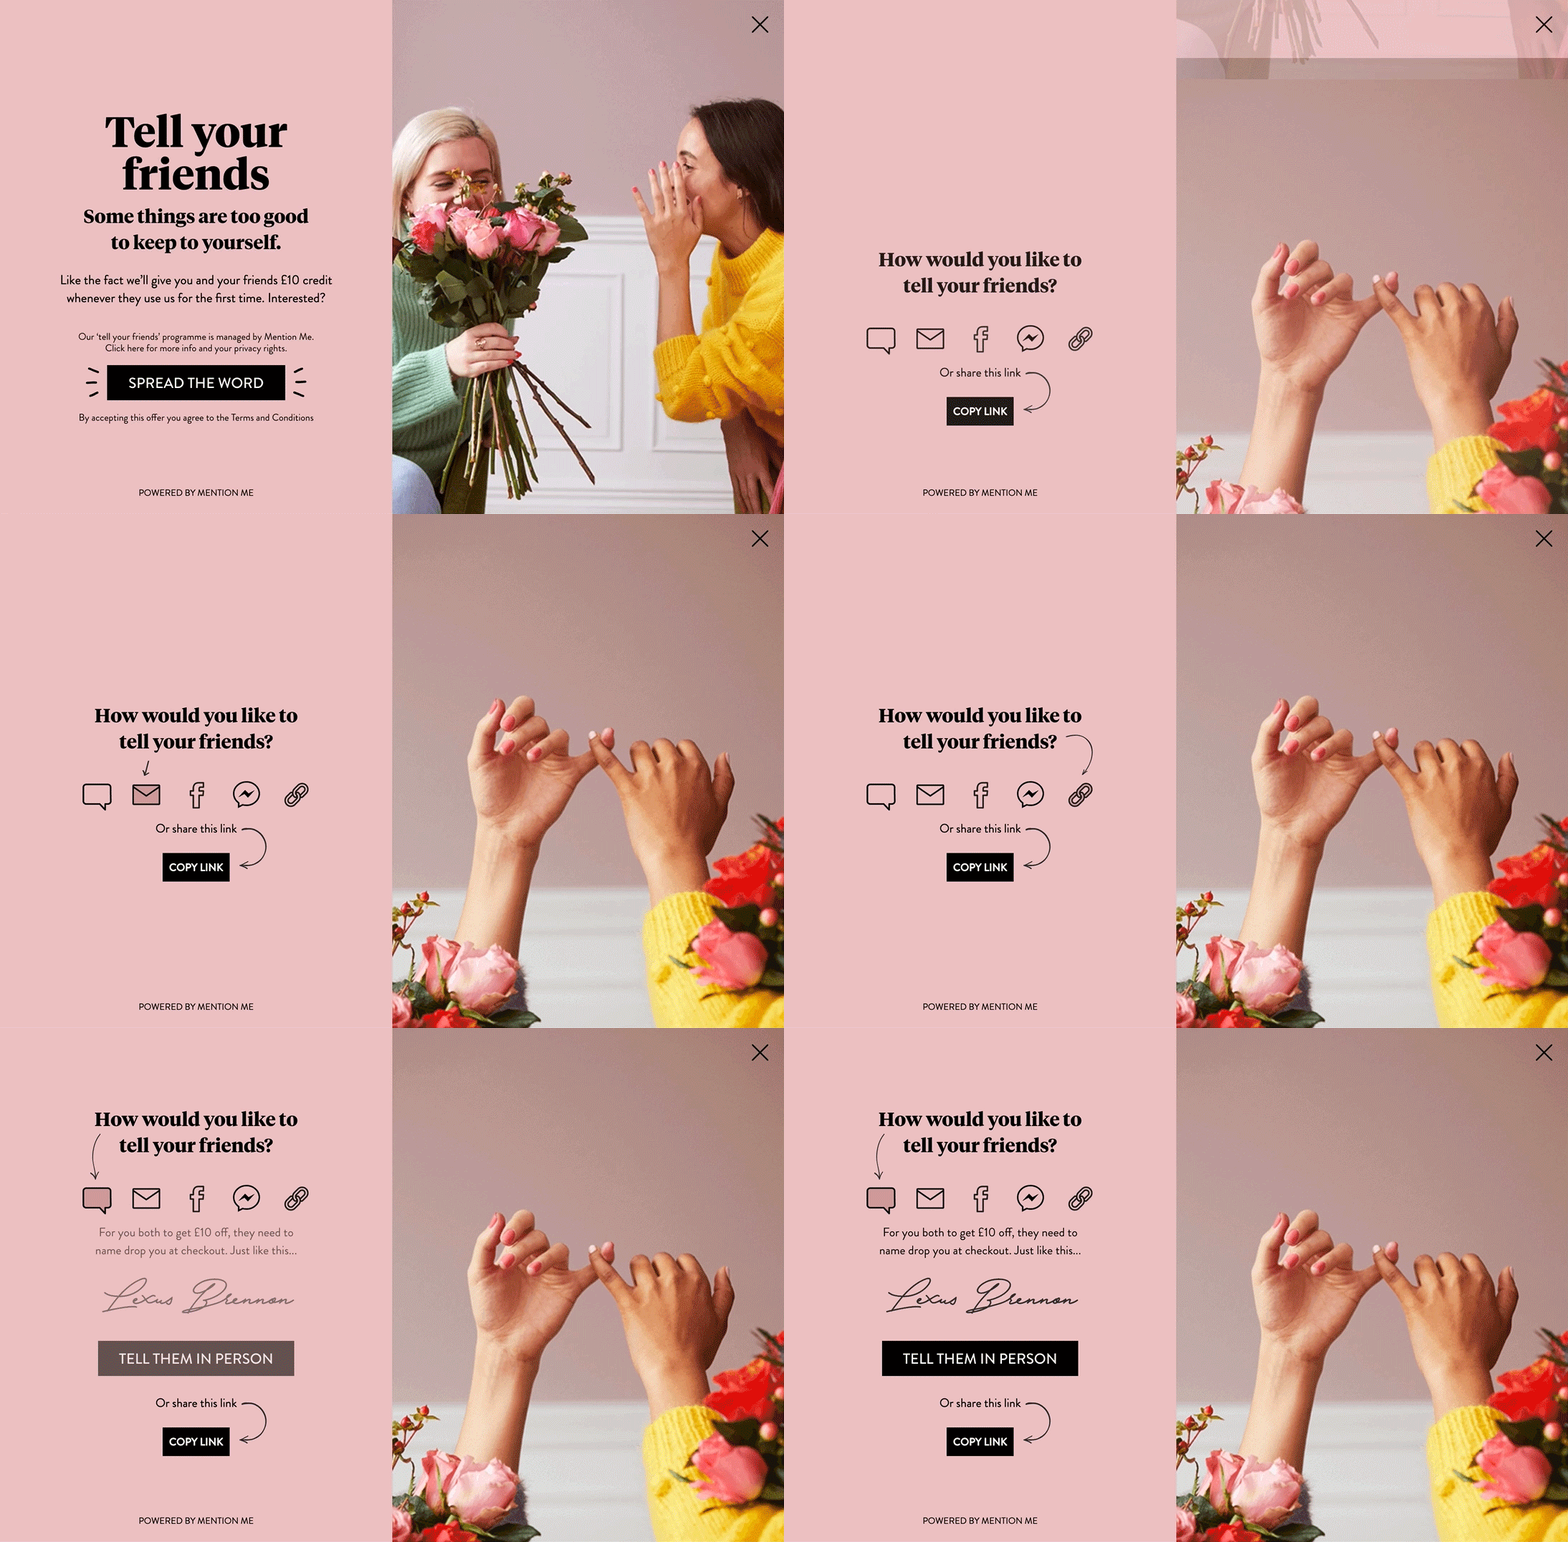
The referrer tag as it appears on the post-purchase page.
## Referee Tag in the Checkout
This tag inserts a link (or form) that says: **"Been referred by a friend?"**. Customers who click this link will be asked to identify their referrer to receive their reward. You can control where the link appears, what it says and how it looks in the platform.
> [!NOTE]
>
> The link copy itself can't be edited directly in the offer preview - to change the wording, request this from the Mention Me support team.
Place the referee tag in your checkout, typically close to any promo code or voucher code box, to support name referral.

The referee tag in the checkout, showing the "Been referred by a friend?" link.
## Developer Integration Guides
For technical implementation details, including all parameters, code snippets, and integration modes, see the developer tag integration guides:
> [card] [Referrer Tag](/developer-docs/integration/entry-points/referrer)
>
> Full parameter reference and implementation options for the referrer tag.
> [card] [Referee Tag](/developer-docs/integration/entry-points/referee)
>
> Full parameter reference and implementation options for the referee tag.
# FAQ
Source: https://docs.mention-me.com/api-reference/webhooks/faqs
Common questions about Mention Me webhooks.
## Do Webhooks support custom Authorisation mechanisms?
No, the Webhook system does not support any Authorisation mechanisms other than Signature validation (for more information, see the [Security section](/api-reference/webhooks/security)).
This includes, but is not limited to:
1. Custom Bearer tokens
2. A custom `Authorization` header
3. Custom API keys
4. Custom payload structure
## What IP addresses should we expect Webhooks to be sent from (for allowlisting senders)?
Signature validation is the main mechanism for preventing your external systems receiving Webhook events from bad actors (for more information, see the [Security section](/api-reference/webhooks/security)).
With signature validation, you can be sure that the sender knows the [Secret which was chosen set during setup](/api-reference/webhooks/create-destination#step-2-choosing-a-secret), and that the contents of the Webhook event has not been intercepted and tampered with once leaving the Mention Me platform.
However, we *can* provide you a series of IP address ranges to expect Webhook requests from. Though, it is worth noting that, at any time, Mention Me reserves the right to change these IP address ranges without notice.
Just reach out to our [support team](https://help.mention-me.com/hc/en-gb/requests/new) for the up-to-date IP address ranges.
## Next Steps
> [card] [Security](/api-reference/webhooks/security)
>
> Verify webhook signatures to ensure authenticity.
> [card] [Set up a webhook](/api-reference/webhooks/create-destination)
>
> Create a webhook destination and start receiving events.
# Security
Source: https://docs.mention-me.com/api-reference/webhooks/security
How do you ensure that the Webhooks you receive are from Mention Me, and have not been tampered with?
Whenever you create a new Webhook to your external system we **strongly** recommend that you:
1. [Choose a Secret](/api-reference/webhooks/create-destination#step-2-choosing-a-secret)
2. Use the Secret in your external system to validate any incoming data and ensure its authenticity.
If you follow both of these principles, you're already well on your way to securing your external systems from any bad actors attempting to deliver malicious Webhook data.
## How It Works
Whenever a new Webhook is setup with a Secret, all events which are delivered to the external system will be accompanied by a [HTTP Header](https://developer.mozilla.org/en-US/docs/Glossary/Request_header) with the key `X-MentionMe-Signature`, and a value which will look something like `sha256=` (*note that it will always begin with `sha256=` followed by the signature value*).
This signature can be used to:
1. Validate that the Sender (i.e. Mention Me) knows the Secret which was entered [when setting up the Webhook](/api-reference/webhooks/create-destination#step-2-choosing-a-secret).
2. Validate that the body of the Webhook ([examples](/api-reference/webhooks/events#examples)) have not been intercepted by a bad actor, and tampered with, *after* they have left the Mention Me platform.
It is the job of the external system to validate this signature and reject any Webhooks which do not match this signature.
## Validation
> [!NOTE]
>
> We **strongly** advise using a **secure comparison function** rather than a standard string comparison (e.g. `==`), and to **fully test the implementation** before deploying to production.
The process of validating the signature of a Webhook is simple - you should:
**1. Extract the request body**
Extract the request body from the [HTTP POST request](https://developer.mozilla.org/en-US/docs/Web/HTTP/Reference/Methods/POST).
**2. Retrieve the Secret**
Retrieve the Secret value in your external system (which **must** be the same value as was provided when setting up the Webhook). We recommend that the Secret be stored securely as an [Environment Variable](https://en.wikipedia.org/wiki/Environment_variable).
**3. Generate the SHA256 hash**
Generate the SHA256 hash, where the data is the request body, and the key is the Secret.
**4. Compare the hashes**
Securely compare the resulting SHA256 hash against the one provided in [the request headers](/api-reference/webhooks/security#how-it-works).
**5. Accept or reject**
If the comparison determines that the hashes are equal, the Webhook's authenticity has been confirmed and can be processed. However, if this is not the case, the Webhook should be rejected.
Many programming languages support secure comparison of SHA256 hashes. Below are some examples which can be used as a starting point.
```javascript JavaScript / Node.js theme={null}
const crypto = require('crypto');
const validateSignature = (request, secretToken) => {
const body = request.body;
const hmac = crypto.createHmac('sha256', secretToken);
hmac.update(body);
const signature = `sha256=${hmac.digest('hex')}`;
const mentionMeSignature = request.headers['X-MentionMe-Signature'];
return crypto.timingSafeEqual(Buffer.from(signature), Buffer.from(mentionMeSignature));
}
```
```php PHP theme={null}
function validateSignature(Request $request, string $secretToken) {
$signature = "sha256=" . hash_hmac("sha256", $request->getBody(), $secretToken);
return hash_equals($signature, $request->headers->get("X-MentionMe-Signature"));
}
```
```python Python theme={null}
import hashlib
import hmac
def validate_signature(request, secret_token):
body = request.body.encode('utf-8')
hmac_obj = hmac.new(secret_token.encode('utf-8'), body, hashlib.sha256)
signature = 'sha256=' + hmac_obj.hexdigest()
mentionme_signature = request.headers['X-MentionMe-Signature']
return hmac.compare_digest(signature.encode('utf-8'), mentionme_signature.encode('utf-8'))
```
```ruby Ruby theme={null}
require 'openssl'
def validate_signature(request, secret_token)
body = request.body
hmac = OpenSSL::HMAC.new(secret_token, OpenSSL::Digest.new('sha256'))
hmac.update(body)
signature = "sha256=#{hmac.hexdigest}"
mentionme_signature = request.headers['X-MentionMe-Signature']
return OpenSSL::SecureCompare.compare(signature, mentionme_signature)
end
```
## Next Steps
> [card] [Events](/api-reference/webhooks/events)
>
> See which webhook events are available and their payload formats.
# Mention Me MCP Connector
Source: https://docs.mention-me.com/changelog/entries/ask-your-referral-data
Connect Mention Me to Claude, ChatGPT or another compatible AI tool to retrieve referral performance data.
June 2026
New
Reporting data
Referral performance data is available in Mention Me, but answering an unplanned question can still require a user to open the platform, locate the relevant report and configure the correct period. The Mention Me MCP Connector provides access to the same reporting data through Claude and other compatible AI tools.

[Set up the MCP Connector](/developer-docs/mcp/setup)
## At a glance
* Connect Mention Me to Claude, ChatGPT or another MCP-compatible AI tool
* Ask questions about referral performance in your own words
* Check referral volumes, conversion trends and revenue contribution
* Compare performance across different periods
* Use a read-only connection with aggregate reporting data and no customer PII
Referral performance questions come up in leadership meetings, channel reviews and campaign discussions, from revenue contribution and year-on-year comparisons to changes in conversion after a campaign update.
The connector gives stakeholders direct access to these answers without needing to log in to the platform.
## How it works
* **Connect Mention Me once.** Follow the [setup journey](/developer-docs/mcp/setup) and add Mention Me to a supported AI tool.
* **Ask a performance question.** Ask a clear question in your own words, including the metric and time period you are interested in.
* **The connector retrieves the relevant figures.** It uses aggregate Mention Me reporting data to answer the question.
* **Continue the conversation.** Ask a follow-up, change the date range or request a comparison without starting again.
Setup takes just a few minutes.
## Questions you can ask today
The connector can answer questions such as:
* How many referrals did we generate last month?
* How has conversion changed over the past six months?
* What was referral's revenue contribution last quarter?
* How does this year compare with the same period last year?
It is designed for senior stakeholders who need referral performance insight, including marketing directors and heads of acquisition, commerce, CRM or referral.

## Read-only by design
The MCP Connector accesses aggregate reporting data only. It does not access customer personally identifiable information and cannot change campaigns, programmes or settings.
The connector is designed for understanding performance, while campaign and account management stay within Mention Me.
## Reporting answers, not campaign actions
This first release focuses on reporting questions. Benchmarking, campaign recommendations and in-platform actions are not included at this stage, and programme management continues in Mention Me.
## Faster access for senior stakeholders
The connector is designed for stakeholders who need referral results but do not use Mention Me every day. It supports board reporting, trend checks and review preparation without a separate data request.
Daily users can continue working in Mention Me, while other stakeholders gain an additional route to the same reporting data.
## From setup to the first answer in minutes
## Connect it, ask a question, check the source
See how to connect Mention Me, ask your first question and check the reporting data being used.
The MCP Connector went live in June 2026. It works with Claude, ChatGPT, Claude Code, Cursor, VS Code, Windsurf and other tools that support MCP connectors.
> [card] [Read the MCP Connector guide](/developer-docs/mcp/setup)
>
> Connect Mention Me to your AI tool and ask your first question.
## Try it
Connect your referral reporting data and ask your first question.
[Set up the MCP Connector](/developer-docs/mcp/setup)
# Product Referral
Source: https://docs.mention-me.com/changelog/entries/product-referral
Product Referral makes organic product sharing visible, connecting shared-product visits and orders back to the products and people that influenced them.
February 2026
New
Product Referral
Customers already share products they love through WhatsApp, messages and email. Product Referral makes that natural sharing visible, showing the visits, orders and revenue connected to shared product links without requiring a reward or formal referral journey.

## At a glance
* Measure product links customers share naturally with friends
* See visits, orders and revenue connected to shared links
* Understand which products generate word of mouth
* Identify known customers who influence product discovery
* Track organic sharing without requiring enrolment or a reward
A customer sees a product they love, copies the link and sends it to a friend. The friend visits later and may go on to buy. To most analytics platforms, that journey can look like direct, organic or unexplained traffic.
Product Referral makes this layer of word of mouth visible.
## How it works
* **A customer visits a product page.** Mention Me prepares the page link so a later share can be recognised.
* **They share it in the way they normally would.** That might be WhatsApp, a message, email or a copied link.
* **A friend follows the shared link.** Mention Me connects the visit to the product-sharing journey.
* **A later purchase identifies the customer.** Where the journey can be matched, the activity becomes part of Product Referral reporting.
The customer does not need to enrol in a programme or claim an offer. Product Referral measures behaviour that is already happening.
## Product Referral and Brand Referral do different jobs
Brand Referral is designed to encourage acquisition through a structured referral journey, usually with a reward or offer.
Product Referral is an attribution capability that measures organic sharing around individual products. It does not claim that Mention Me created the behaviour or that every attributed order is incremental.
The two views complement each other: one helps drive a referral action, while the other reveals recommendations happening outside that journey.

## Identify products that generate organic sharing
Product Referral reporting can show product-sharing views, orders, revenue and average order value, alongside the type of share that started the journey.
This helps answer questions that sales data alone cannot:
* Which products are recommended more often than their sales ranking suggests?
* How much product-page traffic begins with a shared link?
* Which known customers create valuable product-sharing journeys?
* Does a launch or campaign change what customers recommend to friends?
## A useful signal for products and customers
A product that ranks tenth for sales may rank first for sharing, providing a different signal for merchandising and launch teams. A customer who repeatedly drives shared-link visits may also represent stronger advocacy than a customer identified through spend alone.
Product Referral provides this additional behavioural signal for merchandising, CRM and marketing teams.
## Limits to know
Product Referral connects journeys using browser and device signals. A share that moves across substantially different devices may not always be linked.
A visible share button is optional. Tracking works without it.
Availability and setup depend on your ecommerce platform and account configuration. Some Product Referral metrics are available in the updated Reporting experience, with more being added.
## Connect the recommendation to the resulting visit
Shared-link visits are no longer unattributed. You can see the product that started the conversation and, where the journey can be matched, what happened afterwards.
This does not replace Brand Referral or prove that every order was incremental. It adds evidence about the recommendations customers make outside a formal referral journey.
## Follow one shared product from link to order
## See what Mention Me records at each step
See how Product Referral recognises a shared link, connects later activity and presents the result in reporting.
Product Referral launched in February 2026. Setup is available through the Mention Me Shopify integration or a product-page tag for other supported implementations.
> [card] [Read the Product Referral guide](/knowledge-app/referral/campaigns/product-referral/what-product-referral-is)
>
> What product referral measures, how it differs from brand referral, and what a
> product referral campaign gives you.
## Try it
See the product recommendations already happening between your customers.
[Explore Product Referral](https://app.mention-me.com/~/campaigns/product-referral)
# Custom reporting dashboards
Source: https://docs.mention-me.com/changelog/entries/reporting-dashboards
Create a dashboard for a weekly review, campaign analysis or a leadership update.
May 2026
New
Reporting
A weekly campaign review and a leadership update require different levels of detail. Reporting allows teams to build both: select the relevant metrics, charts and tables, arrange them on a flexible grid, or describe the required result and use AI-assisted tile creation.

## At a glance
* Build more than one dashboard for different questions or audiences
* Add metric, chart, table and text tiles to a flexible grid
* Describe the result you want with AI-assisted tile creation
* Set the period and comparison once for the whole dashboard
* Break performance down by available dimensions such as market or funnel stage
Different teams need different views of performance. Marketing tracks the journey from impression to conversion, finance focuses on revenue and average order value, and leadership needs a concise view of programme progress.
Separate dashboards give each team the information it needs from the start.
## How it works
* **Create a dashboard.** Give it a name based on the meeting, audience or question it supports.
* **Add the information you need.** Choose a metric, chart, table or text tile.
* **Ask AI to help.** Describe the metric or view in plain language and review the suggested tile.
* **Arrange the layout.** Resize and move tiles on the grid so the most important information comes first.
* **Set the timeframe once.** Apply the period and comparison across the dashboard rather than updating every tile separately.
## Four reporting formats
* **Metric tiles** put one important number and its direction in focus.
* **Charts** present trends, comparisons and the referral funnel visually.
* **Tables** give you the detail behind the headline.
* **Text tiles** add an explanation, decision or note beside the data.
Combined, they create a dashboard that explains performance on its own.

## One reporting space, different audiences
Create a weekly programme dashboard with the whole referral funnel. Build a leadership view around revenue, customer acquisition and progress against targets. Keep a campaign dashboard for deeper analysis of a particular market or test.
Each dashboard can be named and arranged independently for its audience.
## Create tiles with AI assistance
AI-assisted creation provides a starting point when the required insight is clear but the appropriate metric or visual has not yet been selected.
Describe the insight in ordinary language. Reporting proposes a tile, which you can check and refine before adding it to the dashboard.
## Explore the detail behind the result
Available filters and breakdowns help you move from the overall result to the detail behind it. Depending on the data available to your account, that can include market, customer type (subscribers or one-time buyers), currency and stages of the click-to-conversion funnel.
This supports the analysis that often follows a headline result, including the factors driving a change in performance.
## Reuse dashboards for recurring reporting
Dashboards set up for a recurring meeting or audience can be reused. Change the period, add a comparison and use the same view again, with no need to rebuild the report.
Each team can keep a view with the right level of detail.
## From a blank grid to a meeting-ready dashboard
## Example: a weekly performance review
See the full workflow from an empty dashboard to a view ready for a weekly performance meeting.
Reporting dashboards entered beta in May 2026 and are now available to all clients in the updated Mention Me experience.
> [card] [Read the Reporting guide](/knowledge-app/referral/reporting/overview)
>
> Custom analytics dashboards for your referral programme.
## Try it
Build a reporting view around the next question your team needs to answer.
[Open Reporting](https://app.mention-me.com/~/reporting)
# A new Mention Me
Source: https://docs.mention-me.com/changelog/entries/updated-mention-me-experience
The updated Mention Me experience gives you more control to run and improve the programme you already have.
September 2026
Platform update
Mention Me platform
The updated experience gives teams greater freedom to run and improve their referral programme: make changes, test ideas, understand performance and resolve customer enquiries with less effort. Your programme, data and results stay the same. What changes is how you see and manage them. The Mention Me team remains available for strategic guidance and specialist support.

## At a glance
* **Campaigns:** take a campaign from idea to launch, with guidance and pre-launch checks along the way
* **Home:** see how your programme is performing and what needs attention as soon as you log in
* **Reporting:** build reporting around the questions your team needs to answer, with AI helping you create each view
* **Customers:** resolve enquiries with the full referral history and the actions you need in one view
* **Branding:** shape the campaign experience to fit your brand and preview changes as you make them
## Build and update campaigns directly
The campaign builder lays out the main parts of a campaign on one canvas, including the trigger, branding, imagery, rewards, sharing and customer-facing copy.
Open any step to make a change and preview the result. Where testing is available, create a variation without rebuilding the campaign from the beginning. Before launch, the actions panel and pre-launch checks highlight anything that still needs attention.
For teams managing several markets, campaigns can also be duplicated across languages, giving you a faster starting point for local versions.

## See programme performance and priorities from the first screen
The home page gives you a view of programme health as soon as you log in. See the referral funnel, key metrics, active campaigns and a to-do list in one place.
Programme health is visible from the first screen, with direct routes into rewards, content and performance.
## Build reporting dashboards with AI assistance
Create custom dashboards for different teams and reporting needs. Add metrics, charts, tables and commentary, or describe the insight you need and use AI-assisted tile creation to get started. Set the reporting period once, compare performance over time and explore results by market, customer type (subscribers or one-time buyers), currency and conversion stage.
## Resolve customer enquiries from one place
Customers brings search, filtering and flagged activity into one area. Open a customer profile to see their referral timeline, rewards, emails and codes together.
Depending on your permissions, you can also take supported service actions such as reviewing activity or resending information. The customer's history and the actions available to you stay in the same view.
## Manage your brand experience with a live preview
Colours, fonts, corner styles, layouts and imagery can be managed from the branding step. Changes appear in the preview as you make them, so you can see the customer experience before it goes live.
Every visual setting can be managed in the platform and previewed instantly.
## A guided tour of the updated experience
See how the main areas work together, from spotting an opportunity to making a campaign change and reviewing its impact.
## Where to find it
The updated experience is available at `app.mention-me.com`. Your existing programmes and data are already there. Some less frequently used capabilities may still open in Classic while they are reviewed or rebuilt.
> [card] [Read the updated experience guides](/which-platform)
>
> See what's changed and where to find everything.
## Try it
See your referral programme in the updated Mention Me experience.
[Open Mention Me](https://app.mention-me.com)
# What's new at Mention Me
Source: https://docs.mention-me.com/changelog/index
New ways to run, understand and grow your referral programme.
**September 2026**
Platform update
## [A new Mention Me](/changelog/entries/updated-mention-me-experience)
[](/changelog/entries/updated-mention-me-experience)
Your campaigns, customers and results are already in Mention Me. The updated Mention Me experience gives you more control to run and improve that programme. You see what needs attention when you log in, change the campaign, and describe the report you need.
When you describe the report, Mention Me proposes it and you check it before you keep it.
**June 2026**
New
## [Mention Me MCP Connector](/changelog/entries/ask-your-referral-data)
[](/changelog/entries/ask-your-referral-data)
Connect Mention Me to Claude, ChatGPT or another compatible AI tool to retrieve referral performance data. Review volumes, conversion trends, year-on-year comparisons and revenue contribution without first opening a separate dashboard.
**May 2026**
New
## [Custom reporting dashboards](/changelog/entries/reporting-dashboards)
[](/changelog/entries/reporting-dashboards)
Create a dashboard for a weekly review, campaign analysis or a leadership update. Add the metrics, charts and tables required for each audience, or describe the required result and use AI-assisted tile creation.
**February 2026**
New
## [Product Referral](/changelog/entries/product-referral)
[](/changelog/entries/product-referral)
Customers already send product links to friends through WhatsApp, messages and email. Product Referral makes that organic sharing visible, connecting shared-product visits and orders back to the products and people that influenced them.
# Home
Source: https://docs.mention-me.com/index
Guides, API reference, and tag integration for Mention Me and Classic.
# Everything you need to run Mention Me
Mention Me is rolling out. Classic covers the rest.
[Which one do I need?](/which-platform)
> [card] [Mention Me docs](/knowledge-app/getting-started/overview)
>
> Your new, AI native home
> [card] [Classic docs](/knowledge/getting-started/overview)
>
> Our legacy dashboard
## Other important resources
> [card] [Concepts](/knowledge-app/concepts/programme-structure)
>
> How campaigns, versions, and offers fit together
> [card] [Tag integration](/developer-docs/integration/overview)
>
> JavaScript tags, Shopify, and other ways in
> [card] [API reference](/api-reference/introduction)
>
> Endpoints and payloads
> [card] [Webhooks](/api-reference/webhooks/overview)
>
> Events pushed to your systems as they happen
# Get access token
Source: https://docs.mention-me.com/api-reference/auth/auth/get-access-token
/openapi/auth_api.oas.json post /api/oauth/token
Given a `client_id` and `client_secret`, this will return an `access_token` which can be used in the Authorization header of subsequent requests to the Merchant API.
The token provided will last for 3600 seconds (1 hour) and will need to be refreshed after this time.
# Getting an Access Token
Source: https://docs.mention-me.com/api-reference/authentication/access-token
Get an access token using your API key to make authenticated requests to the API.
In this guide, we'll walk you through the process of obtaining an access token. Access tokens are crucial for authorizing your requests to our API.
Follow the steps below to seamlessly integrate access token retrieval into your application.
**1. Request an access token**
Make a `POST` request to our authorization server using your client credentials. You can read our reference data for the API and try it out via our [Auth API Reference](/api-reference/authentication/overview).
```bash theme={null}
curl -XPOST https://demo.mention-me.com/api/oauth/token \
-H 'Content-Type: application/json' \
-d '{ "client_id": "", "client_secret": "", "grant_type": "client_credentials" }'
```
Replace `` and `` with your API key's client ID and secret respectively.
**2. Receive the access token**
Upon a successful request, the authorization server will respond with a JSON Web Token (JWT) in the access token. Here's an example response:
```json theme={null}
{
"access_token": "",
"expires_in": 3600,
"token_type": "bearer"
}
```
* **access_token**: The JWT representing your access token
* **token_type**: The type of token. In this case, it's "bearer"
* **expires_in**: The expiration time of the access token in seconds (e.g., 3600 seconds equals one hour).
## Handling Errors
While obtaining an access token, errors may occur due to various reasons. For a detailed explanation of potential errors and their resolutions, refer to our [Errors Guide](/api-reference/getting-started/errors).
## JWT Explained
Access tokens returned are [JSON Web Tokens](https://jwt.io/introduction), or JWTs. JWTs are a standardised way of representing claims between two parties. In this case, the two parties are your application and Mention Me.
You can use the debug tool at [JWT.io](https://jwt.io/) to debug what access a token has.
A typical access token will have a payload that looks something like:
```json theme={null}
{
"aud": [
"project-test-2da703ca-e983-410e-93d0-442bb05b9b06"
],
"claims": {
"env": "demo",
"merchantId": "4259"
},
"exp": 1706201080,
"iat": 1706197480,
"iss": "stytch.com/project-test-2da703ca-e983-410e-93d0-442bb05b9b06",
"nbf": 1706197480,
"scope": "customers:list",
"sub": "m2m-client-test-3191ab24-133b-4634-a02d-0ec6249dd481"
}
```
The Mention Me specific fields are:
* **claims**: This shows what Environment and Merchant a token can be used for
* **env**: In this case, we have access to the demo environment
* **merchantId**: In this case, this token can be used for Merchant 4259
* **scope**: This shows the [scopes](/api-reference/authentication/scopes) that the token has access to
## Token Expiration
Access tokens have a limited lifespan for security reasons. In our case, tokens expire after **one hour**. It's essential to implement a mechanism to refresh tokens when they expire, ensuring uninterrupted access to the API.
## Next Steps
> [card] [Scopes](/api-reference/authentication/scopes)
>
> Choose the right scope for your application.
# Create an API Key
Source: https://docs.mention-me.com/api-reference/authentication/create-api-key
Create an API key with the correct scopes to access the API.
We'll walk you through the process of creating, managing, and using API keys for authentication. API keys are composed of an ID and a secret, providing a secure way to interact with our API. We've organised this guide into sections to cover key aspects of API key management.
> [!NOTE]
>
> **Administrator role required.** Only users with the **Administrator** role can create and manage API keys. If you don't have the Administrator role, you'll see a disabled "Add new key" button with a message directing you to contact an administrator. See [User Management](/knowledge/security/account/user-management) for more on permission levels.
## Creating an API Key
All API keys are shared by the account, so if you create a key, it will be available to all users of your account.
**1. Access API Key Management**
Visit the API Key section in the platform - it's available [for demo](https://demo.mention-me.com/merchant/~/settings/api-and-tag-integration#api-keys) or for [production](https://mention-me.com/merchant/~/settings/api-and-tag-integration#api-keys). Here, you can view, create, and manage your API keys.
**2. Add a New API Key**
Click on the "Add New API Key" button. Give your API key a descriptive name to easily identify its purpose later.
> [!NOTE]
>
> You should create different API keys for different use cases. There is a limit of three keys that can be active for any one account. If you would like to create more keys than this, please contact your account manager.
**3. Obtain API Key ID and Secret**
Once created, your API key will be assigned a unique ID and a secret. These credentials are essential for authenticating your requests.
## Managing API Keys
### Viewing API Keys
Navigate to the API Key section to view a list of all your created keys. Here, you can see the names, IDs, and manage the lifecycle of each key.
### Deleting API Keys
If you no longer need an API key, simply select the key and choose the option to delete it. Be cautious, as this action is irreversible.
### Recycle API Secret
You cannot currently cycle the secret of a key directly, you should instead create a new key and switch over your application's usage to the new one, and then delete the old one when that step is completed.
## Secrets
You will use both the ID and the secret to make a call to our OAuth2 token endpoint, to get an authentication token.
### Usage and Security
The API key secret is sensitive information and should be treated with utmost care. Ensure that it is securely stored and never exposed in client-side code or public repositories.
### One-Time Viewing
For enhanced security, you can only view the secret once during the creation process. Make sure to store it in a secure location for future use. **If you lose it, you'll need to create a new key.**
### Scopes
Scopes define the permissions associated with your API key. Each API key is assigned specific scopes that determine the actions it can perform.
You cannot adjust the scopes for an API key once it has been created. You should create a new key if you need to change the scopes, and then delete the old unused key once you have updated your application.
### Understanding Scopes
Explore the available scopes in our documentation to understand the level of access each scope provides. Choose scopes that align with the functionality you need for your application.
## Next Steps
> [card] [Get an access token](/api-reference/authentication/access-token)
>
> Use your API key to retrieve a JWT for making authenticated requests.
# Authentication
Source: https://docs.mention-me.com/api-reference/authentication/overview
Understand how to authenticate with the API and make your first authenticated request.
Welcome to the Authentication Guide for Mention Me.
## Getting Started
By the end of this Getting Started guide for authentication, you will have:
* [Created a new API key](/api-reference/authentication/create-api-key)
* [Retrieved an authentication token using the API key](/api-reference/authentication/access-token)
* [Made your first authenticated request to get a customer](/api-reference/merchant-api/first-request)
> [!NOTE]
>
> **Access.** You'll need to have a Mention Me account already set up to use this API. If you don't have access, please contact your account manager.
>
> Creating and managing API keys requires the **Administrator** role. If you don't have this role, contact an administrator within your organisation. See [User Management](/knowledge/security/account/user-management) for details.
## Client Credentials Flow Diagram
Before diving into the details, let's walk through the OAuth2 client credentials flow. Understanding this flow is crucial for a smooth authentication experience.
1. **Key Generation**: Obtain **client credentials** (client ID and client secret) by registering your application on our developer portal in the Mention Me platform.
2. **Authentication Request**: Your application sends a request to our authorization server (the `/oauth/token` endpoint) with the **client credentials**. Upon successful authentication, the authorization server issues an **access token**, valid for one hour.
3. **API Requests**: Use the **access token** to make authorized requests to our API.
Steps (2) and (3) are shown in the following diagram:
```mermaid theme={null}
sequenceDiagram
participant Client
participant /oauth/token
participant MerchantAPI
Client->>/oauth/token: Request token using "client_credentials" OAuth flow
/oauth/token-->>Client: Authentication access token (JWT) returned
Client->>MerchantAPI: Request to get a customer, with JWT in header
MerchantAPI-->>Client: Customer returned (if scopes allowed)
```
## Token Expiration Management
The **access token** provided will last for **1 hour**.
You should implement a mechanism to refresh tokens when they expire to ensure uninterrupted access.
## Next Steps
> [card] [Create an API key](/api-reference/authentication/create-api-key)
>
> Set up your first API key to start making authenticated requests.
# Scopes
Source: https://docs.mention-me.com/api-reference/authentication/scopes
What are scopes and how do they work?
Scopes play a crucial role in securing and controlling access to specific functionalities within our API.
You can think of them as the **permissions** each API key has to access data.
In this guide, we'll delve into what scopes are, why they are used, and how you can effectively manage them to tailor your application's access.
## What Are Scopes?
Scopes define the specific permissions or actions that an API key is allowed to perform. Each scope corresponds to a set of functionalities or resources within the API. By associating scopes with your API key, you can fine-tune the level of access your application has.
Without specifying *any* scope, you won't be able to utilise the API.
## Included Scopes
Each set of API keys only provides access to **one** Mention Me Merchant. This is automatically enforced when you setup your credentials.
They also only allow access to **one** environment.
If you need access to multiple Merchants, e.g. Brand A and Brand B, you will need different API keys.
Equally, if you require access to multiple environments, e.g. `demo.mention-me.com` and `mention-me.com`, you will also need different API keys.
## Scopes You Can Choose
Each API defined in our reference explains which scope(s) are required to use that API.
For example, if you want to create a new customer, you'll need to grant the `customer:write` scope.
Each scope is suffixed with the level of privilege it grants for a particular type of collection, with three levels available:
* `:read` - allows you to read an item in a collection
* `:write` - allows you to create or update an existing item in a collection
* `:delete` - allows you to delete an existing item in a collection
*NB: Not all collections provide all levels.*
## Least Privilege
We recommend following the [principle of least privilege](https://en.wikipedia.org/wiki/Principle_of_least_privilege). This means to provide each set of credentials as little access as possible required to do what is required.
E.g. we recommend for a customer service application is only given `:read` access, whereas a tool for updating data might only be given `:write` - i.e. each application has the minimal permissions required.
## Next Steps
> [card] [Auth API reference](/api-reference/authentication/overview)
>
> View the full Auth API endpoint documentation.
# Environments
Source: https://docs.mention-me.com/api-reference/getting-started/environments
Which environments you can use for accessing Mention Me
Mention Me has two customer facing environments.
These are known as "demo" and "live".
| Environment | Domain Name | Purpose |
| - | - | - |
| Demo | demo.mention-me.com | Our demo environment is for experimentation, testing, and learning how to use the API. Most clients will use this during the onboarding phase. It can be used at any time, and should **not** contain real customer data. |
| Live | mention-me.com | Our live environment is used for your real customers. It will grant real rewards and is used for all customer facing activity. |
You should conduct all testing against demo.mention-me.com.
For Javascript tags, the domain names are slightly different:
| Environment | Domain Name |
| - | - |
| Demo | tag-demo.mention-me.com |
| Live | tag.mention-me.com |
## Next Steps
> [card] [Errors](/api-reference/getting-started/errors)
>
> Learn about different errors the Mention Me APIs might return.
# Errors
Source: https://docs.mention-me.com/api-reference/getting-started/errors
Errors you might encounter when using the Mention Me APIs.
Understanding and effectively handling errors is crucial for a robust and reliable integration with our API. This guide provides insights into common errors you might encounter and best practices for resolving them. Refer to the table below for detailed information on each error.
## Error Types
| Code | Message |
| - | - |
| `401` | Expired token or other authentication problem |
| `404` | Could not find the resource you were querying |
| `429` | Exceeded a rate limit - slow the number of requests down |
| `500` | Something's wrong on our end, try again shortly |
If you receive a non-`200` response from the API, you should check the response body for more information. The response body will be a JSON object with an `code` key, and a `message` key.
```json theme={null}
{
"code": "401",
"message": "Expired token."
}
```
If the error response is *not* a `401` response, then that means your authentication token is valid, but there is something wrong with your request. You should check the API documentation for more information on the endpoint you're trying to access.
## Best Practices for Handling Errors
> [accordion] Error Handling in Code
>
> Implement robust error handling in your code to gracefully manage different error scenarios. Log error details for troubleshooting purposes.
> [accordion] Retry Mechanism
>
> For transient errors (e.g., 429 or 500), implement a retry mechanism with an exponential backoff strategy.
> [accordion] Rate Limiting
>
> Respect rate limits to avoid being temporarily blocked. Implement rate limiting on your end to prevent reaching these limits.
> [accordion] Detailed Error Messages
>
> Extract and display relevant error messages from the API response to assist in debugging.
> [accordion] Monitoring and Alerts
>
> Set up monitoring tools to track error rates and receive alerts when anomalies occur.
## Next Steps
> [card] [Authentication](/api-reference/authentication/overview)
>
> Learn about authentication with the Mention Me APIs.
# Rate Limits
Source: https://docs.mention-me.com/api-reference/getting-started/rate-limits
Understand rate limits for the Mention Me APIs
Mention Me applies rate limiting to ensure we maintain a high quality of service for all users.
Rate limits are applied for the Merchant API.
## Consumer & EntryPoint API Limits
No rate limiting is applied to the EntryPoint and Consumer APIs - however anti-gaming mechanisms are in place. These are confidential and are unlikely to be met in normal operation.
## Merchant API Limits
The Merchant API applies rate limits over a 5 minute window. You may make as many as N requests in that 5 minute period.
e.g. if the limit is 100 you could:
* Make 20 requests every minute
* Make 100 requests in 1 minute, then no more requests for 4 minutes
If you exceed the limit, a `429` error response will be returned.
We will return the following headers with each request (regardless of whether the limit is exceeded or not):
* `X-RateLimit-Limit` - what is the limit applied to this API endpoint?
* `X-RateLimit-Remaining` - how many requests can you make before you exceed the limit. If the number is 0, you will receive a `429` error
* `X-RateLimit-Reset` - the number of seconds before the rate limit resets
The documentation for each API describes the rate limit that applies to that endpoint.
> [!NOTE]
>
> **Hitting the limit?** If you're regularly hitting our rate limits, please speak to us - we can advise on optimal patterns to deploy or increase your limit depending on your use case.
## Next Steps
> [card] [Errors](/api-reference/getting-started/errors)
>
> Learn about different errors the Mention Me APIs might return.
> [card] [Introduction](/api-reference/merchant-api/overview)
>
> Introduction to the Mention Me Merchant API.
# API Reference
Source: https://docs.mention-me.com/api-reference/introduction
Complete reference documentation for the Mention Me REST APIs
The Mention Me API lets you programmatically manage referral programmes, track conversions, and access customer data. All endpoints use JSON over HTTPS.
## APIs
> [card] [Auth API](/api-reference/authentication/overview)
>
> OAuth2 client credentials flow. Obtain access tokens for authenticating requests to other APIs.
> [card] [Merchant API](/api-reference/merchant-api/overview)
>
> Manage your referral programme, campaigns, and merchant-level configuration.
> [card] [Consumer API](/api-reference/consumer-api/overview)
>
> Track orders, look up customers, and manage referral data at the consumer level.
> [card] [Entrypoint API](/api-reference/entry-point-api/overview)
>
> Server-side alternative to JavaScript tags. Serve referrer offers, referee journeys, and dashboards via API.
## Base URLs
| Environment | Base URL |
| - | - |
| Production | `https://api.mention-me.com` |
| Demo | `https://api-demo.mention-me.com` |
## Authentication
All API requests require a Bearer token obtained via the [Auth API](/api-reference/authentication/overview). See the [authentication guide](/api-reference/authentication/overview) for details on the OAuth2 client credentials flow.
## Common Patterns
* All responses are JSON
* Dates use ISO 8601 format
* Errors return standard HTTP status codes with a JSON error body
* Rate limits apply per access token - see [rate limits](/api-reference/getting-started/rate-limits)
# Your First Merchant API Request
Source: https://docs.mention-me.com/api-reference/merchant-api/first-request
Make your first request to the Merchant API.
This section will guide you through the process of constructing a request and handling the API response.
**1. Obtain an access token**
You’ll need an access token to make requests. [Head back to our authentication section if you’ve not done this yet.](/api-reference/authentication/overview)
**2. Make a request**
For each request, pass the access token in the `Authorization` header. The token you’ll have will be a `Bearer` token, so prefix it with `Bearer ` (note the space).
Here’s an example in curl:
```bash theme={null}
curl -XPOST https://mention-me.com/api/merchant/v2/customers \
-H 'Content-Type: application/json' \
-H 'Authorization: Bearer ' \
--data '{}'
```
Replace the URL with your chosen API endpoint, and the token with the one you obtained previously.
**3. Handle the response**
Ensure that your application is prepared to handle different HTTP status codes and response payloads.
Each API will declare the error responses it has, and you can learn more about errors under [errors](/api-reference/getting-started/errors).
Now that you’ve successfully made your first API request, continue exploring the API documentation. If you encounter any challenges or have questions, refer to the [Errors Guide](/api-reference/getting-started/errors) or reach out to our [support team](https://help.mention-me.com/hc/en-gb/requests/new) for assistance.
> [card] [Get customers](/api-reference/merchant-api/overview)
>
> Ready to call our API? Visit our API reference to learn about endpoints available.
# Overview
Source: https://docs.mention-me.com/api-reference/merchant-api/overview
Introduction to the Mention Me Merchant API.
Welcome to the Merchant API guide.
The Merchant API can be used to access data about your customers as well as configuration data for Mention Me.
You can use it to:
* Perform common actions like marking a customer as **eligible for a reward**, or **purging** them
* Retrieve details about a customer, e.g. their segments or how often they've shared
> [!NOTE]
>
> The Merchant API requires **[Authentication](/api-reference/authentication/overview)**.
> [card] [Authentication](/api-reference/authentication/overview)
>
> Learn about authenticating with the Merchant API.
# Validate coupon code
Source: https://docs.mention-me.com/api-reference/merchant/coupons/validate-coupon-code
/openapi/merchant_api.oas.json get /api/merchant/v2/coupons/validate/{coupon_code}
Check whether a single-use coupon code is valid and return details about the reward it is allowed to be redeemed for.
In this case we assume that Mention Me has issued a coupon to a customer or potential customer. This coupon could be a single-use coupon previously given to Mention Me in a batch of coupons. Or it could be a single-use coupon generated directly by Mention Me.
The customer could have been promised the reward as a potential new customer (referee), for referring another customer (referrer) or just because they've been offered an incentive to come to store (incentive for action).
The customer then brings the coupon to the merchant intending to redeem it. This endpoint allows the merchant (or a third party) to check if the coupon is still valid and is capable of being used to redeem a reward at Mention Me.
This endpoint allows you to validate a coupon code before attempting to redeem it. It will check:
- Whether the coupon exists for your merchant
- Whether the coupon is currently valid (not expired, not barred, has started)
- Whether the coupon is attached to an unredeemed reward and hence can be spent
There are three responses (validityResponseCode):
- FOUND_REDEEMABLE - this means the coupon is found, is valid and can be used to spend the provided reward.
- FOUND_NOT_REDEEMABLE - this means the coupon is known to Mention Me - but is either not valid or has already been spent.
- NOT_FOUND - the coupon is not known to Mention Me.
There is also a human-readable description of the response code (validityResponseDescription). Use the validityResponseCode to decide on the outcome (the human-readable description could change).
If the coupon is found, the response will include details about the reward such as the discount amount, type (e.g., percentage or fixed amount), currency, and description.
If the coupon is not redeemable, the validityResponseDescription will indicate why it cannot be used.
If the coupon is not found, the response won't have additional details.
If you find the coupon is valid and then allow the customer to redeem the coupon you should then subsequently tell us about the purchase they made, including the coupon code so that we can mark it as redeemed. Once you've done that the coupon will of course be invalid if requested again.
You can do this using the Record Order API endpoint (if you have the email address of the customer) or the Redeem Coupon API endpoint (if you don't have the email address of the customer).
**Scopes:** `customers:read`, `rewards:read`
**Rate limits:** 300 requests per 5 minutes. Shared across all 'coupons' endpoints.
# Get customers
Source: https://docs.mention-me.com/api-reference/merchant/customers/get-customers
/openapi/merchant_api.oas.json post /api/merchant/v2/customers
Returns all customers who match the given set of filters.
When filtering by Customer Id, every customer who matches the identifier will be returned.
When filtering by Email, because it is unique, one customer will be returned for each matching identifier.
If we cannot find a customer provided, we will not include them in the response.
If none of the customers provided can be found, we will return a 404.
You may send 100 customers per request.
**Scopes:** `customers:read`
**Rate limits:** 300 requests per 5 minutes. Shared across all 'customers' endpoints.
# Lapse customers
Source: https://docs.mention-me.com/api-reference/merchant/customers/lapse-customers
/openapi/merchant_api.oas.json post /api/merchant/v2/customers/lapse
A customer who is lapsed is one who you no longer consider an existing customer. This can be used to allow the customer to be referred again. A common use case for this is in subscription businesses where a customer has cancelled their subscription and is no longer a customer - you can mark them as lapsed to enable them to be re-introduced.
Lapsing is a permanent action. It can be reversed by recording a new transaction for the customer.
Lapsing is done on a queue. It may take some time for the customers to be recorded as lapsed. We recommend using the `GET /v2/customers` endpoint to determine if the customer is active or not. Approximate time to lapse is
normally under < 5 minutes, but can be several hours in some cases.
Customers who we were able to queue will be returned in the `accepted` array. Customers who we do not hold a record of or cannot find will be returned in the `errors` array.
**Scopes:** `customers:write`
**Rate limits:** 300 requests per 5 minutes. Shared across all 'customers' endpoints.
# Purge customers
Source: https://docs.mention-me.com/api-reference/merchant/customers/purge-customers
/openapi/merchant_api.oas.json delete /api/merchant/v2/customers
Purge all customers matching the given identifiers.
Purging is a permanent action. Once a customer is purged, they cannot be recovered.
Purging is done on a queue. It may take some time for the customers to be purged. We recommend using the `GET /v2/customers` endpoint to determine if the customers have been purged. Approximate time to purge is
normally under < 5 minutes, but can be several hours in some cases.
Customers who we were able to queue will be returned in the `accepted` array. Customers who we do not hold a record of or cannot find will be returned in the `errors` array.
**Scopes:** `customers:delete`
**Rate limits:** 300 requests per 5 minutes. Shared across all 'customers_purge' endpoints.
# Conversion Message Tag
Source: https://docs.mention-me.com/developer-docs/integration/conversion-message
Display a reward reminder banner to referred friends and incented customers on your website
## What Is the Conversion Message Used For?
The conversion message embeds a banner on pages of your website (generally the homepage and/or product pages) which is only shown in these cases:
> [card] Mention Me Refer
>
> Shown to referred friends that have a reward but have not purchased yet. The purpose of the message is to remind them of their reward and encourage them to go on to purchase.
> [card] Mention Me Retain
>
> Shown to customers who have been given an incentive to take an action. The purpose of the message is to remind incented customers of their reward and encourage them to take action.
## How to Integrate the Conversion Message
**1. Add the wrapper div**
Include the following `
Mention Me referral dashboard renders here for logged-in customers
{% endif %}
{% if customer %}
Please log in to see your referral dashboard.
{% endif %} ``` **6. Add your partner code and save** Replace `PARTNERCODE` with your partner code, then click **Save**. What the code does: * Loads the dashboard only for logged-in customers, passing their email address and name so they see their own referral details. * Wraps the dashboard in your theme's `page-width` container, centred and capped at 1200px wide, so it lines up with the rest of your account pages. * Shows logged-out visitors a login link that brings them back to the dashboard after they log in. * Shows a dashed placeholder in the theme editor only, to mark where the dashboard will appear. For other customer details you can pass, see Shopify's [Liquid customer object](https://help.shopify.com/themes/liquid/objects/customer). ### Step 3: Assign the template **1. Open the page** Go back to **Online Store > Pages** and open **Referral Dashboard**. **2. Choose the template** In the **Template** dropdown, choose `referral-dashboard`, then click **Save**. ### Step 4: Add it to your account navigation Add a **Refer a Friend** link to `/pages/referral-dashboard` alongside your other account links (Orders, Loyalty and so on). Depending on your theme, this is either: * a menu under **Online Store > Navigation**, or * a setting or block in your account tabs section in the theme editor. You can also link to it from transactional emails, for example with a "Refer a friend and earn" call to action. ### Step 5: Test **1. Log in as a test customer** Go to `/account/login` and log in as a test customer. **2. Open the dashboard** Click the new **Refer a Friend** link in your account area, or go to `/pages/referral-dashboard`. **3. Check the dashboard** Check the dashboard loads with the test customer's details. **4. Check the logged-out view** Log out and go to the page again. Check the login link appears. # Landing Page Tag Source: https://docs.mention-me.com/knowledge/shopify/additional-tags/landing-page Create a Mention Me referral landing page in Shopify so customers can engage with your referral programme without a purchase. > [!NOTE] > > This guide is for the Classic dashboard. If you use the Mention Me dashboard at app.mention-me.com, follow the [Mention Me landing page guide](/knowledge-app/integrations/shopify/landing-page), which has the right launch steps. A landing page lets customers engage with your referral programme without requiring a purchase. These steps add the Mention Me referrer offer to its own Shopify page, using a **Custom Liquid** section on a dedicated page template in the theme editor.  Referral landing page example > [!WARNING] > > The Mention Me offer does not render in the Shopify theme editor, because the editor runs the page inside Shopify Admin, which blocks the offer's frame. The code below shows a dashed placeholder box in the editor instead, so you can see where the offer will sit. Always test the real offer on the storefront. ## Step 1: Create the page template **1. Open the theme editor** In Shopify Admin, go to **Online Store > Themes** and click **Customize** on your theme. **2. Create a template** In the page dropdown at the top of the editor, choose **Pages**, then **Create template**.  The page dropdown in the theme editor, with Create template at the bottom of the Pages list. **3. Name it and base it on the default page** Name the template `landingpage`, set **Based on** to **Default page**, then click **Create template**.  The Create a template dialog, with the name landingpage and Based on set to Default page. Basing the template on **Default page** gives it a **Template** area in the sidebar, which is where the Custom Liquid section must go. A template with no main area only shows the Header and Footer groups. ## Step 2: Add the Custom Liquid section **1. Add a Custom Liquid section** With the `landingpage` template open, click **Add section** under the **Template** heading in the sidebar, then choose **Custom Liquid**. > [!WARNING] > > Don't use **Add section** under **Header**. The header group is shared by every page, so the offer would appear across your whole site.  Adding a section under the Template heading, with Custom Liquid in the section list. **2. Paste in the code with the Demo tag** Paste the code below into the Custom Liquid section and replace `INSERT_PARTNERCODE` with your partner code. The only difference between the Demo and Live versions is the tag host: `tag-demo.mention-me.com` for Demo and `tag.mention-me.com` for Live. > [!WARNING] > > Only use the **Demo** tag on a staging store, or while you check the page loads and displays the offer correctly. Any page customers can reach on your live store must use the **Live** tag (`tag.mention-me.com`), with your programme launched. ```liquid Demo theme={null} {% if request.design_mode %}
Mention Me referrer offer renders here on the live page
{% endif %}
```
```liquid Live theme={null}
{% if request.design_mode %}
Mention Me referrer offer renders here on the live page
{% endif %}
```

The landingpage template with the code pasted into Custom Liquid, and the Page section hidden.
**3. Hide the Page section**
Click the eye icon on the **Page** section to hide it (or delete the section), unless you want the page title to show above the offer.
**4. Save**
Click **Save**. The editor preview shows the dashed placeholder where the offer will render.

The theme editor preview, showing the placeholder where the offer renders on the live page.
### What the code does
* The `request.design_mode` block shows the dashed placeholder only in the theme editor. Customers never see it.
* `#mmWrapper` is where the embedded offer renders.
* For logged-in customers, their email address and name are passed so the referrer is recognised straight away.
* Everything is wrapped in a function so its variables don't clash with other scripts on the page.
## Step 3: Assign the template to a page
**1. Open or create the page**
Go to **Online Store > Pages** and open your referral page, or click **Add page** to create one (for example, **Refer a friend**). Leave the content area blank. The template supplies it.
**2. Choose the template**
In the **Template** dropdown, choose `landingpage`.

Choosing the landingpage template for the Refer a friend page.
**3. Save**
Click **Save**. If the page is **Visible** on your live store, make sure it uses the Live tag and your programme is launched (see Step 5).
Back in the theme editor, the top of the template's sidebar should now say **Assigned to 1 page**. If it says 0 pages, the template isn't linked to a page yet.
## Step 4: Test on the storefront
**1. Open the page on the storefront**
Use the theme editor's **Preview** button (the eye icon, top right). To try the template on another page before you assign it, add `?view=landingpage` to that page's URL, for example `/pages/contact?view=landingpage`.
**2. Check the offer renders**
Check the referral offer appears where the placeholder was, and looks right.
**3. Test as a logged-in customer**
Log in as a test customer and reload the page to check the logged-in referrer flow.
**4. Check other pages**
Open other pages, such as your home page, to make sure the offer only shows on the landing page.
## Step 5: Go live
**1. Switch to the Live tag**
In the theme editor, open the `landingpage` template's Custom Liquid section. If you tested with the Demo tag, change only `tag-demo.mention-me.com` to `tag.mention-me.com`, keeping your partner code and any locale changes, then click **Save**. See [How to Switch from Demo to Live Tags](/knowledge/onboarding/testing/demo-to-live) for the rest of your integration.
**2. Launch your programme**
Set your campaign to **Running** in Classic. Follow [How to Push a Draft Offer Live](/knowledge/referral/offers/push-draft-live) to launch your offer. The Live tag only shows an offer once your programme is live.
**3. Test the page again**
Repeat the storefront checks in Step 4 and confirm the live referral offer appears and looks right.
**4. Share the page**
Once the page uses the Live tag and your programme is launched, make sure it is **Visible**, then link to it from your navigation, emails or social posts so customers can find it.
# Overview
Source: https://docs.mention-me.com/knowledge/shopify/additional-tags/overview
When and how to use extra Mention Me Shopify tags -- referee and landing page -- outside of the Shopify App, and where the dashboard now lives.
The [Mention Me Shopify App](/knowledge/shopify/app-installation) covers the most impactful referral touchpoints -- checkout (Shopify Plus), thank you, order status, and the **customer account dashboard**. The **additional tags** on this page cover surfaces the app still does not reach.
Use them when you want to:
* Promote referral on pages your Shopify App integration doesn't cover (cart, sidecart, `checkout.liquid`).
* Give customers a standalone **landing page** to share and redeem referrals without needing to buy first.
> [!NOTE]
>
> These tags are complementary to the [Mention Me Shopify
> App](/knowledge/shopify/app-installation) -- always run them alongside it.
> They are **not** a replacement for the app.
For the referral dashboard on **new customer accounts**, add the Profile block in the app instead of pasting Liquid. See [Referral Dashboard](/knowledge/shopify/additional-tags/dashboard). Keep the Liquid snippet only for classic customer accounts.
## Available Tags
> [card] [Checkout & Sidecart Referee Tag](/knowledge/shopify/additional-tags/checkout)
>
> Add the "Been referred by a friend?" link to your cart, sidecart, or `checkout.liquid` (`checkout.liquid` is Shopify Plus only).
> [card] [Landing Page Tag](/knowledge/shopify/additional-tags/landing-page)
>
> Create a standalone referral landing page so customers can engage with your
> referral program without a purchase.
> [card] [Referral Dashboard](/knowledge/shopify/additional-tags/dashboard)
>
> Add the dashboard in customer accounts through the app. Liquid is the old path for classic accounts.
## Before You Start
* Have your Mention Me **Partner Code** ready -- you'll replace `INSERT_PARTNERCODE` (or `PARTNERCODE`) in every snippet.
* Confirm your locale mapping between Shopify and Mention Me -- see [Shopify: Locales](/knowledge/shopify/locales).
* If you're on Shopify Plus and want the Referee experience inside checkout itself, prefer the [Checkout Extensibility App](/knowledge/shopify/app-installation) over `checkout.liquid`.
# How to Add the Announcement Banner
Source: https://docs.mention-me.com/knowledge/shopify/announcement
How to add the Mention Me announcement banner to your Shopify Thank You and Order Status pages.
> [!NOTE]
>
> The following instructions are for **Brand Referral**, which is **not currently available** on the free Tier of the Shopify App. [Contact us to know more](https://help.mention-me.com/hc/en-gb/requests/new?ticket_form_id=20114637802909).
Shopify [announced](https://shopify.dev/changelog/build-an-announcement-bar-extension-for-the-thank-you-page-or-customer-account-pages) the Announcement banner for Shopify Checkouts on 28 August 2025. If you installed the app before then, follow this guide to add the Announcement to your existing checkout pages.
First-time installer? Follow the [comprehensive Mention Me app setup guide](/knowledge/shopify/app-installation), which includes announcement banner instructions.
## Introduction
The announcement banner is shown to customers upon completing a transaction. It prominently appears in checkout pages and helps increase referral conversions.

Mention Me announcement banner on the Thank You page
**This process takes less than 5 minutes per store and requires no technical expertise.**
You will need access to customise your Shopify Checkout.
> [!NOTE]
>
> The Announcement Banner supports text and branding options only. If you're looking to make changes beyond the available settings, please contact the Mention Me Support team.
## Configuring Your Checkout
Navigate to **Settings** in your Shopify admin.

The Settings navigation in the Shopify admin.
Click **Checkout**.

The Checkout settings page in the Shopify admin.
On the Checkout page, click **Customise**.

The Checkout page with the Customise button.
### Where to Add the Announcement
Add the Mention Me Announcement block in two locations:
* **Thank You** page -- appears after order confirmation
* **Order Status** page -- where customers review their order status
### Adding to Thank You Page
**1. Switch to the Thank You Page**
Use the page selector in the design editor to switch to the "Thank You" page.

The checkout editor page selector showing the Thank You page.
**2. Add a Block**
Click **Add block** under the **Announcement bar** section.

The Add block option under the Announcement bar section.
**3. Select the Announcement**
Select **Mention Me Refer a Friend Journey**.

Selecting the Mention Me Refer a Friend Journey block.
The announcement banner will appear at the top of the page and automatically use your brand colours from the checkout settings.
### Adding to Order Status Page
**1. Switch to the Order Status Page**
Use the checkout page selector and select **Order Status**.

The checkout editor page selector showing the Order Status page.
**2. Add a Block**
Add the announcement block by clicking **Add block** under **Announcement bar**.

The Add block option under the Announcement bar section.
**3. Select the Announcement**
Choose **Mention Me Refer a Friend Journey**.

Selecting the Mention Me Refer a Friend Journey block for the Order Status page.
This will place the banner across the top of the order status page using your brand's theme.

The Mention Me announcement banner shown on the Order Status page.
Your Mention Me Announcement banner is now integrated across both the Thank You and Order Status pages. The referral prompt appears immediately after a successful purchase -- the optimal time for a customer to share your brand.
# FAQs
Source: https://docs.mention-me.com/knowledge/shopify/app-faqs
Commonly asked questions about the Mention Me Shopify App, including Shopify Plus requirements, Web Pixels, and checkout extensions.
> [accordion] What best practice do you have for the Shopify App?
>
> We have written a [best practice guide](/knowledge/shopify/checkout-extensibility) to help advise on setting up your Shopify App to maximise performance.
> [accordion] Do I need to be on Shopify Plus?
>
> You can use the Post Purchase and Product Referral extension without Shopify Plus.
>
> The "Been referred by a friend?" experience cannot be added to the Shopify Checkout without Shopify Plus. If you are not a Shopify Plus client, use the [standard Referee Integration](/knowledge/shopify/additional-tags/checkout) on a page earlier in your checkout, such as a Cart page or slide-out cart.
> [accordion] Can we use Shopify Web Pixels alongside or instead of the App?
>
> Shopify Web Pixels cannot display any UI to the customer. They can only send analytics events to third parties. UI such as the "Been referred by a friend?" experience pre-purchase, or the referral promotion post-purchase, cannot be added using Web Pixels.
>
> You could theoretically use Shopify Web Pixels for order tracking, but not for promotion. As promoting at the point of delight (i.e. post purchase) is the **most important promotion point**, use the Mention Me Shopify App instead.
> [accordion] Can I install the App before upgrading to Checkout Extensions?
>
> Yes. You can install and configure the app before upgrading. The app won't do anything until you go live with Checkout Extensibility in Shopify.
>
> You **must** keep the Referrer tag in additional scripts until you upgrade Checkout Extensibility on your Post Purchase page.
> [accordion] Can the Referrer Journey open with a pop-up?
>
> No. Shopify does not allow popups unless a user clicks a button or link first. Their alternative is the "Announcement" banner. The Mention Me Shopify App supports the Announcement -- follow our [integration instructions](/knowledge/shopify/app-installation) to set it up.
>
> Read more in [Shopify's documentation](https://shopify.dev/docs/apps/build/checkout/thank-you-order-status/ux-for-announcement-bar).
> [accordion] Does the Shopify App support pages outside of Checkout Extensibility?
>
> No. For Landing Pages or adding the Referee journey earlier in your checkout (like a side cart), use the standard Mention Me Tag integration via our [additional tag implementation guide](/knowledge/shopify/additional-tags/checkout).
> [accordion] Does the Shopify App support B2B orders?
>
> The Mention Me Shopify App is disabled for B2B orders. If you'd like to change this, [contact our Support Team](https://help.mention-me.com/hc/en-gb/requests/new?ticket_form_id=20114637802909).
# How to Install the Mention Me Shopify App
Source: https://docs.mention-me.com/knowledge/shopify/app-installation
Install the Mention Me Shopify App and add referral blocks to your cart, thank you, order status, and customer account pages.
## Install the App
**1. Install from the Shopify App Store**
Go to the [Mention Me app on the Shopify App Store](https://apps.shopify.com/mention-me) and click **Install**. Log in to your Shopify store if prompted.

The Shopify app permissions screen, shown before installation completes.
Review the permissions and click **Install**.
**2. Get Started**
On the welcome screen, click **Get Started**.
**3. Connect to Mention Me**
On the **Connect to Mention Me** screen, click to connect.

The Connect to Mention Me screen in the Mention Me app.
**4. Sign In or Create an Account**
Sign in or create an account at [app.mention-me.com](https://app.mention-me.com).

The Mention Me sign in or create account screen.
**5. Connect Your Workspace**
Select your workspace, or create a new one, then click **Connect**. If you can't see your existing workspace, [contact us](https://help.mention-me.com/hc/en-gb/requests/new?ticket_form_id=20114637802909).

The Connect to workspace screen.
The app is now connected.
## Add Brand Referral to Your Store
> [!NOTE]
>
> **Brand Referral** is not available on the free tier of the Shopify App. [Contact us to find out more](https://help.mention-me.com/hc/en-gb/requests/new?ticket_form_id=20114637802909).
The Mention Me app includes a **Brand referral setup** page that lists every block to add and tracks which ones are live. You add the blocks in Shopify, not in the Mention Me app.
To open it, go to **Apps > Mention Me > Brand referral setup** in your Shopify admin. Each item has a button that opens the right place in Shopify.
> [tab] Cart (Most Plans)
>
> 
>
> The How to set up checklist on the Brand referral setup page.
> [tab] Checkout (Shopify Plus)
>
> 
>
> The How to set up checklist on the Brand referral setup page for Shopify Plus.
| Block | Where it appears | Required |
| - | - | - |
| Checkout block (Shopify Plus) | Order summary in checkout, so referred customers can claim their offer | Yes, on Shopify Plus |
| Cart block | Cart page, so referred customers can claim their offer | Yes on most plans. Recommended on Shopify Plus |
| Cart drawer referral | Cart drawer, for themes that open the cart in a drawer | Yes on most plans, if your theme uses a cart drawer. Recommended on Shopify Plus |
| Thank you block | Main content of the thank you page | Yes |
| Order status block | Main content of the order status page | Yes |
| Announcement banners | Announcement bar on the thank you and order status pages | Recommended |
| Referral dashboard | Profile page in customer accounts | Recommended |
### Let Referred Customers Claim Their Offer
Where this block goes depends on your Shopify plan. If your plan doesn't allow blocks in checkout, the setup page tells you, and you add it to the cart instead.
On Shopify Plus, add the checkout block. We also recommend adding the cart block and cart drawer, so referred customers can claim their offer before they reach checkout.
> [tab] Cart (Most Plans)
>
> **1. Add the Cart Block**
>
> On the **Brand referral setup** page, click **Open theme editor** next to **Add the cart block**.
>
> In the theme editor, add the **Referred by a friend** block to the cart page, then click **Save**.
>
> 
>
> Adding the Referred by a friend block to the cart page in the theme editor.
>
> **2. Turn On the Cart Drawer**
>
> Most themes open the cart in a drawer, and a block on the cart page can't be placed there.
>
> Click **Open app embeds** next to **Turn on the cart drawer**. In the theme editor, turn on **Cart drawer referral**, then click **Save**.
>
> 
>
> Turning on the Cart drawer referral app embed.
> [tab] Checkout (Shopify Plus)
>
> **1. Open the Checkout Editor**
>
> In Shopify Admin, go to **Settings > Checkout** and click **Customise**.
>
> 
>
> The Checkout page with the Customise button.
>
> **2. Add the Checkout Block**
>
> In the **Order Summary** section, click **Add block** and choose **Mention Me Checkout Journey**.
>
> 
>
> Adding the Mention Me Checkout Journey block to the Order Summary section.
>
> Then tick **Include block in Shop Pay** so the block also shows for Shop Pay customers:
>
> 
>
> The Include block in Shop Pay checkbox.
>
> **3. Save Your Changes**
>
> Click **Save**. The Mention Me link now appears under your discount box.
>
> 
>
> The Mention Me field appearing under the discount box in checkout.
>
> **4. Add the Cart Block and Cart Drawer (Recommended)**
>
> Follow the steps in the **Cart (Most Plans)** tab to add the **Referred by a friend** block and turn on **Cart drawer referral**.
### Configuring Your Shopify Checkout
Add these blocks to the thank you and order status pages so customers can refer a friend after they buy.

The thank you, order status, announcement banner, and dashboard items on the setup page.
**1. Add the Thank You Block**
Click **Open thank you page** on the setup page. In the **Main** content of the thank you page, click **Add block** and select **Mention Me Refer a Friend Journey**, then click **Save**.

Adding the Mention Me Refer a Friend Journey block to the Main section.
> [!TIP]
>
> Place the block high up and in the left-hand column. Blocks in the right-hand column don't show on mobile.
**2. Add the Order Status Block**
Click **Open order status page** on the setup page. In the **Main** content, add **Mention Me Refer a Friend Journey** and click **Save**.

The checkout editor page selector showing the Order Status page.
**3. Add the Announcement Banners (Recommended)**
On both the thank you and order status pages, click **Add block** in the **Announcement bar** and select **Mention Me Refer a Friend Journey**. Click **Save**. The banner uses your checkout colours. For the full steps, see the [announcement banner guide](/knowledge/shopify/announcement#where-to-add-the-announcement).

Adding the Mention Me Refer a Friend Journey block to the Announcement bar.
### Add the Referral Dashboard to Customer Accounts (Recommended)
Customers can open their referral dashboard from the **Profile** page in new customer accounts. No theme code is needed.
**1. Open the Profile Page**
Click **Open profile page** on the setup page. Alternatively, go to **Settings > Customer accounts** and click **Customise**, then switch to the **Profile** page.
**2. Add the Dashboard Block**
Click **Add block**, select **Mention Me Referral Dashboard**, and click **Save**.
For classic customer accounts, see [Referral Dashboard](/knowledge/shopify/additional-tags/dashboard).
## Check Your Setup
Return to the **Brand referral setup** page and click **Refresh**. The **Extension Status** panel shows a tick next to each block that's live.

The Extension Status panel showing which blocks are configured.
If a block doesn't show as configured, check that you clicked **Save** in the Shopify editor, then click **Refresh** again. If blocks don't appear on your store, check that the app is active and visibility is set in the Mention Me platform.
## See Also
> [card] [Checkout Extensibility Best Practices](/knowledge/shopify/checkout-extensibility)
>
> Recommended placement and copy optimisations to maximise referral performance.
> [card] [Referral Dashboard](/knowledge/shopify/additional-tags/dashboard)
>
> Full steps for the customer account dashboard, including classic customer accounts.
> [card] [Additional Tags](/knowledge/shopify/additional-tags/overview)
>
> Add Mention Me to surfaces the app doesn't reach yet.
> [card] [Shopify App FAQs](/knowledge/shopify/app-faqs)
>
> Answers to common questions about the Mention Me Shopify App.
# Checkout Extensibility Best Practices
Source: https://docs.mention-me.com/knowledge/shopify/checkout-extensibility
Recommended optimisations for Shopify Checkout Extensibility to maximise referral performance with Mention Me.
> [!NOTE]
>
> The following instructions are for **Brand Referral**, which is **not currently available** on the free Tier of the Shopify App. [Contact us to know more](https://help.mention-me.com/hc/en-gb/requests/new?ticket_form_id=20114637802909).
These optimisations are recommended for all clients using Shopify Checkout Extensibility on their Checkout or Post-Purchase pages.
## Display Mention Me on Both Thank You and Order Status Pages
Shopify App Blocks allow you to place the Mention Me experience across multiple checkout areas. We strongly recommend including it on **both** the Thank You and Order Status pages.
**The Order Status page can account for up to 30% of post-purchase referrals and improve enrolment rates by up to 20%.**
See step-by-step setup in the [installation guide](/knowledge/shopify/app-installation).
## Optimise Placement of App Blocks
Place the Mention Me block at the **top left** of the Thank You and Order Status pages, ahead of other content.
**Moving the block "above the fold" and positioning it top-left led to a 130% boost in referral performance in tests.**
Avoid placing the block in the sidebar -- sidebars don't appear on mobile, reducing effectiveness.
Shopify currently doesn't allow different placements for desktop vs. mobile, or built-in A/B testing for block position.
## Promote Referral in Shopify's Announcement Banner
Shopify's announcement banner prominently appears in checkout pages (Thank You and Order Status) and helps increase referral conversions.

Mention Me announcement banner on Shopify checkout
**This process takes less than 5 minutes per store and requires no technical expertise.**
See step-by-step setup in the [announcement guide](/knowledge/shopify/announcement).
## Update Default Copy
Mention Me provides default copy to help you launch quickly, but we recommend tailoring the message to match your brand's tone of voice.
**Personalised copy aligned to brand tone has been shown to be 2x more effective, boosting performance by 114%.**
Test **"Give" vs. "Get"** messaging -- depending on whether the emphasis is on the new customer or the referrer.
**"Give" vs. "Get" message focus can result in a performance swing of up to 25%.**
### How to Update the Copy
**1. Open the Offer Preview**
Copy is editable inside the [Mention Me platform](https://mention-me.com/login). Find it under the **Offer > Preview** section of your campaign.

The offer preview in the Mention Me platform with copy editing options.
**2. Edit the Copy**
Use the "Text editing mode" toggle, select the sections to amend, and click **Save & Preview**.

The Text editing mode toggle in the Mention Me platform.
**3. Configure Both Tabs**
Configure both the **Personalised** and **Generic** tabs.

The Personalised and Generic copy tabs in the offer preview.
You can run A/B tests comparing brand-aligned copy with Mention Me default messaging. Learn how to [set up an A/B test](/knowledge/ab-testing/setup).
# How to Customise the Shopify Customer Journey
Source: https://docs.mention-me.com/knowledge/shopify/customer-journey
How to customise the Mention Me experience in Shopify, including checkout overlays, thank you pages, and colour settings.
> [!NOTE]
>
> The following instructions are for **Brand Referral**, which is **not currently available** on the free Tier of the Shopify App. [Contact us to know more](https://help.mention-me.com/hc/en-gb/requests/new?ticket_form_id=20114637802909).
The Mention Me Shopify App uses Checkout Extensibility features. Some screens are configured in Shopify, others in the Mention Me platform. This guide walks through editing the experience across both.
Not sure if you're using Checkout Extensibility? See the [Shopify App Installation guide](/knowledge/shopify/app-installation) or [contact our team](https://help.mention-me.com/hc/en-gb/requests/new?ticket_form_id=20114637802909).
## Checkout ("Been referred by a friend?" Link)
When a customer clicks the "Been referred by a friend?" link, they're prompted to enter who referred them.

Checkout modal: 'Been referred by a friend?'
### To Change the Image
**1. Open Shopify Admin**
Log into the [Shopify Admin Console](https://admin.shopify.com/store/).
**2. Open the Mention Me App**
Search for **"Mention Me"** and open the app.
**3. Update the Image**
Update the image in the **Referee experience** section.

The Referee experience image settings in the Mention Me Shopify app.
* Recommended dimensions: 1200 x 300 px
* Do not reference specific offers, as this is shown to all referees
* All styling for this modal is inherited from Shopify's theme
### To Change the Copy
**1. Open the Name Search Offer Preview**
Copy is controlled via the [Mention Me platform](https://mention-me.com/login), in the **Name search** offer preview.

The Name search offer preview in the Mention Me platform.
**2. Edit the Highlighted Content**
Toggle "Text editing mode" and edit the highlighted content.

Text editing mode with the editable content highlighted.
**3. Save Your Changes**
Click **Save & Preview** to apply your changes.

The Save and Preview button in the Mention Me platform.
Once saved, the updated copy appears in the preview.

The updated copy shown in the Mention Me platform preview.
## Thank You and Order Status Pages
The post-purchase Mention Me "Refer a Friend" journey displays on the Thank You and Order Status pages.
Do not place this block within the right-hand Order Summary sidebar -- it will be hidden on mobile.

Refer a Friend journey on the Thank You page
### To Change Banner Copy and Imagery
**1. Open the EntryPoint API Content**
Copy is controlled in the [Mention Me platform](https://mention-me.com/login). Edit it in the offer preview within **Entrypoint API content**.

The EntryPoint API content editor in the Mention Me platform.
**2. Update the Content**
Use "Text editing mode" to update the content. Edit both the **Personalised** and **Generic** tabs.
**3. Add an Image**
Click **"Add an image for this step"** to add an image -- it will auto-scale.
Shopify does not allow changing the default grey background colour of the banner.
Once a customer engages with the initial CTA, all subsequent pages are handled within the Mention Me platform.
Any modifications in the EntryPoint API preview will also affect mobile app implementations powered by EntryPoint.
## Customise Checkout Colours in Shopify
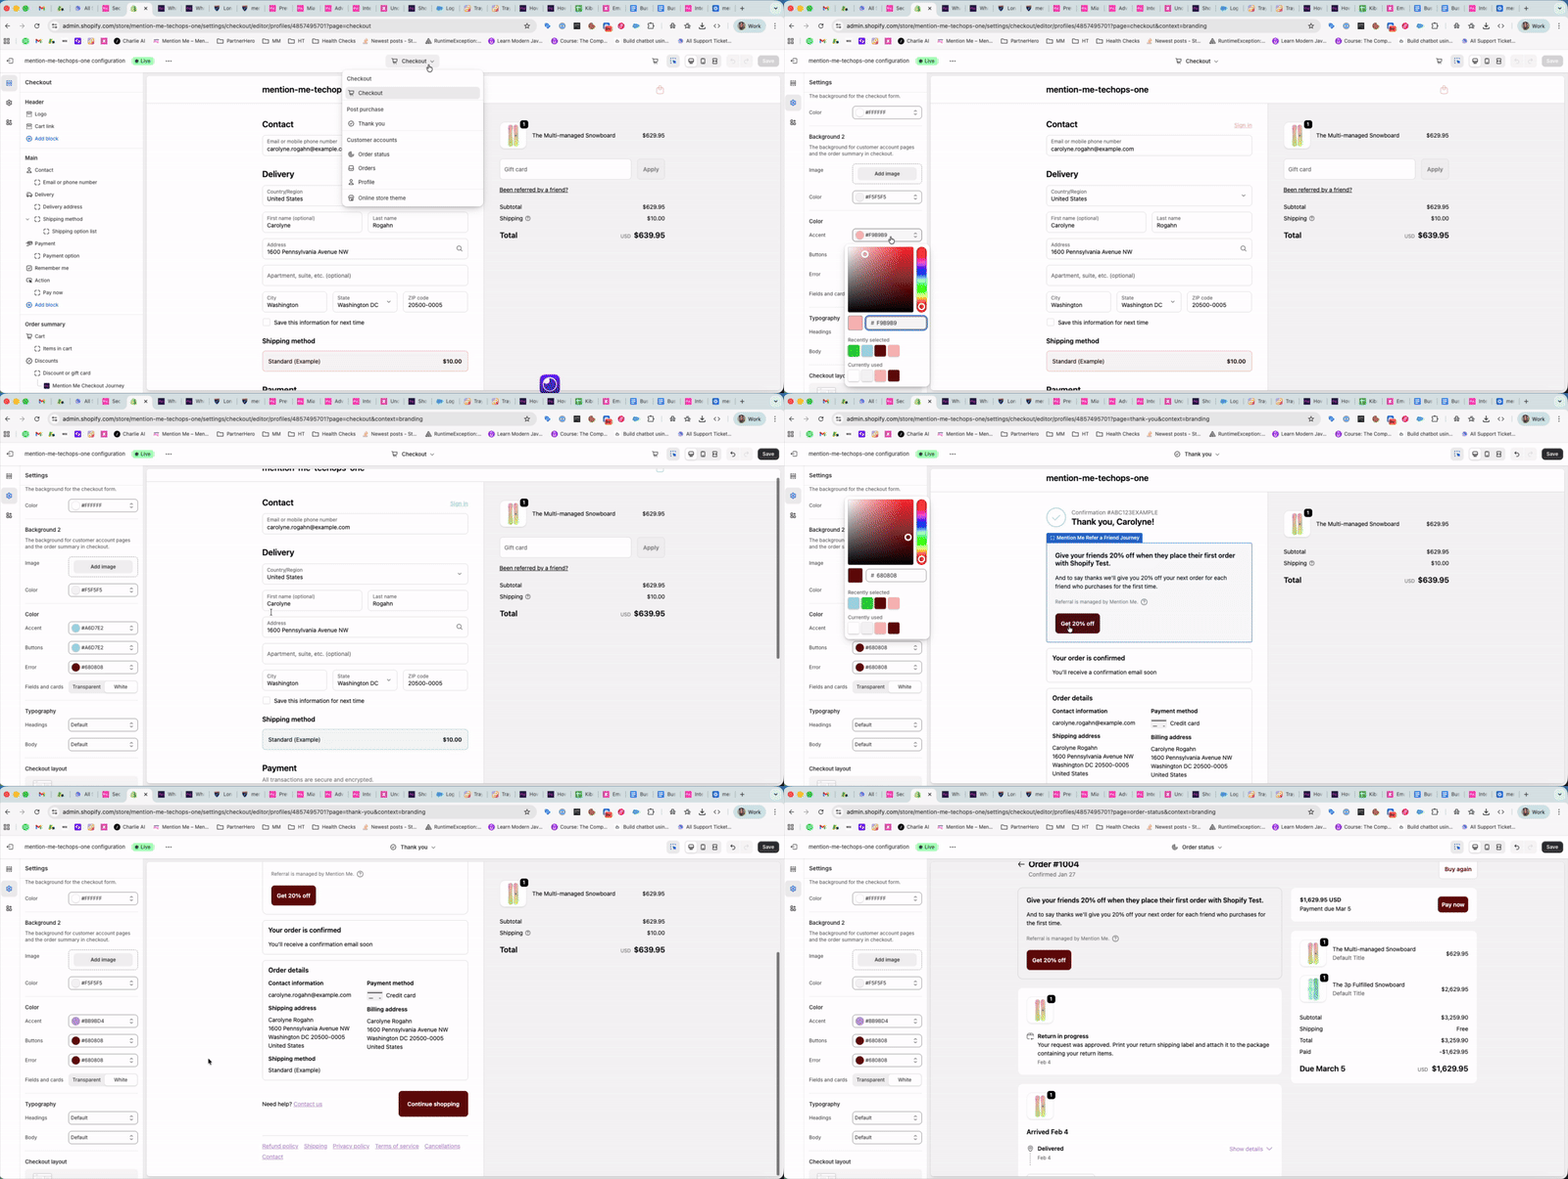
Customising checkout colours in Shopify settings.
**1. Open Checkout Customiser**
In your Shopify admin, go to **Settings > Checkout > Configurations > Customise**.
**2. Open Settings**
In the Checkout Editor, click the settings cog icon on the left-hand side menu.
**3. Update Colours**
Scroll to the **Colour** section. Use the colour picker or enter a HEX code to change:
* Accent
* Buttons
* Error colours
These changes apply to your entire checkout flow, not just Mention Me elements.
# Personalised Discount Codes
Source: https://docs.mention-me.com/knowledge/shopify/discount-code-templates
Customise Shopify discount codes with the referrer's name using template tokens.
When a reward uses the **Created in Mention Me** Shopify fulfilment option (Mention Me creates the discount in your store), you can personalise the generated codes using template tokens. This makes codes more memorable and brand-aligned - for example, `THANKS-SAM20` instead of a random string.
> [!NOTE]
>
> Personalised templates only apply to the **Created in Mention Me** option. If a reward is **Managed in Shopify** (you pre-create the discount and link it), you set codes in Shopify instead. See the [Shopify fulfilment guide](/knowledge/referral/offers/shopify-fulfilment) for the difference between the two options.
> [!NOTE]
>
> This page covers discount code templates for the **Referral** product. For influencer discount code templates, see [Setting Up Automatic Shopify Discount Code Generation](/knowledge/influencer/incentives/shopify-discount-setup).
## Available tokens
Combine these tokens with free text to build your template:
| Token | Description | Example output |
| - | - | - |
| `{REFERRER_FIRST_NAME}` | The referring customer's first name | `SAM` |
| `{REFERRER_LAST_NAME}` | The referring customer's last name | `SMITH` |
| `{REFERRER_NAME}` | The referring customer's full name (first + last, no space) | `SAMSMITH` |
| `{AMOUNT}` | The discount amount (numeric rewards only) | `20` |
All tokens resolve to **uppercase**, and spaces and special characters (other than hyphens and underscores) are removed automatically.
## Example templates
| Template | Generated code |
| - | - |
| `{REFERRER_FIRST_NAME}{AMOUNT}` | `SAM20` |
| `THANKS-{REFERRER_NAME}{AMOUNT}` | `THANKS-SAMSMITH20` |
| `{REFERRER_FIRST_NAME}-VIP` | `SAM-VIP` |
| `SAVE{AMOUNT}-{REFERRER_LAST_NAME}` | `SAVE20-SMITH` |
## How token values are resolved
The tokens always resolve to the **referring customer's** name - that is, the person who made the referral, not the friend who was referred.
* For a **referee reward** (the friend's discount code), the system walks back to the referrer who introduced them.
* For a **referrer reward** (the advocate's own reward), the system uses their own name.
Name values come from the customer's parsed first name and surname as stored in Mention Me. If a name is blank, the token renders as empty.
> [!WARNING]
>
> There are no `{REFEREE_*}` tokens. The standard Shopify referral flow only captures the friend's email address, so referee name tokens cannot resolve reliably. They may be introduced in a future update.
## Collision handling
If a generated code already exists in Shopify, Mention Me automatically appends a random 6-letter suffix to make it unique. For example, if `SAM20` is taken, the code might become `SAM20QRTVWZ`.
If a name token is blank (the customer has no name on file), the suffix alone forms the code, ensuring every discount code is non-empty.
## Template length
Templates can be up to **128 characters** long. The token placeholders (e.g. `{REFERRER_FIRST_NAME}`) count towards this limit, but the actual rendered code will typically be shorter since names replace the longer placeholder text.
## Non-numeric amounts
The `{AMOUNT}` token only renders for numeric reward values (e.g. 10, 20). For description-based rewards (e.g. "a free handbag"), `{AMOUNT}` renders as empty. Decimal amounts have their separator stripped, so `5.99` renders as `599`. Plan your template accordingly if you use non-monetary or fractional rewards.
## Related
* [Shopify reward fulfilment](/knowledge/referral/offers/shopify-fulfilment)
* [How to Set Up a Reward](/knowledge/referral/offers/setup-reward)
* [Reward Fulfilment](/knowledge/referral/offers/fulfilment)
* [Shopify Overview](/knowledge/shopify/overview)
# How to Manage Imagery in Shopify
Source: https://docs.mention-me.com/knowledge/shopify/imagery
How to manage images for referee and referrer journeys when using Mention Me with Shopify.
> [!NOTE]
>
> The following instructions are for **Brand Referral**, which is **not currently available** on the free Tier of the Shopify App. [Contact us to know more](https://help.mention-me.com/hc/en-gb/requests/new?ticket_form_id=20114637802909).
When using Mention Me with Shopify, image configuration differs slightly from standard setups. This guide covers managing images for both Referee and Referrer journeys.
## Referee Journey Image (Checkout Modal)
This image appears when a new customer clicks "Been referred by a friend?" during checkout.

Referee journey checkout modal
### Key Points
* Set directly in the Mention Me Shopify App
* Shared across all languages/locales for a single Shopify store
* Different images can be set for multiple Shopify stores
* Recommended dimensions: **1200px x 300px** (automatically responsive)
### How to Update
**1. Open the Mention Me App**
Open the Mention Me app in your Shopify admin.

The Mention Me app in the Shopify admin.
**2. Find Referee Experience**
Scroll to the **Referee Experience** section.

The Referee Experience section with the image upload option.
**3. Upload and Save**
Add or replace the image as needed, then click **Save** at the top of the page.
## Referrer Journey Image (Thank You and Order Status Pages)
This image is part of the post-purchase referral experience.

Referrer journey on the Thank You page
### Key Points
* Linked to each referral offer
* Customisable per offer and A/B test variations
* Rendered using Mention Me's EntryPoint API
* Ensure changes are consistent across all platforms using EntryPoint (e.g., in-app, email)
**Recommended dimensions:** 1500px x 1000px (3:2 aspect ratio)
### How to Change the Position
The image can be placed in one of four positions:
* Above the content
* Above the information notice
* Above the CTA (below the information notice)
* Below the CTA
**1. Open the Thank You Page**
Visit your Shopify Checkout and navigate to the Thank You page.
**2. Select the Mention Me Block**
Select the **Mention Me Refer a Friend** block.

Selecting the Mention Me Refer a Friend block in the checkout editor.
**3. Choose Image Position**
Select the desired image position.

Image position options for the referrer journey block.
**4. Repeat for Order Status**
Repeat for the Order Status page.
### How to Update the Referrer Image
**1. Open the Relevant Offer**
Go to **Mention Me > Campaigns > Select the relevant Offer**.
**2. Find the Shopify Offer Section**
In Offer Preview, scroll to find the "Shopify Offer" section and click **Manage Images**.

The Mention Me offer preview with the Manage Images button.
**3. Upload or Replace Images**
Use the Image Manager to upload or replace images served via the EntryPoint API.

The Mention Me Image Manager for EntryPoint API images.
Not familiar with Mention Me's image management system? Review the [general image management](/knowledge/referral/design/managing-images) guide first.
## Need Help?
Start a conversation with the in-platform Support widget in the bottom-right corner of your dashboard - it can usually answer this straight away. If it can't, raise a request via the [request form](https://help.mention-me.com/hc/en-gb/requests/new).

The in-platform Support widget starting an AI-assisted conversation.
# Locales
Source: https://docs.mention-me.com/knowledge/shopify/locales
How to configure locale mapping between Shopify and Mention Me for multi-region and multi-language stores.
Shopify has multiple concepts of Locale, including language and currency. This doesn't map exactly to Mention Me locales, so it can be helpful to introduce some translation based on your requirements.
By default, Mention Me assumes a combination of the Shopify Locale and Shopify Country, or for the Order Confirmation page, the Billing Address Country.
You can customise this to your needs and the offers you will be presenting to customers.
## Default
For most journeys:
```javascript theme={null}
["locale", Shopify.locale + "_" + Shopify.country],
```
For the referrer journey on post-purchase:
```javascript theme={null}
["locale", Shopify.locale + "_" + Shopify.checkout.billing_address.country_code],
```
Replace these lines to map to the locale of your choice.
## Your Choices
The default is usually sensible, but it may not always match the offers you want to present or the offers configured in Mention Me.
### Hardcode the Locale
Always show all customers an offer in English in GBP:
```javascript theme={null}
["locale", "en_GB"],
```
### Write Custom Locale Logic
The Locale must match a Mention Me Locale: ISO 639-1 language code + underscore (`_`) + ISO 3166-1 alpha-2 country code (e.g. `fr_FR` for French/France).
### Example
The following maps:
* US customers to US English in US Dollars
* UK customers to British English in British Pounds
* Norwegian customers to English, with Norwegian Krone
* French, German and Spanish customers to English, with Euros
```javascript theme={null}
function getMentionMeLocale() {
var countryCode = Shopify.country;
if (Shopify.checkout && Shopify.checkout.billing_address) {
var countryCode = Shopify.checkout.billing_address.country_code;
}
switch (countryCode) {
case "US":
return "en_US";
case "GB":
return "en_GB";
case "NO":
return "en_NO";
case "FR":
case "DE":
case "ES":
return "en_EU";
default:
return "en_GB";
}
}
```
Then adjust the existing line:
```javascript theme={null}
["locale", getMentionMeLocale()],
```
## Your Locales
Your choices depend on how you want to show the journey to customers. Speak to the Onboarding Team for help with the best mapping.
# How to Migrate to the New Shopify App
Source: https://docs.mention-me.com/knowledge/shopify/migrating-to-new-app
How to install and configure the new Mention Me Shopify App and safely transition from the old app.
This guide covers installing the new Mention Me Shopify App, setting up Product and Brand Referral, verifying settings, adding app extensions, and safely transitioning from the old app.
## Introduction
The new Mention Me Shopify App is available on the marketplace, centralising all Mention Me products in one app with a public install link. Visit [the Mention Me Shopify App page](https://apps.shopify.com/mention-me) to get started for free.
## Installing the App
Visit [the Mention Me Shopify App page](https://apps.shopify.com/mention-me) and click **Install**.

The Mention Me Shopify App install page.
To learn more about why we need this data, visit our [Privacy Policy](https://mention-me.com/help/plg/privacy_policy).
## Configuring Brand Referral
**1. Open Brand Referral Settings**
Open Brand Referral settings in the newly installed Mention Me app.

Brand Referral settings in the new Mention Me app.
**2. Verify Settings Match the Old App**
Go to the old app through the Shopify Apps menu.

The Shopify Apps menu showing the old Mention Me app.
Select the app that starts with "Mention Me" and includes your Store name.
**3. Compare All Settings**
Check that all settings on the old app match the new app.

The old Mention Me app settings, used for comparison.
Compare them against the equivalent settings in the new app.

The new Mention Me app settings, to verify they match.
## Adding the Extensions
Follow the steps in [Shopify App: Installation](/knowledge/shopify/app-installation) to add all the blocks you had with the previous Mention Me app and verify the same settings.
### Example: Mention Me Checkout Journey
After going to the Checkout Editor:
**1. Click Add Block**

The Add Block button in the checkout editor.
**2. Select the New Widget**
Select the Widget from the App without your brand name. You will now have two blocks on the page.

Two Mention Me blocks shown on the checkout page.
**3. Verify Settings Match**
Click on both to make sure the settings match.

Comparing settings between the old and new Mention Me blocks.
**4. (Optional) Remove the Old Widget**
Remove the widget from the old app. If you're immediately uninstalling the old app, you don't need to remove the block right away.

Removing the old app widget from checkout.
You can identify the old block as it should be the one higher on the page.
### Example: Mention Me Refer a Friend Journey - Announcement
For announcements, there's a limit of 1 block on the Thank You and Order Status pages. You will need to remove the block from the old app before adding the new block. Note any settings before removing the old block.

The announcement block limit on the Thank You and Order Status pages.
Remove the old announcement block before adding the new one in its place.

Removing the old announcement block before adding the new one.
Compare the settings between old and new apps, and adjust if needed.

Comparing announcement settings between the old and new apps.
Once compared, adjust the new app's settings to match.

Adjusted announcement settings on the new app.
## Uninstall the Old App
Once you've verified the blocks are working correctly in the Checkout Editor, safely uninstall the old app.

Uninstalling the old Mention Me Shopify app.
# Overview
Source: https://docs.mention-me.com/knowledge/shopify/overview
Install, configure, and customise Mention Me on your Shopify store -- from app setup to checkout optimisation.
The Shopify section covers everything you need to integrate Mention Me with Shopify -- including app installation, customer journey customisation, segmentation, and multi-region configuration.
## App Setup
> [card] [Installation](/knowledge/shopify/app-installation)
>
> Install the Mention Me Shopify App across your checkout, thank you, and order status pages.
> [card] [FAQs](/knowledge/shopify/app-faqs)
>
> Common questions about Shopify Plus requirements, Web Pixels, and checkout extensions.
> [card] [Migrating to the New App](/knowledge/shopify/migrating-to-new-app)
>
> How to install the new app and safely transition from the old one.
> [card] [Additional Tag Implementation](/knowledge/shopify/additional-tags/overview)
>
> Additional tags for implementation outside of the Shopify App -- referee, landing page, and dashboard.
## Customer Experience
> [card] [Customer Journey Changes](/knowledge/shopify/customer-journey)
>
> Customise checkout overlays, thank you pages, and colour settings.
> [card] [Imagery](/knowledge/shopify/imagery)
>
> Manage images for referee and referrer journeys in Shopify.
> [card] [Checkout Extensibility](/knowledge/shopify/checkout-extensibility)
>
> Recommended optimisations for Shopify Checkout Extensibility to maximise referral performance.
> [card] [Adding the Announcement](/knowledge/shopify/announcement)
>
> Add the Mention Me announcement banner to your Thank You and Order Status pages.
> [card] [Product Referral](/knowledge/shopify/product-referral)
>
> Add a Share button to your Shopify product pages using the theme app extension.
## Rewards
> [card] [Personalised Discount Codes](/knowledge/shopify/discount-code-templates)
>
> Customise Shopify discount codes with the referrer's name using template tokens.
## Multi-Region & Segmentation
> [card] [Segmentation](/knowledge/shopify/segmentation)
>
> Use Shopify Metafields or custom JavaScript to show different Mention Me experiences to different customers.
> [card] [Locales](/knowledge/shopify/locales)
>
> Configure locale mapping between Shopify and Mention Me for multi-region and multi-language stores.
# How to Set Up Product Referral Sharing
Source: https://docs.mention-me.com/knowledge/shopify/product-referral
How to install the Mention Me theme app extension to add a Share button on your Shopify product pages.
This guide walks through installing the Mention Me theme app extension to add a Share button on your Shopify product pages so customers can recommend products to each other.
> [!NOTE]
>
> **The block is not enough on its own.** Product referral also needs a live product referral campaign for the language of the store. The Share button only appears, and shares are only tracked, while a campaign is live for that language.
>
> Using the **Mention Me** dashboard? Set the campaign up yourself: see [set up a campaign](/knowledge-app/referral/campaigns/product-referral/set-up-a-campaign). On Classic, ask your Mention Me contact to confirm one is in place.
## Installing the App
Visit [the Mention Me App in Shopify](https://apps.shopify.com/mention-me) and click **Install**.

The Mention Me app install page in the Shopify App Store.
**1. Install the Product Sharing Link**
Follow the instructions to install the Product sharing link.

Mention Me app instructions for installing the product sharing link.
**2. Open the Product Page Editor**
This takes you to your product page editor. Select the placement for the sharing link and click **+**.

The Shopify product page editor showing the placement selector.
**3. Select Share Product**
Select **Share Product** from the App section of the block selector.

Selecting Share Product from the App block section.
**4. Configure Options**
Configure options on the right hand sidebar if needed.

The Share Product block configuration options in the sidebar.
## Options
* **Product**: The current product on the page (autofilled)
* **Show text**: Choose whether to display just an icon or include text
* **Text**: The text that appears on the Share link
* **Colour**: Set the colour of the text and icon
* **Font size**: Set the size of the text
## You Are All Set
Once the block is configured and a product referral campaign is live for that language, the Share Link appears and Mention Me starts tracking product shares. View collected data on the dashboard.

Live Share link on a product page
Click **Go to app dashboard** at the bottom of the page to see your data.

The Mention Me app dashboard showing product share data.
# Segmentation
Source: https://docs.mention-me.com/knowledge/shopify/segmentation
How to segment customers using Shopify Metafields or custom JavaScript logic to show different Mention Me experiences.
> [!NOTE]
>
> The following instructions are for **Brand Referral**, which is **not currently available** on the free Tier of the Shopify App. [Contact us to know more](https://help.mention-me.com/hc/en-gb/requests/new?ticket_form_id=20114637802909).
Segmenting your customers allows you to show different Mention Me experiences to different users. The app automatically includes localisation data, and additional segmentation can be added within the app.
Two methods are supported:
1. **Shopify Metafields** (recommended)
2. **Custom segmentation** using JavaScript logic
## Supported Metafields (Recommended)
Shopify Metafields let you define custom customer metadata. Mention Me can use these values to show different experiences.
Metafields must be explicitly added to the Mention Me app in advance -- Shopify does not automatically send them by default.
> [!WARNING]
>
> Metafields must already exist on the customer record *before* they complete their transaction. Otherwise, Shopify won't pass them to Mention Me.
Automatically supported Customer Metafields:
* **mention-me.segment** -- Mention Me Segment
* **loyaltylion.loyalty_tier** -- Loyalty Lion Loyalty Tier
### Requesting a New Metafield
Raise a support ticket providing both the **namespace** and **key**.
To find the namespace and key:
**1. Open Metafields Settings**
In your Shopify Admin, go to **Settings > Metafields and metaobjects**.

Shopify admin Settings showing Metafields and metaobjects.
**2. Select Customers**

Selecting the Customers metafield category.
**3. Select the Metafield**
Select the metafield you'd like Mention Me to use.

Selecting a customer metafield for Mention Me.
**4. Copy the Namespace and Key**
Copy the "Namespace and key" (e.g., `mention-me.segment`).

The metafield namespace and key value.
Mention Me will add this to the app and begin including it in data from Shopify when available.
## Custom Segmentation with Code
> [!NOTE]
>
> **Advanced feature.** If you need guidance, [contact Mention Me support](https://help.mention-me.com/hc/en-gb/requests/new).
You can create a segment dynamically using the contents of the user's cart by writing JavaScript logic. This is handled via a script input in the Mention Me Shopify app settings.
Example: Segment users depending on which product variants are in their cart.
```javascript theme={null}
const getSegment = (currentSegment, cartLines) => {
const lineItems = cartLines || [];
const segments = [];
lineItems.forEach((item) => {
switch (item.merchandise.id) {
case "gid://shopify/ProductVariant/11102677025151":
segments.push("Segment_A");
break;
case "gid://shopify/ProductVariant/11102667653503":
segments.push("Segment_B");
break;
case "gid://shopify/ProductVariant/11883500654975":
segments.push("Segment_C");
break;
}
});
const priority = ["Segment_A", "Segment_B", "Segment_C"];
for (const seg of priority) {
if (segments.includes(seg)) {
return { segment: seg };
}
}
return { segment: null };
};
return getSegment(segment, cartLines);
```
Full documentation and sandbox examples are available inside the Mention Me admin.
## Can I Use Tags or Other Shopify Attributes?
Shopify does not allow direct access to tags or other customer properties at checkout time. You cannot segment directly using tags.
You may be able to use **Shopify Flow** to assign a metafield to customers dynamically based on tags. However:
* Shopify Flow is asynchronous -- your flow must complete before the customer checks out
* Only values set before checkout are passed to Mention Me
* Consult a Shopify expert when building a Flow-based process
# Debug Dashboard
Source: https://docs.mention-me.com/knowledge/tags/debug-dashboard
How to use the Debug Dashboard to check data is flowing correctly into Mention Me and troubleshoot integration issues.
The Debug Dashboard helps you check that your data is flowing correctly into Mention Me. It gives visibility of orders, customer details, and any issues that may need fixing. Data is retained for **30 days**.
## Why Use the Debug Dashboard?
* Confirm your orders and customer details are being received
* Spot issues like missing data or duplicate orders
* Share examples with your Mention Me contact if something looks wrong
## Accessing the Debug Dashboard
Find the Debug Dashboard under **Settings & Tools > Tools > Debug Dashboard**, or search for "Debug Dashboard" in the search bar.

Debug Dashboard location in Settings and Tools
## What Is Debug Mode?
By default, the Debug Dashboard refreshes on a short delay. Clicking **Enable debug mode** (at the top of the dashboard) switches it to real-time monitoring, so you see tag data the moment it's received — useful when you're actively testing and want instant feedback rather than waiting for the next refresh.
Debug mode also matters if you're testing tags on your **live** site before your integration is approved to go live: without it enabled, live tag requests can return a `403 Forbidden` response. See [Testing Your Integration](/developer-docs/integration/setup/testing#debug-mode) for the full testing workflow.
## At a Glance
The top of the dashboard gives you a quick health check:
* **Found**: All records received
* **Valid**: Records successfully processed
* **Duplicate orders**: Orders sent more than once (e.g. duplicate tag firing)
* **Warnings**: Data was accepted, but something is missing or unusual
* **Errors**: Data could not be processed (requires attention)
Most of your data should appear as **Valid**. A few warnings are normal. Lots of duplicates or errors may suggest a setup issue.

Summary stats: Found, Valid, Duplicates, Warnings and Errors
## Exploring the Data
Beneath the summary stats are "Top 5" lists showing the most common data sources:
* **Transactions**: Currencies of received orders
* **Sources**: How data reached Mention Me (e.g., tag, webhook, API)
* **Situations**: Where the tag fired (e.g. thank-you page)
* **Tag types**: What kind of tag (order, referral, dashboard)
* **Locales**: Site or language the data came from

Top 5 lists for transactions, sources, situations, tag types and locales
## Filtering the Debug Dashboard
Use filters at the top of the dashboard to focus your view:
* **Search bar**: Search by order ID, email, etc.
* **Has warnings?**: Filter records with warnings
* **Parameter filters**: Filter on situation, locale, currency, type, etc.
* **Clear filters**: Reset all filters for a full view

Debug Dashboard filter controls
### When to Use Filters
* **Troubleshoot errors**: See if errors come from a specific situation (e.g., postpurchase)
* **Validate a campaign**: Check that data is being received from the right source
* **Investigate warnings**: Look for patterns
* **Check a case**: Search by known values like email or order ID
## Looking at Individual Records
Click a row to expand details:
* **Customer**: Email, ID, and name
* **Transaction**: Order and purchase details
* **Triggers**: Locale, situation, segment, and type (e.g., popup, embed)

Expanded record showing customer, transaction and trigger details
If everything shows as green (Valid), no action is needed.
## What to Do If You Spot Issues
* **A few warnings**: Normal, no action needed
* **Lots of duplicate orders**: Check your [postpurchase tag](https://demo.mention-me.com/api-demo/v2/generic/instructions/referrer/postpurchase/popup) or your [order API](https://developers.mention-me.com/reference/post_api_order) integration
* **Errors**: Note the affected rows and share them with the Mention Me team or submit via the [Help with Tech form](https://help.mention-me.com/hc/en-gb/requests/new?ticket_form_id=8840645829405). Include the page URL with filters applied.
## Empty Values
Empty values aren't always a concern:
* A landing page referral tag may not capture data until the form is completed
* A transaction total marked as "empty" might just be a dispatch update, not a real order

A debug dashboard record showing empty values that are not necessarily a concern.
These may appear as errors but are often just warnings.

Empty values appearing as errors in the debug dashboard, though they are often just warnings.
## Undefined Values
**Undefined** means the data should be there but isn't. This may indicate a problem with your data layer. Confirm you're referencing the correct object or variable to pull values into the tag.

A debug dashboard record showing undefined values that may indicate a data layer issue.
Always investigate undefined customer details or attributes like situation or locale. These are critical for ensuring users see the correct referral offer.

A warning for undefined customer details shown in the debug dashboard.
## Help with Problem Logs
If you see an issue, raise a ticket using the [Help with Tech form](https://help.mention-me.com/hc/en-gb/requests/new?ticket_form_id=8840645829405). Include filtered URLs, specific tag names or order IDs, screenshots, and steps to reproduce the problem.
# Integrating Mention Me Tags into Global-e Checkout
Source: https://docs.mention-me.com/knowledge/tags/global-e
How to add Mention Me referrer and referee tags into Global-e checkouts, including Shopify + Global-e setups.
## How Does Global-e Integrate with Websites?
Using Global-e as your checkout provider means your brand hosts specific pages (such as checkout or order confirmation) that contain a Global-e iframe. You cannot modify this iframe or use unsupported variables, but you can hook into Global-e functionality using their API to integrate Mention Me.
Only the Referrer tag is added for your Global-e checkout. The referee tag should be added directly to your cart or basket page.
## Implementing the Referrer Tag
This tag collects customer information and serves referral offers post-purchase.
**1. Add the Tag**
Paste the following script on the page containing your Global-e iframe:
```html theme={null}
```
**2. Add Partner Code and Locale**
* Replace `` into your page where you want the content to appear.
```html theme={null}
```
**2. Add the JavaScript tag**
Include the following JavaScript snippet at the bottom of the `` tag on a landing page or information page. The request includes your unique partner code.
> [!NOTE]
>
> To see code snippets pre-filled with your partner code, [**sign in**](https://app.mention-me.com/sign-in).
```html Demo theme={null}
```
```html Live theme={null}
```
**3. Customise the parameters**
(Optional) Include data parameters passing the customer's details if you have them at the point in the process where you insert the tag - this makes the process smoother for the customer.
&nonce=
```
## Validation
Encryption **must** include a valid email address as one of the encrypted fields, otherwise the request will be rejected.
## Example
Given:
* **Query string**: `email=person%40example.com&firstname=John&surname=Smith`
* **Key**: `1234567890123456789012345678901234567890123456789012345678901234`
* **Nonce**: `123456789012345678901234567890123456789012345678`
The encrypted output would be:
```
mm_e=923173becee4ec7bdcfb6820d1e77026adb54f66c6e00abbee470967b114f8653b3e17e906749214406ff8c1105f48f79a9634d11576c3284c2fbfaa4a281fbdd9b6e05dfb9abe&nonce=123456789012345678901234567890123456789012345678
```
### In a Referrer Tag
Unencrypted:
```html theme={null}
```
Encrypted equivalent:
```html theme={null}
```
Non-personal parameters (order details, situation) can remain unencrypted alongside the `mm_e` parameter.
# Homepage Promotions
Source: https://docs.mention-me.com/developer-docs/integration/entry-points/homepage-promotions
Add referral promotion placements to your homepage with cornerpeel and click-overlay options
## Why You Should Promote Referral on Your Homepage
Homepage promotion is an effective method of driving acquisition. Depending on your number of monthly visitors, it could drive up to 60% of all new customer acquisition.
The most common homepage promotion methods require a [landing page](/developer-docs/integration/entry-points/landing-page) to point customers to and allow them to register and share the referral offer.
## Implementation Options
There are two main ways to enable homepage promotions: via a link to the referral landing page, or via a tag.
> [card] Option 1: Via a link to the referral landing page
>
> Gives you full control over your homepage assets. You can promote your referral programme via a link to the referral landing page and fully control the design, but you cannot mention specific available rewards.
> [card] Option 2: Via a tag
>
> Requires adding a simple tag to your homepage so your marketing team can customise design and copy via the Mention Me platform. Available as a homepage corner peel or a link to an overlay.
## How to Enable Homepage Promotions via a Landing Page
**1. Create a referral landing page**
Ensure you've already created a referral landing page. See [landing page instructions](/developer-docs/integration/entry-points/landing-page).
**2. Create a homepage link**
Create a link on your homepage that points to the referral landing page. This can be in any form you like - a text link, a banner or an image. We recommend creating a dedicated banner below the header or a homepage tile.
**3. Add a situation parameter for tracking**
So you can track performance, add a situation parameter to the landing page link. For example:
```
www.example.com/refer-a-friend?situation=homepage-promo
```
If you're promoting the referral programme in multiple places on the homepage, use a unique situation for each promotion point. This will let you track each one separately.
> [!NOTE]
>
> If you're integrating this homepage promotion option, avoid specifying rewards or any other elements being tested in the copy. Otherwise you risk showing information that doesn't match A/B testing set up in the Mention Me platform by your marketing team.
>
> For example, instead of saying **"Earn £50 credit when you refer"**, use a more generic message such as **"Earn rewards by sharing with friends"**.
## How to Enable Homepage Promotions via a Tag
> [!NOTE]
>
> To see code snippets pre-filled with your partner code, [**sign in**](https://app.mention-me.com/sign-in).
> [tab] Corner peel
>
> The corner peel is one of the best ways to promote referral on your homepage. It's easy to implement, requiring only adding a tag to the page that shows a referral overlay when clicked.
>
> Add the following in the body of the homepage:
>
> ```html Demo theme={null}
>
>
>
> ```
>
> ```html Live theme={null}
>
>
>
> ```
> [tab] Link to an overlay
>
> This option will display a link that shows the referral overlay when clicked. This has the advantage of letting customers register without leaving the homepage. The link can be customised to look like a button, and can be incorporated within a banner, image or another element on the page.
>
> **1. Add the wrapper div**
>
> Create an empty div with the ID `mmWrapper`. This is just a placeholder which is populated via the JavaScript tag.
>
> ```html theme={null}
>
>
>
> ```
>
> **2. Add the tag**
>
> ```html Demo theme={null}
>
>
>
> ```
>
> ```html Live theme={null}
>
>
>
> ```
>
> Mention Me will customise the link style to match the look and feel of your website. The end result will be a CTA which displays the overlay when clicked.
## Parameters
### Mandatory
**situation** `string` *required*
`homepage-cornerpeel` or `homepage-click-overlay`. Example: `homepage-cornerpeel`
### Optional
**locale** `string`
Locale code. Example: `en_GB`
# Landing Page Tag
Source: https://docs.mention-me.com/developer-docs/integration/entry-points/landing-page
Create a dedicated referral landing page for existing customers to register and share
## What Is the Landing Page Used For?
When promoting your refer-a-friend programme, you are likely to want to lead your customers to landing pages on your site which include various pieces of Mention Me functionality. If you send out emails with a referral call to action you can direct your customers to a landing page on your own site. Create that page and embed on it a referrer offer tag.
Unlike the referrer tag, the landing page tag does not require customer or order details - making it suitable for standalone promotional pages, email links, or social campaigns.
## How to Integrate the Landing Page Tag
**1. Create a new page on your website**
Create a dedicated page on your site where customers will land when they click a referral promotion link (e.g. from an email or social post).
**2. Add the wrapper div**
Include the following `
` into your page where you want the referral content to appear.
```html theme={null}
```
This is just a placeholder which is populated via the JavaScript tag. You can optionally apply a class or style to the div, via the Mention Me dashboard, if you wish to control the way the contents are styled. If you need to change the id on the wrapper (for example if you need two tags on one page), you can customise from within the Mention Me dashboard.
**3. Add the JavaScript tag**
Include the following JavaScript snippet at the bottom of the `` tag on your landing page. The request includes your unique partner code.
> [!NOTE]
>
> To see code snippets pre-filled with your partner code, [**sign in**](https://app.mention-me.com/sign-in).
```html Demo theme={null}
```
```html Live theme={null}
```
**4. Customise the parameters**
(Optional) Include data parameters if you have customer details available - this makes the process smoother for the customer.
> [!NOTE]
>
> All parameter values must be [URL-encoded](https://developer.mozilla.org/en-US/docs/Web/JavaScript/Reference/Global_Objects/encodeURIComponent) — for example, `@` → `%40`, spaces → `%20`.
## Mandatory Data Parameters
**situation** `string` *required*
String indicator of where you are including this tag within your site. For landing pages, use `landingpage`. Has a maximum of 50 characters. Example: `landingpage`
**locale** `string` *required*
String representing the required locale for the campaign. Used to show the right locale (language, currency) for the user. The format should be [ISO 639-1](https://en.wikipedia.org/wiki/List_of_ISO_639-1_codes) language code, an underscore (`_`), then the [ISO 3166-1 alpha-2](https://en.wikipedia.org/wiki/ISO_3166-1#Current_codes) country code. Default is empty (which will result in a locale of `en_GB` being assumed). Example: `en_GB`
> [accordion] Optional data parameters
>
> **title** `string`
>
> The customer's title. This allows you to have more formal messaging in your flow. Has a maximum of 20 characters.
>
> **firstname** `string`
>
> The customer's firstname. Pre-fills the form if provided. Please URL encode.
>
> **surname** `string`
>
> The customer's surname. Please URL encode.
>
> **fullname** `string`
>
> The customer's full name. Please URL encode.
>
> **email** `string`
>
> The customer's email address. Please URL encode.
>
> **customer_id** `string`
>
> The unique customer identifier from your system.
>
> **username** `string`
>
> The customer's username. Your account is set up for referrers to share using their username not full name. Please URL encode.
>
> **phone_number** `string`
>
> The customer's phone number(s). Pass as many phone numbers as you have as a comma-separated list. If you are passing any data which is not a digit (e.g. spaces, +'s), these need to be URL encoded.
>
> **custom_field** `string`
>
> Any piece of custom data you wish to pass to us.
>
> **custom_share_field** `string`
>
> A piece of text you can use to pass into sharing widgets, such as what the user bought or how much they saved.
>
> **call_to_action_url** `string`
>
> A URL to send users to after they are rewarded. Only functions on the embedded flow.
>
> **segment** `string`
>
> String representing a customer segment (for example one of: men, women) used to pass segmentation data about your customer to us. Has a maximum of 50 characters.
> [accordion] Optional implementation parameters
>
> **implementation** `string`
>
> Optionally override the way the flow is implemented (one of: `link`, `embed`). Default can also be set in the merchant dashboard. If in doubt, leave out.
# Product Referral Tag
Source: https://docs.mention-me.com/developer-docs/integration/entry-points/product-referral
Enable product-level referral tracking so customers can share specific products
Your customers are already sharing products with friends. Product Referral makes that visible - track which products drive the most word-of-mouth, identify your top advocates, and attribute revenue back to the shares that generated it.
> [!NOTE]
>
> To see code snippets pre-filled with your partner code, [**sign in**](https://app.mention-me.com/sign-in).
> [!NOTE]
>
> **The tag is not enough on its own.** Product referral also needs a live product referral campaign for the language you are integrating. The tag injects the share link and rewrites the URL with `mm_rf` only while a campaign is live for that language, so no share is tracked without one.
>
> On the **Mention Me** dashboard you set that campaign up yourself: see [set up a campaign](/knowledge-app/referral/campaigns/product-referral/set-up-a-campaign). On **Classic**, ask your Mention Me contact to confirm one is in place for each language you are integrating.
Install the tag directly on your product pages (recommended for most platforms). Works with any platform.
**1. Install the tracking tag**
Include the following JavaScript snippet at the bottom of the `` tag on the product page. The request includes your unique partner code. This is the only tag the product page needs: with a live campaign in place, it enables URL-based product sharing and tracking.
```html Demo theme={null}
```
```html Live theme={null}
```
Replace `` with the product ID of the page where this is being shown. This can usually be accessed through a data layer.
> [!NOTE]
>
> The verb in the URL path (`product`) can also be written as `tracking` - both behave identically.
> [!NOTE]
>
> All parameter values must be [URL-encoded](https://developer.mozilla.org/en-US/docs/Web/JavaScript/Reference/Global_Objects/encodeURIComponent) - for example, `@` → `%40`, spaces → `%20`.
**2. Track conversions**
By tracking conversions alongside product shares, you can measure the full impact of word-of-mouth on your sales. This allows you to see which shared products are driving revenue, identify your most influential advocates, and understand the complete customer journey from share to purchase.
> [accordion] New clients without a referrer tag
>
> If you haven't yet integrated a referrer (conversion) tag, you'll need to set one up to track conversions. Visit our [referrer tag integration page](/developer-docs/integration/entry-points/referrer) for full setup instructions. When configuring your referrer tag, include the product parameters listed below to enable product-level conversion tracking from the start.
> [accordion] Existing clients with a referrer tag
>
> If you already have a referrer (conversion) tag integrated, you can enhance it with product data by adding the following parameters to your existing tag. This will associate product information with each conversion, enabling product-level reporting.
>
> Add these parameters to your existing referrer tag query string:
>
> **product_ids** `string`
>
> Comma-separated list of product IDs included in the order.
>
> **product_skus** `string`
>
> Comma-separated list of product SKUs included in the order.
>
> **product_names** `string`
>
> Comma-separated list of product names included in the order.
>
> **product_prices** `string`
>
> Comma-separated list of product prices included in the order.
>
> **product_quantities** `string`
>
> Comma-separated list of product quantities included in the order.
>
> For example, append these to your referrer tag URL: `&product_ids=SKU001,SKU002&product_skus=ABC,DEF&product_names=Widget,Gadget&product_prices=9.99,19.99&product_quantities=1,2`
**3. Add a share button (optional)**
If you want to display a share button on the product page, include the following `
` somewhere in the `` tag, near the product name or description. This is a placeholder which will be populated by the JavaScript tag. If you skip this step, URL-based product sharing and tracking will still work.
```html theme={null}
```
If your technical team is unable to add new elements into the page, we can help by setting up the tag to inject the content next to an existing element. Contact your Onboarding Team and let them know which element should be selected.
You can optionally apply a class or style to the div if you wish to control the way the contents are styled.
> [accordion] Checkout on a different subdomain
>
> If your checkout runs on a different subdomain to the product page (for example product pages on `www.merchant.com` but checkout on `checkout.merchant.com`), append the `storage` parameter to your tag URL. The default behaviour stores the referral identifiers in `sessionStorage`, which is per-origin and won't survive the navigation. This option mirrors them to a cookie scoped to your registrable domain so the bootloader on checkout can read them.
>
> ```html Demo theme={null}
>
>
>
> ```
>
> ```html Live theme={null}
>
>
>
> ```
>
> The cookie is scoped to your registrable domain (e.g. `.merchant.com`), set with `Secure` and `SameSite=Lax`, and expires after 30 days. Cookies cannot bridge a checkout that runs on an entirely different domain (e.g. `www.merchant.com` to `pay.thirdparty.com`). Only different subdomains of the same registrable domain are supported.
>
> > [!WARNING]
> >
> > Setting this cookie is your responsibility under your own privacy policy and consumer-consent process. Only enable `storage=session+cookie` if you have the relevant consent in place on your domain.
### Tag Parameters
#### Mandatory
The following parameters are the minimum required to make the integration work.
**locale** `string` *required*
String representing the required locale. Used to show the right language and currency for the user. The format should be [ISO 639-1](https://en.wikipedia.org/wiki/List_of_ISO_639-1_codes) language code, an underscore (`_`), then the [ISO 3166-1 alpha-2](https://en.wikipedia.org/wiki/ISO_3166-1#Current_codes) country code. Default is `en_GB`. Example: `en_GB`
**product_id** `string` *required*
The unique product identifier from your system. This allows tracking which products are being recommended. Example: `PROD-456`
#### Recommended
Add these data parameters to significantly improve performance.
**product_sku** `string`
The product SKU (Stock Keeping Unit) from your system. This provides an additional identifier for tracking products. Example: `SKU-789`
**product_name** `string`
The name of the product. Please URL encode. Example: `Blue Widget`
**product_price** `string`
The price of the product. Example: `29.99`
> [accordion] Optional data parameters
>
> Pass these additional parameters to enhance tracking and personalisation.
>
> **firstname** `string`
>
> The customer's firstname. Please URL encode.
>
> **surname** `string`
>
> The customer's surname. Please URL encode.
>
> **fullname** `string`
>
> The customer's full name. Please URL encode.
>
> **email** `string`
>
> The customer's email address. Please URL encode.
>
> **customer_id** `string`
>
> The unique customer identifier from your system.
>
> **phone_number** `string`
>
> The customer's phone number(s). Pass as many phone numbers as you have as a comma-separated list.
>
> **segment** `string`
>
> String representing a customer segment (for example one of: men, women) used to pass segmentation data about your customer to us. Has a maximum of 50 characters.
# Referee Tag
Source: https://docs.mention-me.com/developer-docs/integration/entry-points/referee
Integrate the referee tag on your checkout page so referred friends can claim their reward
## What Is the Referee Tag Used For?
Mention Me allows referrers to share with their friends via word of mouth by using their name. The referee tag allows prospective new customers to search for their friend's name and claim an introductory reward.
The copy on the referee link is controlled via the Mention Me platform and can be changed without any development work. Contact your Client Success Manager about this option.
> [!NOTE]
>
> The "Been referred by a friend?" link copy can't be edited directly in the offer preview. Any wording change needs to be requested from the Mention Me support team.
## How to Integrate the Referee Tag
**1. Add the wrapper div**
Include the following `
` somewhere in the `` tag of the checkout page near where you offer coupon entry (and optionally on other pages of your site too).
```html theme={null}
```
This is just a placeholder which is populated via the JavaScript tag. You can optionally apply a class or style to the div if you wish to control the way the contents are styled.
**2. Add the JavaScript tag**
Include the following JavaScript snippet at the bottom of the `` tag on the checkout page (and optionally on other pages of your site too). The request includes your unique partner code.
> [!NOTE]
>
> To see code snippets pre-filled with your partner code, [**sign in**](https://app.mention-me.com/sign-in).
> [tab] Link (default)
>
> Renders a "Been referred by a friend?" link that opens an overlay when clicked.
>
> ```html Demo theme={null}
>
>
>
> ```
>
> ```html Live theme={null}
>
>
>
> ```
> [tab] Embedded form
>
> Renders a small form directly in the div above. When submitted, a modal popup opens over your page, captures the customer's registration for the reward, provides them with the coupon to fulfil their reward and finally closes to deposit them back on your page to complete their purchase.
>
> ```html Demo theme={null}
>
>
>
> ```
>
> ```html Live theme={null}
>
>
>
> ```
> [tab] Embedded iframe
>
> Embeds the full referee journey as an iframe within the wrapper div.
>
> ```html Demo theme={null}
>
>
>
> ```
>
> ```html Live theme={null}
>
>
>
> ```
**3. Customise the parameters**
(Optional) Include data parameters passing the customer's details if you have them at the point in the process where you insert the tag - this makes the process smoother for the customer.
> [!NOTE]
>
> All parameter values must be [URL-encoded](https://developer.mozilla.org/en-US/docs/Web/JavaScript/Reference/Global_Objects/encodeURIComponent) — for example, `@` → `%40`, spaces → `%20`.
## Mandatory Data Parameters
**situation** `string` *required*
String indicator of where you are including this tag within your site (for example: `checkout`, `postpurchase`, `landingpage`). Used for reporting. Has a maximum of 50 characters. Example: `checkout`
**locale** `string` *required*
String representing the required locale for the campaign. Used to show the right locale (language, currency) for the user. The format should be [ISO 639-1](https://en.wikipedia.org/wiki/List_of_ISO_639-1_codes) language code, an underscore (`_`), then the [ISO 3166-1 alpha-2](https://en.wikipedia.org/wiki/ISO_3166-1#Current_codes) country code (e.g. `fr_FR` for French/France). Default is empty (which will result in a locale of `en_GB` being assumed). Example: `en_GB`
> [accordion] Optional data parameters
>
> **firstname** `string`
>
> The customer's firstname. Pre-fills the form if provided. Please URL encode.
>
> **surname** `string`
>
> The customer's surname. Please URL encode.
>
> **fullname** `string`
>
> The customer's full name. Please URL encode.
>
> **email** `string`
>
> The customer's email address. Please URL encode.
>
> **customer_id** `string`
>
> The unique customer identifier from your system.
>
> **phone_number** `string`
>
> The customer's phone number(s). Pass as many phone numbers as you have as a comma-separated list. If you are passing any data which is not a digit (e.g. spaces, +'s), these need to be URL encoded.
>
> **call_to_action_url** `string`
>
> A URL to send users to after they are rewarded. Only functions on the embedded flow.
>
> **segment** `string`
>
> String representing a customer segment (for example one of: men, women) used to pass segmentation data about your customer to us. Has a maximum of 50 characters.
> [accordion] Optional implementation parameters
>
> **implementation** `string`
>
> Optionally override the way the flow is implemented (one of: `link`, `form`, `embed`). Default can also be set in the merchant dashboard. If in doubt, leave out.
## Things to Watch Out For
> [accordion] The tag doesn't seem to be working. What should I do?
>
> You can use the browser Console log to check any potential error states relating to the tag integration.
>
> Further details on error messages and how to resolve them is available in the [error codes and messages](/developer-docs/integration/reference/faqs#common-tag-integration-errors) section.
> [accordion] Why does the 'Been referred by a friend?' link not appear on the page?
>
> This could happen for two reasons:
>
> 1. **The locale is missing** - check if a locale is required for this tag integration
> 2. **The `mmWrapper` div is missing from the page** - check that the div is included somewhere in the `` tag of the checkout
> [accordion] How can I change the wording for the 'Been referred by a friend' link?
>
> The copy on the referee link is controlled via the Mention Me platform and can easily be changed. Ask your Client Success Manager about this option.
>
> > [!NOTE]
> >
> > This copy can't be edited directly in the offer preview - it needs to be requested from the Mention Me support team.
> [accordion] I have a dynamic website - how do I get the referee journey to appear?
>
> The referee tag has a feature to prevent it showing multiple times. In websites built with React, Angular, Vue, or other dynamic frameworks, this can conflict and prevent the tag from appearing when you would expect it to.
>
> If this occurs, you will see a message in the browser developer console similar to:
>
> ```text theme={null}
> A tag has already fired with identifier [linkcheckout] on this page. Suppressing tag
> ```
>
> To prevent this, ensure the Mention Me tag is aware it can re-run without harm. The code below clears the fired tag state before loading the referee tag:
>
> ```html theme={null}
>
>
> ```
>
> This concatenates the implementation (in this case `link`) and situation (in this case `checkout`) and tells the Mention Me tag that it can re-fire for `linkcheckout`.
>
> See [SPA Implementation](/knowledge/tags/spa-implementation) for more details.
# Referrer Tag
Source: https://docs.mention-me.com/developer-docs/integration/entry-points/referrer
Integrate the referrer tag on your order confirmation page to promote referrals and track conversions
## Why the Referrer Tag Matters
Mention Me offers referral and influencer solutions. This essential tag allows us to show promotional offers and track customer activity.
### What Does the Referrer Tag Do?
> [card] Promotes your referral programme
>
> Personalised messages encouraging customers to refer.
> [card] Closes the loop for rewards
>
> Tracks when referred friends buy so referrers get rewarded.
> [card] Tracks influencer campaigns
>
> Logs follower transactions so influencers are rewarded accurately.
> [card] Supports other goals
>
> Follow-up content like discounts or NPS surveys.
## How to Integrate the Referrer Tag
> [!NOTE]
>
> To see code snippets pre-filled with your partner code, [**sign in**](https://app.mention-me.com/sign-in).
> [tab] Popup (default)
>
> **1. Add the JavaScript tag**
>
> Include the following JavaScript snippet at the bottom of the `` tag on the order confirmation page (and optionally on other pages too). The request includes your unique partner code and mandatory customer and order parameters.
>
> ```html Demo theme={null}
>
>
>
> ```
>
> ```html Live theme={null}
>
>
>
> ```
>
> The JavaScript runs after the rest of the page has loaded, populates the div above with the content.
>
> **2. Customise the parameters**
>
> Customise any passed parameters to pass the real data. Don't forget to URL encode your data.
>
> > [!NOTE]
> >
> > All parameter values must be [URL-encoded](https://developer.mozilla.org/en-US/docs/Web/JavaScript/Reference/Global_Objects/encodeURIComponent) — for example, `@` → `%40`, spaces → `%20`.
> [tab] Embedded iframe
>
> **1. Add the wrapper div**
>
> Include the following `
` into your page where you want the iframe to appear.
>
> ```html theme={null}
>
>
>
> ```
>
> This is just a placeholder which is populated via the JavaScript tag. You can optionally apply a class or style to the div, via the Mention Me dashboard, if you wish to control the way the contents are styled. If you need to change the id on the wrapper (for example if you need two tags on one page), you can customise from within the Mention Me dashboard.
>
> **2. Add the JavaScript tag**
>
> Include the following JavaScript snippet at the bottom of the `` tag on the order confirmation page (and optionally on other pages too). The request includes your unique partner code and mandatory customer and order parameters.
>
> ```html Demo theme={null}
>
>
>
> ```
>
> ```html Live theme={null}
>
>
>
> ```
>
> The JavaScript runs after the rest of the page has loaded, populates the div above with the content.
>
> **3. Customise the parameters**
>
> Customise any passed parameters to pass the real data. Don't forget to URL encode your data.
>
> > [!NOTE]
> >
> > All parameter values must be [URL-encoded](https://developer.mozilla.org/en-US/docs/Web/JavaScript/Reference/Global_Objects/encodeURIComponent) — for example, `@` → `%40`, spaces → `%20`.
> [tab] Link to overlay
>
> **1. Add the wrapper div**
>
> Include the following `
` into your page where you want the link to appear.
>
> ```html theme={null}
>
>
>
> ```
>
> This is just a placeholder which is populated via the JavaScript tag. You can optionally apply a class or style to the div, via the Mention Me dashboard, if you wish to control the way the contents are styled. If you need to change the id on the wrapper (for example if you need two tags on one page), you can customise from within the Mention Me dashboard.
>
> **2. Add the JavaScript tag**
>
> Include the following JavaScript snippet at the bottom of the `` tag on the order confirmation page (and optionally on other pages too). The request includes your unique partner code and mandatory customer and order parameters.
>
> ```html Demo theme={null}
>
>
>
> ```
>
> ```html Live theme={null}
>
>
>
> ```
>
> The JavaScript runs after the rest of the page has loaded, populates the div above with the content.
>
> **3. Customise the parameters**
>
> Customise any passed parameters to pass the real data. Don't forget to URL encode your data.
>
> > [!NOTE]
> >
> > All parameter values must be [URL-encoded](https://developer.mozilla.org/en-US/docs/Web/JavaScript/Reference/Global_Objects/encodeURIComponent) — for example, `@` → `%40`, spaces → `%20`.
## Verb Aliases in the URL
The verb in the URL path (`referreroffer`) can be replaced with `offer` or `conversion` - all three behave identically. Pick whichever reads best in your codebase, for example `/api/v2/conversion/YOUR_PARTNER_CODE?...`.
## Mandatory Data Parameters
These are required to ensure that your referral programme runs correctly.
**firstname** `string` *required*
The customer's firstname. Please URL encode. Example: `Franklin`
**surname** `string` *required*
The customer's surname. Please URL encode. Example: `McFly`
**email** `string` *required*
The customer's email address. Please URL encode. Example: `franklinmcfly559@mention-me.com`
**order_number** `string` *required*
The unique order identifier from your system. Has a maximum of 50 characters. Example: `8494024521`
**order_subtotal** `string` *required*
The order subtotal (excluding VAT/taxes and shipping) in the currency indicated by the `order_currency` parameter. If you can't remove VAT, let us know. Example: `106.75`
**order_currency** `string` *required*
The three character (ISO 4217) currency code that the order total is in. Example: `GBP`
**situation** `string` *required*
String indicator of where you are including this tag within your site (for example: `checkout`, `postpurchase`, `landingpage`). Used for reporting. Has a maximum of 50 characters. Example: `postpurchase`
**locale** `string` *required*
String representing the required locale for the campaign. Used to show the right locale (language, currency) for the user. The format should be [ISO 639-1](https://en.wikipedia.org/wiki/List_of_ISO_639-1_codes) language code, an underscore (`_`), then the [ISO 3166-1 alpha-2](https://en.wikipedia.org/wiki/ISO_3166-1#Current_codes) country code (e.g. `fr_FR` for French/France). Default is empty (which will result in a locale of `en_GB` being assumed). When launching your first referral programme, we recommend targeting your main regions/locales first, based on volume. You can also group together and target certain regions with the same campaign if using the same language and currency (e.g. `en_EU` for all countries that have English as their language and Euro as their currency). If your referral programme offers third-party vouchers (e.g. Amazon gift card), check if they can support the locales you're promoting to. Example: `en_GB`
**coupon_code** `string` *required*
The coupon code used by the customer (if any). Example: `ABC4577`
## Extra Parameters to Drive Referral Optimisation
Add these data parameters to significantly improve performance.
**order_discount_amount** `string`
The discount amount - our assumption is this has already been taken off the order subtotal provided. This allows us to calculate the Cost Per Acquisition for referral. Example: `23.49`
**order_item_count** `string`
The number of items in the basket (if applicable). This helps us understand the type of purchase and can be a signal of advocacy. Example: `1`
**order_is_subscription** `string`
Whether this order is for a subscription (recurring). This helps us qualify and categorise the revenue. Example: `false`
**order_is_gift** `string`
Whether this order is a gift (being bought for someone else). Gifts can be signals of advocacy. Example: `false`
**customer_id** `string`
The unique customer identifier from your system. Example: `MI1404024521`
## Extra Parameters for Product Referral
If you are using [Product Referral](/developer-docs/integration/entry-points/product-referral), add these parameters to your referrer tag to enable product-level conversion tracking. See the [product referral instructions](/developer-docs/integration/entry-points/product-referral) for full details.
**product_ids** `string`
Comma-separated list of product IDs included in the order.
**product_skus** `string`
Comma-separated list of product SKUs included in the order.
**product_names** `string`
Comma-separated list of product names included in the order.
**product_prices** `string`
Comma-separated list of product prices included in the order.
**product_quantities** `string`
Comma-separated list of product quantities included in the order.
> [accordion] Optional data parameters
>
> **phone_number** `string`
>
> The customer's phone number(s). Pass as many phone numbers as you have as a comma-separated list. If you are passing any data which is not a digit (e.g. spaces, +'s), these need to be URL encoded.
>
> **title** `string`
>
> The customer's title. This allows you to have more formal messaging in your flow. Has a maximum of 20 characters.
>
> **fullname** `string`
>
> The customer's full name. Please URL encode.
>
> **username** `string`
>
> The customer's username. Your account is set up for referrers to share using their username not full name. Please URL encode.
>
> **segment** `string`
>
> String representing a customer segment (for example one of: men, women) used to pass segmentation data about your customer to us. Has a maximum of 50 characters.
>
> **custom_field** `string`
>
> Any piece of custom data you wish to pass to us.
>
> **address_line1** `string`
>
> The customer's address line 1 (if known).
>
> **address_line2** `string`
>
> The customer's address line 2 (if known).
>
> **address_city** `string`
>
> The customer's address city (if known).
>
> **address_county** `string`
>
> The customer's address county (if known).
>
> **address_postcode** `string`
>
> The customer's address postcode (if known).
>
> **address_country** `string`
>
> The customer's address country (if known).
>
> **custom_share_field** `string`
>
> A piece of text you can use to pass into sharing widgets, such as what the user bought or how much they saved.
>
> **order_date** `string`
>
> The date and time the order was placed. The format must be in ISO 8601 format and URL encoded. If not provided or invalid, we will use the date and time at the point we received the tag.
>
> **mm_encrypted** `string`
>
> In some cases it may be desirable to ensure that email addresses and other information is not in clear text. See [encrypted parameters](/developer-docs/integration/encrypted-parameters).
> [accordion] Optional implementation parameters
>
> **implementation** `string`
>
> Optionally override the way the flow is implemented (one of: `link`, `embed`). Default can also be set in the merchant dashboard. If in doubt, leave out.
>
> **variation** `string`
>
> Integer representing the index of an offer within an experiment. Used to override the dynamic allocation of offers to customers so that, for example, email creative can be set up to show a specific variation. Default is null.
## Example with All Mandatory Parameters Populated
```html Demo theme={null}
```
```html Live theme={null}
```
## Things to Watch Out For
> [accordion] The tag doesn't seem to be working. What should I do?
>
> Check the browser developer console for errors from the Mention Me tag. Most integration issues come down to a missing mandatory parameter, an un-encoded value, or the demo host being left in the live snippet. See the [common tag integration errors](/developer-docs/integration/reference/faqs#common-tag-integration-errors) and [error codes](/developer-docs/integration/reference/error-codes) for the full checklist.
> [accordion] The customer's name isn't populated in the overlay
>
> The most common reasons are that `firstname` and `surname` are not being rendered into the tag URL (the snippet still contains `` / ``), or the values are not URL encoded. Customer names with accented characters or spaces must be URL encoded before being written into the URL.
> [accordion] How do I exclude VAT and shipping from the order total?
>
> `order_subtotal` must be the order subtotal **excluding VAT/taxes and shipping** - this is the figure the referral reward is calculated against. If you cannot remove VAT on your side, let your Client Success Manager know and we can handle the adjustment.
> [accordion] Why are firstname and surname mandatory?
>
> The referrer tag personalises the sharing experience using the customer's real name (for example, "Franklin recommends…"). Without a name we cannot build that sharing message, which dramatically reduces referral performance. If your account is configured to share by username instead, use the `username` parameter - but the referral programme still needs a name for display in some flows.
# Drive Action Tag
Source: https://docs.mention-me.com/developer-docs/integration/incentive-for-action
Incentivise and reward customers for completing specific actions
## Overview
Mention Me can support incentivising customers for taking an action and rewarding them once the action has been completed. This tag allows us to know once customers have completed the action so that we can reward them.
## What Is the Drive Action Tag Used For?
To enable us to reward a customer when an action has been completed. We use the email address as the eligibility criteria.
## How to Integrate the Drive Action Tag
**1. Add the JavaScript tag**
Include the following JavaScript at the bottom of the page where the action has been completed. The request includes your unique partner code and the action ID. Your Client Success Manager will confirm the action ID.
> [!NOTE]
>
> To see code snippets pre-filled with your partner code, [**sign in**](https://app.mention-me.com/sign-in).
```html Demo theme={null}
```
```html Live theme={null}
```
**2. Confirm the action ID**
Ask your Client Success Manager to confirm the action ID for your integration.
**3. Customise the parameters**
Customise the email parameter to pass the real data. Don't forget to URL encode your data.
`, `` or similar placeholders, your templating engine has not rendered the real values into the URL. Nothing will match a real customer.
> [accordion] tag-demo has been left in the live tag
>
> The demo host is `tag-demo.mention-me.com` and is for pre-launch testing only. When you go live, the host must be `tag.mention-me.com`. Forgetting to swap it means live customers hit the demo environment and no real referrals are recorded.
> [accordion] firstname or surname is missing
>
> `firstname` and `surname` are mandatory on the referrer tag. Without them we cannot personalise sharing (which dramatically reduces conversion) and in most configurations the tag will refuse to serve.
> [accordion] locale is missing or invalid
>
> The `locale` parameter must be in the form `xx_YY` (ISO 639-1 language, underscore, ISO 3166-1 alpha-2 country), e.g. `en_GB`. An unknown locale will result in either the default campaign being served or nothing at all.
> [accordion] Partner code is missing or hard-coded incorrectly
>
> The partner-code placeholder in the URL path must be replaced with the partner code issued to your account. If it is missing, mistyped, or copied from another environment, the request will return a 404.
> [accordion] Hardcoded customer or order data
>
> The values passed on the tag must reflect the current customer and their current order. Copying the tag snippet verbatim (with someone else's email or order number) will attribute activity to the wrong customer.
> [accordion] order_currency is missing or not ISO 4217
>
> `order_currency` must be a three-character [ISO 4217](https://en.wikipedia.org/wiki/ISO_4217) code such as `GBP`, `EUR`, or `USD`. Values like `£` or `pounds` will be rejected.
> [accordion] order_number is reused across orders
>
> `order_number` should be unique per order. Duplicate order numbers cause downstream deduplication and make the order look like a refund or replay of an earlier one.
> [accordion] Multiple tags fire but share the same wrapper
>
> If you render more than one Mention Me tag on the same page, each needs its own wrapper `div`. Configure a distinct wrapper id from the Mention Me dashboard rather than reusing `mmWrapper` for all of them.
> [accordion] Tag fires before the DOM is ready in SPAs
>
> In React, Angular, Vue, or other SPA frameworks, inject the tag after the page content has rendered, and clear `window.MentionMeFiredTags` if you need the tag to re-fire on client-side navigations. See the [SPA implementation notes](/knowledge/tags/spa-implementation) for more detail.
### Referee Tag
> [accordion] Locale is missing on the referee tag
>
> The referee tag must be passed a valid `locale` - without one, the "Been referred by a friend?" link will not appear. Check the value is being set for the country your customer is browsing from.
> [accordion] mmWrapper div is missing from the page
>
> The referee tag populates a placeholder `` somewhere in the page ``. If the div is missing, the link or embedded form has nowhere to render. You can also see `Mention Me Tag failed to insert into wrapper` in the console in this case - see the [error codes](/developer-docs/integration/reference/error-codes).
# Tag Containers
Source: https://docs.mention-me.com/developer-docs/integration/setup/tag-containers
How to integrate Mention Me tags using tag container vendors like Google Tag Manager
## Overview
If you have or plan to use a tag container, it can be even easier to integrate with us. Our tags work with most tag container vendors and we've already integrated with Qubit, OpenTag, TagMan, BrightTag, DC-Storm, Tealium and Google Tag Manager.
## Supported Platforms
Specific instructions are available for:
> [card] [Google Tag Manager](/developer-docs/integration/setup/google-tag-manager-referrer)
>
> Detailed instructions for deploying Mention Me tags via GTM.
We support almost any tag manager, including:
> [card] [Qubit](https://www.qubit.com)
> [card] [Tealium](https://tealium.com)
> [card] [BrightTag](https://www.signalco.com)
> [card] [OpenTag](https://www.qubit.com/tag-management)
> [card] [TagMan](https://www.ensighten.com)
> [card] [DC Storm](https://www.dcstorm.com)
## How It Works
Tag containers wrap the same JavaScript snippets documented in our [Javascript integration guide](/developer-docs/integration/javascript-overview). Instead of placing the script tags directly in your page HTML, you configure them within your tag manager and use its triggers to control when they fire.
The Mention Me tags themselves are identical - the tag container simply manages their deployment.
> [!NOTE]
>
> If you're using a tag container, make sure the `mmWrapper` div is still present in your page HTML where needed (e.g. for referee, dashboard, and landing page tags). The tag container only manages the JavaScript - the placeholder div must be in the page source.
For single-page applications (SPAs), see [SPA Implementation](/knowledge/tags/spa-implementation) for additional considerations when using tag containers with dynamic routing.
## Related Guides
> [card] [Google Tag Manager Setup](/developer-docs/integration/setup/google-tag-manager-referrer)
>
> Step-by-step guide for configuring your data layer, variables, and each tag type in GTM.
> [card] [Error Codes Reference](/developer-docs/integration/reference/error-codes)
>
> Troubleshoot HTTP and JavaScript errors from Mention Me tags.
# Testing Your Integration
Source: https://docs.mention-me.com/developer-docs/integration/setup/testing
How to test Mention Me tags before going live, including debug mode and environment setup
## Using the Demo Environment
Always use the URL `tag-demo.mention-me.com` in your tags when developing and testing. The demo server is a production-like version of Mention Me set up with your account and test campaigns that display when you make tag requests.
You can send the demo system test or mocked customer data without the risk of real coupons being given out or cash/rewards changing hands. We can give you access to the client dashboard on the demo server at your request so you can review the state of the integration.
> [!TIP]
>
> Use your browser's Network or Console tabs (filter to `mention-me.com`) to see exactly how the tag is being called and diagnose any issues.
The offers and forms can be disabled at any time from the Mention Me platform without requiring any development work. You can go live with the integration tags before any campaign is designed to start - campaigns can start, change and finish without any further development involvement.
## Debug Mode
Debug mode is a setting on the [Debug Dashboard](/knowledge/tags/debug-dashboard) that switches it from its default near-real-time view to instant, real-time monitoring of incoming tag data. It's especially useful when testing on your live site: without it enabled, live tag requests can return a `403 Forbidden` response before your integration has been approved to go live.
**1. Enable debug mode**
In the Mention Me platform, go to **Settings & Tools > Tools > Debug Dashboard**, then click **Enable debug mode**. See [Debug Dashboard](/knowledge/tags/debug-dashboard) for more detail on what the dashboard shows you.
**2. Inspect tag events**
Check all tag firing events using the browser's Network or Console tabs. These will show you exactly how each tag is being called and allow you to diagnose any issues.
**3. Verify tag content**
The following content should be served for each tag:
* **Referrer tag**: If integrated correctly, content should be served on the order confirmation and landing page.
* **Referee tag**: The "Been referred by a friend?" link should be injected on the page. When clicked, content should be served.
## Publishing to Live
After you've implemented and tested the tags, you can publish them to your live site.
> [!NOTE]
>
> Make sure to switch from `tag-demo.mention-me.com` to the live URL `tag.mention-me.com` when you deploy your integration.
You can publish the tags at any time on your live site - content will only show when the integration is approved by us.
## Step-by-Step Testing Guides
For detailed walkthrough instructions on testing each tag type in both Demo and Live environments:
> [card] [Post-Purchase Tag](/knowledge/onboarding/testing/postpurchase-tag)
>
> Test the referrer tag on order confirmation.
> [card] [Referee Tag](/knowledge/onboarding/testing/referee-tag)
>
> Test the referee tag in checkout.
> [card] [Dashboard Tag](/knowledge/onboarding/testing/dashboard-tag)
>
> Test the dashboard tag in the account area.
## Browser Support
Mention Me supports the following browsers and environments:
> [accordion] Windows (7, 8, 8.1, 10)
>
> * Internet Explorer: 11+
> * Edge: 14+
> * Chrome: Last two versions
> * Firefox: Last two versions
> [accordion] Mac (10.9+ / Mavericks and above)
>
> * Safari: 9+
> * Chrome: Last two versions
> * Firefox: Last two versions
> [accordion] iOS (10.3+)
>
> * Chrome: Last two versions
> * Safari: 9+
> [accordion] Android (v5+ / Lollipop and above)
>
> * Chrome: Last two versions
> * Firefox: Last two versions
> * Android Browser: Last two versions
### TLS Protocols
In line with security best practices, we use secure encryption protocols. Browsers that do not support the following cipher suites will be unable to view our pages:
* TLS v1.2
# Mention Me MCP Server
Source: https://docs.mention-me.com/developer-docs/mcp/setup
Connect your AI assistant to real-time Mention Me reporting data via the Model Context Protocol (MCP).
Connect your AI assistant to real-time Mention Me reporting data. Query referral programme metrics, generate reports, and surface insights directly from your AI tool of choice.
## Server URL
Use the following URL when adding the server to your AI client:
```
https://mcp.mention-me.com
```
## Authentication
> [!NOTE]
>
> On first connect, your AI client opens a browser sign-in with your Mention Me account. No API keys or tokens are needed.
## Connect Your AI Client
Select your AI client below for step-by-step instructions.
> [accordion] Claude Desktop
>
> 1. Open Claude Desktop
> 2. Click **Customise**
> 3. Go to **Connectors**
> 4. Click **Add custom connector**
> 5. Set the name to **Mention Me**
> 6. Paste the URL: `https://mcp.mention-me.com`
> [accordion] ChatGPT
>
> 1. Open the ChatGPT desktop app
>
> 2. Go to **Settings > Plugins**
>
> 3. Click **Browse directory**
>
> 4. Click **Add** in the top right, then **Add custom MCP**
>
> 5. Set the name to **Mention Me**
>
> 6. Paste the URL: `https://mcp.mention-me.com`
>
> 7. Set authentication to **OAuth**
>
> 8. Sign in with your Mention Me account when ChatGPT asks
>
> > [!NOTE]
> >
> > Custom MCP servers are not available on every ChatGPT plan. On a Business or Enterprise workspace, an admin may need to turn them on first.
> [accordion] Claude Code
>
> Run the following command in your terminal:
>
> ```bash theme={null}
> claude mcp add --transport http mention-me https://mcp.mention-me.com
> ```
>
> Then run `/mcp` once you've opened a Claude Code session to go through the authentication flow.
> [accordion] Cursor
>
> 1. Open **Cursor Settings > MCP**
> 2. Click "Add new global MCP server"
> 3. Paste the following configuration:
>
> ```json theme={null}
> {
> "mcpServers": {
> "mention-me": {
> "url": "https://mcp.mention-me.com"
> }
> }
> }
> ```
> [accordion] Visual Studio Code
>
> 1. Open the Command Palette and search for "MCP: Add Server"
> 2. Choose "HTTP" as the server type
> 3. Paste the server URL: `https://mcp.mention-me.com`
>
> Or add it manually to `.vscode/mcp.json`:
>
> ```json theme={null}
> {
> "servers": {
> "mention-me": {
> "type": "http",
> "url": "https://mcp.mention-me.com"
> }
> }
> }
> ```
> [accordion] Windsurf
>
> Add the following to your Windsurf MCP configuration file at `~/.codeium/windsurf/mcp_config.json`:
>
> ```json theme={null}
> {
> "mcpServers": {
> "mention-me": {
> "url": "https://mcp.mention-me.com"
> }
> }
> }
> ```
> [accordion] Codex
>
> The setup is the same whether you use the IDE extension or the CLI, since they share configuration.
>
> Run the following command in your terminal:
>
> ```bash theme={null}
> codex mcp add mention-me --url https://mcp.mention-me.com
> ```
>
> This will automatically prompt you to sign in with your Mention Me account.
>
> If this is the first time you are using an MCP server in Codex, you will need to enable the rmcp feature. Add the following to your `~/.codex/config.toml`:
>
> ```toml theme={null}
> [features]
> experimental_use_rmcp_client = true
> ```
>
> Or configure manually via `~/.codex/config.toml`:
>
> ```toml theme={null}
> [features]
> experimental_use_rmcp_client = true
>
> [mcp_servers.mention-me]
> url = "https://mcp.mention-me.com"
> ```
>
> Then run `codex mcp login mention-me` to authenticate.
> [accordion] Other clients
>
> Hundreds of AI tools now support MCP servers. You can configure them with the following settings:
>
> ```
> Command: npx
> Arguments: -y mcp-remote https://mcp.mention-me.com
> Environment: None
> ```
## Enhance with the Agent Skill
The MCP server gives your AI assistant the tools - the companion skill teaches it how to use them well: picking the right metric, resolving merchants, and building date comparisons correctly. We recommend installing it alongside the server.
> [card] [Download mention-me-reporting.skill](https://mcp.mention-me.com/mention-me-reporting.skill)
>
> Follows the open [Agent Skills](https://agentskills.io) format, supported by most AI clients.
> [accordion] Claude & Claude Desktop
>
> 1. Download the [skill file](https://mcp.mention-me.com/mention-me-reporting.skill)
>
> 2. Go to **Settings > Capabilities > Skills**
>
> 3. Click **Upload skill** and select the downloaded file
>
> > [!TIP]
> >
> > Skills are installed per user. On Claude for Work, an admin can enable the skill for the whole workspace.
> [accordion] Claude Code
>
> Run the following command in your terminal:
>
> ```bash theme={null}
> curl -fsSL https://mcp.mention-me.com/mention-me-reporting.skill -o /tmp/mention-me-reporting.skill \
> && unzip -o /tmp/mention-me-reporting.skill -d ~/.claude/skills
> ```
>
> To share the skill with your team via version control, extract it into `.claude/skills/` in your repository instead.
> [accordion] Codex, Cursor, Copilot & other agents
>
> Most agents - including Codex, Cursor, GitHub Copilot, Windsurf, Amp, and Goose - scan the shared `~/.agents/skills` directory:
>
> ```bash theme={null}
> curl -fsSL https://mcp.mention-me.com/mention-me-reporting.skill -o /tmp/mention-me-reporting.skill \
> && unzip -o /tmp/mention-me-reporting.skill -d ~/.agents/skills
> ```
>
> Gemini CLI uses `~/.gemini/skills` instead. Restart or reload your agent after installing.
## What You Can Do
Once connected, you can ask your AI assistant to:
* Fetch any referral programme metric, with optional date comparison
* Generate time-series reports broken down by day, week, or month
* Split metrics by dimension, such as campaign, market, or locale
* List the campaigns and organisations you have access to
### Available Tools
| Tool | Description |
| - | - |
| `fetch_metric` | Fetch a single metric value (e.g. total referrals this month) |
| `fetch_metric_series` | Fetch a metric as a time series (e.g. daily referrals over 30 days) |
| `fetch_metric_by_dimension` | Fetch a metric split by dimension (campaign, market, locale) |
| `fetch_metric_series_by_dimension` | Fetch a metric over time, split by dimension |
| `fetch_campaigns` | List campaigns with status, type, locale, dates, and triggering rules |
| `list_organizations` | List organisations the authenticated user can access |
The catalog of available metrics is exposed as the `mentionme://metrics` resource.
## Example Prompts
Try asking your AI assistant something like:
* "Show me a weekly breakdown of new Mention Me referrals over the last 3 months"
* "How many successful Mention Me referrals did we get last quarter?"
* "Compare our Mention Me conversion rate this year vs last year"
* "Give me a monthly trend of Mention Me referral revenue for the past 6 months"
## Where to Get Help
If you need help connecting or using the MCP server, contact our [support team](https://help.mention-me.com/hc/en-gb/requests/new).
# Order Tracking
Source: https://docs.mention-me.com/api-reference/consumer-api/order-tracking
Record orders via the Consumer API or tracking pixel to attribute referrals.
> [!WARNING]
>
> **Authentication.** Our **[Entry Point API](/api-reference/entry-point-api/overview)** or **[Consumer API](/api-reference/consumer-api/overview)** do not require API Keys.
>
> Our Dashboard Endpoints require an Authentication Token in the request.
Mention Me needs to know if an order (or sign up event) takes place so we can track it and reward the appropriate referrer.
We prefer to combine this with Referrer Promotion where possible - because this allows to best segment your customers - so if you are promoting at the order (or sign up event) then pass us the Order details with that endpoint. Follow the rest of this guide if you need to track orders separately from referrer promotion.
In a transactional business (e.g. ecommerce), this is typically upon "Order confirmation". In a subscription or other business, this is typically after "Customer sign up" or "Registration" when the customer gives their details.
We require the following information:
* Customer’s email address
* Order ID (or transaction/account Id if you are tracking signups)
* Order subtotal (if appropriate, otherwise 0)
* Currency
There are 2 ways you can pass Mention Me this information:
1. Call our [Order API](/api-reference/consumer-api/overview) directly; or
2. Add a direct request to our [Order Tracking pixel](https://demo.mention-me.com/api-demo/v2/generic/instructions/order_tracking/all/pixel), either server side or in app
> [card] [Record Order](/api-reference/consumer-api/order-tracking)
>
> View the Record Order API reference.
# Overview
Source: https://docs.mention-me.com/api-reference/consumer-api/overview
An introduction to our Consumer API
We recommend most brands integrate their app using our Entry Point API which provides links to web views. This enables you to get started quickly, and to rely on the Mention Me platform to provide a rich content editing and branding experience.
In some cases, brands would prefer an "assemble yourself" model, and want to fully customise the experience. The Consumer API provides you the functionality to do this.
> [!NOTE]
>
> Using the Consumer API is significantly more complex than using our Javascript tags or our [EntryPoint API](/api-reference/entry-point-api/overview) and will take more development time to complete.
>
> If you wish to do this, please contact our [support team](https://help.mention-me.com/hc/en-gb/requests/new) so we can best support you.
You can find further documentation about the API endpoints in our [API reference](/api-reference/entry-point-api/overview).
## Share Links
When you enrol a referrer via the Consumer API, the response includes a `shareLinks` array containing pre-built share links for each sharing channel (WhatsApp, Facebook, X, SMS, link copy, and others configured for your offer).
Each share link object includes:
| Field | Description |
| - | - |
| `type` | The sharing channel (e.g. "whatsapp", "facebook", "link") |
| `protocol` | The URL protocol for the share, if applicable |
| `url` | The referral URL to include in the share |
| `defaultShareMessage` | The pre-rendered share message text for this channel |
| `exampleImplementation` | A ready-to-use share URL you can open directly, or adapt to suit your implementation |
### Dynamic Content in Share Messages
The `defaultShareMessage` field returns fully rendered text with all dynamic content placeholders resolved. Any placeholders configured in your offer's share copy - such as the referrer's first name or custom share fields - are automatically populated with real values.
For example, if your WhatsApp share copy is configured as:
```text theme={null}
Hi, it's {{referrer-firstname}}! I recently used [Brand] and was given an offer...
```
The API returns:
```text theme={null}
Hi, it's Henrietta! I recently used [Brand] and was given an offer...
```
You do not need to perform any placeholder rendering on your side. The message is ready to use as-is.
To configure the share copy and available placeholders for each channel, see [Share messages](/knowledge/referral/design/share-messages).
> [card] [Order tracking](/api-reference/consumer-api/order-tracking)
>
> Learn how to pass order data to Mention Me for referral tracking.
# Get dashboard
Source: https://docs.mention-me.com/api-reference/dashboard/get-dashboard
/openapi/entrypoint_api.oas.json post /api/entry-point/{version}/dashboard
Provide a customers' details so we can tell you if we could show them a dashboard (or offer). We'll provide the URL to the web-view for their dashboard.
Provide their full details (name, email, customerId) if you want us to optionally register them if they're not yet a referrer.
For information on how to correctly generate the Authentication Token, please see the documentation: https://docs.mention-me.com/api-reference/entry-point-api/authentication-token
# Enrol referrer
Source: https://docs.mention-me.com/api-reference/enrol-referrer/enrol-referrer
/openapi/consumer_api.oas.json post /api/consumer/{version}/referrer/enrol
Tell us about a customer (and any related order and segmentation details) to enrol them as a referrer and receive an offer to share with them
# Authentication Token
Source: https://docs.mention-me.com/api-reference/entry-point-api/authentication-token
How to Generate the Authentication Token for the Dashboard Endpoint
To send authenticated requests to the **Dashboard** Entry Point API you must include an Authentication Token.
This token is a SHA256 hash, based on the customer's email address being sent in the request, and an Authentication Secret key provided by Mention Me.
## Token Generation Format
`AuthenticationToken = LowerCase( SHA256_Hash( LowerCase(EMAIL) + [AUTHENTICATION_SECRET] ) )`
## Getting Your Salt Key
Your `AUTHENTICATION_SECRET` is unique and provided by Mention Me. It is used on both Demo and Production environments and may differ between those environments. You can find your authentication secret in the **Merchant Settings > Security & Data** page within the Mention Me platform.
## Steps to Generate the Token
**1. Lowercase the email**
Convert the customer’s email address in your API Request to lowercase.
**2. Concatenate with secret**
Concatenate the lowercase email with your Mention Me Authentication Secret.
**3. Generate SHA-256 hash**
Generate a SHA-256 hash of the resulting string.
**4. Lowercase the hash**
Convert the final hash to lowercase (most libraries return lowercase by default).
**5. Include in request**
Include this value in your API request as the AuthenticationToken.
## Testing the Authentication Token
We have a dedicated [Hash Testing tool](https://demo.mention-me.com/merchant/~/tools/test-hash?mode=authentication) you may use. This allows you to test that an Authentication Token you have generated will pass Mention Me's validation when sent as part of a request to the EntryPoint or Consumer APIs.
> [!NOTE]
>
> You will need access to the Mention Me Platform to access this page.
Simply add the email address you have hashed to create the Authentication Token, and the Authentication Token you generated, and the Mention Me platform will confirm if the token is valid.
If the hash does not match, the platform will share with you the expected hashed value.

The Hash Testing tool showing the expected hashed value when a submitted hash does not match.
## What's Next
> [card] [Referrer promotion](/api-reference/entry-point-api/referrer-promotion)
>
> Learn about referrer promotion via the Entry Point API.
# Overview
Source: https://docs.mention-me.com/api-reference/entry-point-api/overview
An introduction to the Entry Point API, its benefits and how to use it
> [!NOTE]
>
> **New here?** If you're not familiar with the different Consumer Journey APIs, we recommend reading our introduction to the [APIs we offer](/api-reference/introduction).
> [!WARNING]
>
> **Authentication.** Our **[Dashboard endpoint](/api-reference/entry-point-api/referrer-dashboard)** requires an Authentication Token in the request. See [how to generate an Authentication Token](/api-reference/entry-point-api/authentication-token).
The Entry Point API is used to transition a user from a native (usually in-app) experience to a web view. The web view is operated by Mention Me and displays the same journey displayed on the web.
## Benefits of Using Our API for Web Links
* Recommended for both web-based and native apps, it's easy and doesn't require too much custom development
* It allows the marketing team to control the content and even enable or disable individual touch points as and when required, directly via the Mention Me platform
* It allows AB testing of customer journeys via the Mention Me platform directly to continuously optimise the programme
## Advice for Android Developers
Android has multiple ways of displaying WebViews. There is an "embedded" web view, and a "in app browsing" web view which a user can open in Chrome from your app.
The "embedded" web view is a **limited** browser and as such does not support the `navigator.share` API. This powers the "share via any app on your phone" method we call "native share". This functionality does not work in the embedded view. This is a [known issue in Chromium](https://issues.chromium.org/issues/40540400). The "share via any app" method is a much nicer experience for users, and allows them to share on apps Mention Me might not directly support today.
We recommend you use the "in app browsing" approach instead. The experience is better for the user, and allows you to use our message capture functionality to see how your customers are talking about your brand.
You can read about these two methods on Android's documentation:
* [Embedded](https://developer.android.com/develop/ui/views/layout/webapps/embed-web-content-in-app?_gl=1*1au59rq*_up*MQ..*_ga*MTM4NjAxNDAzMy4xNzUzNDU5NTY0*_ga_6HH9YJMN9M*czE3NTM0NTk1NjMkbzEkZzAkdDE3NTM0NTk1NjMkajYwJGwwJGgxNDI4MzAxNjUx)
* [In app browsing](https://developer.android.com/develop/ui/views/layout/webapps/in-app-browsing-embedded-web?_gl=1*1mkljez*_up*MQ..*_ga*MTM4NjAxNDAzMy4xNzUzNDU5NTY0*_ga_6HH9YJMN9M*czE3NTM0NTk1NjMkbzEkZzAkdDE3NTM0NTk1NzckajQ2JGwwJGgxNDI4MzAxNjUx)
## How to Use the Entry Point API
**1. Add touch points**
Add links/buttons at various key touch points in your app for the following purposes:
1. [Referrer promotion](/api-reference/entry-point-api/referrer-promotion)
2. [Referee integration for name sharing](/api-reference/entry-point-api/referee-integration)
3. [Order tracking](/api-reference/consumer-api/order-tracking)
4. [Referrer dashboard](/api-reference/entry-point-api/referrer-dashboard)
**2. Get URLs and copy**
Use our Entry Point API to get the URLs and copy for the Calls to Action for these various buttons and links.
> [!WARNING]
>
> **Important.** Use the url `demo.mention-me.com` in your API endpoints when developing and testing.
>
> Switch to the live url `mention-me.com` when you deploy your integration live.
## Frequently Asked Questions
**I have a web-based app, can I use Javascript tags to integrate Mention Me?**
If you have a web-based app and can use Javascript tags within it, then that can be a suitable option. [Follow our web integration guide](https://demo.mention-me.com/api-demo/v2/generic/overview).
**I would like to build the referral journey natively into my app, do you have an API for that?**
Yes, we have a publicly accessible consumer API analogous to our Javascript tag implementation which lets you tell us about various events from your apps.
We provide back the copy to allow you to build the journey. This enables you to build an entire referral journey natively into your app. We recommend proceeding with this integration as a phase 2, once you’re happy with how the programme performs. [See further instructions for our Consumer API](/api-reference/consumer-api/overview).
**Can I integrate the programme in different languages in my app using the API?**
Yes, all the integration options allow you to use a `locale` parameter which can be passed to Mention Me to trigger a specific campaign for the user's language/region and currency. Your locales need to be configured via the Mention Me platform.
## What's Next
> [card] [Authentication Token](/api-reference/entry-point-api/authentication-token)
>
> Learn how to generate an Authentication Token.
# PostMessage Iframe Events
Source: https://docs.mention-me.com/api-reference/entry-point-api/postmessage
Triggering events when someone interacts with a Mention Me iframe
The Mention Me journey is often presented inside an iframe (embedded into your website) or within a "WebView" inside a mobile application.
When a user interacts with the Mention Me journey inside the iframe, it can be useful to update your own site - e.g. tracking events in your analytics.
If you're using our EntryPoint API to show the Mention Me experience inside a "WebView", it is also important for Mention Me to be able to tell you when a user has requested to close a popup.
Using the [postMessage](https://developer.mozilla.org/en-US/docs/Web/API/Window/postMessage) API, we can send you a message when a user completes certain actions.
Common examples include:
* Track when a user actively enrols into the referrer journey
* For clients using the EntryPoint, close the iframe when a user clicks close.
* Update your checkout with a coupon code when a referee is rewarded a coupon.
This solution requires no tags or 3rd party JS dependencies on Mention Me.
Here's some example code you can install in your website (commonly referred to as the "parent"):
```javascript Example message listener theme={null}
window.addEventListener('message', (event) => {
let { data = {} } = event;
// For security, filter for accepted origins here
// Handle IE browser support
if (typeof data === 'string') {
try {
data = window.JSON.parse(data);
} catch (error) {
data = {};
// Handle errors if desired.
}
}
switch (data.action) {
case 'mm:referee:close':
case 'mm:referrer:close':
case 'mm:referrer-share:close':
// This will be triggered whenever the IFRAME needs to be closed
// (by the user or by them reaching the end of the flow in any case)
// You should close the IFRAME here
break;
case 'mm:referrer:consent':
// A referrer has clicked the CTA in the referrer journey to confirm they wish
// to be actively enrolled in the program.
break;
case 'mm:referee:fulfilled':
// This will be triggered whenever the user gets given a coupon at the
// end of the happy path and you should apply the coupon if present
// and possible
break;
default:
// Future post message events may be provided.
// They can be ignored for now.
}
});
```
## Close event: `mm:*:close`
The close event is triggered when a customer clicks the close button inside an iframe hosted by Mention Me.
In the Mention Me Javascript tags, the Mention Me javascript will automatically handle closing the iframe.
If you're using the EntryPoint API to render your own iframe or web page inside a mobile app, you can use this close event to trigger your code to close the iframe/web page and return the user to the page.
An example close event which can be used to detect that the user wishes to close the iframe is below:
```json Close event payload theme={null}
{
"action": "mm:referee:close",
"sourceName": "Referee1577983405347"
}
```
*Note:`sourceName` is our own internal validation mechanism, you can ignore this.*
## Consent event: `mm:referrer:consent`
This event is triggered when a referrer clicks on the CTA to confirm registration in the programme.
In the case of a journey where the users details are pre-populated (e.g. post purchase), this event will fire when the user clicks on the CTA.
In the case of a journey where the users details are not pre-populated (e.g. a landing page), this event will fire when the user has entered their details to register with the programme.
## Referee fulfil event: `mm:referee:fulfilled`
We fire the `mm:referee:fulfilled` event when the referee gets given a coupon (or told they still have a valid coupon) - before they click the final CTA or close icon. So you should be able to apply the coupon as soon as there is one.
Because of this, when the user finishes the flow (by clicking either close or the final CTA to "continue shopping") you will have already handled the coupon and so we will fire the mm:referee:close event.
Note for clients with "after purchase" rewards, since there is no coupon produced by the journey, the only event that will be fired is the mm:referee:close one.
The payload would look something like this in each case:
```json Example payload theme={null}
{
"action": "mm:referee:fulfilled",
"referee": {
"email": "[email protected]"
},
"coupon": {
"couponCode": "REFEREE123",
"securityCode": "CODE456",
"expiryDate": "2021-01-02"
},
"message": "Here is 20% off your first order thanks to John",
"sourceName": "Referee1577983405347"
}
```
*Note:`sourceName` is our own internal validation mechanism, you can ignore this.*
The elements of the payload are to be used how you see fit to optimise conversion in the referee journey - for example telling them how long they have to spend the coupon or using the content to explain why they have received this coupon and encourage conversion.
## Click action event: `clickAction`
For Entry Point API journeys embedded in an iframe on a checkout (or any other page you don't want the customer to navigate away from), the referee experience can send a `clickAction` message so you can close the iframe and keep the customer where they are, instead of following the CTA link.
Mention Me sends this message when the customer clicks the final CTA in the journey:
```json Message payload theme={null}
{
"choice": "clickAction",
"clickAction": "https://www.example.com/",
"clickType": "redirect",
"sourceName": "",
"suffix": "Referee"
}
```
* `clickAction` - the URL the CTA would normally redirect the customer to.
* `suffix` - `"Referee"` or `"Referrer"` depending on which journey the message was sent from.
Listen for this event in the parent page and close the iframe instead of allowing the redirect:
```javascript Parent page listener theme={null}
window.addEventListener('message', function (e) {
var d = e.data;
if (d && d.choice === 'clickAction') {
closeIframe(); // close the iframe and keep the customer on the current page
}
});
```
Replace `closeIframe()` with your own function that hides or removes the Mention Me iframe from the DOM. This is the recommended pattern when the Entry Point API journey is embedded directly in your checkout flow.
> [card] [FAQ](/api-reference/webhooks/faqs)
>
> View frequently asked questions.
# Referee Integration
Source: https://docs.mention-me.com/api-reference/entry-point-api/referee-integration
How to build the "Find a friend" journey in-app
Name sharing is a great way for customers to share your brand with friends via word of mouth. They tell their friends to come to your app or website and enter their name to earn an introductory reward (provided they are a new customer).
Using the Referee API allows you to render a link/button in your customer journey so the prospective customer can find their referrer and get their reward. They will then return to your app via a deep link.

The Find a Friend button as it appears within the musicMagpie app.
## How to Implement Name Sharing
**1. Call the Referee API**
Call the Referee API passing parameters about the customer (if you know any details) and touchpoint. [See the reference instructions for the Referee API](/api-reference/entry-point-api/overview).
**2. Handle the response**
Mention Me returns a URL to the web view and a piece of text which you can use to create a call to action. This would typically say "Been referred by a friend?" and can be edited via the Mention Me platform.
> [!NOTE]
>
> This link copy can't be edited directly in the offer preview - changes need to be requested from the Mention Me support team.
If we return an HTTP error code (e.g. 404) you should not show anything - name sharing is not available for that customer, your account, or that touchpoint.
**3. Return to app**
When the user has finished entering the name of a referrer, they may be asked to register their own email address to earn a reward or the promise of one. After this they will close the web view to return to the app.
If you can support it, we can enable an app-specific deep link call-to-action to go back to your app. Alternatively, the customer can close the web view to return to your app.
For some use cases, we also offer a Javascript postMessage to return the customer from this journey. To learn more, [see our instructions on postMessage](/api-reference/entry-point-api/postmessage).
If the journey is embedded in an iframe on your checkout (or another page you don't want the customer to navigate away from), listen for the [`clickAction` postMessage event](/api-reference/entry-point-api/postmessage#click-action-event-clickaction) to close the iframe instead of allowing the CTA redirect.
## Frequently Asked Questions
**Can I manage the referee journey on the web or in-app without tags?**
Yes, you can invoke our referee name sharing journey via our API within your own IFRAME, and manage closing that IFRAME and applying a coupon when the journey successfully concludes, in your own checkout via postMessage. To learn more, [see our instructions on postMessage](/api-reference/entry-point-api/postmessage).
**When the referred customer arrives in our new customer journey, can we avoid them needing to enter their own email address again?**
Yes, absolutely. We’ll capture their email address and can provide it in the link back to your app or website (base64 encoded if preferred), along with any coupon code, so you can use it to avoid them having to enter it again. Your client success manager can set this up for you.
## What's Next
> [card] [Referrer dashboard](/api-reference/entry-point-api/referrer-dashboard)
>
> Learn about the dashboard journey via the Entry Point API.
# Referrer Dashboard
Source: https://docs.mention-me.com/api-reference/entry-point-api/referrer-dashboard
How to display a referrer their dashboard in-app
You may want to give referrers the ability to see the status of their referrals, the rewards they've earned, and encourage them to share again. The simplest way to do this is to provide a link or button in your app which takes the customer to a dashboard web view hosted by us.
> [!WARNING]
>
> **Authentication.** Our **[Dashboard endpoint](/api-reference/entry-point-api/referrer-dashboard)** requires an Authentication Token in the request. See [how to generate an Authentication Token](/api-reference/entry-point-api/authentication-token).
## How to Add a Link to the Referrer Dashboard
**1. Call the Dashboard API**
Call the Dashboard API passing parameters about the customer and the touchpoint. [See the reference instructions for the Dashboard API](/api-reference/entry-point-api/overview).
**2. Handle the response**
If available, Mention Me returns a URL to the web view and a piece of text which you can use for the call to action.
If we return an HTTP error code (e.g. 404) you should not show anything - the dashboard is not available for that customer, your account, or that touchpoint.
**3. Return to app**
When the user has finished using their dashboard they will close the web view to return to the app.
## What's Next
> [card] [Referrer promotion](/api-reference/entry-point-api/referrer-promotion)
>
> View the Entry Point API reference.
# Referrer Promotion
Source: https://docs.mention-me.com/api-reference/entry-point-api/referrer-promotion
How to promote your referral programme to referrers in app
You can promote referral at any point in your app - normally a "**point of delight**" makes sense - after a successful transaction. We’ll send customers from those touch points via links or buttons to web views hosted by us where they can share the offer with their friends.
Here is an example of how this integration looks in app for two of our clients:

The referral promotion button as it appears within the ASOS app.
The same pattern applied within the Bloom & Wild app:

The referral promotion button as it appears within the Bloom & Wild app.
## How to Promote Referral to Your Existing Customers
**1. Call the Referrer API**
Call the [Referrer API](/api-reference/entry-point-api/overview) passing parameters about the customer and touchpoint.
Pass the customer details, any segmentation parameters and the order/transaction/sign-up event details (if it happens at the same time).
**2. Handle the response**
If the touch point is available, Mention Me returns a URL to the web view and content which you can use for the headline, description and call to action.
If we return an HTTP error code (e.g. 404) you should not show anything - enrolment is not available for that customer, your account, or that touchpoint.
**3. Return to app**
When the user has finished sharing they will close the web view to return to the app.
## What's Next
> [card] [Referee integration](/api-reference/entry-point-api/referee-integration)
>
> Learn about the Referee ("find a friend") integration via the Entry Point API.
# Find a friend
Source: https://docs.mention-me.com/api-reference/find-referrer-by-name/find-a-friend
/openapi/consumer_api.oas.json get /api/consumer/{version}/referrer/search
Search for a referrer by name (or email) to allow your customer to find their friend via NameShare.
If an exact match is found, we will return a 200 response. The 200 response will include the `referrerMentionMeIdentifier` and `referrerToken`. You should next collect the referee's details (i.e. their email address) and register them with the "Register referee" API. Completion of the registration with a valid email, `referrerMentionMeIdentifier` and `referrerToken` will allow the referee to gain their reward.
If no exact match is found, we will return a 404 response. A 404 may indicate we didn't find anyone, or it may indicate that we found multiple people with the same name. If we did find multiple people with the same name, we will also set the `foundMultipleReferrers` parameter in the root of the response to true.
If `foundMultipleReferrers` is set to true, the client should prompt the referee to narrow down the search, e.g. by entering the email address of the referrer. The exact narrowing strategy is up to the client.
# Find a friend content
Source: https://docs.mention-me.com/api-reference/find-referrer-by-name/find-a-friend-content
/openapi/consumer_api.oas.json get /api/consumer/{version}/referrer/search/content
Fetch details from Mention Me with which to build a "find a friend" page. This will include an initial CTA, such as "Been referred by a friend?" as well as specific content which you can use to build the page.
Using this API to build your content will allow you to keep your content up to date with the latest content managed in Mention Me.
You should call this API once when your page is loaded, e.g. on the checkout page, and use it to populate the page.
# Get dashboard
Source: https://docs.mention-me.com/api-reference/get-referrer-dashboard/get-dashboard
/openapi/consumer_api.oas.json get /api/consumer/{version}/referrer/dashboard
Get a referrer's dashboard (given a referrer identity, get their dashboard data).
If we respond with a 404 they are not a referrer. Instead, you should Enrol them as a referrer first, then call this endpoint again.
For information on how to correctly generate the Authentication Token, please see the documentation: https://docs.mention-me.com/api-reference/entry-point-api/authentication-token
# Register referee
Source: https://docs.mention-me.com/api-reference/link-new-customer-to-referrer/register-referee
/openapi/consumer_api.oas.json post /api/consumer/{version}/referee/register
After a successful response from the "Find friend" API, this endpoint allows you to register a new customer to confirm the relationship between the Referee (the friend) and the Referrer (the person who referred them).
Confirming the registration requires the `referrerMentionMeIdentifier` and `referrerToken` from the search API response.
To complete the registration, you will need to confirm the registration details of the referee via this API. This will grant the referee their reward, or will inform them on how to obtain one if further action is required
(e.g. making a purchase).
# Get customer rewards
Source: https://docs.mention-me.com/api-reference/merchant/customers/get-customer-rewards
/openapi/merchant_api.oas.json post /api/merchant/v2/customers/rewards
Returns all rewards a customer has been given.
Rewards that are fulfilled outside of Mention Me will not be returned.
**Scopes:** `customers:read`, `rewards:read`
**Rate limits:** 300 requests per 5 minutes. Shared across all 'rewards' endpoints.
# Referee cancellations
Source: https://docs.mention-me.com/api-reference/merchant/referee/referee-cancellations
/openapi/merchant_api.oas.json post /api/merchant/v2/referee/cancellation
Mark all customers matching the given identifiers as cancelled. i.e. they've cancelled their order or have failed to fulfil all necessary steps in order to be given a reward.
Only customers who could be eligible for a reward will be marked as cancelled. Any other customers included
(e.g. customers who might order in the future) will be ignored and discarded.
We strongly suggest you pass us _all_ customers who cancelled - as you may not know who was introduced by a friend. We will discard any customers details who do not need cancellation.
Cancellation is completed on a queue. It may take some time for the customers to be marked as cancelled. Approximate time to mark someone as cancelled is normally under < 5 minutes, but can be several hours in some cases.
Customers who we were able to queue will be returned in the `accepted` array. Customers who we do not hold a record of or cannot find will be returned in the `errors` array.
You may send 100 customers per request.
**Scopes:** `customers:write`
**Rate limits:** 300 requests per 5 minutes. Shared across all 'referee' endpoints.
# Referee eligibility
Source: https://docs.mention-me.com/api-reference/merchant/referee/referee-eligibility
/openapi/merchant_api.oas.json post /api/merchant/v2/referee/eligibility
Mark all customers matching the given identifiers as eligible for a reward - i.e. they've completed all necessary steps in order to be given a reward. For instance, this could be keeping a product for a certain amount of time, completing their first month with a subscription or completing transferring provider for a utility.
Only customers who are eligible for a reward will be marked as eligible. Any other customers included (e.g. customers who were not referred by a friend or those who do not require approval) will be ignored and discarded.
Customers who require approval because they are suspected of gaming the program will not be marked as eligible. You can approve the customers in the Merchant Portal.
We strongly suggest you pass us _all_ customers who complete the eligibility criteria - as you may not know who was introduced by a friend. We will discard any customers details who are not eligible.
Eligibility is completed on a queue. It may take some time for the customers to be marked as eligible. Approximate time to mark someone as eligible is normally under < 5 minutes, but can be several hours in some cases.
Customers who we were able to queue will be returned in the `accepted` array. Customers who we do not hold a record of or cannot find will be returned in the `errors` array.
You may send 100 customers per request.
**Scopes:** `customers:write`
**Rate limits:** 300 requests per 5 minutes. Shared across all 'referee' endpoints.
# Record order
Source: https://docs.mention-me.com/api-reference/record-order/record-order
/openapi/consumer_api.oas.json post /api/consumer/{version}/order
Tell us that an order took place.
We will use the order to:
- Record the customer is an existing customer and no longer eligible for introductory rewards - Reward a referrer if this purchase was as a result of a referral
We will also use the data to optimise your referral scheme.
# Record order with a coupon
Source: https://docs.mention-me.com/api-reference/record-order/record-order-with-a-coupon
/openapi/consumer_api.oas.json post /api/consumer/{version}/coupon_redemption
For In-Store situations where a referral transaction can occur identified by a coupon
and typically without a customer email address.
The coupon must be a single-use coupon. You can validate the coupon code first using the Merchant API -> Validate Coupon Code endpoint if you wish.
If you have an email address and may not have a coupon, use the Record Order endpoint instead.
We will use the order confirmation to:
- Record the customer is an existing customer and no longer eligible for introductory rewards
(and mark their referral as redeemed)
- Reward a referrer if this purchase was as a result of a referral
We will also use the data to optimise your referral scheme.
# Find a friend by name
Source: https://docs.mention-me.com/api-reference/referee/find-a-friend-by-name
/openapi/entrypoint_api.oas.json post /api/entry-point/{version}/referee
Provide some details of a referee (optional - if you have them) and some context (such as locale) so we can tell you if we can serve a name finder journey. We'll provide the URL to the web-view for their journey.
Given a set of input parameters about the referee (and segment etc), decide if we could serve them a referee
name finder journey and give them a link to the web view for doing that.
If you choose to direct the consumer to the URL via an iframe, the closing of the journey and the fulfillment of any coupon is done via postMessage. If you send the consumer to the URL they will close the flow using the browser itself and the CTA at the end is the defined CTA URL to take them to the next step of their journey.
# Enrol a customer in an offer
Source: https://docs.mention-me.com/api-reference/referrer/enrol-a-customer-in-an-offer
/openapi/entrypoint_api.oas.json post /api/entry-point/{version}/offer
Provide a customers' details so we can tell you if we could enrol them into an offer. We'll provide the URL to the web-view for their journey.
Given a set of input parameters about the customer (and segment and any order that has just taken place), decide if we could enrol them as a customer and if so, give you a link to the web view so they can share the offer - whether referral, IFA or NPS - with their friends.
We encourage you to include the details of any order which has just taken place as this helps us with segmentation and propensity modelling. You can tell us about orders separately too.
You can present this as a button, link or broader display panel. We include other useful content which you can choose to present to the customer to give them a richer invitation to join the promotion
programme. A headline and description describe the offer and the default CTA text gives you content to add to the link or button. There is also an optional image URL. There is also an optional privacy information notice if you need it.
Users of the Mention Me platform can configure and edit the content and image returned and those can be AB tested also - for example half the customers see one image and one set of content and half see another so that you can test how offers perform.
Note: you can also use `/api/entry-point/{version}/referrer` as the endpoint, which is an alias of this path
# Track product page view for referral attribution.
Source: https://docs.mention-me.com/api-reference/track-product-page-view-for-referral-attribution
/openapi/consumer_api.oas.json post /api/consumer/{version}/product/view
Request body (JSON): - browserId (string, required): Client-generated browser fingerprint hash (djb2)
- referrerId (string, optional): Referring user's visitorId from mm_rf URL param - currentUrl (string): Full URL of product page - host (string): Hostname - pathname (string): URL path - referrer (string): Document referrer or "$direct" - referringDomain (string): Referrer hostname or "$direct" - os (string): Operating system name - osVersion (string): OS version
- browser (string): Browser name - device (string): Device identifier - deviceType (string): "Mobile", "Tablet", or "Desktop" - browserLanguage (string): Browser language (e.g., "en-GB")
- screenHeight (int): Screen height in pixels - screenWidth (int): Screen width in pixels - viewportHeight (int): Viewport height in pixels - viewportWidth (int): Viewport width in pixels
Response: - visitorId (string): SHA256(browserId + clientIP)
- shareEnabled (bool): Whether the tag should run sharing for this view (campaign-level gate). When false, neither the share link nor the organic `mm_rf` rewrite runs. - resolution (object, optional): { status, message } — the coarse reason this arrival was or wasn't served. Omitted only when resolution could not run at all. - offer (object, optional): { tagUrl } — present only for an exposed visitor with a coupon to reveal
# Track product share action.
Source: https://docs.mention-me.com/api-reference/track-product-share-action
/openapi/consumer_api.oas.json post /api/consumer/{version}/product/share
Request body (JSON): - visitorId (string, required): User's visitorId from /view response - currentUrl (string): Full URL being shared - (+ all tracking properties from viewAction)
Response: }
# Create Destination
Source: https://docs.mention-me.com/api-reference/webhooks/create-destination
Set up a webhook destination in the Mention Me Connections Hub
> [!NOTE]
>
> **Access.** You'll need to have a Mention Me account in order to set up Webhooks. If you don't have access, please contact your account manager.
**1. Open the Connections Hub**
Webhooks can be created in the Connections Hub (for [Demo](https://demo.mention-me.com/merchant/~/webhooks/view), and [Production](https://mention-me.com/merchant/~/webhooks/view)) per account. Once enabled, this will mean any events which occur in *the account* will be delivered to the Destination of your choosing.
Simply click "Create webhook", and begin setting up the Destination.
**2. Choosing a Secret**

The secret field when creating a new webhook destination.
> [!NOTE]
>
> **Tip.** One easy way we recommend to create a secure secret is by using the Terminal. A good command is: `uuidgen | shasum -a 256`
Secrets are the mechanism in which you can ensure the authenticity of a Webhook you receive from us. In other words, the Secret is the security mechanism which ensures that no bad actor is able to send data which looks like a Webhook from Mention Me to your system with malicious intent.
The Secret you choose should be kept confidential and not stored in plaintext, or directly in the code of your external system.
You can read more about how to use the Secret you choose in the [Security section](/api-reference/webhooks/security).
**3. Choosing Events**

The event selection list when creating a webhook destination.
Events are all the types of data your external system can choose to subscribe to receive when they occur for a Customer.
All of the events follow generally the same structure - with parts of the payload changing depending on the event which is being delivered. You can see examples of each payload in the [Events section](/api-reference/webhooks/events).
Once chosen, whenever that event occurs for a Customer in the Mention Me platform, we will, in real-time, deliver a Webhook to you which outlines what happened.
**4. Choosing Locales**

The locale selection list when creating a webhook destination.
Locales are how you choose which regions of Customers your external system should be subscribed to receive events from. For example, you may wish to only receive Webhooks for Customers in the UK, and not ones from other regions.
If you leave all Locales unchecked, events from Customers of all regions will be sent to your external system.
## Next Steps
Once your destination is created, you can [send a test event](/api-reference/webhooks/test-webhook) to verify your endpoint receives and processes payloads correctly before any real customer activity triggers a delivery.
# Disable or Delete a Webhook Connection
Source: https://docs.mention-me.com/api-reference/webhooks/disable-webhook
If a webhook connection is no longer required, you can either disable it (to pause message delivery) or delete it permanently from your account.
## Disable a Webhook
**1. Go to Connections Hub > Webhooks**
Navigate to:
**Connections Hub > Webhooks**

The Webhooks page within the Connections Hub.
**2. Open the menu and select Edit**
Find the webhook you want to update. Click the **⋮** menu, then choose Edit.

The actions menu opened on a webhook destination row.
Choosing **Edit** opens the destination's settings:

The Edit option selected from the actions menu.
**3. Set the webhook to Disabled**
In the "Enabled" dropdown, set the value to Disabled, then click Save.

The Enabled dropdown set to Disabled.
After clicking **Save**, the destination updates to reflect the new status:

The webhook destination after being saved as disabled.
**4. Confirm the webhook is disabled**
You'll see the updated status in the Webhooks dashboard.

The webhook shown with a Disabled status in the Webhooks dashboard.
## Delete a Webhook
**1. Locate the webhook**
From the Webhooks dashboard, locate the webhook you'd like to delete.
**2. Select Delete from the menu**
Click the **⋮** menu on the webhook row, then choose Delete.

The Delete option in the webhook actions menu.
## Need Support?
Contact your integration lead or raise a support ticket via the Admin Portal if you need help managing webhook connections.
# Events
Source: https://docs.mention-me.com/api-reference/webhooks/events
Webhook event types and their payloads.
> [!NOTE]
>
> Some Events are dependent on certain features being enabled.
>
> For instance, Events focussing on NPS or Propensity to Refer require Campaigns for NPS or Smart Experiments to be being actively promoted to Customers respectively.
>
> If you'd like to know more about these features, please speak to your Account Manager.
Events are all the different types of actions Customers can do, which can be subscribed to by external systems.
These events underpin many of our most central Customer actions, like when a Referrer is Registered, or a Referee receives their reward. And can intern drive functionality in your external systems.
For instance, you may wish to update a customer record when a customer successfully refers their friend, send out an email when a customer receives a reward for referring, or apply credit to an account in real-time when a reward is received.
## Examples
### Referrer has been registered
Referrer has been registered (`webhook/registration/referrer`)
This event occurs whenever a customer is registered as a referrer. This may be a silent enrolment, and does not require that the referrer actively interacts with the journey.
It is up to you to determine if you can contact this customer with marketing messages.
```json Example Payload theme={null}
{
"meta": {
"domain": "demo.mention-me.com",
"type": "webhook/registration/referrer",
"isTest": true,
"triggeredAt": "2025-08-27T12:40:18.982+01:00",
"uuid": "139fe691-1819-42ee-b7de-49a458e90c43",
"version": "1"
},
"merchant": {
"id": 0,
"slug": "",
"partnerCode": ""
},
"payload": {
"customerOffer": {
"id": 105,
"createdDate": "2020-04-03T09:39:08+01:00",
"expiryDate": "2020-07-03T09:39:08+01:00",
"segment": "",
"situation": "postpurchase",
"shareLink": "https://demo.mention-me.com/m/ol/ka2bu-ryder-collins",
"dashboardLink": "https://demo.mention-me.com/d/55/1c9925260de8cc0c5d1f5398af9624a3ff798e754dba5891587c2f545ec9192f"
},
"customer": {
"customerId": "MI9795903142",
"email": "[email protected]",
"firstname": "Ryder",
"surname": "Collins",
"metrics": {
"successfulReferrals": 7,
"shareCount": {
"all": 8,
"byWhatsApp": 2,
"byFacebook": 1,
"byFacebookMessenger": 0,
"byName": 2,
"byEmailLink": 1,
"byNativeShare": 0
}
}
},
"campaign": {
"id": 233023,
"shortName": "Campaign",
"locale": {
"id": 323691,
"localeCode": "en_GB",
"shortName": "English UK",
"languageCode": "en",
"currencyCode": "GBP",
"currencySymbol": "£"
},
"state": "Running"
},
"experiment": {
"id": 712100,
"name": "Experiment",
"variationCount": 1,
"isPromotion": false
},
"offer": {
"id": 70171,
"shortName": "Variation",
"type": "referral",
"summary": "Referrer gets £10 off. Referee gets 15% off",
"variation": 0,
"content": {
"referrer": {
"headline": "Treat a friend to 15% off and get £10 off for yourself",
"cta": "Get £10 off"
},
"incentive": {
"headline": null,
"cta": null
}
}
},
"rewards": [
{
"id": 54182,
"fulfilledBy": "coupon",
"amount": 250,
"referrerReward": "$250",
"refereeReward": "20%",
"discountReward": null,
"spendConstraint": 1000,
"minimumFriendsRequired": 0,
"description": "Referrer gets $250 off when they spend over $1000",
"type": "amount"
}
]
}
}
```
### Referrer has engaged during registration
Referrer has engaged during registration (`webhook/registration/referrer_engaged`)
This event occurs whenever a customer actively engages with the referral journey during registration.
It is up to you to determine if you can contact this customer with marketing messages.
```json Example Payload theme={null}
{
"meta": {
"domain": "demo.mention-me.com",
"type": "webhook/registration/referrer_engaged",
"isTest": true,
"triggeredAt": "2025-08-27T12:40:18.983+01:00",
"uuid": "139fe691-1819-42ee-b7de-49a458e90c43",
"version": "1"
},
"merchant": {
"id": 0,
"slug": "",
"partnerCode": ""
},
"payload": {
"customerOffer": {
"id": 105,
"createdDate": "2020-04-03T09:39:08+01:00",
"expiryDate": "2020-07-03T09:39:08+01:00",
"segment": "",
"situation": "postpurchase",
"shareLink": "https://demo.mention-me.com/m/ol/ka2bu-ryder-collins",
"dashboardLink": "https://demo.mention-me.com/d/55/1c9925260de8cc0c5d1f5398af9624a3ff798e754dba5891587c2f545ec9192f"
},
"customer": {
"customerId": "MI9795903142",
"email": "[email protected]",
"firstname": "Ryder",
"surname": "Collins",
"metrics": {
"successfulReferrals": 7,
"shareCount": {
"all": 8,
"byWhatsApp": 2,
"byFacebook": 1,
"byFacebookMessenger": 0,
"byName": 2,
"byEmailLink": 1,
"byNativeShare": 0
}
}
},
"campaign": {
"id": 233023,
"shortName": "Campaign",
"locale": {
"id": 323691,
"localeCode": "en_GB",
"shortName": "English UK",
"languageCode": "en",
"currencyCode": "GBP",
"currencySymbol": "£"
},
"state": "Running"
},
"experiment": {
"id": 712100,
"name": "Experiment",
"variationCount": 1,
"isPromotion": false
},
"offer": {
"id": 70171,
"shortName": "Variation",
"type": "referral",
"summary": "Referrer gets £10 off. Referee gets 15% off",
"variation": 0,
"content": {
"referrer": {
"headline": "Treat a friend to 15% off and get £10 off for yourself",
"cta": "Get £10 off"
},
"incentive": {
"headline": null,
"cta": null
}
}
},
"rewards": [
{
"id": 54182,
"fulfilledBy": "coupon",
"amount": 250,
"referrerReward": "$250",
"refereeReward": "20%",
"discountReward": null,
"spendConstraint": 1000,
"minimumFriendsRequired": 0,
"description": "Referrer gets $250 off when they spend over $1000",
"type": "amount"
}
]
}
}
```
### Referee has been registered
Referee has been registered (`webhook/registration/referee`)
This event occurs whenever a referee provides their email address to confirm they have been referred by a friend.
```json Example Payload theme={null}
{
"meta": {
"domain": "demo.mention-me.com",
"type": "webhook/registration/referee",
"isTest": true,
"triggeredAt": "2025-08-27T12:40:18.982+01:00",
"uuid": "139fe691-1819-42ee-b7de-49a458e90c43",
"version": "1"
},
"merchant": {
"id": 0,
"slug": "",
"partnerCode": ""
},
"payload": {
"referee": {
"customerId": null,
"email": "[email protected]",
"firstname": "",
"surname": "",
"marketingOptIn": true,
"phoneNumbers": ["+447927275988"],
"isVoid": false,
"id": 193,
"shareSource": "WHATSAPP"
},
"referrer": {
"id": 53137,
"customerId": "MI9795903142",
"email": "[email protected]",
"firstname": "Ryder",
"surname": "Collins",
"referrerIsUnknown": false,
"segment": "VIP",
"metrics": {
"successfulReferrals": 7,
"shareCount": {
"all": 8,
"byWhatsApp": 2,
"byFacebook": 1,
"byFacebookMessenger": 0,
"byName": 2,
"byEmailLink": 1,
"byNativeShare": 1
}
}
},
"campaign": {
"id": 14660,
"shortName": "Campaign 1",
"locale": {
"id": 1,
"localeCode": "en_GB",
"shortName": "English (UK)",
"languageCode": "en",
"currencyCode": "GBP",
"currencySymbol": "£"
},
"state": "Running"
},
"experiment": {
"id": 13268,
"name": "Experiment 1",
"variationCount": 1,
"isPromotion": false
},
"offer": {
"id": 86237,
"shortName": "Variation 1",
"type": "referral",
"summary": "Referrer gets £10 off. Referee gets 15% off",
"variation": 0,
"content": {
"referrer": {
"headline": "Treat a friend to 15% off and get £10 off for yourself",
"cta": "Get £10 off"
},
"incentive": {
"headline": null,
"cta": null
}
}
},
"reward": {
"id": 44137,
"fulfilledBy": "coupon",
"amount": 20,
"referrerReward": "20%",
"refereeReward": "20%",
"discountReward": null,
"type": "percent",
"description": "Referee gets 20% off",
"beforePurchase": true
}
}
}
```
### Referrer metrics has been updated
Referrer metrics has been updated (`webhook/metric/referrer`)
This event occurs whenever a customer's behaviour results in their referrer metrics to have. For example, they they actively share, or when their friend signs up.
```json Example Payload theme={null}
{
"meta": {
"domain": "demo.mention-me.com",
"type": "webhook/metric/referrer",
"isTest": true,
"triggeredAt": "2025-08-27T12:40:18.983+01:00",
"uuid": "139fe691-1819-42ee-b7de-49a458e90c43",
"version": "1"
},
"merchant": {
"id": 0,
"slug": "",
"partnerCode": ""
},
"payload": {
"referrer": {
"customerId": null,
"email": "[email protected]",
"firstname": "Kirk",
"surname": "Begby",
"segment": "mock-segment"
},
"metrics": {
"successfulReferrals": 7,
"shareCount": {
"all": 8,
"byWhatsApp": 2,
"byFacebook": 1,
"byFacebookMessenger": 0,
"byName": 2,
"byEmailLink": 1,
"byNativeShare": 0
},
"firstShareDate": "2023-10-23T16:13:21+01:00",
"lastShareDate": "2023-10-23T16:49:09+01:00",
"firstReferralDate": "2023-10-23T15:26:29+01:00",
"lastReferralDate": "2023-10-24T08:59:19+01:00"
},
"campaign": {
"id": 14679,
"shortName": "Campaign 1",
"locale": {
"id": 1,
"localeCode": "en_GB",
"shortName": "English (UK)",
"languageCode": "en",
"currencyCode": "GBP",
"currencySymbol": "£"
},
"state": "Running"
},
"experiment": {
"id": 13355,
"name": "Experiment 1",
"variationCount": 4,
"isPromotion": false
},
"offer": {
"id": 86438,
"shortName": "Variation 1",
"type": "referral",
"summary": "Referrer gets £10 off. Referee gets 15% off",
"variation": 1,
"content": {
"referrer": {
"headline": "Treat a friend to 15% off and get £10 off for yourself",
"cta": "Get £10 off"
},
"incentive": {
"headline": null,
"cta": null
}
}
},
"customerOffer": {
"id": 105,
"createdDate": "2020-04-03T09:39:08+01:00",
"expiryDate": "2020-07-03T09:39:08+01:00",
"segment": "",
"situation": "postpurchase",
"shareLink": "https://demo.mention-me.com/m/ol/ka2bu-ryder-collins",
"dashboardLink": "https://demo.mention-me.com/d/55/1c9925260de8cc0c5d1f5398af9624a3ff798e754dba5891587c2f545ec9192f"
},
}
}
```
### Marketing consent has been given
Marketing consent has been given (`webhook/marketing/consent`)
This event occurs whenever a customer consents to receiving marketing messages from your brand (e.g. for a newsletter).
The option to consent to marketing is only presented to referees when they are signing up after being referred by a friend.
```json Example Payload theme={null}
{
"meta": {
"domain": "demo.mention-me.com",
"type": "webhook/marketing/consent",
"isTest": true,
"triggeredAt": "2025-08-27T12:40:18.984+01:00",
"uuid": "139fe691-1819-42ee-b7de-49a458e90c43",
"version": "1"
},
"merchant": {
"id": 0,
"slug": "",
"partnerCode": ""
},
"payload": {
"customer": {
"customerId": null,
"email": "[email protected]",
"firstname": "Kirk",
"surname": "Begby",
"marketingOptIn": true,
"phoneNumbers": ["+447927275988"]
},
"campaign": {
"id": 14679,
"shortName": "Campaign 1",
"locale": {
"id": 1,
"localeCode": "en_GB",
"shortName": "English (UK)",
"languageCode": "en",
"currencyCode": "GBP",
"currencySymbol": "£"
},
"state": "Running"
},
"experiment": {
"id": 13355,
"name": "Experiment 1",
"variationCount": 4,
"isPromotion": false
},
"offer": {
"id": 86438,
"shortName": "Variation 1",
"type": "incentive",
"summary": "25% off when they sign up to newsletter",
"variation": 1,
"content": {
"referrer": {
"headline": null,
"cta": null
},
"incentive": {
"headline": "Get 20% off when you make another purchase",
"cta": "Get 20% off"
}
}
},
"marketing": {
"source": "newsletter-signup"
}
}
}
```
### Incentive for Action has been fulfilled
Incentive for Action has been fulfilled (`webhook/fulfillment/incentive_for_action`)
This event occurs whenever an action, separate from referral, is completed to earn an individual a reward (e.g. signing up for a newsletter).
```json Example Payload theme={null}
{
"meta": {
"domain": "demo.mention-me.com",
"type": "webhook/fulfillment/incentive_for_action",
"isTest": true,
"triggeredAt": "2025-08-27T12:40:18.981+01:00",
"uuid": "139fe691-1819-42ee-b7de-49a458e90c43",
"version": "1"
},
"merchant": {
"id": 0,
"slug": "",
"partnerCode": ""
},
"payload": {
"reward": {
"id": 200021,
"callToActionUrl": null,
"fulfilledBy": "coupon",
"amount": 20,
"referrerReward": null,
"refereeReward": null,
"discountReward": "£20",
"description": "Referrer gets 20% off",
"type": null,
"expiryDate": "2025-09-03T12:40:18+01:00"
},
"campaign": {
"id": 555960,
"shortName": "Campaign",
"locale": {
"id": 1,
"localeCode": "en_GB",
"shortName": "English (UK)",
"languageCode": "en",
"currencyCode": "GBP",
"currencySymbol": "£"
},
"state": "Running"
},
"experiment": {
"id": 600340,
"name": "Experiment",
"variationCount": 1,
"isPromotion": false
},
"incentivee": {
"customerId": null,
"email": "[email protected]",
"firstname": "Firstname",
"surname": "Surname"
},
"offer": {
"id": 810477,
"shortName": "Variation",
"type": "incentive",
"summary": "Ifa gets 20% off",
"variation": 1,
"offerTermsUrl": "https://mentionme.dev/me/terms/123456/abcdef",
"content": {
"referrer": {
"headline": null,
"cta": null
},
"incentive": {
"headline": "Get 20% off when you make another purchase",
"cta": "Get 20% off"
}
}
}
}
}
```
### Referrer has been fulfilled
Referrer has been fulfilled (`webhook/fulfillment/referrer`)
This event occurs whenever a customer earns a reward for referring their friend, e.g. because a Referee has completed a purchase.
```json Example Payload theme={null}
{
"meta": {
"domain": "demo.mention-me.com",
"type": "webhook/fulfillment/referrer",
"isTest": true,
"triggeredAt": "2025-08-27T12:40:18.981+01:00",
"uuid": "139fe691-1819-42ee-b7de-49a458e90c43",
"version": "1"
},
"merchant": {
"id": 0,
"slug": "",
"partnerCode": ""
},
"payload": {
"reward": {
"id": 23674,
"callToActionUrl": null,
"fulfilledBy": "coupon",
"amount": 33,
"referrerReward": "£33",
"refereeReward": "20%",
"discountReward": null,
"type": "amount",
"description": "Referrer gets £33 off",
"couponCode": "example-coupon-123",
"minimumFriendsRequired": 1,
"maximumFriendsRequired": 1,
"expiryDate": "2025-09-03T12:40:18+01:00"
},
"campaign": {
"id": 14679,
"shortName": "Campaign 1",
"locale": {
"id": 1,
"localeCode": "en_GB",
"shortName": "English (UK)",
"languageCode": "en",
"currencyCode": "GBP",
"currencySymbol": "£"
},
"state": "Running"
},
"experiment": {
"id": 13355,
"name": "Experiment 1",
"variationCount": 4,
"isPromotion": false
},
"offer": {
"id": 86438,
"shortName": "Variation 1",
"type": "referral",
"summary": "Referrer gets £10 off. Referee gets 15% off",
"variation": 1,
"offerTermsUrl": "https://mentionme.dev/me/terms/123456/abcdef",
"content": {
"referrer": {
"headline": "Treat a friend to 15% off and get £10 off for yourself",
"cta": "Get £10 off"
},
"incentive": {
"headline": null,
"cta": null
}
}
},
"referees": [
{
"customerId": "abc123xyz321",
"email": "[email protected]",
"firstname": "Firstname",
"surname": "Surname"
}
],
"referrer": {
"id": 53137,
"customerId": "abc123xyz321",
"email": "[email protected]",
"firstname": "Firstname",
"surname": "Surname",
"referrerIsUnknown": false,
"segment": "VIP",
"metrics": {
"successfulReferrals": 7,
"shareCount": {
"all": 8,
"byWhatsApp": 2,
"byFacebook": 1,
"byFacebookMessenger": 0,
"byName": 2,
"byEmailLink": 1,
"byNativeShare": 0
}
}
}
}
}
```
### Referee has been fulfilled
Referee has been fulfilled (`webhook/fulfillment/referee`)
This event occurs whenever a customer earns a reward for being referred by their friend.
```json Example Payload theme={null}
{
"meta": {
"domain": "demo.mention-me.com",
"type": "webhook/fulfillment/referee",
"isTest": true,
"triggeredAt": "2025-08-27T12:40:18.981+01:00",
"uuid": "139fe691-1819-42ee-b7de-49a458e90c43",
"version": "1"
},
"merchant": {
"id": 0,
"slug": "",
"partnerCode": ""
},
"payload": {
"reward": {
"id": 23668,
"callToActionUrl": "https://demo.mention-me.com/ac/admin/client/merchants/add",
"fulfilledBy": "coupon",
"amount": 20,
"referrerReward": "20%",
"refereeReward": "20%",
"discountReward": null,
"type": "percent",
"description": "Referee gets 20% off",
"beforePurchase": true,
"couponCode": "example-coupon-123",
"expiryDate": "2025-09-03T12:40:18+01:00"
},
"campaign": {
"id": 14679,
"shortName": "Campaign 1",
"locale": {
"id": 1,
"localeCode": "en_GB",
"shortName": "English (UK)",
"languageCode": "en",
"currencyCode": "GBP",
"currencySymbol": "£"
},
"state": "Running"
},
"experiment": {
"id": 13355,
"name": "Experiment 1",
"variationCount": 4,
"isPromotion": false
},
"offer": {
"id": 86438,
"shortName": "Variation 1",
"type": "referral",
"summary": "Referrer gets £10 off. Referee gets 15% off",
"variation": 1,
"offerTermsUrl": "https://mentionme.dev/me/terms/123456/abcdef",
"content": {
"referrer": {
"headline": "Treat a friend to 15% off and get £10 off for yourself",
"cta": "Get £10 off"
},
"incentive": {
"headline": null,
"cta": null
}
}
},
"referee": {
"customerId": null,
"email": "[email protected]",
"firstname": "Firstname",
"surname": "Surname",
"isVoid": false,
"phoneNumbers": ["+447927275988"],
"id": 36,
"shareSource": "WHATSAPP"
},
"referrer": {
"id": 36242,
"customerId": "124124124124",
"email": "[email protected]",
"firstname": "Firstname",
"surname": "Surname",
"referrerIsUnknown": false,
"segment": "VIP",
"metrics": {
"successfulReferrals": 7,
"shareCount": {
"all": 8,
"byWhatsApp": 2,
"byFacebook": 1,
"byFacebookMessenger": 0,
"byName": 2,
"byEmailLink": 1,
"byNativeShare": 0
}
}
}
}
}
```
### NPS feedback has been received
NPS feedback has been received (`webhook/nps/feedback`)
This event occurs whenever a customer submits qualitative feedback to an NPS survey.
The event will only occur for active NPS campaigns.
```json Example Payload theme={null}
{
"meta": {
"domain": "demo.mention-me.com",
"type": "webhook/nps/feedback",
"isTest": true,
"triggeredAt": "2025-08-27T12:40:18.982+01:00",
"uuid": "139fe691-1819-42ee-b7de-49a458e90c43",
"version": "1"
},
"merchant": {
"id": 0,
"slug": "",
"partnerCode": ""
},
"payload": {
"nps": {
"id": 1,
"situation": null,
"segment": null,
"answer": 2,
"feedback": "Could have been better",
"createdDate": "2025-08-27T12:40:18.982+01:00"
},
"customer": {
"customerId": null,
"email": "[email protected]",
"firstname": "Firstname",
"surname": "Surname"
},
"campaign": {
"id": 14733,
"shortName": "1st order campaign",
"locale": {
"id": 1,
"localeCode": "en_GB",
"shortName": "English (UK)",
"languageCode": "en",
"currencyCode": "GBP",
"currencySymbol": "£"
},
"state": "Running"
},
"experiment": {
"id": 13479,
"name": "1st order experiment 1",
"variationCount": 4,
"isPromotion": false
},
"offer": {
"id": 86664,
"shortName": "NPS leading to referral or incentive",
"type": "nps-referral-incentive",
"summary": "Referrer gets £10 off. Referee gets 15% off",
"variation": 1,
"content": {
"referrer": {
"headline": "Treat a friend to 15% off and get £10 off for yourself",
"cta": "Get £10 off"
},
"incentive": {
"headline": null,
"cta": null
}
}
}
}
}
```
### NPS score has been received
NPS score has been received (`webhook/nps/score`)
This event occurs whenever a customer submits an NPS score, before providing qualitative feedback.
The event will only occur for active NPS campaigns.
```json Example Payload theme={null}
{
"meta": {
"domain": "demo.mention-me.com",
"type": "webhook/nps/score",
"isTest": true,
"triggeredAt": "2025-08-27T12:40:18.982+01:00",
"uuid": "139fe691-1819-42ee-b7de-49a458e90c43",
"version": "1"
},
"merchant": {
"id": 0,
"slug": "",
"partnerCode": ""
},
"payload": {
"nps": {
"id": 1,
"situation": "postpurchase",
"segment": null,
"answer": 8,
"createdDate": "2025-08-27T12:40:18.982+01:00"
},
"customer": {
"customerId": null,
"email": "[email protected]",
"firstname": "Firstname",
"surname": "Surname"
},
"campaign": {
"id": 14733,
"shortName": "1st order campaign",
"locale": {
"id": 1,
"localeCode": "en_GB",
"shortName": "English (UK)",
"languageCode": "en",
"currencyCode": "GBP",
"currencySymbol": "£"
},
"state": "Running"
},
"experiment": {
"id": 13479,
"name": "1st order experiment 1",
"variationCount": 4,
"isPromotion": false
},
"offer": {
"id": 86664,
"shortName": "NPS leading to referral or incentive",
"type": "nps-referral-incentive",
"summary": "Referrer gets £10 off. Referee gets 15% off",
"variation": 1,
"content": {
"referrer": {
"headline": "Treat a friend to 15% off and get £10 off for yourself",
"cta": "Get £10 off"
},
"incentive": {
"headline": null,
"cta": null
}
}
}
}
}
```
### Propensity to Refer segment has been updated
Propensity to Refer segment has been updated (`webhook/propensity_to_refer/segment`)
This event occurs whenever a Propensity To Refer score is requested and potentially updated.
The score is only calculated for active Smart Experiments.
```json Example Payload theme={null}
{
"meta": {
"domain": "demo.mention-me.com",
"type": "webhook/propensity_to_refer/segment",
"isTest": true,
"triggeredAt": "2025-08-27T12:40:18.983+01:00",
"uuid": "139fe691-1819-42ee-b7de-49a458e90c43",
"version": "1"
},
"merchant": {
"id": 0,
"slug": "",
"partnerCode": ""
},
"payload": {
"customer": {
"customerId": null,
"email": "[email protected]",
"firstname": "Kirk",
"surname": "Begby"
},
"campaign": {
"id": 14679,
"shortName": "Campaign 1",
"locale": {
"id": 1,
"localeCode": "en_GB",
"shortName": "English (UK)",
"languageCode": "en",
"currencyCode": "GBP",
"currencySymbol": "£"
},
"state": "Running"
},
"experiment": {
"id": 13355,
"name": "Experiment 1",
"variationCount": 4,
"isPromotion": false
},
"offer": {
"id": 86438,
"shortName": "Variation 1",
"type": "referral",
"summary": "Referrer gets £10 off. Referee gets 15% off",
"variation": 1,
"content": {
"referrer": {
"headline": "Treat a friend to 15% off and get £10 off for yourself",
"cta": "Get £10 off"
},
"incentive": {
"headline": null,
"cta": null
}
}
},
"propensity": {
"segment": "High"
}
}
}
```
### Referee qualification has started
Referee qualification has started (`webhook/qualification_start/referee`)
This event occurs whenever a referee completes a transaction, signs up or completes a booking, which confirms they were introduced by their friend successfully.
It is the first step before the referee (and referrer) are eventually rewarded (or cancelled).
```json Example Payload theme={null}
{
"meta": {
"domain": "demo.mention-me.com",
"type": "webhook/qualification_start/referee",
"isTest": true,
"triggeredAt": "2025-08-27T12:40:18.984+01:00",
"uuid": "139fe691-1819-42ee-b7de-49a458e90c43",
"version": "1"
},
"merchant": {
"id": 0,
"slug": "",
"partnerCode": ""
},
"payload": {
"referee": {
"customerId": null,
"email": "[email protected]",
"firstname": "",
"surname": "",
"isVoid": false,
"phoneNumbers": ["+447927275988"],
"id": 193,
"shareSource": "WHATSAPP"
},
"campaign": {
"id": 14660,
"shortName": "Campaign 1",
"locale": {
"id": 1,
"localeCode": "en_GB",
"shortName": "English (UK)",
"languageCode": "en",
"currencyCode": "GBP",
"currencySymbol": "£"
},
"state": "Running"
},
"experiment": {
"id": 13268,
"name": "Experiment 1",
"variationCount": 1,
"isPromotion": false
},
"offer": {
"id": 86237,
"shortName": "Variation 1",
"type": "referral",
"summary": "Referrer gets £10 off. Referee gets 15% off",
"variation": 0,
"content": {
"referrer": {
"headline": "Treat a friend to 15% off and get £10 off for yourself",
"cta": "Get £10 off"
},
"incentive": {
"headline": null,
"cta": null
}
}
},
"order": {
"id": 123456,
"currency": "GBP",
"total": 97.98,
"orderDate": "2020-09-08T11:14:55+00:00",
"confirmedBy": "Matt Stevens"
},
"referrer": {
"id": 53137,
"customerId": "abc123xyz321",
"email": "[email protected]",
"firstname": "Firstname",
"surname": "Surname",
"referrerIsUnknown": false,
"segment": "VIP",
"metrics": {
"successfulReferrals": 7,
"shareCount": {
"all": 8,
"byWhatsApp": 2,
"byFacebook": 1,
"byFacebookMessenger": 0,
"byName": 2,
"byEmailLink": 1,
"byNativeShare": 0
}
}
},
"reward": {
"id": 44137,
"fulfilledBy": "coupon",
"amount": 20,
"referrerReward": "20%",
"refereeReward": "20%",
"discountReward": null,
"type": "percent",
"description": "Referee gets 20% off",
"waitPeriodDays": 5,
"requiresApproval": true
}
}
}
```
# FAQ
Source: https://docs.mention-me.com/api-reference/webhooks/faqs
Common questions about Mention Me webhooks.
## Do Webhooks support custom Authorisation mechanisms?
No, the Webhook system does not support any Authorisation mechanisms other than Signature validation (for more information, see the [Security section](/api-reference/webhooks/security)).
This includes, but is not limited to:
1. Custom Bearer tokens
2. A custom `Authorization` header
3. Custom API keys
4. Custom payload structure
## What IP addresses should we expect Webhooks to be sent from (for allowlisting senders)?
Signature validation is the main mechanism for preventing your external systems receiving Webhook events from bad actors (for more information, see the [Security section](/api-reference/webhooks/security)).
With signature validation, you can be sure that the sender knows the [Secret which was chosen set during setup](/api-reference/webhooks/create-destination#step-2-choosing-a-secret), and that the contents of the Webhook event has not been intercepted and tampered with once leaving the Mention Me platform.
However, we *can* provide you a series of IP address ranges to expect Webhook requests from. Though, it is worth noting that, at any time, Mention Me reserves the right to change these IP address ranges without notice.
Just reach out to our [support team](https://help.mention-me.com/hc/en-gb/requests/new) for the up-to-date IP address ranges.
## Next Steps
> [card] [Security](/api-reference/webhooks/security)
>
> Verify webhook signatures to ensure authenticity.
> [card] [Set up a webhook](/api-reference/webhooks/create-destination)
>
> Create a webhook destination and start receiving events.
# Overview
Source: https://docs.mention-me.com/api-reference/webhooks/overview
An introduction to Webhooks.
> [!NOTE]
>
> Some technical knowledge about webhooks is assumed. If you need help, contact our [support team](https://help.mention-me.com/hc/en-gb/requests/new).
Webhooks are a standard way of receiving near real-time notifications of when events happen in the Mention Me platform.
With the Webhook system, you can create Webhooks which will deliver events to external systems which you control. These external systems can then execute code of your choice whenever one or more events occur.
For instance, you may wish to update a customer record when a customer successfully refers their friend, send out an email when a customer receives a reward for referring, or apply credit to an account in real-time when a reward is received. All of which are great use cases for Webhooks.
## Difference between Webhooks and APIs
Unlike our APIs, where your external systems are *requesting data from us*, Webhooks are a way in which *you can receive data* from us when events occur in real-time.
## Basics
A Webhook is an [HTTPS POST request](https://developer.mozilla.org/en-US/docs/Web/HTTP/Reference/Methods/POST) to a URL of your choice, and any system which can accept an HTTPS request can be used to consume a Webhook from Mention Me.
Any request your external system receives will:
1. Be an HTTP POST request (over SSL).
2. Have data about an event which occurred in the body of the request. This data will be in the JSON format (you can see more in the [Events section](/api-reference/webhooks/events#examples)).
3. (*Optionally, if [a Secret was set during setup](/api-reference/webhooks/create-destination#step-2-choosing-a-secret)*) Have an HTTP Header with a signature for the webhook. This signature helps to validate the authenticity of the Webhook - you can read more in the [Security section](/api-reference/webhooks/security#how-it-works).
## Next Steps
> [card] [Set up a webhook](/api-reference/webhooks/create-destination)
>
> Create a webhook destination and start receiving events.
> [card] [Test a webhook](/api-reference/webhooks/test-webhook)
>
> Send a test event to verify your endpoint is working correctly.
> [card] [FAQs](/api-reference/webhooks/faqs)
>
> Common questions about webhook delivery, retries and formats.
# Security
Source: https://docs.mention-me.com/api-reference/webhooks/security
How do you ensure that the Webhooks you receive are from Mention Me, and have not been tampered with?
Whenever you create a new Webhook to your external system we **strongly** recommend that you:
1. [Choose a Secret](/api-reference/webhooks/create-destination#step-2-choosing-a-secret)
2. Use the Secret in your external system to validate any incoming data and ensure its authenticity.
If you follow both of these principles, you're already well on your way to securing your external systems from any bad actors attempting to deliver malicious Webhook data.
## How It Works
Whenever a new Webhook is setup with a Secret, all events which are delivered to the external system will be accompanied by a [HTTP Header](https://developer.mozilla.org/en-US/docs/Glossary/Request_header) with the key `X-MentionMe-Signature`, and a value which will look something like `sha256=` (*note that it will always begin with `sha256=` followed by the signature value*).
This signature can be used to:
1. Validate that the Sender (i.e. Mention Me) knows the Secret which was entered [when setting up the Webhook](/api-reference/webhooks/create-destination#step-2-choosing-a-secret).
2. Validate that the body of the Webhook ([examples](/api-reference/webhooks/events#examples)) have not been intercepted by a bad actor, and tampered with, *after* they have left the Mention Me platform.
It is the job of the external system to validate this signature and reject any Webhooks which do not match this signature.
## Validation
> [!NOTE]
>
> We **strongly** advise using a **secure comparison function** rather than a standard string comparison (e.g. `==`), and to **fully test the implementation** before deploying to production.
The process of validating the signature of a Webhook is simple - you should:
**1. Extract the request body**
Extract the request body from the [HTTP POST request](https://developer.mozilla.org/en-US/docs/Web/HTTP/Reference/Methods/POST).
**2. Retrieve the Secret**
Retrieve the Secret value in your external system (which **must** be the same value as was provided when setting up the Webhook). We recommend that the Secret be stored securely as an [Environment Variable](https://en.wikipedia.org/wiki/Environment_variable).
**3. Generate the SHA256 hash**
Generate the SHA256 hash, where the data is the request body, and the key is the Secret.
**4. Compare the hashes**
Securely compare the resulting SHA256 hash against the one provided in [the request headers](/api-reference/webhooks/security#how-it-works).
**5. Accept or reject**
If the comparison determines that the hashes are equal, the Webhook's authenticity has been confirmed and can be processed. However, if this is not the case, the Webhook should be rejected.
Many programming languages support secure comparison of SHA256 hashes. Below are some examples which can be used as a starting point.
```javascript JavaScript / Node.js theme={null}
const crypto = require('crypto');
const validateSignature = (request, secretToken) => {
const body = request.body;
const hmac = crypto.createHmac('sha256', secretToken);
hmac.update(body);
const signature = `sha256=${hmac.digest('hex')}`;
const mentionMeSignature = request.headers['X-MentionMe-Signature'];
return crypto.timingSafeEqual(Buffer.from(signature), Buffer.from(mentionMeSignature));
}
```
```php PHP theme={null}
function validateSignature(Request $request, string $secretToken) {
$signature = "sha256=" . hash_hmac("sha256", $request->getBody(), $secretToken);
return hash_equals($signature, $request->headers->get("X-MentionMe-Signature"));
}
```
```python Python theme={null}
import hashlib
import hmac
def validate_signature(request, secret_token):
body = request.body.encode('utf-8')
hmac_obj = hmac.new(secret_token.encode('utf-8'), body, hashlib.sha256)
signature = 'sha256=' + hmac_obj.hexdigest()
mentionme_signature = request.headers['X-MentionMe-Signature']
return hmac.compare_digest(signature.encode('utf-8'), mentionme_signature.encode('utf-8'))
```
```ruby Ruby theme={null}
require 'openssl'
def validate_signature(request, secret_token)
body = request.body
hmac = OpenSSL::HMAC.new(secret_token, OpenSSL::Digest.new('sha256'))
hmac.update(body)
signature = "sha256=#{hmac.hexdigest}"
mentionme_signature = request.headers['X-MentionMe-Signature']
return OpenSSL::SecureCompare.compare(signature, mentionme_signature)
end
```
## Next Steps
> [card] [Events](/api-reference/webhooks/events)
>
> See which webhook events are available and their payload formats.
# Test a Webhook
Source: https://docs.mention-me.com/api-reference/webhooks/test-webhook
Send a test event to your webhook destination to verify your integration is working correctly.
Before going live with a webhook integration, you can send a test event from the Mention Me dashboard to verify your endpoint receives and processes webhook payloads correctly.
Test deliveries use the same HTTP client, headers, HMAC signing, and timeout as production deliveries, so a successful test confirms your integration will work in production.
## Sending a Test Event
**1. Open the Webhooks page**
Navigate to **Connections Hub** and find the webhook destination you want to test.
**2. Open the actions menu**
Click the **⋮** menu on the webhook destination row, then choose **Send test**.
**3. Choose an event type**
In the modal that appears, select which event type you would like to test from the dropdown. Only events that the destination is subscribed to are shown.
**4. Send the test**
Click **Send test**. Mention Me will send a sample payload to the destination URL and report the result.
## Understanding the Result
After sending a test, you will see one of three outcomes:
| Outcome | What it means |
| - | - |
| **Success** (2xx response) | Your endpoint received the payload and responded successfully. The integration is working. |
| **Warning** (non-2xx response) | The test reached your endpoint, but it returned an error (e.g. 400, 500). Check your endpoint's logs to diagnose the issue. |
| **Error** (transport failure) | The request never reached your endpoint. Common causes include DNS resolution failure, connection refused, TLS certificate errors, or a request timeout. |
## How Test Deliveries Differ from Production
Test payloads are nearly identical to production deliveries. The key differences are:
* An `X-MentionMe-Test: true` header is included so your system can distinguish test events from real ones.
* The payload uses sample data rather than real customer data.
* Responses are captured and reported back to you in the dashboard. Production deliveries do not surface response details.
> [!NOTE]
>
> If you configured a [Secret](/api-reference/webhooks/security) on this destination, the test payload is HMAC-signed with the same Secret. You can use a test delivery to verify your signature validation logic is working correctly.
## Rate Limiting
Test sends are rate-limited to **10 per minute** per user per destination. If you exceed this limit, wait a moment before trying again.
## Troubleshooting
| Error | Suggested action |
| - | - |
| DNS resolution failed | Verify the destination URL hostname is correct and publicly resolvable. |
| Connection refused | Confirm your endpoint is running and accessible from the internet. Check firewall rules. |
| TLS error | Ensure your endpoint has a valid, non-expired SSL certificate from a trusted certificate authority. |
| Timeout | Your endpoint must respond within 10 seconds. Check for slow processing or network issues. |
| Blocked URL | The destination URL must use HTTPS and resolve to a public IP address. Private, loopback, and link-local addresses are not permitted. |
## Next Steps
> [card] [Events](/api-reference/webhooks/events)
>
> See which webhook events are available and their payload formats.
> [card] [Security](/api-reference/webhooks/security)
>
> Verify webhook signatures to ensure authenticity.
# Mention Me MCP Connector
Source: https://docs.mention-me.com/changelog/entries/ask-your-referral-data
Connect Mention Me to Claude, ChatGPT or another compatible AI tool to retrieve referral performance data.
June 2026
New
Reporting data
Referral performance data is available in Mention Me, but answering an unplanned question can still require a user to open the platform, locate the relevant report and configure the correct period. The Mention Me MCP Connector provides access to the same reporting data through Claude and other compatible AI tools.

[Set up the MCP Connector](/developer-docs/mcp/setup)
## At a glance
* Connect Mention Me to Claude, ChatGPT or another MCP-compatible AI tool
* Ask questions about referral performance in your own words
* Check referral volumes, conversion trends and revenue contribution
* Compare performance across different periods
* Use a read-only connection with aggregate reporting data and no customer PII
Referral performance questions come up in leadership meetings, channel reviews and campaign discussions, from revenue contribution and year-on-year comparisons to changes in conversion after a campaign update.
The connector gives stakeholders direct access to these answers without needing to log in to the platform.
## How it works
* **Connect Mention Me once.** Follow the [setup journey](/developer-docs/mcp/setup) and add Mention Me to a supported AI tool.
* **Ask a performance question.** Ask a clear question in your own words, including the metric and time period you are interested in.
* **The connector retrieves the relevant figures.** It uses aggregate Mention Me reporting data to answer the question.
* **Continue the conversation.** Ask a follow-up, change the date range or request a comparison without starting again.
Setup takes just a few minutes.
## Questions you can ask today
The connector can answer questions such as:
* How many referrals did we generate last month?
* How has conversion changed over the past six months?
* What was referral's revenue contribution last quarter?
* How does this year compare with the same period last year?
It is designed for senior stakeholders who need referral performance insight, including marketing directors and heads of acquisition, commerce, CRM or referral.

## Read-only by design
The MCP Connector accesses aggregate reporting data only. It does not access customer personally identifiable information and cannot change campaigns, programmes or settings.
The connector is designed for understanding performance, while campaign and account management stay within Mention Me.
## Reporting answers, not campaign actions
This first release focuses on reporting questions. Benchmarking, campaign recommendations and in-platform actions are not included at this stage, and programme management continues in Mention Me.
## Faster access for senior stakeholders
The connector is designed for stakeholders who need referral results but do not use Mention Me every day. It supports board reporting, trend checks and review preparation without a separate data request.
Daily users can continue working in Mention Me, while other stakeholders gain an additional route to the same reporting data.
## From setup to the first answer in minutes
## Connect it, ask a question, check the source
See how to connect Mention Me, ask your first question and check the reporting data being used.
The MCP Connector went live in June 2026. It works with Claude, ChatGPT, Claude Code, Cursor, VS Code, Windsurf and other tools that support MCP connectors.
> [card] [Read the MCP Connector guide](/developer-docs/mcp/setup)
>
> Connect Mention Me to your AI tool and ask your first question.
## Try it
Connect your referral reporting data and ask your first question.
[Set up the MCP Connector](/developer-docs/mcp/setup)
# Product Referral
Source: https://docs.mention-me.com/changelog/entries/product-referral
Product Referral makes organic product sharing visible, connecting shared-product visits and orders back to the products and people that influenced them.
February 2026
New
Product Referral
Customers already share products they love through WhatsApp, messages and email. Product Referral makes that natural sharing visible, showing the visits, orders and revenue connected to shared product links without requiring a reward or formal referral journey.

## At a glance
* Measure product links customers share naturally with friends
* See visits, orders and revenue connected to shared links
* Understand which products generate word of mouth
* Identify known customers who influence product discovery
* Track organic sharing without requiring enrolment or a reward
A customer sees a product they love, copies the link and sends it to a friend. The friend visits later and may go on to buy. To most analytics platforms, that journey can look like direct, organic or unexplained traffic.
Product Referral makes this layer of word of mouth visible.
## How it works
* **A customer visits a product page.** Mention Me prepares the page link so a later share can be recognised.
* **They share it in the way they normally would.** That might be WhatsApp, a message, email or a copied link.
* **A friend follows the shared link.** Mention Me connects the visit to the product-sharing journey.
* **A later purchase identifies the customer.** Where the journey can be matched, the activity becomes part of Product Referral reporting.
The customer does not need to enrol in a programme or claim an offer. Product Referral measures behaviour that is already happening.
## Product Referral and Brand Referral do different jobs
Brand Referral is designed to encourage acquisition through a structured referral journey, usually with a reward or offer.
Product Referral is an attribution capability that measures organic sharing around individual products. It does not claim that Mention Me created the behaviour or that every attributed order is incremental.
The two views complement each other: one helps drive a referral action, while the other reveals recommendations happening outside that journey.

## Identify products that generate organic sharing
Product Referral reporting can show product-sharing views, orders, revenue and average order value, alongside the type of share that started the journey.
This helps answer questions that sales data alone cannot:
* Which products are recommended more often than their sales ranking suggests?
* How much product-page traffic begins with a shared link?
* Which known customers create valuable product-sharing journeys?
* Does a launch or campaign change what customers recommend to friends?
## A useful signal for products and customers
A product that ranks tenth for sales may rank first for sharing, providing a different signal for merchandising and launch teams. A customer who repeatedly drives shared-link visits may also represent stronger advocacy than a customer identified through spend alone.
Product Referral provides this additional behavioural signal for merchandising, CRM and marketing teams.
## Limits to know
Product Referral connects journeys using browser and device signals. A share that moves across substantially different devices may not always be linked.
A visible share button is optional. Tracking works without it.
Availability and setup depend on your ecommerce platform and account configuration. Some Product Referral metrics are available in the updated Reporting experience, with more being added.
## Connect the recommendation to the resulting visit
Shared-link visits are no longer unattributed. You can see the product that started the conversation and, where the journey can be matched, what happened afterwards.
This does not replace Brand Referral or prove that every order was incremental. It adds evidence about the recommendations customers make outside a formal referral journey.
## Follow one shared product from link to order
## See what Mention Me records at each step
See how Product Referral recognises a shared link, connects later activity and presents the result in reporting.
Product Referral launched in February 2026. Setup is available through the Mention Me Shopify integration or a product-page tag for other supported implementations.
> [card] [Read the Product Referral guide](/knowledge-app/referral/campaigns/product-referral/what-product-referral-is)
>
> What product referral measures, how it differs from brand referral, and what a
> product referral campaign gives you.
## Try it
See the product recommendations already happening between your customers.
[Explore Product Referral](https://app.mention-me.com/~/campaigns/product-referral)
# Custom reporting dashboards
Source: https://docs.mention-me.com/changelog/entries/reporting-dashboards
Create a dashboard for a weekly review, campaign analysis or a leadership update.
May 2026
New
Reporting
A weekly campaign review and a leadership update require different levels of detail. Reporting allows teams to build both: select the relevant metrics, charts and tables, arrange them on a flexible grid, or describe the required result and use AI-assisted tile creation.

## At a glance
* Build more than one dashboard for different questions or audiences
* Add metric, chart, table and text tiles to a flexible grid
* Describe the result you want with AI-assisted tile creation
* Set the period and comparison once for the whole dashboard
* Break performance down by available dimensions such as market or funnel stage
Different teams need different views of performance. Marketing tracks the journey from impression to conversion, finance focuses on revenue and average order value, and leadership needs a concise view of programme progress.
Separate dashboards give each team the information it needs from the start.
## How it works
* **Create a dashboard.** Give it a name based on the meeting, audience or question it supports.
* **Add the information you need.** Choose a metric, chart, table or text tile.
* **Ask AI to help.** Describe the metric or view in plain language and review the suggested tile.
* **Arrange the layout.** Resize and move tiles on the grid so the most important information comes first.
* **Set the timeframe once.** Apply the period and comparison across the dashboard rather than updating every tile separately.
## Four reporting formats
* **Metric tiles** put one important number and its direction in focus.
* **Charts** present trends, comparisons and the referral funnel visually.
* **Tables** give you the detail behind the headline.
* **Text tiles** add an explanation, decision or note beside the data.
Combined, they create a dashboard that explains performance on its own.

## One reporting space, different audiences
Create a weekly programme dashboard with the whole referral funnel. Build a leadership view around revenue, customer acquisition and progress against targets. Keep a campaign dashboard for deeper analysis of a particular market or test.
Each dashboard can be named and arranged independently for its audience.
## Create tiles with AI assistance
AI-assisted creation provides a starting point when the required insight is clear but the appropriate metric or visual has not yet been selected.
Describe the insight in ordinary language. Reporting proposes a tile, which you can check and refine before adding it to the dashboard.
## Explore the detail behind the result
Available filters and breakdowns help you move from the overall result to the detail behind it. Depending on the data available to your account, that can include market, customer type (subscribers or one-time buyers), currency and stages of the click-to-conversion funnel.
This supports the analysis that often follows a headline result, including the factors driving a change in performance.
## Reuse dashboards for recurring reporting
Dashboards set up for a recurring meeting or audience can be reused. Change the period, add a comparison and use the same view again, with no need to rebuild the report.
Each team can keep a view with the right level of detail.
## From a blank grid to a meeting-ready dashboard
## Example: a weekly performance review
See the full workflow from an empty dashboard to a view ready for a weekly performance meeting.
Reporting dashboards entered beta in May 2026 and are now available to all clients in the updated Mention Me experience.
> [card] [Read the Reporting guide](/knowledge-app/referral/reporting/overview)
>
> Custom analytics dashboards for your referral programme.
## Try it
Build a reporting view around the next question your team needs to answer.
[Open Reporting](https://app.mention-me.com/~/reporting)
# A new Mention Me
Source: https://docs.mention-me.com/changelog/entries/updated-mention-me-experience
The updated Mention Me experience gives you more control to run and improve the programme you already have.
September 2026
Platform update
Mention Me platform
The updated experience gives teams greater freedom to run and improve their referral programme: make changes, test ideas, understand performance and resolve customer enquiries with less effort. Your programme, data and results stay the same. What changes is how you see and manage them. The Mention Me team remains available for strategic guidance and specialist support.

## At a glance
* **Campaigns:** take a campaign from idea to launch, with guidance and pre-launch checks along the way
* **Home:** see how your programme is performing and what needs attention as soon as you log in
* **Reporting:** build reporting around the questions your team needs to answer, with AI helping you create each view
* **Customers:** resolve enquiries with the full referral history and the actions you need in one view
* **Branding:** shape the campaign experience to fit your brand and preview changes as you make them
## Build and update campaigns directly
The campaign builder lays out the main parts of a campaign on one canvas, including the trigger, branding, imagery, rewards, sharing and customer-facing copy.
Open any step to make a change and preview the result. Where testing is available, create a variation without rebuilding the campaign from the beginning. Before launch, the actions panel and pre-launch checks highlight anything that still needs attention.
For teams managing several markets, campaigns can also be duplicated across languages, giving you a faster starting point for local versions.

## See programme performance and priorities from the first screen
The home page gives you a view of programme health as soon as you log in. See the referral funnel, key metrics, active campaigns and a to-do list in one place.
Programme health is visible from the first screen, with direct routes into rewards, content and performance.
## Build reporting dashboards with AI assistance
Create custom dashboards for different teams and reporting needs. Add metrics, charts, tables and commentary, or describe the insight you need and use AI-assisted tile creation to get started. Set the reporting period once, compare performance over time and explore results by market, customer type (subscribers or one-time buyers), currency and conversion stage.
## Resolve customer enquiries from one place
Customers brings search, filtering and flagged activity into one area. Open a customer profile to see their referral timeline, rewards, emails and codes together.
Depending on your permissions, you can also take supported service actions such as reviewing activity or resending information. The customer's history and the actions available to you stay in the same view.
## Manage your brand experience with a live preview
Colours, fonts, corner styles, layouts and imagery can be managed from the branding step. Changes appear in the preview as you make them, so you can see the customer experience before it goes live.
Every visual setting can be managed in the platform and previewed instantly.
## A guided tour of the updated experience
See how the main areas work together, from spotting an opportunity to making a campaign change and reviewing its impact.
## Where to find it
The updated experience is available at `app.mention-me.com`. Your existing programmes and data are already there. Some less frequently used capabilities may still open in Classic while they are reviewed or rebuilt.
> [card] [Read the updated experience guides](/which-platform)
>
> See what's changed and where to find everything.
## Try it
See your referral programme in the updated Mention Me experience.
[Open Mention Me](https://app.mention-me.com)
# What's new at Mention Me
Source: https://docs.mention-me.com/changelog/index
New ways to run, understand and grow your referral programme.
**September 2026**
Platform update
## [A new Mention Me](/changelog/entries/updated-mention-me-experience)
[](/changelog/entries/updated-mention-me-experience)
Your campaigns, customers and results are already in Mention Me. The updated Mention Me experience gives you more control to run and improve that programme. You see what needs attention when you log in, change the campaign, and describe the report you need.
When you describe the report, Mention Me proposes it and you check it before you keep it.
**June 2026**
New
## [Mention Me MCP Connector](/changelog/entries/ask-your-referral-data)
[](/changelog/entries/ask-your-referral-data)
Connect Mention Me to Claude, ChatGPT or another compatible AI tool to retrieve referral performance data. Review volumes, conversion trends, year-on-year comparisons and revenue contribution without first opening a separate dashboard.
**May 2026**
New
## [Custom reporting dashboards](/changelog/entries/reporting-dashboards)
[](/changelog/entries/reporting-dashboards)
Create a dashboard for a weekly review, campaign analysis or a leadership update. Add the metrics, charts and tables required for each audience, or describe the required result and use AI-assisted tile creation.
**February 2026**
New
## [Product Referral](/changelog/entries/product-referral)
[](/changelog/entries/product-referral)
Customers already send product links to friends through WhatsApp, messages and email. Product Referral makes that organic sharing visible, connecting shared-product visits and orders back to the products and people that influenced them.
width="1" height="1" style="display:none" />
>
> ```
>
> ```html Live theme={null}
>
> width="1" height="1" style="display:none" />
>
> ```
>
> The pixel returns:
>
> * **HTTP 204** (No Content) if the request was processed successfully
> * **HTTP 404** (Not Found) if there is a problem with the parameters
>
> In neither case will it cause an error or anything visible on the page.
## Parameters
Both the JavaScript tag and the tracking pixel accept the same parameters.
### Mandatory
**email** `string` *required*
The customer's email address. Please URL encode. Example: `doreen@example.com`
**order_number** `string` *required*
The unique order identifier from your system. Has a maximum of 50 characters. Example: `ORD-12345`
**order_subtotal** `string` *required*
The order subtotal (excluding VAT/taxes and shipping) in the currency indicated by the `order_currency` parameter. If you can't remove VAT, let us know. Example: `49.99`
**order_currency** `string` *required*
The three character (ISO 4217) currency code that the order total is in. Example: `GBP`
**coupon_code** `string` *required*
The coupon code used by the customer (if any). Example: `SAVE10`
### Recommended
**customer_id** `string`
The unique customer identifier from your system. Example: `CUST-789`
**order_item_count** `string`
The number of items in the basket (if applicable). This helps us understand the type of purchase and can be a signal of advocacy. Example: `3`
**order_discount_amount** `string`
The discount amount - our assumption is this has already been taken off the order subtotal provided. This allows us to calculate the Cost Per Acquisition for referral. Example: `5.00`
**segment** `string`
String representing a customer segment (for example one of: men, women) used to pass segmentation data about your customer to us. Has a maximum of 50 characters. Example: `vip`
**order_is_subscription** `string`
Whether this order is for a subscription (recurring). This helps us qualify and categorise the revenue. Example: `true`
**order_is_gift** `string`
Whether this order is a gift (being bought for someone else). Gifts can be signals of advocacy. Example: `false`
> [accordion] Optional parameters
>
> **custom_field** `string`
>
> Any piece of custom data you wish to pass to us.
>
> **address_line1** `string`
>
> The customer's address line 1 (if known).
>
> **address_line2** `string`
>
> The customer's address line 2 (if known).
>
> **address_city** `string`
>
> The customer's address city (if known).
>
> **address_county** `string`
>
> The customer's address county (if known).
>
> **address_postcode** `string`
>
> The customer's address postcode (if known).
>
> **address_country** `string`
>
> The customer's address country (if known).
>
> **custom_share_field** `string`
>
> A piece of text you can use to pass into sharing widgets, such as what the user bought or how much they saved.
>
> **order_date** `string`
>
> The date and time the order was placed. The format must be in ISO 8601 format and URL encoded. If not provided or invalid, we will use the date and time at the point we received the tag.
>
> **mm_encrypted** `string`
>
> In some cases it may be desirable to ensure that email addresses and other information is not in clear text. See [encrypted parameters](/developer-docs/integration/encrypted-parameters).
>
> **locale** `string`
>
> Locale code (e.g. `en_GB`).
## Verb Aliases in the URL
The verb in the URL path (`order`) can be replaced with `booking`, `signup`, or `transaction`, matching whichever term best describes the action on your site. All four verbs behave identically.
The same applies to the pixel form: `orderpixel` can be replaced with `bookingpixel`, `signuppixel`, or `transactionpixel`. Each pixel verb still ends with `/pixel.gif`.
For example, a signup pixel would look like:
```html theme={null}
```
## Parameter Aliases for Non-Ecommerce
If your business tracks bookings or signups rather than orders, you can use alternative parameter names. The tag behaviour is identical - only the parameter names differ.
> [accordion] Booking aliases
>
> **booking_id** `string`
>
> Alias for `order_number`.
>
> **booking_subtotal** `string`
>
> Alias for `order_subtotal`.
>
> **booking_currency** `string`
>
> Alias for `order_currency`.
>
> **booking_date** `string`
>
> Alias for `order_date`.
>
> **booking_item_count** `string`
>
> Alias for `order_item_count`.
>
> **booking_is_subscription** `string`
>
> Alias for `order_is_subscription`.
>
> **booking_is_gift** `string`
>
> Alias for `order_is_gift`.
>
> **booking_discount_amount** `string`
>
> Alias for `order_discount_amount`.
> [accordion] Signup aliases
>
> **signup_id** `string`
>
> Alias for `order_number`.
>
> **transaction_subtotal** `string`
>
> Alias for `order_subtotal`.
>
> **transaction_currency** `string`
>
> Alias for `order_currency`.
>
> **signup_date** `string`
>
> Alias for `order_date`.
>
> **item_count** `string`
>
> Alias for `order_item_count`.
>
> **is_subscription** `string`
>
> Alias for `order_is_subscription`.
>
> **is_gift** `string`
>
> Alias for `order_is_gift`.
>
> **signup_discount_amount** `string`
>
> Alias for `order_discount_amount`.
# Integration Overview
Source: https://docs.mention-me.com/developer-docs/integration/overview
Merchant-specific integration instructions for implementing Mention Me
Welcome to our product integration instructions.
**Mention Me** seamlessly integrates into brands' websites to incentivise, track and reward referrals throughout the customer journey, as well as further enhance the customer experience to turn even more shoppers into brand advocates.
## Choose Your Integration
Pick the platform you're integrating with to jump straight to a tailored Quickstart covering every touchpoint (referrer, referee, landing page, and dashboard).
> [card] [JavaScript Tags](/developer-docs/integration/javascript-overview)
> [card] [Shopify App](/knowledge/shopify/overview)
> [card] [Tag Containers](/developer-docs/integration/setup/tag-containers)
> [card] [SAP Commerce Cloud](/developer-docs/integration/setup/sap-commerce-cloud-referrer)
> [card] [Global-e](/knowledge/tags/global-e)
> [card] [Native Apps](/developer-docs/integration/native-apps)
We require a set of touch points to be implemented on your website. Each point of the customer journey has set parameters which allow you to pass us the data we need such as order details and customer email and name.
## Where to Get Help
If you need help at any time while integrating our tags, contact our [support team](https://help.mention-me.com/hc/en-gb/requests/new).
# Error Codes & Messages
Source: https://docs.mention-me.com/developer-docs/integration/reference/error-codes
Guidance on errors and warnings from Mention Me tags and how to resolve them
The following section provides guidance on the types of errors or warnings that can be received from the Mention Me tags along with examples on how to resolve those issues.
The Mention Me tags can return errors of two types - an **HTTP error** code or a **tag error**.
HTTP errors are normally an indication of the request being malformed (such as wrong URL or missing critical data). These errors will only consist of an HTTP error code.
Tag errors are accompanied by both an HTTP error code and a JavaScript error message which will be rendered within the console of the browser's development tools. This message further assists with debugging.
## HTTP Error Codes
The below summarises the HTTP errors where no further message is available in the console.
**400 - Bad Request** `error`
We have successfully received the request, but it is either malformed or missing important information. Please check the parameters are being passed correctly, and that all mandatory parameters are included.
**403 - Forbidden** `error`
See the section on [integration approval](#content-not-served-due-to-integration-being-disabled-or-not-approved-to-go-live) below.
**404 - Not Found** `error`
Please check the URLs of the tags you're integrating and ensure that your unique partner code is correct.
## Tag Errors
The below summarises example Mention Me specific error conditions which will also render an error into the browser's console.
> [accordion] Content not served due to integration being disabled or not approved to go live
>
> Mention Me tags must be manually approved by you and your Client Success Manager before they become enabled on your live site.
>
> Until your tags are enabled by us on your live environment, you will see this error message in the console. Your customers will see no content, and this error is harmless.
>
> You may also see this as an HTTP 403 error code.
>
> **Affected tags:** All
> [accordion] Content not served due to specific configuration 'situation' being disabled
>
> The situation parameter passed has been disabled. The tag has been received and processed but no content will be shown to the customer as the tag has been disabled from within the Mention Me platform.
>
> **Affected tags:** All
> [accordion] Offer shown recently. Not showing again as frequency limits are in place
>
> The Mention Me platform can limit the number of times a tag is shown to a user either by number of days (i.e. show only once every 3 days) or by number of visits (i.e. only show this offer on the 5th, 10th, 15th, etc. visits).
>
> This offer was seen recently and will not be shown again until the limit is passed.
>
> **Affected tags:** Referrer
> [accordion] Unable to find suitable offer
>
> The Mention Me platform can be configured to serve different Offers to users based on information passed to us within the tag or from information we know about the customer.
>
> In this case, we were unable to choose an appropriate Offer from the information available to us and have opted to show nothing to the user.
>
> This may indicate the triggering rules for your Campaigns are set too narrow and you may wish to add additional Campaigns to target users who are missing out.
>
> **Affected tags:** Referrer
> [accordion] Skipping order tag, will attempt to serve offer
>
> The tag received is missing mandatory order details. Please ensure all mandatory parameters for the order, including `order_currency`, `order_subtotal` and `order_number` are all present.
>
> We will still attempt to serve an Offer to your customer so they can participate in the referral programme.
>
> **Affected tags:** Referrer, Order Tracking
> [accordion] Referee search disabled
>
> The Referee Tag has been disabled within the Mention Me platform. No Referee tag will be served to any users. We advise against disabling the tag as this may harm Referee conversion.
>
> **Affected tags:** Referee
> [accordion] Unable to serve this locale
>
> The `locale` provided does not have a corresponding Campaign setup. Check whether the `locale` is being passed correctly, or consider setting up a new Campaign to allow Referees for this locale to be served correctly.
>
> **Affected tags:** Referee
> [accordion] Dashboard disabled
>
> The Dashboard Tag has been disabled within the Mention Me platform. No Dashboard tag will be served to any users. We advise against disabling the tag as this may prevent users from sharing their offers with friends.
>
> **Affected tags:** Dashboard
> [accordion] Mention Me Tag failed to insert into wrapper
>
> This tag requires a location on the page for the content to be inserted into. The Mention Me tags were unable to find this location. By default, we expect a div with the id `mmWrapper` to be present on the page:
>
> ```html theme={null}
>
> ```
>
> If you are having trouble positioning the wrapper or need advice regarding placing multiple Mention Me elements on the page, please reach out to us and we'll assist you.
>
> **Affected tags:** Referee, Dashboard, Landing Page
# Integration FAQs
Source: https://docs.mention-me.com/developer-docs/integration/reference/faqs
Common questions about Mention Me tag integration, data protection, and troubleshooting
## Frequently Asked Questions
> [accordion] How do you protect customer data?
>
> We use SSL for all JavaScript requests to protect customer personal data.
> [accordion] Will the Mention Me tags slow down my site?
>
> Our JavaScript is executed at the bottom of your page and waits for the rest of the document to finish loading before injecting any elements.
> [accordion] What happens if your service is unavailable?
>
> The tags are designed to fail silently during exceptional conditions - nothing will interfere with your page if something goes wrong (for example, if our service is unavailable or if your campaign is paused).
> [accordion] Why do I get a 403 when loading the tags?
>
> This normally happens when the integration has not been approved by Mention Me. We will approve the integration once the referral programme has been signed off.
> [accordion] How can I encrypt my data? Do I need an encryption key?
>
> Our data is already passed via HTTPS. This means the data you're passing to us will already be encrypted and only visible to you, the user and us. Third parties will not be able to get hold of this information.
>
> If you wish to send users to a landing page and would like to include the users' email address in the link so that they're shown a personalised link (but do not wish to expose the email address in the link), you can follow our instructions on [how to use encrypted parameters to transmit personal data](/developer-docs/integration/encrypted-parameters).
## Common Tag Integration Errors
Most integration problems come down to how the tag URL is built. Run through the checklist below before raising a ticket - each of these has caught out many integrators.
### Referrer Tag
> [accordion] Parameter values are not URL-encoded
>
> All parameter values must be [URL-encoded](https://developer.mozilla.org/en-US/docs/Web/JavaScript/Reference/Global_Objects/encodeURIComponent). Common offenders are `@` in email addresses (must be `%40`), spaces in names (must be `%20`), and `+` or `/` in custom fields. An un-encoded `&` inside a value will look like the start of the next parameter and corrupt everything that follows it.
> [accordion] order_subtotal includes VAT or delivery
>
> `order_subtotal` must be the order subtotal **excluding VAT/taxes and delivery**. Passing the gross total inflates reward calculations and distorts reporting. If you cannot strip VAT on your side, let your Client Success Manager know so we can handle it.
> [accordion] Placeholder values have been left in the tag
>
> If the tag still contains literal `